Unify WooCommerce and Odoo with Multichannel Connector
WooCommerce is a renowned e-commerce platform. Odoo is popular for its inventory management and accounting functionalities. Altogether, we can upgrade e-commerce operations and take advantage of both platforms. In this case, integration of these platforms makes it easier for data transfer. This also boosts data operations.
Business owners can integrate many WooCommerce stores with a single instance. Basically, multiple WooCommerce stores can be linked alongside other channels. It helps ease operations and achieve the best results.
The Odoo Multichannel Woocommerce Connector is a powerful module. Not only does it bridge the gap between WooCommerce and Odoo, but it also enables you to take advantage of the strengths of both platforms for your business.
With this connector, you can easily import data from WooCommerce to Odoo. Likewise, you can export data from here to WooCommerce. It includes products, categories, customers, orders, and more. It offers real-time synchronization for orders, shipments, invoices, and cancel status.
Moreover, the module also provides a dynamic dashboard. It includes informative charts and data cards for easy analysis. Most importantly, if you want to centralize inventory, then this connector is a valuable tool to use. It can optimize backend management.
NOTE: Odoo Multichannel WooCommerce Connector works in conjunction with the following module:
Odoo Multi-Channel Sale.
First, you must install this module to your system for the Odoo Multichannel WooCommerce to work correctly.
FEATURES
1. Import Products including details like categories and attributes.
2. Import Product Categories or set up automatic imports.
3. Import Customer data including customer addresses.
4. Import Order details like customer information, taxes, delivery methods, payment methods and currency.
5. Auto-sync order statuses like cancellation, shipment, and invoice between both platforms.
6. Achieve real-time sync of order statuses, shipments, invoices, cancellations, and inventory.
7. Use a dynamic dashboard to track Woocommerce data within Odoo. This dashboard features charts, graphs, and clickable tabs for easy analysis.
8. Export products and product categories in bulk or individually.
9. Manually map order statuses between Odoo and Woocommerce for better management.
10. Automatically fetch Products and Orders from WooCommerce to Odoo in real time using Webhooks.
11. Automatically fetch WooCommerce API into Odoo during instance configuration, eliminating manual API key entry.
Explore our Odoo development services & a vast range of quality Odoo Apps.
INSTALLATION
1. Before installing, you need to download the respective Woocommerce Python Library
- pip install WooCommerce==1.2.1 (Install for the Odoo versions till 10 )
- pip3 install WooCommerce==1.2.1 (Install For the Odoo versions 11, 12, and 13)
- pip3 install WooCommerce==3.0.0 (Install For the Odoo versions 14 onwards)
2. Once you buy the App from the Webkul store, you will receive the link to download the zip file of the module.
3. Extract the file on your system after the download finishes. You will see a folder named- ‘Odoo Multichannel Woocommerce Connector.’
4. Copy and paste this folder inside your Odoo Add-Ons path.
5. Now, open the Odoo App and click on the Settings menu. Here, click on Activate the Developer Mode.
6. Then, open the Apps menu and click on ‘Update Modules List.’
7. In the search bar, remove all filters and search ‘Odoo Multichannel Woocommerce Connector.’
8. You will be able to see the module in the search result. Click on ‘Install’ to install it.
WORKFLOW
Configuration at WooCommerce
1. Log in to WooCommerce and navigate to the Settings section. Next, switch to the advanced tab and locate the REST API tab. Here, you will find all the necessary information about the issued API Keys.

2. Fill in the Title, User, and Permission. Then generate an API Key. This key would further help in for connection to Odoo account.

3. Copy the Consumer Key and Consumer Secret for further use. Scan the barcode for sharing both keys.

Configuration at Odoo
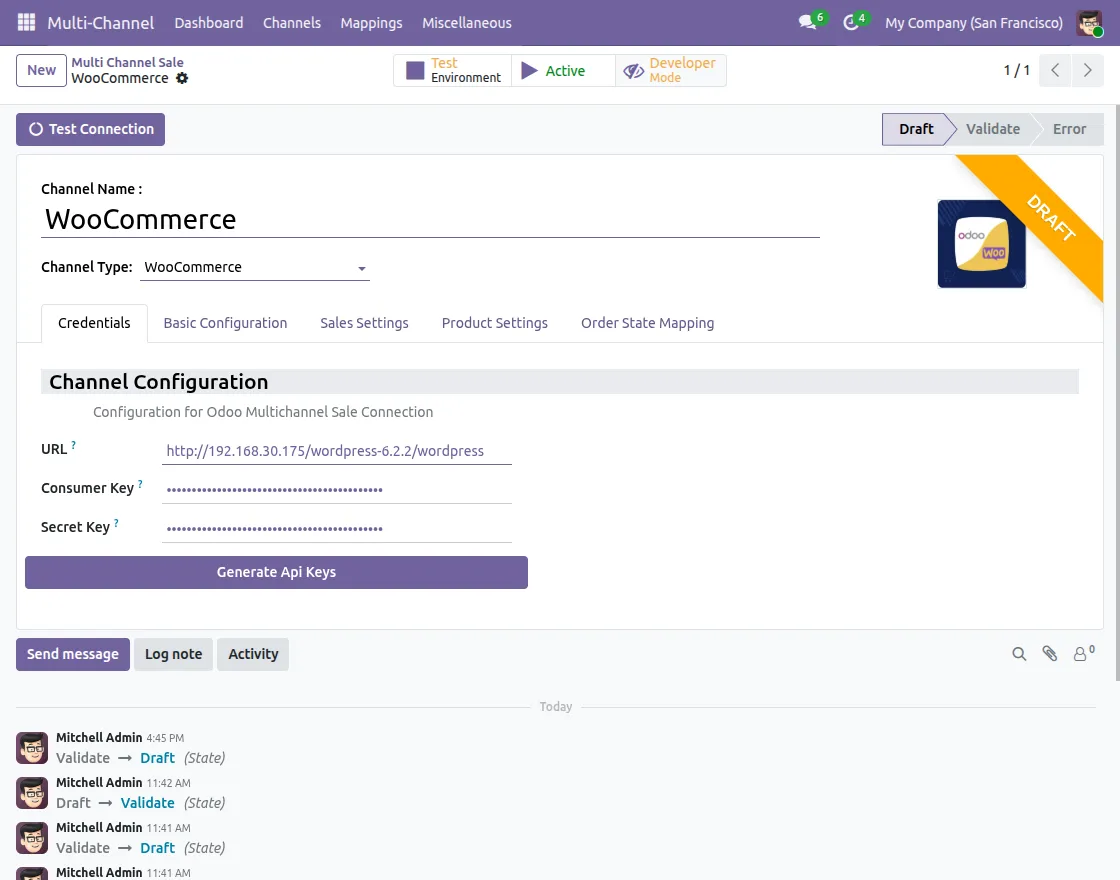
Login to Odoo and open the MultiChannel module. Click on Connect to link the API key with the Wocommerce Account.
Copy all required details and configure channel type and name. Additionally, click on Test Connection to check API Connectivity. It can be confirmed if a message for a successful connection pops up.

Data Import and Export
1. Dashboard contains Quick Import/Export options for Data Synchronization between platforms. It displays active Multichannels and stats about them.

2. For Import, Select channel ID objects (Product, Order, Category, Customer, and Shipping Method). Next, specify the filter type (All, By ID, By Date) to refine the import criteria. After successful import, a message will pop up.

3. For Export, Select channel ID and Objects (Category, Product Template). After successful export, a message will pop up.

4. Under all active Configured Multichannel Instances are visible. These instances also show import/export stats.

5. After Selecting any Channel, the settings for the channel are present. These include API Record limit, Auto Stock, Crons, and more. Schedule automatic updates by configuring cron. These updates can be toggled and configured in Global Config.

6. Toggle to Avoid Duplicity of data is present in Global Config. Configure Import scheduler settings for regular updates. Configure Cron Scheduler for Customer, Category, Product & Order.

7. Access sync history for the Latest Updates of database.

8. Mappings are Auto-updated via cron. For manual mapping, go to Mappings and create mappings. The mappings include Category, Attribute, Value, and so on.

9. Real-Time Synchronization Using Webhooks: Automatically fetch Products and Orders from WooCommerce to Odoo in real time using Webhooks for instant synchronization without waiting for scheduled cron jobs.
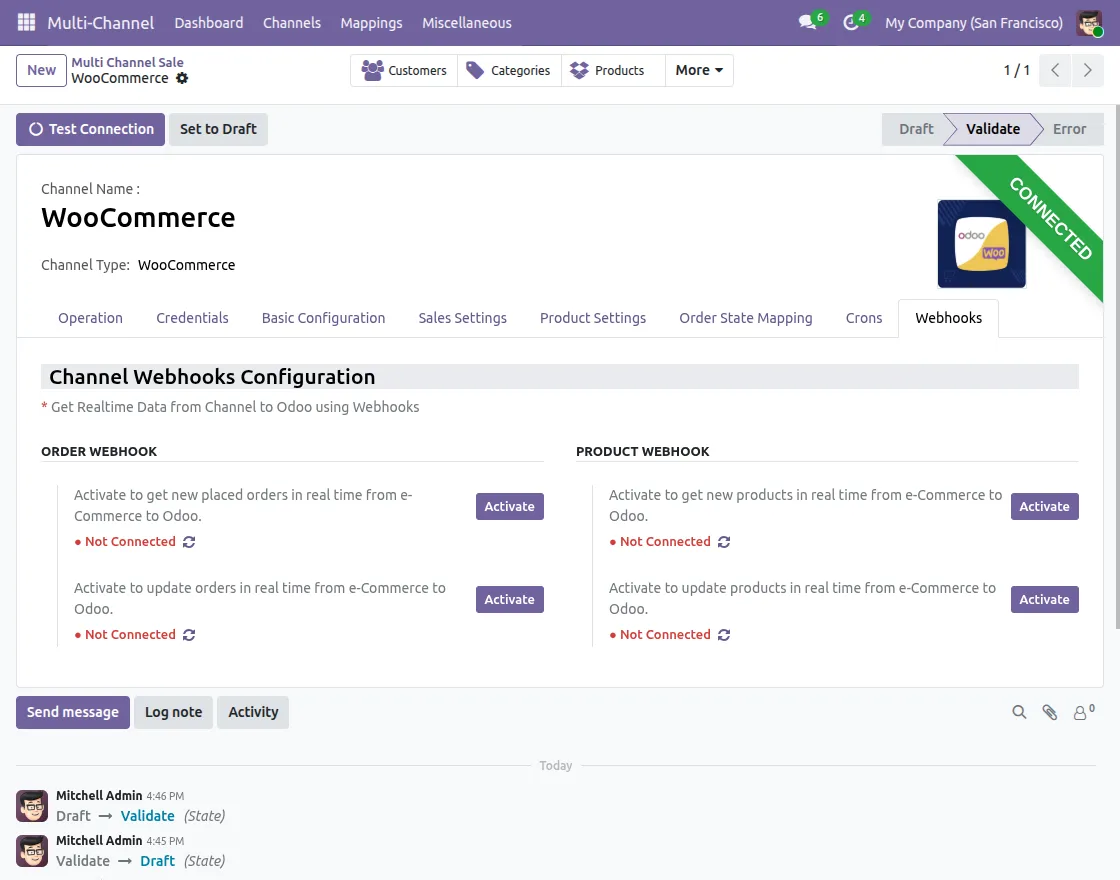
10. Automatic API Configuration: Automatically fetch the WooCommerce API credentials during instance configuration, eliminating manual API key and secret entry for faster and error-free setup.
NEED HELP?
Hope you find the guide helpful! Please feel free to share your feedback in the comments below.
If you still have any issues/queries about the same, please raise a ticket at the UV Desk.
For any doubt, contact us at our support mail.
Thanks for paying attention!!
Current Product Version - 2.1.1
Supported Framework Version - Odoo 19, 18, 17

4 comments
We have created a ticket on your behalf and our team will contact you soon regarding your queries.
Thanks and Regards,
Team Webkul
By default, this feature is not available in the module. However, you can ask us for its customization at [email protected]
Regards
Anisha Bahukhandi