WooCommerce Affiliate Plugin allows the store owner to run an affiliate marketing program on its online store.
Using this, the affiliate users can register on the store and start promoting products using products ads and banners ads.
The admin, as well as affiliate users, can analyze incoming traffic, sales performance, view statistics.
The affiliate user can select a payment method like – direct bank transfer, check payment, PayPal for the commission’s payment.
Note:
- This plugin is now compatible with WooCommerce’s latest High-Performance Order Storage (HPOS) and Cart and Checkout block.
- Checkout how to Activate WooCommerce Plugin through the purchase code and get updates on Webkul Modules directly on the Plugins page
- We provide a production version of the plugin. If you want a development version then you can get it at an additional cost. Please contact [email protected] for it.
Check the overview of the plugin –
Features of Affiliate Plugin for WooCommerce
- Set up affiliate programs for the online store.
- Auto-approve affiliates if required.
- The admin can view the sales, traffic, and statics.
- The affiliate users can select the commission payment method like PayPal, Direct Bank Transfer, Check Payment.
- The admin can send emails to the Affiliate Users.
- The admin can view the affiliate user’s information like total clicks, pending balance, account information, etc.
Installation
The user will get a zip file which he has to upload in the “Add New” menu option in the WordPress admin panel.
For this, login to WordPress Admin Panel then Under the Dashboard, hover your mouse over the “Plugins” menu option which brings out a Sub-Menu then select the “Add New” option.

After this, you will see an option on the top of your page that is “Upload Plugin”, Now clicks the option to upload the zip file.

Choose the file.

Tap, install now to install the same.

Now when the plugin is installed correctly, you will see the success message & an option to activate the plugin.
Henceforth now, click on “Activate Plugin” to activate the installed plugin.

Module Translation
Check how to translate the plugin.
Admin End Configuration
The admin can manage the module from the admin panel easily.
Moreover, after the successful installation of the module, the admin can easily configure the plugin.
For this, the store owner from the admin panel sidebar will navigate to the Affiliate in order to configure.
Affiliate :
At the backend, the admin can manage the affiliate user as shown in the below snapshots:

Thus, the admin will pay the commission amount of the affiliate user by clicking the “Pay Affiliate” button as shown below.

So, when the transaction is done then the admin can see the transaction history for that affiliated user.

Admin can check transaction history from the payment record list.
Statistics:
Moreover, the admin can see Statistics showing the Graph Weekly, Monthly, Yearly. Additionally, the Graph Daily under the Statistics Graph section as per the below snapshot.

Traffic
Even, the admin can see the Traffic Record list from the admin panel. So, navigate through Webkul WC Addons->Woo Affiliates->Statistics-> as shown below in the snapshots.

Sales :
Now, the admin can see the Sales Record list from the admin panel by navigating through Webkul WC Addons->Woo Affiliates->Statistics->Sales.
Here the admin can approve an affiliate Sales Record Status after which the affiliate user gets the commission for that order.
Moreover, check the below-given screenshot for more details.

Email Affiliate :
Admin can send emails to the affiliate users as shown below by navigating to Affiliate > Email.

Banners/Ads
Admin will be able to create Banners/Ads for the affiliates –
To add the banner admin will navigate through Affiliate ->Banner/Ads.
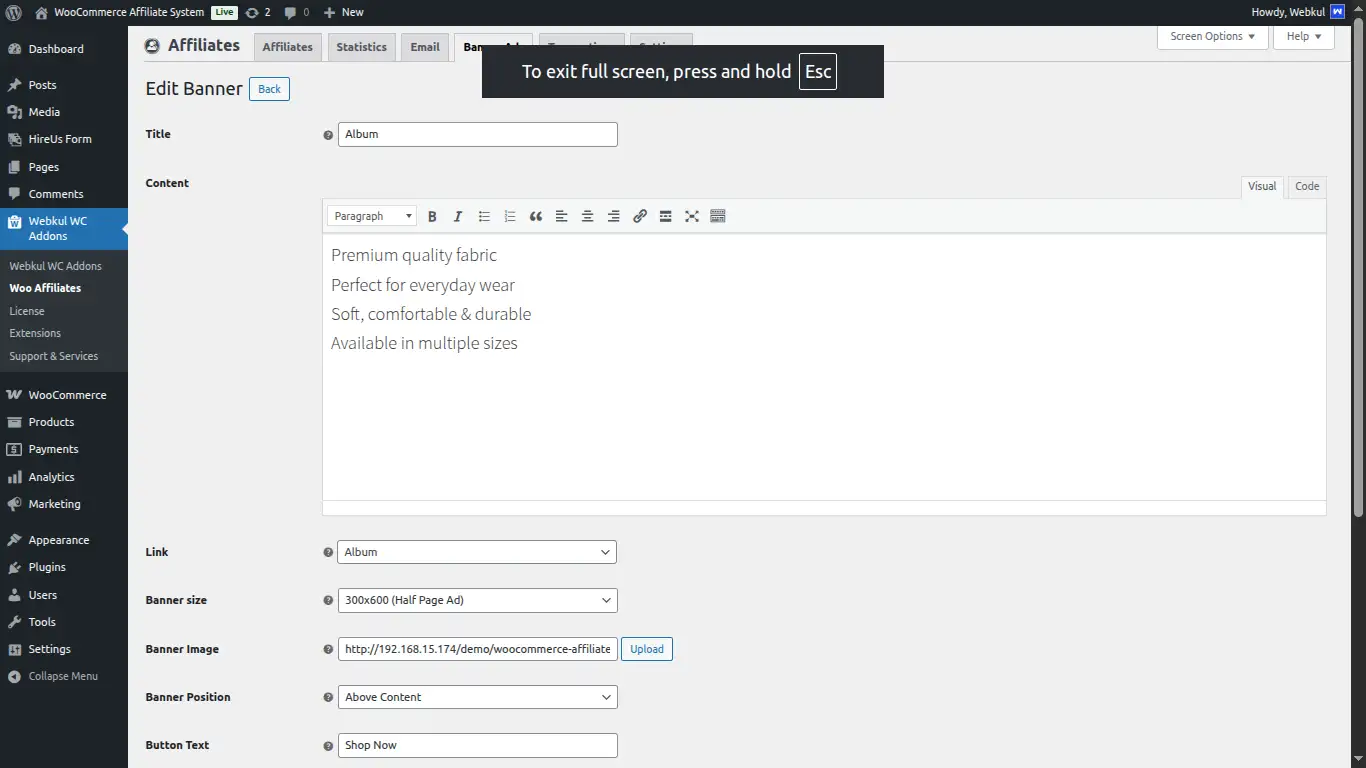
After clicking the “Banner/Ads” menu item, a page with an option to add a new banner appears.
Here, by clicking the “Create” button a page to create the text banner appears

Banner Preview
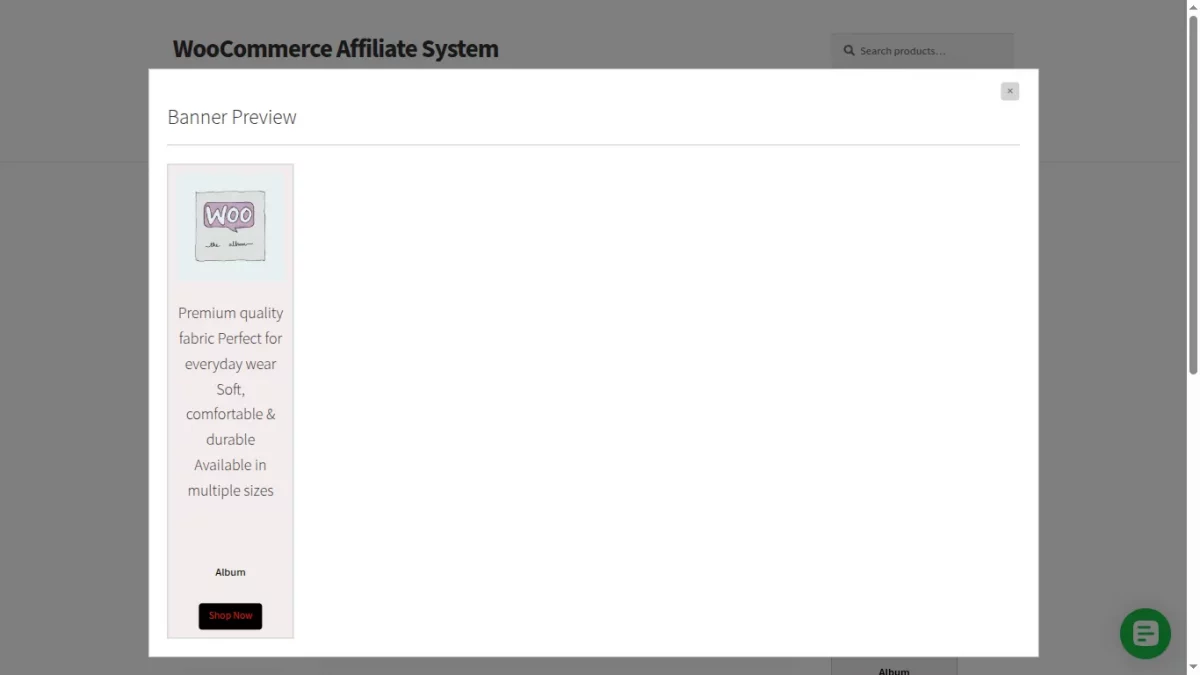
For a banner, the added product can be viewed by tapping the View Product button.

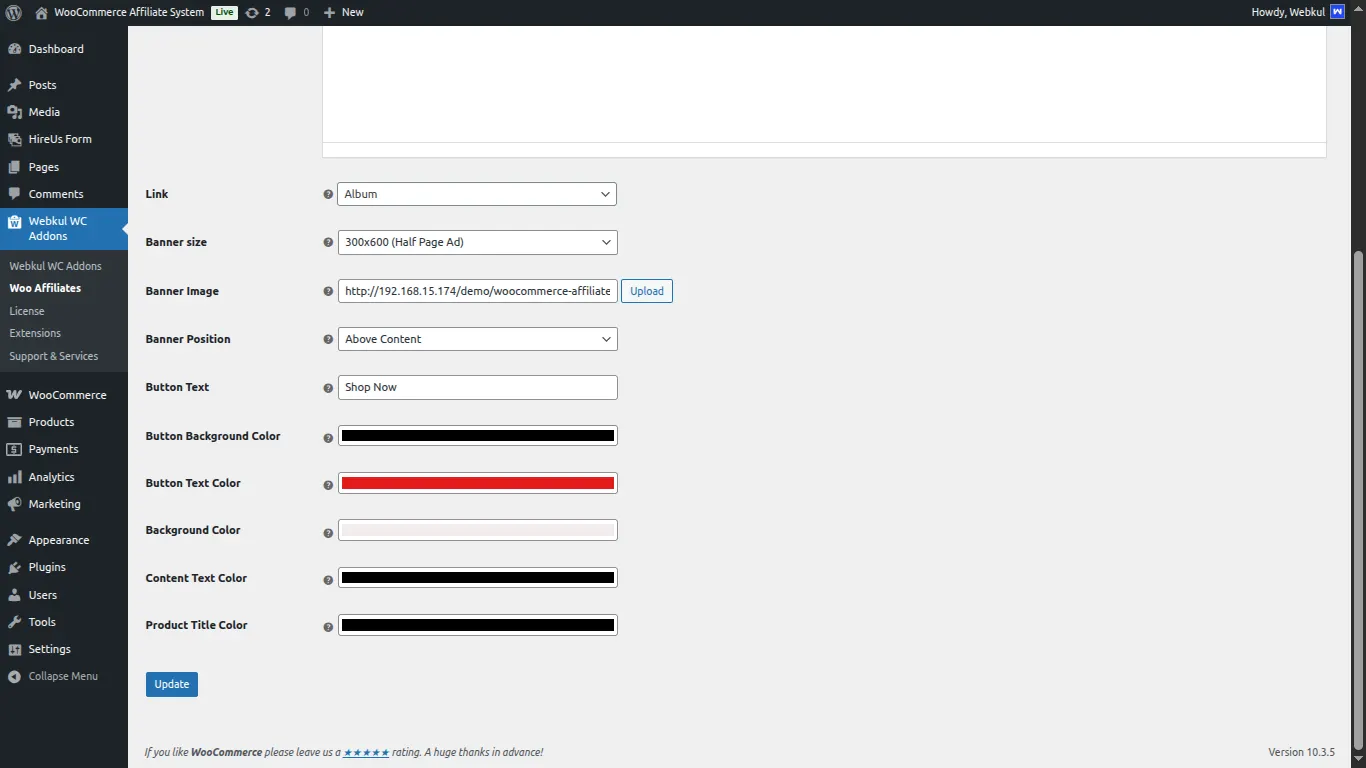
Here the admin will enter the Banner Title, Content, Link, Banner Image, Button Text,Button Text Color, Content Text Color, Background Color and the Size of the banner.
Transactions
The admin can see the transaction history for that affiliated user. Admin can check transaction history from the payment record list.

Settings
Post the successful installation of the Affiliate System module, the admin can see the settings panel. Admin can get the settings to panel under Affiliates-> Settings.
Affiliate System General Settings :
Auto approves affiliates – Then, select Yes to approve the affiliates automatically else select No to manually approve the affiliates.
Allow affiliate registrations – Firstly, select Yes to enable the affiliate registrations else select No.

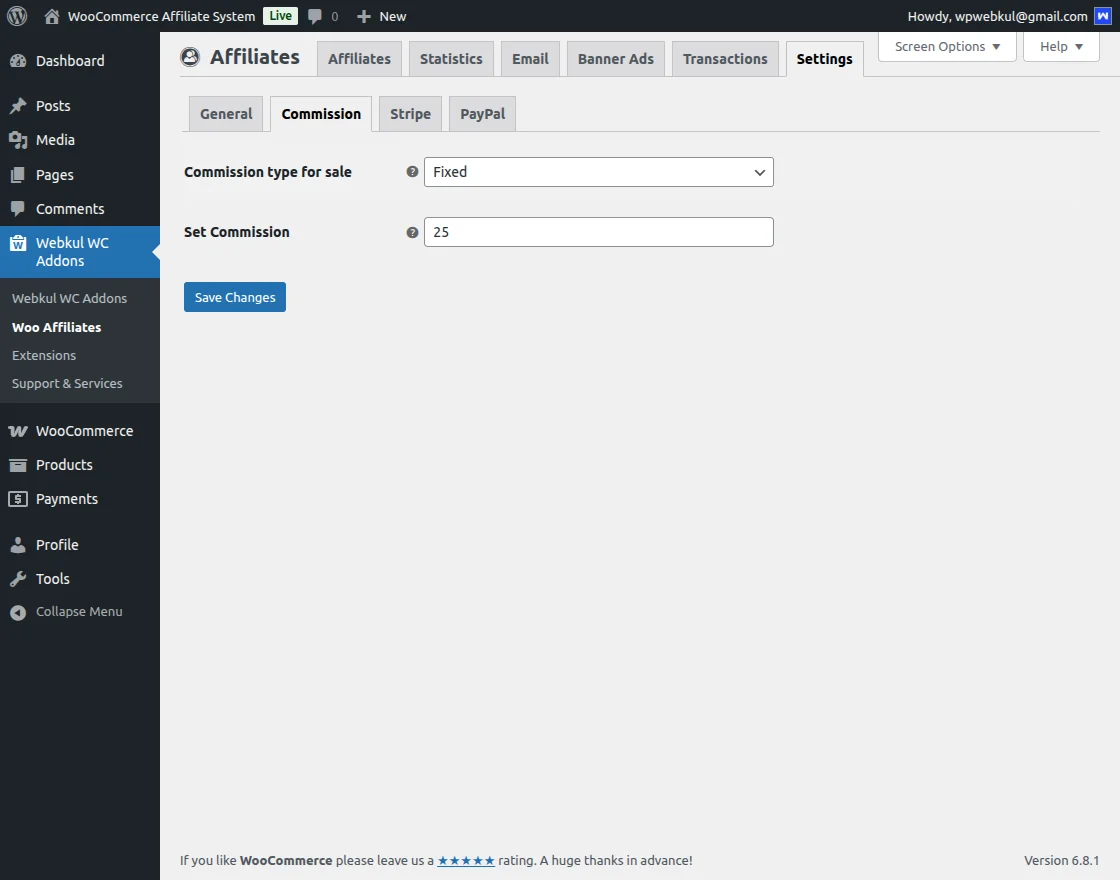
Affiliate System Commission Settings :
Commission type of sale – The admin can set fixed or percentage type of commission.
Set Commission – Admin can set the Commission amount.
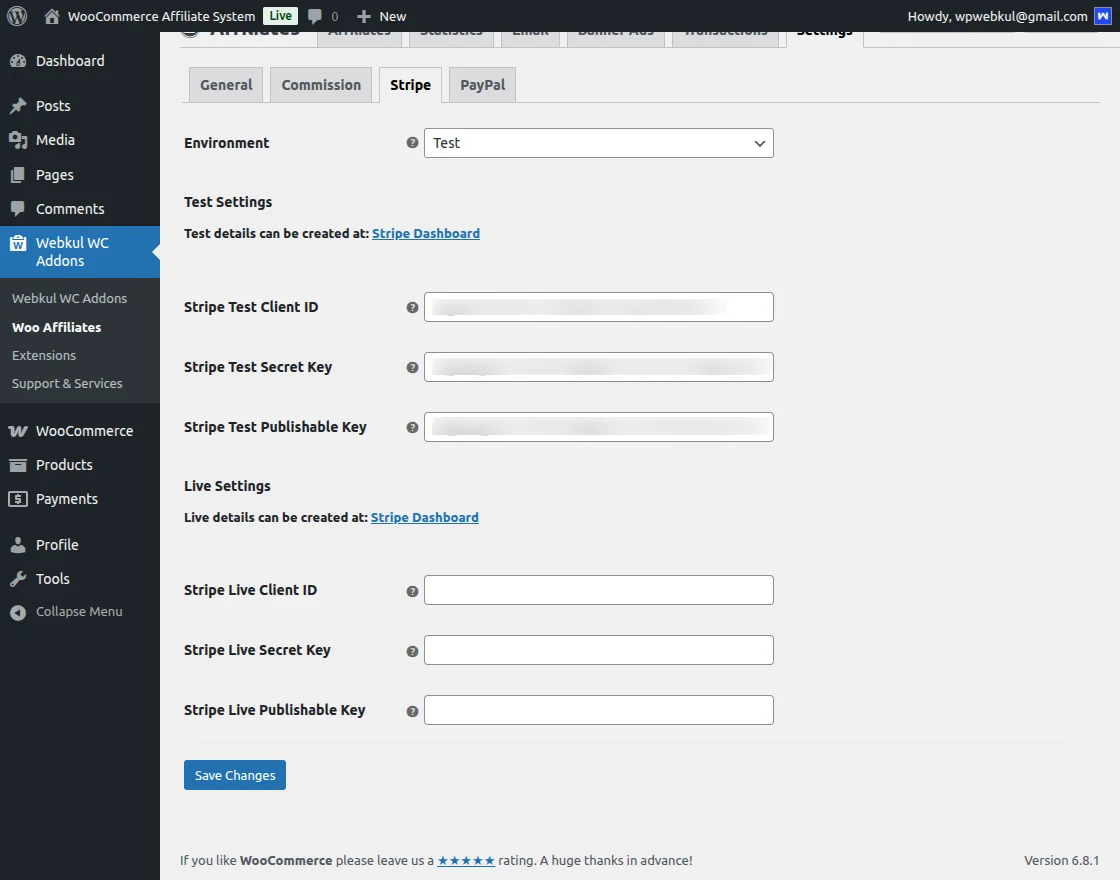
Stripe setting Affiliate System
This functionality is used to send commission to the affiliate user with the Stripe payment method.
Admins must configure the environment and input the corresponding Stripe credentials, including Client ID, Secret Key, and Publishable Key.
Shown in the images below.
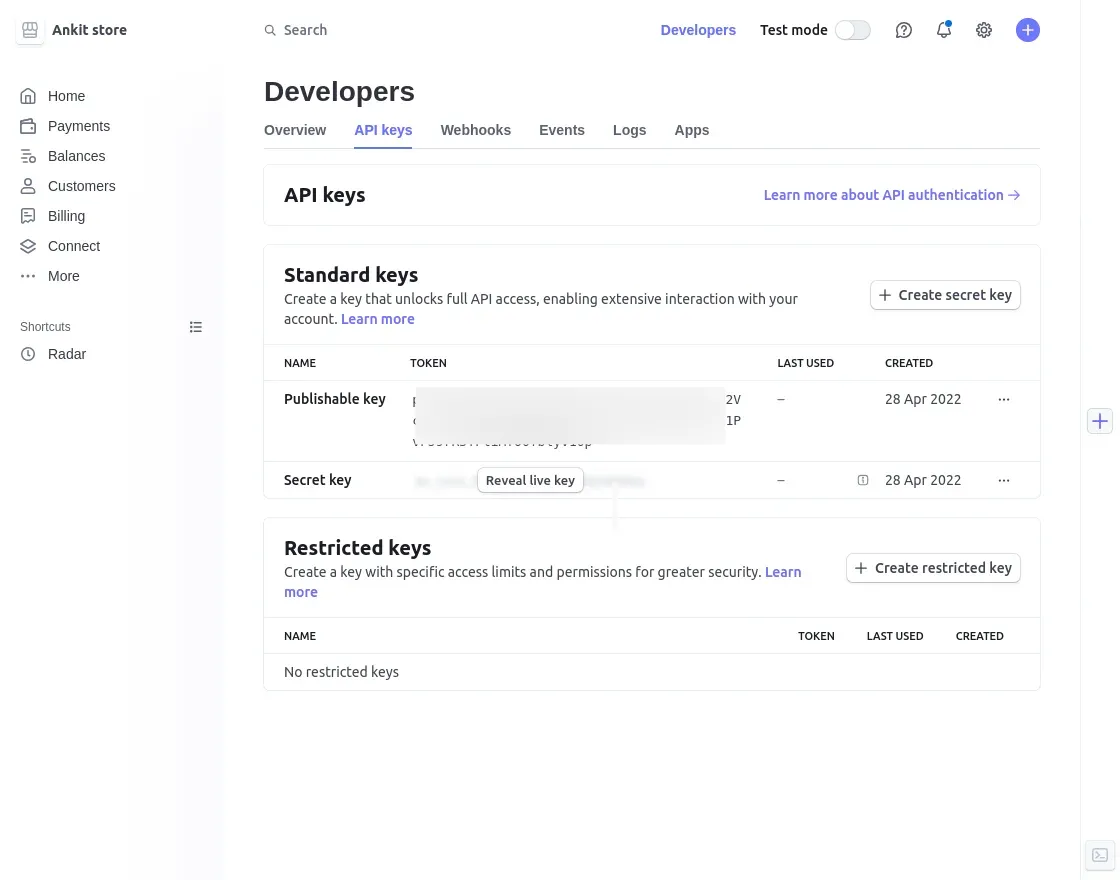
For Stripe:
Log in to the Stripe Dashboard.

Navigate to Developers → API Keys to get your Publishable Key and Secret Key. Use Sandbox/Test mode credentials during testing to avoid real transactions.
PayPal Setting Affiliate System
This functionality is used to send commission to the affiliate user with the PayPal payment method.
Shown in the image below.
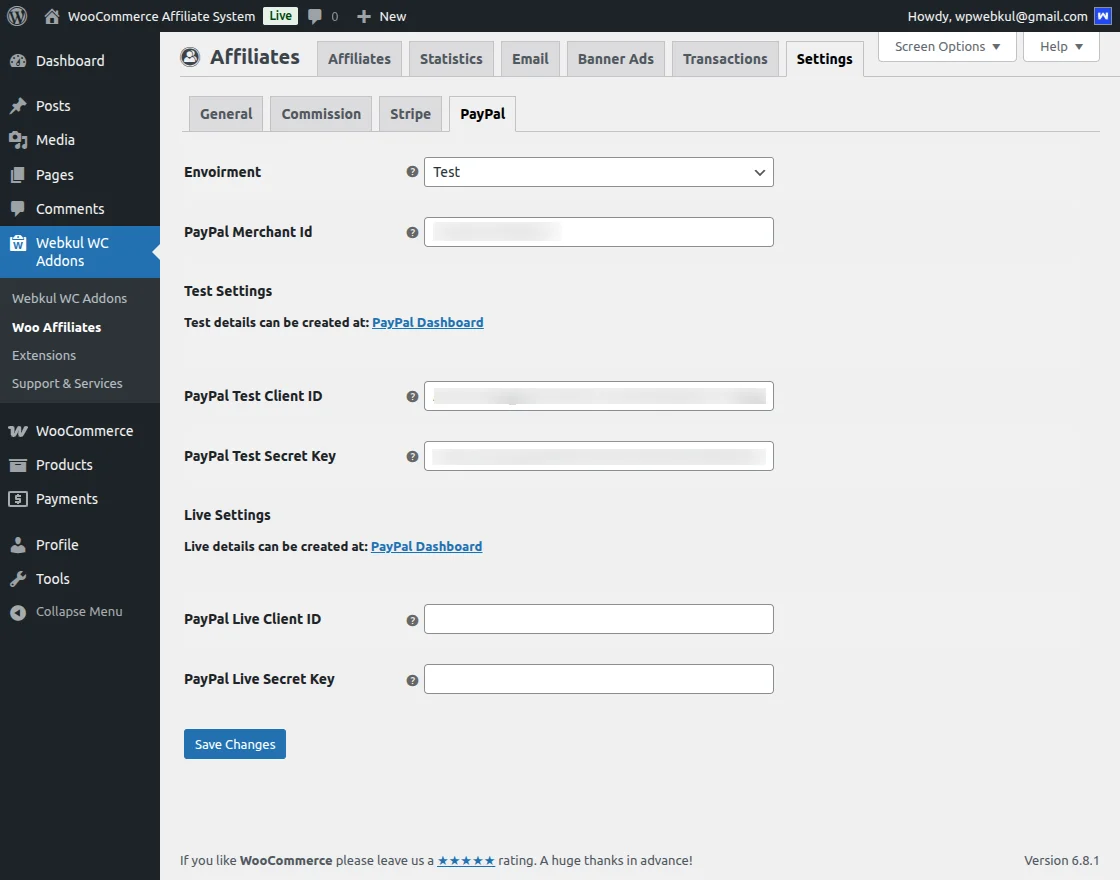
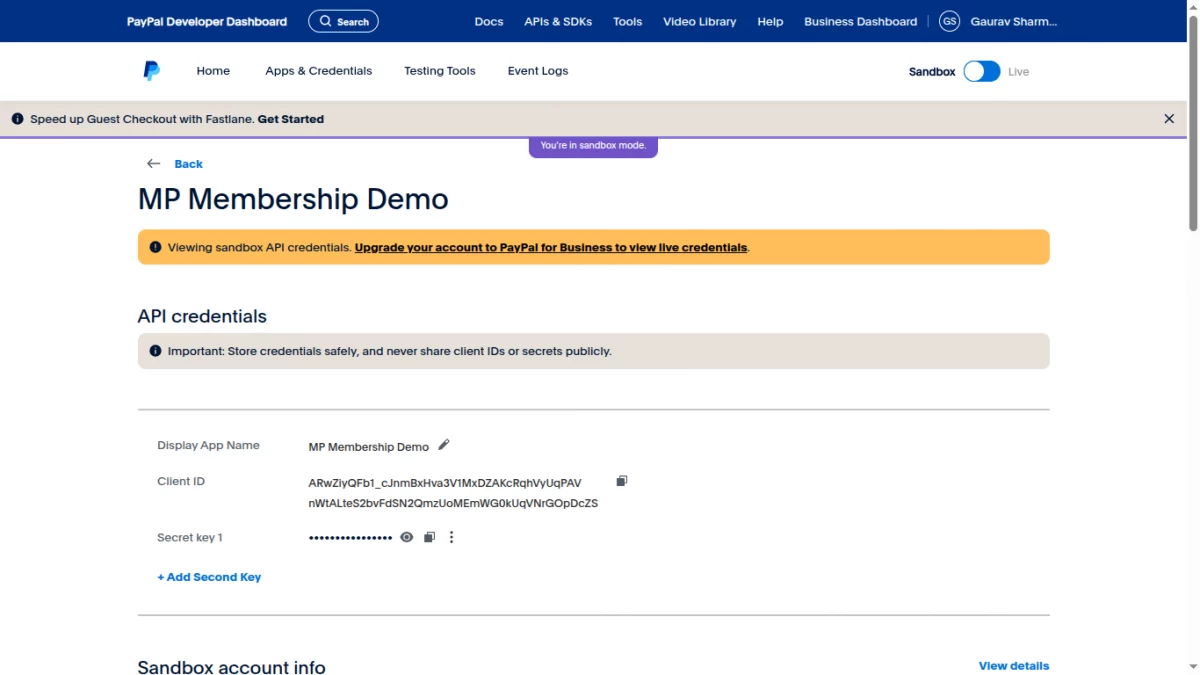
Select the environment and enter the PayPal Merchant ID along with credentials, including Client ID and Secret Key, which can be created through the PayPal Dashboard.
Obtain API Credentials
For PayPal:
Log in to the PayPal Developer Dashboard: http://developer.paypal.com/
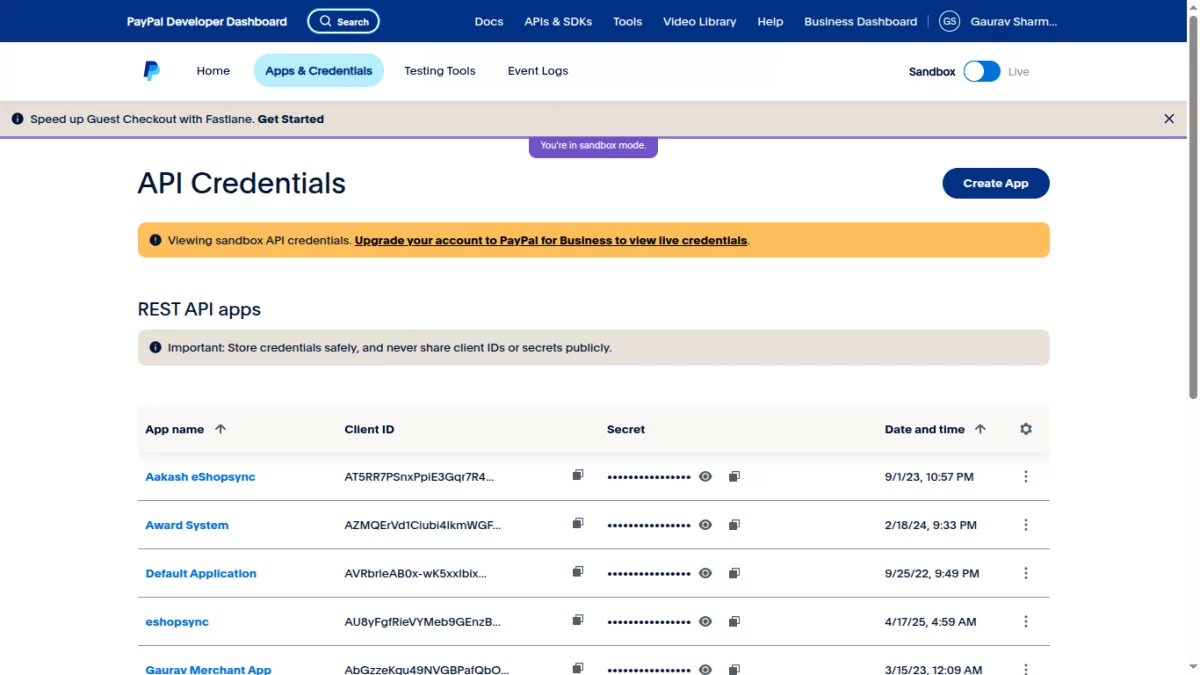
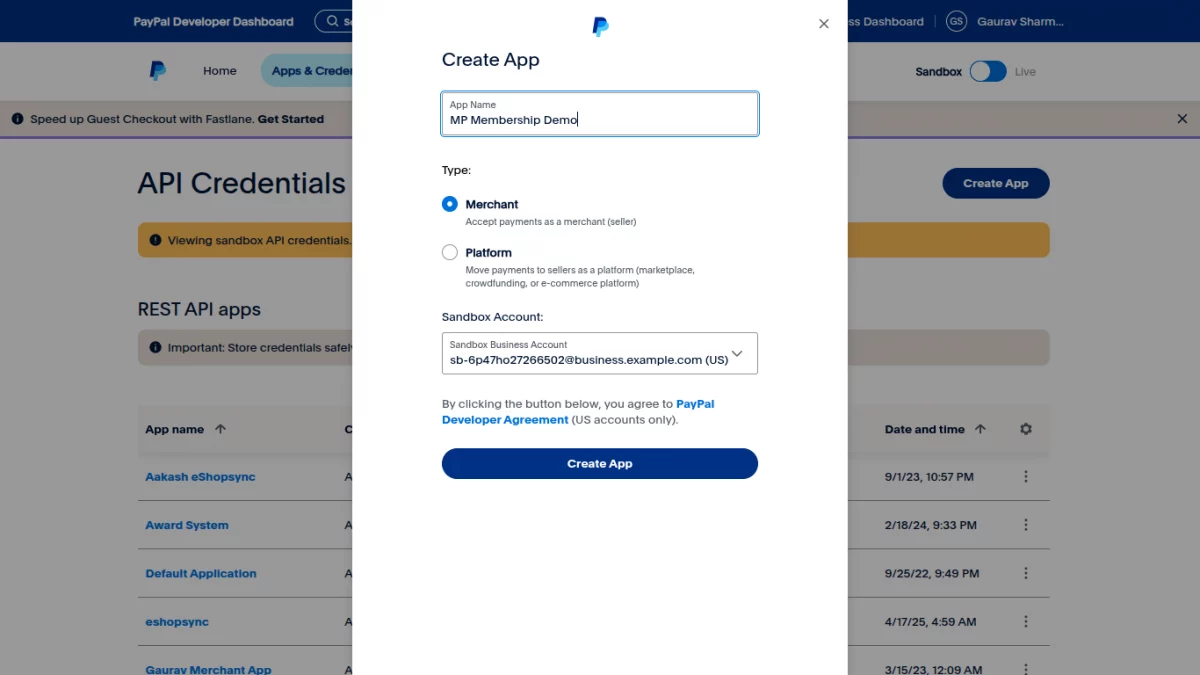
Now, create an App by clicking on the Create App button
Now App credentials are visible like Secret Key, Client Key, etc.c
Summary :
All details for the affiliate are shown on the Dashboard Page as shown below in the screenshot.

Statistics :
Moreover, the affiliates can see Statistics for traffic in his account as shown below in the screenshot.

Affiliate Ads :
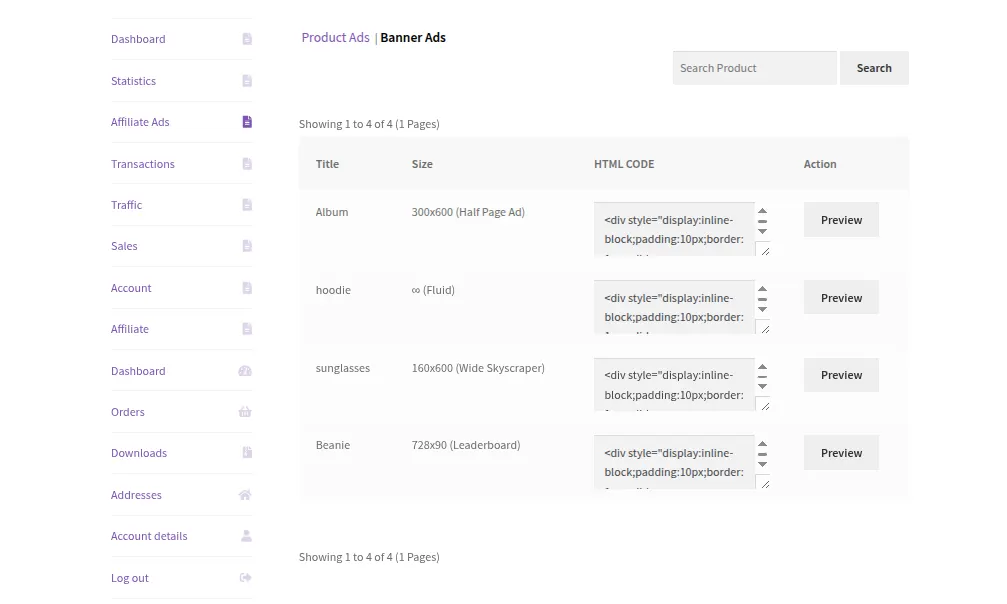
Now, the affiliate can add banners & ads under the Affiliate Ads menu item. Here affiliates can check their Product Ads and Banners Ads.
Now, the affiliate can click on Copy Html Code and paste it into the website where he wants to put it.
The affiliate can share links, copy the share links and open links to the product ads. For add have to share direct links and products will be shown only when it will be completed.
Product Ads :

Banner Ads :
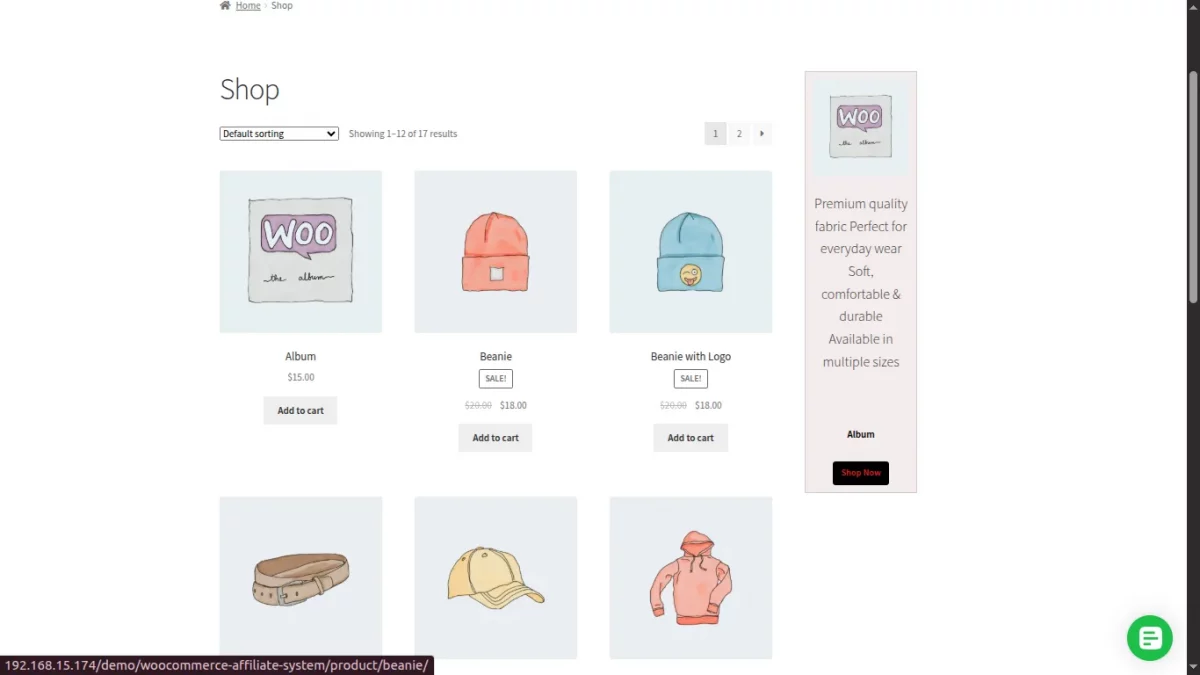
Affiliates can click on Preview to check the preview of the banner. In order to display a banner on the site affiliate needs to copy HTML content.
After that paste that code on the website.
Transactions
Even the affiliates can check their transaction records by clicking the “Transactions” tab as shown below in the snapshot. At the time of payment that amount should be less the pending amount.

Traffic :
Also, the affiliate user can check all the traffic details under the Traffic section of the account.

Sales :
Sales of an affiliate can be view in the Sales section.

Account
For making payments or transactions for admin, the affiliate user needs to set the payment method.
Affiliate users can set it from their “Payment” tab under their account. Check the below-given screenshot for more details.
Here the seller can select any one payment method from the admin to allow payment methods – Direct Bank Transfer, Check Payment, and PayPal.

The affiliate can opt for any of the options. Below we have select Direct Bank Transfer :

Affiliate
Affiliate will have to enter his Promotion URL (Where affiliate wants to post the ads and banners). And then click update to update his blog link as shown below.

Moreover, that’s all for the Affiliate Plugin for the WooCommerce module. Still have any issue feel free to add a ticket and let us know your views at webkul.uvdesk.com.
You may also check our quality Woocommerce Plugins.
Current Product Version - 1.3.0
Supported Framework Version - WordPress - 6.9.0 WooCommerce - 10.3.0

2 comments
We have created a ticket on your behalf and soon you will get a resolution to your queries over that.
Ticket URL – https://webkul.uvdesk.com/en/customer/ticket/view/576895
Thanks and Regards,
Team Webkul