Overview
Using the Career Job Board App, employers post job vacancies and job seekers search for employment opportunities.
It acts as a digital bridge between talent and employers, streamlining the hiring process.
This helps both employers and applicants find the right match quickly and easily.
A career job board provides the ability to create templates, jobs, and categories for applicants.
You can update the status by clicking the icon associated with the job, applicant, or category.
Installation and Configuration
Career Job Board Installation:-
To install the app, follow the following steps –
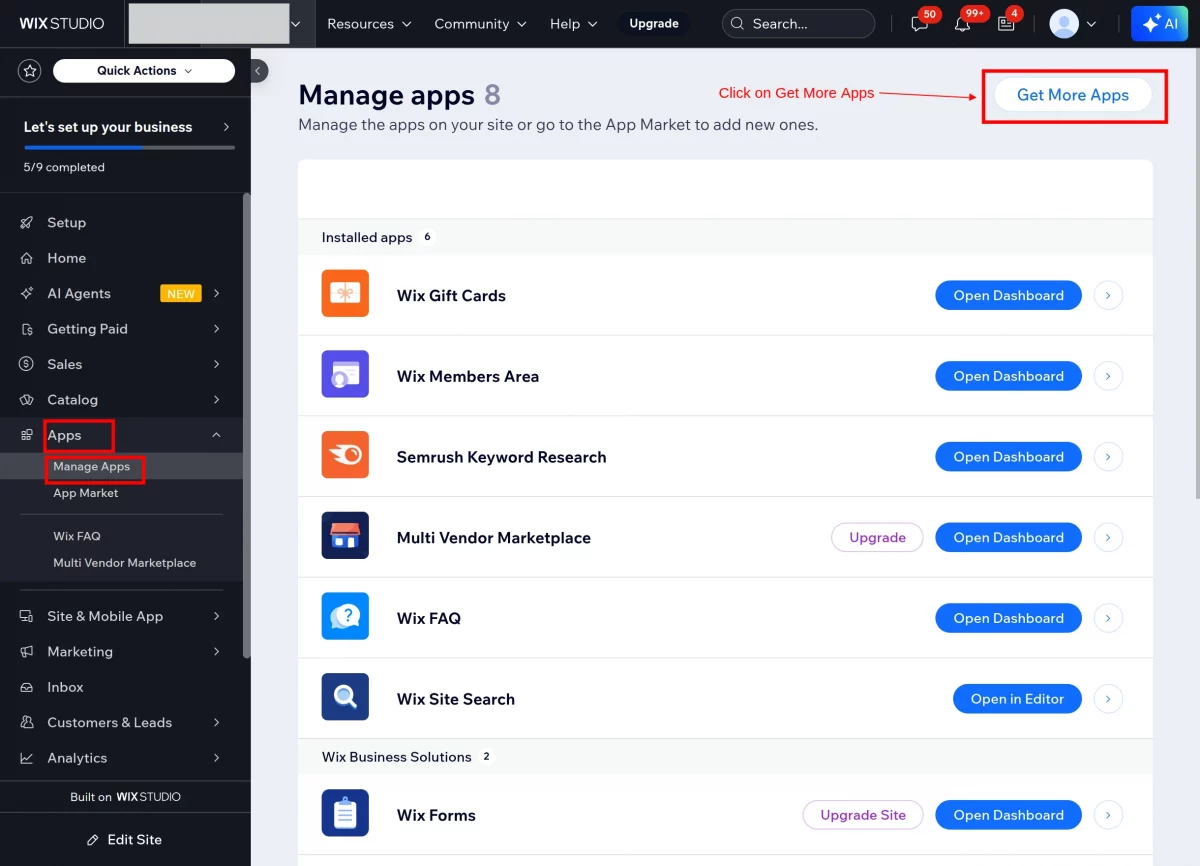
- Go to your Wix store, then click on Apps >> Manage Apps as shown.
- Now, click on Get More Apps.
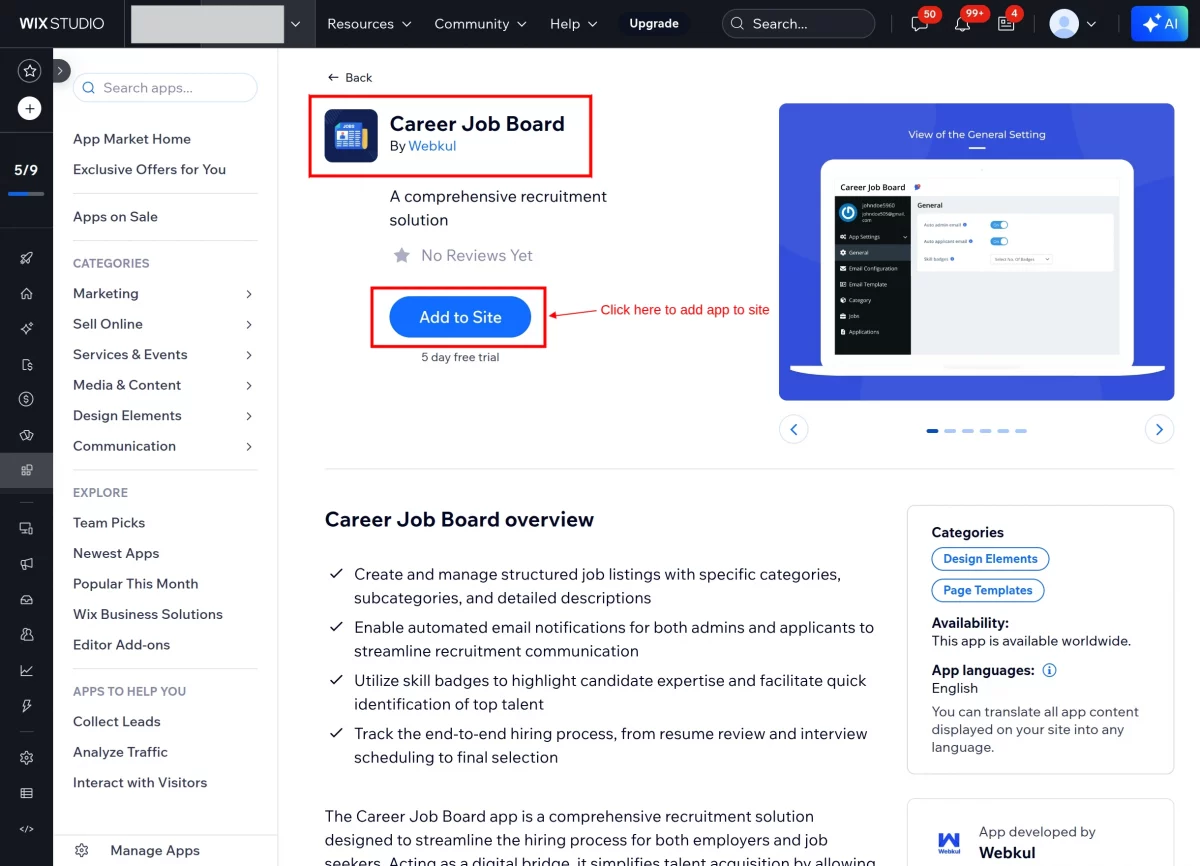
- Now, you’ll be redirected to the app market page from where you need to search for “Career Job Board”.
- Click on the ” Add to site” button to add the app to your site, as shown below.
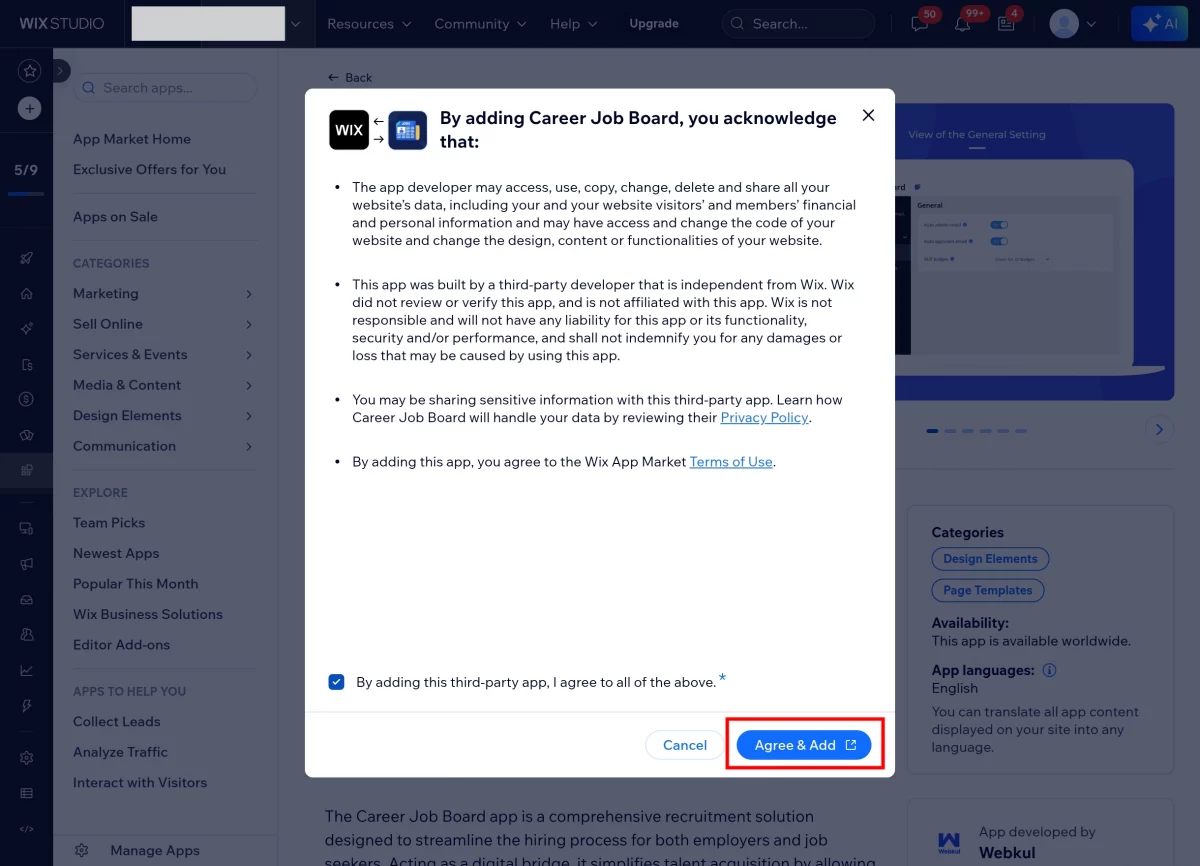
- Click on Agree & Add to move forward after reading the terms and conditions of the application.
After this, you will be redirected to Wix Studio. From there, click on “Publish” to save the changes and install the app on your site.
App Settings
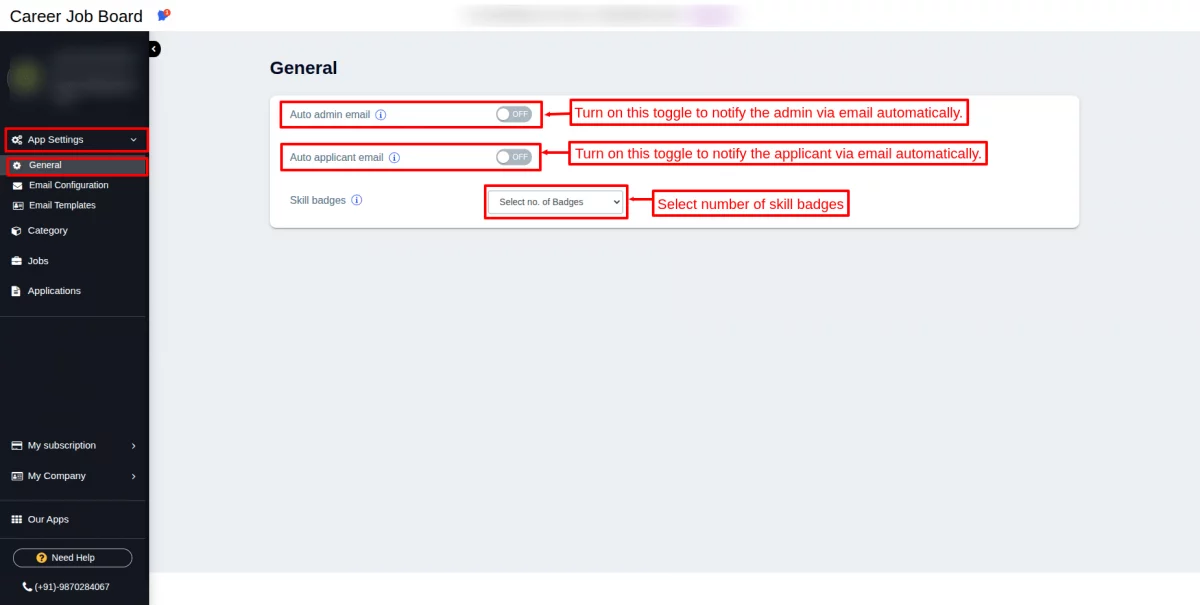
Go to App Settings << General
Turn on the “Auto admin email” toggle to notify the admin via email automatically.
Turn on the “Auto applicant email” toggle to notify the admin via email automatically.
Select the number of skill badges.
Note: Skill badges are small digital icons or symbols that show you are good at a certain skill. You earn them by passing tests, completing courses, or proving your ability.
In a career job board app, skill badges help employers quickly see what you’re good at, like coding, writing, or customer service.
Email Configuration :
To know how to configure email settings, please visit the user guide and follow the required steps.
Click on Save to save the details and then try sending a test email to verify that the email configuration is complete.

Email Templates :
Go to App Settings << Email Templates
Click on the plus icon to create “Email Templates”.

Choose the template to create an email template for applicants.
Then, mention the job title for which profile you want to create the email template.
In the email content box, write the content that you want to show to applicants.
Then click on “Save Changes” to save the email template.

After saving the email template, a pop-up message saying “Email Template Settings saved successfully” will appear on the screen.
Click the edit icon to modify the template and make changes.
The template will look like this, as shown in the screenshot below:

Click on the delete icon to delete a single template.
Check the box to select templates, then click the “Delete Bulk Template” button to delete multiple or selected templates at once.

Category
Click on the “Add Category” button to add categories as shown in the screenshot below:

Write the name of the category and choose the status to Active or Inactive based on your needs.
Click on Save to save the category.

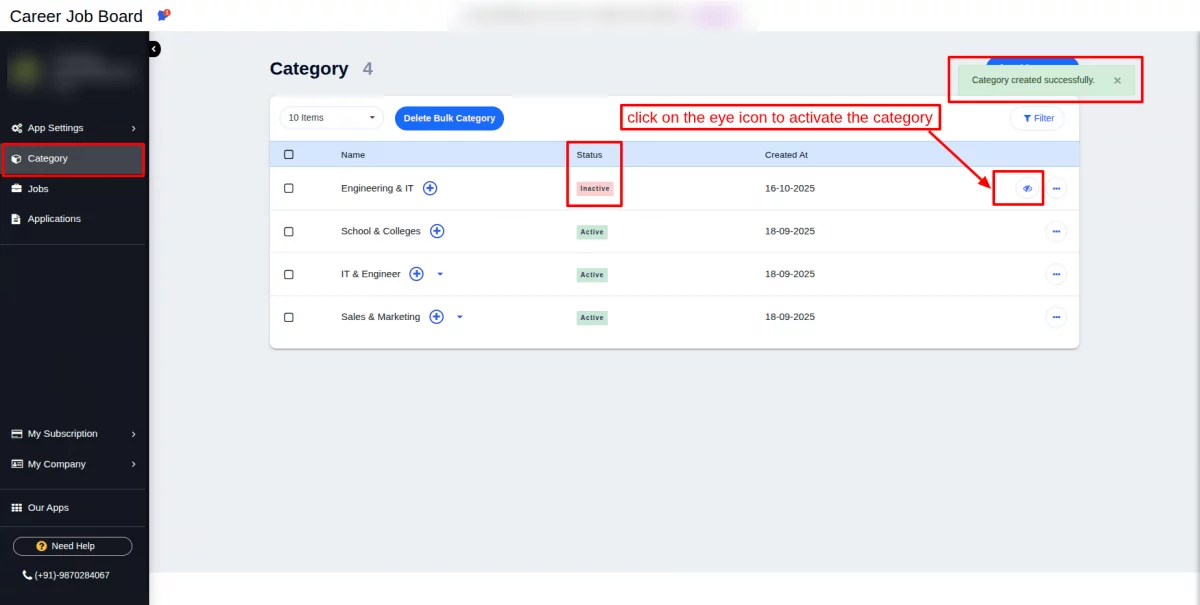
After saving the category, a pop-up message saying “Category created successfully” will appear on the screen.
Click the plus icon within a category to create a subcategory.
The Active status will be displayed with a green background color.
To edit a category, click the three dots (more options), select Edit, and make your changes.

The Inactive status will be displayed with a red background color.
To enable (change from inactive to active), click on the eye icon as shown in the screenshot below:
Write the name of the Subcategory and choose the status to Active or Inactive accordingly.
When you change the status to active or inactive from the Manage section, the same status will automatically be applied to all subcategories.
Click on Save to save the subcategory.

The subcategory will look as shown in the screenshot below:
To edit the subcategory, click on the edit icon and make changes.
To delete the subcategory, click on the delete icon and delete the subcategory.

Jobs
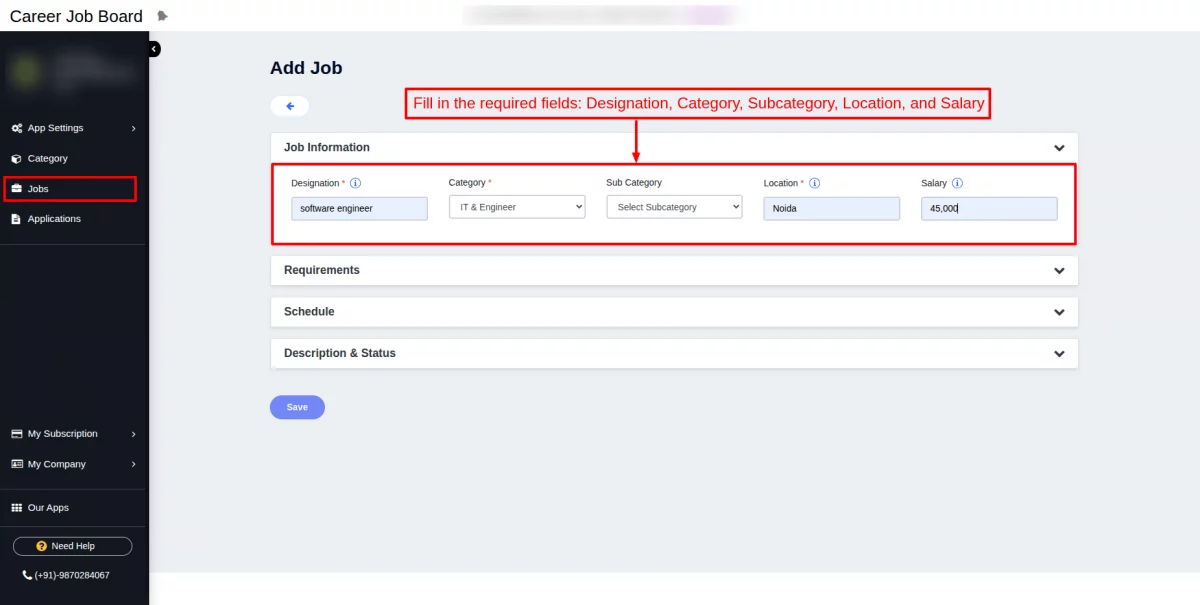
Click on the “Add Job” button to add jobs as shown in the screenshot below:

Job Information :
Enter the following details in the input fields: Designation, Category, Location, and Salary.
Designation: The job title or role being offered (e.g., Software Engineer, Marketing Manager).
Category: The industry or job type the role falls under (e.g., IT, Finance, Healthcare).
Location: The city, region, or remote status where the job is based.
Salary: The compensation or pay range offered for the position.

In cases where a subcategory exists, please make sure to fill it in.
Subcategory: A specific specialization within a category (e.g., Software Development, Accounting, Nursing).
Requirements :
Fill out all required fields to complete the job requirements.
Eligibility: The minimum qualifications or criteria required to apply for the job.
Skill: The specific abilities or expertise needed to perform the job effectively.
Experience: The amount of relevant work history required for the role, usually measured in years.

Schedule :
Mention the starting and closing date:
Start Date: The date when the job or application period begins.
End Date: The deadline or closing date for job applications or the job posting.

Description & Status :
Description: A detailed overview of the job role, responsibilities, and requirements.
Status: Indicates whether the job posting is currently active, inactive, or closed.
Click on Save after filling in the required details.

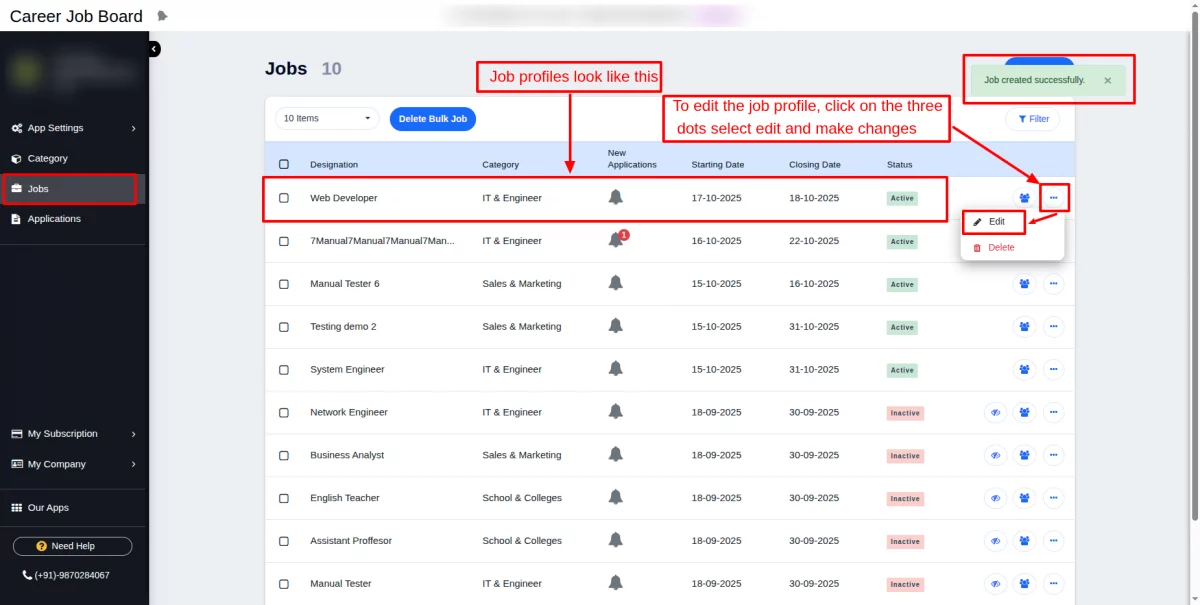
After saving the job, a pop-up message saying “Job created successfully” will appear on the screen.
In order to edit the Job Profile, click on the edit icon and make changes.
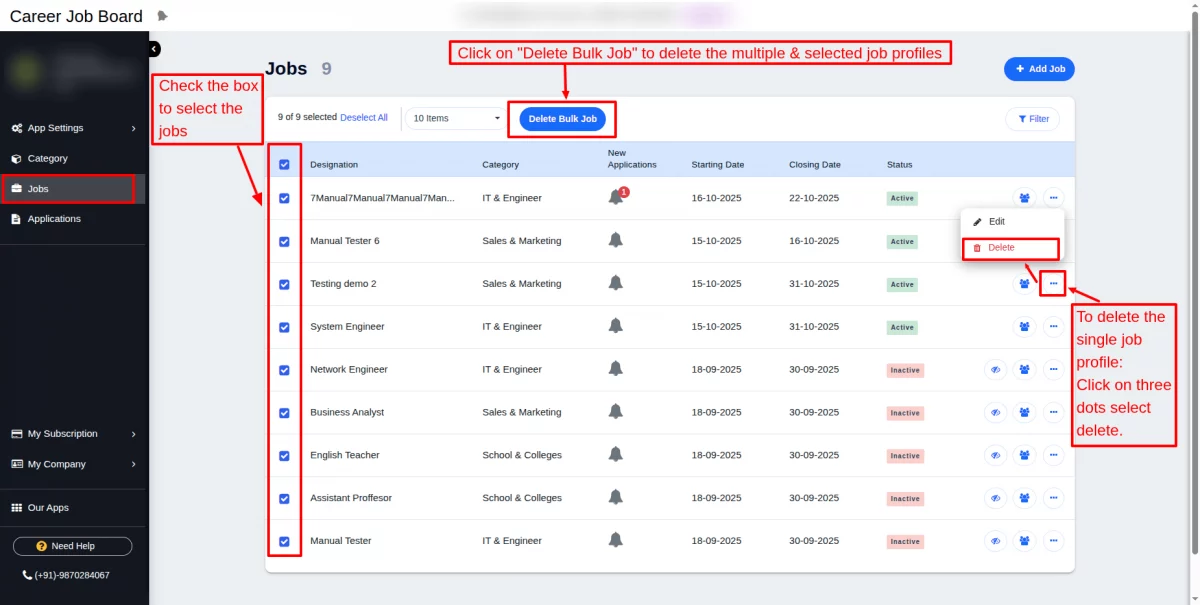
Check the box to select the jobs and click on the “Delete Bulk Job” button to delete the multiple selected job profiles.
To delete a single job profile, click on the three dots, select “Delete,” and then confirm by clicking “Delete” again.
Application view on Frontend
An open position looks like this in a frontend:
Search for the job role you’re looking for in the search bar, then click on the profile to view the job requirements and details.

Click on the “Please log in to apply for this job ” button to log in:


After logging in, the visitor is redirected to this page, where they can apply for a job by clicking the “Apply Job” button.

Fill in the required details. Click on Submit Application.

Your application has been submitted successfully.
Click on the Track your Application button to track the further interview process:

Applicants can track the hiring process.
Enter your registered Email and click on “Check Status”.

It works like this: when an applicant applies for a job profile, their resume is reviewed.
If selected, an interview is scheduled. The applicant then proceeds through all the interview steps, after which they are either selected or rejected.

When a new application is received, it will also appear in the notification bell icon with a count.
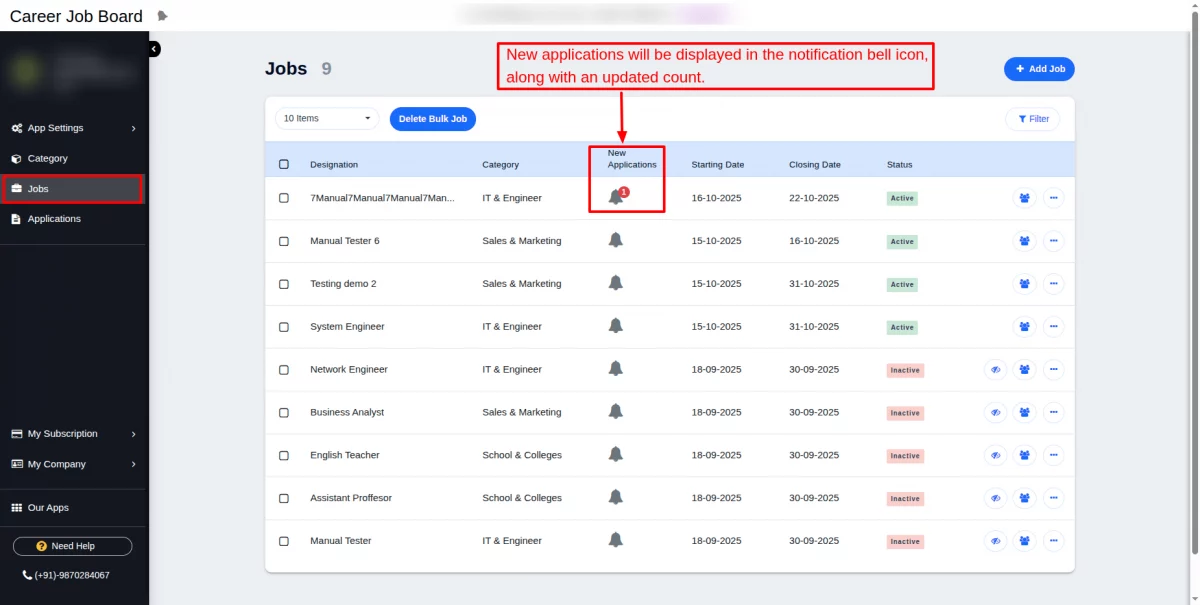
Applications
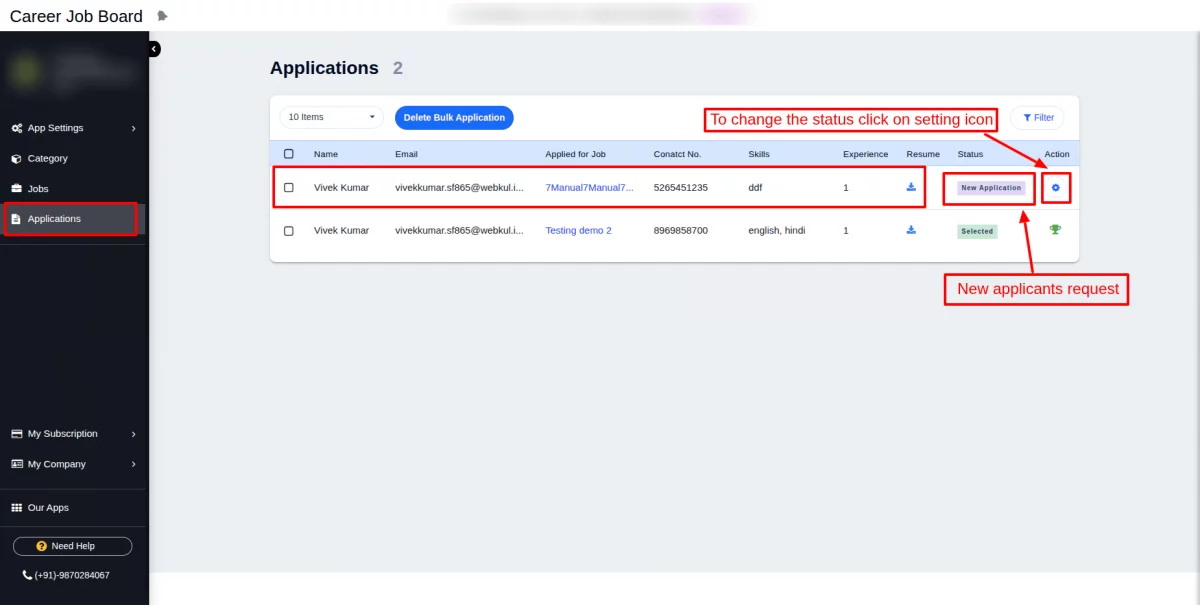
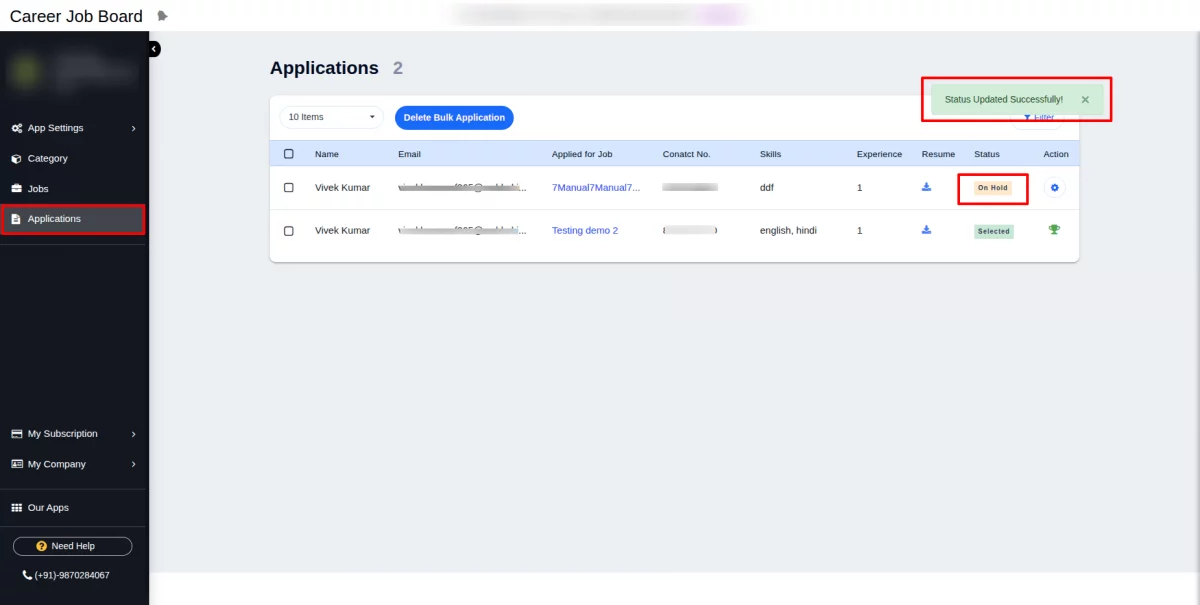
All applications submitted by applicants are listed under the Applications section.
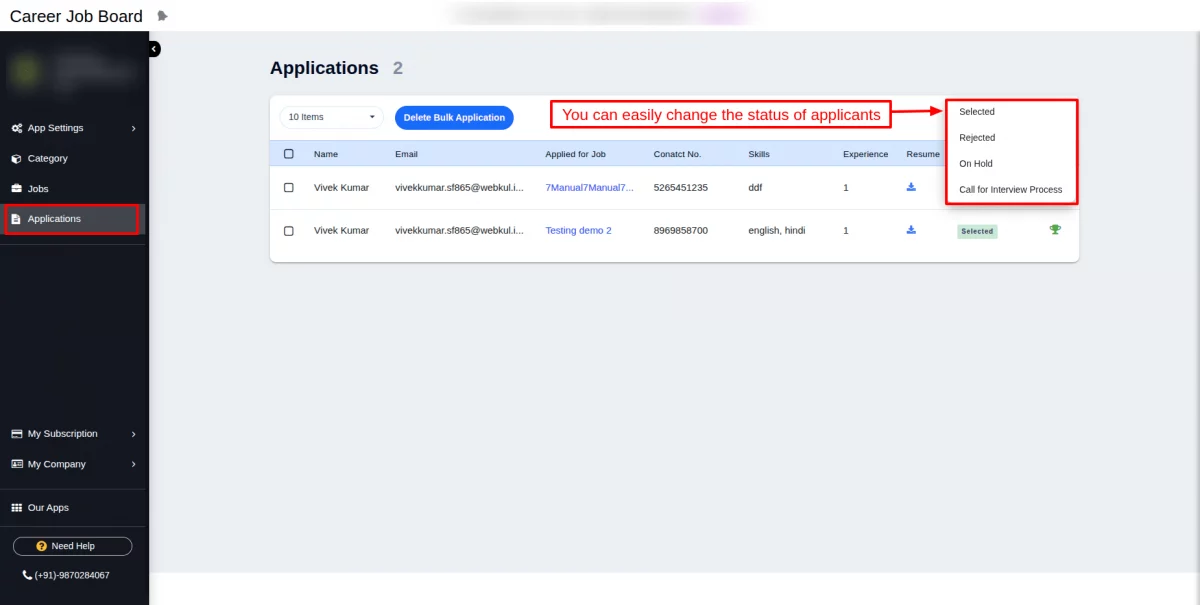
Click on the settings icon to change the applicant’s status.
You can easily manage all the hiring processes for applicants from the Actions menu.
The status will be updated by clicking on the icon on the job, applicant, or category
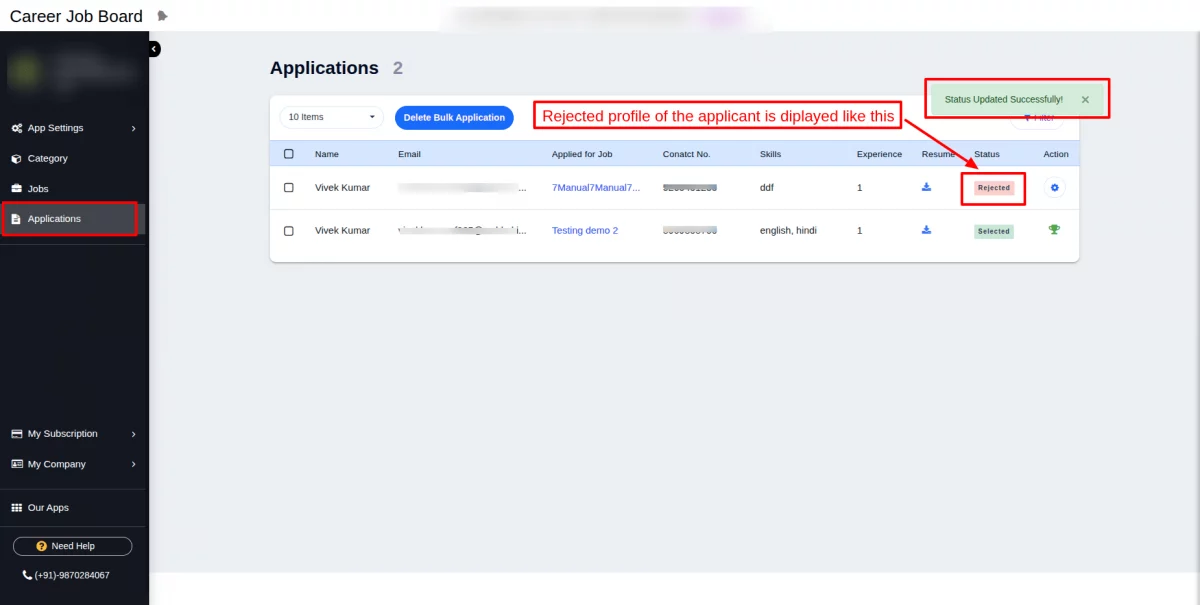
A rejected profile of applicants is displayed like this, as shown in the screenshot below:
A hold profile of applicants is displayed like this, as shown in the screenshot below:
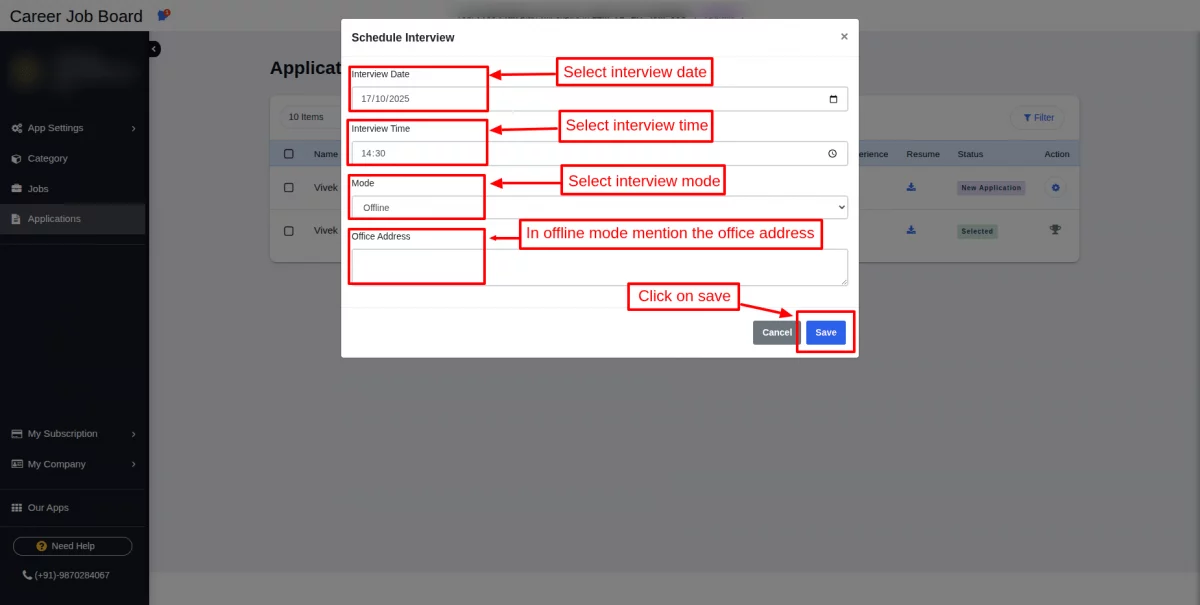
Call for Interview Process:
You can easily schedule a call for the interview process. The page appears as shown in the screenshot below.
Select the interview date, interview time, and mode of interview.
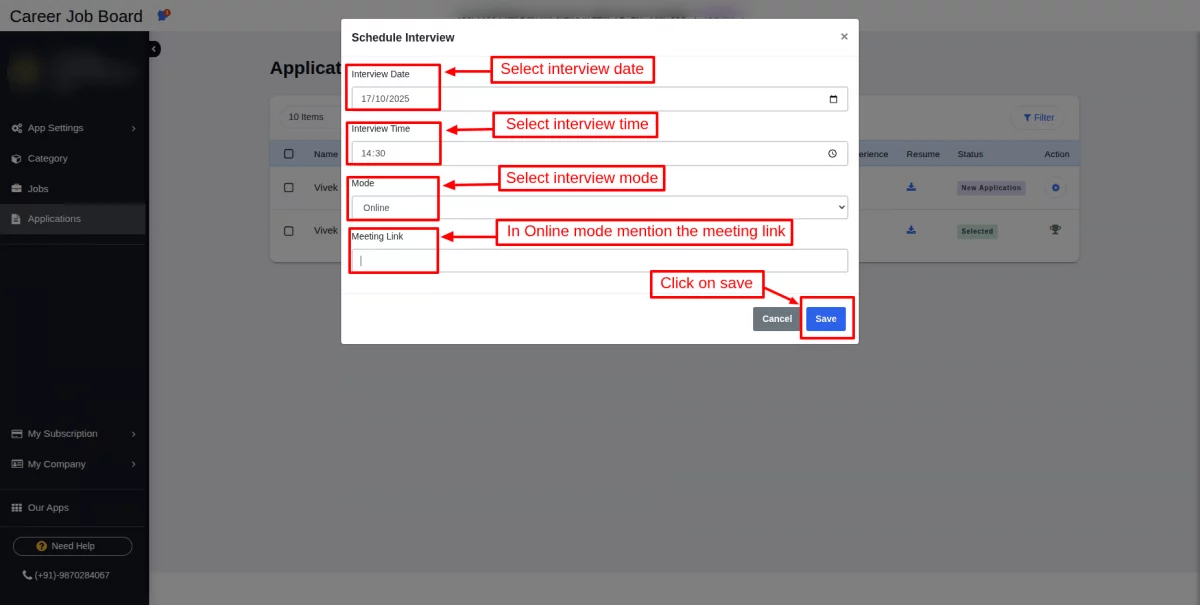
There are two modes given: offline mode and online mode.
In case of offline mode, mention the office addresses.
In online mode, provide the meeting link for the interview.
Click on the Save button.
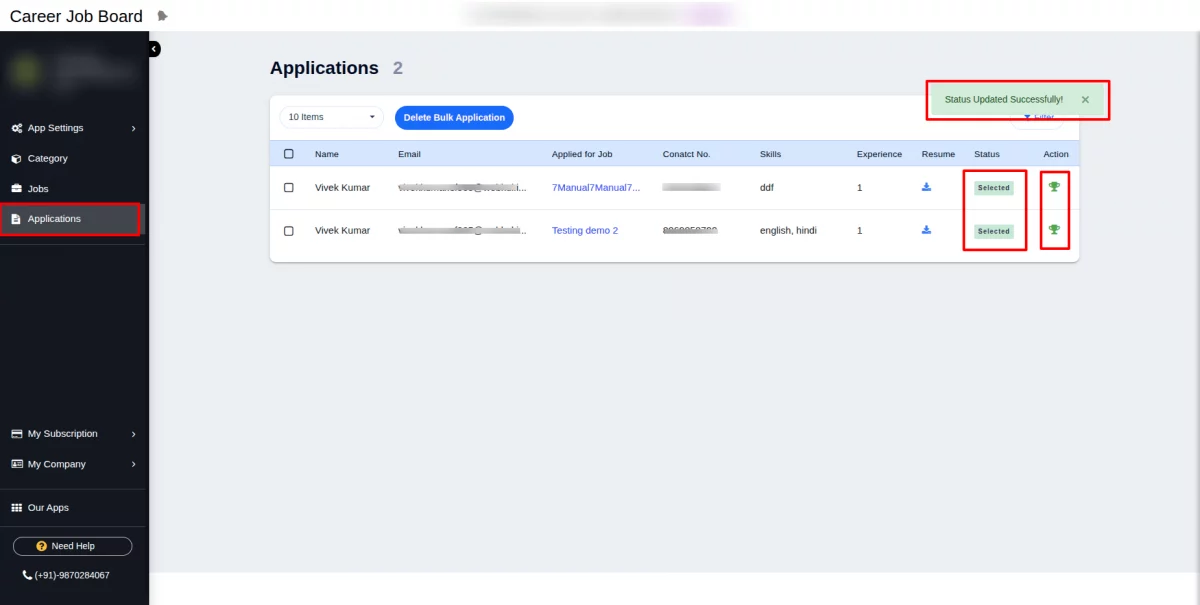
Selected applicants look like this, as shown in the screenshot below:
Please note: Once selected, this option cannot be changed (This prompt appears in the confirmation dialog before the change is applied to select).
WEBKUL SUPPORT
I hope this blog will help you understand the complete process involved in the Career Job Board App for the Wix application.
In case you have any queries, please generate a ticket https://webkul.uvdesk.com
For More Development on Wix, contact us.

Be the first to comment.