The Multi-vendor Marketplace app has come up with yet another connector add-on i.e. SooPOS Connector.
SooPOS [Shopify+POS] is a perfect Shopify POS inventory order management solution for online stores. Learn
SooPOS connector helps to get the seller’s products synced with the merchant’s store if the seller’s shop name will match the “vendor” field of the “Add Product” section of Shopify.
Moreover, if the merchant will edit those SooPOS products from Shopify end then, the changes will get updated automatically in the multivendor app.
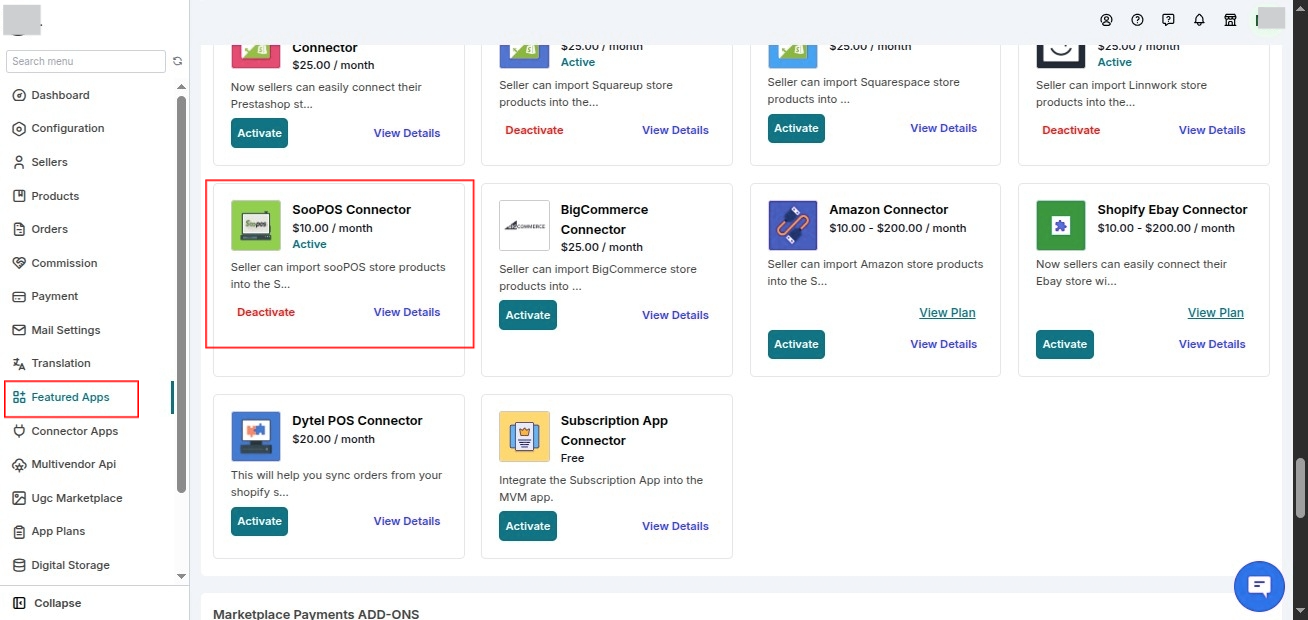
You can enable the SooPOS connector from the “Feature App” section of the app.
Then, approve the additional charge of $10 USD/month over and above your current Multi-vendor app plan.
Let’s explore the connector in detail.
Required Conditions
The connector will work with newly added products, if the below three important conditions satisfy:
- The sellers need to enable the “SooPOS Configuration” from their respective seller panels.
- SooPOS tag must be assigned to the SooPOS products.
- The seller shop name on the marketplace should match the “vendor” field under the “Add Product” section of your Shopify store.
How to Activate?
To enable this feature app, you need to visit the Feature app section and enable the SooPOS connector feature app. Click the Enable button to activate the feature app.
WorkFlow
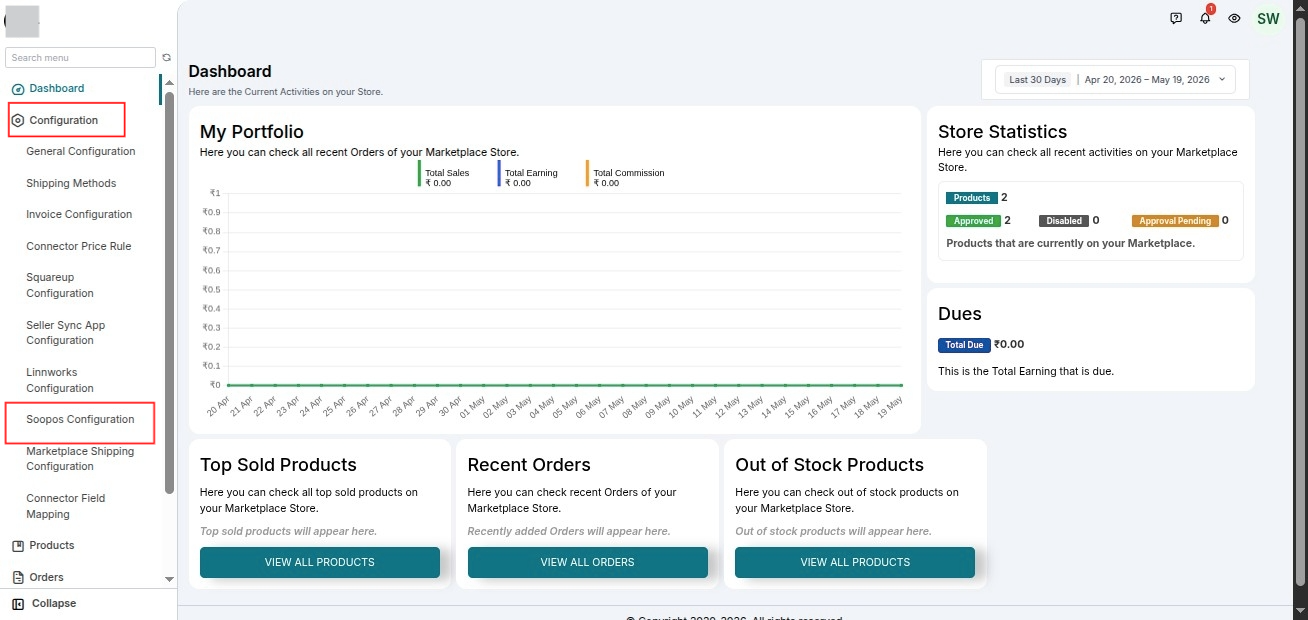
After activating the feature app, the seller will get a new configuration added to their respective seller panels i.e. SooPOS Configuration.
SELLER END
The seller needs to log into their seller panel. Then, go to Configurations>>SooPOS Configurations.
From here, Seller needs to enable the SooPOS option.
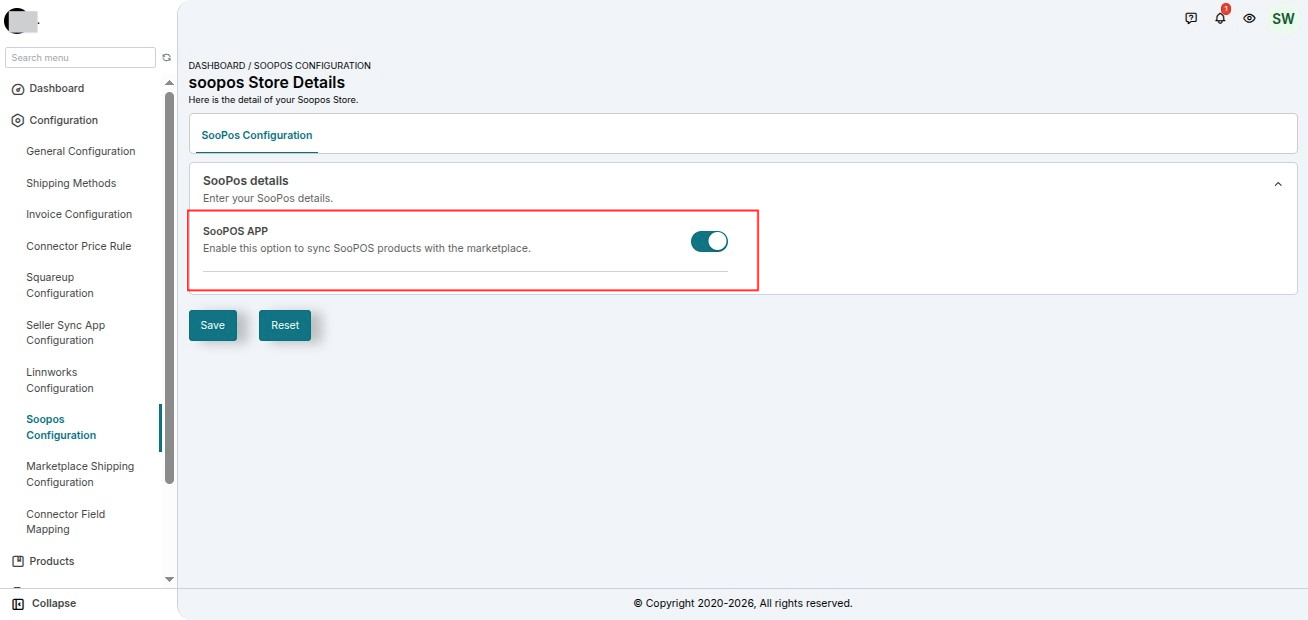
That’s all required for sellers.
ADMIN END
Now, the merchant can import products with “SooPOS Tag” to the app, and then, the imported products will auto-assign to the sellers.
Please Note: It will work on newly added products only. For Old products, the Merchant needs to manually assign the products to sellers.
Learn How To Import Products from Shopify To App
Before You Import Products:-
Make Sure the “SooPOS” Tag is available on the products that you are going to import to the app.

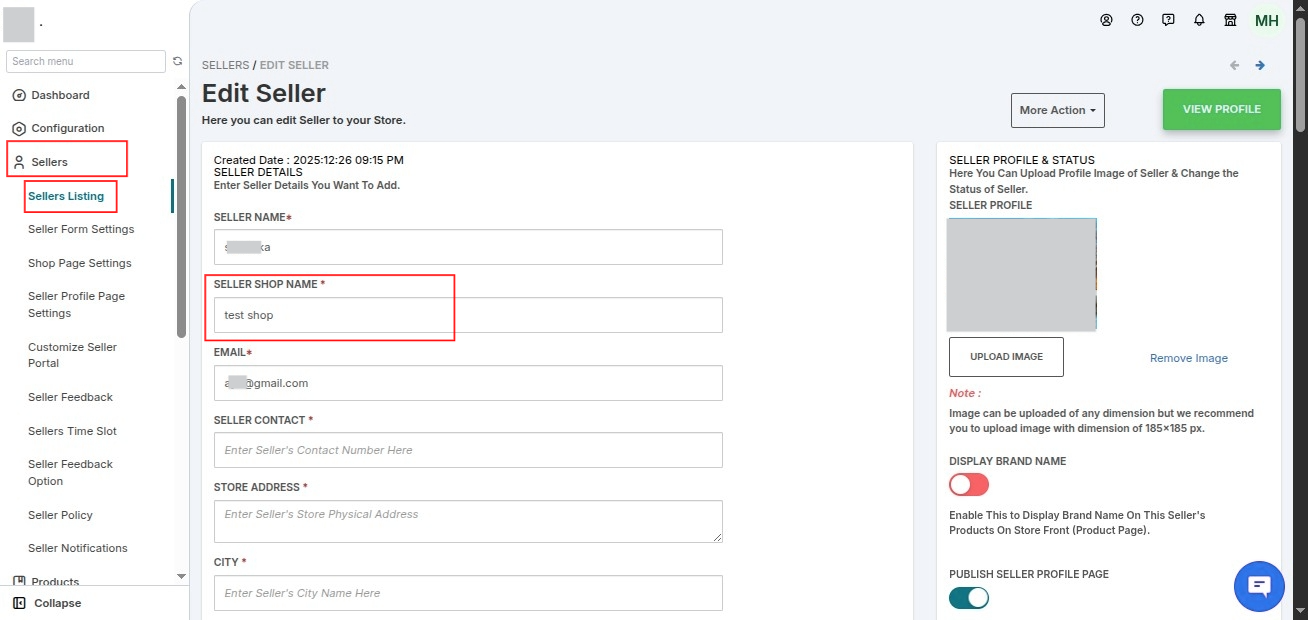
Secondly, make sure that the seller shop name in the app should match the “vendor” name on Shopify.
Below screenshot shows the seller shop name on the multi-vendor app:-
Below screenshot shows the “Vendor” field on Shopify end:-

That’s all you need to check before importing products.
Now, proceed to import products and the “SooPOS” products auto-assigned to the sellers in the app.
Furthermore, if you need any kind of support/Consultancy then please raise a ticket at http://webkul.uvdesk.com/ or drop an email at [email protected].
Thanks for reading this blog!!! 🙂

Be the first to comment.