Salesforce Connector for Shopify: Shopify and Salesforce Integration is taking e-Commerce & CRM platform to new heights. Now, dealing with e-Commerce unlimited data is much easier than ever before. Salesforce Connector for Shopify is acting as a bridge between Shopify and Salesforce. It is enhancing features of e-commerce and CRM platform with the concept of service first approach. With the help of this application, admin can easily synchronize Customers, Collections, Products, and orders to Salesforce CRM which will help them to track sales and growth trends.
Note: Application required to install in Salesforce Org from AppExchange: eShopSync For Shopify
Features
- Provides unified Salesforce platform to manage both e-Commerce and CRM data.
- Multi-store oriented integration to enhance management of e-Commerce data more efficiently.
- Real-time synchronization for Collections, Products, Customers, and Orders from Shopify to Salesforce.
- Effective utilization of multiple Shopify stores in single Salesforce CRM.
- Synchronize e-Commerce data at Salesforce end to avail CRM benefits.
- Salesforce Centric configuration concept to avail hassle free environment.
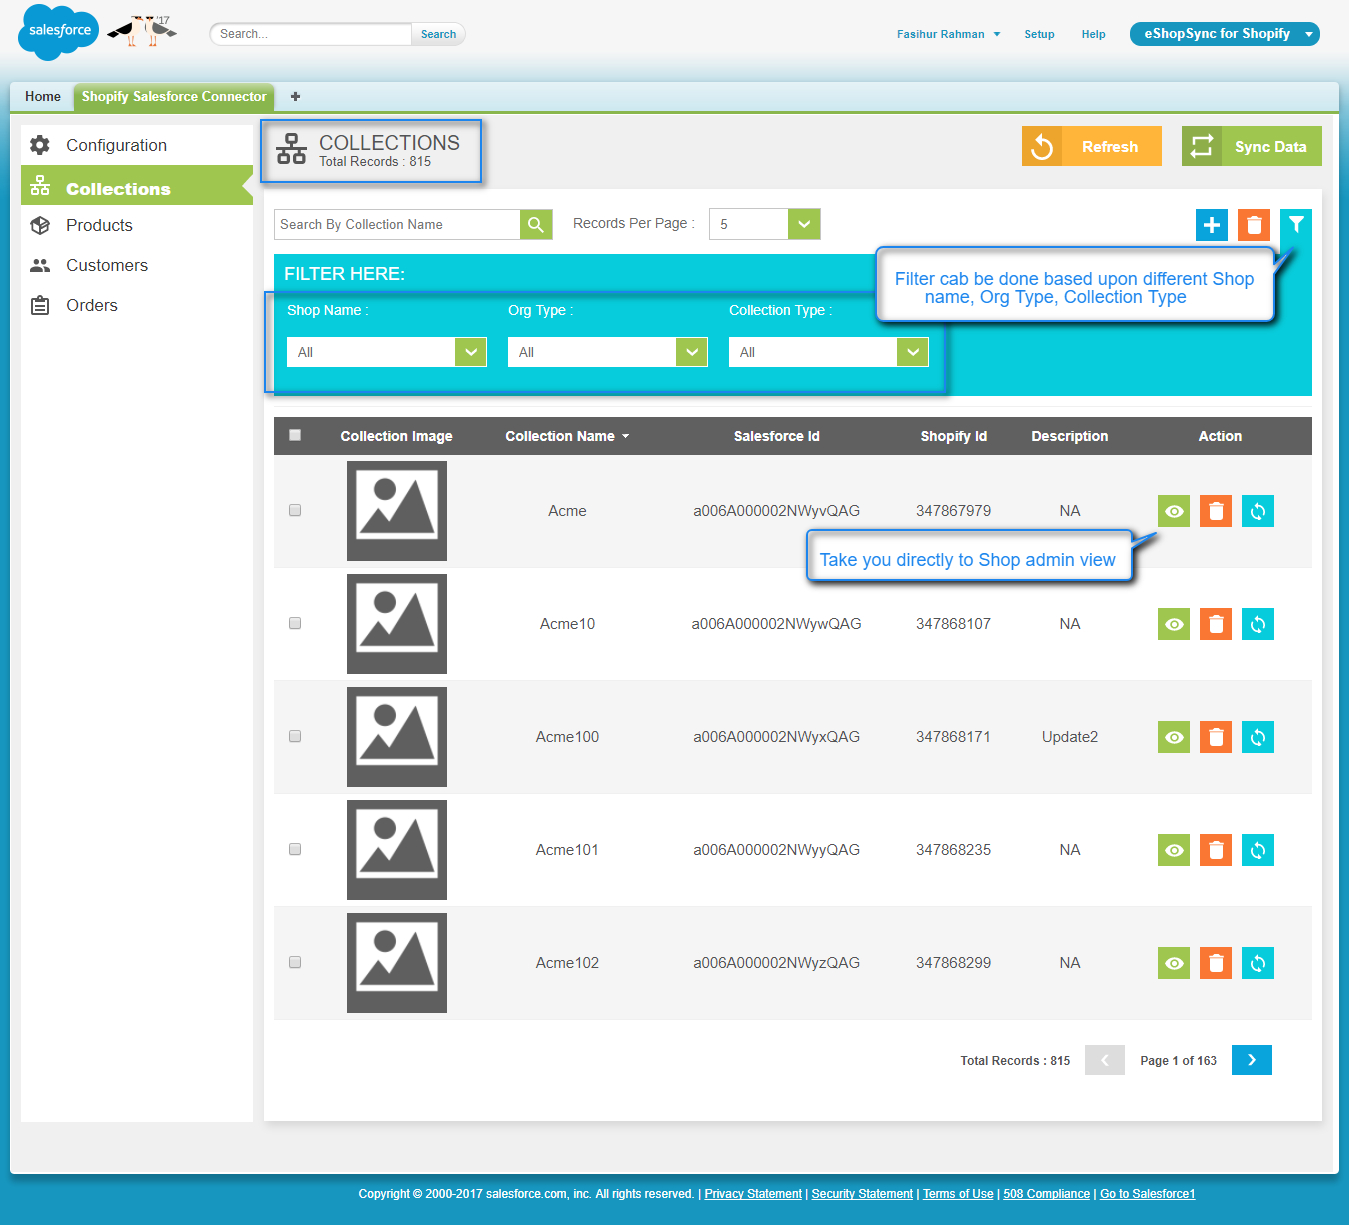
- Synchronization of Collections from Shopify to Salesforce end.
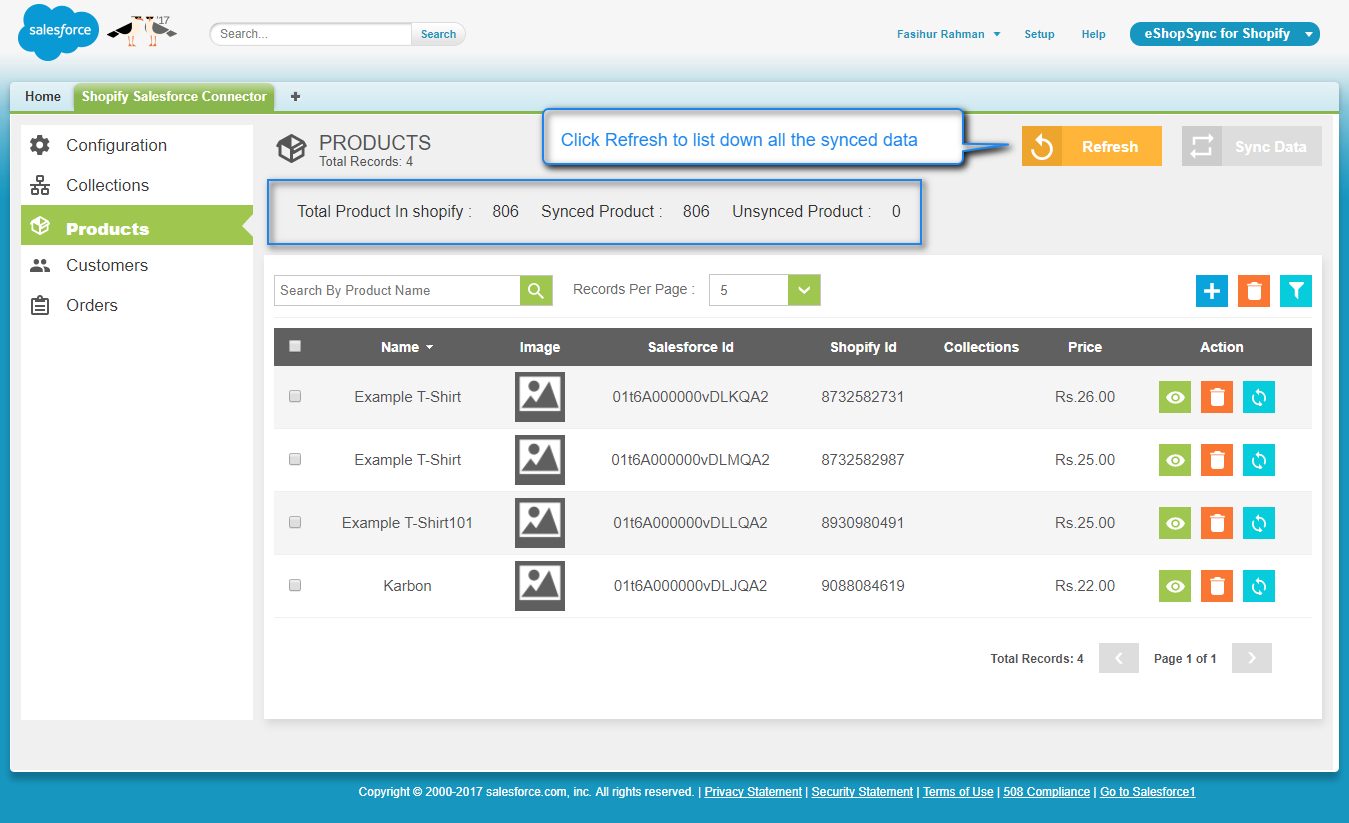
- Orders and Products synchronization to manage Inventory effectively.
- Customers synchronization as Accounts and Contacts at Salesforce end.
- Interactive design with the user interface at Salesforce end adding on effective data utilization
Features
- Bidirectional Synchronization (Contact us for price)
- Supports Multicurrency (Contact us for price)
How to Configure
Installation at Shopify end
- Install Salesforce Connector by eShopSync app in Shopify: Get it Now
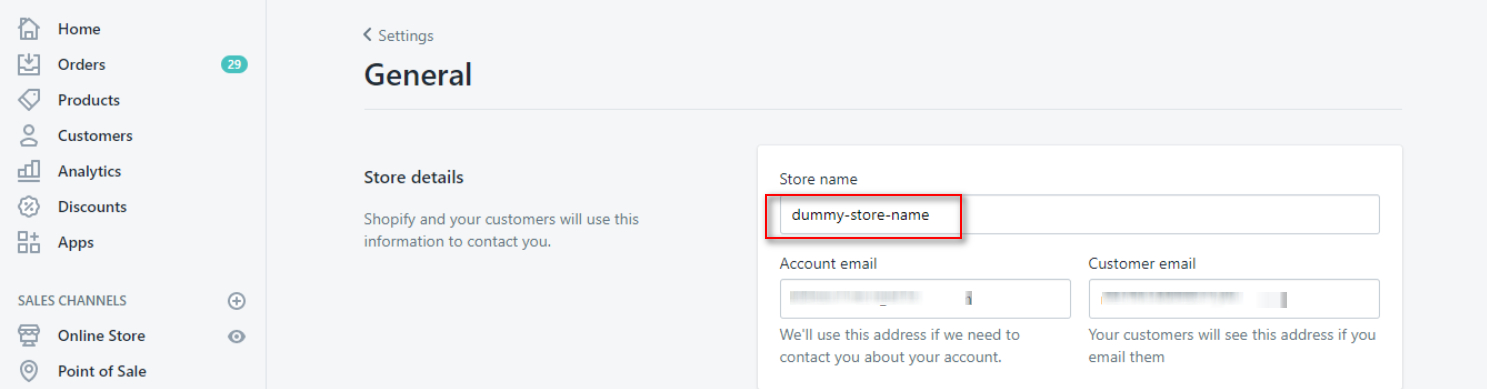
- Enter Shop Name. To get Shop Name: Login to Shopify Admin Account | Go to Settings | General | Copy Store Name
- Paste into Shop name box on Salesforce Connector by eShopSync app installation page then click install.

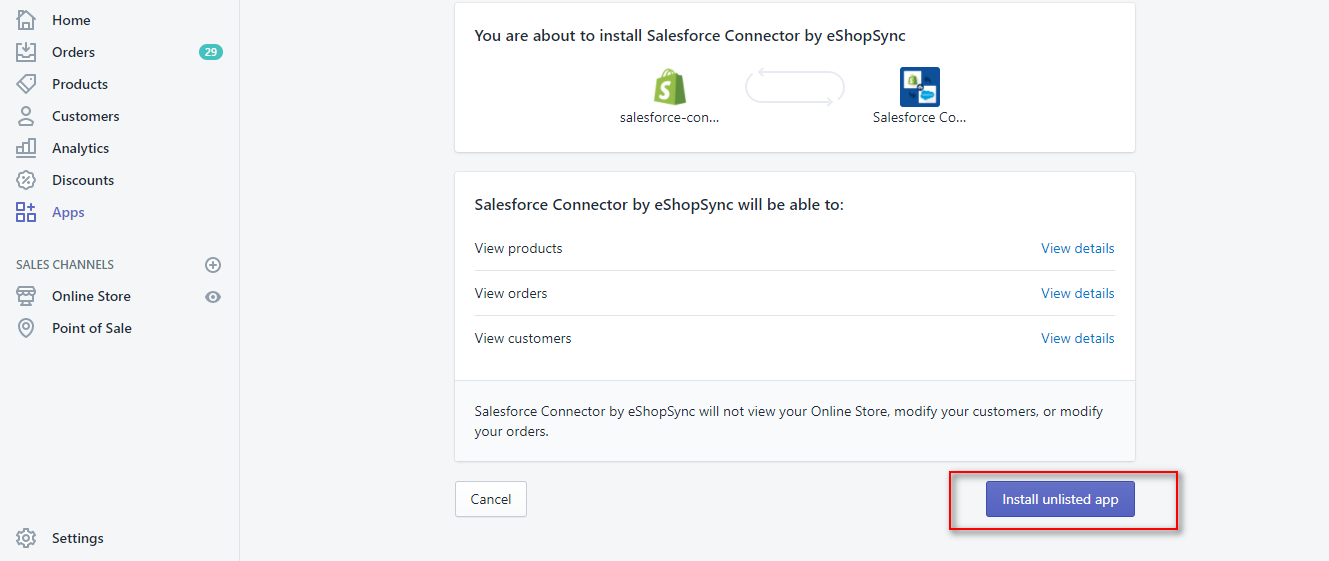
- Proceed with installation by logging to Shopify admin account ( if you are logged out). Click Install unlisted app as shown below.
- NOTE: Currently Shopify App review team is reviewing our application to get it listed soon. However, we are already having existing clients using our application at its best and looking forward to having it listed.
- Upon successful installation, you will get the page with Access token as shown below.

- To verify app installation in Shopify. Go to Apps and you will find app installed successfully in the list. Select Salesforce Connector by eShopSync

- Copy Access Token required at Salesforce end to fill in Shopify Access Token for a successful connection.
- Follow the steps guided under the installation section to complete the installation procedure on the Salesforce end. In case, you have already installed eShopSync For Shopify then proceed with setup and configuration steps mentioned below.
Installation & Setup at Salesforce end
Once you install eShopSync For Shopify from AppExchange. Go through the screenshots mentioned below to update the field accessibility.
- Go to Setup | Customize | Accounts | Fields | Check Custom fields created by eShopSync for Shopify

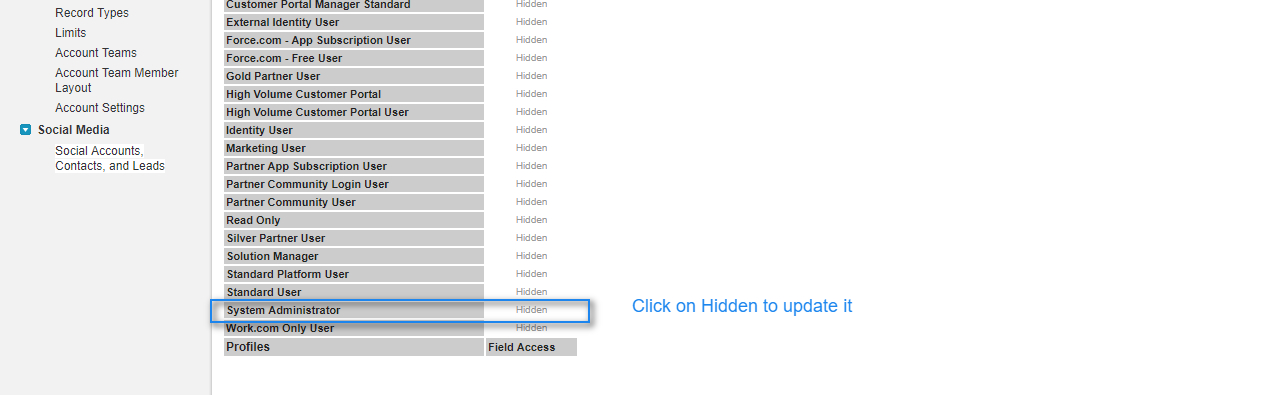
- Click on Field Label | View Field Accessibility | Next to System Admin, Click Hidden
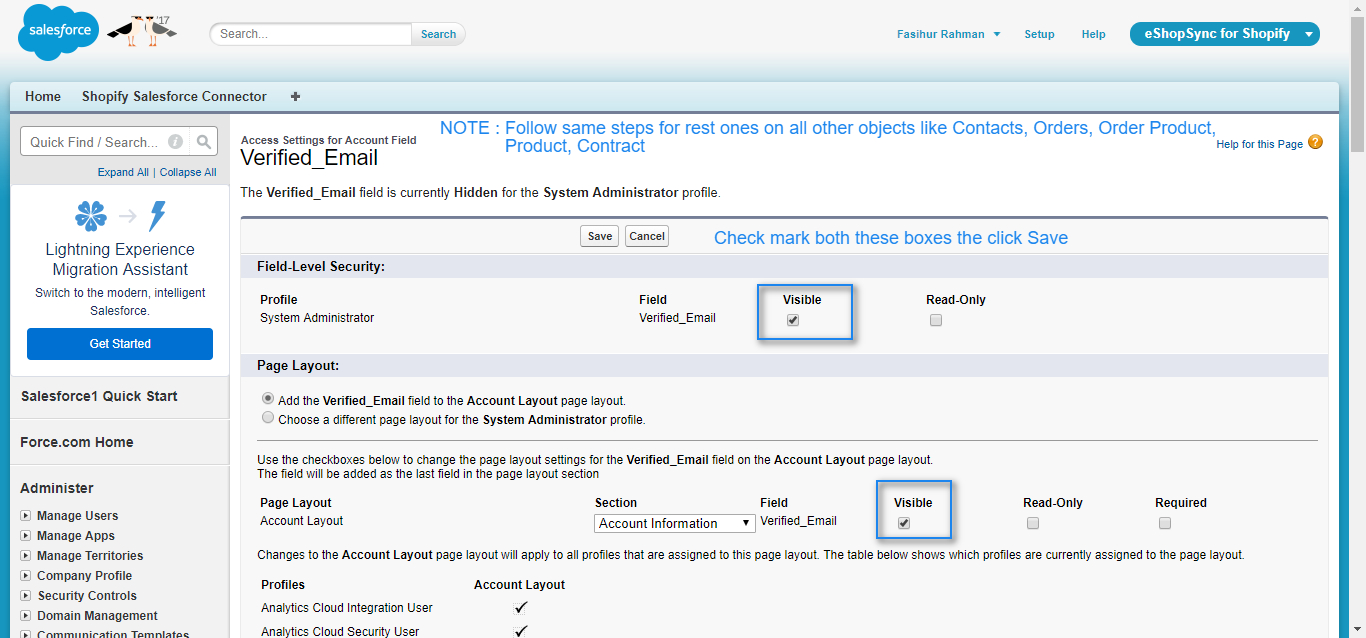
- Check Mark both boxes shown below
- Follow the same steps to update field accessibility for rest custom field created on Accounts, Contacts, Orders, Order Products, Products, Contracts.
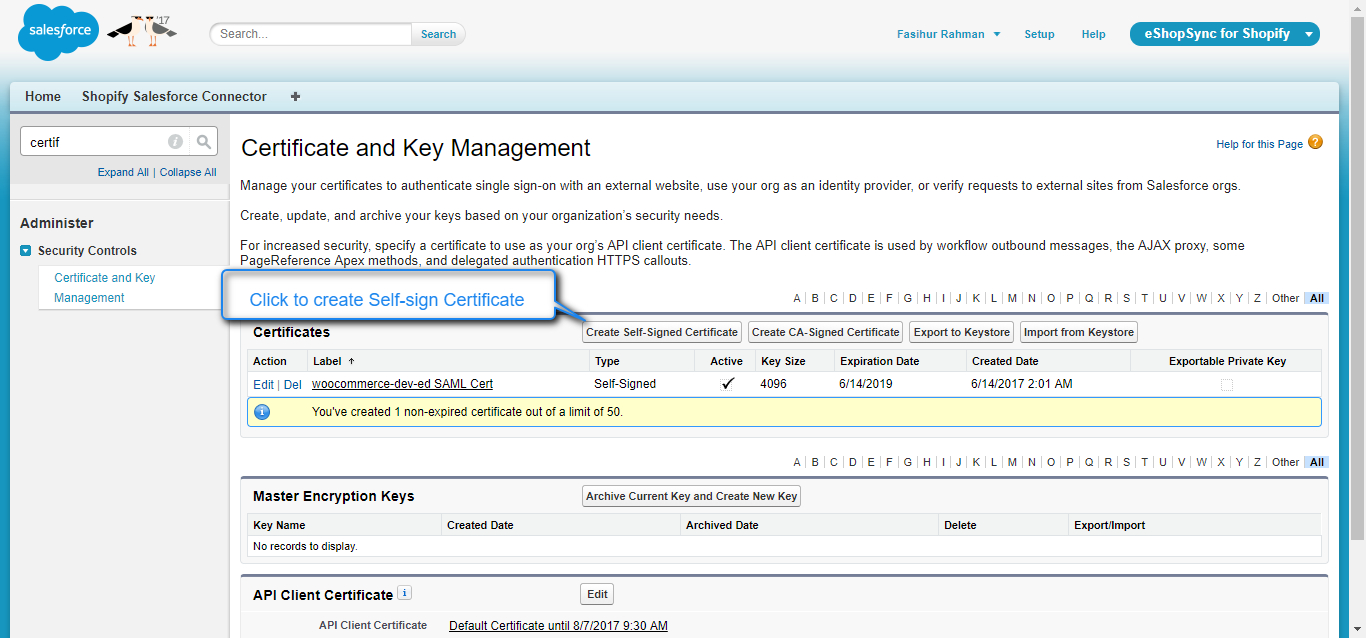
- Now, Go to Setup | Security Controls | Certificate and Key Management | Click Self-Signed Certificate
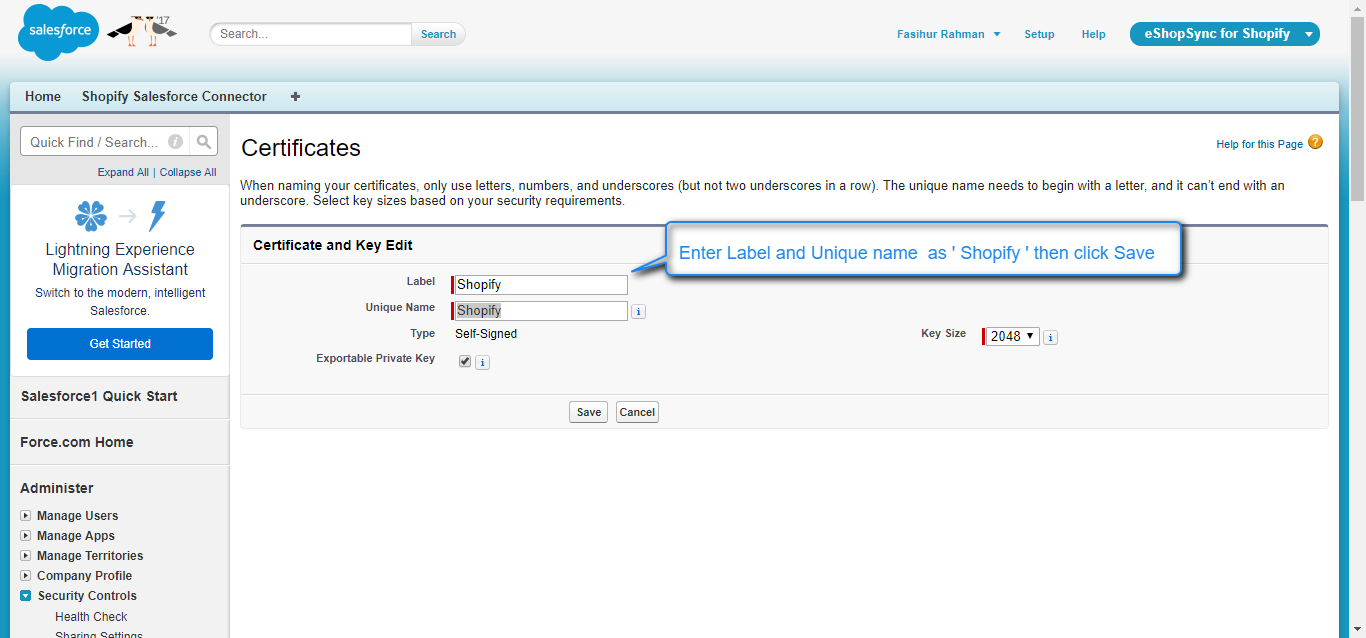
- Enter Label and Unique Name, then click Save.
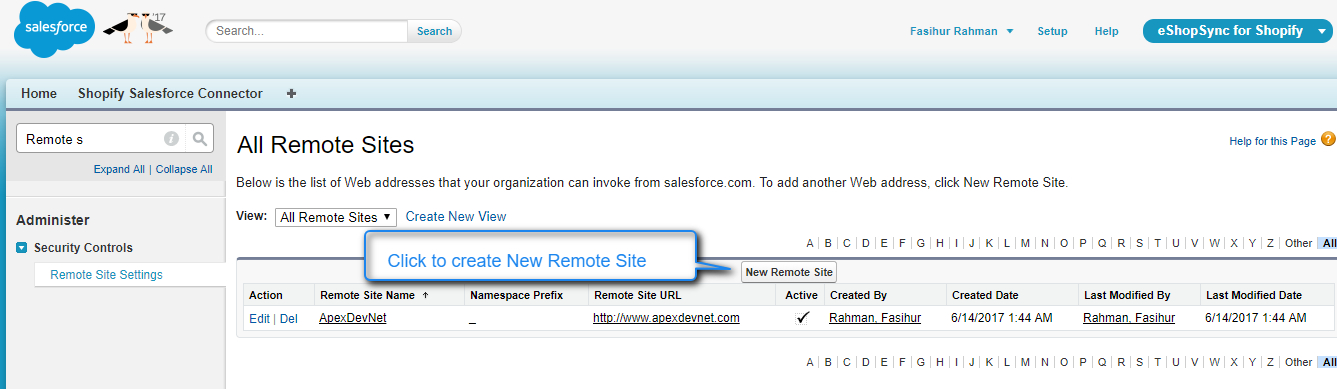
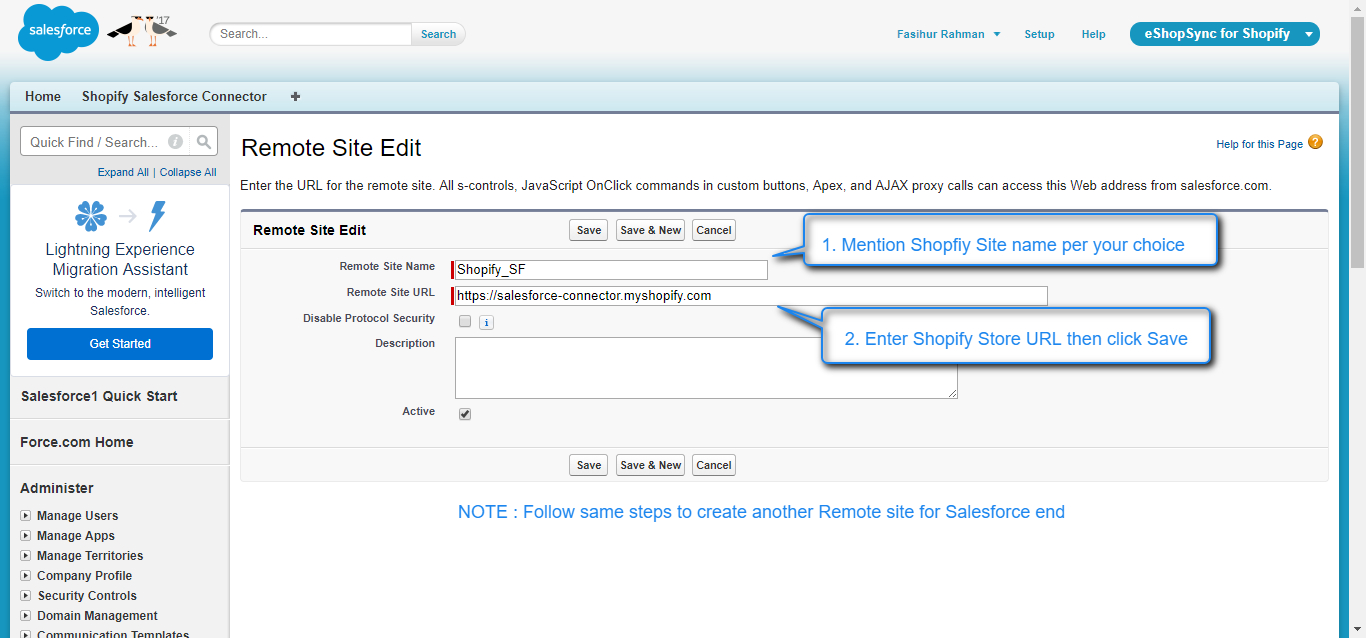
- Go to Setup | Security Controls | Remote Site Settings | Click New Remote Site. Create a New Remote Site for Shopify Store as explained in the screenshot below.
- NOTE: For Shopify Store URL, provide .myshopify.com URL(eg: https://shop-name.myshopify.com) automatically generated at the time of shop set-up.
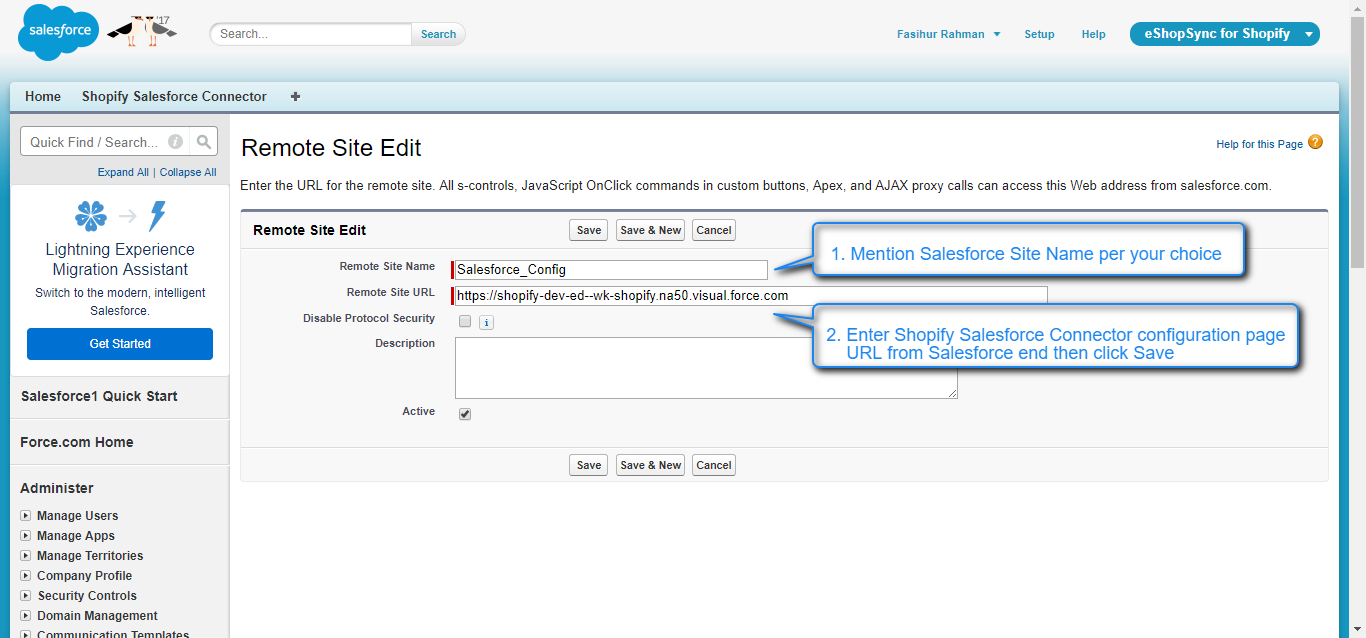
- Create one Remote Site for Salesforce as well. Copy Salesforce Connector Configuration URL by the following path.
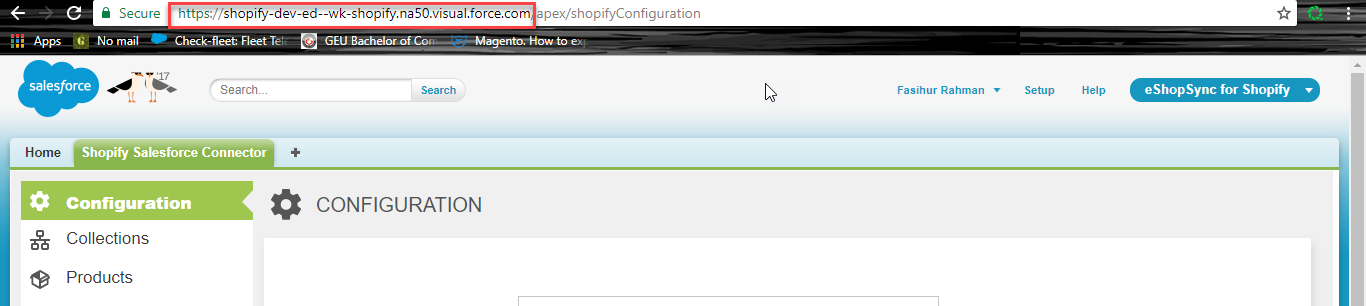
- From App Menu, click on eShopSync For Shopify
- Click Salesforce Connector tab | Click Configuration and copy the URL as shown below.
- Copy and paste the URL into Remote Site URL option as shown below.
Create a Site in Salesforce ( To achieve Real-time Synchronization Feature)
- Go To Setup | Develop | Sites | Click New
- Enter Site Label, Name, Site Contact, Active Homepage (Opt any random template) then click Save.
- Once Site is created, Click on Site Lable | Public Access Settings | Click Edit | Update Standard and Custom Object permission as shown below

- On the same page, scroll to Enable Apex Class Access section | Click Edit and add all four Apex classes mentioned below.

- Update field accessibility as mentioned in the screenshot.

- Copy the site URL created and paste into Salesforce Site URL in the Configuration tab.
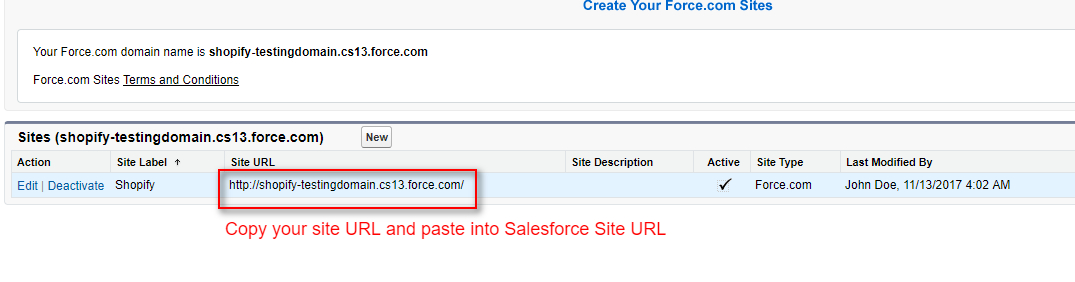
- Suppose created Site URL is http://shopify-testingdomain.cs**.force.com/
NOTE: Make sure to replace “http://” with “https://” and remove ‘/’ from the end of site URL - Once you are done with these changes, from the App menu drop-down, go to eShopSync for Shopify | Salesforce Connector | Configuration
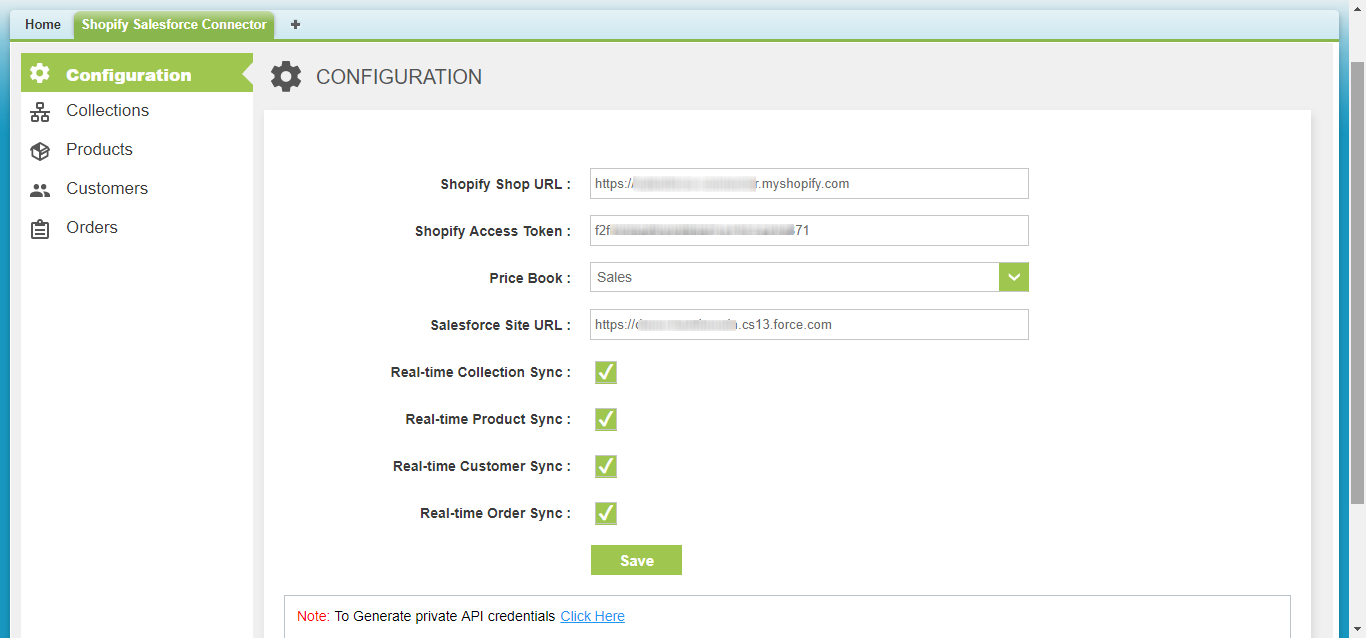
- Enter the Shopify Store URL, Shopify Access Token generated at Shopify end and select preferred Price book then Save it as shown below.
- NOTE: For Shopify Store URL, provide .myshopify.com URL (eg: https://shop-name.myshopify.com ) automatically generated at the time of shop set-up.
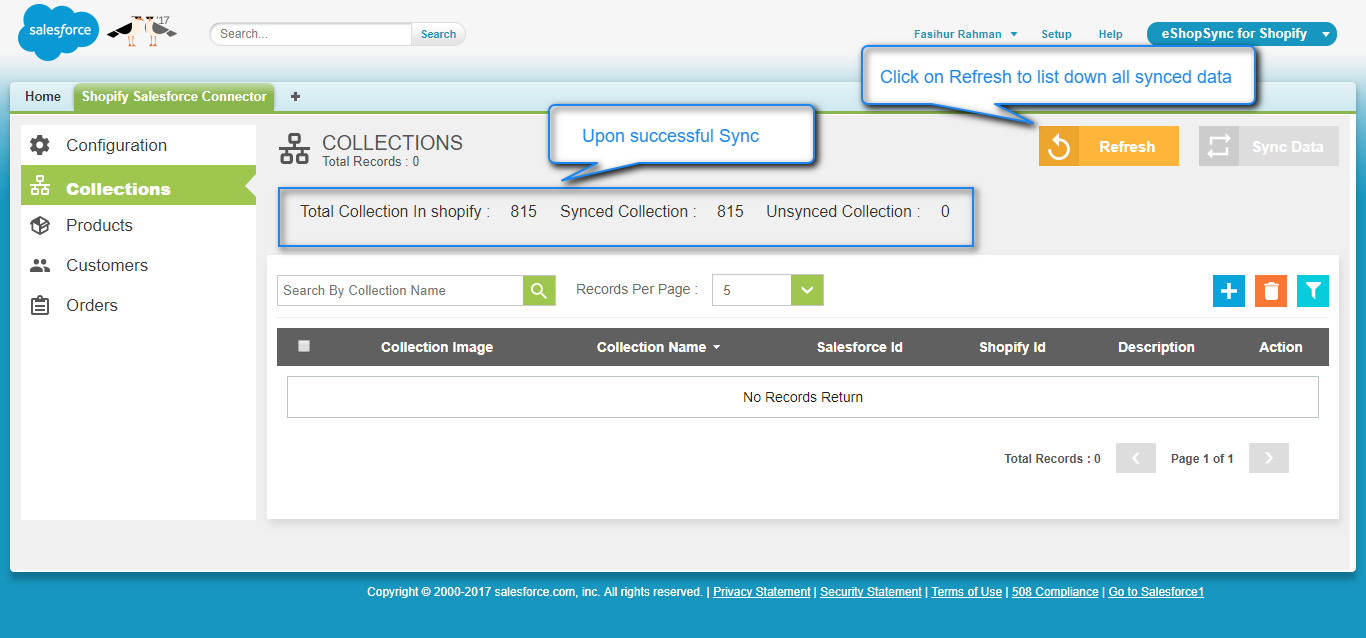
This completes the installation and setup process of the connector. Now, you may proceed to sync Collections, Products, Customers, and Orders.
Synchronization Process
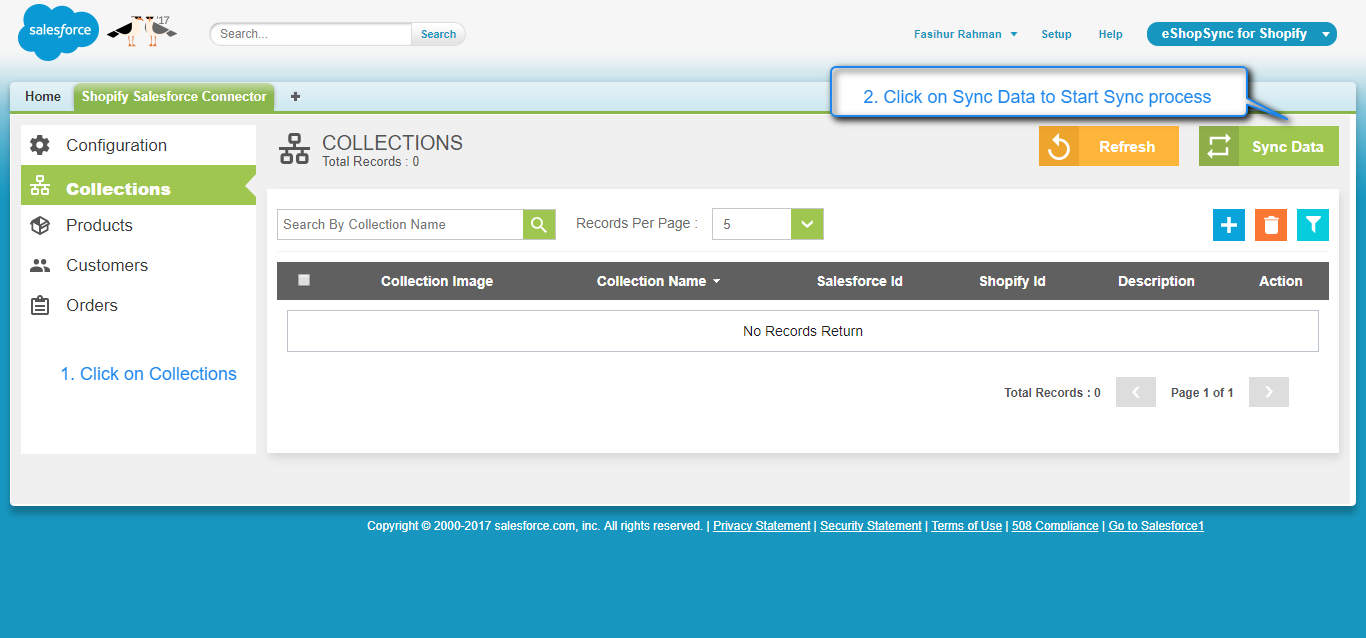
- Sync Collections: Click on Sync Data to start importing data from Shopify as shown below.
- Sync Products: Click on Sync Data to start importing data from Shopify as shown below.


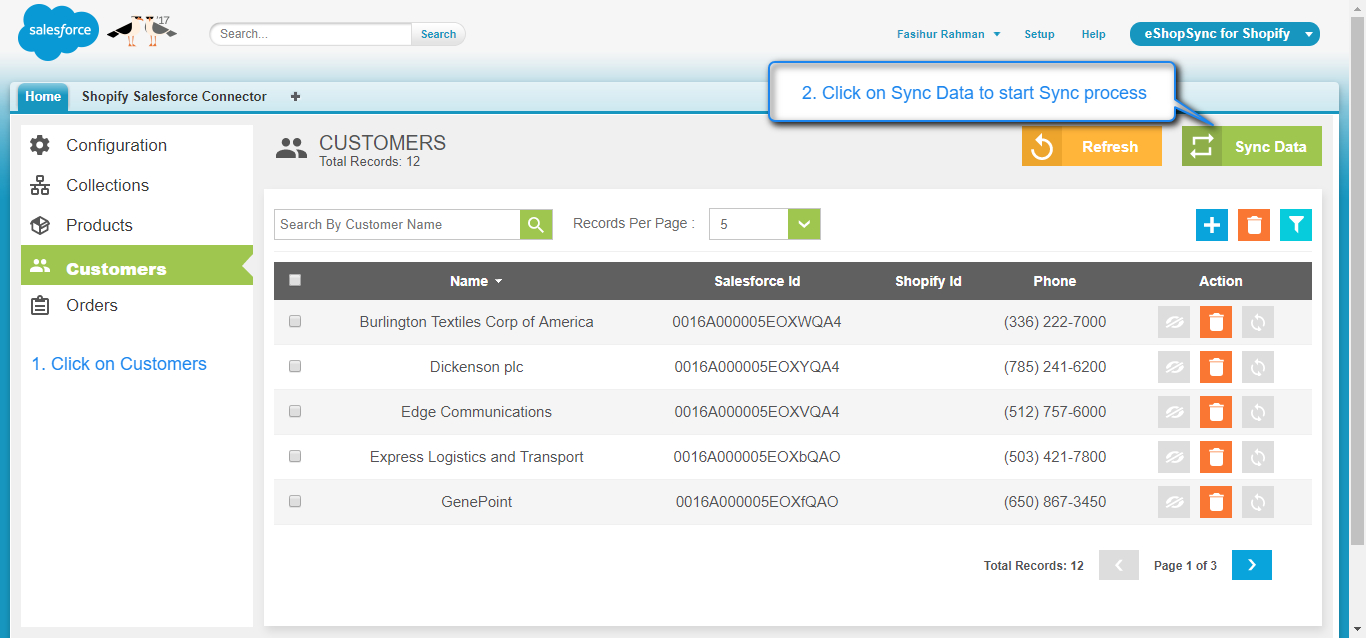
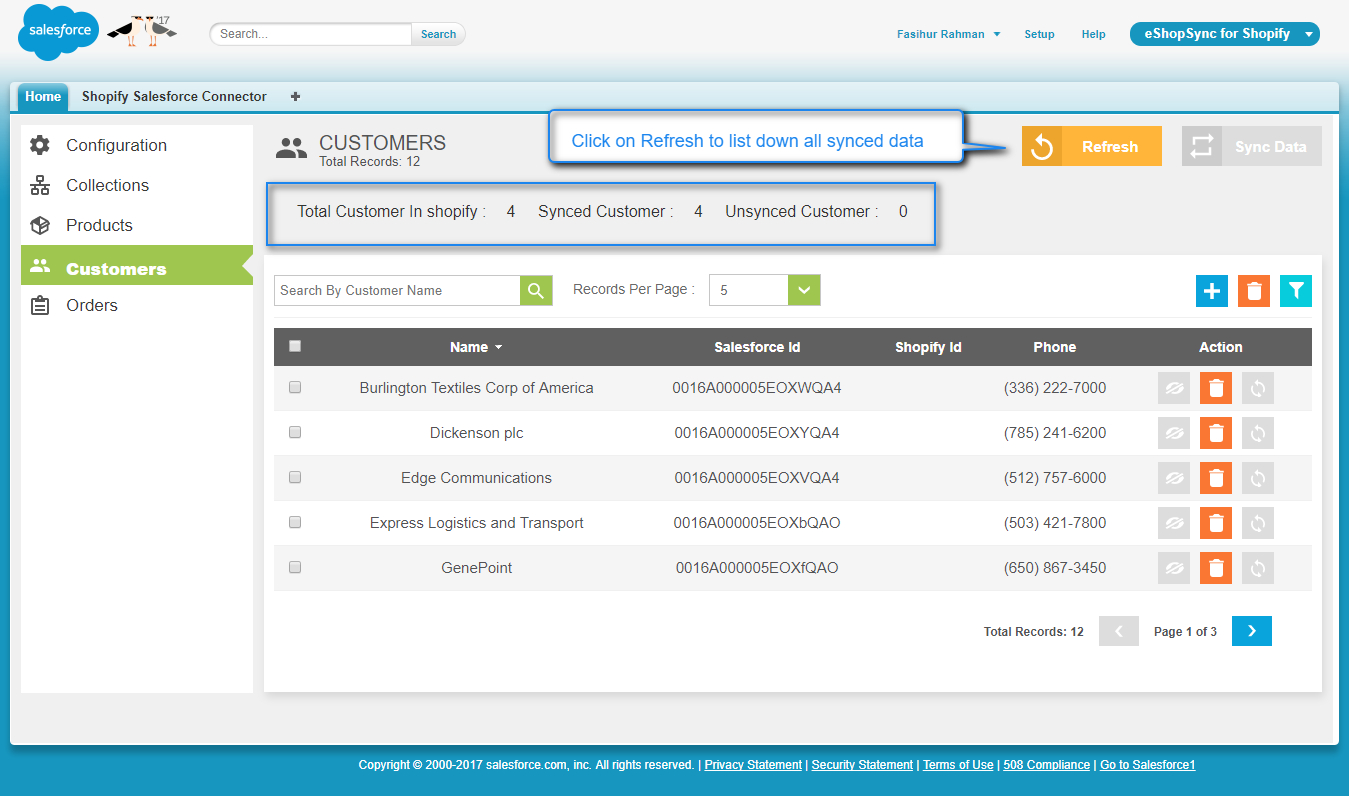
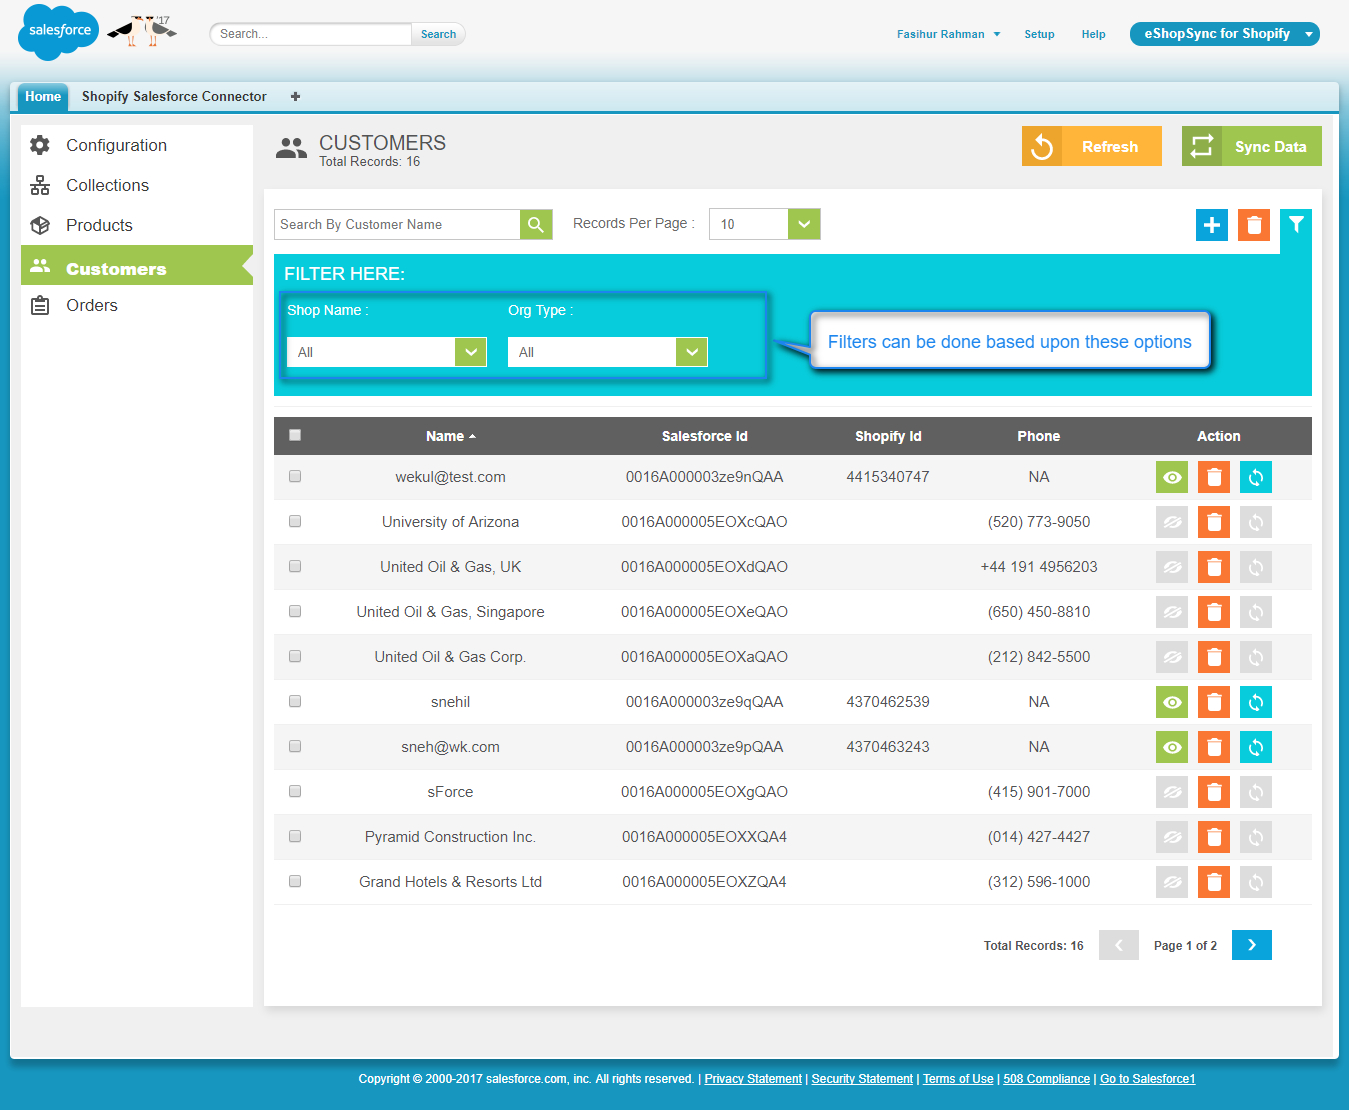
- Sync Customers: Click on Sync Data to start importing data from Shopify as shown below.
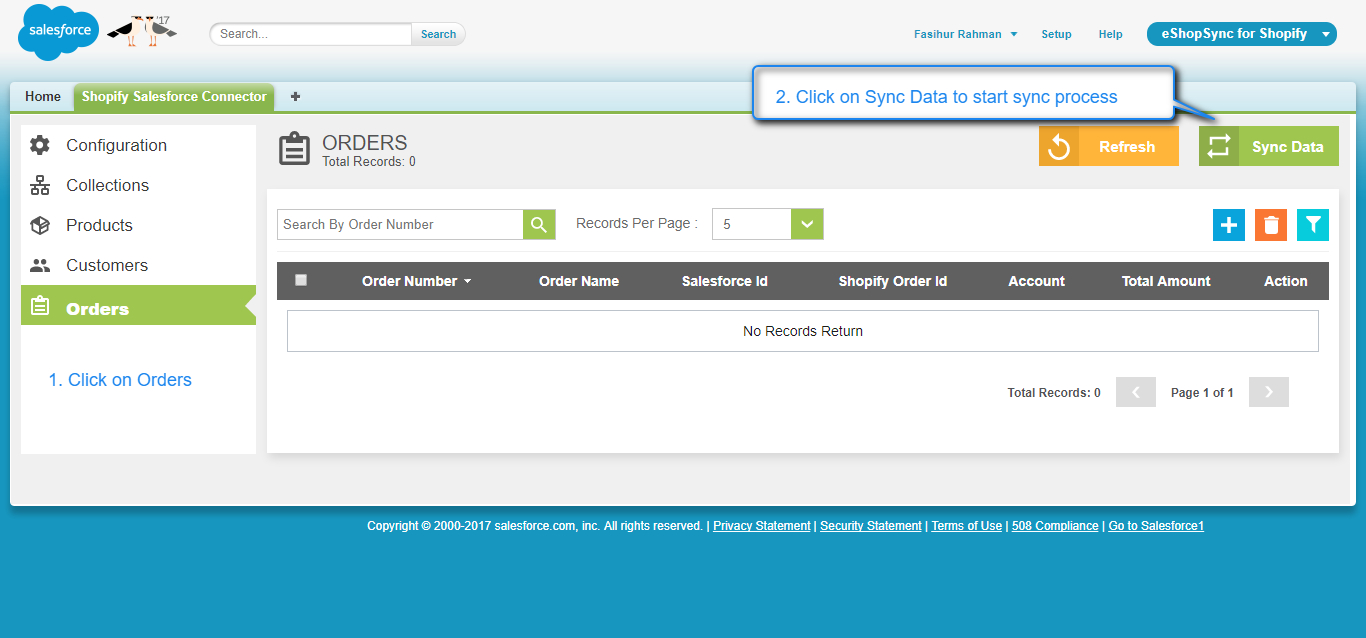
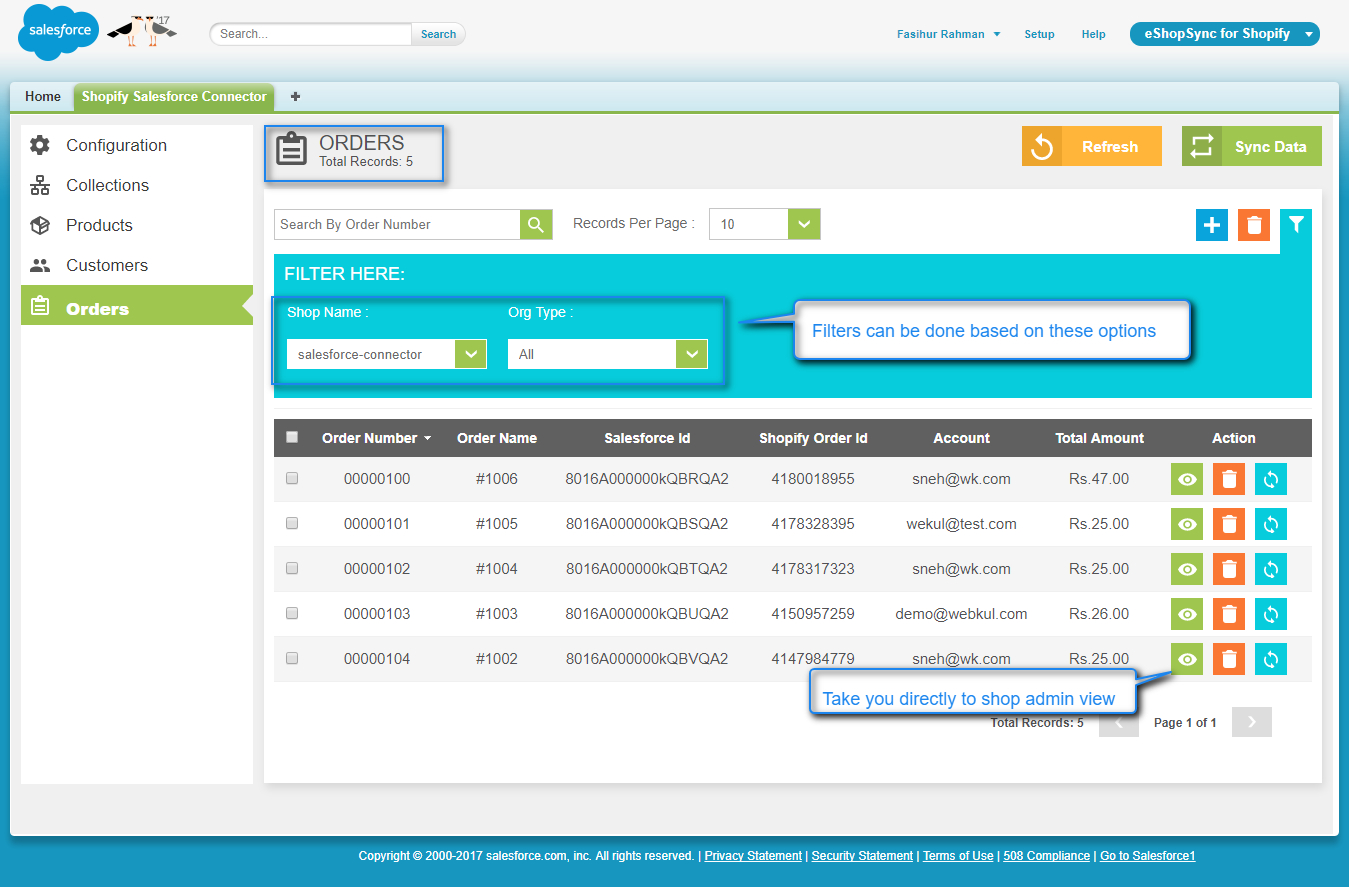
- Sync Orders: Click on Sync Data to start importing data from Shopify as shown below.

Support
- To view all our applications in Appexchange, go to Webkul AppExchange Apps.
- For any further query, Click To Create Ticket

Be the first to comment.