PrestaShop Sitemap Generator offers store owners to generate the XML sitemap for their PrestaShop eCommerce website.
A sitemap is a blueprint of your website. It lets search engine knows about your website i.e., what is present where?
Sitemaps are very important as it helps search engines in discovering your website.
According to sitemaps.org, sitemaps are an easy way to inform search engines about pages on the sites that are available for crawling.
Using an XML file, a sitemap lists all the URLs of a website in one place & in an organised manner. Therefore, making it easy for the search engines to crawl.
This module also allows the store owners to generate the sitemap in various languages.
Additionally, it also offers whether to include images available on the website in the sitemap.
NOTE: PrestaShop Sitemap Generator is compatible with the PrestaShop Multi-store feature.
Features of the PrestaShop Sitemap Generator module
- Human-readable sitemap.
- Follows all the sitemap protocols.
- Select all the languages in which you want to create a sitemap.
- Choose to include or exclude the images in the sitemap.
- Include category, product, supplier, manufacturer, CMS & other pages in the sitemap.
- Configure the settings accordingly to include the above pages in the sitemap.
- Set the priority of the page URLs & their update frequencies.
- Also, choose to select only certain pages of the category, product, supplier, manufacturer, CMS & other pages to include in the sitemap.
- Generate a sitemap after configuring settings for each page to include them in the sitemap.
- Choose to generate the sitemap through the cron link.
- Add the URL of a sitemap XML file in the Google Search Console for proper indexing of the website.
How to install the PrestaShop Sitemap Generator module
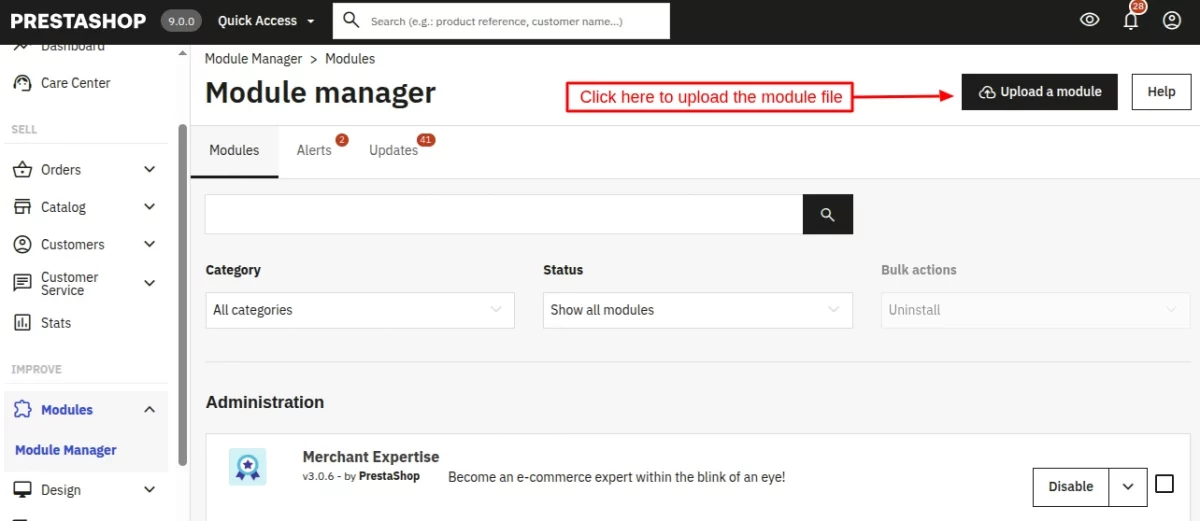
- Firstly, go to the module manager in back office and click on ‘upload a module’.
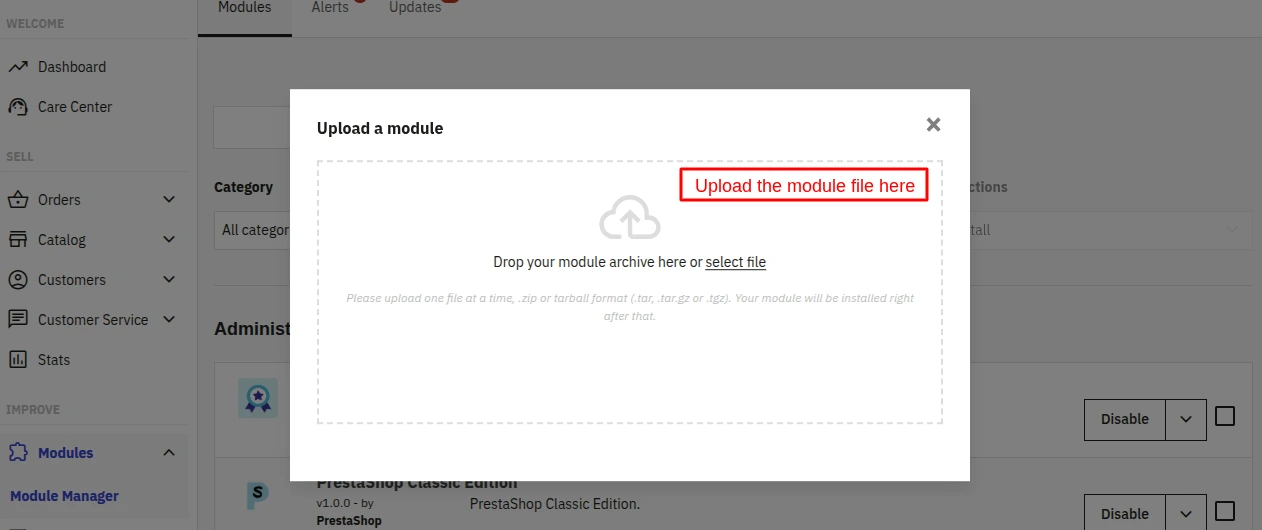
- After that, drag and drop the module file or select the file from the system.
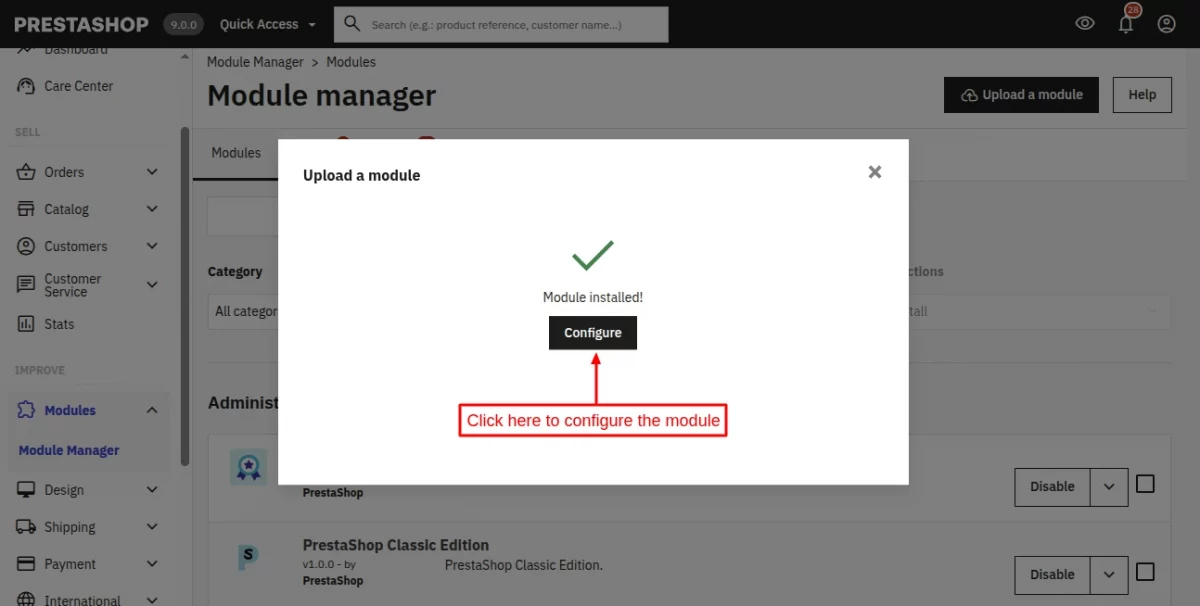
- In this way, the module installation will be successful.
How to configure & use the PrestaShop Sitemap Generator module
After the successful installation, you(admin) will need to configure the module. As there are multiple sections in configuration settings, we will deal with each one of them one by one.
Sitemap Settings
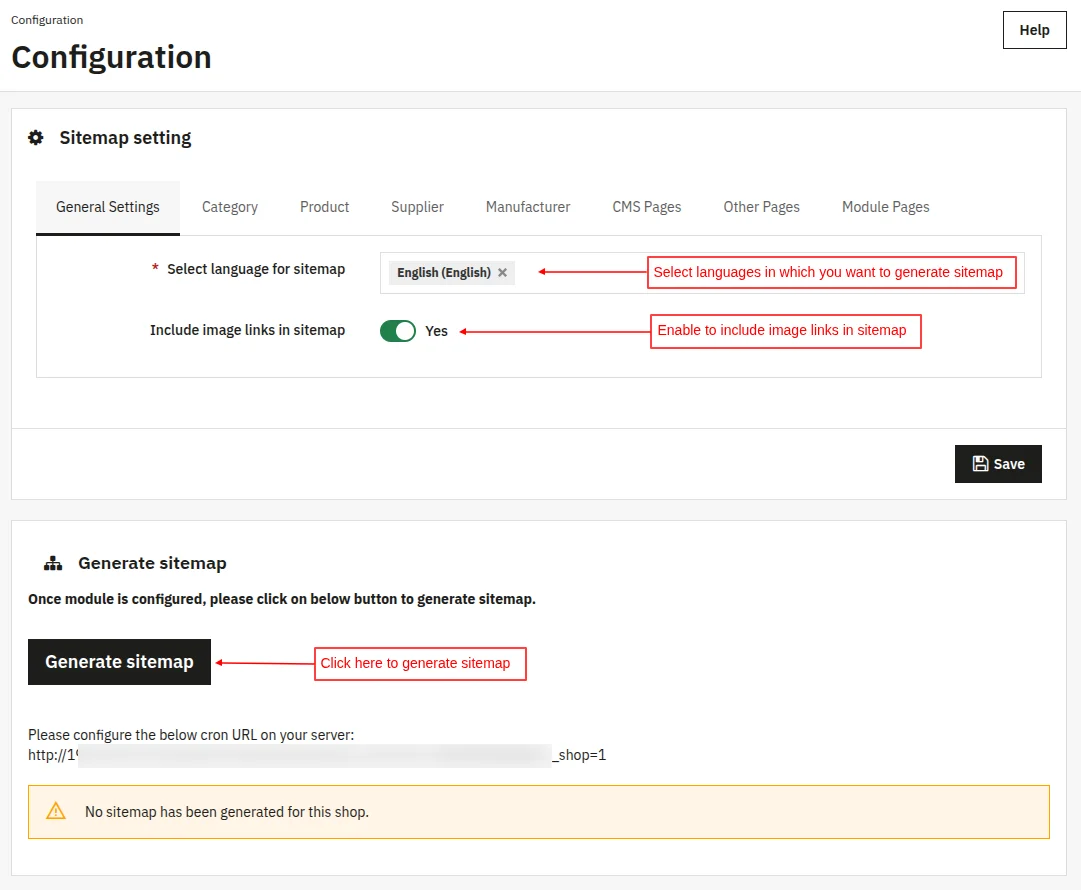
General Settings
- Firstly, select the languages in which you want to generate a sitemap of your eCommerce website.
- The next option allows you to choose whether you want to include image links in the sitemap or not.
Generate Sitemap
This section basically offers to generate a sitemap after configuring all the settings of each section. For now, just know that on clicking the button, a sitemap will generate.
We will deal with this section in detail later in this document.
Category
In this section, I will explain to you each of the options available under this category section in detail.
However, I’ll not be covering the options of other sections like the product, supplier etc in this manner.
This is because the options in all of the sections are similar. Also, they are available to perform the same function.
Hence, it’d not be just wise to cover them again and again for every other section that is available in the configuration settings.
So, let’s just hop on to the options to know about them in detail & their significance.
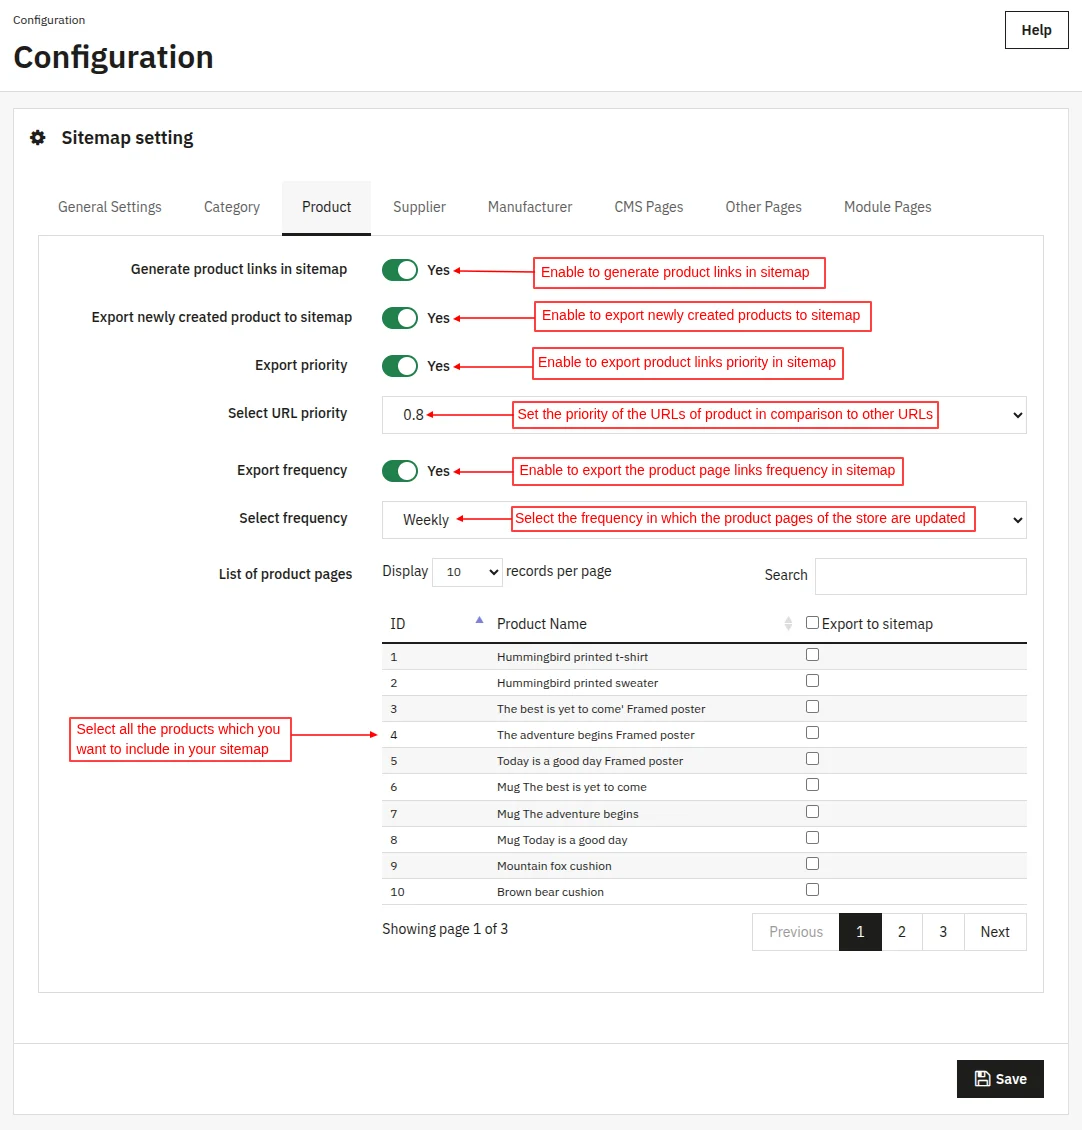
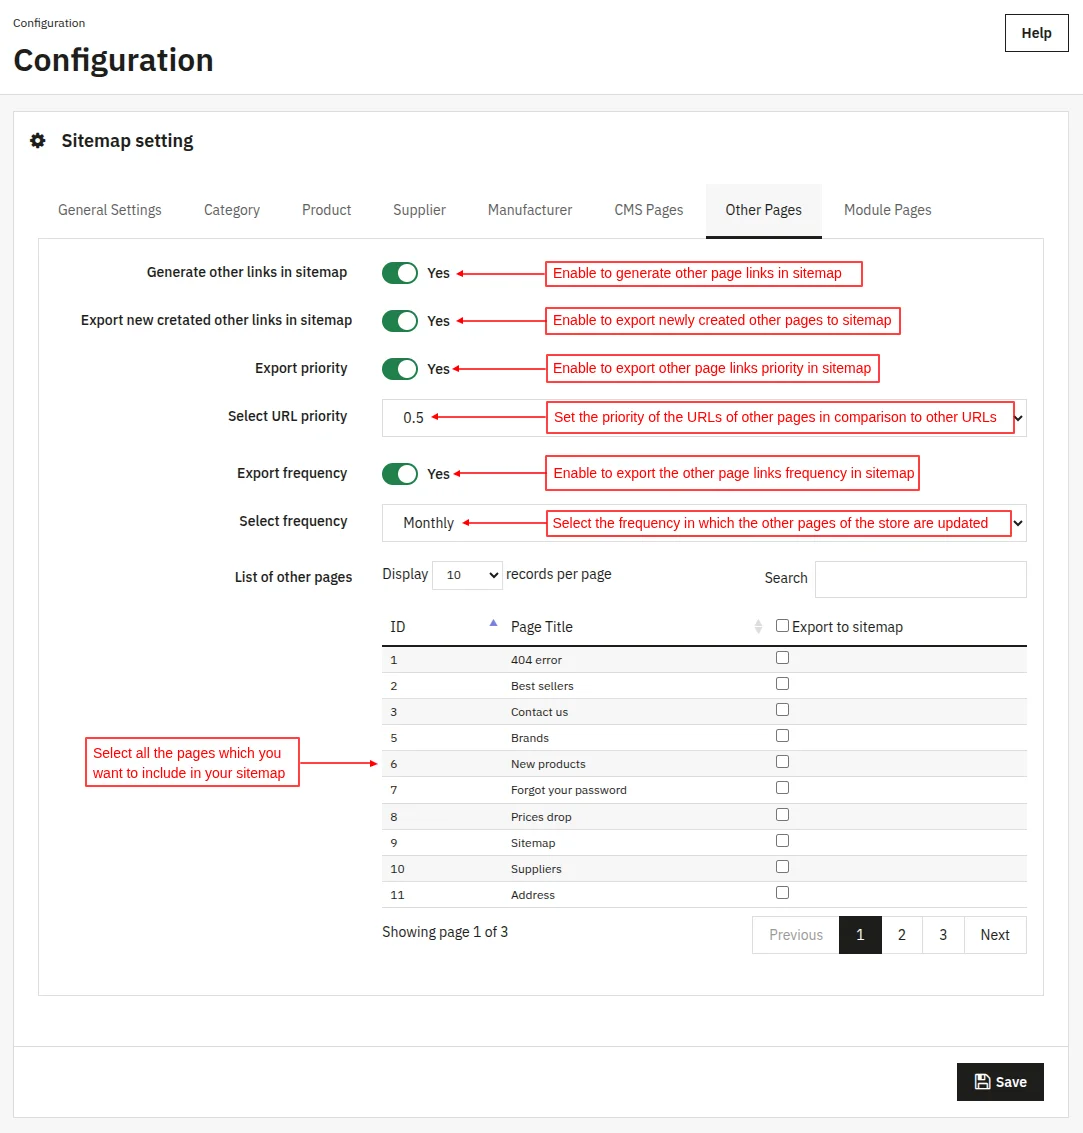
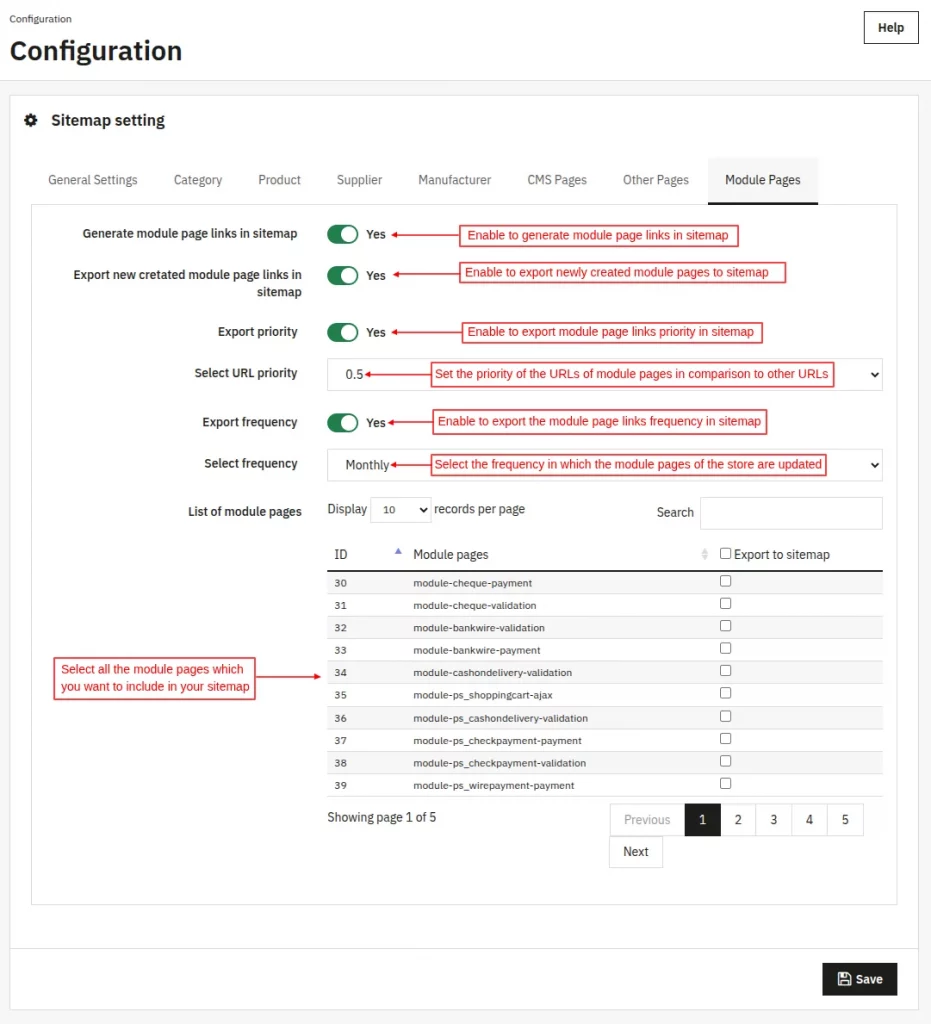
- Generate category links in sitemap: Enable the option if you want to generate the links of the category pages in the sitemap.
- Export newly created category to sitemap: Enable this option if you want to include newly created categories in the sitemap automatically.
- Export priority: Enable this option to export the priority of category page URLs in the sitemap.
- Select URL priority: Select the priority for the URLs of category pages. Generally, the default value is 0.5. However, you can set any value between 0 and 1.
- Export frequency: Enable exporting the frequency of updates made to the category pages.
- Select frequency: Select the frequency of the updates, i.e., hourly, weekly, monthly, etc., that is applicable to the category pages. It simply means how often the page content is updated.
- Category: Now, select all the categories that you want to include in your sitemap.
So, this is how you can configure the settings for each kind of page before generating a sitemap.
To know more about URL priority & update frequency, visit the page.

Important Information
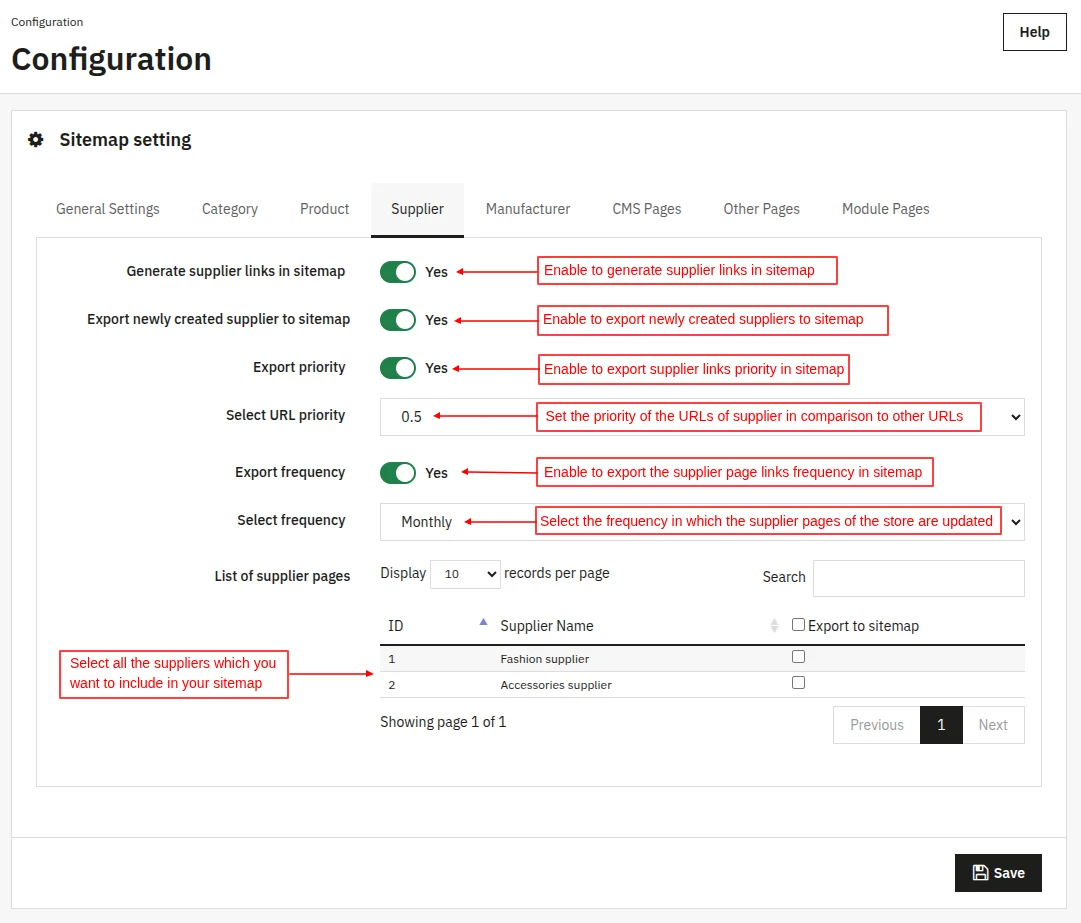
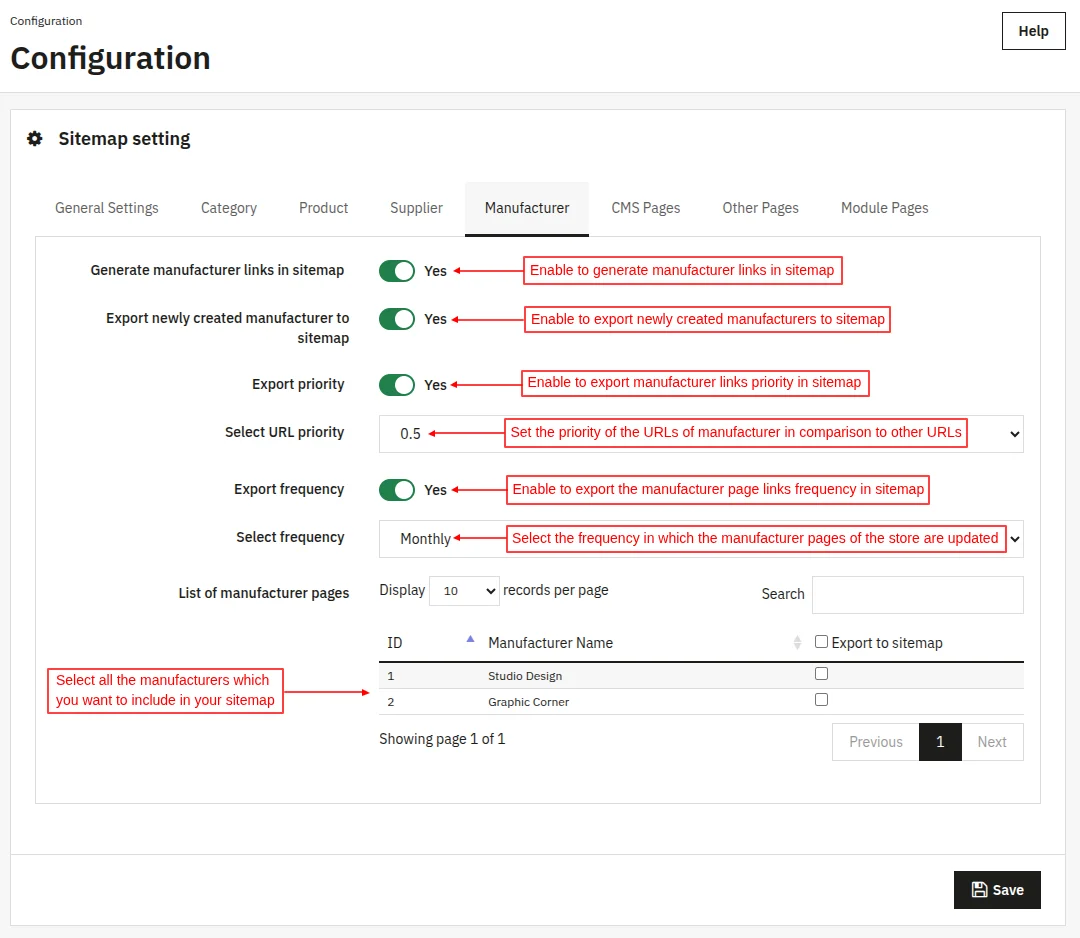
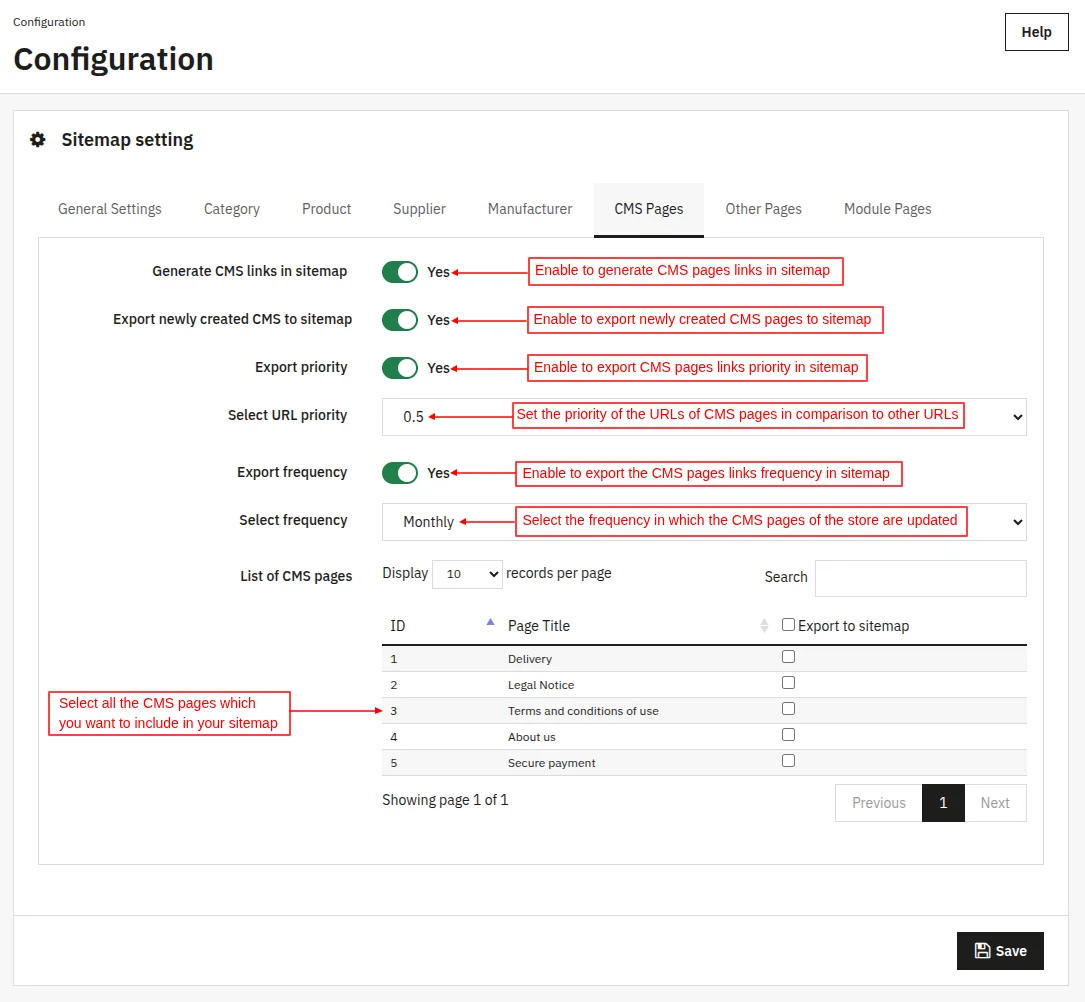
Now, taking cues from the above explanation, you can also configure settings for other sections as well.
Also, please note that you only need to configure the sections whose pages you want in your sitemap.
Therefore, you can leave the sections whose pages you don’t want to include in the sitemap.
Now, you can configure other available sections as well in a similar fashion as above. However, the explanation of each option is still available in the screenshots.
Product
Supplier
Manufacturer
CMS Pages
Other Pages
Module Pages
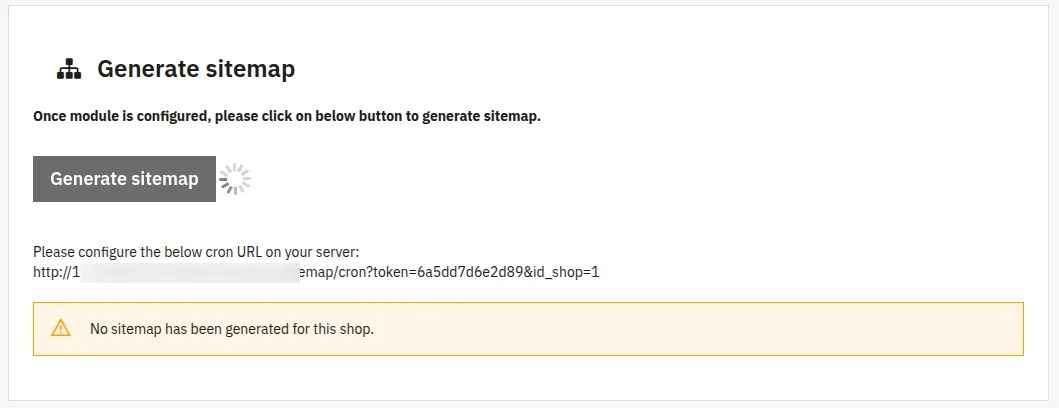
Generate Sitemap
After configuring the sections available in sitemap settings, you can now click on the “generate sitemap” button.
On clicking the “generate sitemap” button, a sitemap will be generated for each page whose configuration you already saved.
There is a cron URL also available to add to the server to automatically generate the sitemap.
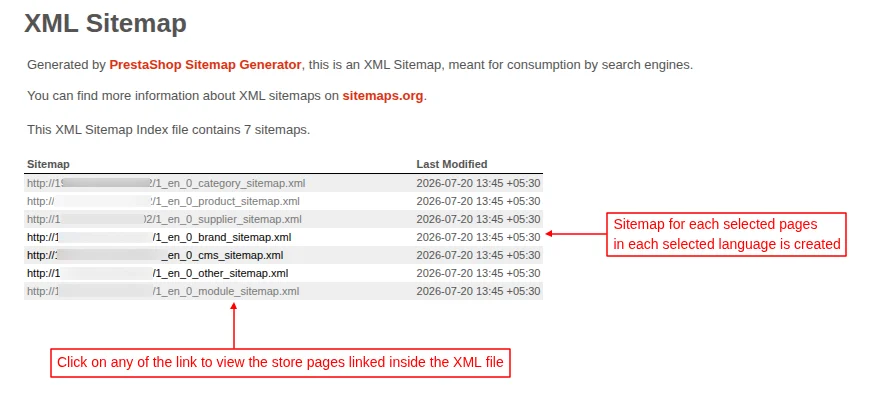
After the sitemap is generated, a new link will start appearing just below the cron URL.
You can add this URL to your “Google Search Console” for improving the indexing of your website.
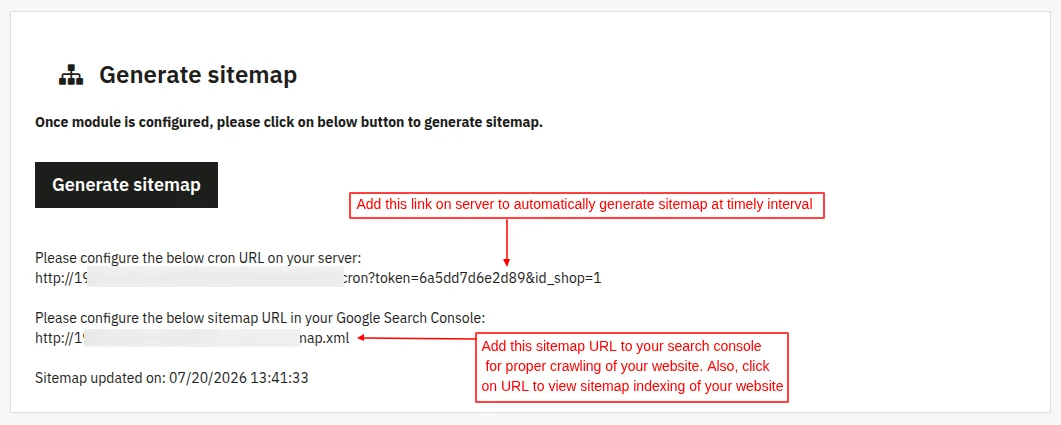
Moreover, you can also click on the URL to view the sitemap indexing of your eCommerce website.
So, this was all about PrestaShop Sitemap Generator Module. I hope this document will help you in checking the functionality of the module in a better way.
Also, do let us know about your views in the comments.
Support
For any kind of technical assistance or query, please raise a ticket at http://webkul.uvdesk.com or send us a mail at [email protected]
Also, please explore our PrestaShop development services & vast range of featureful PrestaShop Addons.
Current Product Version - 4.1.0
Supported Framework Version - 9.x.x, 8.x.x, 1.7.x.x

Be the first to comment.