Prestashop Shipping Rates extension offers an easy solution for all ecommerce merchants facing limited shipping rate options in the Prestashop’s default installation.
It is an addon to integrate the functionality of adding different shipping rates for different carriers. Add shipping rates on the basis of the continent, country, state, zipcode etc.
Features of the Prestashop Shipping Rates Module
- Admin can define different shipping rates for different carriers based on continent, countries, states & zipcodes.
- Admin can choose to show free shipping for default address or all addresses of customers.
- An admin can choose to show/hide free shipping based on IP address of customer.
- Admin can customize popup block, banner & information block showing all the information about shipping rates as per need.
- Admin can add shipping rates by importing a CSV file containing all the details.
- An admin can download info of all the shipping rates by exporting the CSV file.
- Admin can choose to show banner, popup & information block on various pages.
- Admin can also link geocoding API with the module to validate zipcodes through geocoding.
- An admin can choose to add shipping rates considering price, weight or both.
- Admin can choose to show info about exceeding or deficit amount or both to avail free shipping on the order.
- Admin can add zipcodes or zipcode ranges under zipcode section in order to easily define shipping rates for them.
- An admin can also add zipcodes by importing CSV file.
Installation
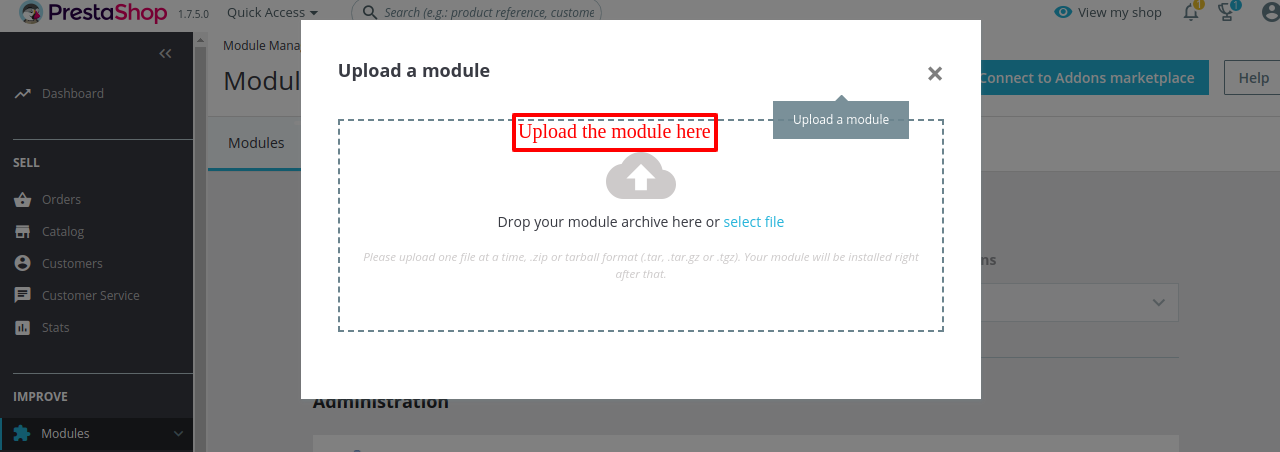
- Firstly, Go to Module Manager in Back office and click on ‘upload a module’.
- Now, Drag and drop the module file or select the file from the system.
- In this way, the module installation will be successful.


How to configure the Prestashop Shipping Rates Module
After successful installation of module, Admin can configure the module.
Admin can choose to provide free shipping based on IP address of customer in following two cases:
1) If the customer has registered & did not save the address in his/her account.
or
2) If he/she is a guest customer.
To use geolocation feature admin needs to download the file & extract it into app/Resources/geoip/ directory.
Admin can either provide free shipping on default address or all addresses of customer.

Various other blocks present under configuration settings are as follows:
- Information Block
- Banner Configuration
- Popup Configuration
Information Block
Under Information block, Admin can Customize the appearance of a block by changing icon & background image of the block.
The two options i.e. increased cart value & decreased cart value block will display information about the deficit/exceeding amount needed to avail free shipping on the order.
Choose to show this information block on various pages of the shop.

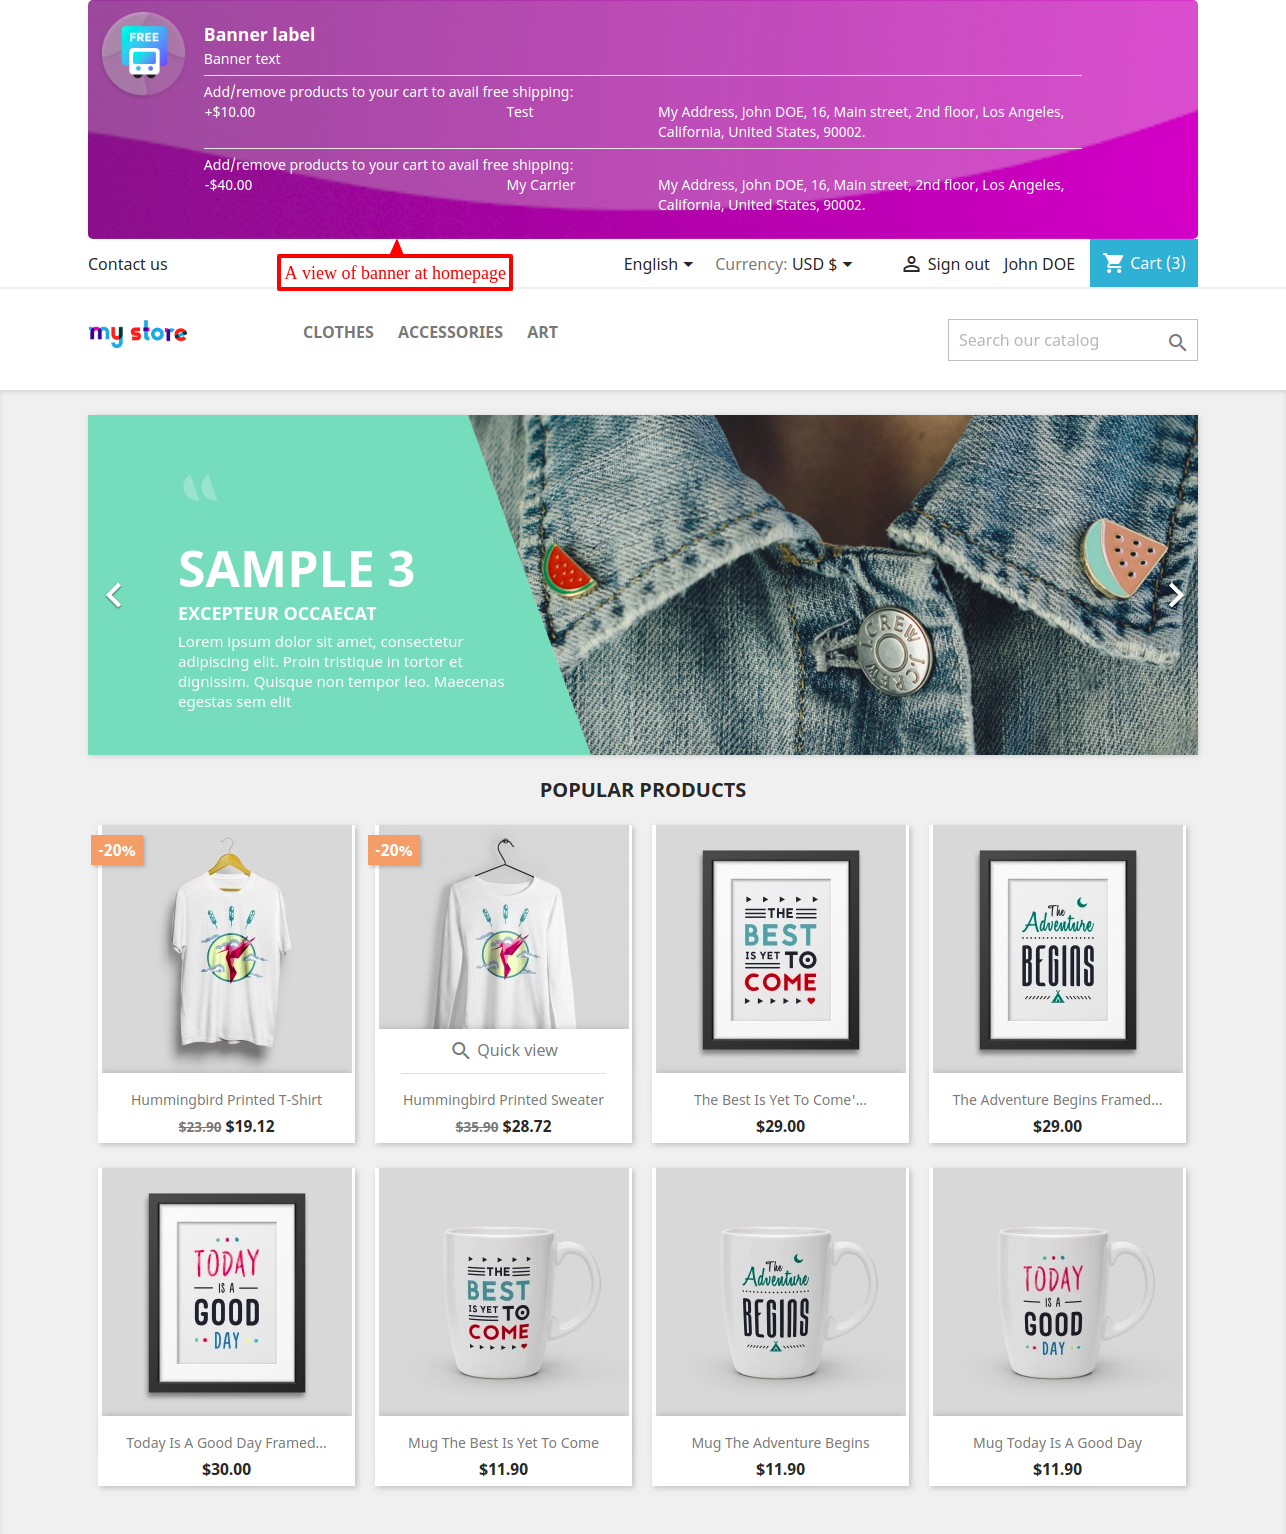
Banner Configuration
You can also customize the banner by changing its background image, icon & text color to show on the front end. Show this banner at different positions on various pages.

Choose to show the popup & banner both at all 21 pages.
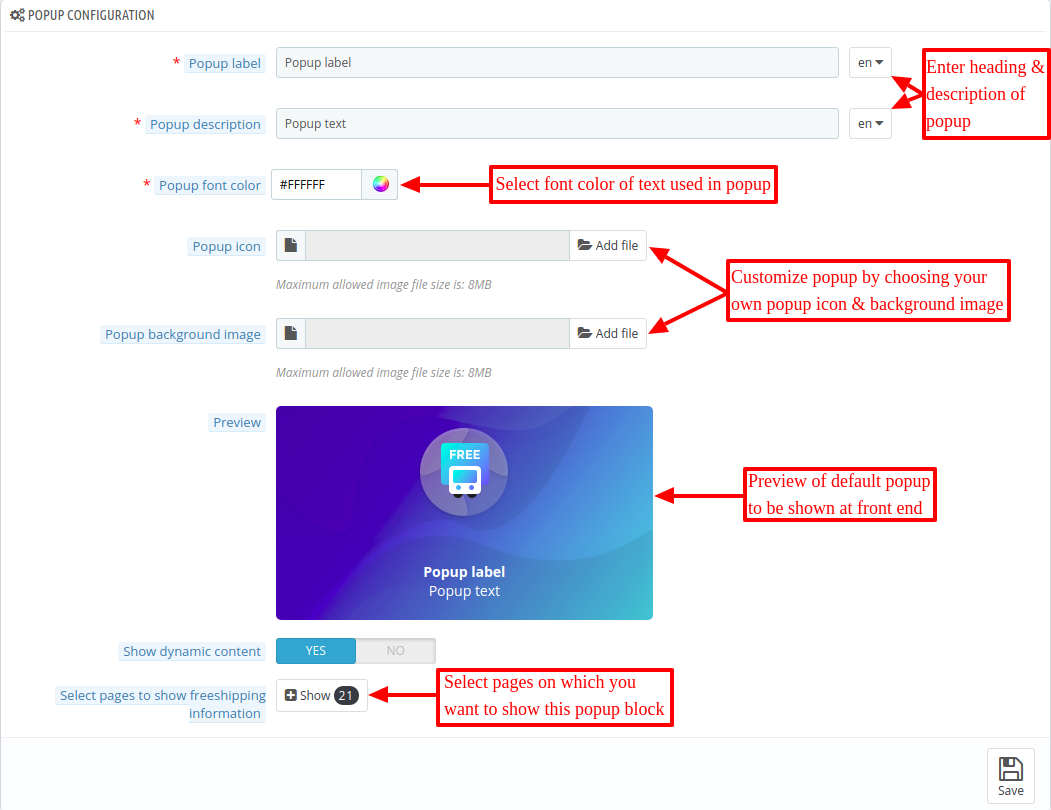
Popup Configuration
The popup will show info about customer’s address, name of shipping partner.
It also shows the amount which needs to be added or subtracted in order to get free shipping.
Choose to show this popup at various pages of the shop.
In this way, you can configure the module successfully.
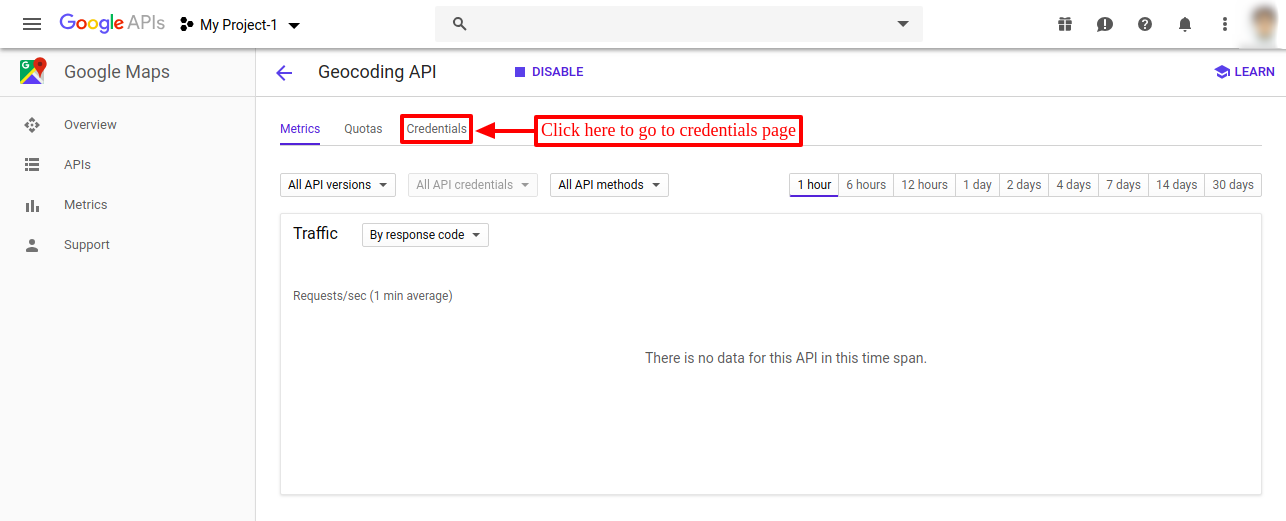
How to generate API key
To use geocoding for zipcode validation, Admin needs to link geocoding API to module. The following screenshots show the steps to generate the geocoding API key.


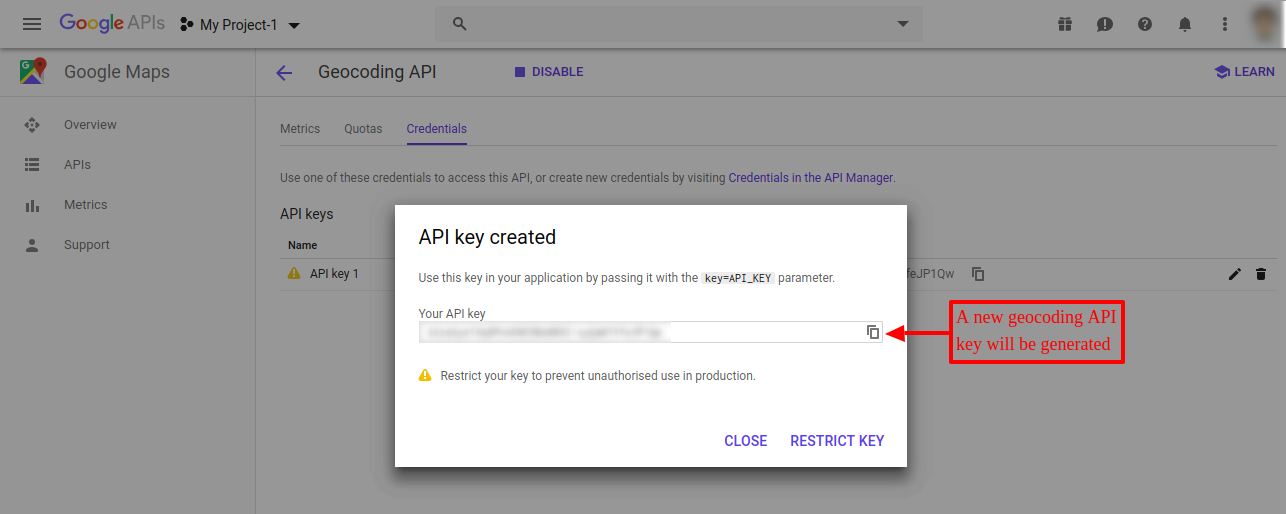
In this way, admin can successfully generate geocoding API key.
Add Shipping Rates
Under the shipping rates section, Admin can add various price conditions for different shipping partners. Set different price for different continents, countries, states & zipcodes.

After clicking on the add button, the box shown in the screenshot below will open. here admin can choose country, state & zipcode for which conditions need to be defined.

After saving the above details, an option to add different price conditions will be available. Now click on price details to add price conditions for the selected place.

Here in the box shown below, Admin can define price & weight range with the shipping price applicable on that range(in case if free shipping is inactive). Admin can also disable any particular range.

In case if you want to disable any particular range, then you can simply enter ‘zero’ in those fields.

Admin can also upload or download shipping rates in CSV format.

CSV Export
By clicking on CSV export, Admin can directly export all the shipping details that he has defined for that particular carrier for different continents, countries & zipcodes.
CSV Import
Admin can also import a CSV file for adding shipping rates for any particular carrier.

View of the sample CSV file.

In this way, Admin can easily add shipping rates for different continents, countries etc by simply uploading a CSV file.
Zip Code
Add zipcodes or zipcode ranges of various countries. Choose to upload these zipcodes via CSV file if you want to add thousands of zipcodes.
A sample CSV file is also available with the module to give an idea about tables & entries that you need to add in CSV file.

You can also add zipcode or zipcode ranges manually for different countries & states.
Given below is a screenshot of the manual addition of zipcode range from ‘90001’ to ‘90050’ of California in the United States.

This is how admin can add various zipcodes for different countries & states.
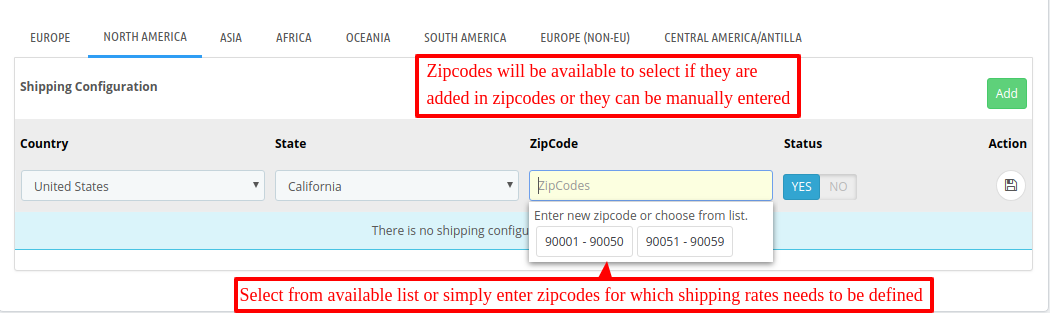
All the saved zipcodes will be available to add from the dropdown, if they are previously added under ‘zipcode section’.
Note-: In case if any of the carrier is disabled from module then shipping price of that carrier will be calculated from the default carrier setting of Prestashop.
Workflow
Given below are screenshots of two different plans added on two different carriers.


After adding above two plans, the amount which needs to be added or subtracted to avail free shipping will show on all the blocks i.e popup, banner & information.
All the blocks will contain deficit/exceeding amount with their carriers name to avail free shipping & address of the customer.
A view of all the blocks at front end is shown in upcoming screenshots.
1) Popup-:

2) Banner-:
3) Information Block-:

At the checkout page, Prices of respective carriers will be fetched from module as per settings.

This was all about Prestashop Shipping Rates module. I hope this document will help you in checking the functionality of the module in a better way. And, do let us know about your views in comments.
Support
For any kind of technical assistance or query, please raise a ticket or send us a mail at [email protected]
Also, please explore our Prestashop development services and vast range of quality Prestashop addons.
Current Product Version - 4.0.3
Supported Framework Version - 9.x.x, 8.x.x, 1.7.x.x

now it is easy to buy things by using shipping services.