PrestaShop Salesforce Connector: Automate PrestaShop with Salesforce
Synchronizes your e-commerce and CRM platforms. PrestaShop Salesforce connector provides Real-time synchronization of the PrestaShop store to the Salesforce platform.
With the help of this module, the admin can easily sync Contact Us as Leads, Customers, Categories, Products, and Orders into Salesforce Org.
As a result, it will help to increase their sales and customer service. Admin can also synchronize Orders and Products from Salesforce to the PrestaShop store.
Note: Application required to install in Salesforce Org from AppExchnage: eShopSync For PrestaShop
Check the overview of the plugin in the video mentioned below –
Features of Prestashop Salesforce Connector
- Acts as a bridge between PrestaShop and Salesforce.
- It gives the concept of a “Service-first” approach.
- It gives the admin the ability to set default shipping and payment methods.
- It supports Lightning features.
- Sync PrestaShop Contact us to Salesforce as Leads and PrestaShop Customers to the Salesforce Accounts and Contacts.
- Synchronize PrestaShop Categories and Products to Salesforce as Custom Categories and Products respectively.
- Sync PrestaShop Orders to Salesforce Orders.
- It provides a custom logger for all success and error message cases.
- In Sync Record View, the admin can view synced, unsynced, and error records using the following options:-
- Search
- Pagination
- Filter.
- Real-time synchronization of Leads, Customers, Categories, Products, and Orders.
- You can enable the Option to sync Order Invoice for PrestaShop Orders as PDF on Salesforce.
- You can do Field Mapping for Customer, Product, Order, Order Status, and Lead Status.
- Compatible with Business accounts as well as Person accounts in Salesforce
- Provides compatibility with Multi-currency Enabled Org.
- Admin can synchronize Salesforce Products and Orders to PrestaShop.
- Provides a view to check the default mapping list for the Product, Customer, and Order.
- The admin can select the default price book for the product price
- It can do Background synchronization of all records.
- It can sync Product and Category images to Files or Documents.
- It can select the default Folder when syncing Images to a Document.
- Ability to select default Price Book for Product Price.
- Provides support for the NPSP Package.
- It is fully based on REST API using OAuth2.0 of Salesforce to provide an easy, fast, and secure set-up for the user.
Note- If you want real-time sync of data from Salesforce Org to PrestaShop then you can request customization.
How to Configure Prestashop Salesforce Connector
Pre-Configuration settings
Once you install “eShopSync For PrestaShop” from AppExchange. Go through the links mentioned below to update the required settings.
Update Field Accessibility: PrestaShop Salesforce Connector Field Accessibility
Field Mapping section Link: How to Map PrestaShop Fields to Salesforce Fields
Connector configuration
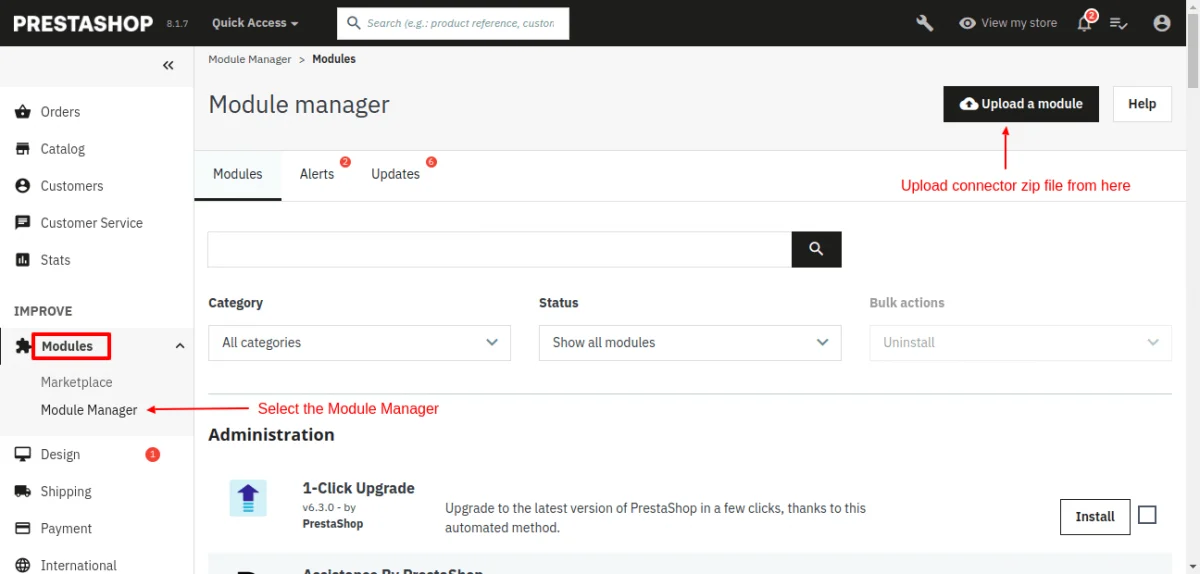
1. Hover over Modules and Services | Click on Module Manager | Add a new module as shown in the screenshot. In the meantime, Choose the PrestaShop Connector Zip file and upload it.

2. After successful installation, Click the configure button and follow the process in the screenshots below.

3. Once you finish the installation, log in to the Salesforce Org. Hover over Connect Salesforce Production | Click Configuration to set up and configure the connector.

4. Enter the License Key to your Salesforce Org and click verify.

Click the verify button to set up and configure the connector

you can check the custom logger for all Success and error message cases.
Path for the custom logger : YOUR_SITE_PATH/modules/salesforceconnector/logs
5. Under the Settings section, choose the preferred option for the Document folder to store images of the Products, categories and the Price book available at the Salesforce end.
Then, enable/disable the real-time sync option for Leads/ Customers/ Categories/ Orders and click Save.


Moreover, Sync order Invoices as PDFs at the Salesforce end.


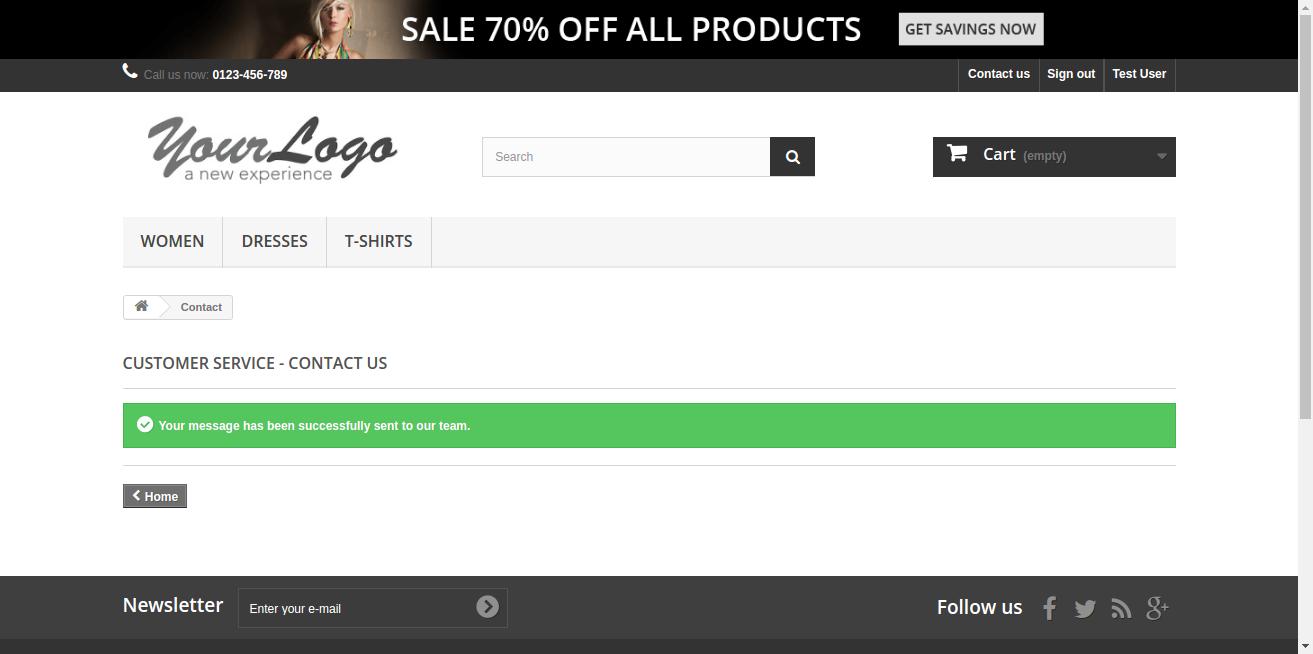
Shift to the Contact Us tab, and enable the toggle to sync your registered customers as leads.

Shit to the Dashboard tab on the left hand. Here you have access to all the synced records and API Hits.


In the Configuration section Choose the option for field mapping of Contact Us, Customer, Product, Order, Contact, and Account object.


This completes the configuration of the PrestaShop Salesforce Connector. Now, let us proceed to Synchronize data from PrestaShop to Salesforce and vice-versa.
Synchronization process of PrestaShop Salesforce Connector
1. Sync Customers: Sync Customers | Sync Customers to Salesforce | Select list of PrestaShop Customers | Click Start Adding Customers to Salesforce.

2. Sync Products: Sync Products | Click Sync Products to Salesforce | Choose the PrestaShop Product list and Select All products | Click Start adding Products to Salesforce

3. Set Mapping Status: Set Mapping status as Synced, UnSynced & Error at the Salesforce end.

4. Sync Orders: Sync Orders | Click Sync Orders to Salesforce | Choose the PrestaShop Order list and Select All Orders | Click Start adding Orders to Salesforce

Afterwards, refresh the page to get the list of Synced Orders.
5. Contact Us Status Mapping: Hover over Salesforce | Click Contact Us Status Mapping to change the mapping status of PrestaShop Contact Us and Salesforce Lead.

6. Hover over Salesforce | Click on Sync Leads, all the Contact Us responses will be automatically displayed under this section certainly, if you have enabled real-time synchronization of Leads.
Bi-Directional Sync in PrestaShop Salesforce Connector
Our new bi-directional sync feature ensures data accuracy and saves you valuable time.
Changes made in either PrestaShop or Salesforce are instantly reflected in the other, creating a seamless flow of information.
Furthermore, this real-time synchronization eliminates the risk of errors caused by manual data entry and frees you from the tedious task of constantly switching between platforms.
With bi-directional sync, you can ensure that your data is always accurate and up-to-date in both systems.
Bidirectional Sync Setup at Salesforce End
Once you are logged in to your Salesforce org, open the PrestaShop Salesforce Connector for a bi-directional setup.
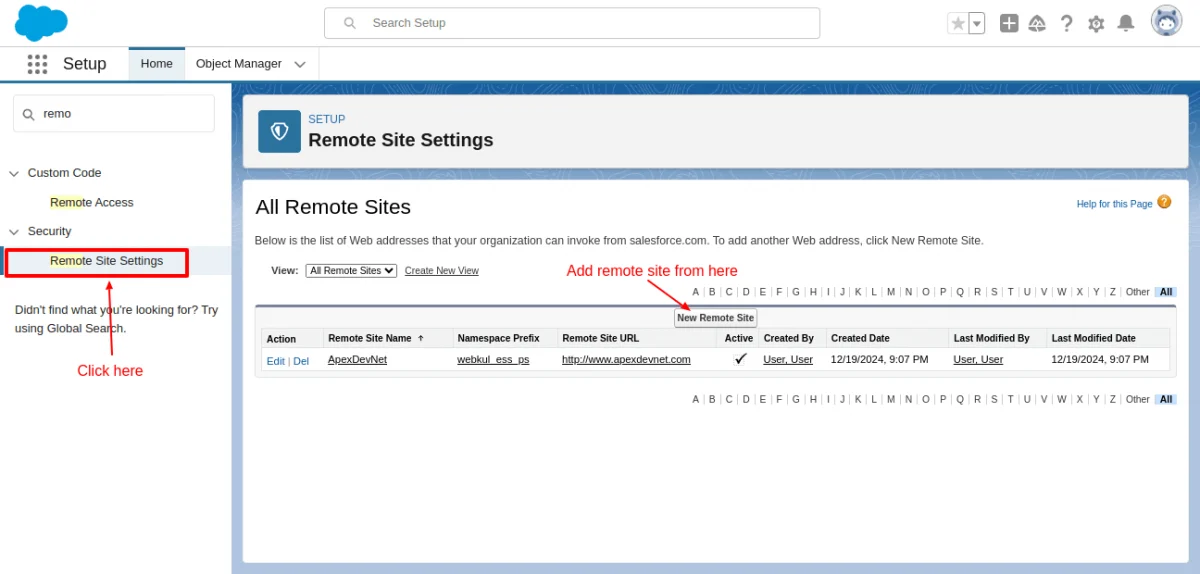
Firstly, add a remote site to your Salesforce org. To do this, go to the Gear Icon and click on Setup.

After that, use the quick search bar and search for “remote site settings”. Open it and click on the New Remote Site button.
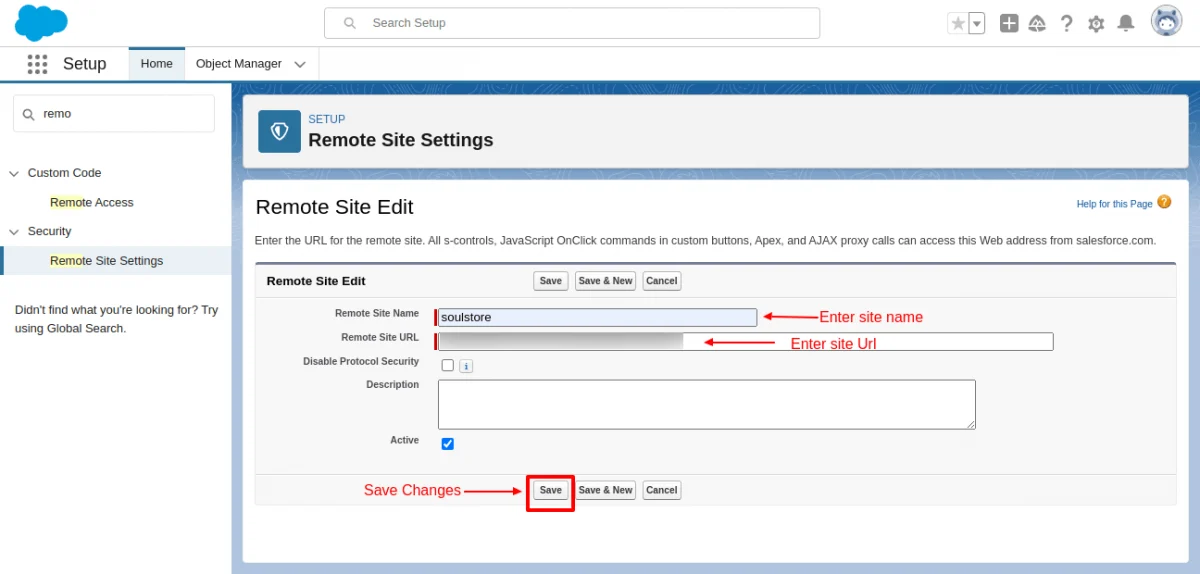
Here enter your site name and site URL and save. Your new remote site has been successfully created.
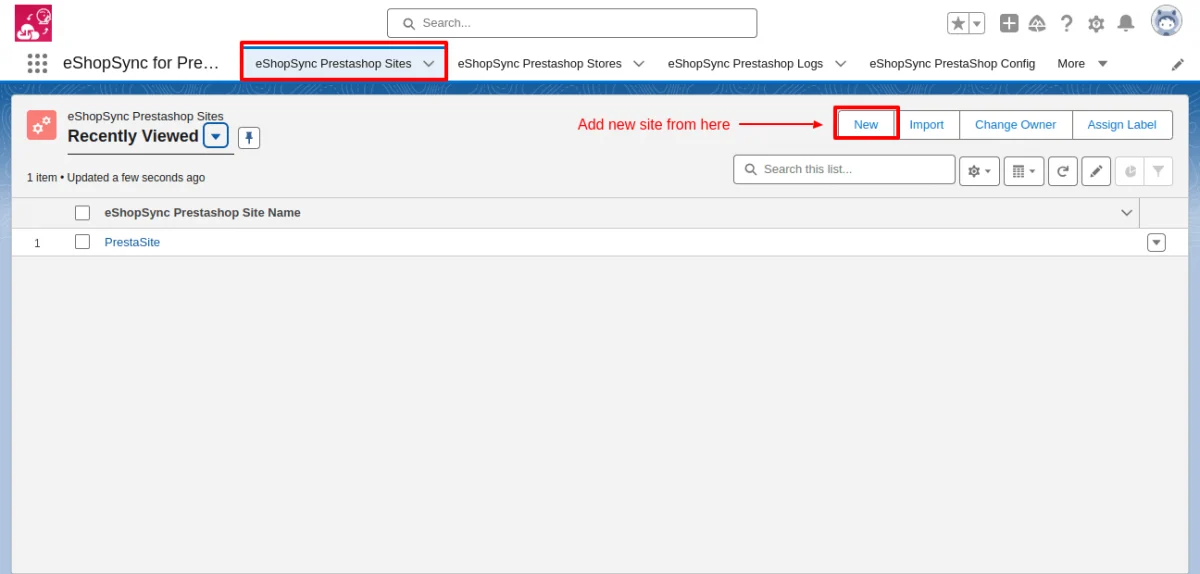
Go to PrestaShop Salesforce Connector, under the PrestaShop Sites tab. Click on New site.
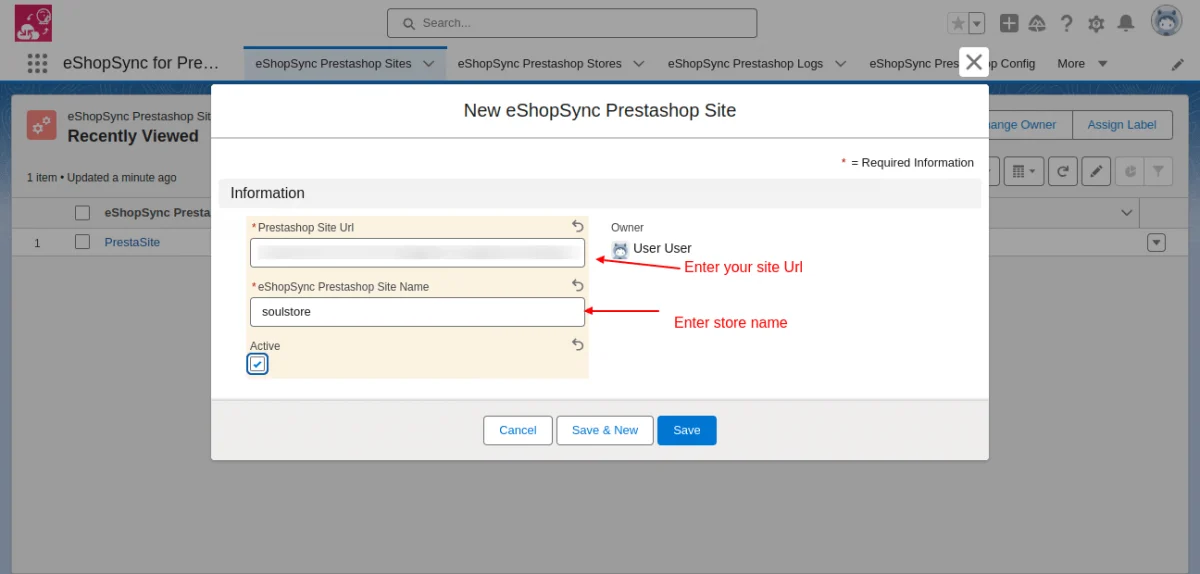
Further, enter the site URL, and site name then click on the checklist button below.
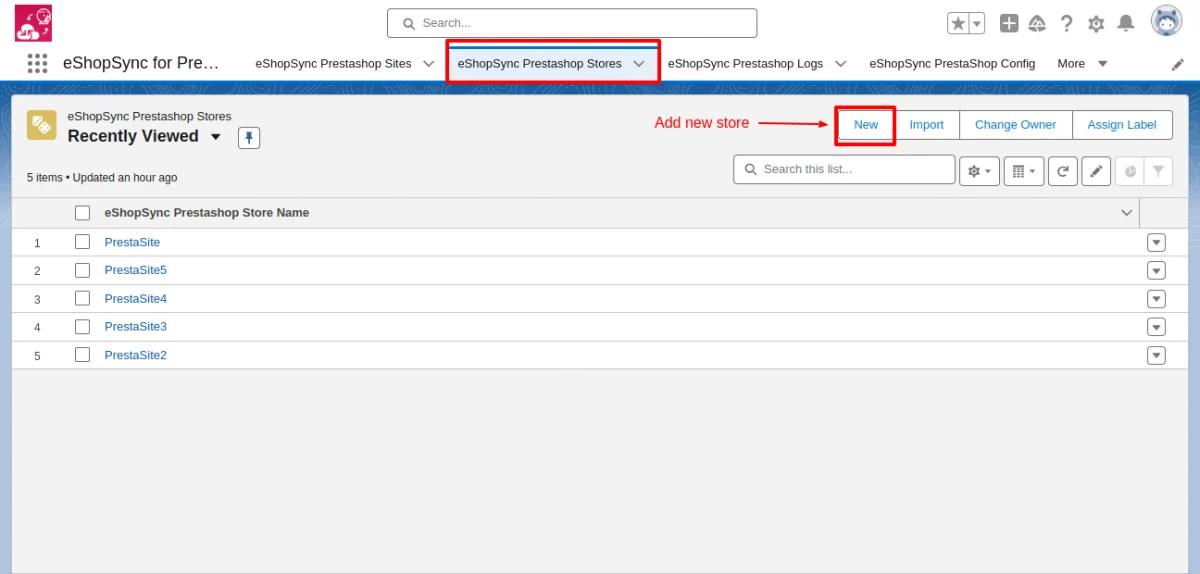
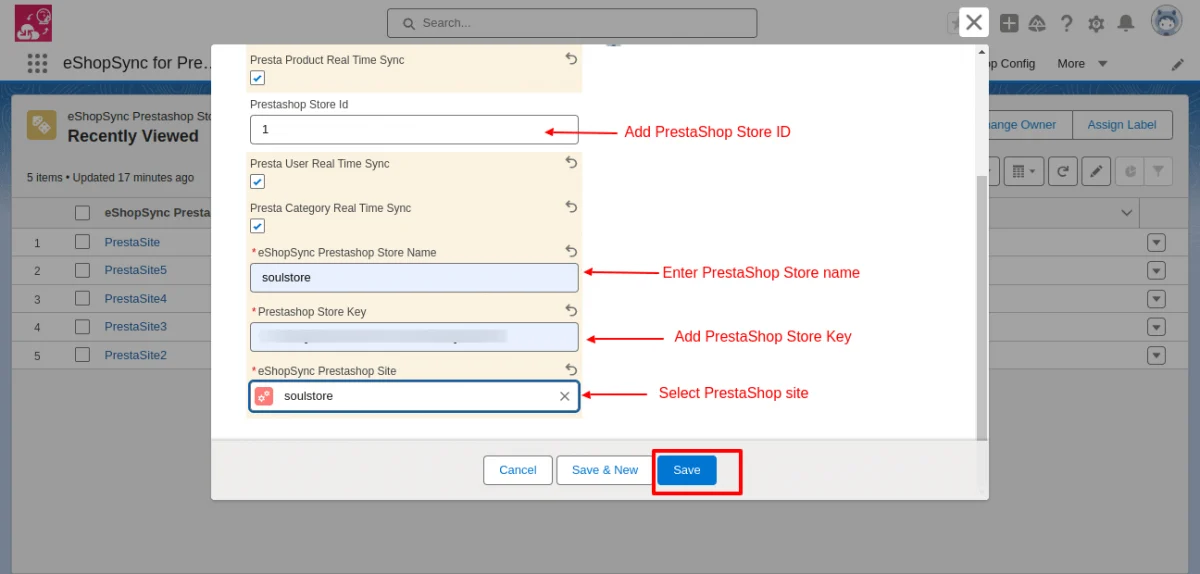
Afterwards, on the PrestaShop Store tab. Add your new store.
Meanwhile, tick all the checklist buttons to enable real-time sync in different store objects and enter your PrestaShop Store ID.
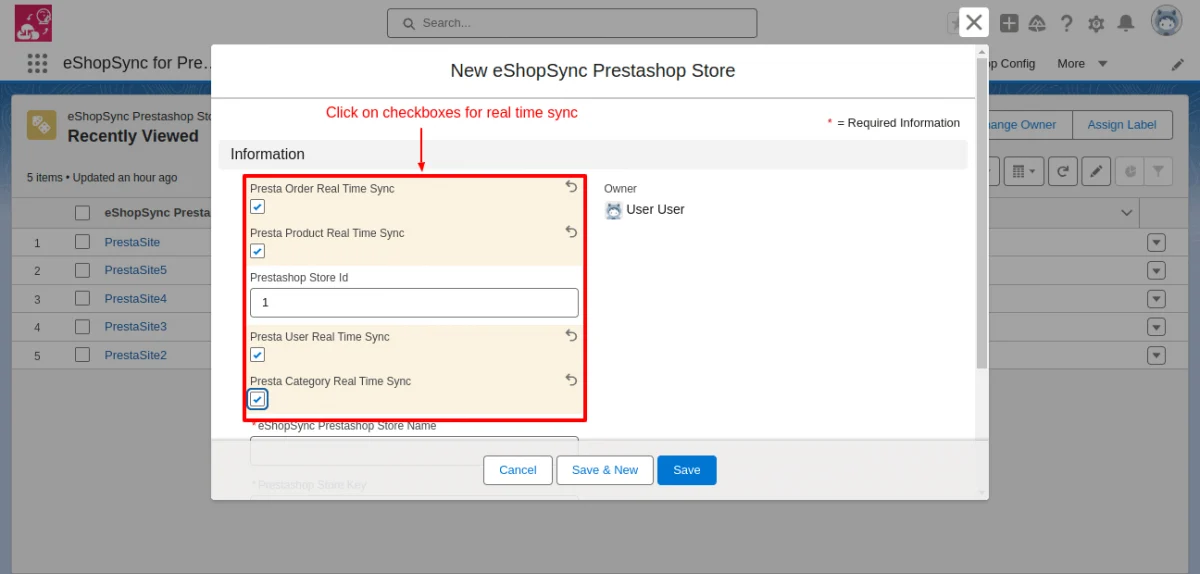
Scroll down below, Fill in the Store ID, Store Name, and Store Key, and Select Site.
Remember to find the store key, you must generate it from your PrestaShop Dashboard. Later, I will let you go through the process of getting the key.
How to Generate Store Key at PrestaShop
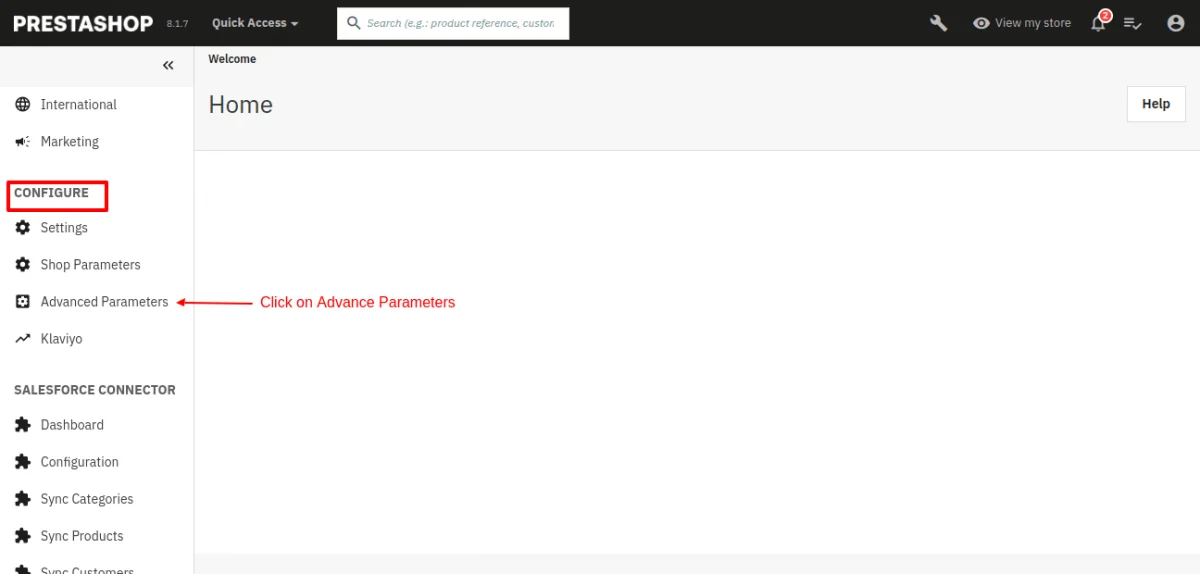
Firstly, log in to your PrestaShop dashboard. Click on Advanced Parameters under Configure.
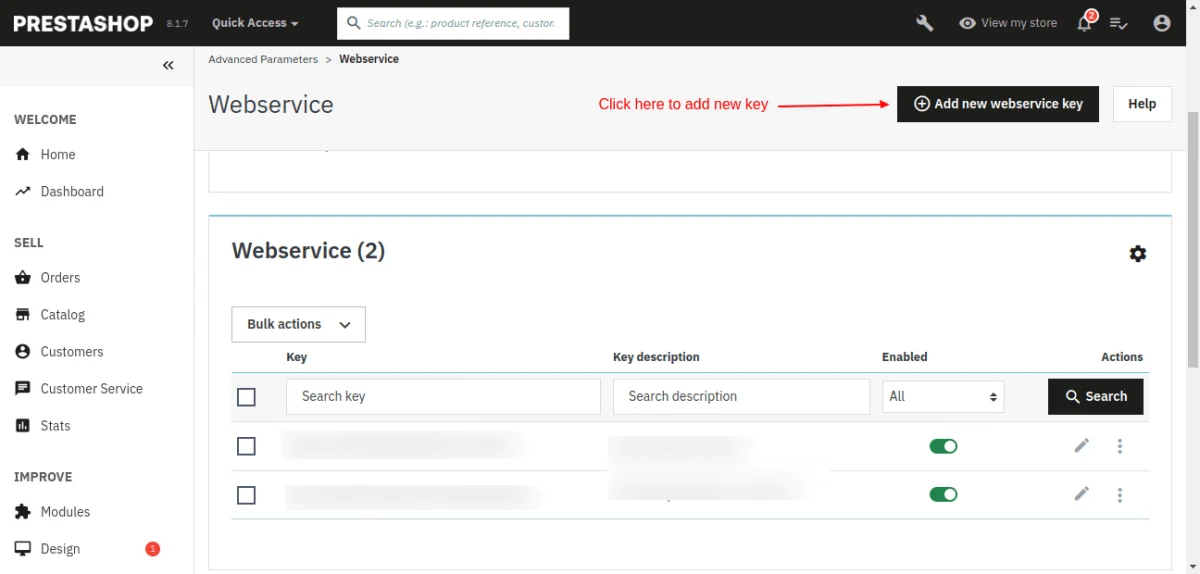
Then, open Webservice.

Further, click on the Add new webservice key button.
Generate the key by pressing the Generate button and copy the generated key. Paste this generated key in the Salesforce org above.
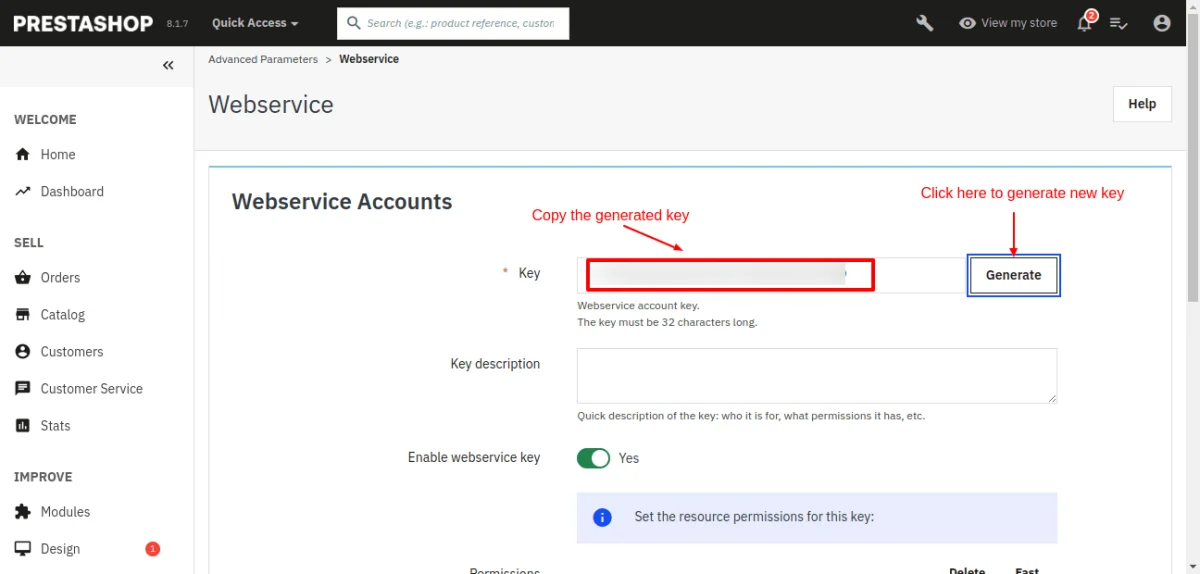
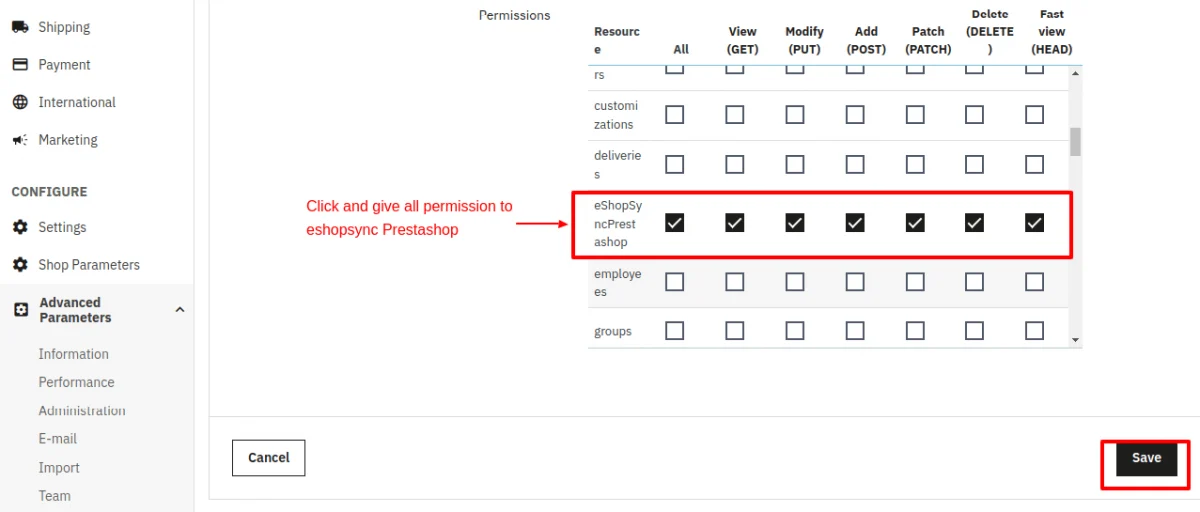
Finally, scroll down and select all the checkboxes in front of eshopsyncPrestaShop. Then, click on Save.
Picklist Value Set in Salesforce
Adding your site to the Picklist Value Set will help in showing all the stores related to the site. To begin with, go to the Gear Icon and click on Setup.
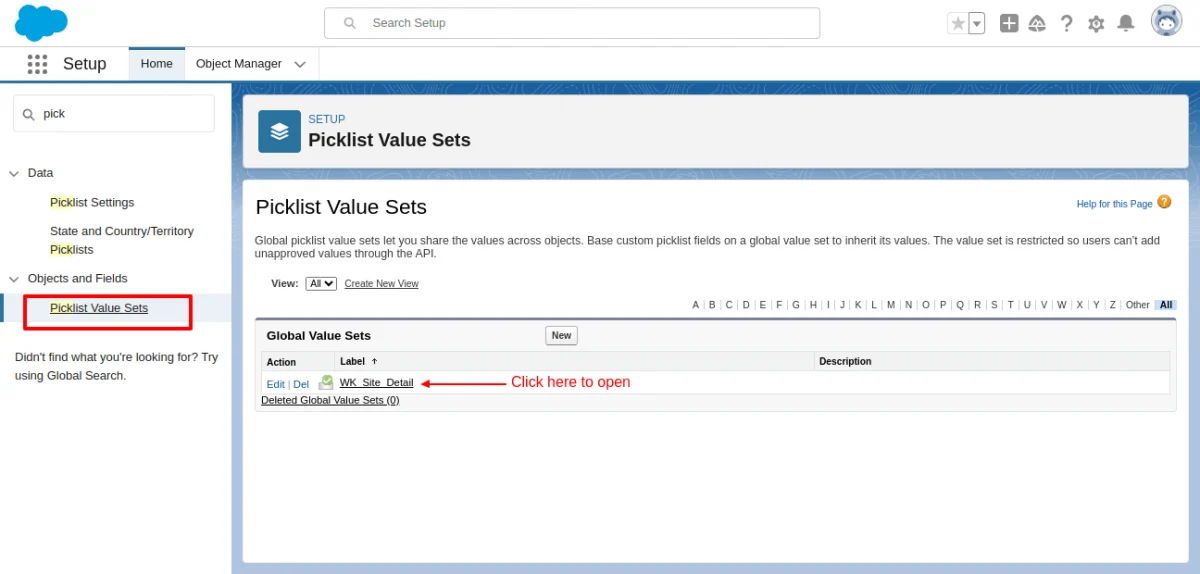
Then, search for the Picklist Value Set. Please open it and click on the Wk Site Detail.
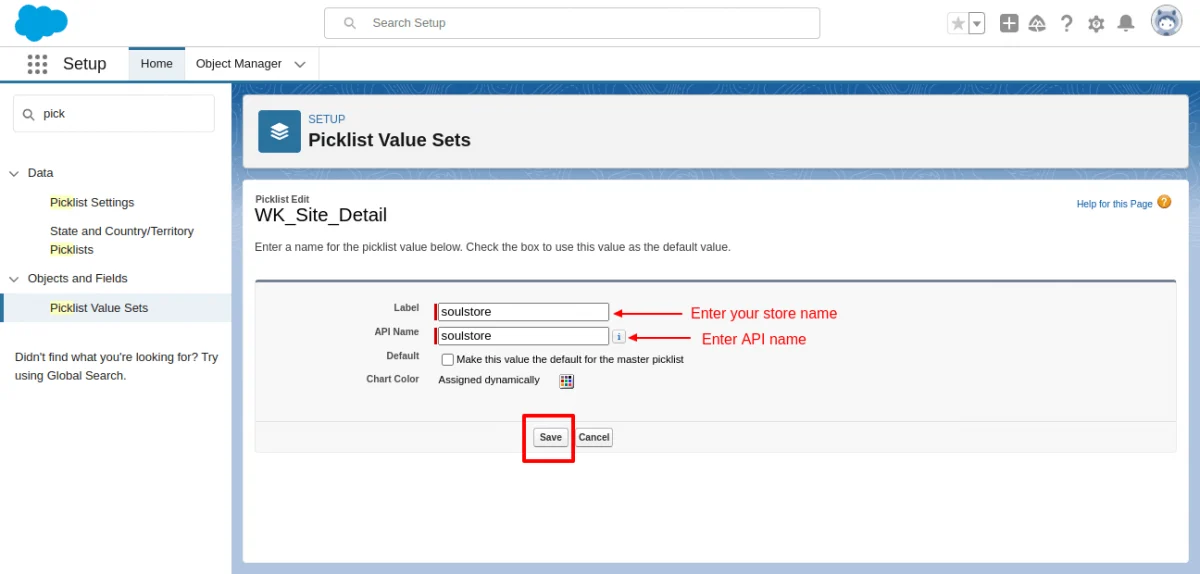
Here click to edit the Picklist value.

Add your Site name and API name. Then, click on the save button. Your changes are saved in the Picklist Value Set.
Add Store Field in Salesforce Objects For Synchronization
Incorporating a Store field will not only assist in selecting the store from your multiple stores, but it will also ensure that only the data from the selected store is synchronized.
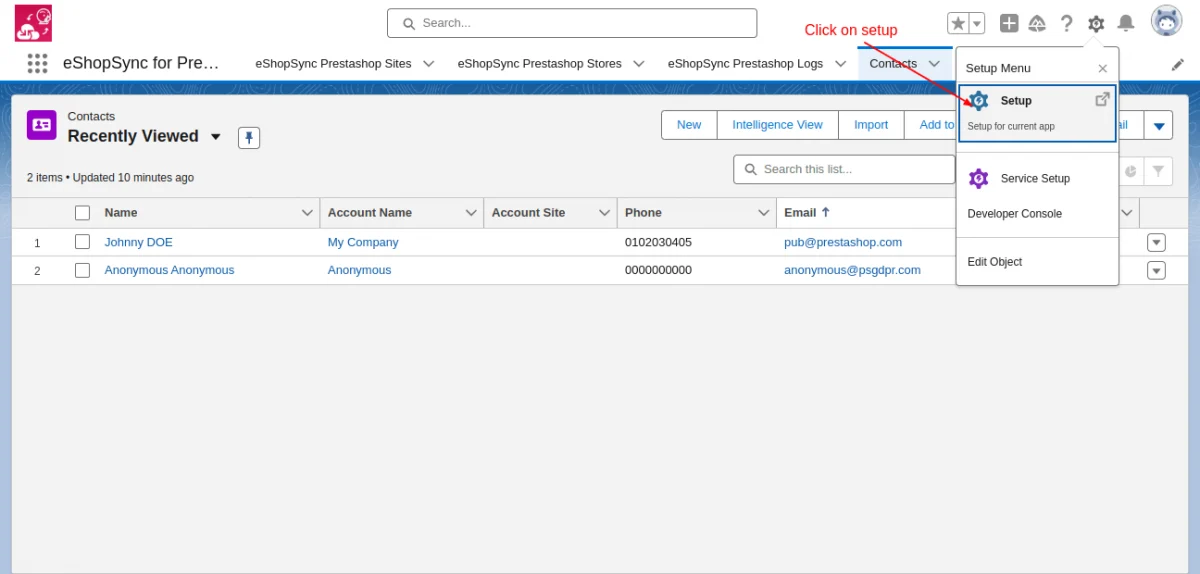
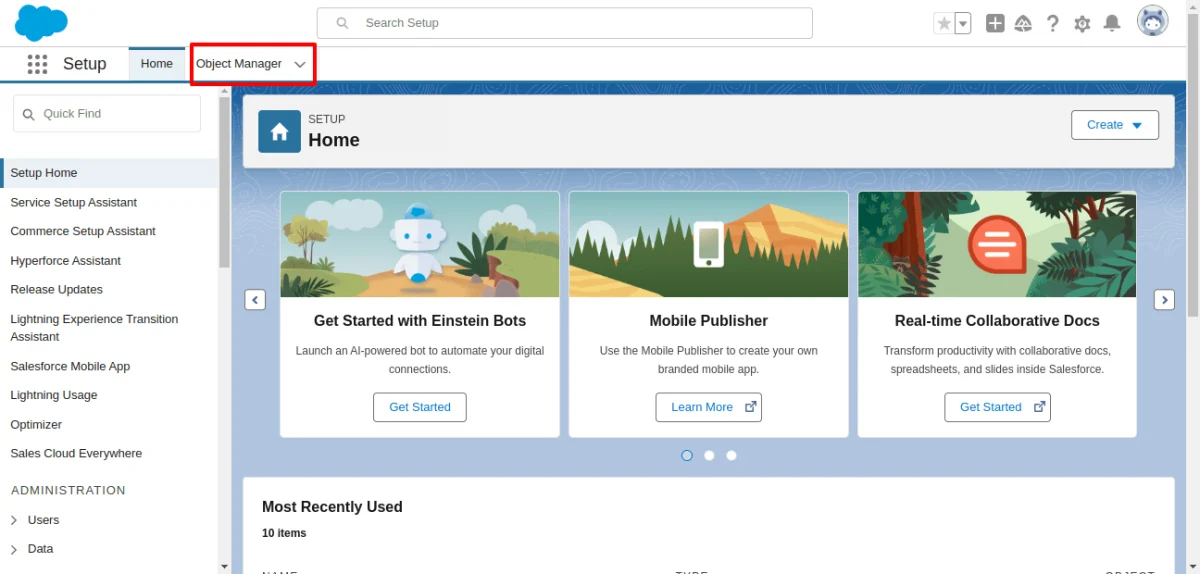
Therefore, let’s proceed to add the field in the contact object. First, open the Gear Icon, and then click on Setup.
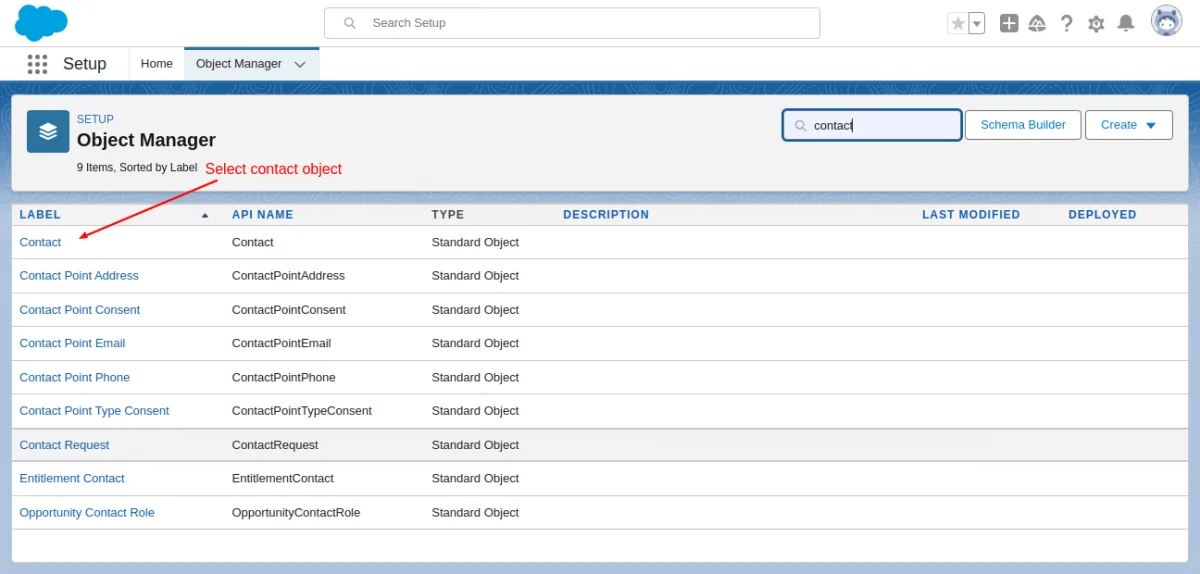
Further, shift to the Object Manager tab.
Then, select the Contact object to add the field.
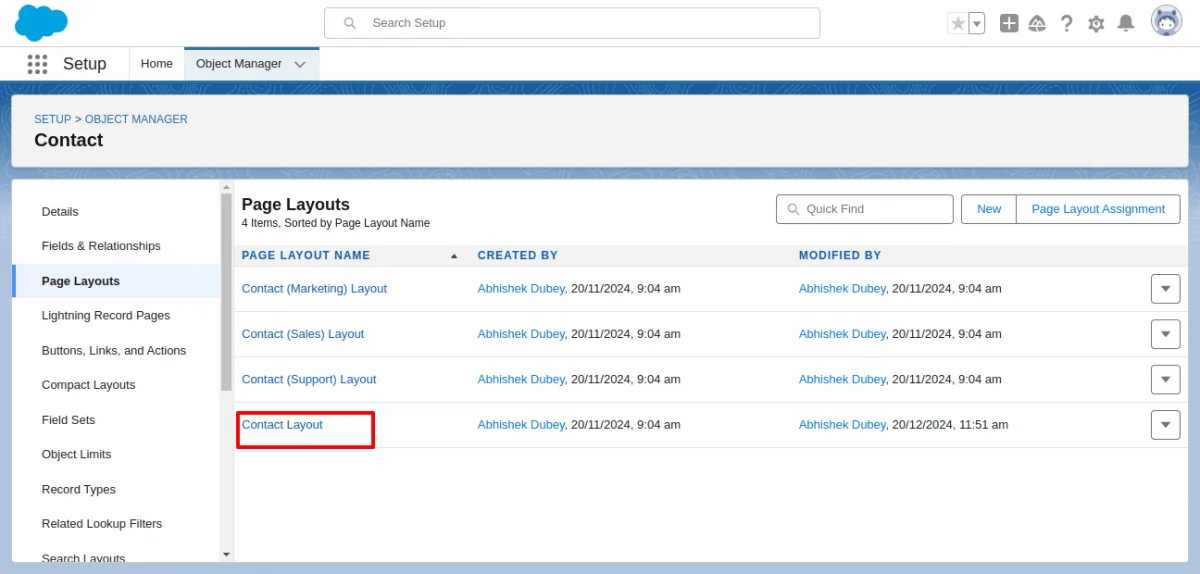
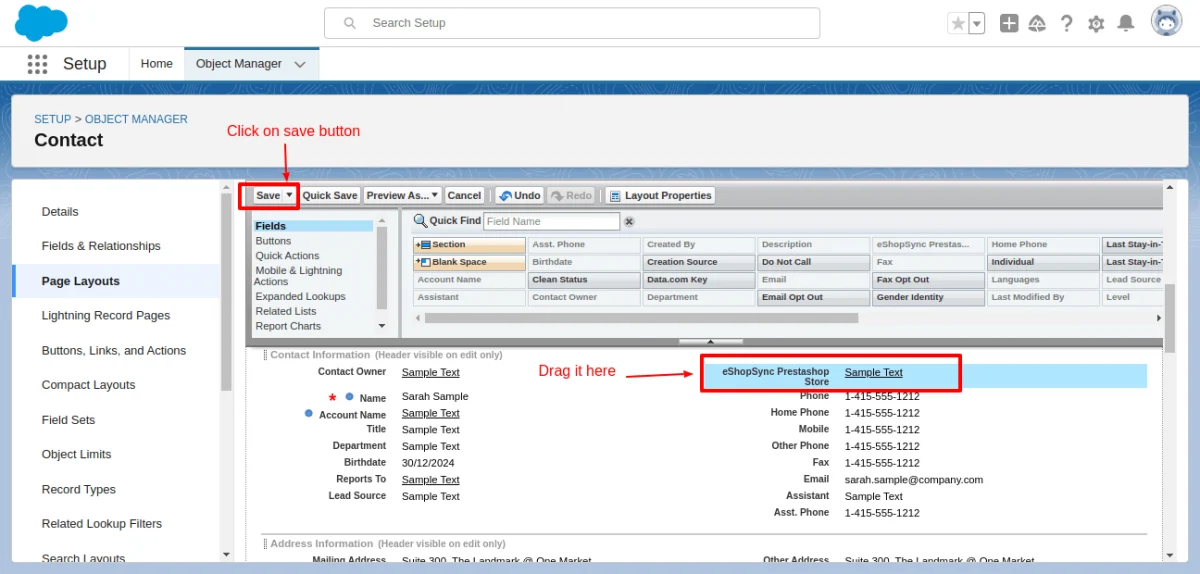
Go to the Page Layout option.

Choose the last option Contact Layout in this window.
Further, drag and drop the eshopsync PrestaShop field below.
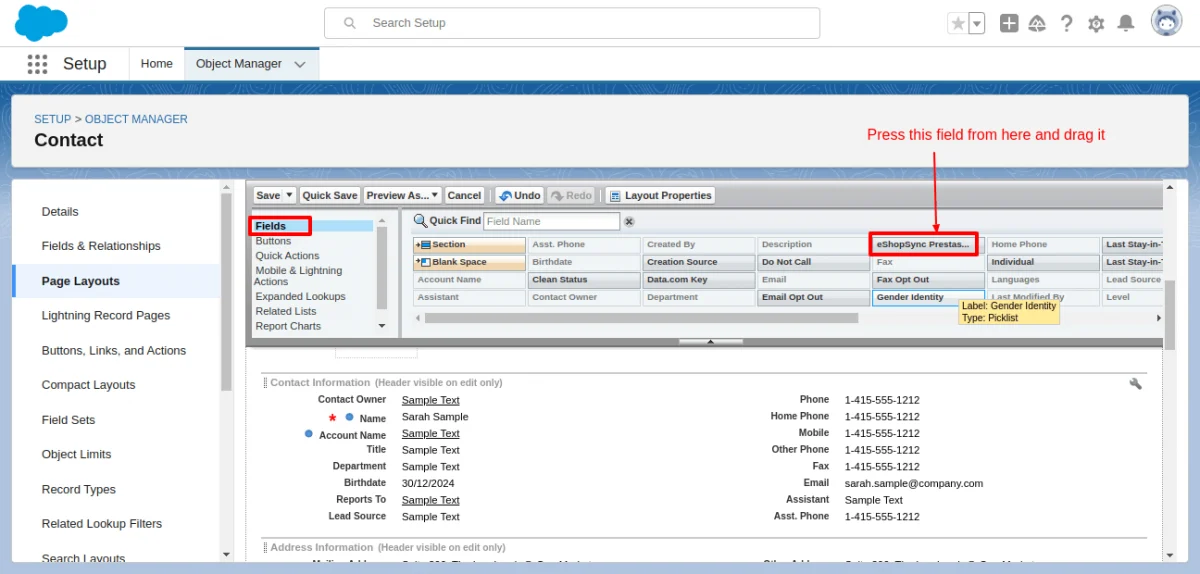
Lastly, Click on the save button to save the changes.
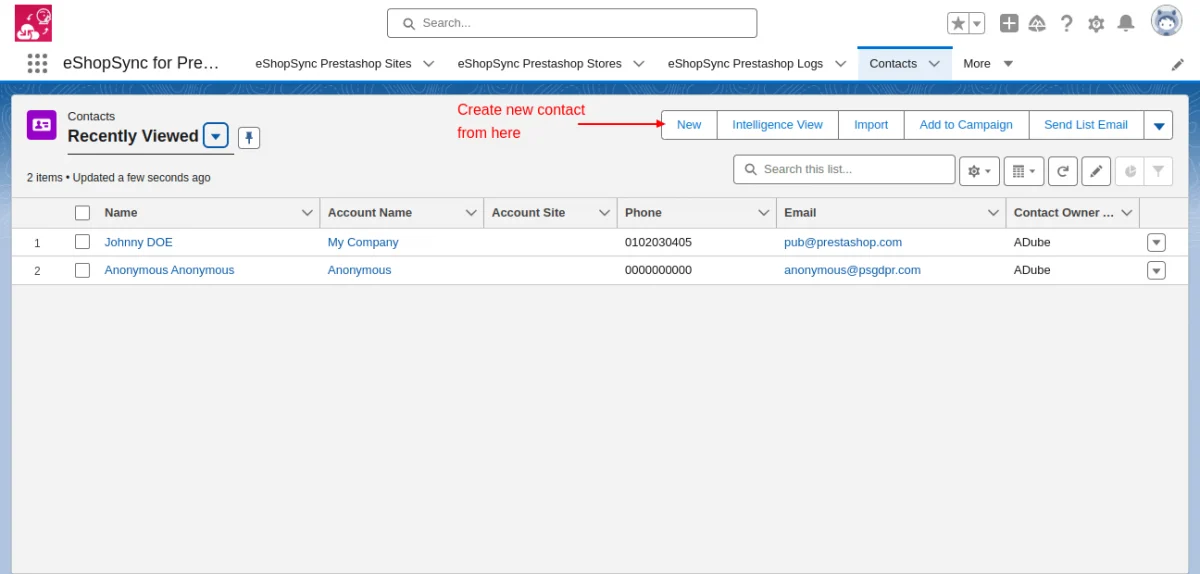
Now, go to the PrestaShop Salesforce Connector to see if the changes are visible in the connector.
Create a new contact on Salesforce by clicking on the New button.
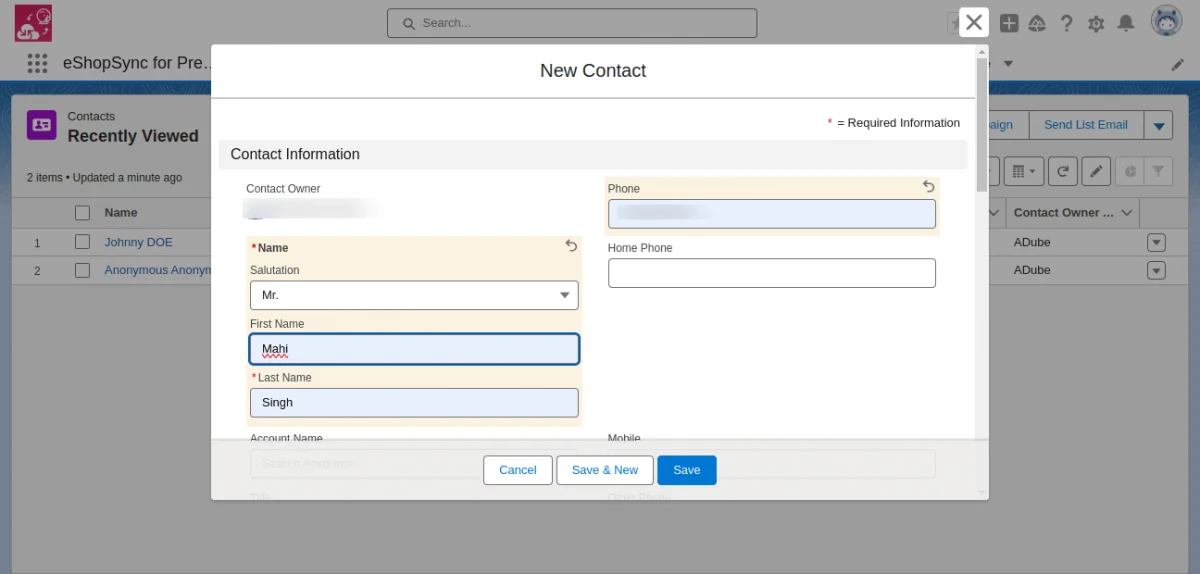
Add the contact details below.
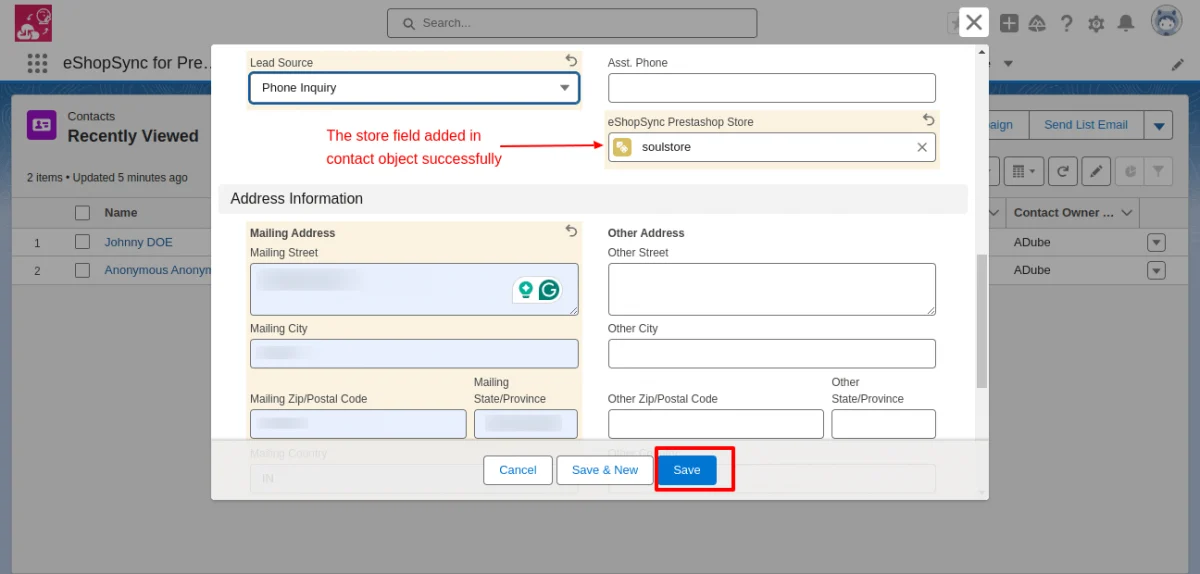
Next, scroll down to observe that the field has been successfully added to the contact object.
After that, select your store and click on the save button. Consequently, this will create a new contact record in Salesforce.
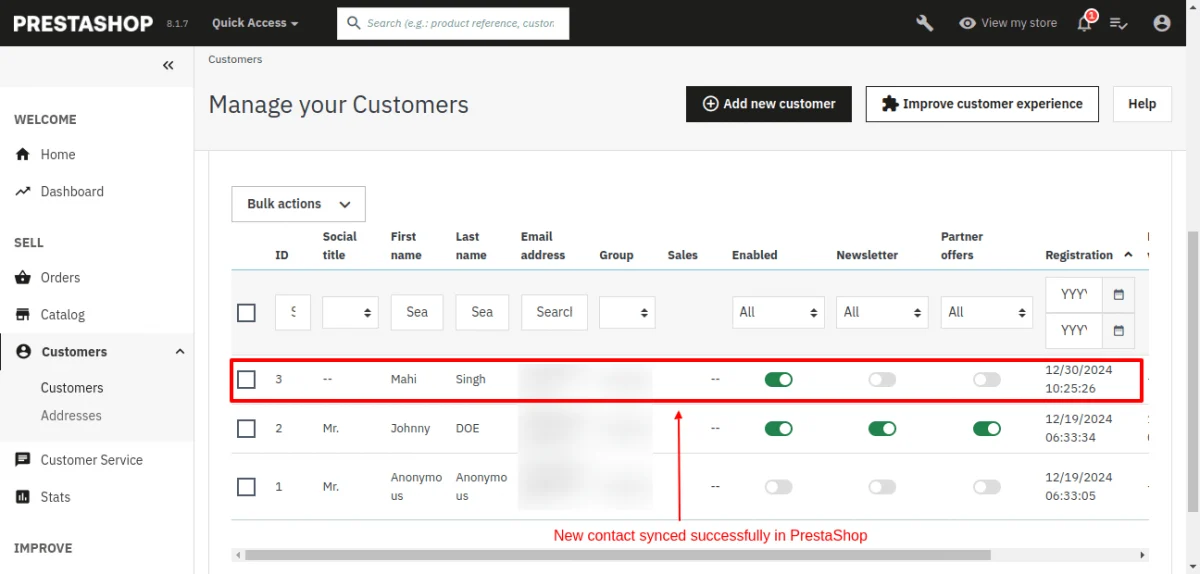
Thereafter, you can see that the contact has been successfully synced in real-time on the PrestaShop store as a customer.
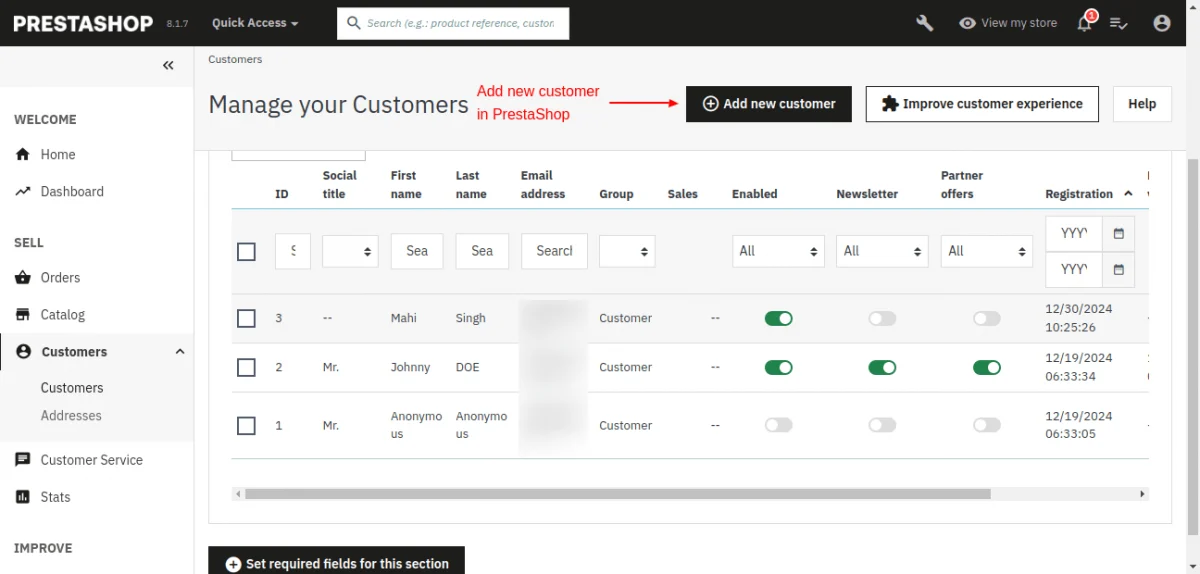
Moreover, let’s check the bi-directional feature. To check this feature, open the PrestaShop store and Add a new Customer in the Customer section.
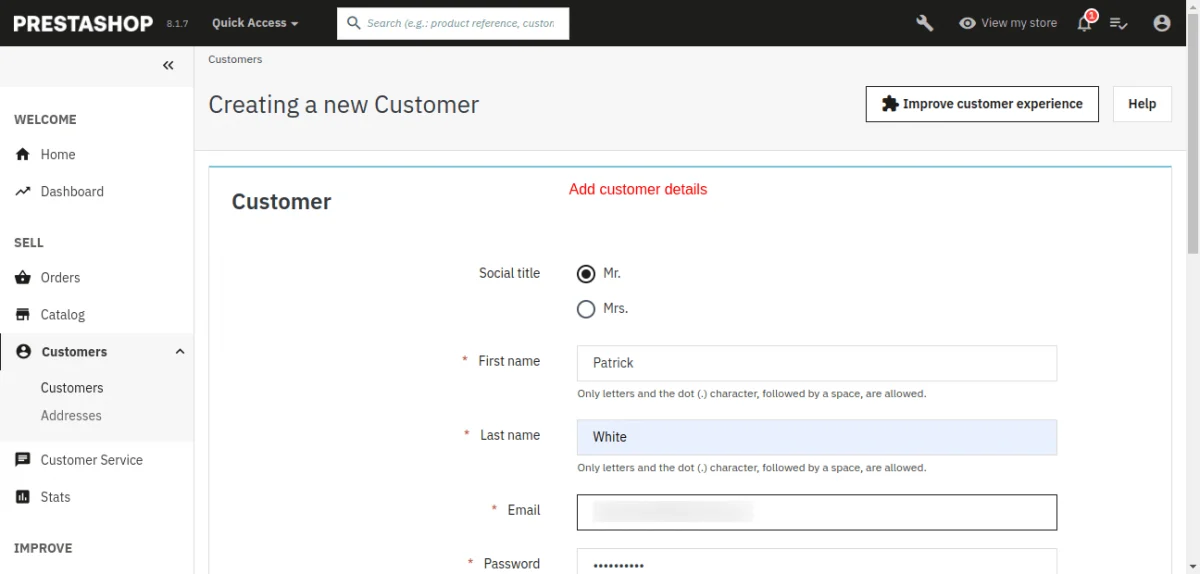
Afterward, add the details of the customers and scroll down to save the customer.
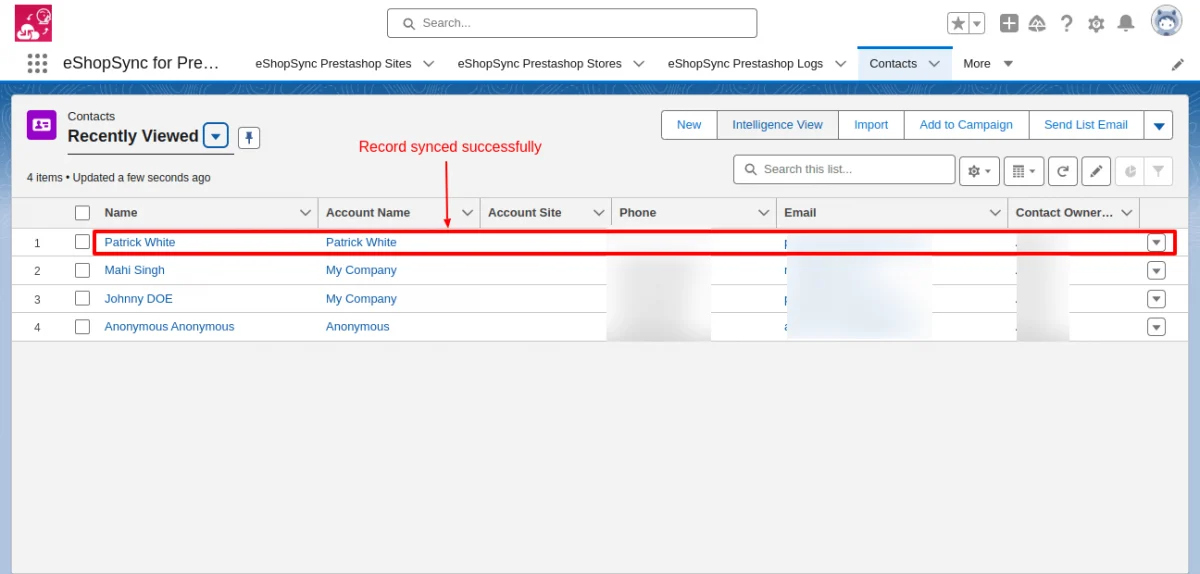
Now, navigate to the PrestaShop Salesforce Connector. As a result, the customer record saved in PrestaShop has been successfully synced to Salesforce in real-time.
Note: The process for syncing data bidirectionally is similar for all other objects, such as Products, Categories, Orders, and Opportunities.
PrestaShop-Salesforce Lightning View
Customers Sync on Salesforce

Products Sync on Salesforce

Orders Sync on Salesforce

Contact Us synced as Leads

Frequently Asked Questions
Q: What is the best way to test the purchased connector file?
A: We recommend installing and testing the connector sync features in the development site first, by establishing the connection with Salesforce Sandbox.
Upon successful testing, you may proceed to install the connector in the Live site and Salesforce Production environment.
Q: Which Salesforce editions PrestaShop Salesforce Connector is compatible with?
A: PrestaShop Salesforce Connector is compatible with the following Salesforce editions:
- Professional
- Enterprise
- Performance
- Unlimited
- Developer
- Force.com
Note: For Salesforce Professional Edition, you must have the API-enabled Org to avail of connector Sync features.
Q: What are the benefits of purchasing the connector along with Installation fees?
A: Purchasing connector along with Installation fees bring you a comfort where you just have to share the required details to initiate the installation process.
Our concerned team will effectively proceed with the installation process as soon we get complete details.
Your trust and satisfaction are highly important to us.
Q: What will be covered under Installation fees?
A: We will install and set up the connector at the PrestaShop end and get things ready to go situation for you.
Set up of application, eShopSync For PrestaShop at the Salesforce end as well, in case it is not installed at the Salesforce end.
You get synced a test record on each object to make sure that synchronization is working fine. Further, you may proceed with synchronization on your own.
Q: What are the required details mandatory to share for the Installation procedure?
A: You have to share the following details to proceed with the installation and setup of the connector:
- Would be preferable to install it in the Development site first in connection with Salesforce Sandbox, so create a Dev site and share the details accordingly.
- PrestaShop Admin URL of the concerned site with login credentials.
- Salesforce login credentials and Security Token.
- SFTP/FTP Details such as Host Name, Port, User, and Password.
NOTE: Mandatory to share SFTP/FTP details and all of the concerned sites such as Host Name, Port, User, and Password if we experience any issue while connector installation due to any plugin conflict.
Q: What are the conditions for paying Installation fees?
A: If you are stuck and having trouble while proceeding with configuration then you have to pay Installation fees along with the required details to install and set up the connector properly.
NOTE: We have already provided helpful links and video tutorials to install and set up the connector.
Q: When you can avail benefits of free support?
A: Free support comes into the picture once the connector is installed and configured properly.
If there is any issue during the connector installation then it will fall under the Installation process and will be treated as per the Installation procedure.
You have to pay the installation fees if you want support to install and configure the connector and must share the required details to initiate the connector installation procedure.
Q: What will be covered under the Free 3 months of support availed with connector purchase?
A: Post successful connector installation and configuration, if you are experiencing any issue while data synchronization that would fall under free support.
Q: What are the details mandatory to be shared to debug the issue?
A: You must share the following details to investigate the issue:
- PrestaShop Admin URL of the concerned site with login credentials.
- SFTP/FTP Details such as Host Name, Port, User name, and Password.
- Salesforce login credentials. Or, you may grant login access for Salesforce as well: How to Grant Login Access
NOTE: Mandatory to share SFTP/FTP details and all of the concerned sites such as Host Name, Port, User, and Password if required while investigating.
Q: What if you can’t share SFTP/FTP details or login credentials of PrestaShop and Salesforce due to privacy/security concerns?
A: Your data is highly secured with us and it is mandatory to share SFTP/FTP details and login credentials of PrestaShop and Salesforce to investigate any issue.
Q: Can you provide support on screen sharing sessions via any medium like Team Viewer/ GoToMeeting/etc?
A: No, we don’t provide any support on any of the screen-sharing sessions like Team Viewer/GoToMeeting/etc. So it is mandatory to share complete details to provide seamless support.
Q: What if you can’t share the asked details on the support ticket to debug the issue and want a full refund?
A: In this case, the refund would be processed as per the Refund Policy: Check Refund Policy Here
Q: What are the other options to get support if you have privacy concerns sharing Live Site details?
A: You have to provide a development environment (complete replica of the Live site) with the following details:
- Steps to reproduce
- Login credentials
- SFTP/FTP details such as Host Name. Port, User, and Password
We will debug the issue and also provide a proper resolution on the Development site. Upon successful testing, you can implement it on the Live site.
Support
- For any further query, Click To Create Ticket
- To know the feasibility of specific requirements: Request For Customization
- To view all our applications in Appexchange, go to Webkul Appexchange Apps
Current Product Version - 4.1.2
Supported Framework Version - 1.7.x.x

Be the first to comment.