With the Opencart Google Map Pin Address module, the customer can easily fill up the address fields by moving the Google Map drop pin to the desired location.
The customer can use this feature at registration, checkout(logged in and guest users) and while editing the address book.
Note:
1. This module supports all templates and themes including the Journal theme.
2. Opencart Google Map Pin Address module supports the Multi-Store feature of default Opencart.
To get more clear idea on the module, kindly review the video below-
Features
- The admin can enable or disable the module as desired.
- Logged in user can add the address in the address book with the help of Opencart Google Map Pin.
- On the checkout page, the user can autofill data related to the address with the help of Opencart Google Map Pin.
- This module works for both guest users and customers.
- The admin can set the Google Map API key.
- The admin has the option to select Default Address Type (Default Address & Current Location) along with Default Location.
- Current Location Icon for easier navigation & accessibility.
- It supports multi-store.
Note – Google Map API feature is a paid service.
Installation
Upload Files
First, extract the downloaded zip file. After that, open the correct Opencart Version Folder. According to Opencart Version installed in your system.
Then, upload admin, and catalog to the Opencart root directory.

Once you have uploaded the file then login to admin and from catalog section go to Extensions> Extension installer and upload the XML file.
The XML file can be found on ocmod folder under the module directory. Under the ocmod folder, you will find webkul_google_pin_location.ocmod.xml file.

Refresh Modifications
The user can navigate through Extensions > Modifications. Now click the Refresh button as visible in below screenshot.

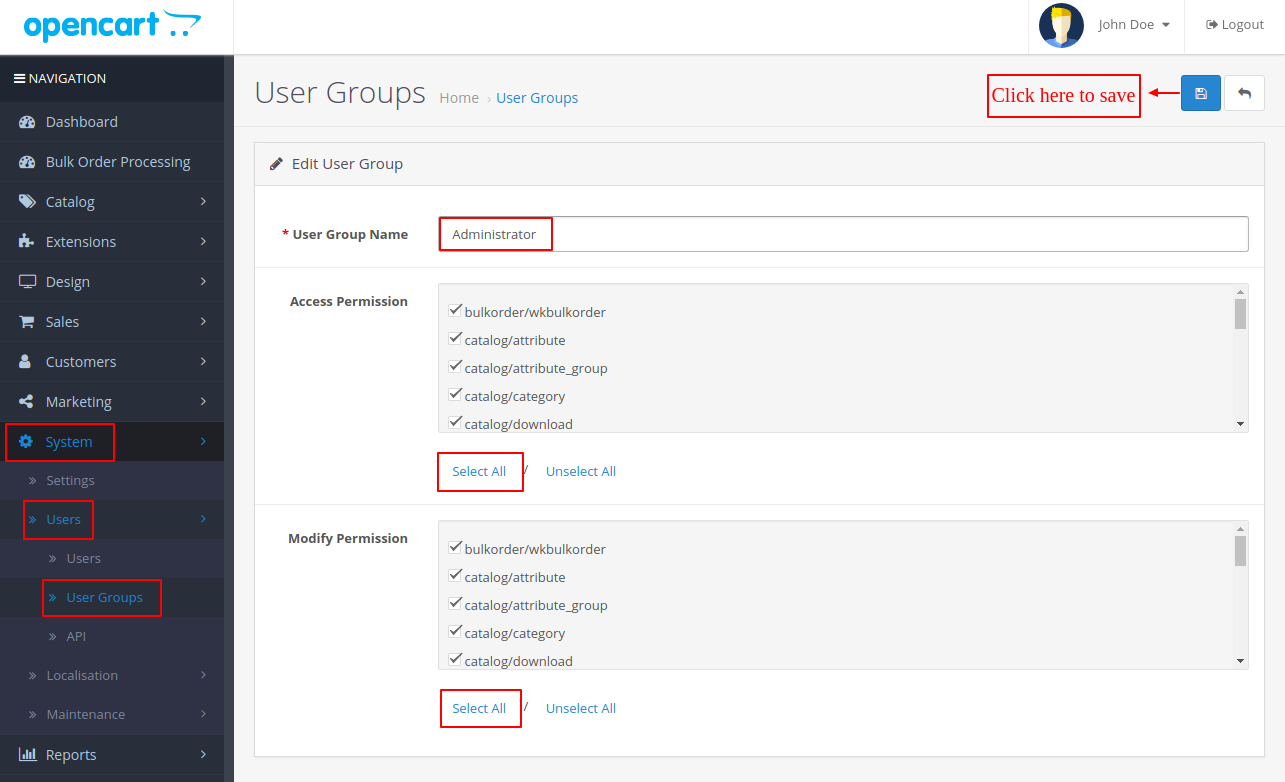
Edit User Groups
After that, go to System > Users > Usergroups. And then edit ‘Administrator’. Click Select All for both Access Permission and Modify Permission and Save it.
Modules
Now navigate to Extensions > Extensions > Modules. Find the Webkul Google Maps Pin Address from the list and install it. After the installation, the module will be listed as shown in the image below.

How To Get The Google API
Before configuring the module, the admin needs to have the Google Map Pin API. You can easily get one by following the steps as mentioned below.
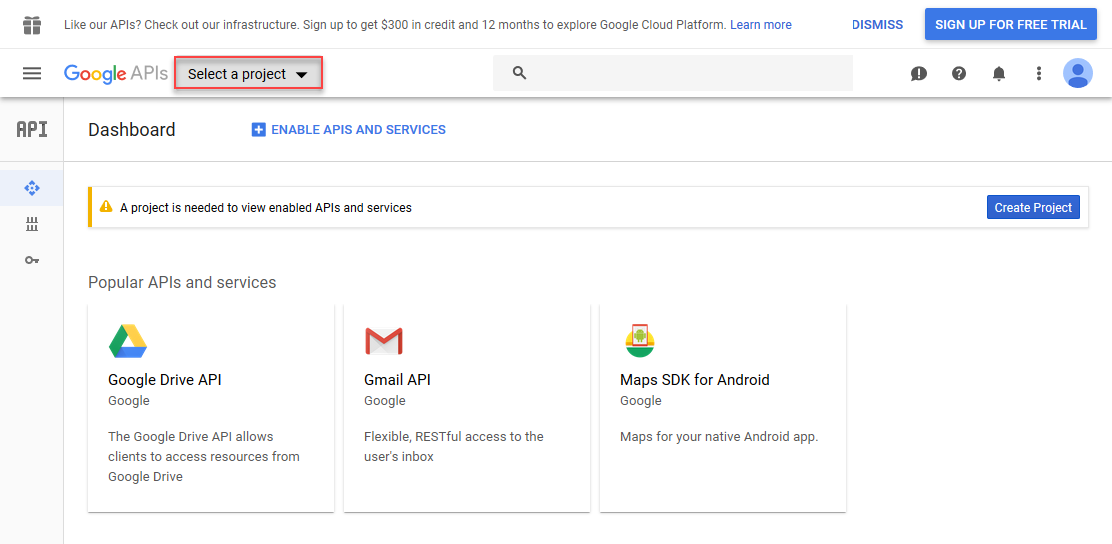
Step 1. Go to console.developers.google.com and log in using your Gmail ID. After that, click on select a project.
Step 2. Click on New Project Button. After that, you need to enter the name of the project and Browse the location of the organization.

Step 3. After creating the project click on the Enable API And Services.

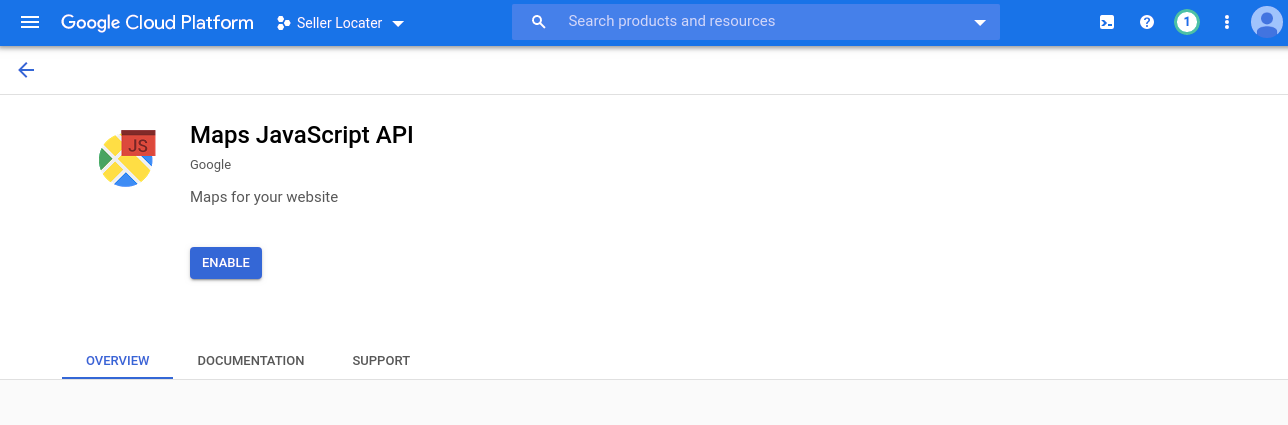
Step 4. Then click on the Maps JavaScript API to get the API key.

Step 5. After clicking on the Maps JavaScript API, you need to click on the ENABLE button.

Step 6. Once you have enabled the API then you need to navigate through Credentials> Credentials in APIs & Services.

Step 7. After that, you need to click on the create credentials and select the API key.

Step 8. Now you can copy the generated API key.

Domain Verification
The user needs to follow the given steps for verifying the domain.
Initially, on the Google Cloud Platform page, the user must navigate to APIs & Services > Domain verification as shown below.

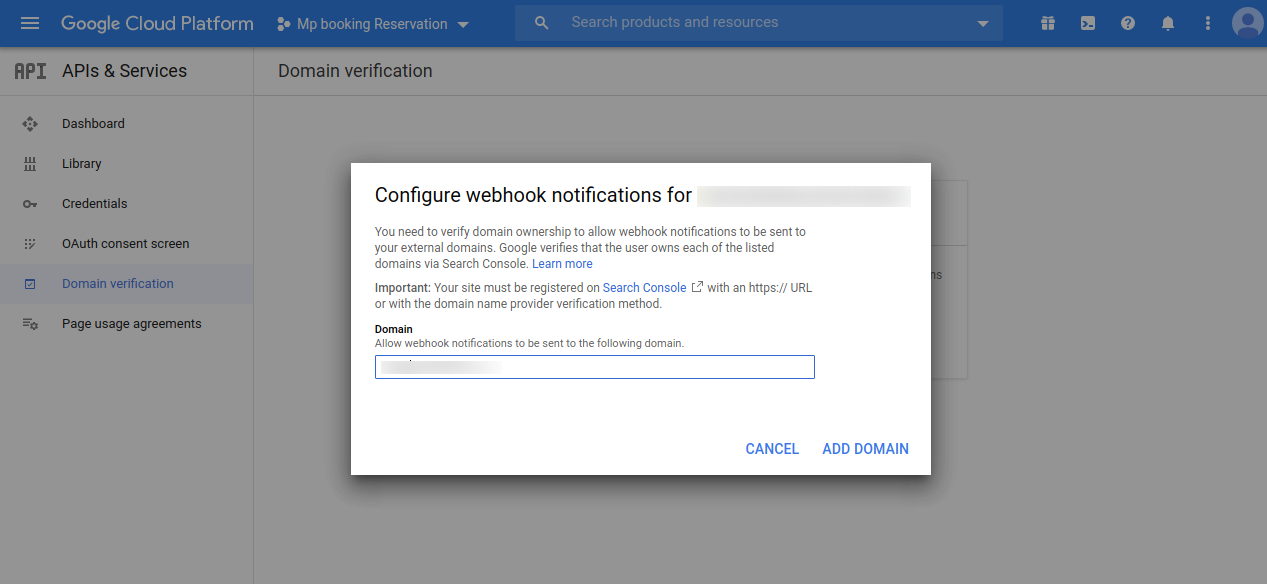
This navigates the user to the Domain Verification page, where the user needs to click on the Add Domain button.

A popup shall appear as shown in the image, where the user needs to fill in the Domain URL (https://example.com/) in the text box and click the ADD DOMAIN button.
On clicking the ADD DOMAIN button, another popup opens up bearing a name Verify ownership.
The user must click on TAKE ME THERE, to proceed further.

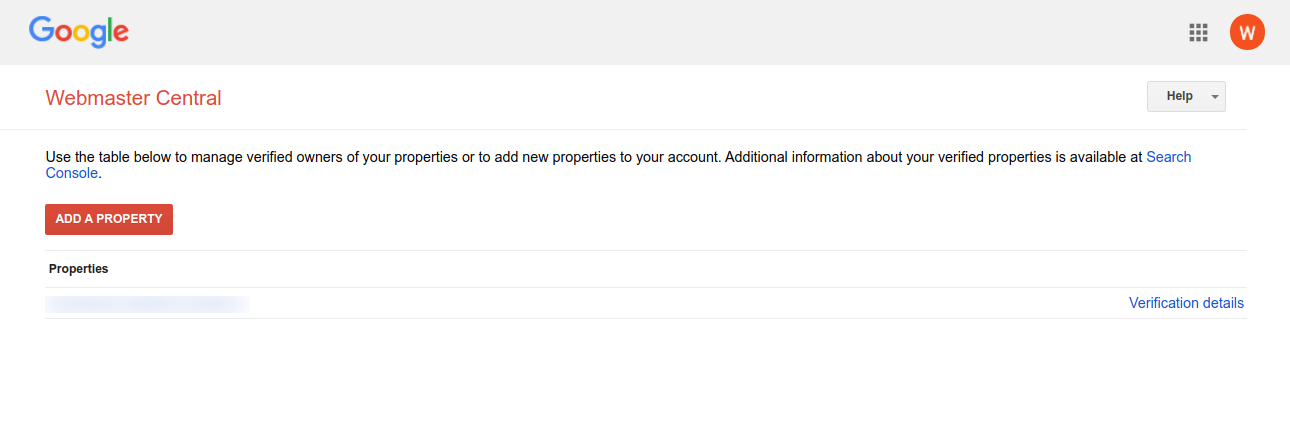
On clicking the same, it redirects the user to the Webmaster Central page as shown in the image below.
The user must click on ADD A PROPERTY button present on this page.
A textbox opens up where the user needs to add the URL of the property that the user wishes to verify and click on Continue.

Google recommends some steps that the user must follow to verify the URL of the property.

Thereafter, the user can tick-mark the I’m not a robot checkbox and further click Verify button.

Once the verification process is completed, the following page shall appear.

Enable Google API Keys
To enable the Google APIs, the user must open up the Google Cloud Platform page and navigate to the Credentials page.
The user will find All Google Maps APIs dropdown, clicking which the user needs to click on the ENABLE API.

In doing so, a list of Google APIs opens up. If users don’t find the required API, they can type the name of the API in the search box and search for it.
To enable the API, the user needs to click on it.
Geocoding & Maps JavaScript APIs

Geocoding API: Enable

Maps JavaScript API: Enable
Places API

Places API: Enable

Admin Configuration
After the successful installation, the admin can configure the Opencart Google Map Pin module without any issues by navigating to Extensions>Modules>Webkul Google Maps Pin Address and click on edit option as shown in the image below.

On clicking the edit button, a new configuration page will open with the following configuration options as shown in the image below.

The admin can configure the following:
- Status: The admin can set the module as enable or disable as desired.
- Google API Key: The Google API key which was generated earlier can be filled in the following field. The admin can navigate directly to the get api key section in developer documents through the following link “For Google API Key”.
- Default Address Type: Select from a Default Address or Current Location in the dropdown according to the preference which will then be displayed at the customer end.
- Default Location: It can be searched and selected from the dropdown as per the preference.
Registration Page – Google Map
After the configuration, the customer will be able to add the address fields during the registration by selecting the location through the google map as shown in the image below.

Address Book – Google Map
The customer can even use the google map for the editing or creating new addresses in the Address Book section as shown in the image below.

Checkout Page – Google Map
Logged In Customers
The customer that are logged in can either use the save address from the address book or can create a new address through the Google Map.
For the Billing Details:

For the Delivery Details:

Guest Customers
For the Billing Details
The guest customer can use the Google map for adding addresses in the billing detail section as shown in the image below.

For the Delivery Details
The guest customer can use Google map for adding addresses in the delivery detail section as shown in the image below.

Current Location Icon
Customers can use the current location icon at the bottom of the maps by tapping or clicking on it to get to their current location instantaneously.
That’s all about Opencart Google Maps Pin Address module. For any further queries, suggestions or customization, please add a ticket to HelpDesk Support.
Current Product Version - 1.5.3.0
Supported Framework Version - 3.x.x.x

Be the first to comment.