Opencart Facebook Shopbot: Now you can add a Facebook shopbot feature to your store which will provide a new shopping experience to your customers.
As with artificial intelligence, this technology gives complete information about the product to the customer.
This will help customers to find complete details of the product in an easy way.
Customers can generate Facebook chat over browser or messenger and see the most popular product list.
Customers can ask for the available options and check variables like color, size, etc.
How to use the demo of Opencart Facebook Shopbot
To use the demo you need to login to Facebook messenger or your Facebook account.
For web messenger, you need to click on this link https://www.messenger.com/t/1089552357839396.
Now in the chat window search for ” Webkul Opencart Shopbot” and select the option like this.

Now you are ready to chat with the Opencart Facebook shopbot. You can ask for products and their options.
Features of Opencart Facebook Shopbot
- Adds automated chat feature on the store.
- Customers can browse products on Facebook Messenger.
- Customers can ask queries regarding products on Facebook Messenger.
- Customers can ask for product information on the messenger.
- Customers can check product options and their variables on chat.
- Customers can go to the product page from the messenger.
Installation Of Opencart Facebook Shopbot
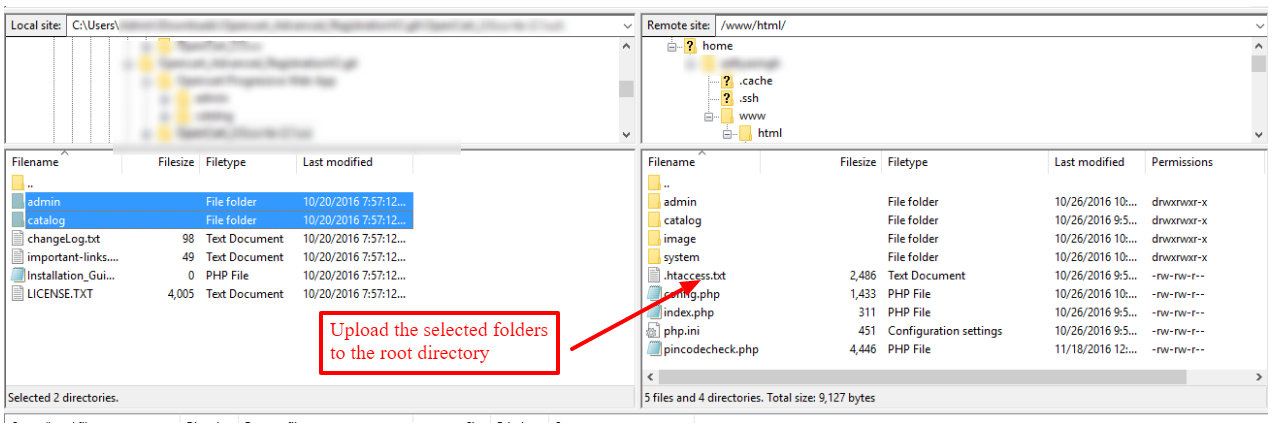
Installation of the Opencart Facebook Shopbot is easy. In the module zip, you will find two folders, namely admin and catalog.
You just need to upload admin and catalog folders to the root directory of the website.
Uploaded the file, and then logged in to admin.
Go to Extensions > Modification and click on the refresh field.

After that in the admin panel go to System -> Users -> Usergroup, and edit ‘Administrator’ and select all for both Access and Modify Permission then save it.

After that under Extension > Modules install the Opencart Facebook Shopbot Module like this way.

Configuration of Opencart Facebook Shopbot
After installing the module customers can click on the edit button to enable and configure the module.
From here customers can enable the module, enter Salutations, Salutation messages, and nothing found messages.
These messages are sent to the customers randomly at the time of the chat.

Note: The Access User Token will be fetched by the admin from the Facebook Meta Account.
How Can The Admin Fetch The Access and Verification Token?
First, the user creates a Facebook Meta account.
Then, log in to the Meta dashboard and click on Create App

Now, the admin selects the Other option and clicks on the Next button.

Next, the admin clicks on the Business option to proceed further.
Then,click on the Next button.

Here the admin enters the app name and clicks on the Create app button.

After this admin will select the app that was created from the list.

A new window will open.

Here the admin will click on the Setup Webhooks.

In the dropdown menu click on Page.

Next, the admin will tap on the Subscribe to this object.

In the module configuration, the admin will get the callback URL.
Also, the admin will enter the same verification token that was entered in the module configuration.
Example – Webhook Url – https://oc.webkul.in/zoho-inventory/index.php?route=bots/starter
Next, the admin clicks on the subscribe options for all the pages.

After this, the admin will click on the Tools.
In the developer tools page, the admin will click on Access Token Tool.

Now, the admin will scroll down and find the option to grant permission to get an access token.
Now, the customer will tap on the grant permission.

click on continue.

The token will be created.

Now, the customer will copy the access user token and paste it into the module configuration.

Now the admin will tap on set up the Messenger.

In the second step, the admin will connect Messenger to the Facebook account to generate Access token.


By tapping on the Connect button, a new window will appear.
Here the admin will connect Messenger with a Facebook account.

After clicking on the continue, the admin will choose the page to grant access.

Then, click on continue.
The page is now successfully connected to the messenger.

Then, the admin will click on add subscription.

Next, the admin selects the subscription and taps on confirm.
After that, the admin can click on the generate.

Here, the admin gets the token.

Now, the customer will copy the access user token and paste it into the module configuration.
Opencart Facebook Shopbot for Customers
Once the configuration is complete a customer can login to their Facebook messenger or Facebook account to start the chat.
Here, the customer will search your store page to start the chat.
After sending the message the customer will receive the reply from the shopbot.
Customers can ask for any specific product from the store by typing the product name.
Like if a customer wants to see apple product they can type apple.

If the customer wants to check the options available for the product.
Then, they can type options and the available options will be visible.

Support
That’s all for the Opencart Facebook Shopbot module. For any issues feel free to add a ticket and let us know your views on making the module better http://webkul.uvdesk.com/
Current Product Version - 2.0.0.3
Supported Framework Version - 3.x.x.x

Be the first to comment.