Using the OpenCart Etsy connector the store owner can sync hundreds of products, categories, and orders from Etsy store to the OpenCart store. Apart from this, the store owner can import products from Etsy to his OpenCart store and export products from the OpenCart Store to Etsy.
Check the backend configuration of the plugin –
Check how to add a etsy seller account from the backend panel –
Features
- Connect multiple Etsy seller accounts.
- Import products from Etsy to your OpenCart store.
- Export products from OpenCart store to Etsy.
- Import multiple products to Etsy.
- Import a single product using Etsy listing Id.
- Select the default store for Etsy Order sync.
- Select default order status for Etsy Orders.
- Orders can be imported from Etsy to OpenCart Store.
- Import Orders by – All Receipts, Receipts by Status, Search Receipts, and Search Receipts by ID.
- Map Etsy categories with the OpenCart categories.
- Set Etsy product variation name as Option name for OpenCart store.
- Multiple Image export for both the imported and exported products.
- Select Enable/disable option to update exported products on Etsy store.
- Select Enable/disable option to update imported products on Etsy store.
- List of mapped products is visible for both the imported and exported products.
Installation
Please Note: You need to install/enable the following libraries(as shown in the snapshot below) on your OpenCart server(Linux Server).
To install the OAuth extension you must first run the command – pecl install oauth.
After this, to install the Request engine support for Curl run the command – apt-get install libcurl3-dev on the same Linux server.
Step 1:
Extract the contents of the received zip folder on your system according to your Opencart version. The extracted folder has admin, ocmod, and system folders. Now, upload the admin and system directories into the Opencart root directory.

Step 2:
Once you have uploaded the folders, login to admin and then from the catalog section go to Extensions> Extension Installer and then upload the XML file. The XML file is in the ocmod folder under module directory. In the ocmod folder, select the Opencart version that you are using and under it, you will find Opencart_Etsy_Connector.ocmod.xml file.

Step 3:
After uploading the XML file go to the Extensions > Modification and click on refresh field.

Step 4:
After that in Admin panel go to System -> Users -> User Groups and edit ‘Administrator’ and choose to select all for both Access and Modify Permission for the permission that you want to provide and save it.

Step 5:
Now go to Extensions-> Modules->Webkul Etsy Connector and click the install button to install the module.

How to Get the Consumer Key & Secret Key
Step 1:
Navigate to etsy.com/developers and click on the Register link as shown in the snapshot below.

Step 2:
Now on the pop-up, you can choose to register using your social account or enter your first name, email address, password, reenter the entered password, and lastly click the register button to register.

Step 3:
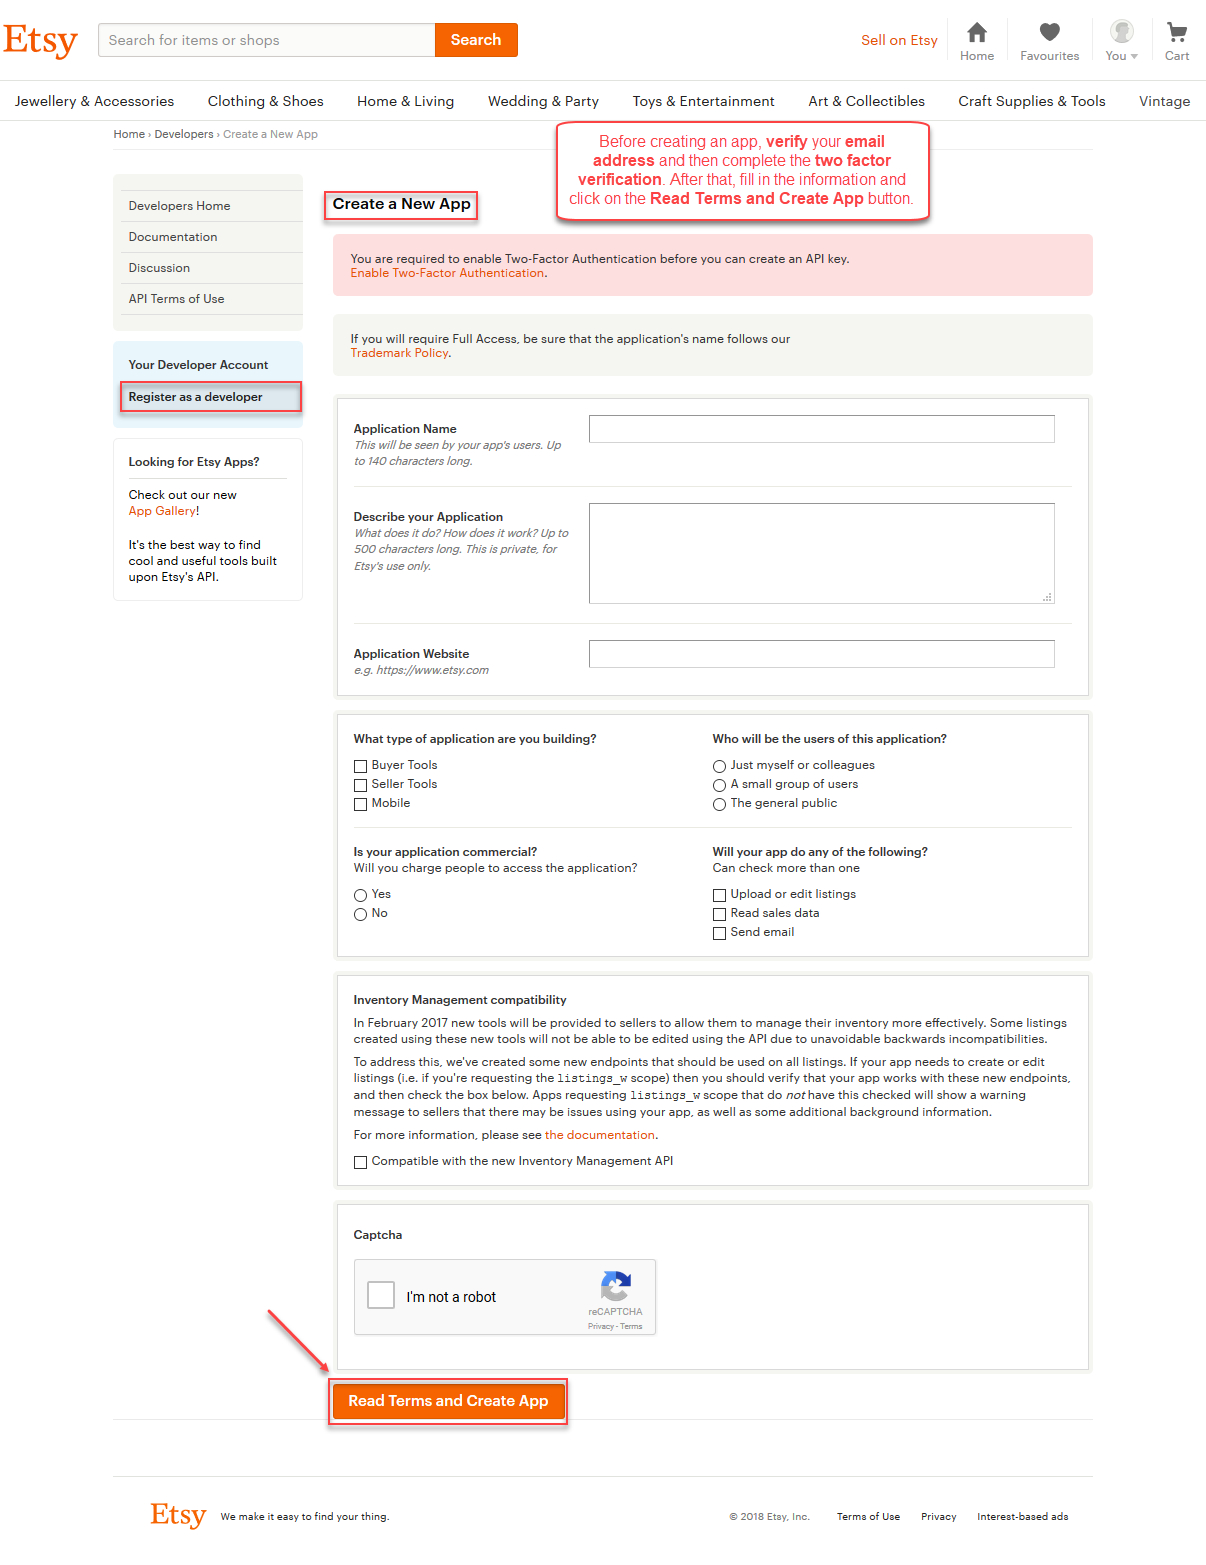
After registering in the previous step, click the Register as a Developer menu link. Here, you will have to verify the email address that you entered while registering and enable the Two-Factor authentication before creating the API key.
Enabling Two-factor Authentication:
Step 1: Click the Two-Factor Authentication link as shown below in the snapshot.
Step 2: This brings up the Security Settings section. Here, click the Enable button to enable two-factor authentication.
Step 3: Now, enter your mobile phone number with the correct country code and select your Confirmation type as – SMS/Text Message or Phone Call as per your feasibility and click Confirm Phone Number button.
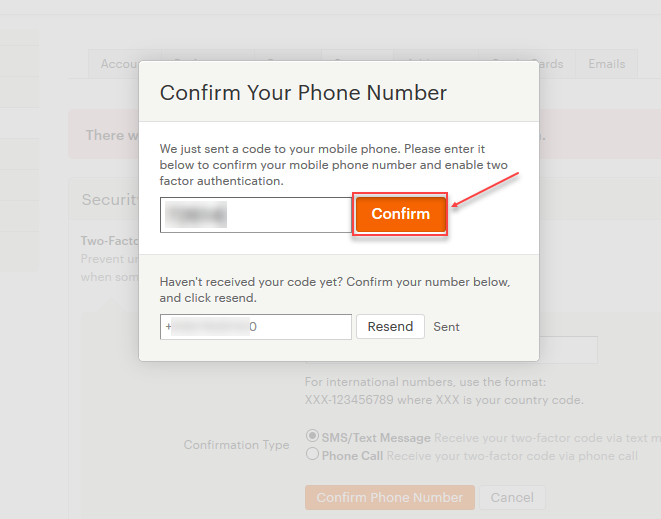
Step 4: This brings up a popup to enter the two-factor code, enter the code and click the Confirm button.
You will also be able to backup codes(to sign in) that can be used to login in case you don’t have the mobile phone along.

You can see the Two-Factor Authentication is now enabled.

After verifying the email address and setting up the Two-Factor Authentication now you can go back to the Register as Developer section. Here, enter all the related information on the page to create the app. Now, click the Read Terms and Create App button.

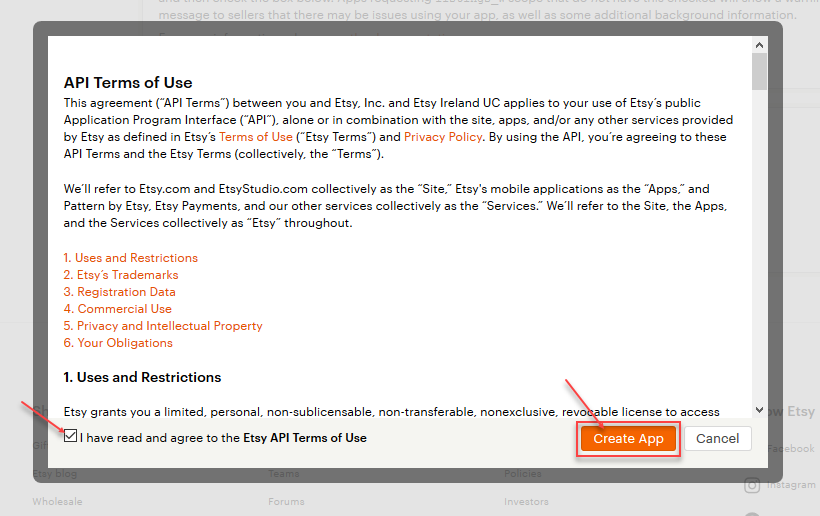
This brings a popup to accept the API agreement. Here check the agree to the terms and conditions checkbox and click the Create App button.
This creates the app and you get the Consumer Key(Key String) and the Secret Key(Shared secret).

lastly, you need to have a Shop name(required for module configuration). To create one go to the Shop Settings menu link and create one. Here, you can see the shop name as WebkulShop.
Module Configuration – Admin
After the successful installation, navigate through Extensions>Modules>Opencart Etsy Connector and click on the edit button next to the module to open the configuration settings of the extension.
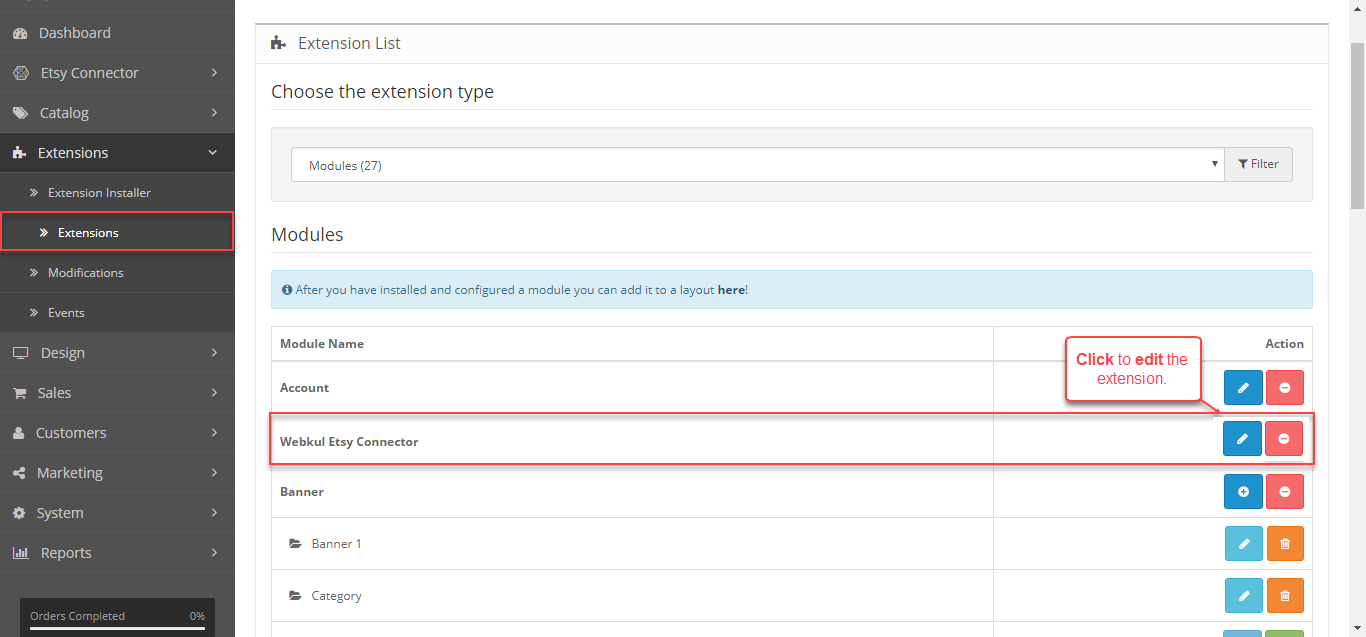
Clicking the edit button brings up the module configuration settings as shown below in the snapshot.
 Here, we have an option to enable or disable the extension and 4 configuration settings –
-
-
- General Settings
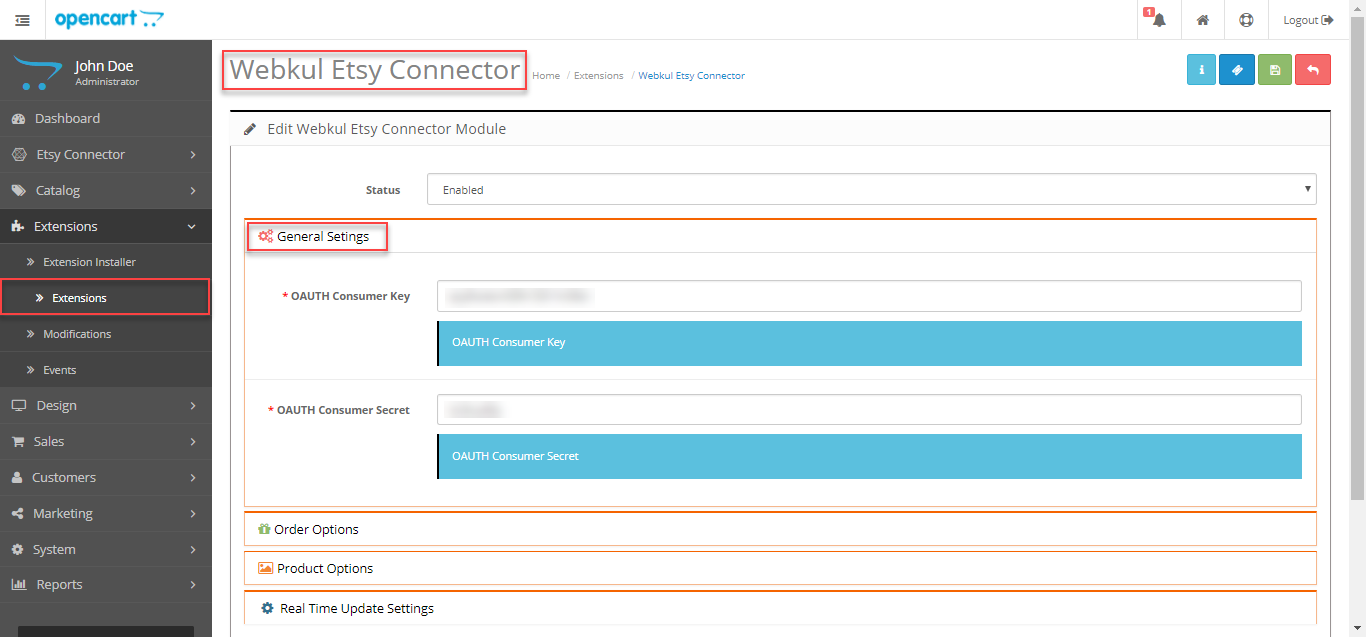 Under the General Settings, the admin will enter the – OAuth Consumer Key and the OAuth Consumer Secret received after registering as a seller and creating the app at Etsy.
 - Order Options
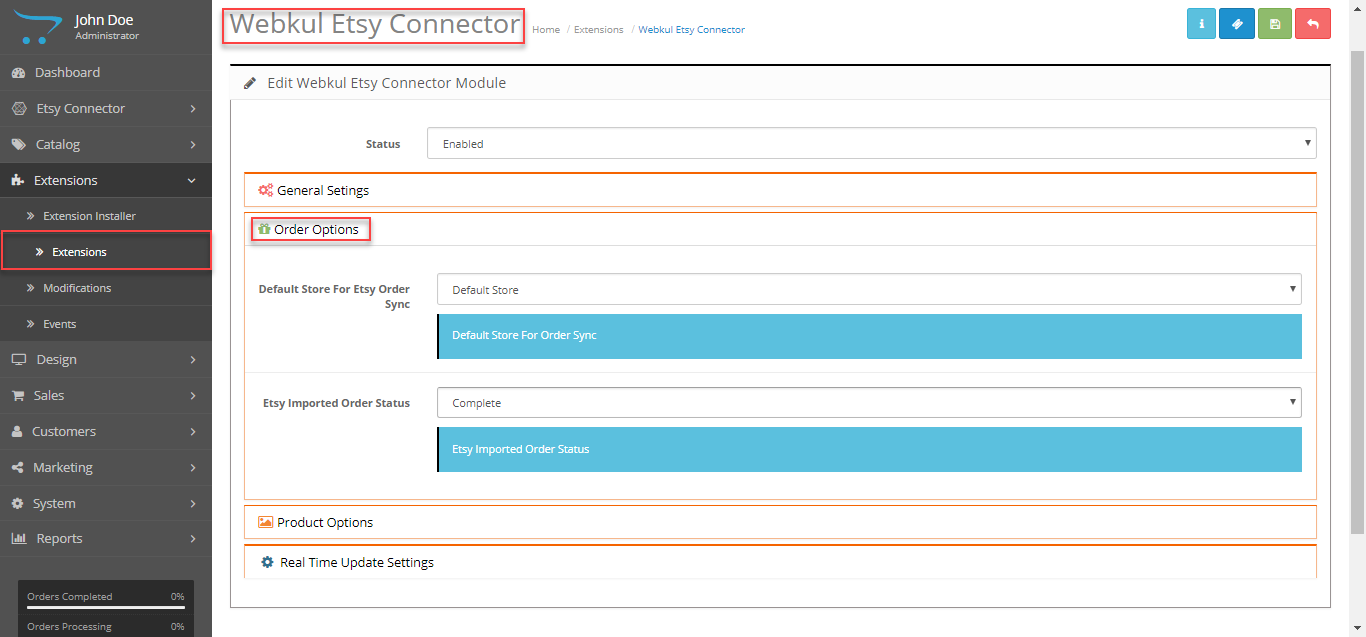 Here, the admin will – select the Default Store in Opencart for Syncing orders from Etsy. Also, the admin will select the imported order status of the Etsy imported orders.
 - Product Options

Here, the admin will select the default store where the products synced from Etsy to the OpenCart store will be assigned. The admin can also set up the Etsy Product Variation name as option name for the OpenCart store. - Real Time Update Settings

Here, the admin will –
1. Enable/disable the option to update the products on Etsy store that are imported from Etsy store to the OpenCart store.
2. Enable/disable the option to update the products on Etsy store that are exported from OpenCart store to the Etsy store.
- General Settings
-
Manage Etsy Accounts – Admin
Etsy Account List:
After the successful installation, the admin will add a new Etsy seller account details. To do so navigate to Etsy Connector>Account Manager. The page that comes up, here you will see all of the added Etsy seller accounts and can delete the accounts as well.

To add a new Etsy Seller account click the Add Etsy Account button After this, you will have to enter the Etsy Shop Name and click the Save Etsy Account button.
After this, now edit the added Etsy account as shown below in the snapshot.

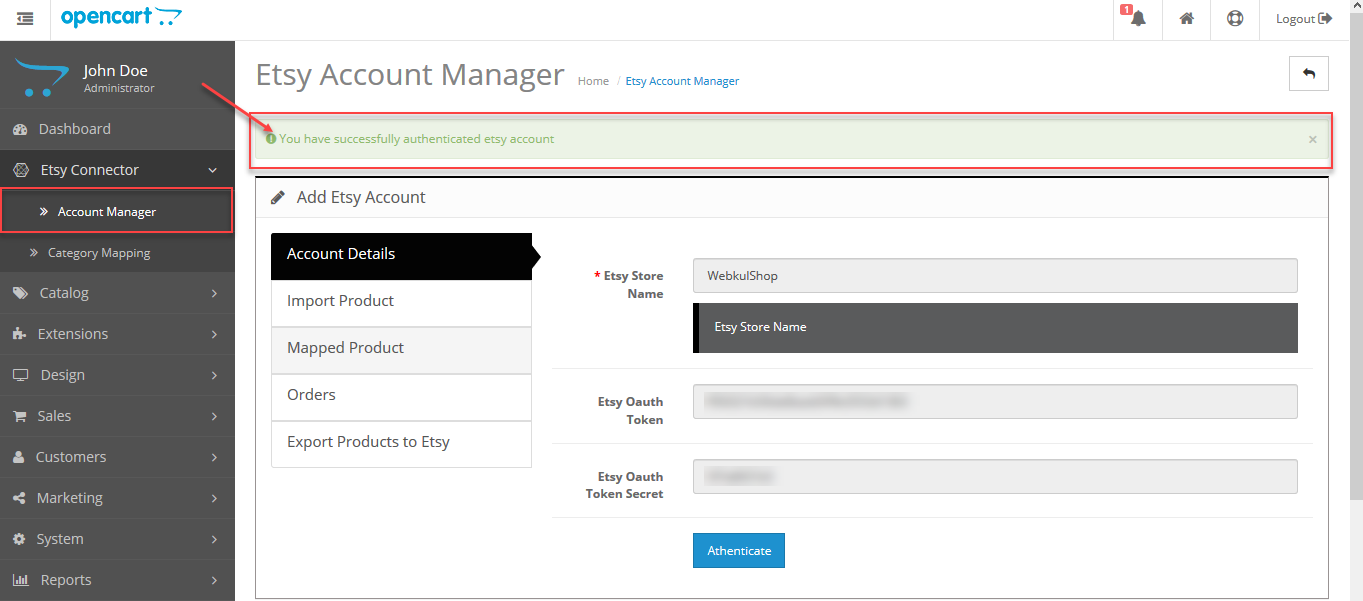
The admin needs to authenticate the account. To confirm, click on the Authenticate button. 
After authentication of the Etsy account, you can see a success message for the same as shown in the snapshot.
Map Categories
After entering the Etsy seller accounts details and authenticating them, the admin needs to map the correct Etsy category with OpenCart category. So that after importing the products from Etsy, they’ll be added to the correct OpenCart category. To map the categories navigate to Etsy Connector>Category Mapping and click on the Map New Category button on the top right corner.
This brings a section to map the OpenCart store categories with the Etsy categories. To map the store categories, select the OpenCart category and then accordingly select the Etsy category and subcategories to which you want to map the OpenCart category with. Lastly, click the Save Mapped Categories button to save the mapping. If you have already mapped this category then you will see a message for the same. 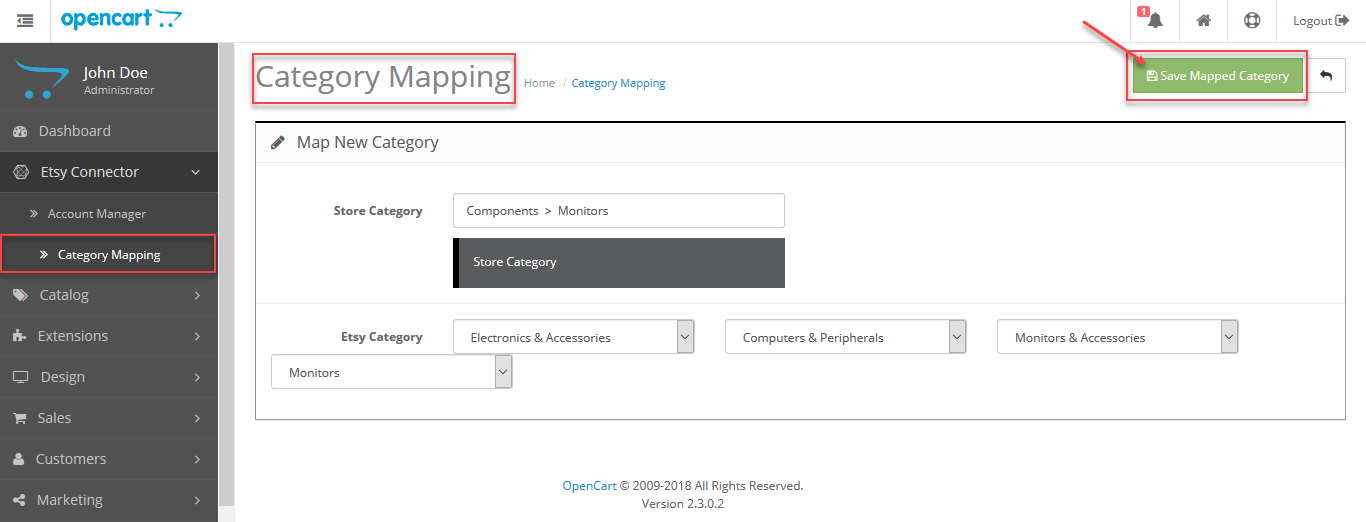
An Example: Category Mapping
Here, we have mapped the OpenCart category Software with the Etsy Sub-Category Computers.

Import Products
For importing the product listings from Etsy to OpenCart store, navigate to Etsy Connector>Account Manager and edit the account for whom you want to import the products. After this go to the Import Product menu options as shown in the snapshot below.

Here, the admin can import products in two ways –
- Import Multiple Products – Clicking this option allows importing multiple products.
- Import Product – Import a single product by entering the products Etsy Listing Id(also import multiple products together by separating their Etsy Listing Ids using a comma separator).
First, select the Etsy Listing Type that you want to import like active, expired, draft, etc. and then click the Import Multiple Products(for multiple products) or the Import Products button (for a single product import & can be used for multiple product imports as well) as per your requirement. After that, you can see the import taking place along with a message. To check the mapped products you can click on the See Mapped Product Section at the end of the page.
Clicking the See mapped Product Section will redirect you to the Mapped product section. Here, you will be able to see the Imported products from Etsy to OpenCart store.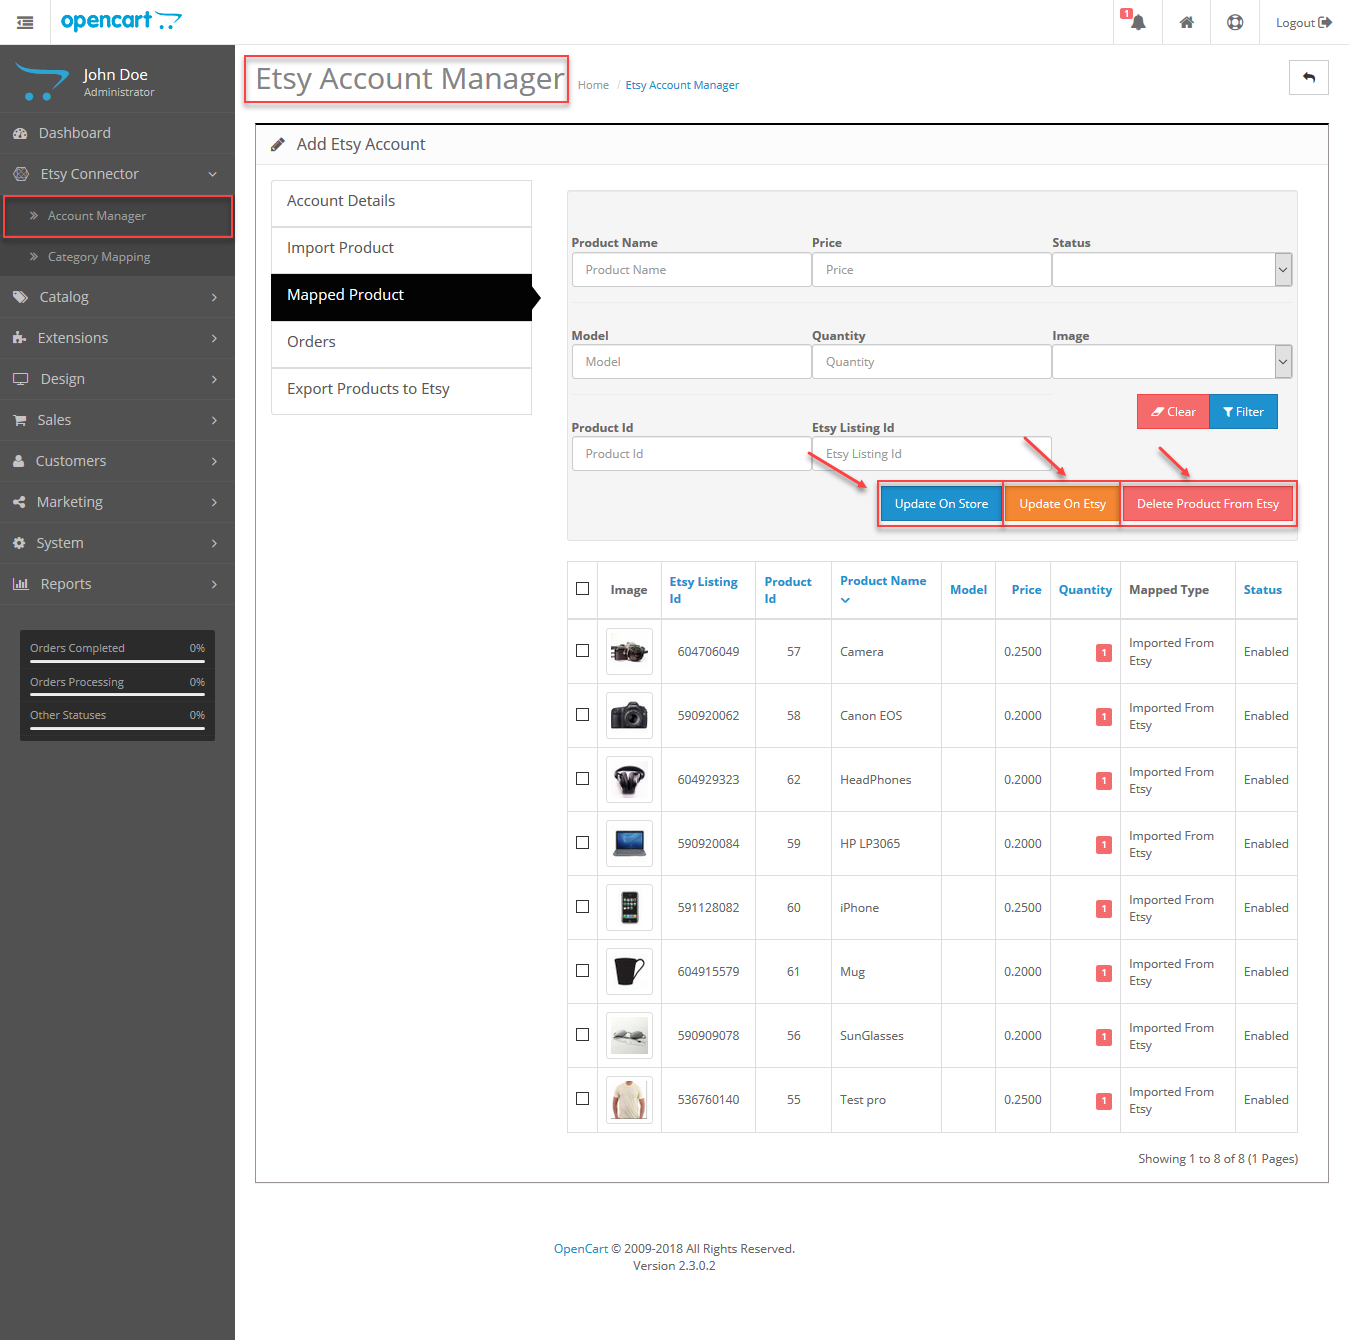
Here the admin can –
-
- Update on Store – Products imported from Etsy when get altered at Etsy you can make use of this button to updates the data for those products on your OpenCart store.
- Update on Etsy – Products exported from OpenCart to Etsy when get altered at OpenCart you can make use of this button to updates the data for those products in your Etsy store.
- Delete Products From Ebay – Select the products that you want to delete and click the Delete products from eBay button to remove the imported products from Etsy.
Exporting Orders From Etsy
Exporting Products to Etsy
To export the products just navigate to the Export Products to Etsy tab. Here, you can see select the default values for the product being exported to Etsy. These include –
- State
- Who Made
- When Made
- Is Supply
- Shipping Template
After selecting the values for the above points, select the product from the list that displays all the new products. Now, click the Export to Ebay button. This exports the selected product to Etsy.
That’s all for the OpenCart Etsy Connector. If you have queries or doubts get back to us at [email protected] or raise a ticket at webkul.uvdesk.com
Current Product Version - 3.1.1.1
Supported Framework Version - 2.x.x.x, 3.x.x.x





Be the first to comment.