INTRODUCTION
Efficient appointment management with Odoo Website Appointment Management System!
Customers nowadays don’t want to spend unnecessary time waiting for their turn in the queue. Hence, they book appointments in advance to save time. Moreover, the customers who book appointments in advance are more likely to visit the store, clinic, hospital, etc.
But, the question is how to manage these appointments?
Odoo Website Appointment Management System helps a customer to book an appointment on their own from the website. Further, they can make payment either before or after the appointment confirmation depending on the configuration set by the admin.
Moreover, the admin can view and track all appointment history, accept or reject an appointment, create appointees, appointment categories, and many more from the backend.
NOTE: Odoo Website Appointment Management System Module works in conjunction with the following module:
Odoo Appointment Management System
First, you must install the Odoo Website Appointment Management System module in your system for this module to work correctly.
FEATURES
- The module helps customers to book an appointment from the website.
- Further, the module enables the admin to add appointees, appointment groups, appointment slots, etc. from the backend.
- Customers can search for an appointee and check their time slots.
- Customers can book an appointment on the desired day as per the time slot.
- Admin can configure payment before or after an appointment from the Odoo backend.
- Moreover, the admin can approve or reject the appointment created by customers.
- General information on Appointee can be seen by customers while finding appointees on the website.
- The customer will get a mail reminder before the date of the appointment.
- In addition, customers will get an email notification on the appointment’s approval.
INSTALLATION
- Once you purchase the App from Webkul store, you will receive the link to download the zip file of the module.
- Extract the file on your system after the download finishes. You will be able to see a folder named- ‘wk_website_appointment.’
- Copy and paste this folder inside your Odoo Add-Ons path.
- Now, open the Odoo App and click on the Settings menu. Here, click on Activate the Developer Mode.
- Then, open the Apps menu and click on ‘Update Modules List.’
- In the search bar, remove all the filters and search ‘wk_website_appointment.’
- You will be able to see the module in the search result. Click on ‘Install’ to install it.
WORKFLOW CONFIGURATION
BACKEND CONFIGURATION
1. Firstly, log in to the Odoo backend and go to ‘Appointment> Configuration> Settings> Appointment Payment Mode for Customers’ and choose whether to take payment before or after the appointment configuration.

2. Next, go to ‘Configuration> Appointee> Create’ and enter every detail to create an appointee.

3. After that, open ‘Configuration> Appointment Groups> Create’ and enter the details. And add group members and click the ‘Save’ button.

4. Once done, go to ‘Configuration> Appointment Slot’ and create an appointment slot by filling in the details such as name, day, start and end time, etc.

5. In the ‘Configuration’ tab, go to ’Appointment Source’ and create a source according to the requirement.

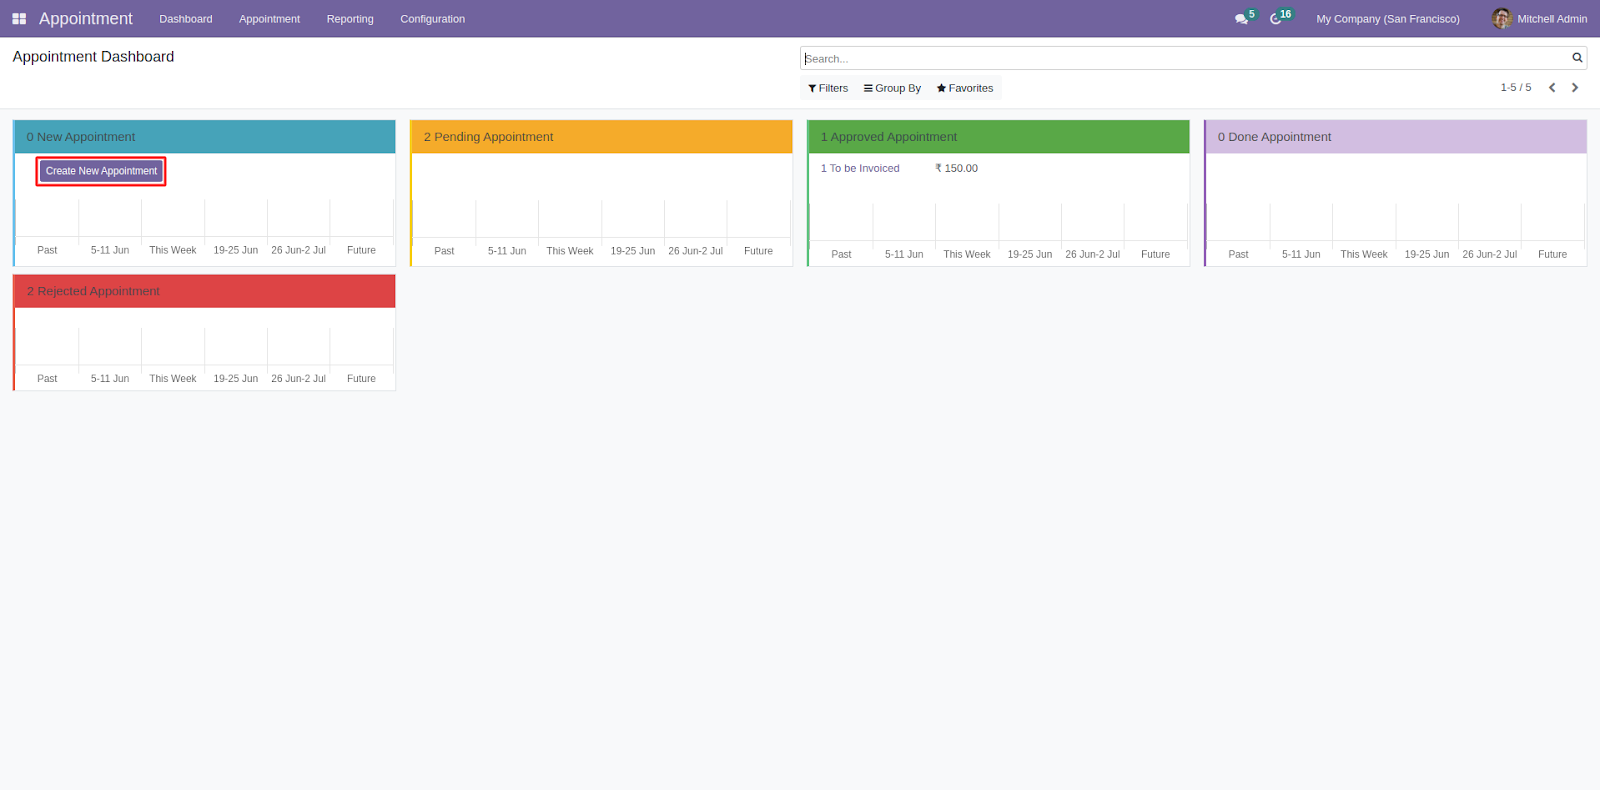
6. In the Odoo backend, go to ‘Dashboard’ and click the ‘Create New Appointment’ button.
7. On the new page, fill in the details and choose ‘Appointee, Appointment Date, and Time slot’ and click the ‘Save’ Button.

8. After that, go to ‘Appointment> New Appointment.’ Here, you can see the calendar with all the appointments. Also, by clicking any particular appointment you can view its details.

9. Next, go to the ‘All Appointment’ section located under ‘Appointment.’ Here, you can view all the appointment request and their status.

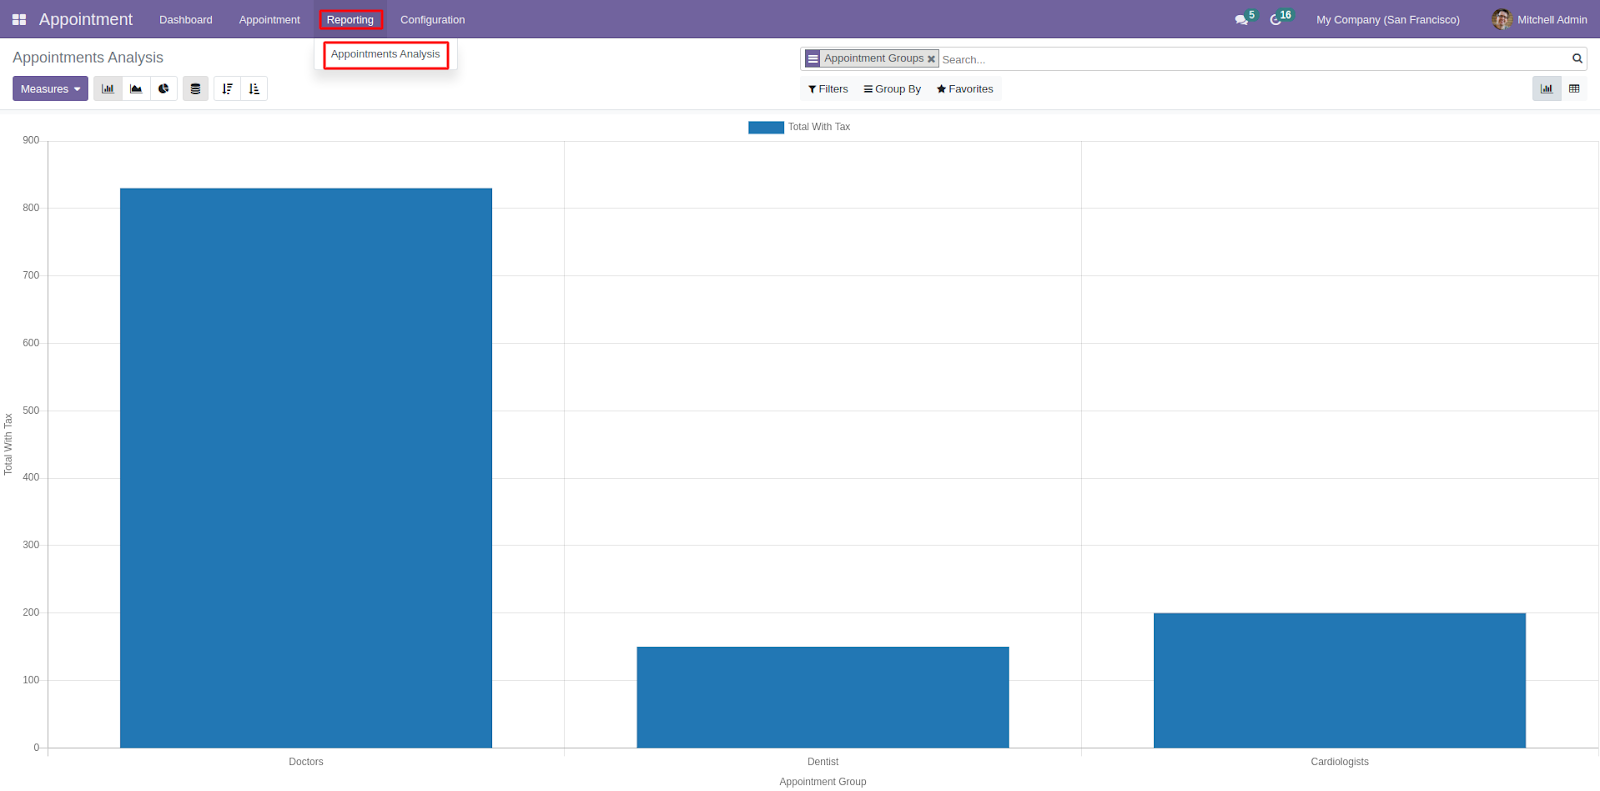
10. In the ‘Reporting> Appointment Analysis’ section, you can see the statistics of all the appointments to date.
BOOKING AN APPOINTMENT AND CONFIRMING OR REJECTING IT
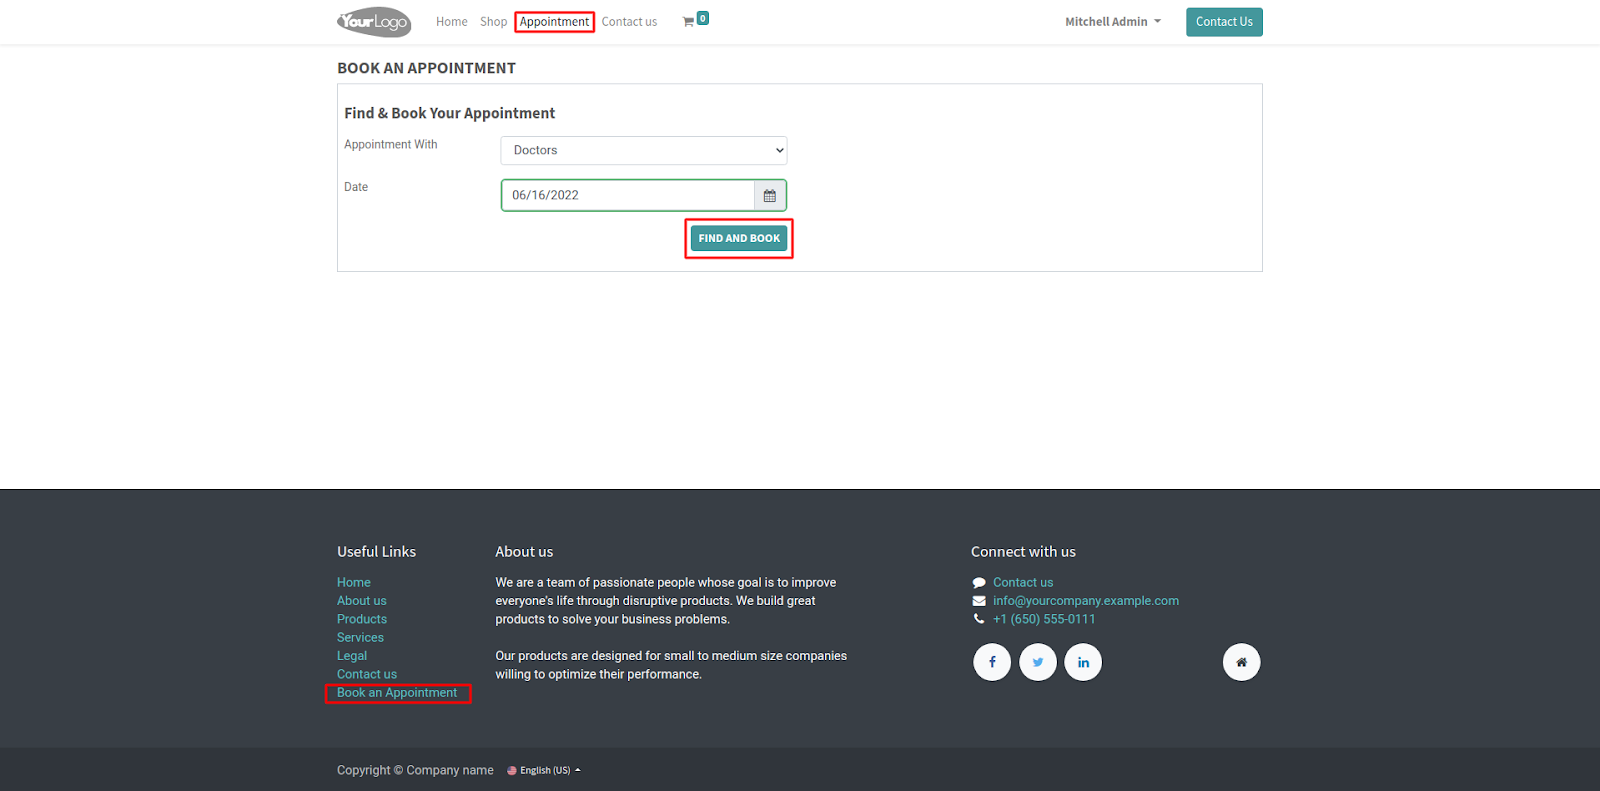
11. Now, open the Odoo website and go to ‘Appointment’ (Can locate from the top menu bar and footer section). Choose the option from both; ‘Appointment With and Date’ and click ‘Find And Book.’
12. After that, you can see the ‘Appointee Listing’ on the page, then click the ‘Book Now’ button.

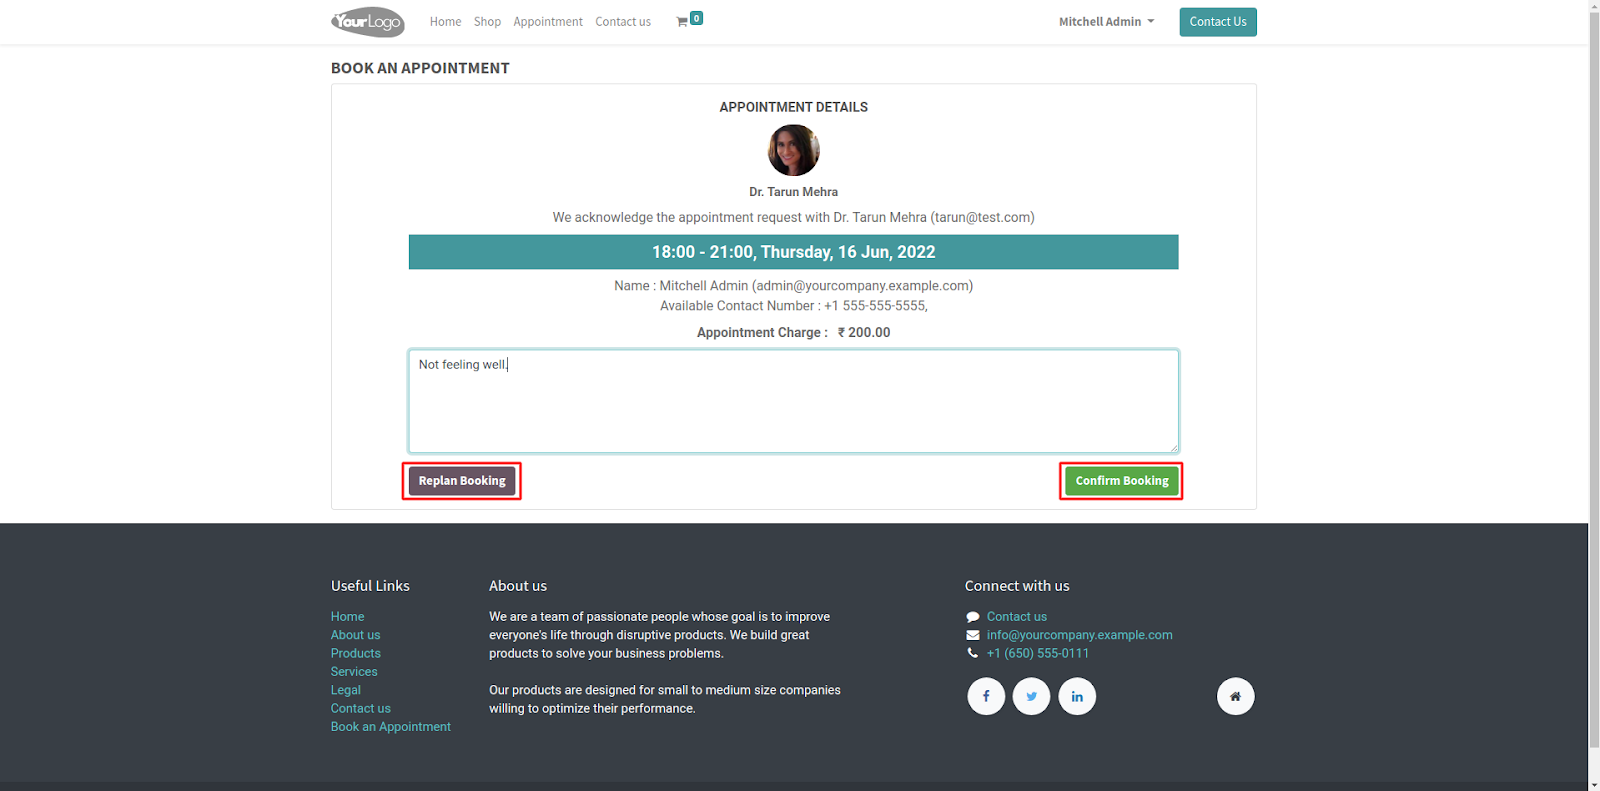
13. On the next page, mention the reason and click ‘Confirm Booking.’ Also, you can go to the previous page by clicking ‘Replan Booking.’
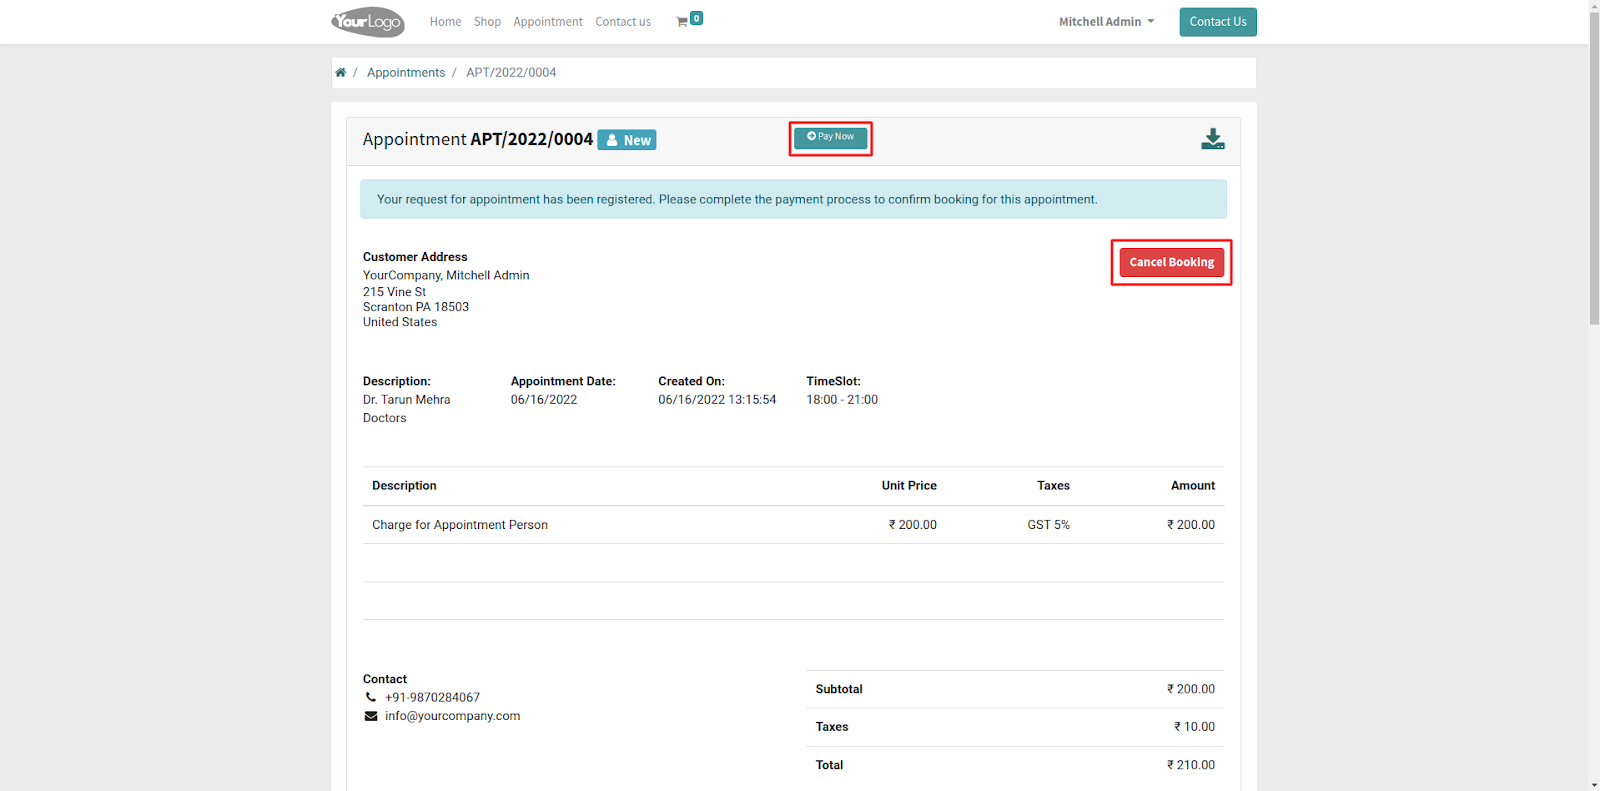
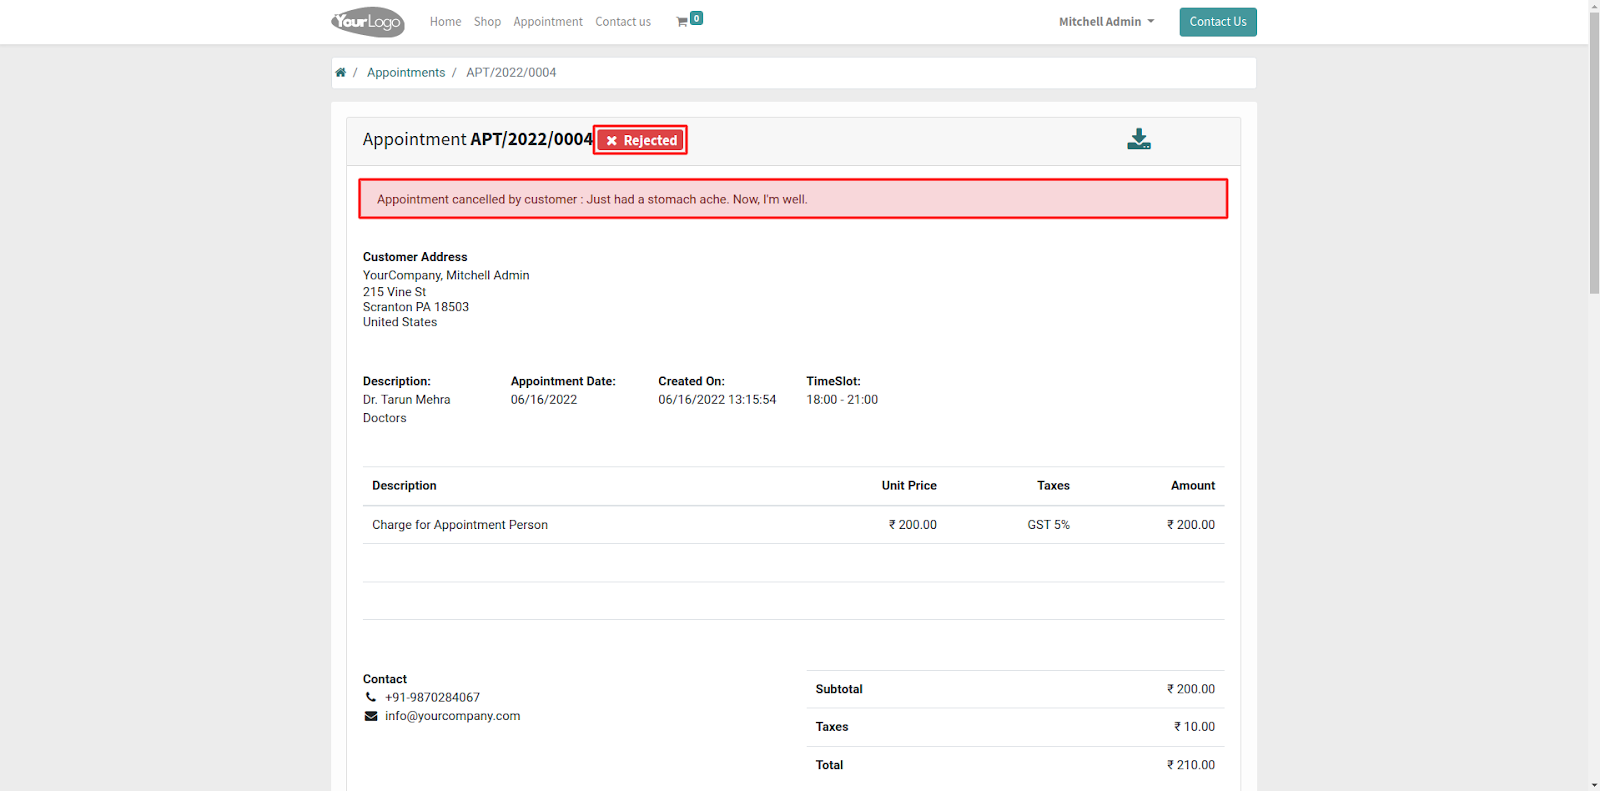
14. On clicking ‘Confirm Booking,’ you can view the appointment slip. From here, click the ‘Cancel Booking’ button, state the reason for canceling and click ‘Cancel Now.’

15. After cancellation, the status changes to ‘Rejected.’ Moreover, you can view the reason for rejection on top of the invoice.
16. On clicking the ‘Pay Now’ button, the payment will be done, and the status will change from ‘New to Pending.’


APPROVAL AND REJECTION OF APPOINTMENT
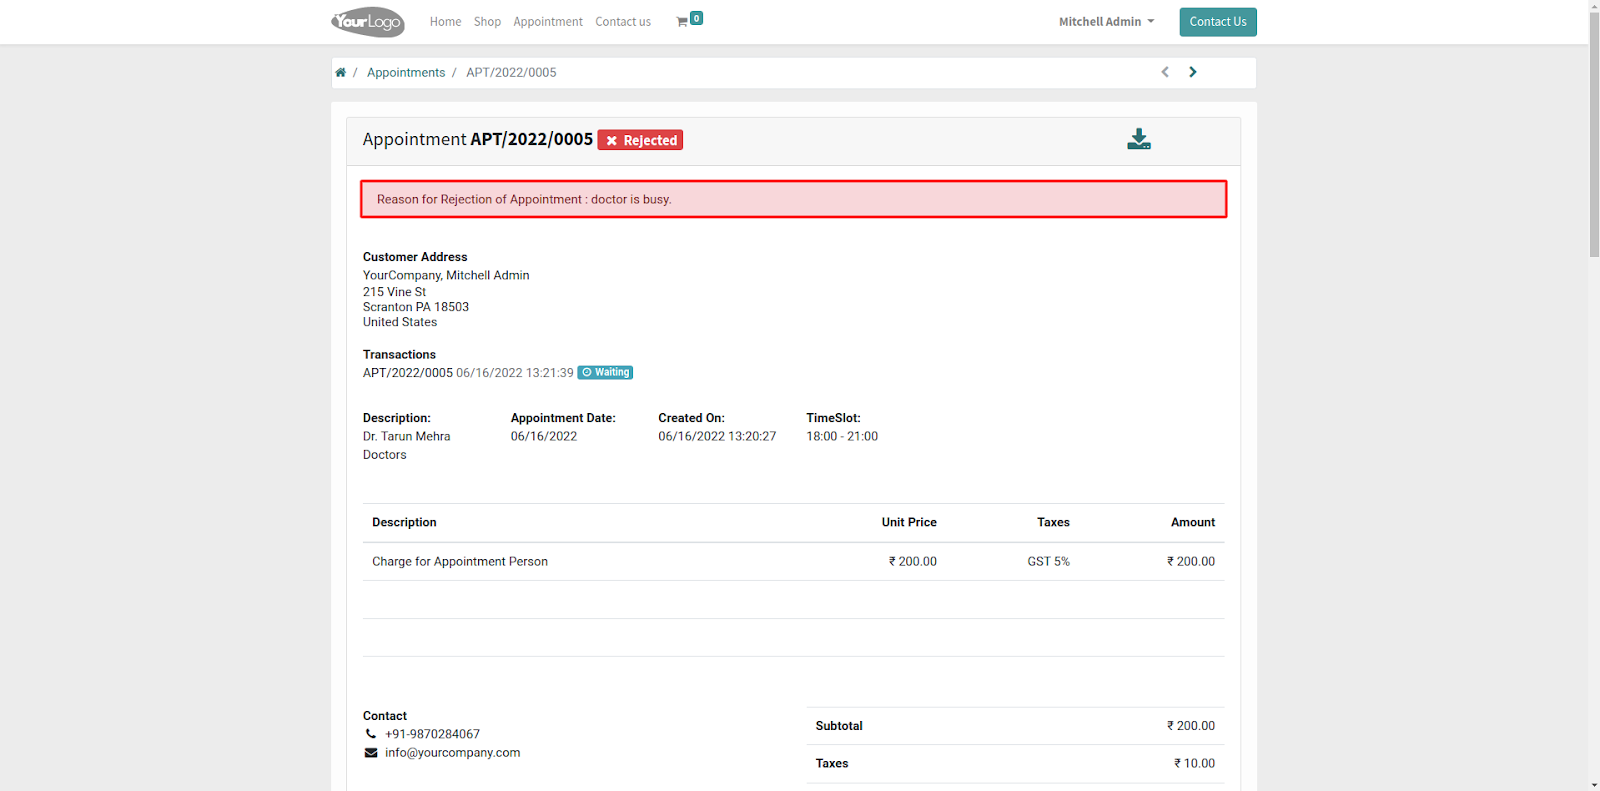
17. In the backend, open the ‘All Appointment> Pending list’ you can ‘Approve or Reject’ the appointment.

18. On clicking the ‘Reject’ button, a popup will appear asking the reason for rejection. Once you enter the reason, the status changes on the website.

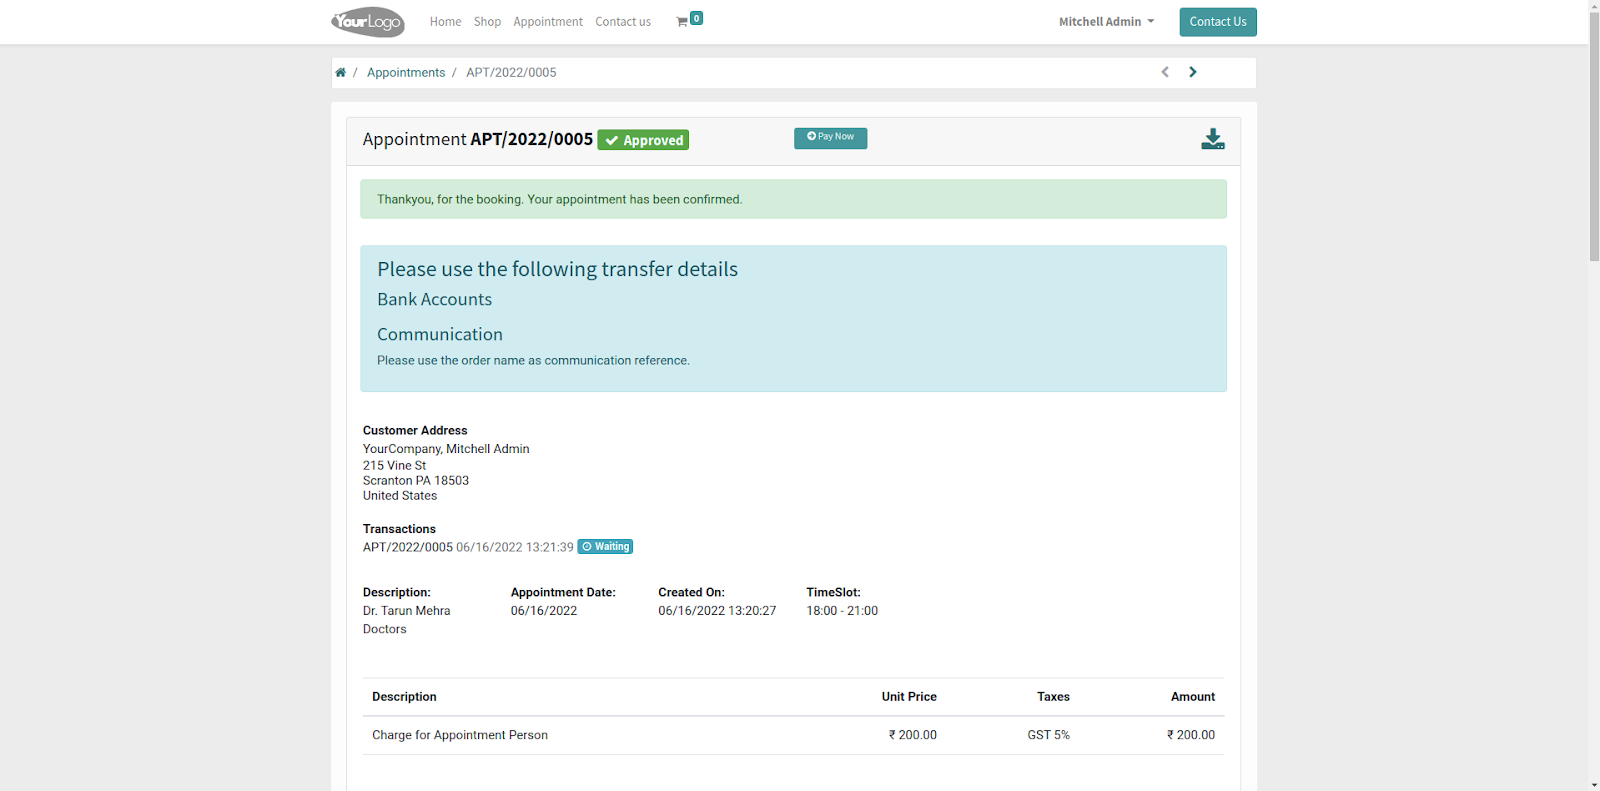
19. In case the appointment request is accepted. Its status will change to approved on the website. You can check the status on the website by going to ‘My Account> Appointments.’

VIEWING ALL THE APPOINTMENTS OF A PARTICULAR APPOINTEE
20. Moreover, the admin can view the appointment of a particular appointee from the backend. Go to ‘Configuration> Appointee’ and open a particular appointee profile, and under the ‘All Appointment’ tab, users can view all the appointments with their status.

OTHER ODOO MODULES
- Odoo GST e-Invoicing System
- Odoo Zoom Meeting Integration
- Website Micropayment Gateway Integration
- Odoo Website Product Files Upload
- Odoo Quickbooks Timesheet Synchronization
- Website Variants in Table
- Odoo Quickbook Reports
- Odoo Purchase Dashboard
- Advance Signup For Multi Pricelist
- Odoo Partner Map Integration
- Odoo Website Cetelem Payment Acquirer
- Stock Picking & Delivery XLS Reports
NEED HELP?
Hope you find the guide helpful! Please feel free to share your feedback in the comments below.
If you still have any issues/queries regarding the module, please raise a ticket at https://webkul.uvdesk.com/en/customer/create-ticket/.
Also, please explore our Odoo development services & an extensive range of quality Odoo Apps.
For any doubt, contact us at [email protected].
Thanks for paying attention!!
Current Product Version - 1.0.0
Supported Framework Version - V15, V14, V13, V12, V11

Be the first to comment.