Odoo Multichannel eBay Connector: Optimize eBay-Odoo Workflow Integration
INTRODUCTION
Odoo is a complete business solution that lets you manage all backend operations in a centralized way. eBay has expanded to include some of the strongest brands in the world.
It offers great exposure to the sellers and expands their brand value. Isn’t it perfect to use eBay for the marketplace and Odoo to manage all its operations?
But, how to connect eBay store(s) with Odoo?
Odoo Multichannel eBay Connector offers you the perfect solution to connect Odoo to eBay. If you are also managing one or more eBay seller accounts then Odoo Multichannel eBay Connector can help you in the best way.
Prerequisites For Using The Odoo Multichannel eBay Connector
Odoo Multichannel Ebay Connector is a dependent module on the Odoo Multi-Channel Sale Module, which is the framework module to provide the structure to integrate Ebay with Odoo. Install the base module first for the Odoo Multichannel Ebay Connector to work properly.
FEATURES
Here is a concise list of the features. Visit the Store Page to learn the detailed features of Odoo Multichannel Ebay Connector
- Import eBay Products, Orders, Categories, Partners, and Delivery Methods in Odoo
- Option to import data manually or via the cron scheduler
- Product details (like category, attributes, and attribute values) are imported along with the products.
- Customer details (like addresses) are imported along with the Customers
- Manually export selected or bulk products and categories From Odoo to eBay
- Order State mapping to map the orders states of eBay with Odoo. Orders are imported based on the set mapping.
- Enhanced Dynamic Dashboard to track the data from one place.
Looking to implement ERP in your system? Check out Odoo Implementation! It’s your go-to solution for seamless integration and enhanced efficiency.
INSTALLATION
1) After purchasing the Odoo eBay connector, you will get a link at your registered email Id to download the module.
2) Extract the file on your system after the download finishes. You will be able to see a folder named- ‘ebay_odoo_bridge’.
3) Copy and paste this folder inside your Odoo Add-Ons path.
4) Now, open the Odoo App and click on the Settings menu. Here, click on Activate the Developer Mode.
5) Then, open on Apps menu and click on ‘Update Modules List’.
6) In the search bar, remove all the filters and search ‘ebay_odoo_bridge’.
7) You will be able to see the module in the search result. Click on ‘Install’ to install it.
Explore and check out our Odoo development services and a plethora of quality Odoo Apps.
WORKFLOW
Setting Up eBay Connector:
1. Log in to your Odoo App and Navigate to the Odoo Multichannel which is available on the left side of the module.
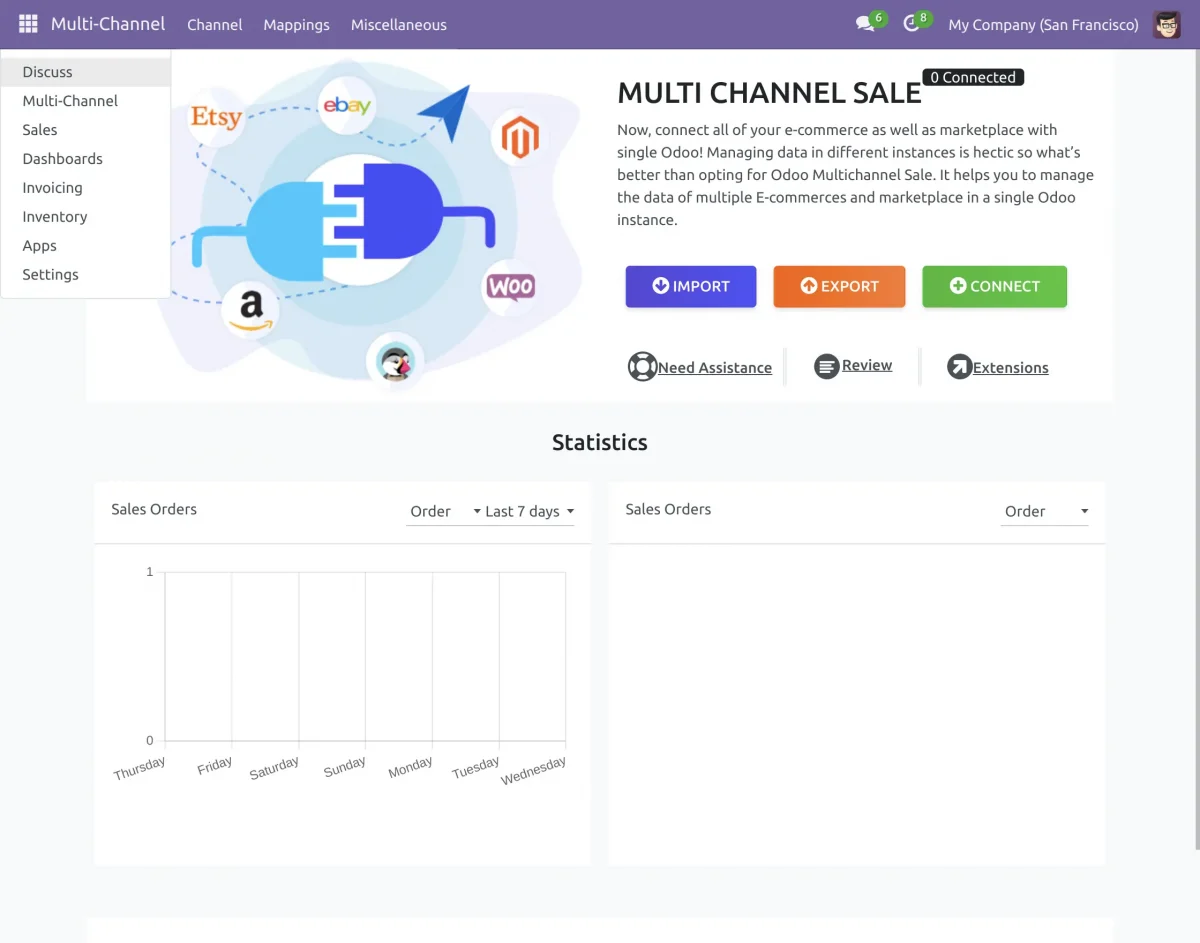
2. Navigate to the Channel menu and then click on Instances. Under the channel menu, You will find the option to create a connection.

3. To create a new instance click on the “New“ button at the top left corner. If you already have created the instance then you can your instance.
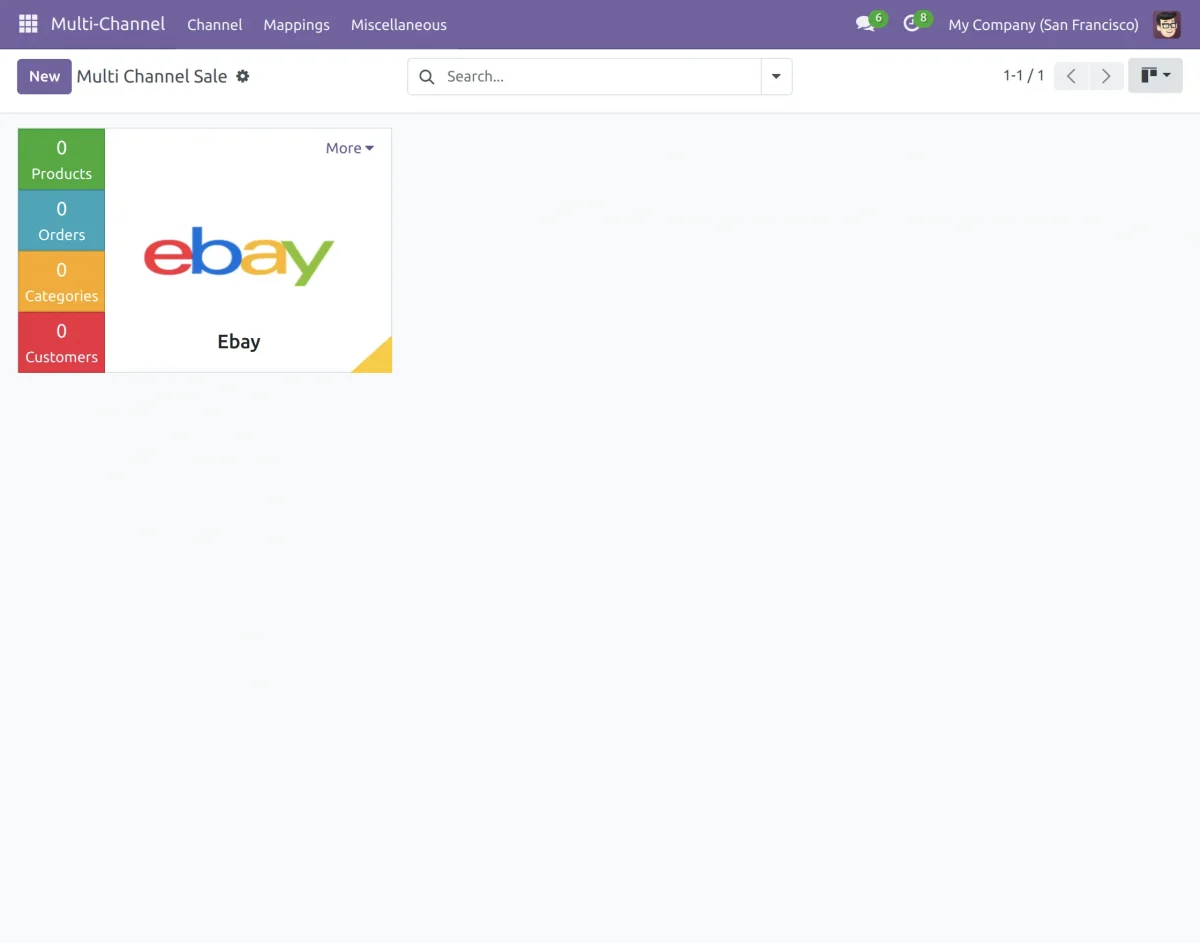
4. In the channel name menu, enter the channel name and then you need to select the Channel type as eBay.

Generate eBay API Credential
5. To generate eBay API credentials and connect your Odoo instance to your eBay store, follow these steps:
a. Login to your eBay Developer portal. If you do not have an account create a new one using your eBay creds.
b. Create a new application under the “My Applications” menu.
c. You will get API credentials like App ID, Dev ID, and Cert ID for both Sandbox and Production environments.
d. You can get eBay Seller ID by navigating to Account Settings >> Seller Dashboard.
Generate eBay User Tokens:
6. To get the User Tokens follow the below steps:
a. Navigate to your Application Keys page on the eBay Developer Portal.
b. Click the User Tokens link next to the App ID value for Production or Sandbox environments.
c. You have to choose the OAuth option and sign in.
d. Then you have to grant application access and then click to agree.
e. The User access token will be provided for API requests.
Configuration at Odoo end
7. Enter the credential details obtained from your eBay Developer Account. Select your eBay Site from the drop-down list. If you are not sure what is your eBay Site you can visit the eBay Developer Programm website.

8. Now, Click ‘Test Connection’. your Odoo and eBay stores will be connected. When your connection is established it will show a green icon as Connected instead of draft on the right side.
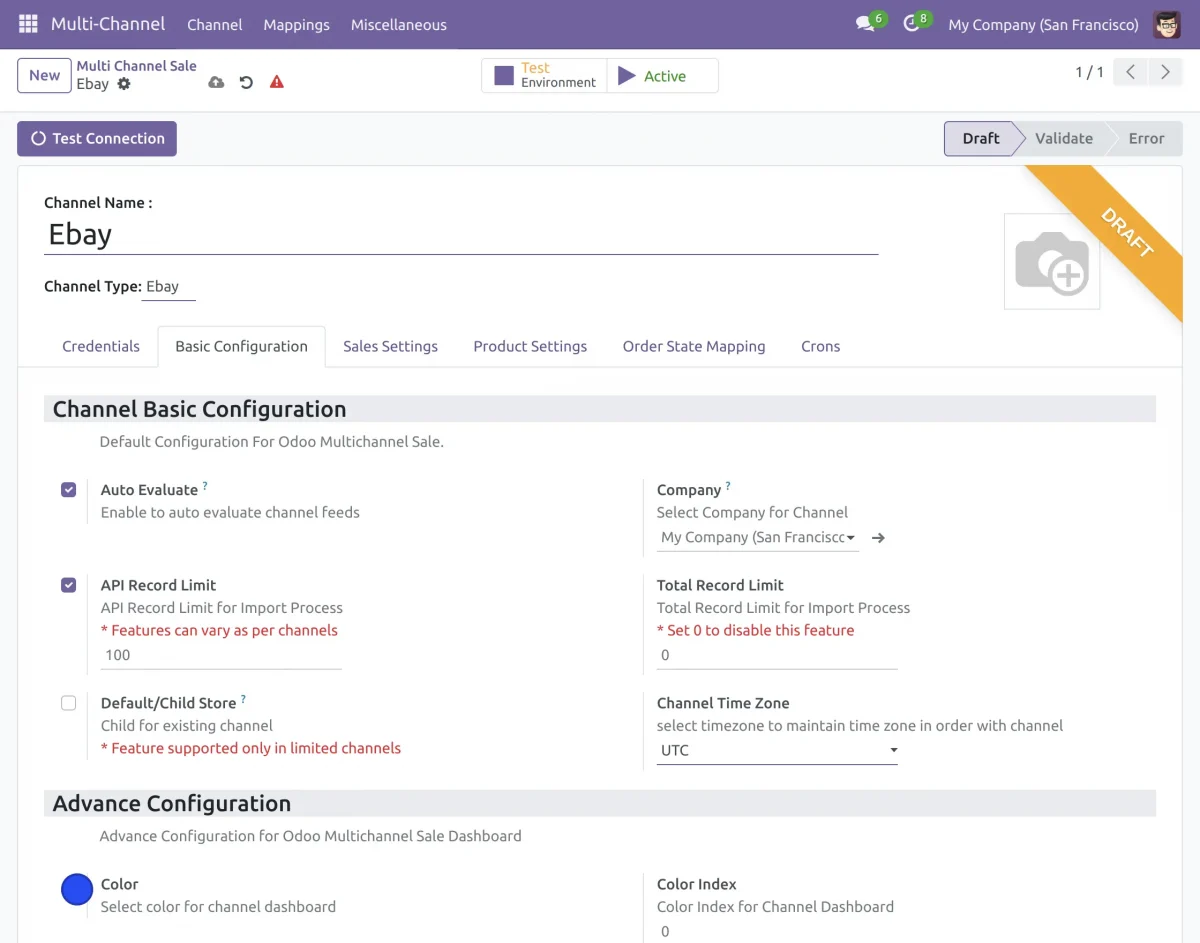
Basic Configuration Settings
9. Go to the “Basic Configuration” tab and configure the eBay connection as per your requirements.

Auto Evaluate: Enabling this feature will auto-evaluate the feed just after the import.
API Record Limit: After setting the limit, the API will hit that particular number only (recommended to set 100 by default).
Default/Child Store: Select the default store/Parent store from where the order and partner will imported for this child store.
Total Record Limit: Enabling this feature will limit the record for the import process.
Channel Time Zone: select the timezone to maintain the time zone in order with the channel.
Sales Settings
10. Go to the “Sales Settings” navigate to the “Channel Sales Order” tab and configure the Sales order-related configuration for exporting your sales order from the drop-down list.
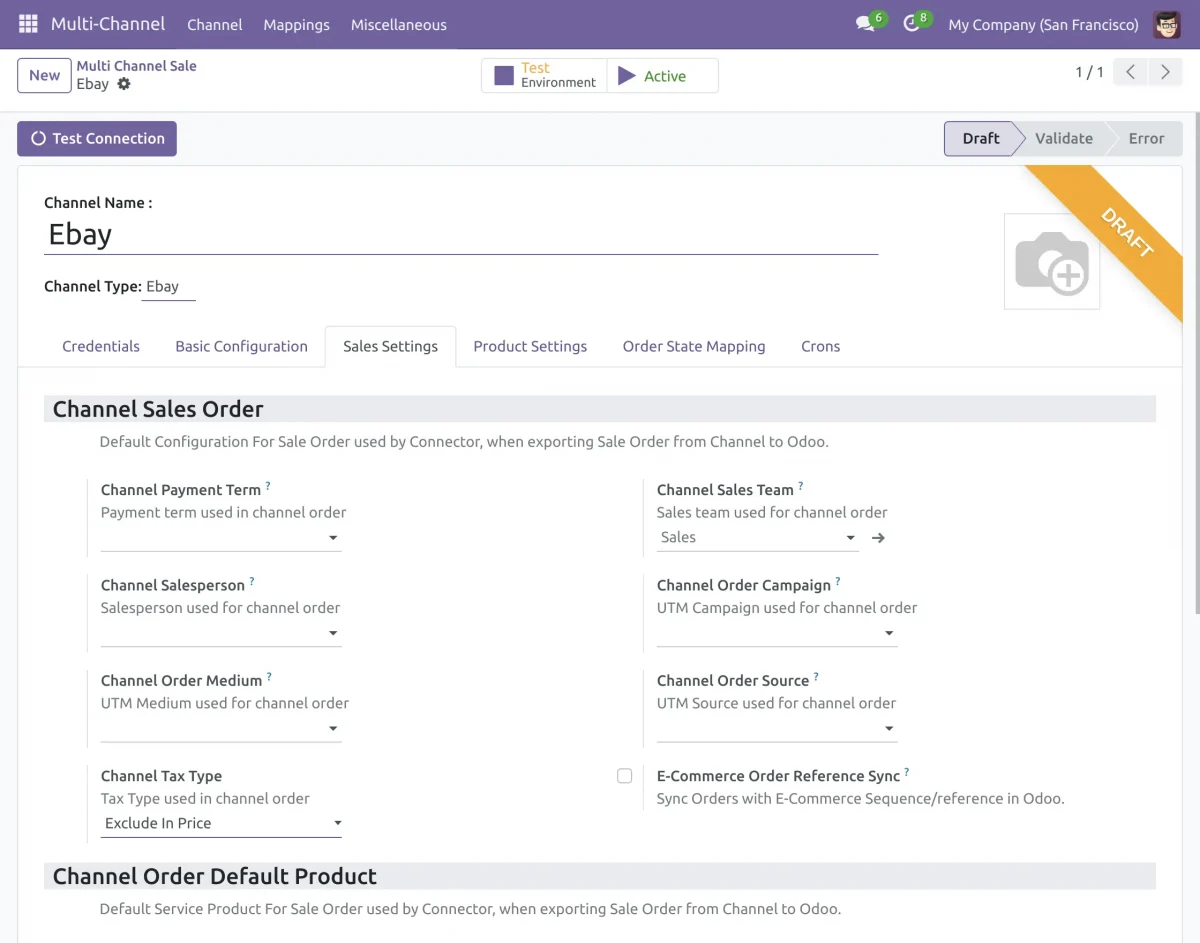
E-Commerce Order Reference Sync: Enabling this feature will create an order with an e-commerce sequence/reference at the Odoo end.
11. Go to the “Sales Settings” and navigate to the “Channel Order Default Product” tab. Configure the Default Service Product For Sale Order.
The connector will export the default Discount and Shipping product when exporting a sale order.
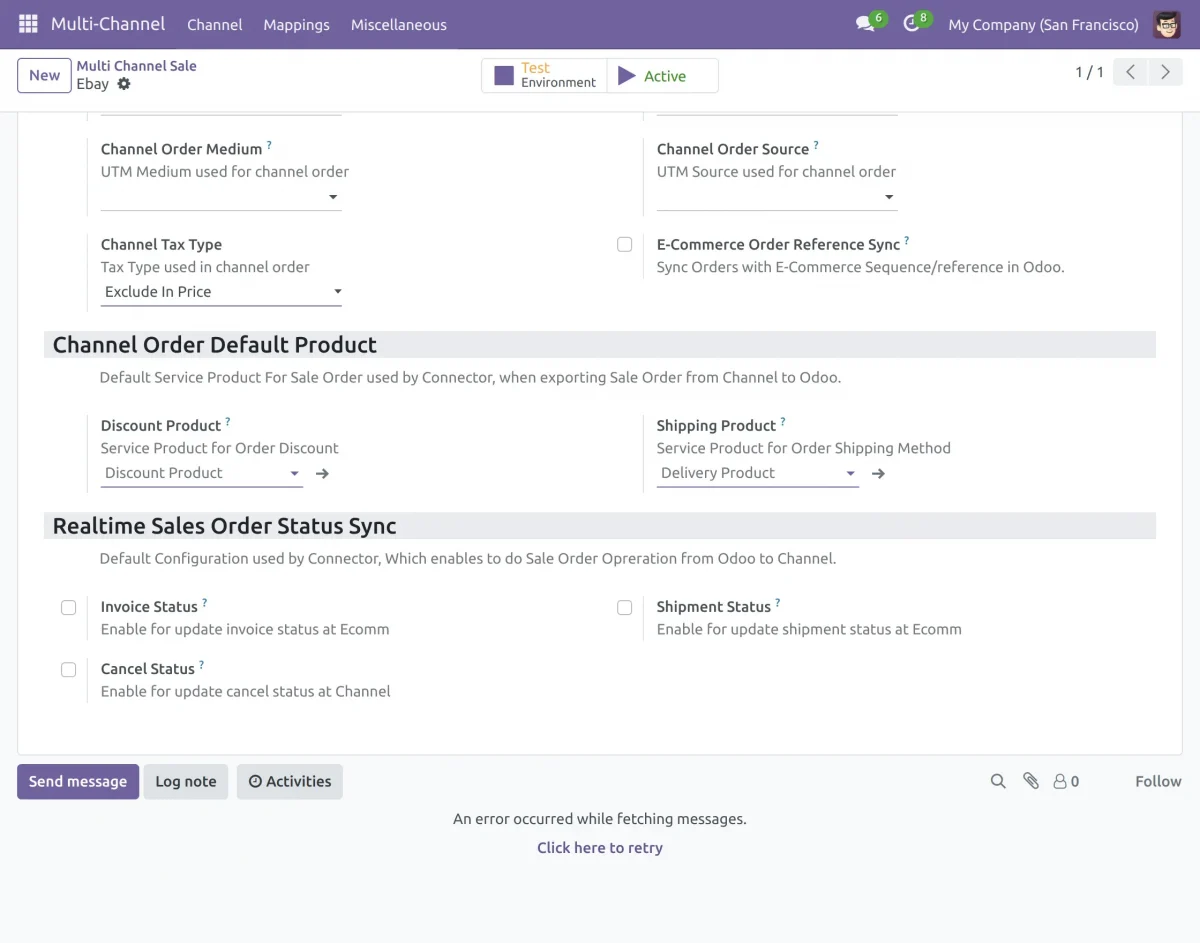
12. Go to the “Sales Settings” and navigate to the “Realtime Sales order status sync tab.
Default Configuration used by Connector, Which enables to do Sale Order Operation from Odoo to Channel.
Product Settings
13. Go to the “Product Settings” and navigate to “Default Settings” for default product-related configurations.

Category: Select the default category for each imported product on Odoo.
Pricelist: You can set the default pricelist for the price of eBay products.
SKU Pattern: You can set the sequence SKU for the eBay products that do not have SKU.
Language: Select the language that is used in the marketplace.
Channel Category: You can add the default Category for product export on Channel.
14. Go to the “Product Settings” and navigate to “Stocks Settings” for default stock-related configurations.
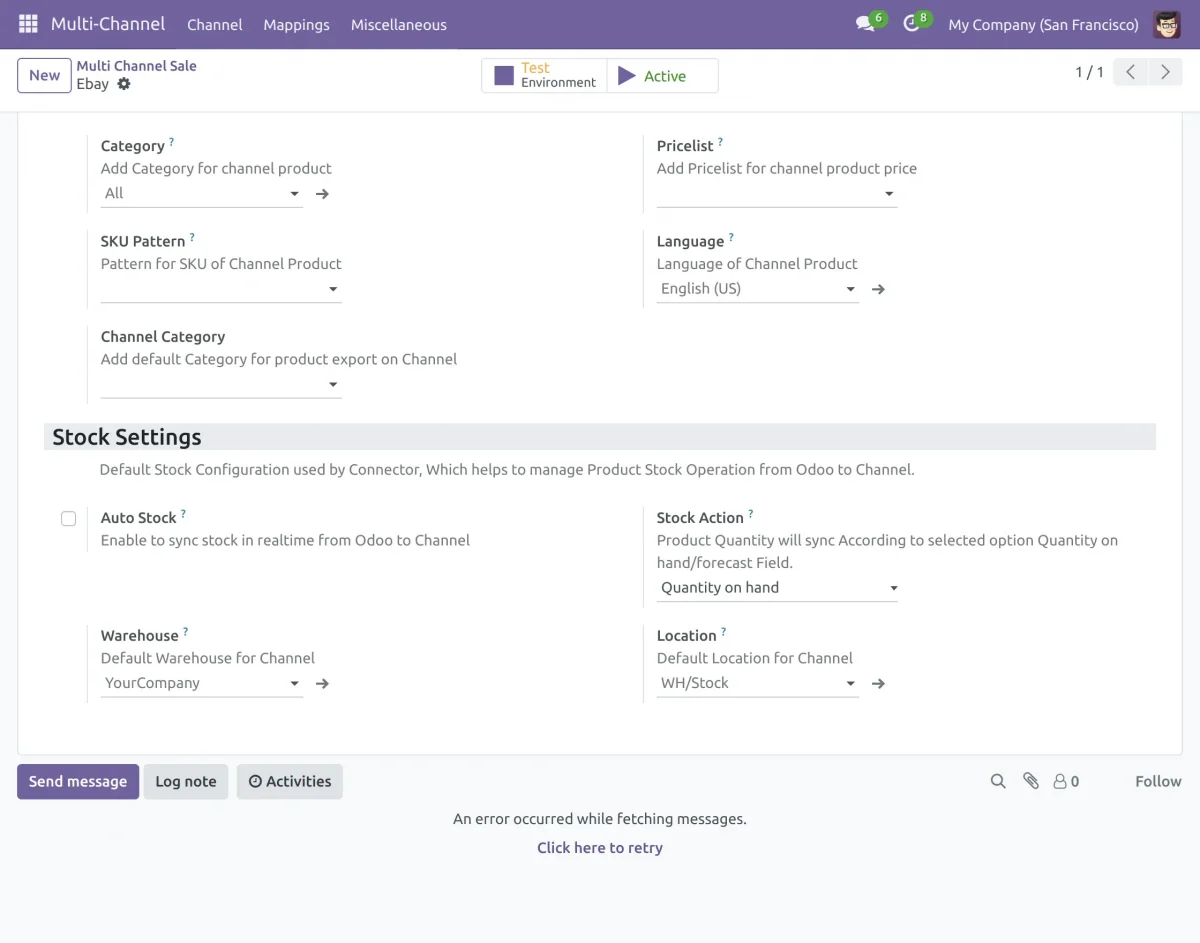
Auto Stock: Enabling this feature will automatically synchronize stocks from Odoo to your eBay store in real-time.
Stock action: You can manage your stock based on Quantity on hand or forecast quantity.
Warehouse: Select the default warehouse for the channel. Inventory of products will be managed in this warehouse.
Locations: Select the default location for the channel. The stock of all the imported products will be managed in this default location.
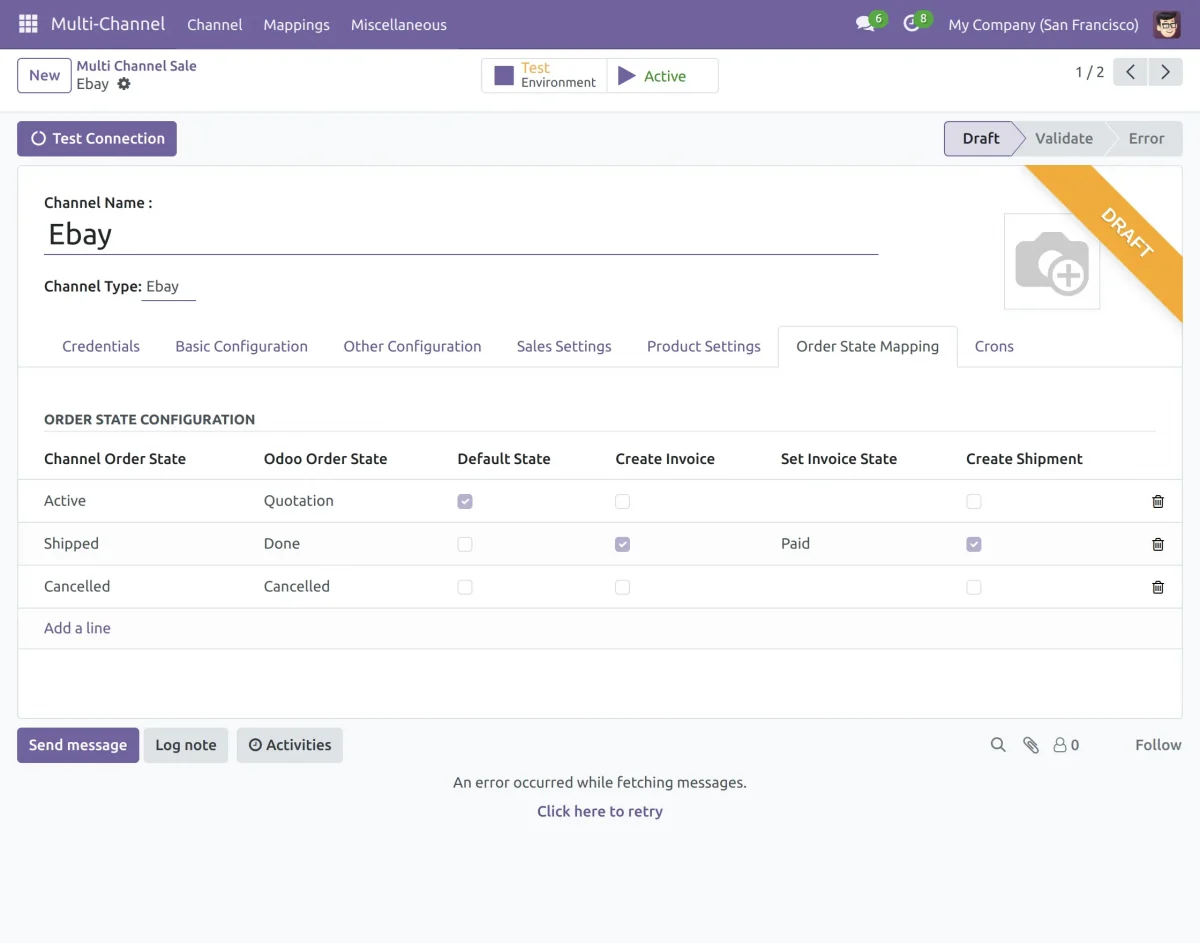
Order State Mapping Settings
15. Go to “Order State Mapping” and create a channel order state for order state configuration.
Cron Settings
16. Go to the “Cron” and navigate to “Channel Cron Configuration” to set up cron for orders, products, customers, and categories.
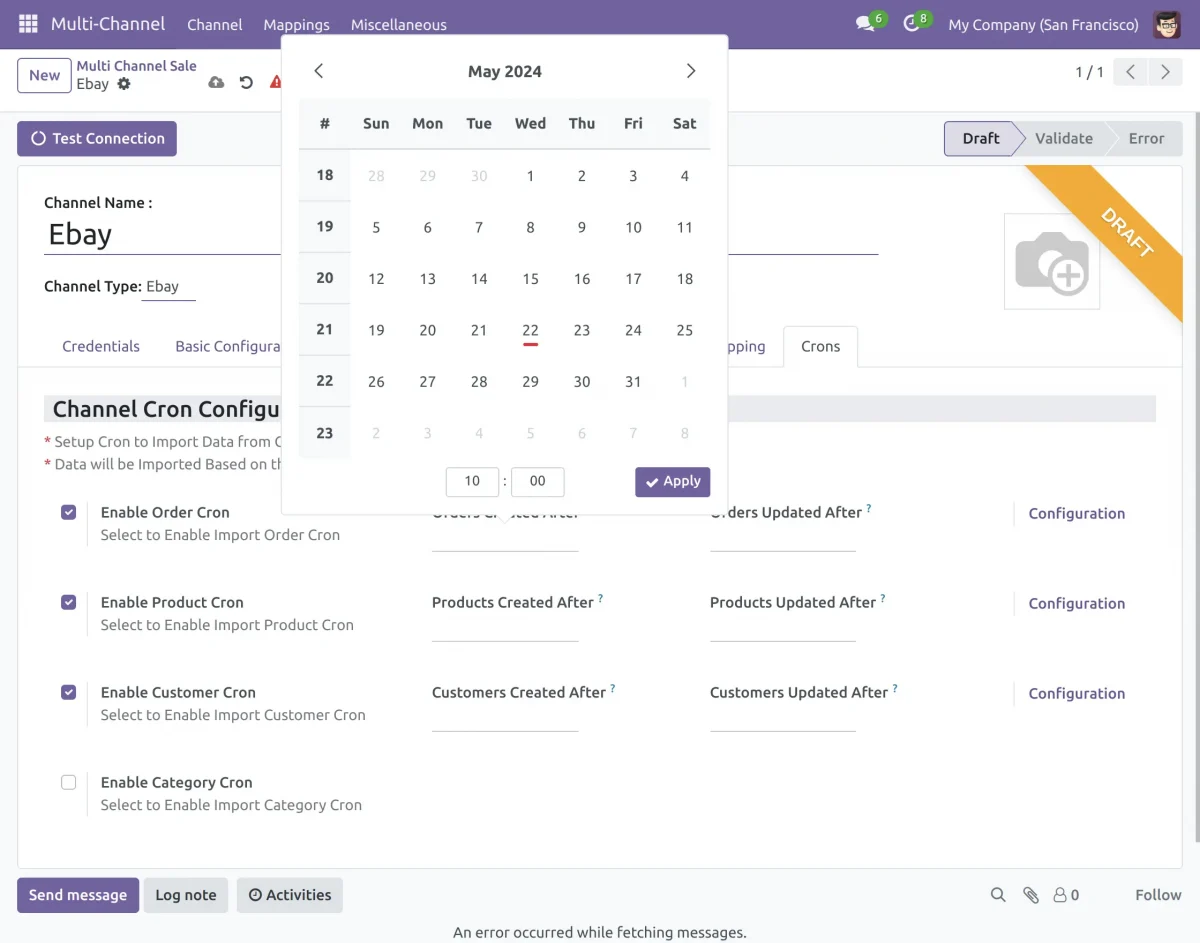
You can import products, categories, customers, orders, and order status to the Odoo via the Cron scheduler in Odoo. Data will be Imported Based on the Created/Updated after a defined date.
Test Connection Again
17. Now, click on the save button which is above the Test Connection Button ( Top left) to save your configuration. You can also Test Connection again.
Are you looking for any other connector ?? Explore our Odoo Multichannel Shopify Connector that will Integrate your Shopify store with Odoo.
Import functions
18. Navigate to Multichannel and access the eBay connector dashboard. Here, you can analyze data using line graphs, donut charts, and clickable data cards, and review synchronization history.
19. Next, click on the “Import” button to import the data from eBay. You will get a pop-up window of “Import Wizard”.
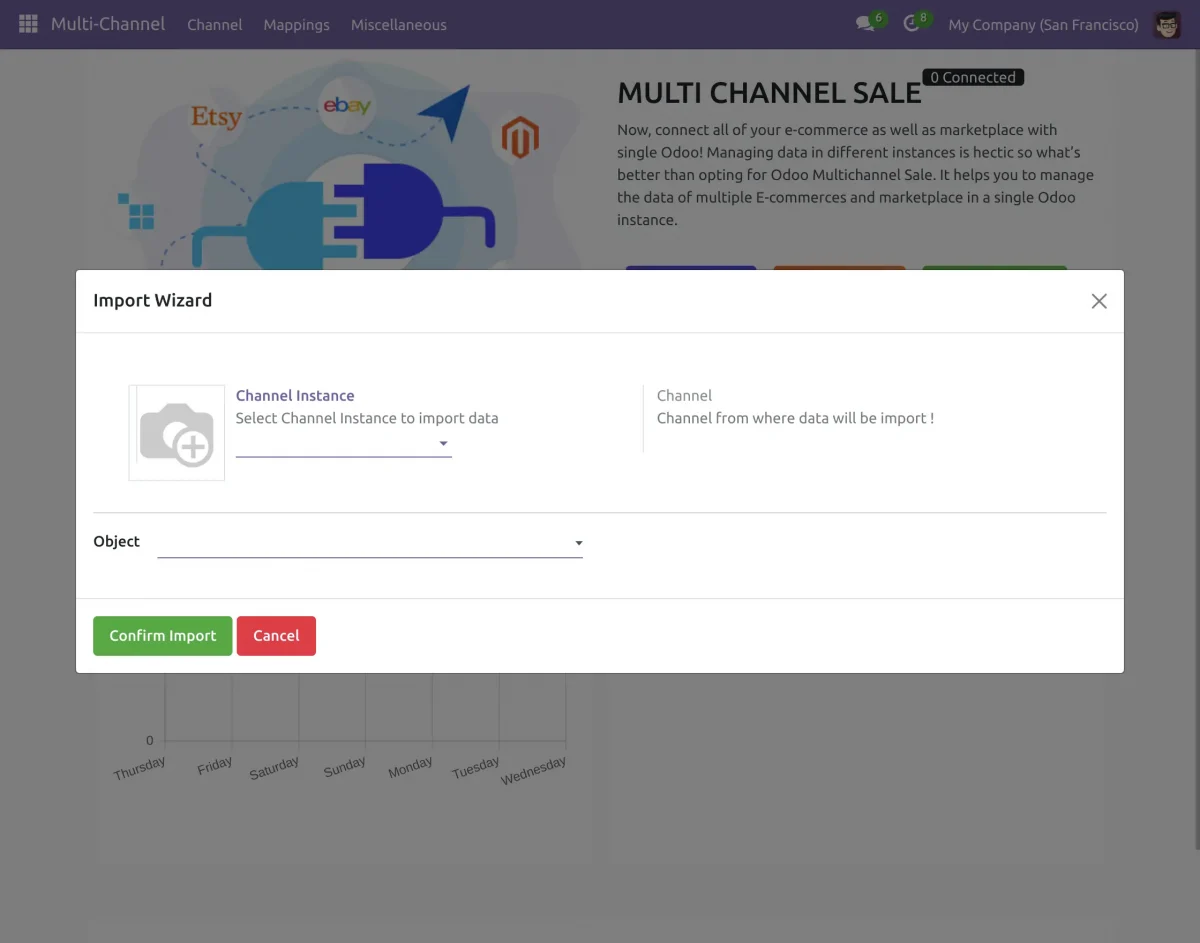
20. Select Channel Instance from the dropdown menu and then select the object you want to import from the drop-down list.
You can import these items (Product, Order, Category, Customer, Shipping Method, and Business Policy) from your eBay store to your Odoo.
21. Then click “confirm Import” to import the selected object to your Odoo.
Export functions
22. To export data from Odoo to your eBay store, navigate to Multichannel and click on the “Export” button to open the “Export Wizard” pop-up window.

23. Fill in the channel ID from the dropdown list, then select the operation like export or update.
To export your data select export and if you want to update your exported data select update.
24. Then select the Object you want to export. The Objects that you can select are Category and product templates.
25. Then click “Confirm Export” to export your object.
Need Help?
Hope you find the guide helpful! Please feel free to share your feedback in the comments below.
However, if you still have any issues/queries regarding the module then please raise a ticket at UV Desk.
For any doubt contact us at [email protected].
Thanks for paying attention!!
🙂 😌
Current Product Version - 4.5.5
Supported Framework Version - Odoo V17, V16 & V15.

how to install eBaySDK?
Does this process eBay message?
Thanks