Introduction
If anyone wants to search for any product GOOGLE is the first thing that comes to mind!!
You can increase the traffic on your Odoo website using Google Shop. Odoo Google Shopping Feed helps you advertise your products directly on Google Shopping with ease.
Furthermore, this powerful module connects your Odoo store with Google Merchant Center easily. It syncs product details and helps you reach millions of potential customers through targeted ads.
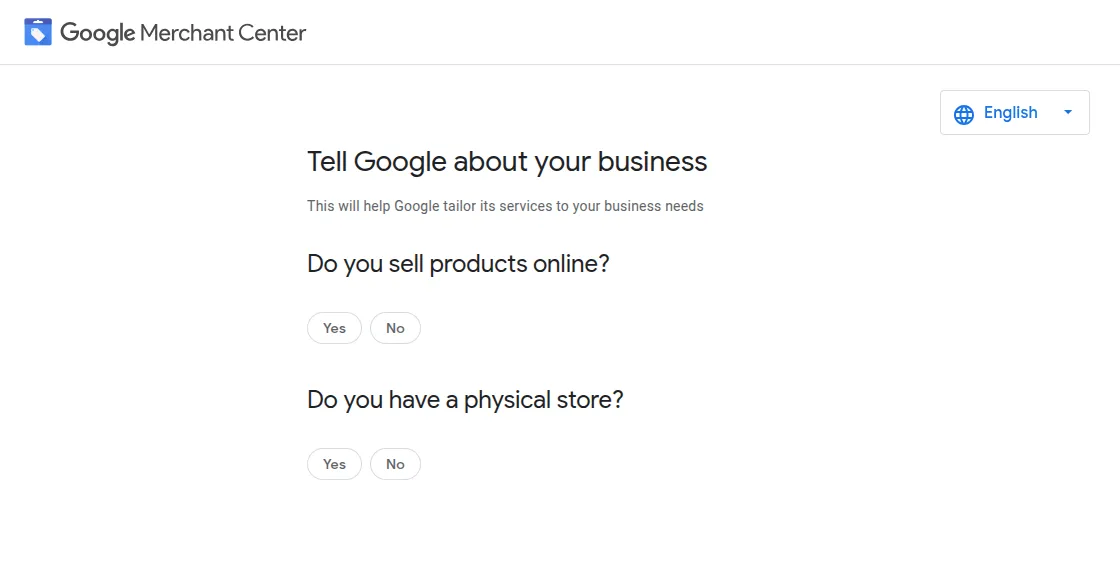
Google Shopping is a service provided by Google which allows users to search for products on online shopping websites and compare prices between different vendors.
Moreover, Google Shopping supports two platforms: Ad Words and Google Merchant Center. Also, you can store all your product feeds on Google Merchant Center.
With Odoo Google Shopping Feed, you can create product feeds for Google Shopping campaigns quickly. In addition, the module supports multiple countries and languages for global reach.
By using this module, you can verify your Odoo store domain with Google.
Then, you can send and store your Odoo product data to your Google Merchant account and easily create product feeds for Google Ads campaigns.
Additionally, you can map Odoo product categories to Google’s standard taxonomy for better visibility.
Consequently, managing product information becomes simple with automatic synchronization features. You can control which products appear on Google Shopping using flexible selection options.
Moreover, Odoo Google Shopping Feed provides product status tracking to monitor your product performance effectively.
Features
- Integrates Odoo store seamlessly with Google Shopping and Google Merchant Center for complete product advertising
- Supports multiple countries and languages for global product advertising, enabling businesses to reach international markets
- Provides simple one-step domain verification process with Google Merchant Center for quick setup
- Maps Odoo product categories accurately to Google’s standardized product taxonomy for better search visibility
- Syncs product data using manual or scheduled sync including titles, descriptions, prices, images, and stock levels
- Additionally, Manages product pricing effectively using Odoo pricelists for different markets and customer segments
- Offers flexible bulk product upload and individual product sync options for efficient data management
- Tracks product status with manual fetch updates from Merchant Center for better monitoring
- Supports both domain-based automatic selection and manual product selection methods for precise control
- Displays comprehensive product information including creation dates, modification times, and expiration timestamps
- Allows convenient simultaneous product deletion from both local database and Google Merchant Center
- Provides manual status update options for quick product refresh whenever changes are made
- Enables flexible country-specific pricing and stock availability management for regional markets
- Shows detailed product-level error messages and descriptions for easy troubleshooting and resolution
- You can map Odoo products with the corresponding Google products ID in the Google Merchant account.
- It also lets you map Odoo product model fields Product Id, description, etc. with appropriate Google product fields.
- Odoo Google Shopping Feed enables you to create new Google product fields for your products and assign default values to them.
- Also, you have complete control to select products you wish to send to Google Shopping.
- By selecting cron, customers can also update data on Google Merchant Center from their accounts.
- Odoo Google Shopping Feed allows you to mark a specific state for the product as updated or not updated.
- With the help of this module, you can map product attributes to the Google Merchant Center.
- Using the product field in GMC, you can map the product attributes such as shape, size, and color.
- You can specify an email address under configuration to receive notifications if the account’s Oauth token expires.
Prerequisites to configure Odoo Google Shopping Feed with Google Merchant Console
For configuring this module successfully, the user would need:
- A Google Developer Console account. You require this account to obtain the client Id and client secret key for the configuration. Click Me to create a Google Developer console account
- A Google Merchant Account to get a merchant ID. You need a Google merchant account to integrate and upload your product details from Odoo. CLICK HERE to create a new account. Paste the merchant ID in Odoo under the account menu. Follow the steps below to verify your website.
Setting up The Module
Generating Client ID and Client Secret key on Google Developer console.
- On setting up your Google Dev console account, click on credentials>>OAuth Client ID >> Web application.
- Now, choose any name for the configuration.
- Enter your website URL under the field -‘Authorized JavaScript origins’
- Next, copy the callback URL from account menu in Odoo and paste it under the field – ‘Authorized redirect URLs’
- You can automatically generate the client ID and client secret key.
- On obtaining the Client ID and Client secret key from the Google Dev console, go to your Odoo back end.
- Paste the client ID and Secret key in the account menu under Google products.
Verifying your Website with Google Merchant Account for Odoo Google Shopping Feed
- If you have logged into your Merchant account for the first time you would need to verify your shop domain with Google.
- Go to Business information >> Website.
- Enter your website URL and choose the option “I have access to my server option to verify your website.” (You can use any one of the other two options available.)
- Click on ‘Upload an HTML file on my website’.
- Now, download the HTML file which is shown on the page under the steps.
- In Odoo, go to account >> Token 1. Here, under merchant details. Paste the entire name of the file next to the field – ‘URL to verify’.
- Now, open the file and paste the text inside it under the field- ‘Data in URL
- Go back to your Google merchant account and click on the URL in step 3 on that page.
- Your URL should be verified and you can start to send and sync product information to Google Shopping.
Installation
- Once you purchase the App from Webkul store, you will receive a link to download module’s zip file.
- Extract the file on your system after download finishes. As a result, you will be able to see a folder named- ‘google_shop.’
- Copy and paste this folder inside your Odoo Add-Ons path.
- Now, open Odoo App and click on the Settings menu. Here, click on Activate Developer Mode.
- Then, open Apps menu and click on ‘Update Modules List.’
- In the search bar, remove all the filters and search ‘google_shop.’
- You will be able to see module in the search results. Click on ‘Activate’ to install it.
WORKFLOW
1. Create Google Merchant Center Account
First create the Google Merchant Account for Odoo Google Shopping Feed from the URL: https://www.google.com/retail/solutions/merchant-center/#?modal_active=none
2. After creating, the merchant account will look like this:

Steps to sync products in Google Shop
- First, install Webkul Message Wizard add on
- Then, Verify the Google OAuth2
Steps to generate Auth token:
3. Follow the path ‘Google Shop> Settings> Account> Create,’ now fill in the details.
3.1 Sequence No- The sequence number should be unique and the system will not accept two different Accounts with the same sequence no.
3.2 Shop URL- On this block, you have to enter your shop URL.
3.3 Callback URL- After entering the shop URL and clicking anywhere the system will automatically generate the Callback URL.
3.4 Cron Action- Here, choose the option ‘Google Shop Product Update,’ so the cron can update your product listing on the google shop without any manual input.

Enter Authentication Keys and Configure Merchant Details
4. First, in the Authentication Key section, enter the Client ID and Client Secret which you will get from Google Console Account.
5. Next, check the box next to “Configure Merchant Detail” to enable the Merchant Details section. In case you don’t have a Google Merchant Account, you can create one by clicking “Click here to Create Merchant Account.”
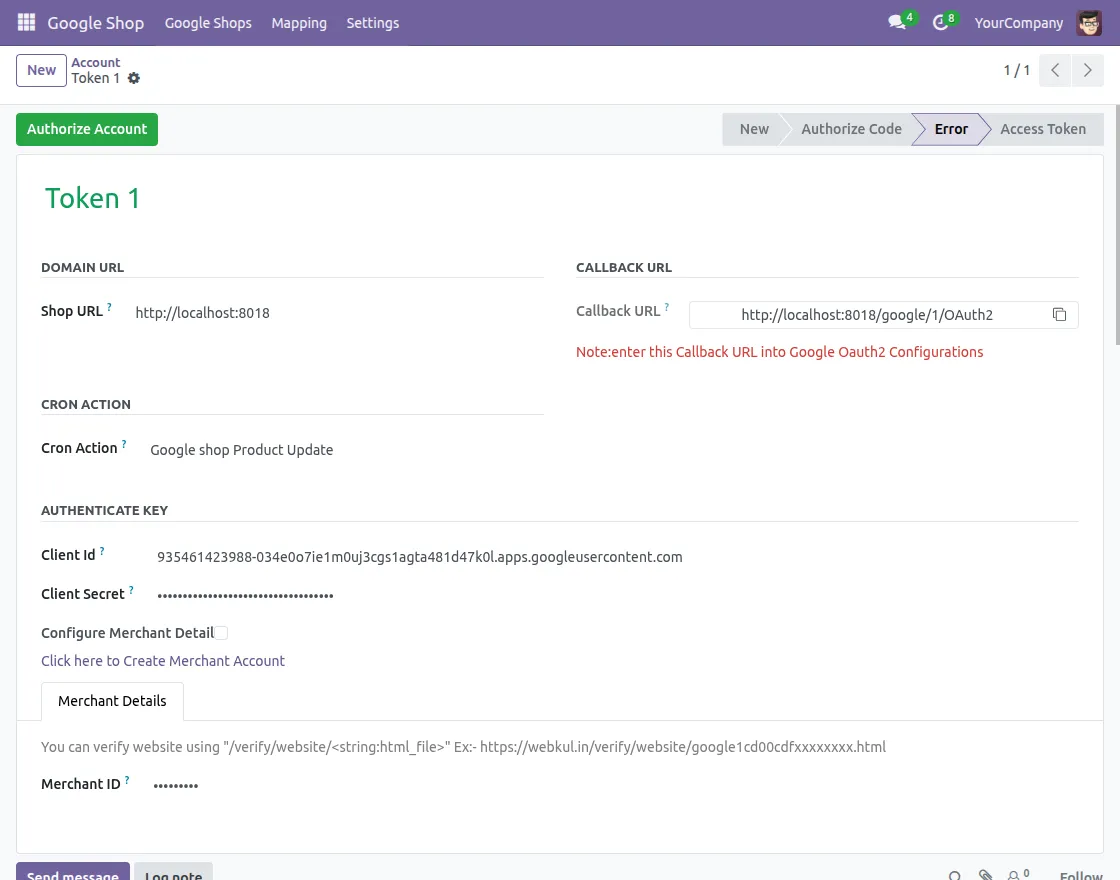
Complete Domain Verification and Authorize Account
6. In the Merchant Details tab, enter the URL to Verify and Data in URL which you will get from Google Merchant Account.

7. Then, On clicking “Authorize Account” it will be authorized by Google. As a result, the state will change to “Access Token.”
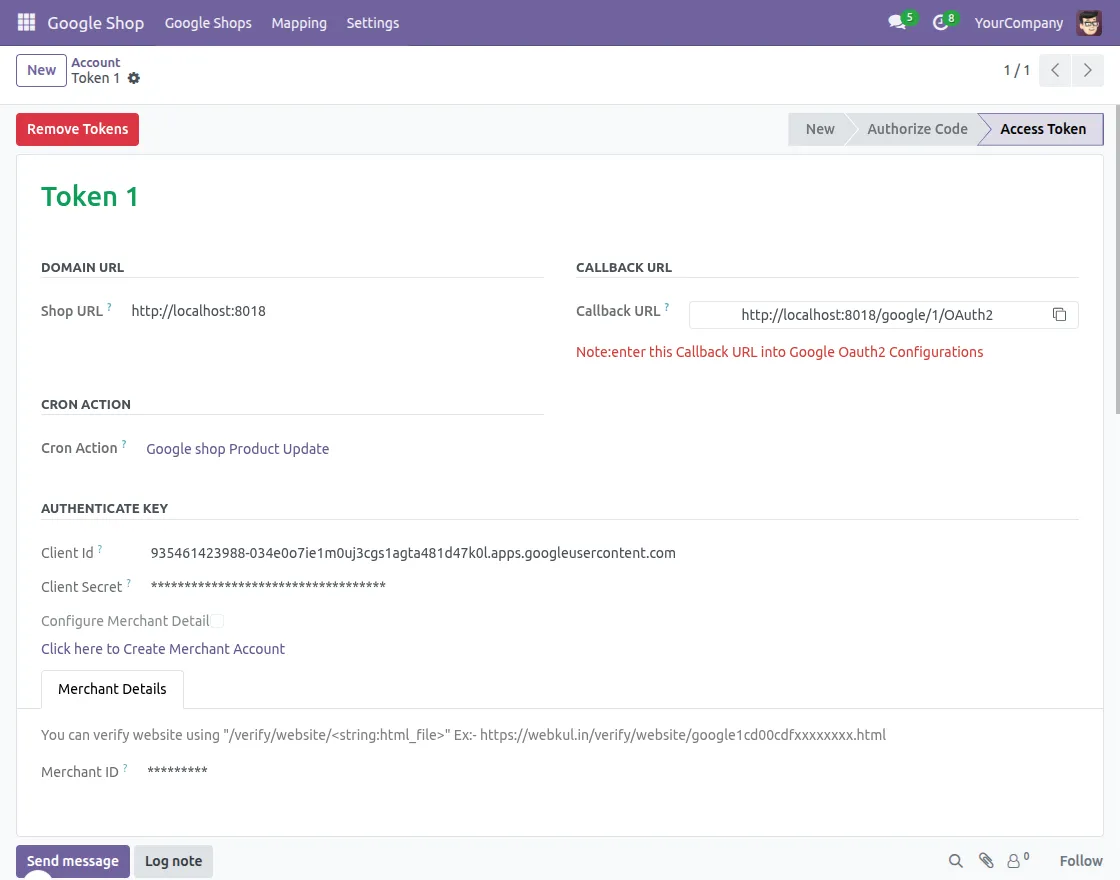
8. Now, you are able to sync the products after the state is ‘Access Token‘.
9. Press ‘Refresh Token‘ to refresh your token and authorize it.
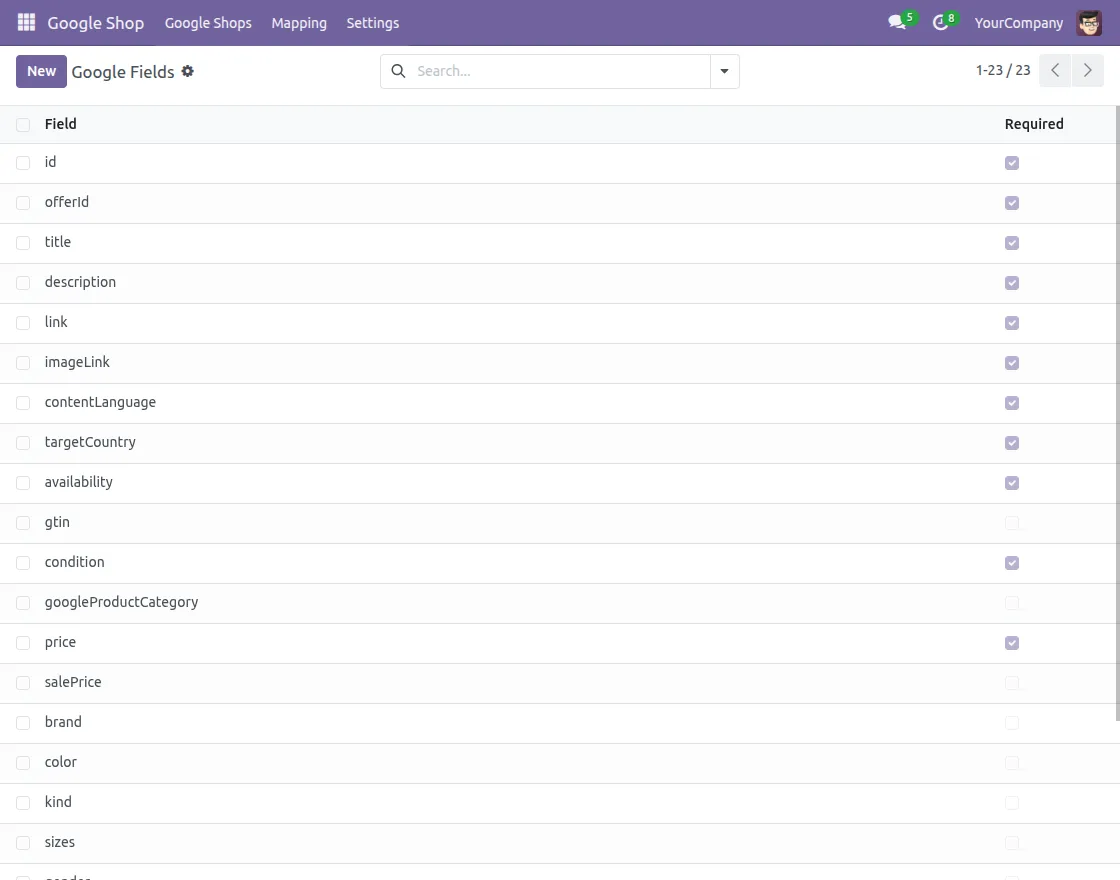
Configuring and creating Google Fields
10. Add Google fields to be synchronized and check the box next to them to enable or disable them.
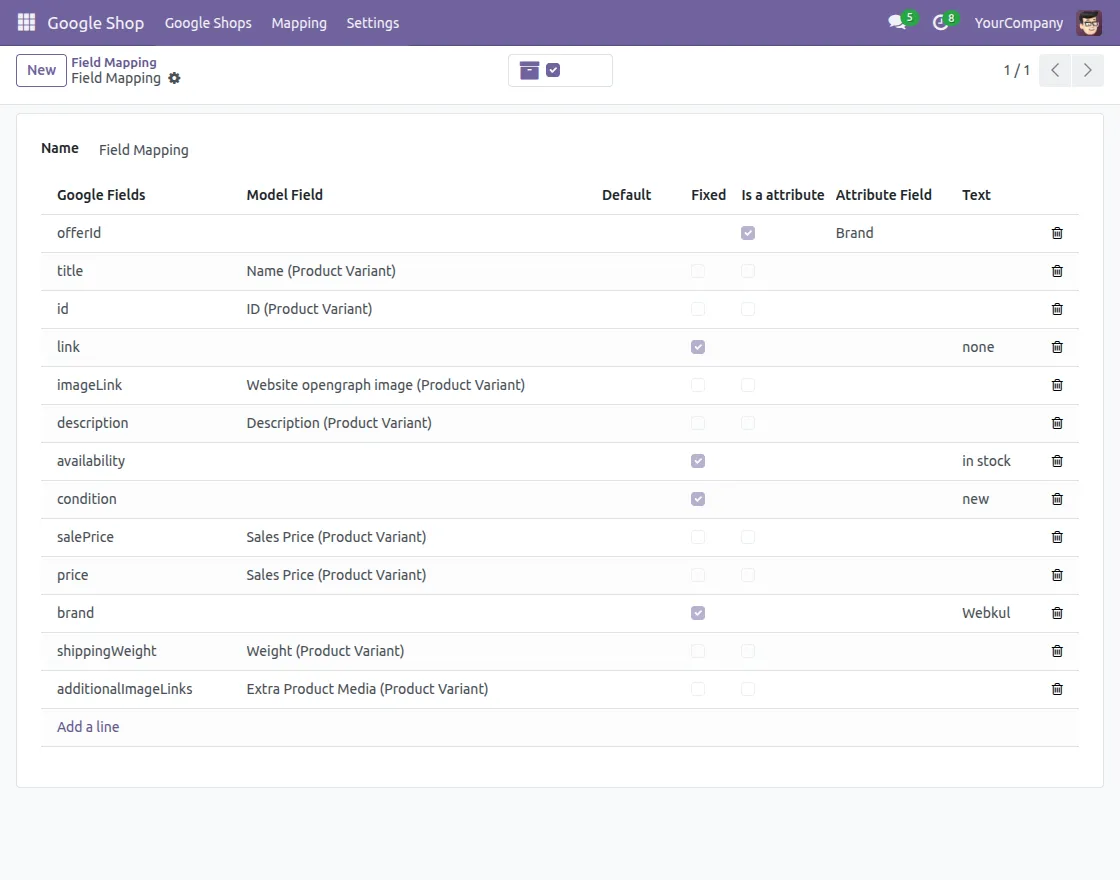
Creating Field Mapping
11. First, Locate ‘Field Mapping’ under ‘Mapping> Field Mapping’ and click the ‘Create’ button.
12. Then, Enter a field name and choose a model field, next you can choose a default value, fixed value, or attribute as per requirement.
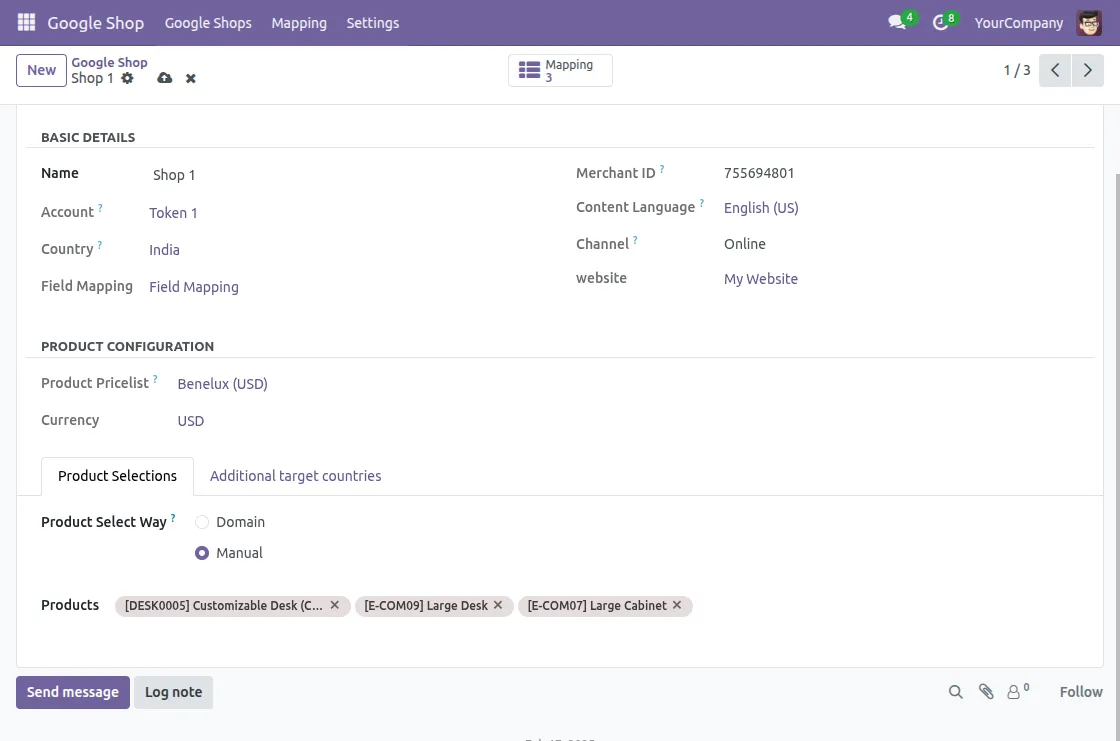
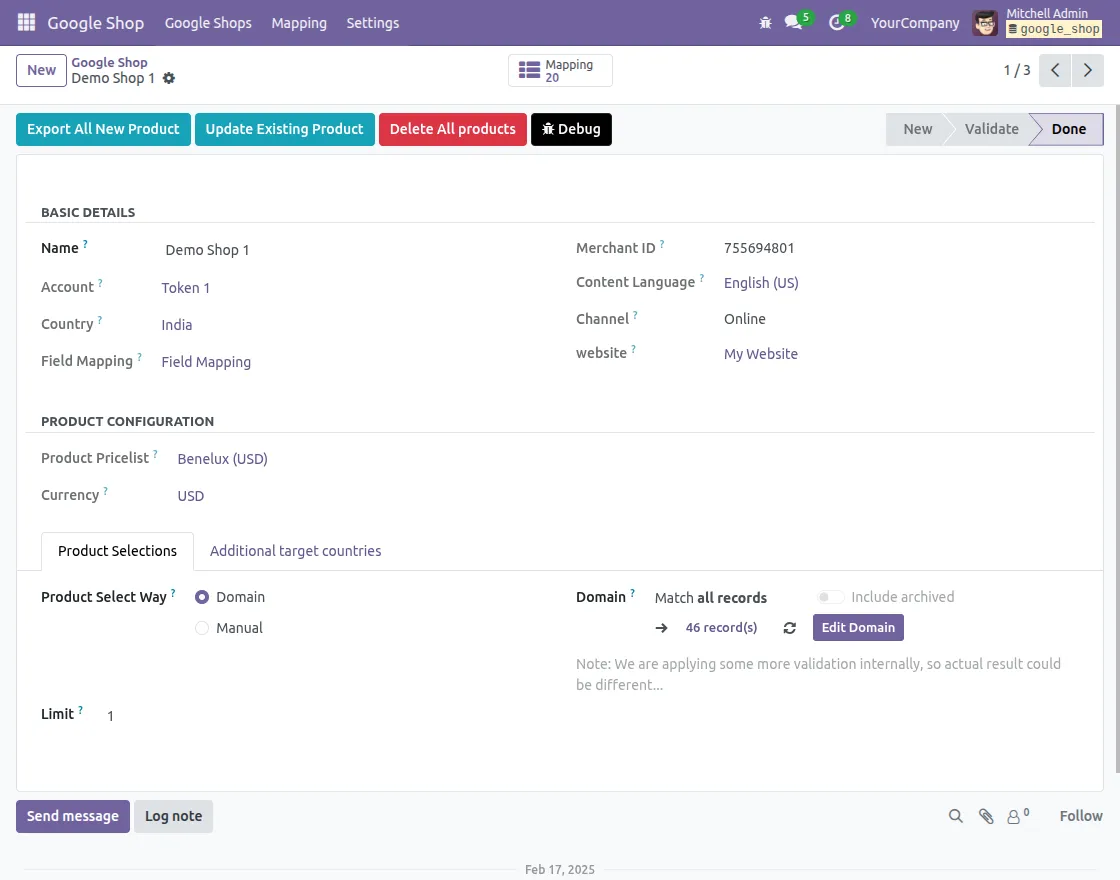
Creating shop in Odoo Backend
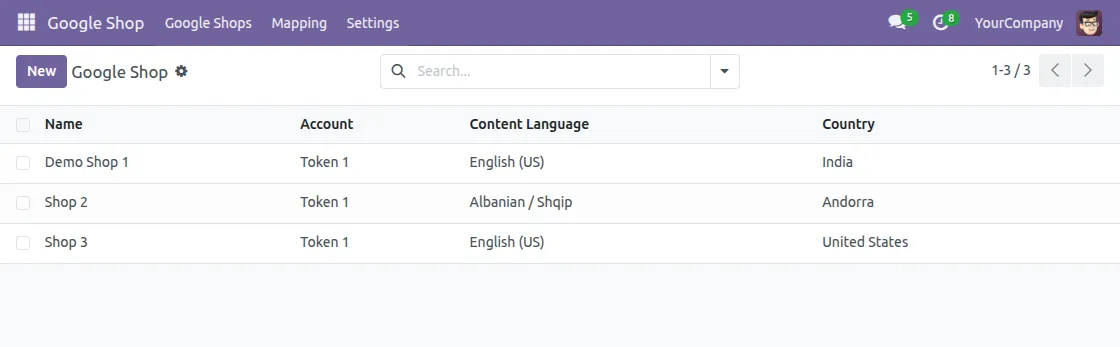
13. Create Google Shop for a different country and different content language.
14. Choose Product Select Way between ‘Manual‘ or ‘Domain‘.
15. On choosing Product Select Way as ‘Domain‘, Mapping will be shown under ‘Product Mapping‘.
Review Product Mapping
16. Now, The‘Product Mapping‘ will be created with the shop detail and the status of that product(Error or Updated)
- On update of products, status of field “Updated” is set to true and it is automatically selected.
- If you want to update the products, deselect it and click the button Shop>>Update Existing Product.
- Moreover, On changes made in the product, the template status of field ‘Updated‘ will be automatically set to False.

Export Products
17. Finally, click on “Export All New Product” or “Update Existing Product” in Shop to automatically update them in the mapping.

Updating product on Google shopping
18. For instance, In case you made some changes in the product and want to update them as soon as possible,
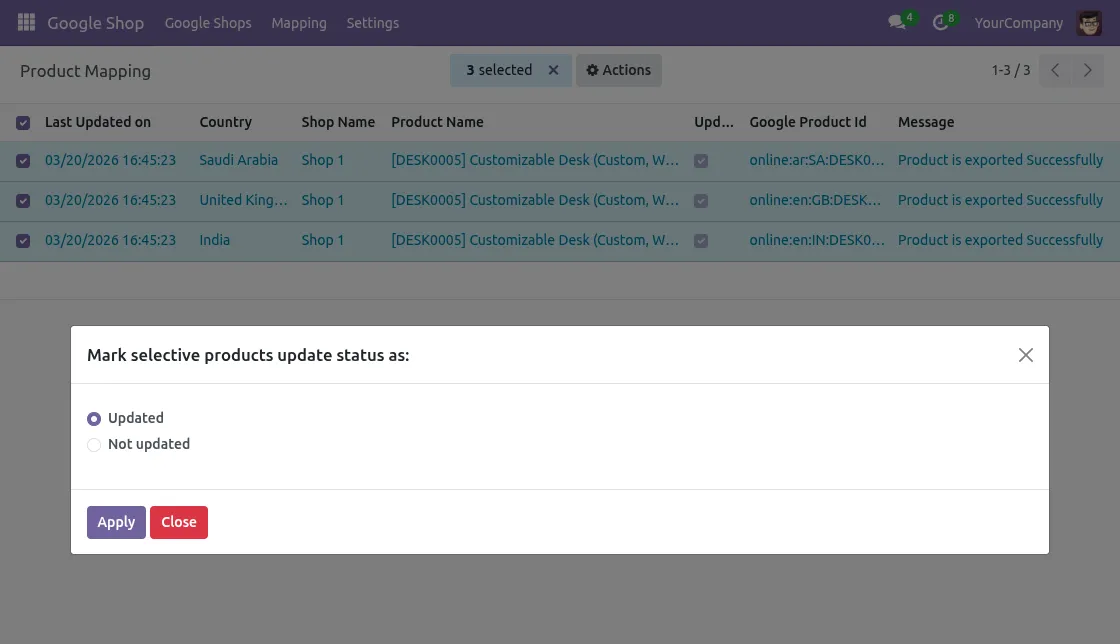
19. Go to ‘Mapping> Product Mapping’ and select the shop, and under action choose the option ‘Update Product Status.’
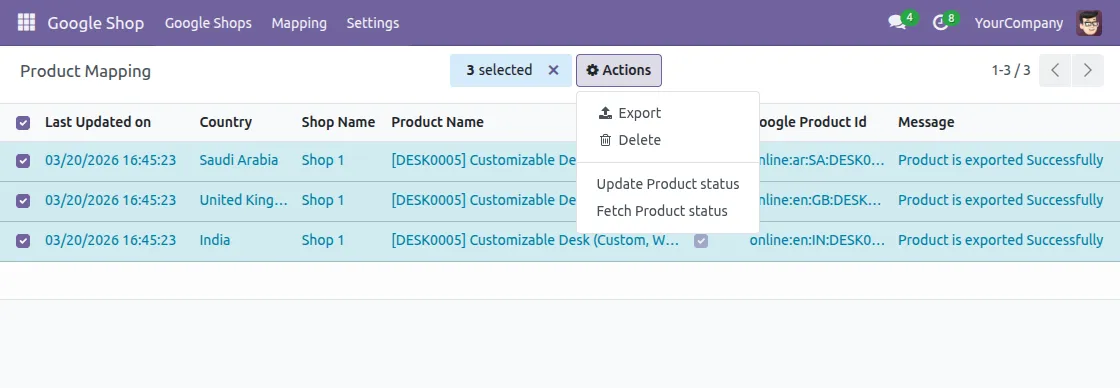
20. In the popup choose the option of ‘Not Updated’ if you want to update the products and select ‘Updated’ when you don’t want to update the products.
Read The User Guides For The Other Modules:
Need Help?
Hope you find guide helpful! Please feel free to share your feedback in the comments below.
If you still have any issues/queries, please create a ticket at the UV Desk.
I hope this helps. In case of any further queries, contact us at our support mail.
Thanks for paying attention!!
Current Product Version - 1.0.9
Supported Framework Version - Odoo V17, V18, V19

When autorizing the account we get a token. But it still says that we need to autorize the account before export of products?
What is wrong?