Marketplace Buyer Seller Communication For Magento 2 is a useful module for Marketplace Multi-Vendor Module for Adobe Commerce. Hence it allows the buyers can communicate with the seller regarding their query about a particular product and the seller can respond to the same.
So, to use this module, you must have installed the first Magento 2 Multi Vendor Module.
Check the working of the plugin showing how the customer or the guest user can initiate the communication –
Features
- All Asked Query list showing in seller’s account.
- Enable/disable reply mail notification to admin by admin panel.
- The admin enables/disable auto-approval for the query to the seller.
- The admin can restrict or allow the guest customer to ask queries.
- Admin can delete query/Conversation history between seller and buyer.
- The seller can send a reply message regarding query to the buyer and vice versa.
- The seller can search the conversation by the Customer’s email id or keyword/content.
- Each reply message is forwarded as a mail to the seller and customer.
- Seller and customer can attach images in query/conversation.
- Seller and customer can change the Query status (Pending, Resolved, or Closed).
- Customers can also ask the question to the seller using the seller profile page.
- Customers can choose the Support Type for the query (Support, Presale, Technical, and Other).
- The response rate and time of queries for any product and seller are visible to customers.
- Customers can search the conversation by Product name or keyword/content.
- The logged-in customer’s name and email id will remain auto-filled in the Contact Seller form.
- The extension is compatible with the Hyva Theme.
Installation
Customers will get a zip folder and they have to extract the contents of this zip folder on their system. The extracted folder has an src folder, inside the src folder you have the app folder.
So, you need to transfer this app folder into the Magento 2 root directory on the server as shown below.

If you have downloaded the module from Adobe Commerce Connect then unzip the respective extension zip.
Henceforth, create Webkul(vendor) then MpSellerBuyerCommunication(module) name folder inside your Adobe Commerce Cloud root directory as app/code/Webkul/MpSellerBuyerCommunication.
Thus, move all module’s files inside /app/code/Webkul/MpSellerBuyerCommunication/ folder in magento root directory.

Henceforth, post the upload, you can see the folders in your Magento 2 Root Directory.

After the successful installation, you have to run these commands in the Magento 2 root directory.
First command- php bin/magento setup:upgrade
Second Command - php bin/magento setup:di:compile
Third Command - php bin/magento setup:static-content:deploy
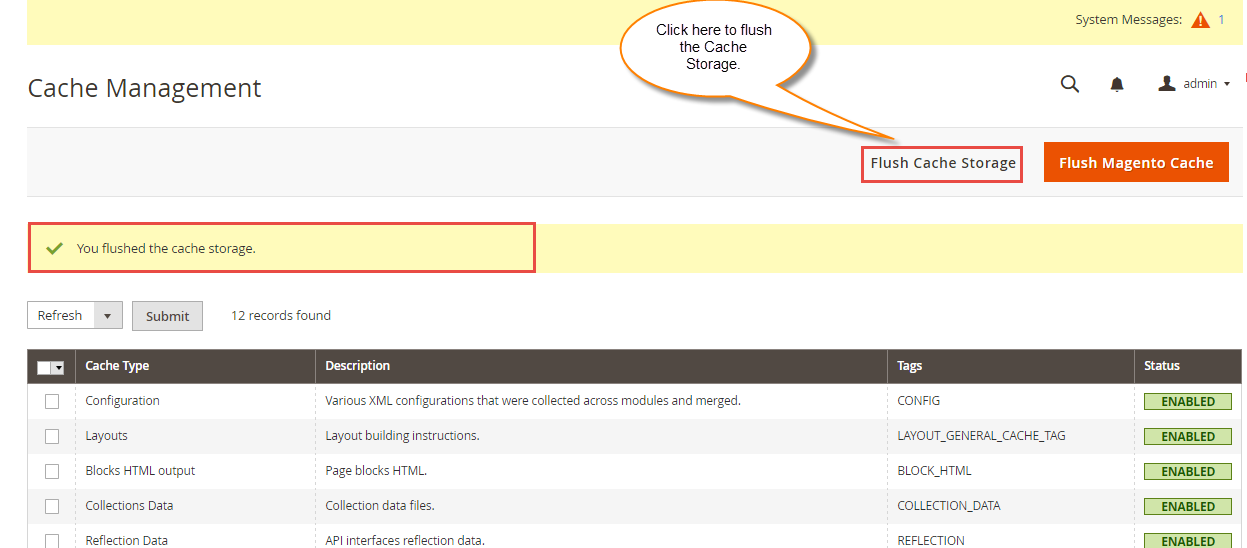
So post running the commands, you have to flush the cache from the Adobe Commerce admin panel by navigating through->System->Cache management as shown below.
Multi-lingual Support
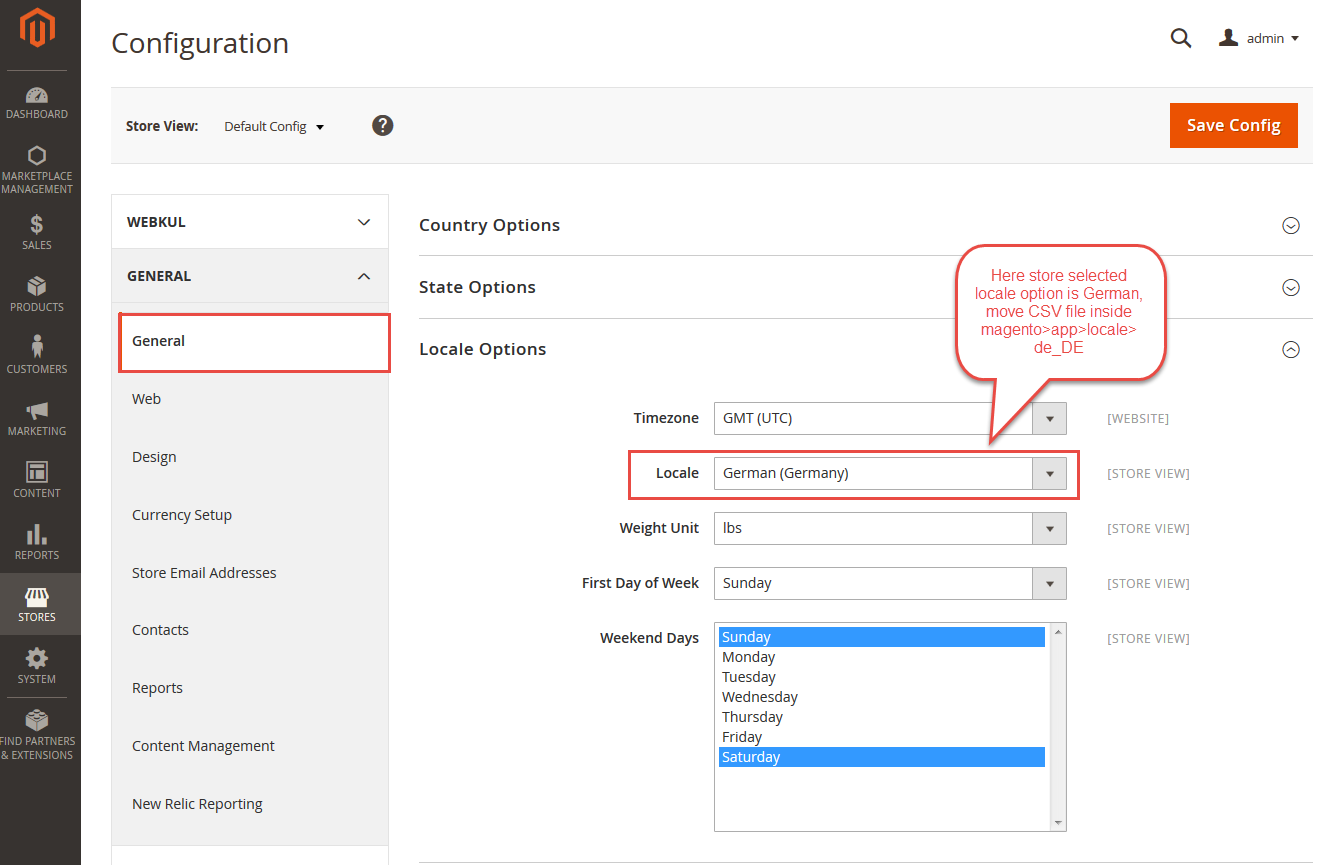
For the multilingual support, the admin will navigate through Store->Configuration->General ->Locale Options. Hence, select the locale as German (the language into which admin wants to translate his store content).
Translation
If a user wants to translate their module from English to German then they need to follow the path app/code/Webkul/MpSellerBuyerCommunication/i18n.
Therein, need to unzip the Adobe Commerce MpSellerBuyerCommunication folder and will get a CSV file with the name “en_US.csv”.
Now they will rename that CSV as “de_DE.csv” and translate all right side content after the comma in the German language.
Hereafter edit the CSV, save it, and then upload it to the path app/code/Webkul/MpSellerBuyerCommunication/i18n where they have installed Adobe Commerce Cloud on the server.
Thus, the module will get translated into the German Language.
It supports both RTL and LTR languages.

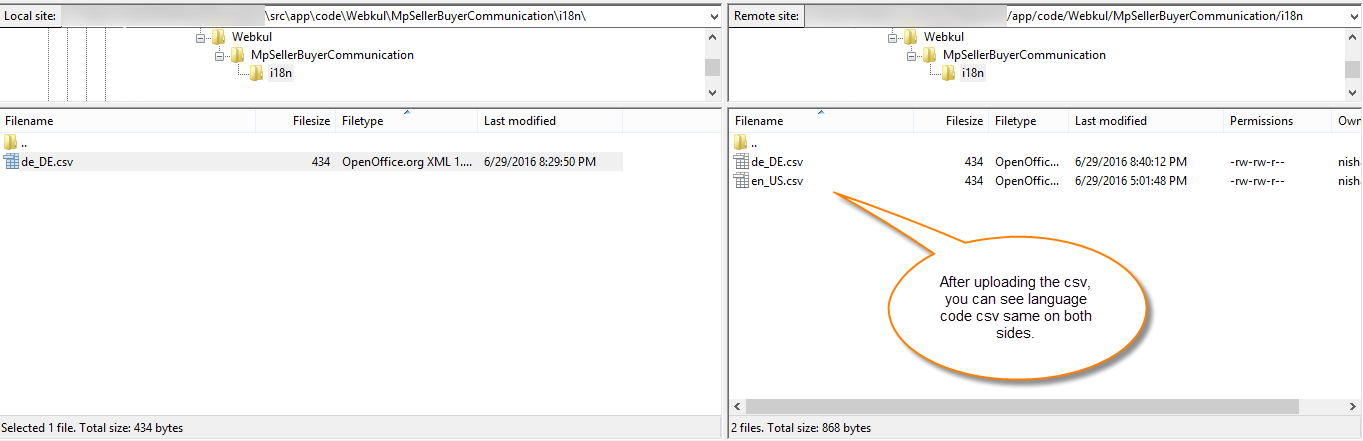
Hence the user can edit the CSV like the image below.
Module Configuration
To set email address of the admin, please go to Stores>Configuration>Webkul>Marketplace>General Settings and enter the email ID.
Hence, for configuring the Buyer Seller Communication module, the admin can go to Stores>Configuration>Webkul>Seller Buyer Communication.
So, here are the options available:
Admin Settings
- Enable Message Notification to Admin – Enable/disable email notification for messages to store owners.
- Order status- The default status of the order from which the communication is taking place.
- Query Auto Approval – Set whether to auto-approve a query and be made visible to the seller in the seller’s panel.
- Allow Guest Customer to ask Query- However, the admin can set if the guest customer can ask queries to the seller.
- Send Mail from Seller Email Id- If enabled then the seller will receive query mail otherwise not.
Transactional Emails
Thus, the admin can select templates for the following email notification:-
- Ask Query Mail Notification to Customer Regarding Product
- Ask Query Mail Notification to Admin Regarding Product
- Communication Mail Notification to Admin
- Communication Mail Notification to Customer
- Ask Order Query from-
- Mail Notification
- Seller Mail Notification to Admin
- Query from Customer Mail Notification to Admin
- Query From Admin Notification to Customer

Seller E-mail Notification Templates
For configuring seller email notification templates, the admin needs to go to Stores>Configuration>Webkul>Marketplace>Marketplace Transactional Emails and select the templates for the following:
- Ask Question to Seller Regarding Product – When a customer asks a query from a product page, this email template will be used for notifying the seller.
- Ask Question to Seller Template – However, when a customer asks a query from a seller profile page section, this email template will be used for notifying the seller.
- Communication Mail Notification to Admin- When a customer asks a query from a seller then communication mail notification will be sent to admin.
- Communication Mail Notification to Customer- When a customer asks a query from a seller then communication mail notification will be sent to the customer.

- Seller
- approved Template-
- request Template-
- unsubscribe Template-
- deny by admin Template-
- Product
- deny by admin Template-
- approval request to admin Template-
- Edit approval request to admin Template-
- Ask Question to
- Seller Regarding Product Template-
- seller Template-
- admin by seller Template-
- Product approval mail to seller Template-
How To Use- Buyer-Seller Communication
After Installing Marketplace Buyer Seller Communication For Adobe Commerce, customers will find a contact us link at the product page.
Hence here customers can ask queries to the seller and can also see the response rate and response time of queries for that particular product of that seller. (Refer the snapshot).

Once the buyer clicks on “Contact Seller” then a pop-up will open with contact seller form.
Hence, the customer has to fill in all the details such as
- Support Type,
- name,
- email id,
- the subject for the query,
- query description which the customer can write in the WYSIWYG editor and
- can attach multiple images related to the query.

Note- However, here the name and mail id of the logged-in customer will remain auto-filled.
When a customer asks a query, an e-mail notification will be sent to the customer’s email address.

Seller Email Notification View:

Hence, the buyer can also ask the question to the seller using the seller profile page.
They can also see the response rate and response time of that seller for responding to the queries, as shown in the below screenshot.

The admin can set another layout for the seller profile and it will be displayed as per the screenshot

The buyer will click on the contact button and the below form will display to contact the seller.

The buyer can also contact to the seller or the admin regarding any particular order. For this customer has to navigate to “My Orders” and then click on “view order” for the particular order for which he wants to contact Admin/seller.

NOTE: The admin can decide when to display the contact option in the order section of the customers based on the order status as shown in the image below –

Seller Communication History
From the Marketplace account, the seller can see queries that are asked by customers regarding their products. However, the seller can also search the conversation using the customer’s email id and content/keyword.
Note:
If the admin has set the setting “Query Approval” as “Yes“, now only after the admin approves the query, the query gets displayed under the Seller’s “My Communication History“.
Otherwise, if the admin has selected the Query Approval as “No“, the queries will not require any approval and will automatically display in the communication grid.

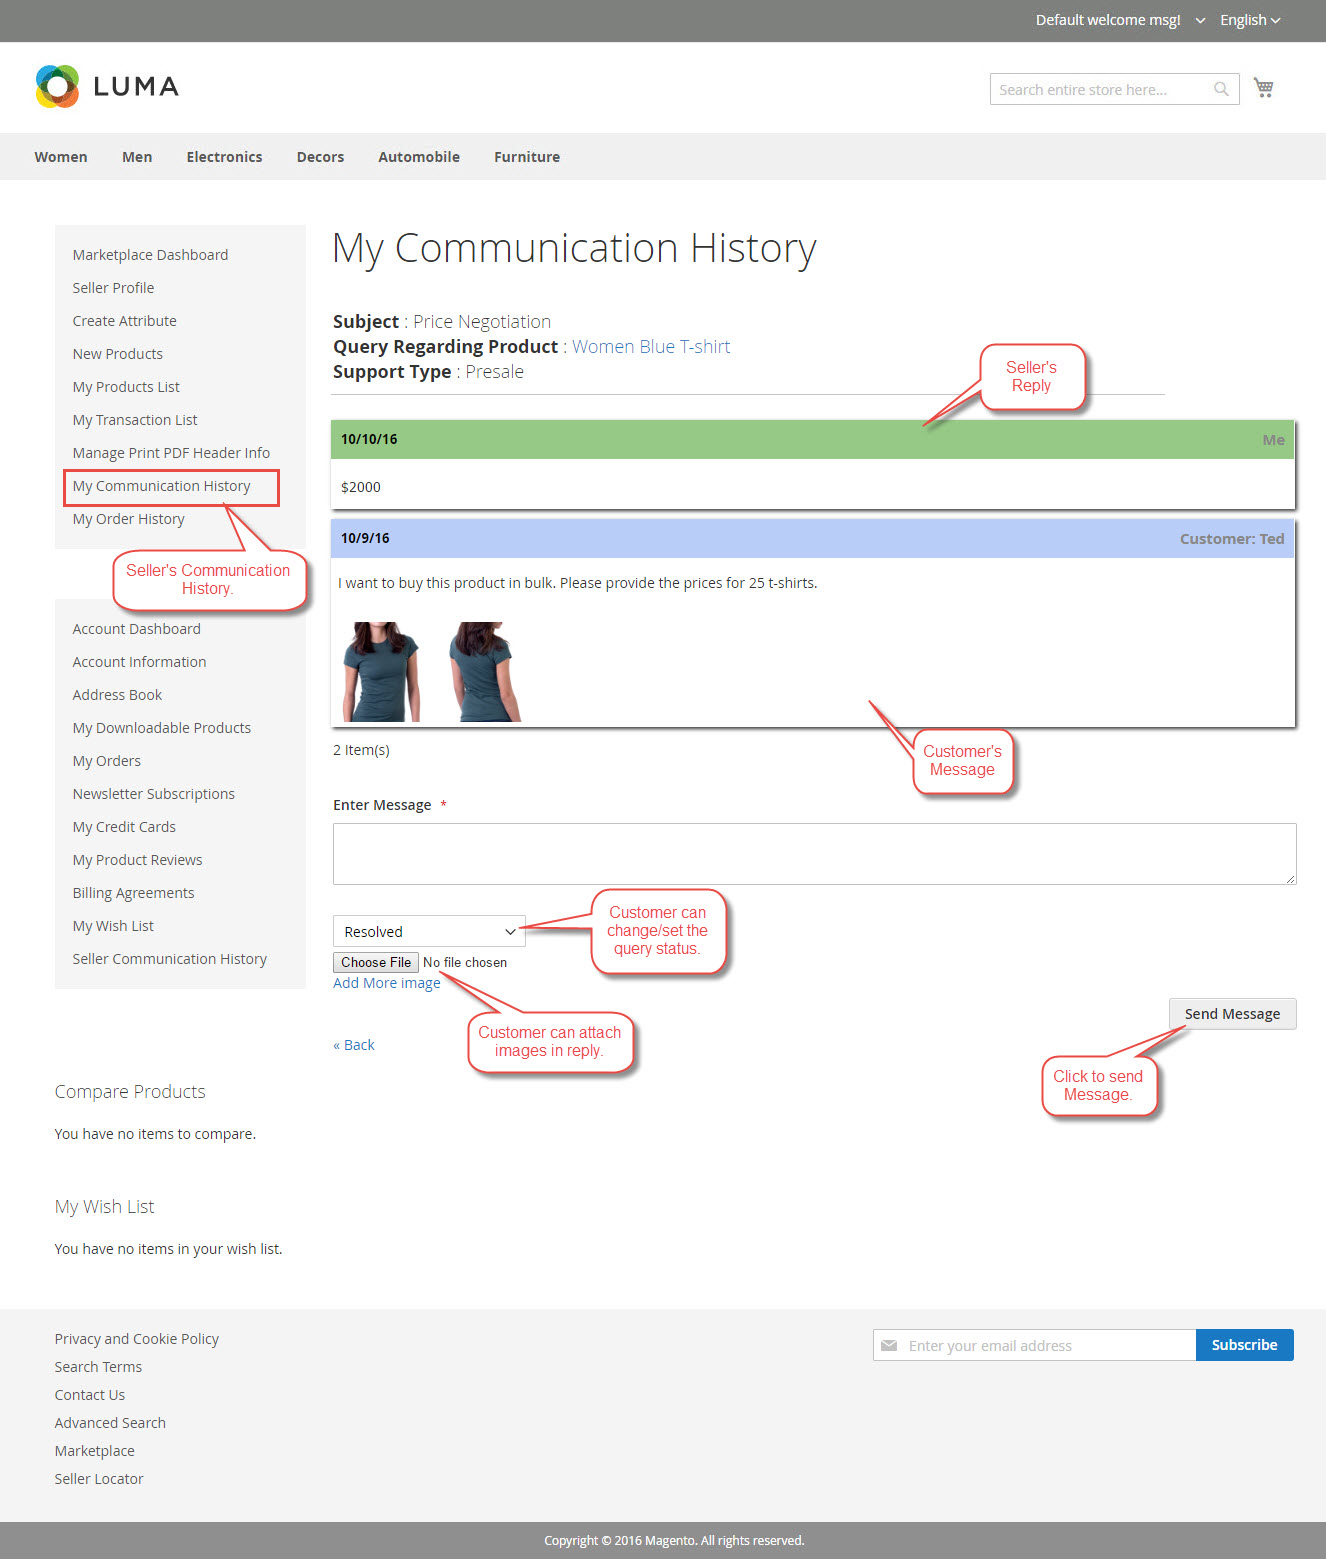
The seller can see conversation history for a particular query placed by the customer from his marketplace account. Thus, from here seller can reply to the buyer’s query and can change the query status.
Seller Reply to Customer – Email Notification View:
Buyer Seller Communication
The customer can see their query list under My Account >Seller Communication History. So, the customer can also search the conversation using the Product name or any content/keyword.
Note:
If the admin has set the setting “Query Approval” as “Yes“, now only after the admin approves the query, the query gets displayed under the buyer’s “My Seller Communication History“.
However, if the admin has selected the Query Approval as “No“, the queries will not require any approval and will automatically display in the communication grid.
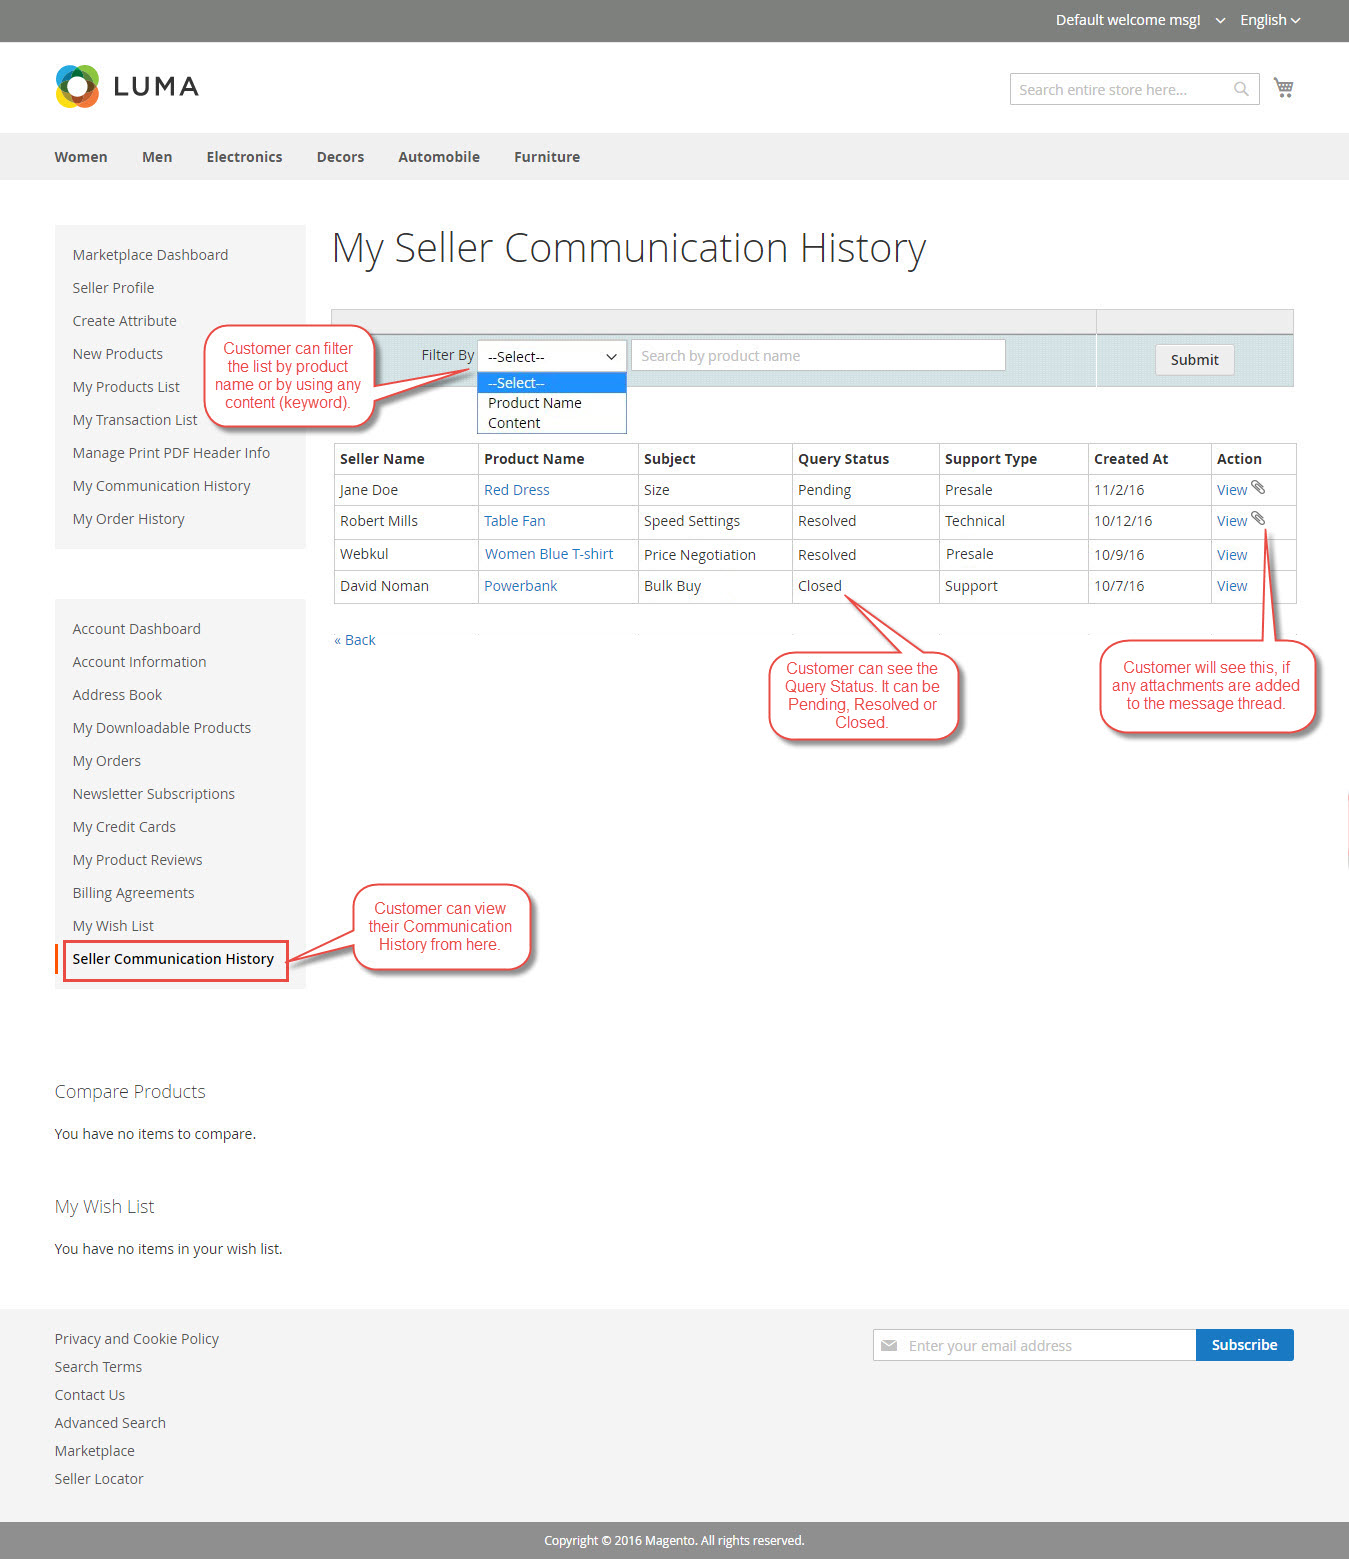
After clicking on “View”, the customer can see conversation history from their account. Henceforth, from here customers can reply to the seller and can change the status of the query.
Admin Customer Communication
The admin can even communicate with the customer about an order. Thus, the admin can navigate to the Sale>Orders>Select a Particular Order>Contact Tab.

Here the customer name and email are auto-filled. However, the admin can select the message type and in the WYSIWYG editor enter the address. Additionally, the admin can even add an attachment if required.
Customer Response
The customer can view the message shared by the admin in the Seller Communication History section.
Hence the customer can click on View to revert the admin.

Admin Management of Buyer Seller Communication
Admin can find a query grid under Marketplace Management > Seller Buyer Communication Query List.

So, here admin can view/delete and approve/disapprove the customer’s query along with the admin can see the information of seller and customer name, query subject and status, type of query and can check the query creation time on the same page.

When the query is Approved, the seller can see the query in the seller’s panel.
Tapping on the view button will show all conversations for a particular query such as sender name, message, and created time to the admin. However, admin can delete conversation history as shown below:

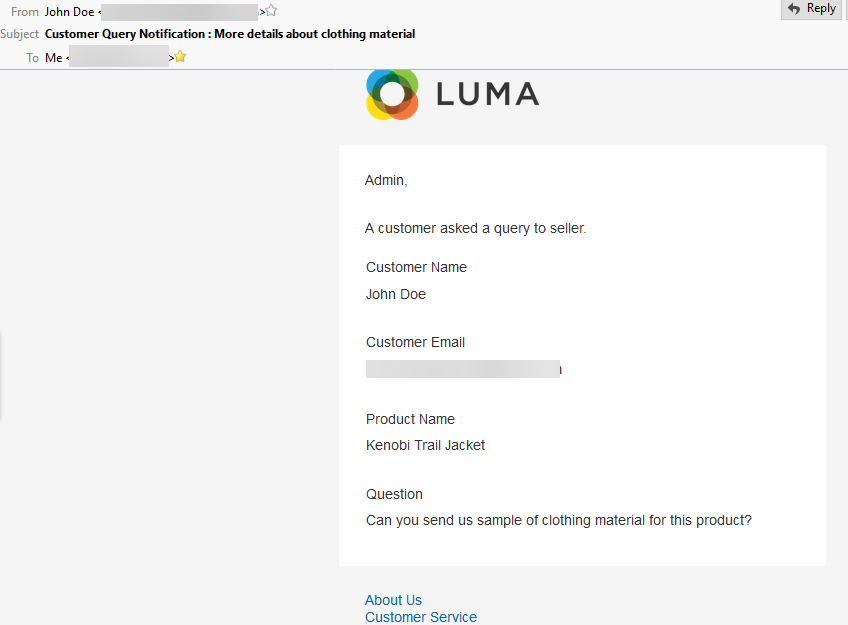
Customer Query to Seller – Admin Email Notification View:
Seller Reply to Customer – Admin Email Notification View:

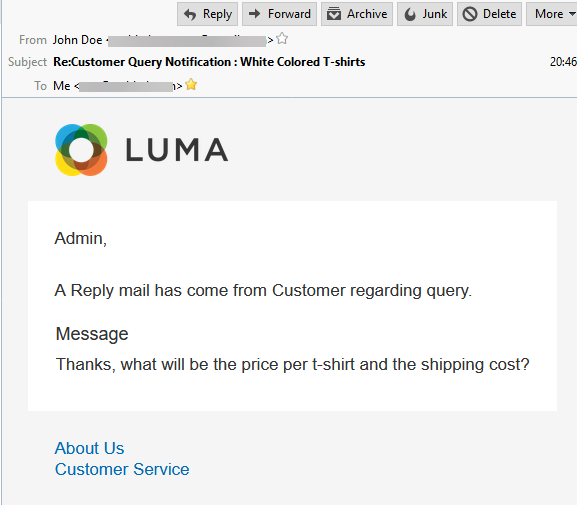
Customer Reply to Seller – Admin Email Notification View:
Support
So, that’s all for the Marketplace Buyer Seller Communication For Magento 2, still have any issues feel free to add a ticket and let us know your views to make the module better at webkul.uvdesk.com. You may also browse other Adobe Commerce marketplace addons and our quality Adobe Commerce Cloud extensions.
Current Product Version - 5.0.0-p2
Supported Framework Version - Magento 2.0.x, 2.1.x, 2.2.x,2.3.x, 2.4.x

2 comments
The feature to block certain words in the message is not available as of now in this module. Further, it can be developed, please connect at [email protected] to get back to you accordingly.
Thanks