Introduction
Product Table Attribute for Magento 2 module helps the admin to create a table attribute for products.
The table attribute allows a multi-dimensional presentation of the product data in the form of a table. It is useful in managing multiple data entries of a single product.
The admin can also add multiple tables to the single product page.
The admin can add as many rows and columns to a product table for showing the detailed information about the product which will display at the product page on the front-end.
Note:
- The admin can create the product table of a product for the different store views.
- The admin can manage the columns of the table for different store views from the back-end.
Check a brief overview of the plugin –
Features
- The admin can create a table attribute from the back-end.
- This module helps to show detailed information about the product.
- The product details will show in the form of the product table.
- The details of the product will get visible on the product page under charts.
- The value of the table is entered while creating the product.
- The admin can create as many rows and columns for the table.
- The admin can create the product table of a product for the different stores.
- Multiple tables for a single product.
Install Extension from Webkul Store
#1 Download Module
Firstly, you need to log in to Webkul Store, go to My Account>My Purchased Products section, verify and then download and extract the contents of this zip folder on the system.
#2 Upload Folder
Once the module zip is extracted, follow path src>app and then copy the app folder into the Magento 2 root directory on the server as shown below:

#3 Run Commands
After uploading the module folder, you need to run the following commands in the Magento 2 root directory:
php bin/magento setup:upgradephp bin/magento setup:di:compilephp bin/magento setup:static-content:deployphp bin/magento indexer:reindexphp bin/magento cache:flush
Install Extension from Magento Marketplace
If you have purchased this extension from the Magento Marketplace then please follow the below process or visit this link.
#1 Get Access Keys
You need to get access keys, navigate to My Profile in Magento Marketplace, then choose Access Keys in the My Products section.

Go to Magento 2 and then you need to copy both the Access Keys – Public Key and Private Key. These access keys will be needed in the next steps for authentication.

If access keys are not created earlier, click Create A New Access Key, enter any name and click OK.

#2 Update composer.json File
To know the component name and version number, go to your Magento Marketplace account section, My Profile>My Purchases, then find this extension to view the details.
Please note – Below is an example image, every extension will have its unique component name and version.

After that, navigate to your Magento project directory and update your composer.json file in the following format.
composer require <component-name>:<version>
For example, to install version 5.0.0 of this extension you need to run the following command:
composer require webkul/product-table-attribute:5.0.0
#3 Enter Access Keys
Now you will need to enter the Access Keys that you obtained as explained in the first step #1 Get Access Keys. Wait for Composer to finish updating your project dependencies and make sure there aren’t any errors.
#4 Run Command
You need to run the following commands:
php bin/magento setup:upgradephp bin/magento setup:di:compilephp bin/magento setup:static-content:deployphp bin/magento indexer:reindexphp bin/magento cache:flush
Language Translation
For translating the module language, navigate through src/app/code/Webkul/ProductTableAttribute/i18n and edit the en_US.csv file.
Thereafter, rename the CSV as “en_SA.csv” and translate all right side content after the comma in the Arabic language. After editing the CSV, save it.
Then upload it to the path src/app/code/Webkul/ProductTableAttribute/i18n where the Magento2 is installed on the server. The module gets translated into the Arabic Language. It supports both RTL and LTR languages.

Creation of Table Attribute
After the successful installation of the module, the admin can navigate through, Stores > Product > Add New Attribute for creating a table type attribute.
For reference, please check the below image:
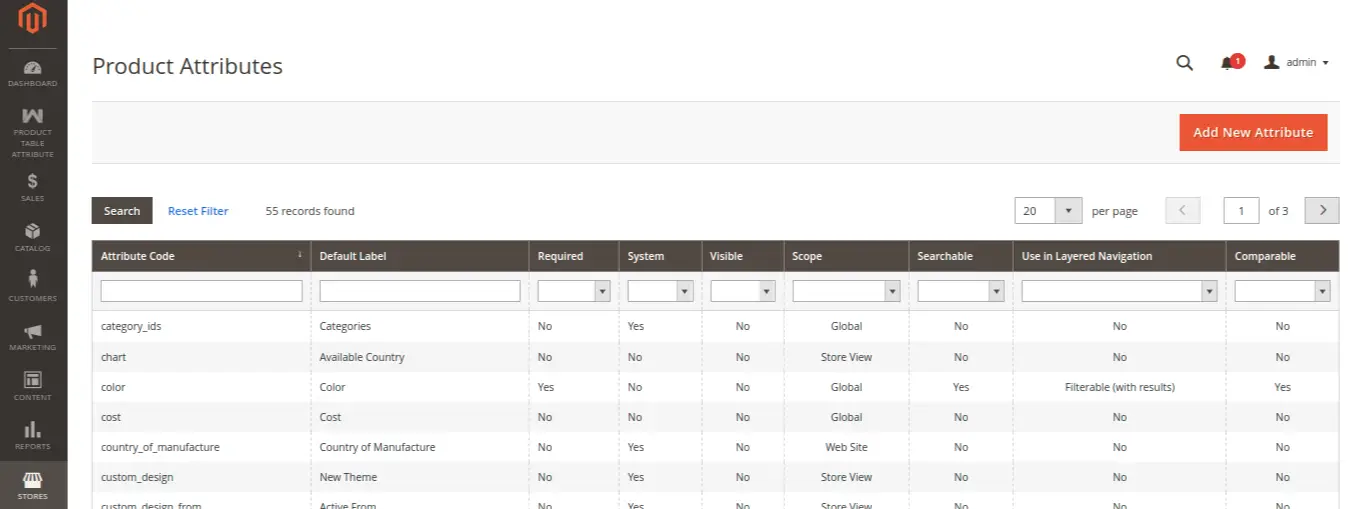
After clicking on “Add New Attribute,” the admin will see various options, as per the below image:
Default label- The admin will enter the name of the attribute by which the attribute will get identified.
Catalog Input Type for Store Owner- Here the admin has to choose Input type as “Table,” to create a table attribute.
Manage Columns-
- Here the admin needs to enter the column values, which will display at the front-end as per the stores.
- The same column names will be visible during the product creation, where the admin will enter values from the back-end as per the description of the product.
- The admin can create multiple columns for the stores.
Different column values can enter by the admin as per the store.
After setting all the fields, the admin needs to click on “Save Attribute” to save the table attribute.
Assignment of Table Attribute
Once the table attribute gets created, then the admin needs to assign the attribute to the attribute set.
For this, the admin needs to navigate through Stores > Configuration > Webkul > Product Table Attribute as per the below image:

Here the admin needs to select the attribute set from the drop-down of Attribute Set ID.
Let’s assume that the admin selects the “Default” attribute set from the drop-down of Attribute Set ID.
Now, whenever the admin creates a table attribute, it automatically gets assigned into the Default Attribute set.
Another method to assign the table attribute:
The admin needs to navigate through, Stores > Attribute set as per the below image:
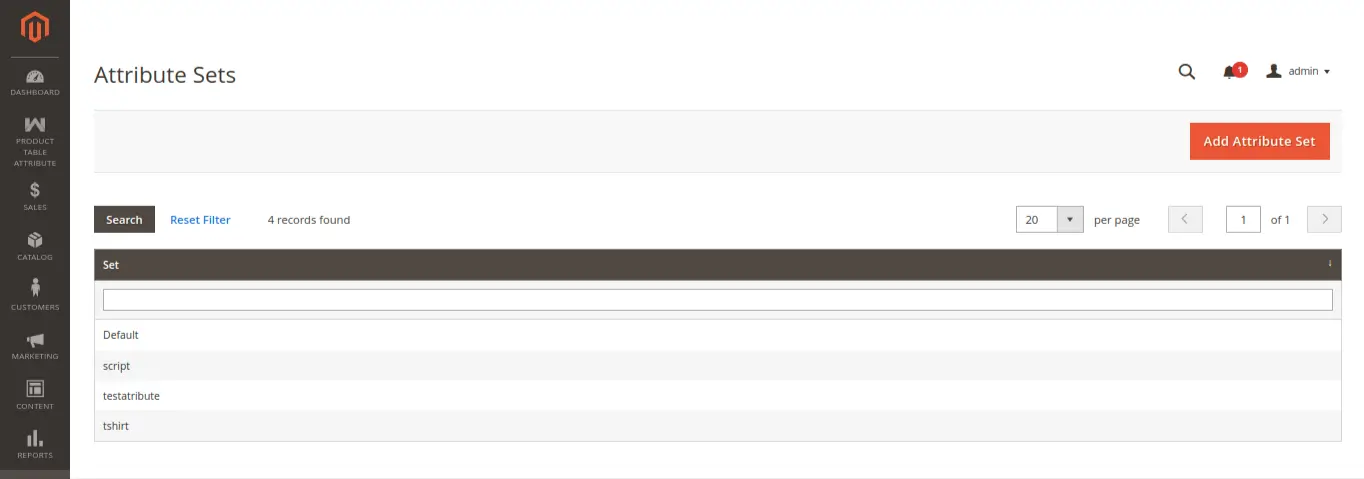
Now, the admin can select the attribute set in which they want to assign the table attribute.
Let’s suppose the admin selects the Default attribute set to assign the table attribute.
Then, the admin can assign the table attribute to the Default attribute set by Drag and Drop.
The admin will drag the table attribute from Unassigned attributes groups and drop it to the Default attribute groups.
for the reference check the below image:

Use of Table Attribute
Whenever the admin creates a new product by using the attribute set which contains the table attribute, the admin can fill the product attribute table which describes the details of the product.
For the reference, check the below image:

Note: The admin can also create the product table for different store views by selecting Store views while creating the product.
Front View
The product description table will appear on the product page under charts as shown in below image:

The customer can also select the different store to see the chart in different language as per the below snapshot:

If the admin has added more than one table in the product, then the customer can see the multiple tables under Charts only as per below image:

That’s all about the Product Table attribute for Magento 2 still have any issue feel free to add a ticket and let us know your views to make the module better http://webkul.uvdesk.com/.
You may also check our quality Magento 2 Extensions.
Current Product Version - 5.0.2-p1
Supported Framework Version - Magento 2.0.x, 2.1.x, 2.2.x,2.3.x, 2.4.x

2 comments
This module is only for Magento 2.
If you want to develop the same for Magento 1.9, then it can be done via customization. For that, you can contact us at [email protected].
Thank you.