POS Unit Measure module for Magento 2 helps the POS agent to change the measurement units (such as – liter, kilo, gallon, pound, meter) of products in the POS cart. With this, customers will be able to buy the product at different quantities and varying units.
Note – To use this module, you must install the Webkul Point of Sale (POS) System for Magento 2 first.
Watch the below video tutorial to understand the extension workflow:
Feature List
- The admin can create a unit of measure category.
- Admin can also create a unit of measures.
- The POS agent changes the unit of measure of any product in the cart.
- A product can be sold with one or many units of measure in a single order.
- Price also updated with respect to the new unit of measure.
- The stock is maintained in inventory with respect to the purchased unit of measure and sold the unit of measure.
- Invoice for the particular order also maintained with new units of measure.
- The stock of the POS product updates as per the POS order.
- The admin can enable & disable the module from configuration Yes/No.
Installation
First, Customers will get a zip folder and they have to extract the contents of this zip folder on their system.
The extract folder has an src folder, inside the src folder you have the app folder.
Now, they need to transfer this app folder into the Magento 2 root directory on the server as shown below.

After the successful installation, the users have to run the following commands on Magento2 root directory:
First command –
php bin/magento setup:upgrade
Second Command –
php bin/magento setup:di:compile
Third Command –
php bin/magento setup:static-content:deploy
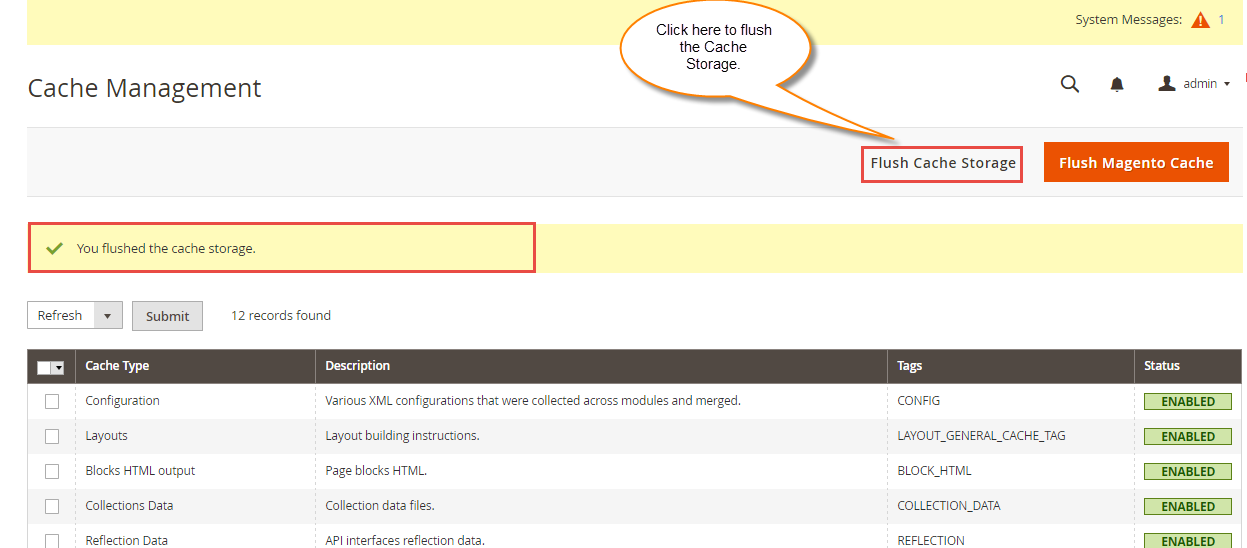
Thus, after running the commands, they have to flush the cache from the Magento admin panel by navigating through->System->Cache management as shown below:
Thus, in this way, you can install the module.
Language Translation
For module translation, navigate to the following path in your system app/code/Webkul/PosUnitPrice/i18n/en_US.csv.
Open the file name en_US.CSV for editing as shown in the below screenshot:

Then replace the words after the comma(,) on the right in the file with your translated words.

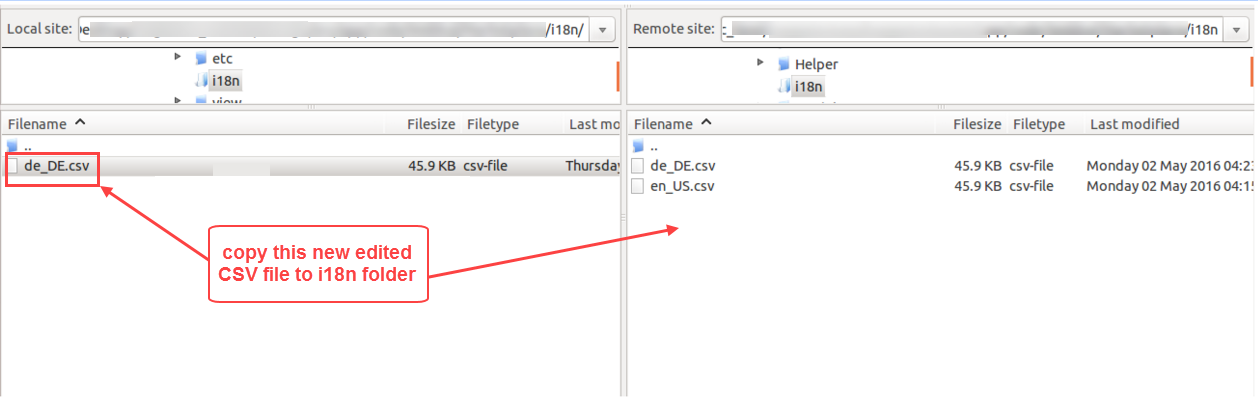
After editing and translating the CSV file, the users need to save the translated file name according to your region language and country code such as – de_DE.CSV.
Followed by uploading the translated file to the same folder from where the users have obtained it.
Thus, the module translation is completed.
Thus, in this way, language translation of the module is done.
Configuration Through Commands
The admin can enable or disable POS Unit Measure module through terminal. The commands to enable and disable module are given below:
Enable Module Via Terminal
For enabling the module via terminal, the admin needs to run the following commands:
First Command –
php bin/magento module:enable Webkul_PosUnitPrice
Second Command –
php bin/magento setup:upgrade
Third Command –
php bin/magento setup:di:compile
Fourth Command –
php bin/magento setup:static-content:deploy
Disable Module via Terminal
Also, if the admin wants to disable the module completely, then they need to run the following command through terminal:
First Command –
php bin/magento posunitprice:disable
Second Command –
php bin/magento setup:di:compile
Third Command –
php bin/magento setup:static-content:deploy
Note –
To disable the module and drop unit columns from existing Magento tables and drop module’s tables:
php bin/magento posunitprice:disable --remove=tables
Admin End Workflow
After the successful installation of the module, the admin can easily create the Unit Of Measure Category.
For that, they need to navigate through, Stores > Configuration first, you can go to the POS Unit Price configuration, here you have to fill all the options.


In the POS Configuration page -> POS Unit 0f Measure, you can select enable & disable the module from configuration Yes/No.

After that, the admin has clicked on the POS Unit Measure, they can easily create a Unit Of Measure Category and can manage the existing one.

New Category
For creating a new, the admin can click on the “Add Category”. And then, can enter the respective details as per below image:

Category Information:
Category Name – Here the admin can enter the name of the category.
Status – The admin cam make the status of the category as enable or disable.
Thus, by following this, the admin can create a New POS Unit Of Measure Category.
Manage Unit Of Measure
The admin can create a new unit of measure or can edit the existing one.

For editing the existing one the admin can click on the edit button of that particular unit of measure.

Add New Unit Measures
For adding a new unit measures, the admin can click on the “Add New Unit Of measure” button. They can enter the required details as per below image:

Information for Unit:
Unit Of Measure Title – Enter the title of the unit of measure.
Unit Category – Select the unit category from the drop-down, which are already created.
Type – Here, select the type for the unit of measure. There are three types of it:
- Smaller than the reference unit of measure.
- Reference unit of measure for selected category.
- Bigger than the reference unit of measure.
Status – The admin can make the status of the unit as enable or disable.
Thus, the admin can save a new POS Unit Of Measure.
POS Shopping Cart Settings
For allowing the POS agent to checkout from the cart the product having quantity less that one. The admin has to do some settings.
For that, they need to navigate to Stores > Configuration > Catalog > Inventory as per below image:

Here, the admin can enable Minimum Qty Allowed in Shopping Cart and define the minimum quantity in the shopping cart.
POS Product Settings
There a some required fields, which need to be mentioned while creating the product for the POS. For the reference, please check the snapshot below:

Unit of Measures – From here, select the created unit of measure for the product. This will be the base unit for the product.
Now, Define the Quantity into the POS source.
Also, for allowing the quantity of the product in decimal click on Advanced Inventory as per below image:

Now here, make Qty Uses Decimals as Yes.
POS – Front End
Now the POS agent can add the product into the cart and edit the unit of measure of the product.

Now for changing the unit of measure of the product, the POS agents need to click on the Scales symbol in the cart.

From here, the POS agent and select the Unit Of Measures and click on DONE.
After that, the unit measure of the product in the cart gets changed as per below image:

For editing the quantity of the product, the POS agent can click the product in the cart. Now, the Quantity button in the POS gets enable as per below image:

Now, they can click on the Quantity button for altering the quantity of the product in the cart. For the reference, check below:

Here the POS agent can enter the desired quantity of the product and then click on the DONE button.
After that, the quantity gets edited into the cart as per below image:

POS – Invoice
After placing the order, the Unit Of Measure of the product also gets displayed on the invoice of the order.
For the reference, check below snapshot:

POS Product Inventory
Once, the order is placed on the POS, the inventory of the product get updated accordingly as per below image:

Thus, that is all about Magento 2 POS Unit Price still have any issue feel free to add a ticket and let us know your views to make the module better https://webkul.uvdesk.com/.
Current Product Version - 5.0.0
Supported Framework Version - Magento 2.0.x, 2.1.x, 2.2.x,2.3.x, 2.4.x

Be the first to comment.