Magento 2 Job Board extension permits the admin to create a separate Job Board listing section within the Magento 2 web store.
The admin can easily create job openings by adding the job categories, jobs, and can also check the job applications sent in by the applicants.
In short, this extension will allow you to manage the job postings from within the Magento 2 store and the applicants can easily apply to the various job opening from the store front end.
Watch the below video tutorial to understand the extension workflow:
Features
- The admin can manage the Job Categories, jobs, and Applications.
- Applicants can browse Job Categories & Jobs at the Frontend.
- Allow applicants to submit a Job Application via frontend.
- Landing Page Heading title can be set by the admin.
- Job Board content can be configured by the admin.
- The admin can set the allowed extensions for the resume.
- Transactional emails are sent to the admin & the applicant.
- Users can check the applied jobs in the applied job section on their account panel.
- Schema Markup for Job postings.
- This extension is compatible with GraphQL.
- The extension is compatible with the Hyva Theme.
Installation – Magento 2 Job Board Module
Follow the below steps for installing the extension –
Step 1:
Unzip the respective extension zip and then move “app” folder (inside “src” folder) into Magento root directory on the server.

Step 2:
Now, run the below-mentioned commands in the Magento 2 root directory via terminal.
php bin/magento setup:upgrade
php bin/magento setup:di:compile
php bin/magento setup:static-content:deploy
php bin/magento indexer:reindex
php bin/magento cache:flush
Language Translation
For translating the module language, navigate through src/app/code/Webkul/JobBoard/i18n and edit the en_US.csv file.
Thereafter, rename the CSV as “en_SA.csv” and translate all right side content after the comma in the Arabic language. After editing the CSV, save it.
Then upload it to the path src/app/code/Webkul/JobBoard/i18n where the Magento2 is installed on the server. The module gets translated into the Arabic Language. It supports both RTL and LTR languages.
Module Configuration
After the successful installation of the extension, the admin will configure the module. To do so, navigate through Stores -> Configuration -> Webkul -> Job Board.

Here, the admin has two configuration settings –
JobBoard:
- General Settings
- Transactional Emails
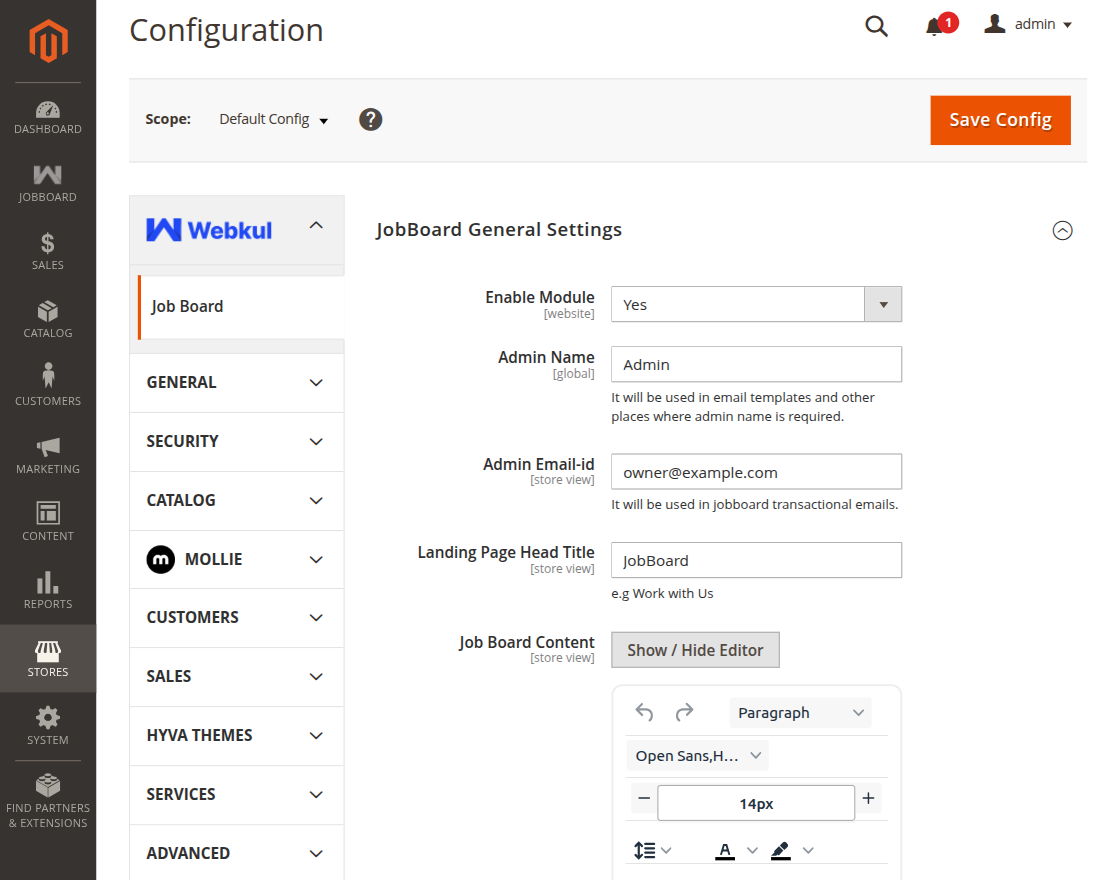
JobBoard General Settings
The admin will –
- Add the Admin Name that will be used in email templates and other places where the admin name is required.
- Enter the Admin’s Email Address that will be used for the job board transactional emails.
- The Landing Page Head Title is added which shall be visible at the front end.
- Job Board Content allows the admin to enter the details such as a description or a message for the organization.
- Admin needs to enter the types of resume file type permissible in the Allowed Extensions for Resume section.
JobBoard Transactional Emails
Here, the admin needs to select the email templates that will be sent for notification –
- Choose the Notification Email to the Admin Template.
- Select the Notification Email to Applicant Template.
- Further Notification Email to Admin Created By Admin Template
- And also Notification Email to Applicant Created By Admin Template
- Notification Email to Applicant Created By Admin Template for Approval/Disapproval
On making the configuration, tap the Save Configuration button on the top right-hand side.
Module Workflow – Admin
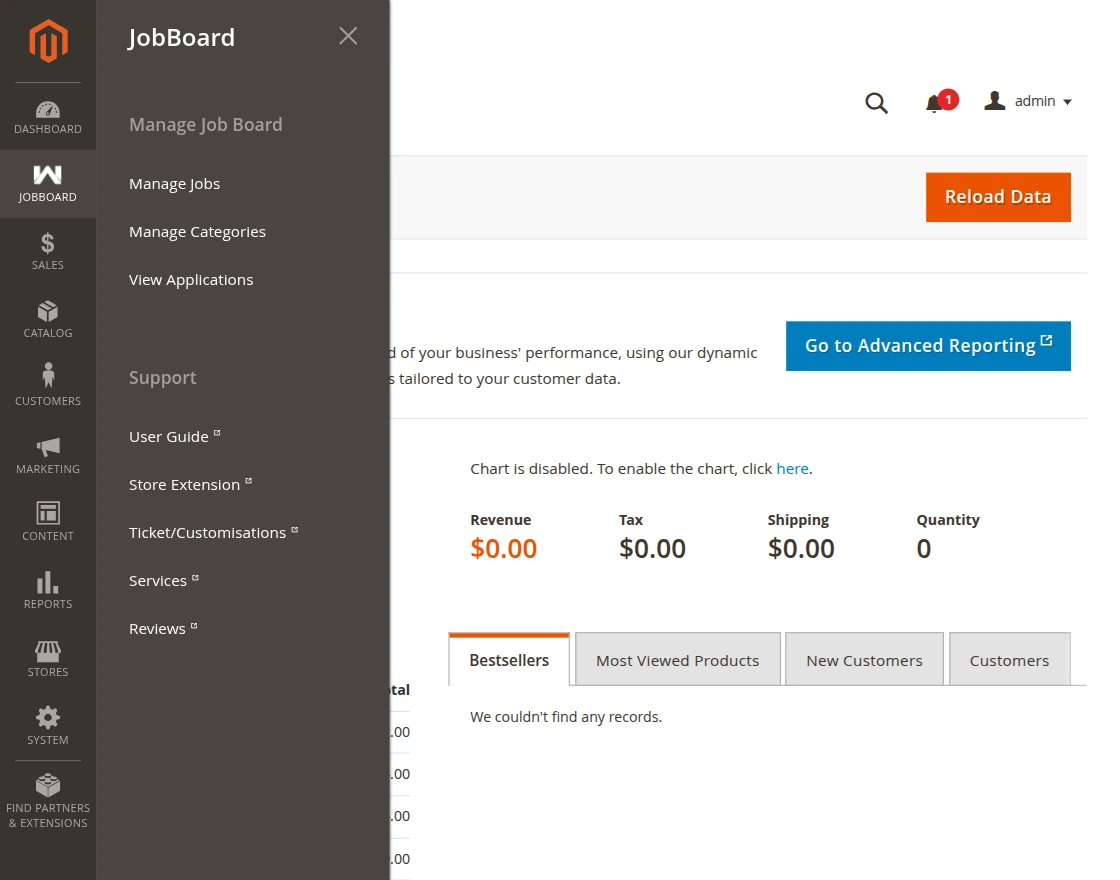
After the successful installation of the extension, the admin will have a JobBoard menu option with 3 sub-menu options –
- Manage Jobs
- Manage Categories
- View Applications
Manage Jobs
Under this section, the admin will be able to view all the created jobs and can add new jobs as well.
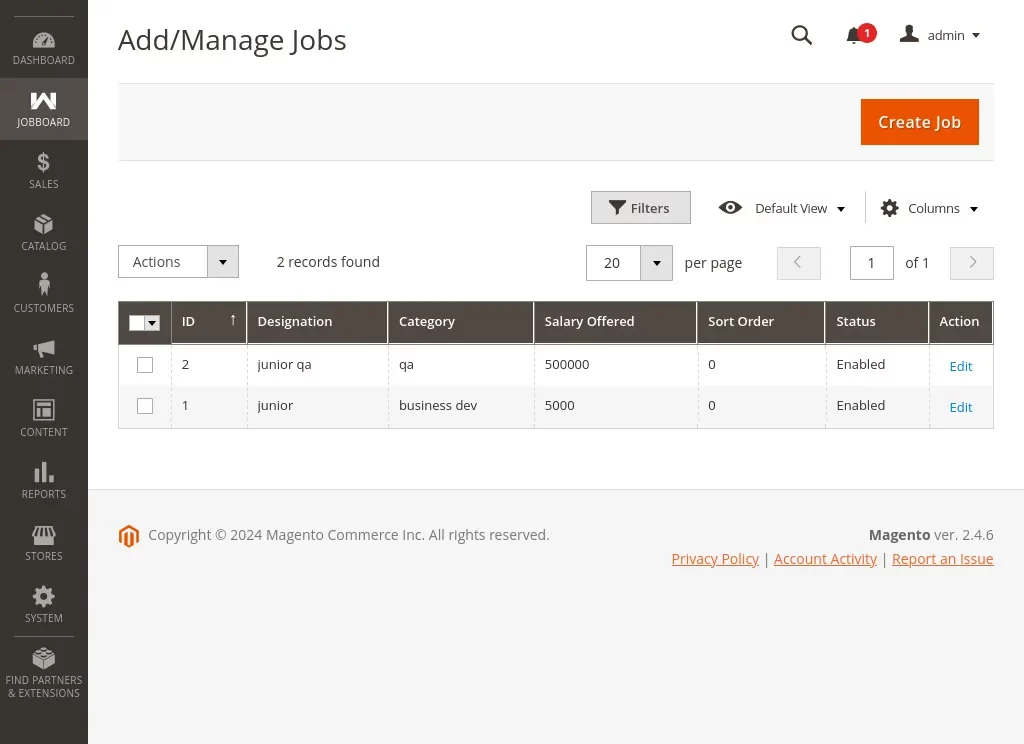
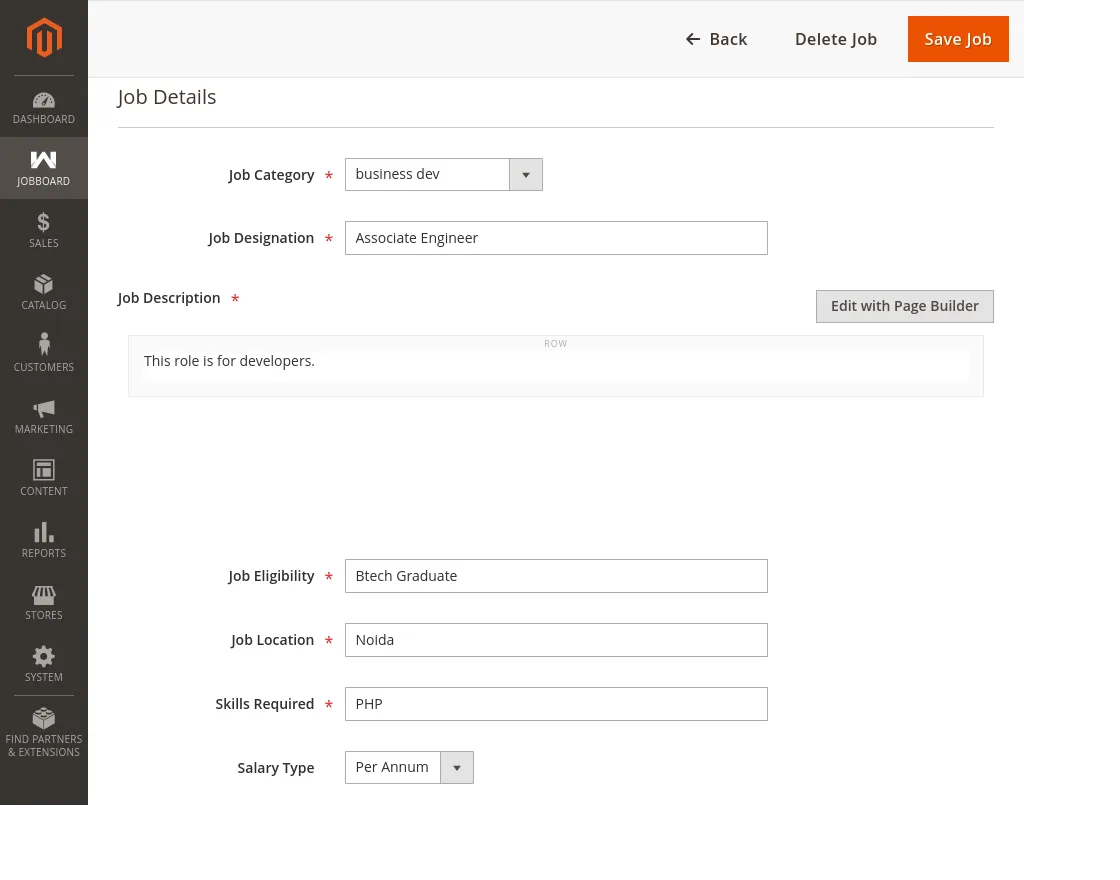
To create a new job posting, tap the Create Job button which brings up a section to create a new job.
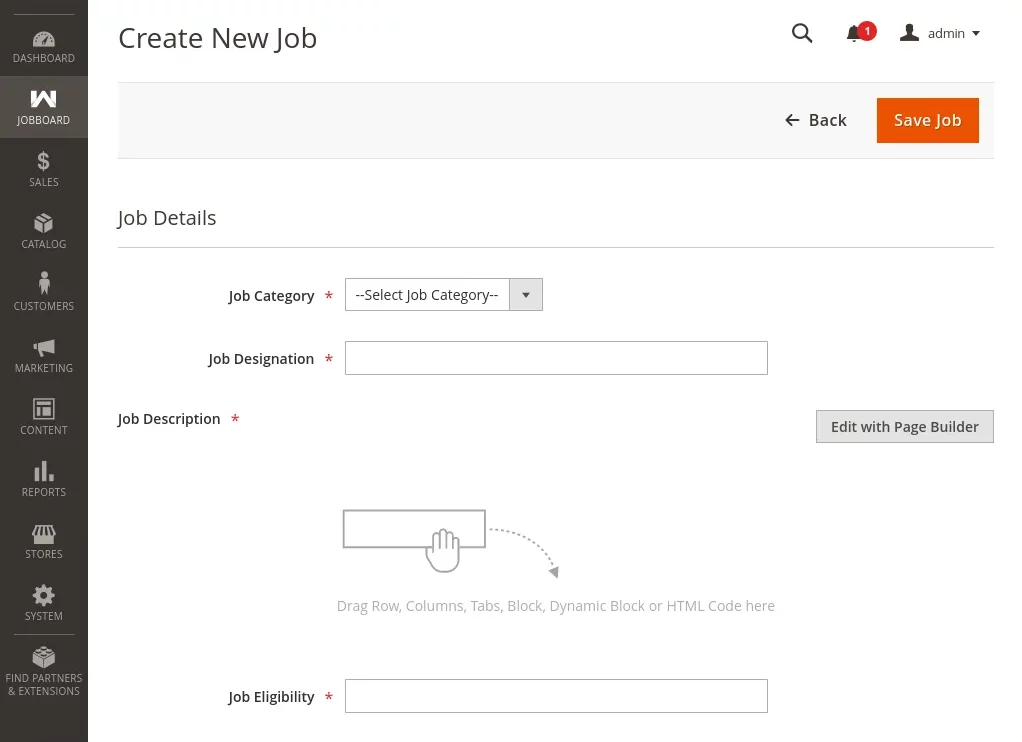
The admin can configure the settings as under:
Job:
- Category: Choose a category for the respective job.
- Designation: Add the name of the designation of the job.
- Description: Add a description of the job profile using the Page builder as required.
- Eligibility: Add eligibility requirements for the job profile.
- Location: Locations for the job openings.
Skills Required: Add the skills needed for the job profile.
Salary Type: The admin may either choose Per Annum or Per Month against salary type.
Salary: Salary for the respective job profile.
Experience Required: The experience required for the respective job profile.
Sort Order: The admin adds a sort order for the Job.
Status:
The admin may set the status of the Job as Enabled or Disabled
After creating a job, the admin will find it within the list itself.
Here, the admin can enable, disable, or delete a created job by selecting the job first and then choosing the appropriate option from the Actions drop-down as shown below.

To edit a created job, tap the View button for the respective job under the Actions column which brings up the section for editing the job.
Here, the admin can make the changes as required and can save the job thereafter.
Manage Categories
Under this section, the admin can create the job categories and view the created ones.

To create a new Job Category tap the Create Category button that brings up a section to create a new job category. Here, the admin will –
- Enter the Category Name
- Configure the Sort Order for the job category.
- Set the Status as Enabled or Disabled as required.

After creating the new category, the admin can see a success message.
Apart from that, the admin can also enable, disable, or delete a created job category by choosing the appropriate option from the Actions drop-down after selecting the categories to affect.

To view the details of a particular job category tap the View link under the Actions column. Here, the admin can edit the name, sort order, and the status of a job category.

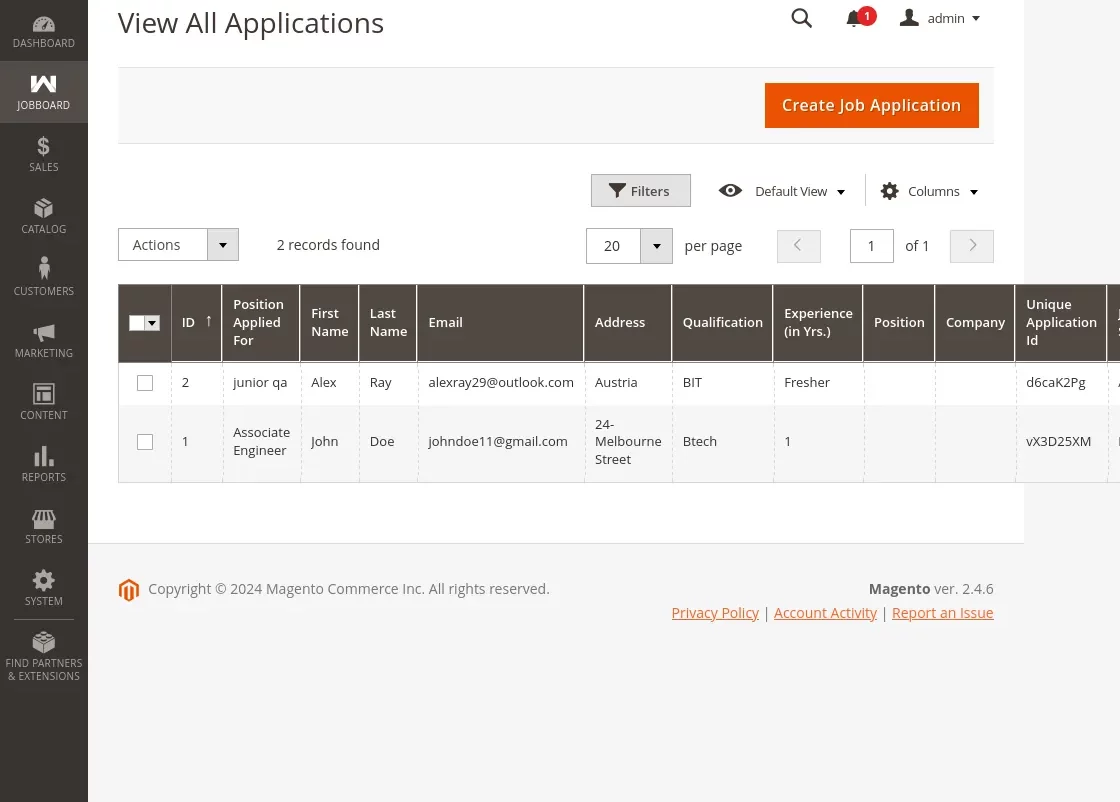
View Applications
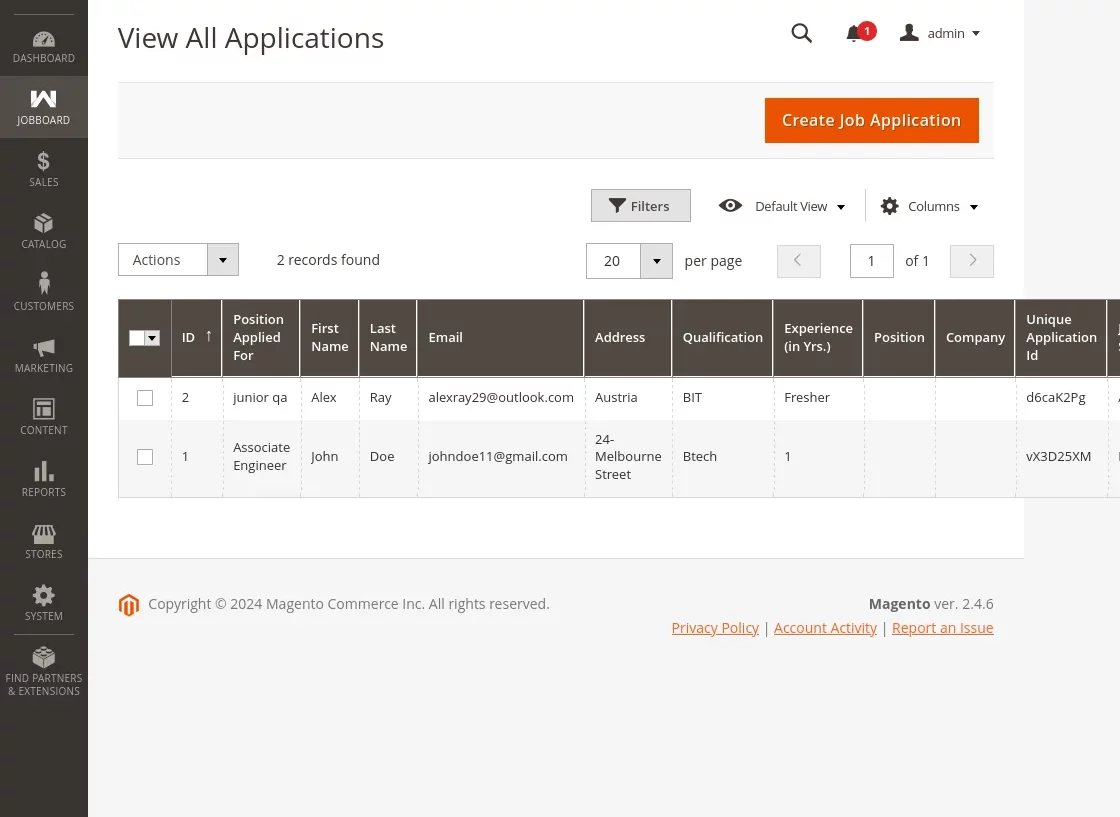
Under this section, the admin will find all the applications for the various job profiles that are applied by the various applicants from the front end.
Create Job Application on Applicants Behalf – Admin
The admin will be able to apply for the positions that are open under the various job categories on the applicant’s behalf as well.
To do so, the admin will navigate to JobBoard -> View Applications -> Create Job Application.

Tapping the Create Job Application button, as a result, brings up the section to create a job application on the applicant’s behalf.
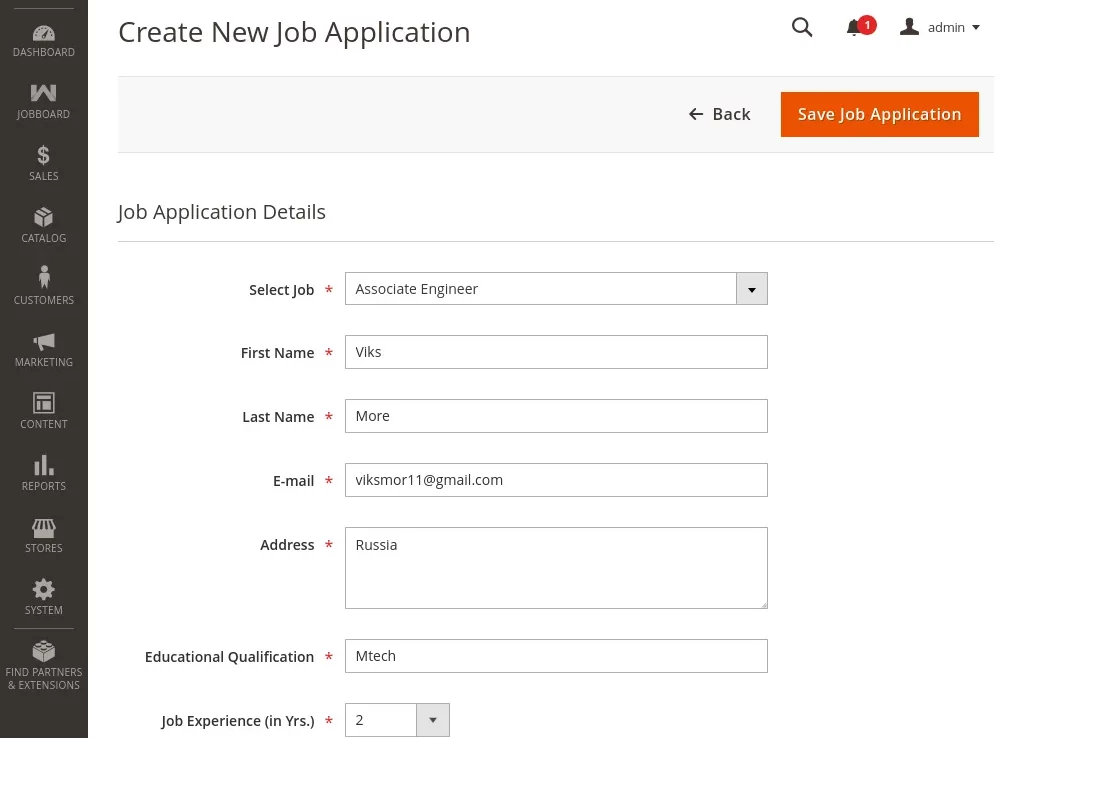
Moreover, here, the admin needs to enter the job application details along with –
Select Job:
Further, Select the Job from the drop-down option for which the applicant wants to apply.
First Name: Firstly add the first name.
Last Name: Add the last name.
Email Address: Secondly enter the email address of the applicant.
Address: Further add the address details of the applicant.
Education Qualification: Moreover add the qualification details for job profile.
Job Experience(In Years): Add the work experience in years.
Current/Previous: Enter the current/ previous position of the Applicant.
Upload Resume:
Upload the Resume (pdf,png,pdf,doc,txt) of the applicant for the job.
Job Status: The admin can set the job status as pending, approve, disapprove, hired, and rejected.
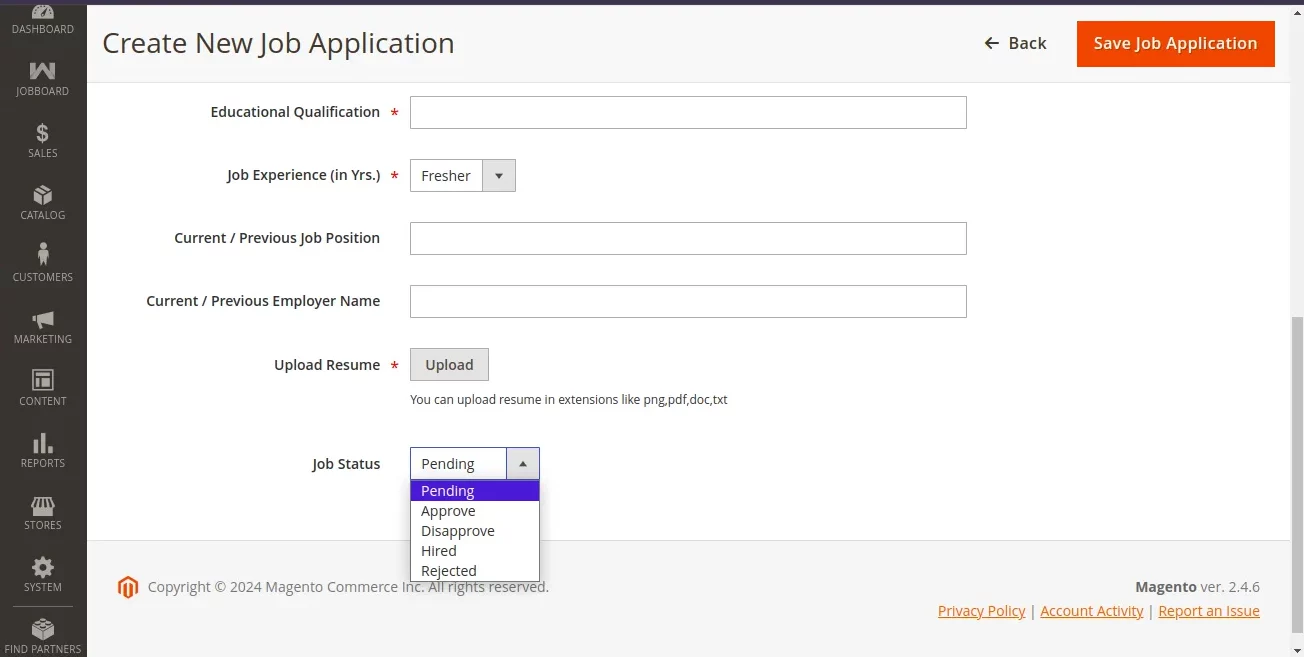
Lastly, tap the Save Job Application button to save the job application on the behalf of the applicant.
After saving the job application, an email for the same is sent to the email address added by the applicant while filling in the job application.

As the applicant submits the job application, an email is automatically sent to the admin as well.

The admin can view the list of applications under View All Applications as shown in the image below.
Frontend Module Workflow – Job Board
In the frontend, applicants can reach the Job posting section by navigating to the Jobs link available in the header and footer section of the website.
On the Job posting page, the applicants can see the various different job categories. Tapping a particular job category shows its respective job openings.

To view a particular job’s detail, the applicant has to tap the respective View Job Details button.
On clicking the View Job Details, the customer will find the details and description of the respective job profile.

As the customer clicks on Apply For Job, a form shall pop up as shown in the image below.

Moreover, the users will have to add details such as First Name, Last Name, Email, Address, Qualifications, Total Experience, Current Position, Current Company, and Position Applied.
They will also need to upload a Resume file to apply for a job profile as shown below.


The user can use PDF, DOC, and TXT formate to upload the resume file. The applicant can tap on the Submit Application button to send the job application.
After submitting the application the guest user can see a message with a unique ID.

Using the unique id the guest user can check his application status. Just tap on the Job Status link and a pop-up will appear. Here, enter your unique id and your email id to check your job status.

After tapping the check status button the status of your application will get displayed.

Applied Jobs – In case of Registered Users
The applicant can check the applied job details in my account section. Here they can check how many jobs they have applied for and can view their application as well along with the job status.

Also, if the user has already applied to a particular job he can see the message for the same.

Markup Schema for Job Posting
By including JobPosting structured data on your job posting websites, you can enhance the job seeker experience.
Your job postings will appear in a special Google Search experience when you add structured data to your Job postings. This feature is simplified by this extension.
As an example, you can see how the job postings will appear on the Google search page.

After you have created your jobs on your website, we can check whether your page supports rich results.

For the same, check whether your page supports rich results.
Here, on this site page, just enter your website URL as shown below, and tap the Test URL button.

Now, the results will get populated as shown below in the site and you will get to know if the page supports rich results for the Google search page.


That’s all for the Magento 2 Job Board extension. Still, have issues, get back to us at [email protected] or raise a ticket at our HelpDesk System.
Current Product Version - 4.0.5
Supported Framework Version - Magento 2.0.x, 2.1.x, 2.2.x,2.3.x, 2.4.x

Be the first to comment.