Magento 2 Google Maps Pin Address (Adobe Commerce) allows the customer to enter the address at the time of checkout by using the google map, With the help of this module, the customer can drag and drop the pin icon on the google map to enter the address.
Also, the billing address of the customer/guest user can be entered by using the google map of this module.
Watch the video tutorial below to understand the extension workflow:
Features
- Logged in user can add the address in the address book with the help of Google Map.
- On the checkout page, the user can fill data related to the address with the help of Google Maps.
- This module works for both guest users and customers.
- The admin can set the Google map API key.
- Admin can set the default longitude and latitude for the map.
- Now the Magento 2 Google Map Pin address module supports GraphQL API.
- The extension is now compatible with the Hyva theme.
Installation
Customers will get a zip folder and they have to extract the contents of this zip folder on their system. The extracted folder has an src folder, inside the src folder you have the app folder. You need to transfer this app folder into the Magento 2 (Adobe Commerce) root directory on the server as shown below.

If you have downloaded the module from Magento Connect then unzip the respective extension zip and then GoogleMapPinAddress(module) name folder inside your Magento root directory as app/code/Webkul/GoogleMapPinAddress and then move all module’s files inside /app/code/Webkul/GoogleMapPinAddress/ folder in Magento root directory.
After the successful installation, you have to run these commands in the Magento 2 root directory.
First command- php bin/magento setup:upgrade

Second Command – php bin/magento setup:di:compile

Third Command – php bin/magento setup:static-content:deploy

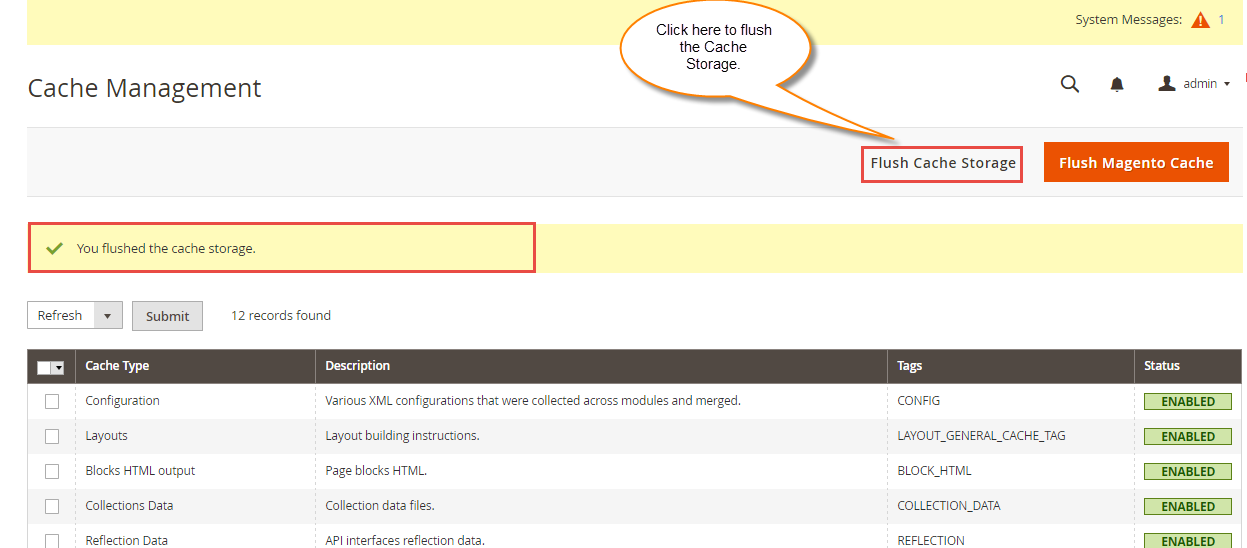
After running the commands, you have to flush the cache from the Magento admin panel by navigating through->System->Cache management as shown below.
Multilingual Support
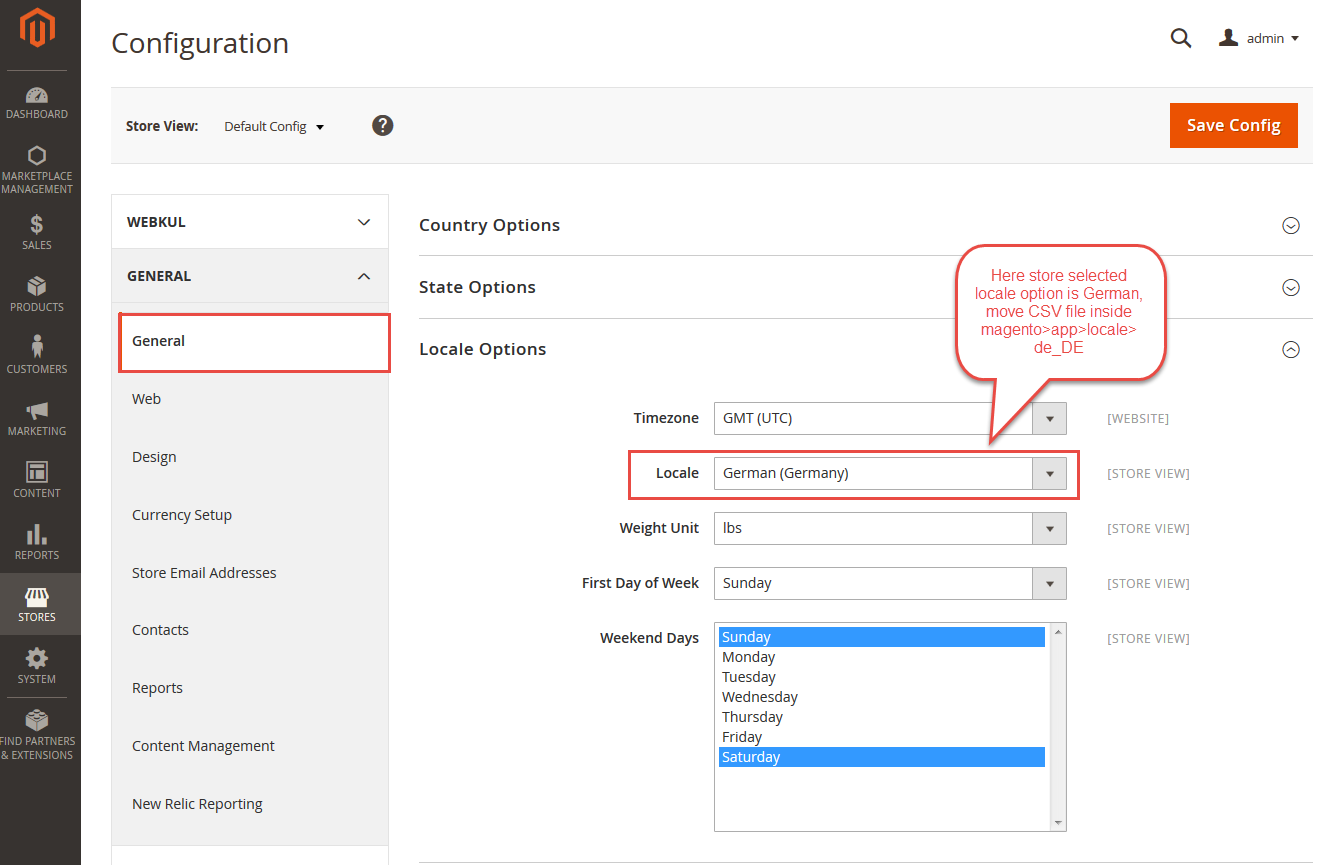
For the multilingual support, the admin will navigate through Store->Configuration->General ->Locale Options and select the locale as German (the language into which admin wants to translate his store content).
Translation
If a user wants to translate their module from English to German then they need to follow the path app/code/Webkul/GoogleMapPinAddress/i18n in their unzipped Google Maps Pin Address for Magento 2 folder and will get a CSV file with name “en_US.csv”. Now they will rename that CSV as “de_DE.csv” and translate all right side content after the comma in the German language. After editing the CSV, save it and then upload it to the path app/code/Webkul/GoogleMapPinAddress/i18n where they have installed Magento2 on their server. The module will get translated in the German Language. It supports both the LTR and RTL languages.

The user can edit the CSV like the image below.

How to Get Google API
For getting the google API key, the admin needs to follow these steps:
Watch the video tutorial below to know how to get Google Maps API Keys
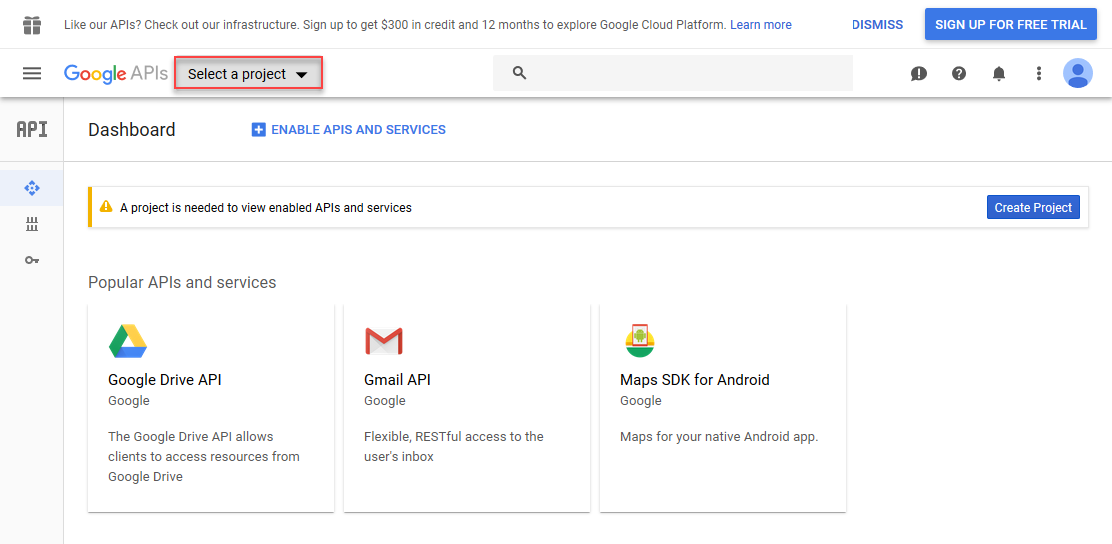
Step 1. Go to console.developers.google.com and log in using your Gmail ID. After that, click on select a project.
Step 2. Click on New Project Button. After that, you need to enter the name of the project and Browse the location of the organization.

Step 3. After creating the project click on the Enable API And Services.

Step 4. Then click on the Maps JavaScript API to get the API key.

Step 5. After clicking on the Maps JavaScript API, you need to click on the ENABLE button.

Step 6. Once you have enabled the API then you need to navigate through Credentials> Credentials in APIs & Services.

Step 7. After that, you need to click on the create credentials and select the API key.

Step 8. Now you can copy the generated API key.

Admin End Configuration
After getting the API key, the admin needs to enter that API key while configuring the module. For configuring the module the admin can navigate through Stores> Configuration> Google Map Pin Address Settings.

After that, by using the general settings the admin can Active this module by selecting Yes and can select No for not using it, in the API Key tab, he needs to enter the Google map API key. Admin can set the default longitude and latitude for the map as well.
Lastly, the admin needs to click on the Save Configuration button to save the configuration.
User End Workflow
In the front end while doing the check out this module comes into the action by representing the Google Maps for inserting the address.

Note:
- Similarly, the guest user can also view the google map for inserting the address.
The customer can change the billing address by just pointing the pin of the google map to his address.

Note: If the customer is inserting the address manually by himself, then he needs to insert Country, State, and Pincode to locate the map for his address correctly.
The customer can also change/add the address of his address book by using the google map as well. For updating/adding the address the customer can navigate through My Account> Address Book.

That’s all about Google Maps Pin Address for Magento 2 (Adobe Commerce) module. For any further queries, suggestions or customization, please add a ticket to HelpDesk Support.
Explore the Adobe Commerce Cloud development service by Webkul. You may browse other quality Magento 2 extensions.
Current Product Version - 5.0.3
Supported Framework Version - Magento 2.0.x, 2.1.x, 2.2.x,2.3.x, 2.4.x

2 comments