Magento 2 Smart Auto Login feature saves your website passwords to your Google Chrome. And, using these saved passwords one can sign in automatically into their website when use on Chrome.
Using the Magento 2 Smart Auto Login extension, the store owner can integrate the Google Smart Lock feature into the Magento store.
The Google Smart Lock functionality allows the Magento store customers to save and sync their Magento customer account passwords when using on Chrome browser.
The customers will be able to automatically log in to the store in one click without entering the password.
Note:
- Google Smart Lock feature in the Magento store will work only on Google Chrome.
- SSL must be enabled for the proper functioning of this module.
Features of Magento 2 Smart Auto Login
- Secure your website with Google Smart Lock integration.
- Allow one-click customer smart auto-login to your website.
- Provide login convenience to your customers.
- Supports the latest Google Chrome web browsers.
- The admin can enable or disable the module.
- The module supports both registered users as well as guest users.
- Allow to save and sync account passwords with Google Chrome for automatic login.
- Ask for customer permission before saving the passwords.
- Saved passwords will appear in a pop-up display.
Installation of Magento 2 Smart Auto Login
Customers will get a zip folder and they have to extract the contents of this zip folder on their system.
The extracted folder has an src folder, inside the src folder you have the app folder. You need to transfer this app folder into the Magento2 root directory on the server as shown below.

After the successful installation, you have to run these commands in the Magento2 root directory.
composer require google/apiclient:^2.12.1
php bin/magento setup:upgrade
php bin/magento setup:di:compile
php bin/magento setup:static-content:deploy
php bin/magento indexer:reindex
php bin/magento cache:flush
Multi-Lingual Configuration
For Multilingual support, please navigate to Store>Configuration>General >Locale Options. And select your desired language from the Locale option.

Language Translation
For module translation, navigate to the following path in your system app/code/Webkul/GoogleSmartLock/i18n/en_US.csv. Open the file named en_US.CSV for editing as shown in the below screenshot.

Then replace the words after the comma(,) on the right in the file with your translated words.

After editing and translating the CSV file, you need to save the translated file name according to your region language and country code such as – de_DE.CSV.
Followed by uploading the translated file to the same folder from where you have obtained it. Now your module translation is complete.
How To Get Google API Credentials for Magento 2 Smart Auto Login?
You need to create a Google application using this link https://console.developers.google.com/project
Steps to create an Application:
1. Go to your API & Services ->Library

2. Now click Google+API under the section Social.
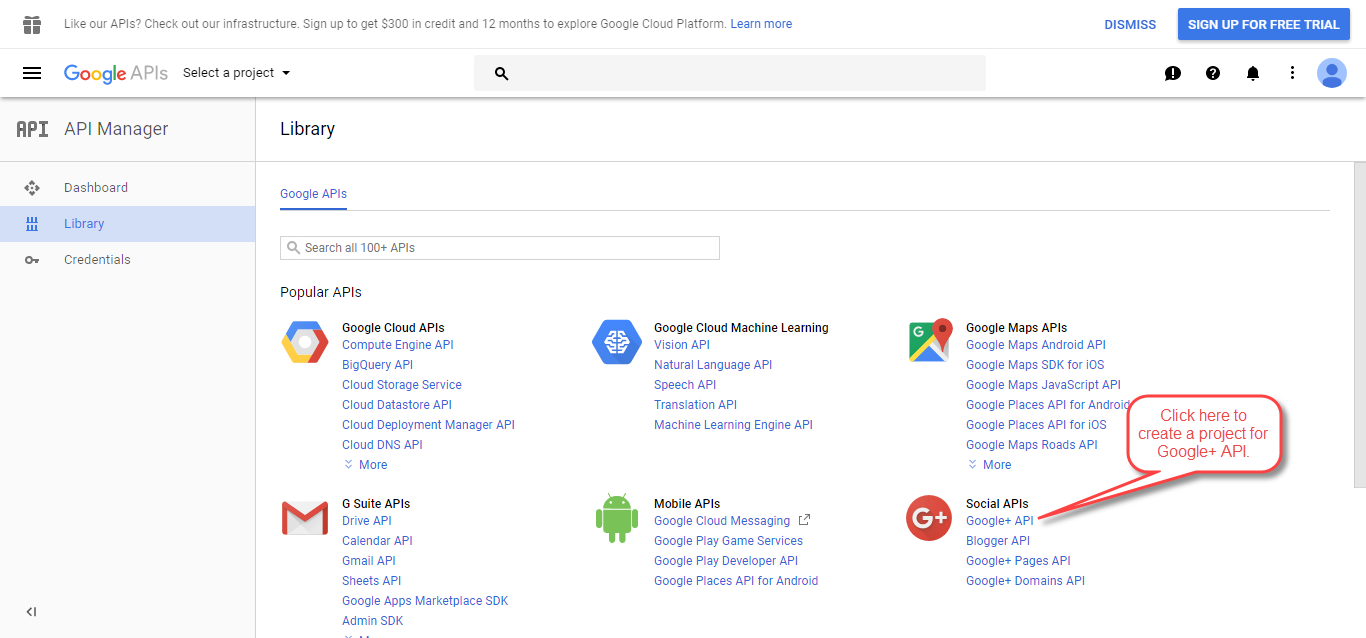

3. Now, click the Enable button to enable the Google+ API.

4. Now, click My Project to create a new project.

5. On clicking My Project, a pop-up will appear. Click “New Project” link.

6. Enter the name for your project so that you can identify your project. Please note that you should not include any Google word for your project name.

7. Now go to Credentials menu option and then click on Create credentials.

8 Now, click API Key section to create the API Key and then, click the OAuth client ID section to create the Client ID.

9. To configure the consent screen, click the “Configure consent screen” button.

10. Enter the product name that is to be shown to the users and then clicks the Save button.

11. Now, select the Application type and enter the Authorized JavaScript origins and the Authorized redirect URLs. Click the Create button.

**Note:
Set the OAuth Redirect URL like this – www.example.com/smartautologin/google/connect/
12. After clicking the Create button in the above step you will get the Client Id and Client Secret.

This will successfully create the Client ID and Client Secret Id which you will use while integrating the Google Smart Lock feature in the Magento store.
Configuration of Magento 2 Smart Auto Login
After the module installation, the admin will configure the module settings by navigating to the Store -> Configuration -> Webkul -> Google Smart Lock Auto Login as per the below image.
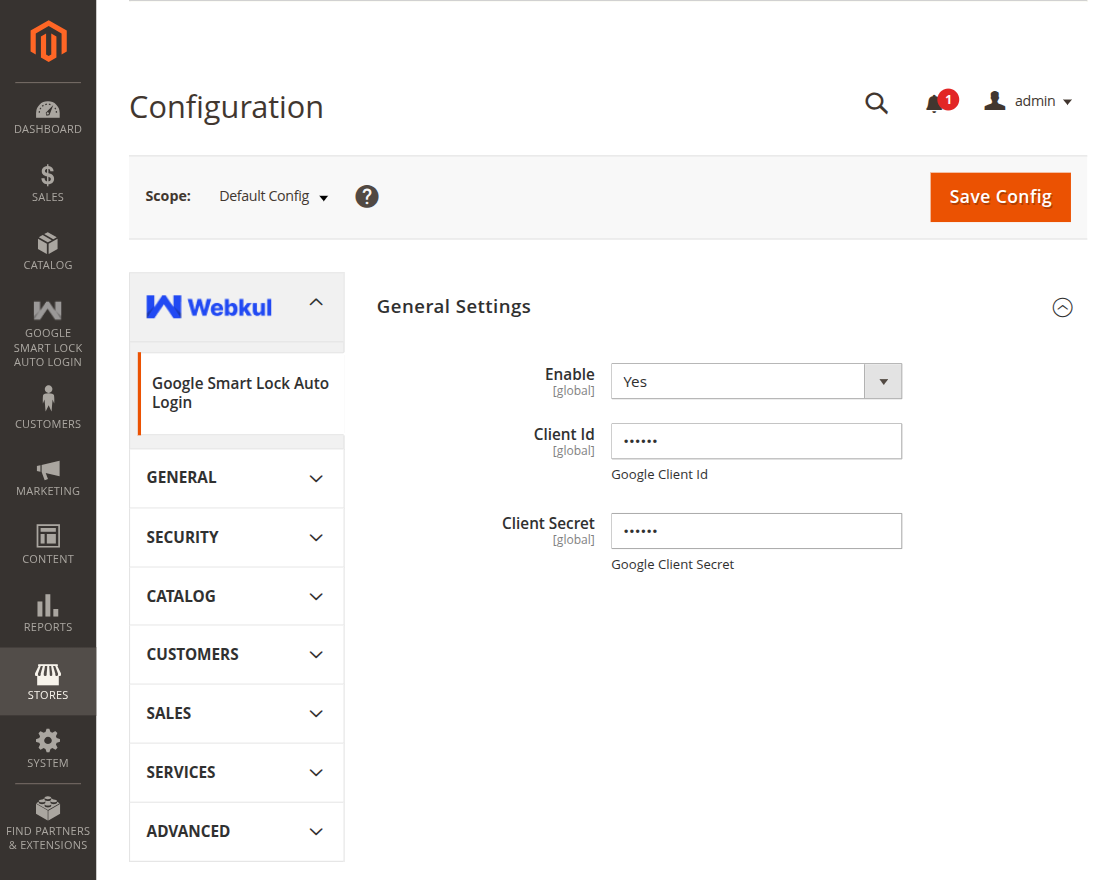
Here, the admin will:
- Enable: enable the module by selecting “Yes”. Else select “No” to disable the module.
- Client Id: enter the Client Secret Key that the admin has received while creating the app from the Google account.
- Client Secret: enter the Client Secret Id that the admin has received while creating the app from the Google account.
And, lastly will hit the Save Config button to save the module configuration successfully.
Front-End Workflow


The module allows the customers to save and sync their account passwords with Google Chrome for automatic login. The module supports both registered users as well as the guest users.
Registered Users:
At the front-end when the customer tries to sign-in, a pop-up will display as per the below image.
This pop-up will display the existing saved accounts with the chrome. The customers will simply select their respective account for the automatic login.
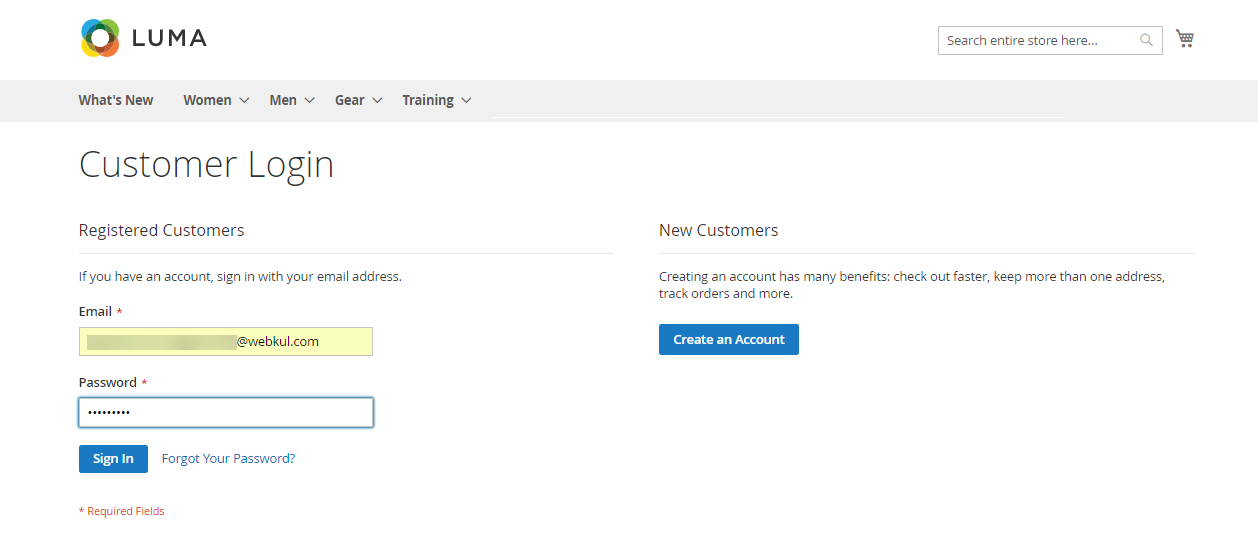
And if the customer account is not saved, the customer first needs to enter their accounts credentials as per the below image.
After hitting the Sign-In button, the customer gets signed-in into the account and again a pop-up will gets displayed.
This pop-up will ask the customers whether they want to save their passwords to the Chrome or not. If the customer selects:
- Save: the account gets saved. And next time onwards whenever the customer tries to log in, a pop-up will appear displaying the customer’s saved account. The customer will select the respective account for the automatic login.
- Never: the account will not get saved. And, every time the customer needs to feed the account credential and log in the account manually.
Guest Users:
At the front-end, the guest users first need to sign-up as per the below image.
After hitting the Create an Account button, the customer gets signed-up into the account and again a pop-up will get displayed.
This pop-up will ask the customers whether they want to save their passwords to the Chrome or not. If the customer selects:
- Save: the account gets saved. And next time onwards whenever the customer tries to log in, a pop-up will appear displaying the customer’s saved account. The customer will select the respective account for the automatic login.
- Never: the account will not get saved. And, every time the customer needs to feed the account credential and log in the account manually.
That’s all for Magento 2 Google Chrome Smart Auto Login extension. However, if you still have questions regarding the Magento 2 extensions
please create a support ticket by clicking Webkul Support System.
Current Product Version - 4.0.3
Supported Framework Version - Magento 2.0.x, 2.1.x, 2.2.x,2.3.x, 2.4.x

Be the first to comment.