With Magento 2 Barcode Inventory module, the admin can generate unique barcodes for all products received in incoming shipments.
The admin can also update the stock automatically through barcode scanning after receiving the shipment from the supplier.
Hence, the admin can even generate the barcode PDF of single as well as multiple shipments.
Note: To use Magento 2 Barcode Inventory module, Magento 2 Purchase Order must be installed also Barcode Scanner Device is required to read the barcodes.
Watch the video tutorial below to understand the extension workflow:
Features
- Enable and disable the module.
- Generate barcodes for incoming products automatically.
- Scan the barcode and update inventory.
- Update individual product stock.
- Update multiple inventories in bulk.
- Print PDF functionality from mass action.
- Print PDF functionality from individual shipment.
Installation
Firstly, the customers will get a zip folder and they have to extract the contents of this zip folder on their system.
Then the extracted folder has an src folder, inside the src folder you have the app folder.
Hence, you need to transfer this app folder into the Magento2 root directory on the server as shown below.

After the successful installation, you have to run these commands in the Magento 2 root directory –
php bin/magento setup:upgrade
php bin/magento setup:di:compile
php bin/magento setup:static-content:deploy
composer require picqer/php-barcode-generator
composer require mpdf/mpdf
php bin/magento indexer:reindex
php bin/magento cache:flush
Multi-Lingual Configuration
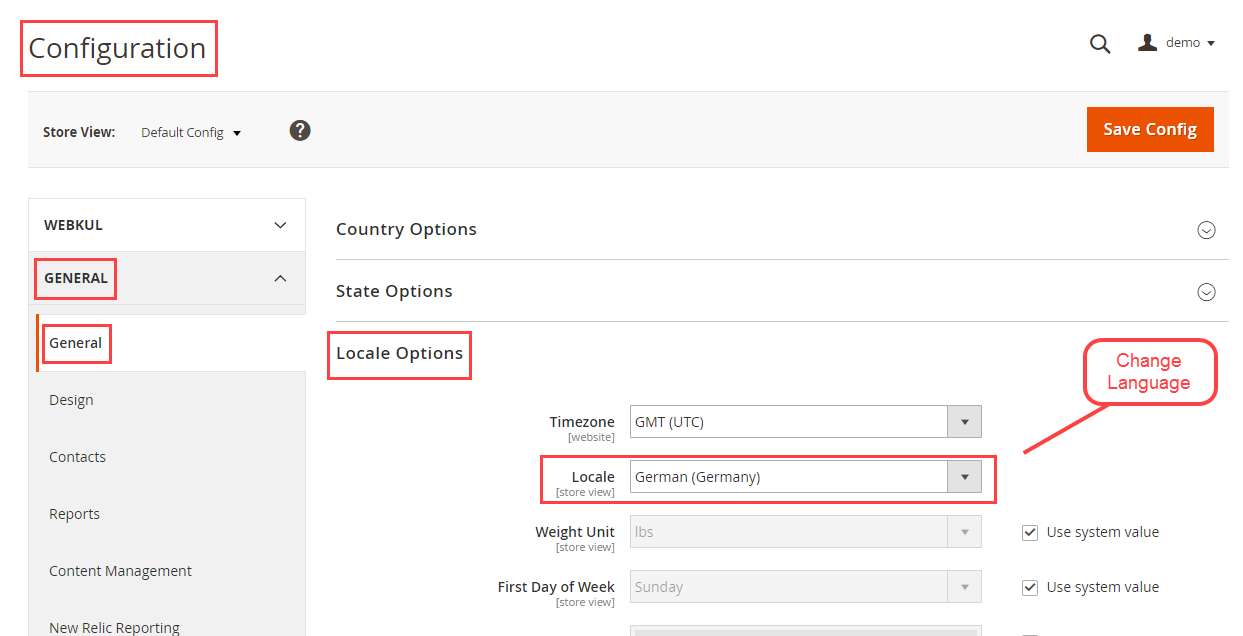
Additionally, for Multilingual support, please navigate to Store>Configuration>General >Locale Options. And select your desired language from the Locale option.
Language Translation
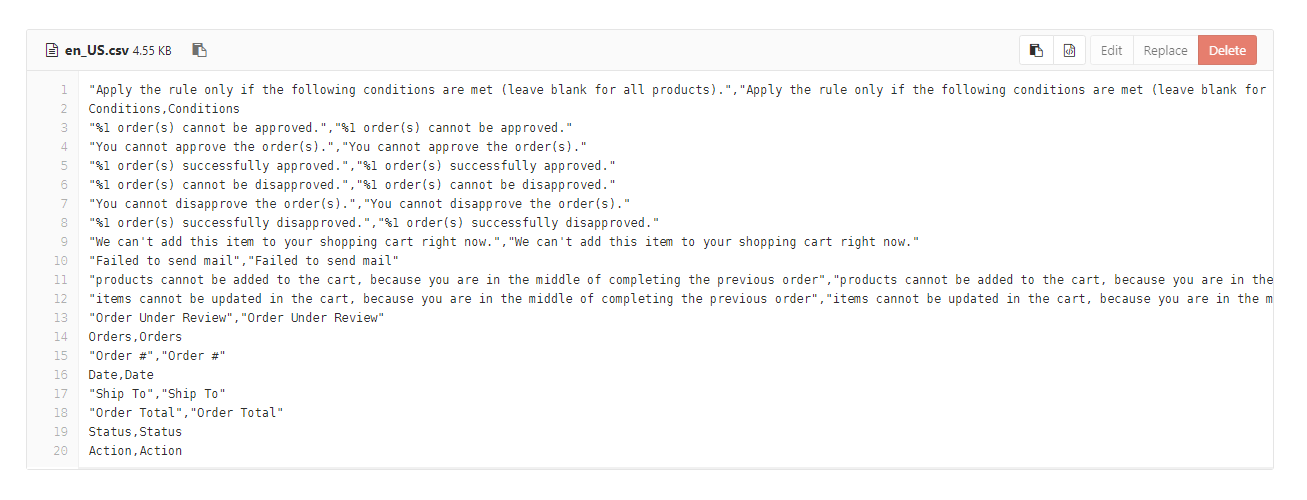
Now, for module translation, navigate to the following path in your system app/code/Webkul/Barcode/i18n/en_US.csv. Open the file named en_US.CSV for editing as shown in the below screenshot.

Then replace the words after the comma(,) on the right in the file with your translated words.
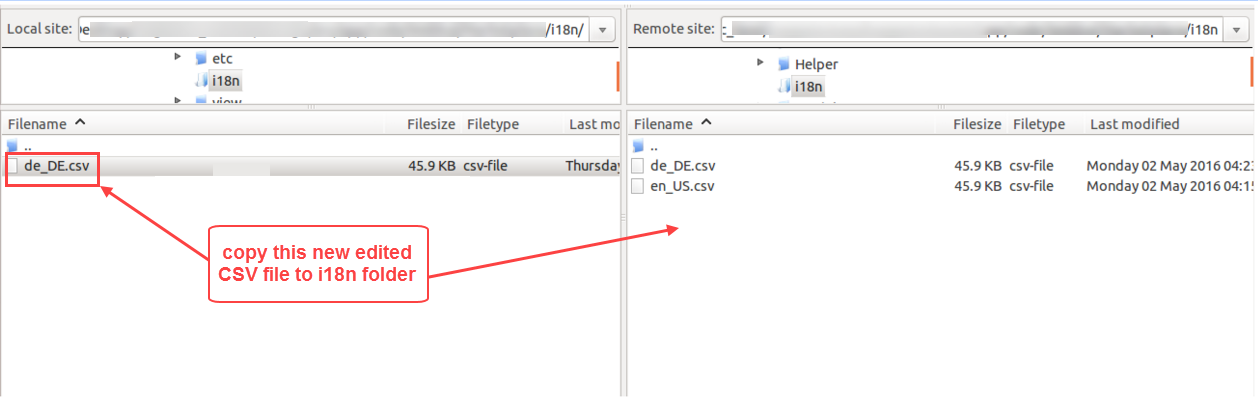
After editing and translating the CSV file, you need to save the translated file name according to your region language and country code such as – de_DE.CSV.
Followed by uploading the translated file to the same folder from where you have obtained it.
Finally, your module translation is complete.
Module Configuration
After the module installation, the admin will configure the module settings by navigating to Stores -> Configuration -> Webkul -> Barcode Inventory Management as shown below.
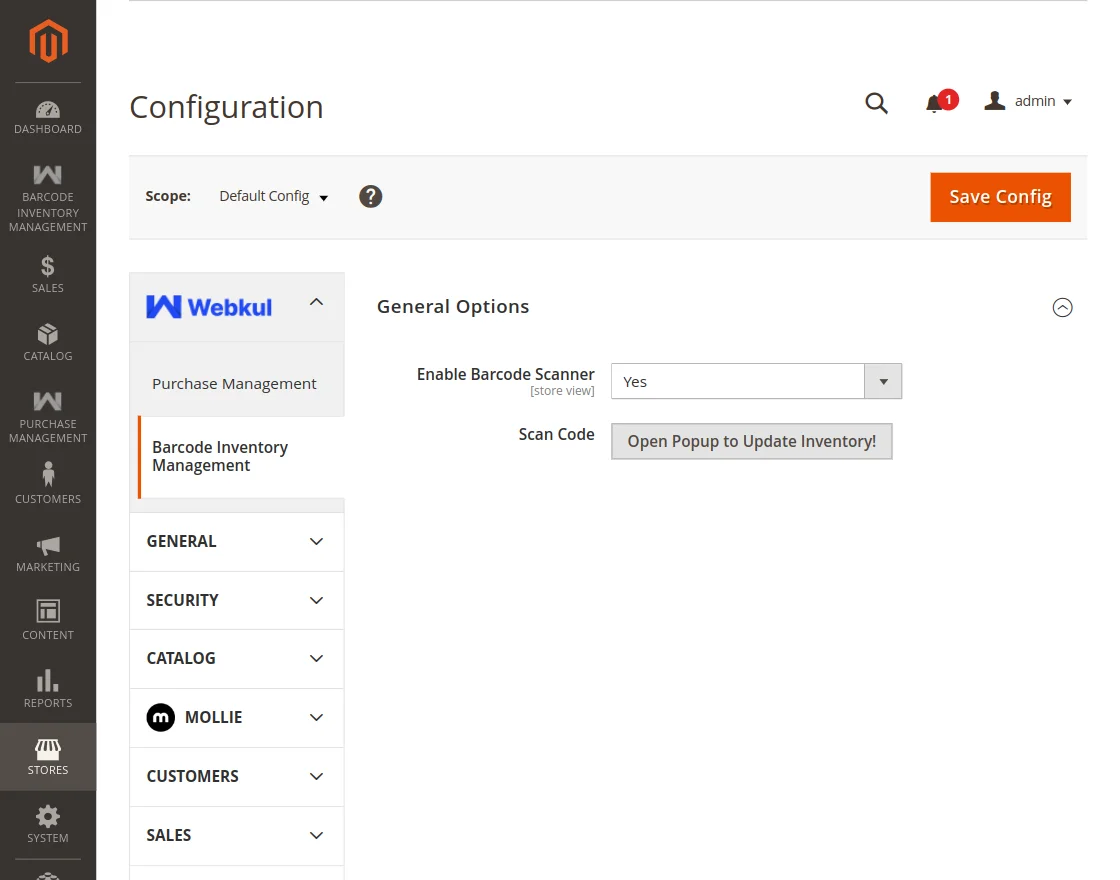
Here, the admin will –
- Enable Barcode Scanner – Select Yes to enable the module. Else, select No to disable the module.
- Scan Code – Click the Open Popup To Update Inventory button to scan and update the inventory once the admin has received the incoming shipments.
Thus, lastly, hit the Save Config button to save the configuration successfully.
Generate Barcodes: Incoming Shipment Products
After sending the purchase order to the supplier, an incoming shipment will be created and admin can check the same by navigating to –
Purchase Management -> Incoming Shipments -> Click to response (respective shipment ID).
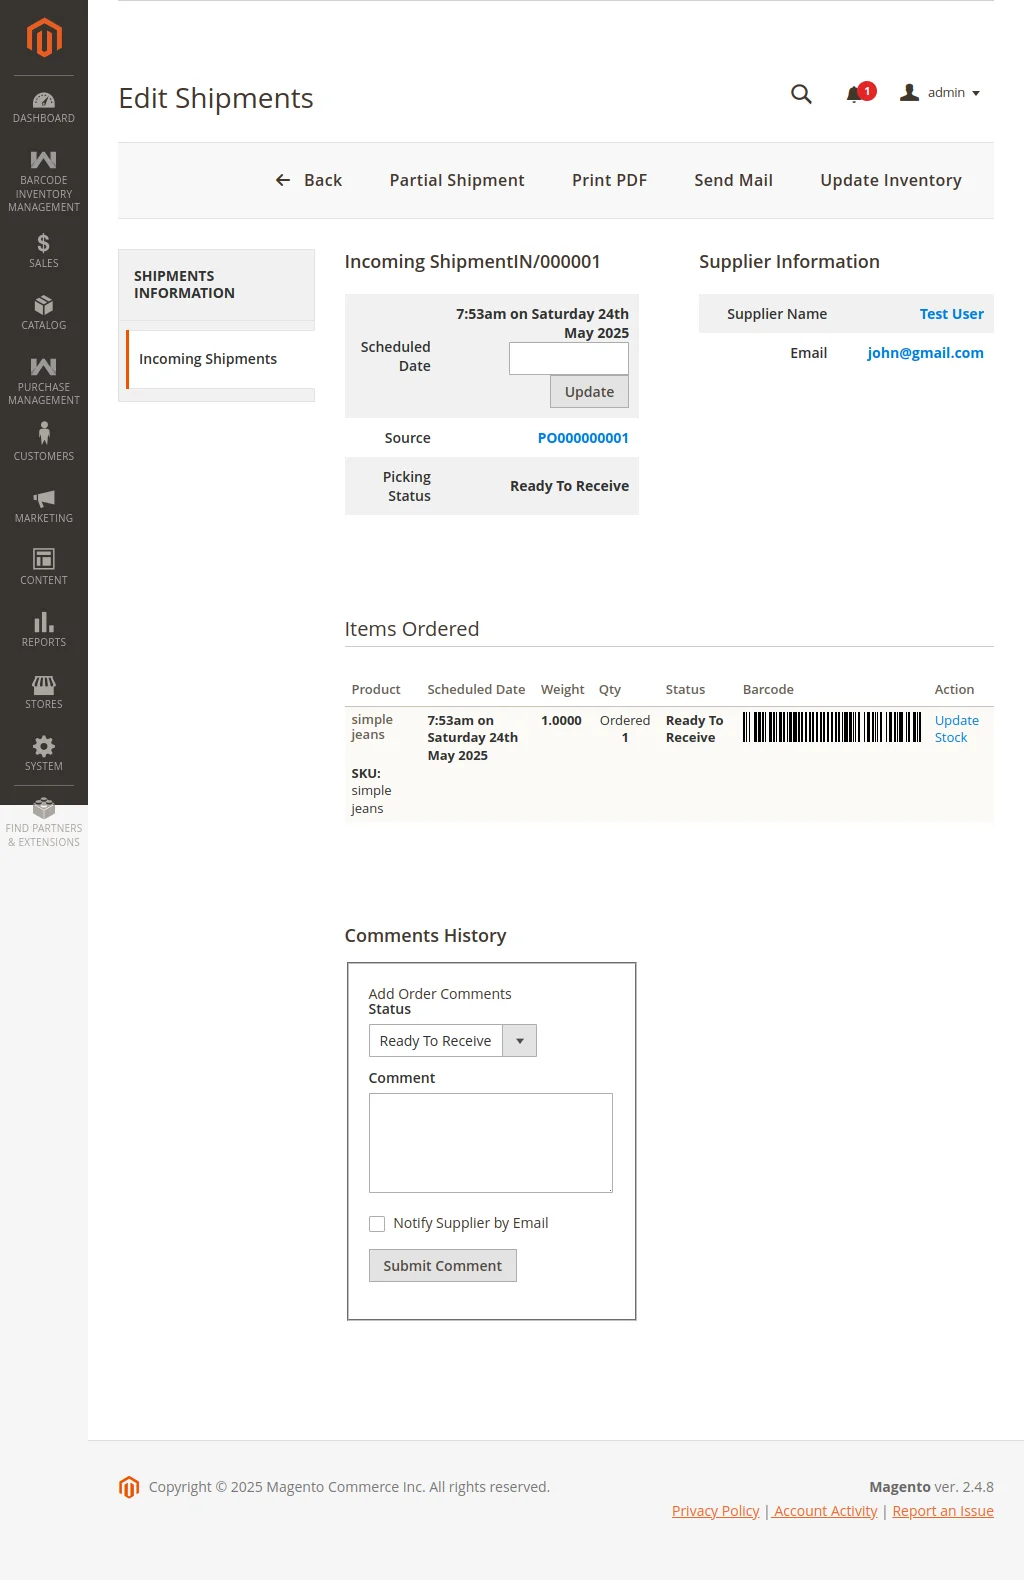
And the admin will get the barcodes for the incoming shipment products automatically.
Update The Inventory Manually
Now, after getting the shipment from the supplier, the admin will update the inventory.
Now, the admin can manually update the inventory of the shipment products individually.
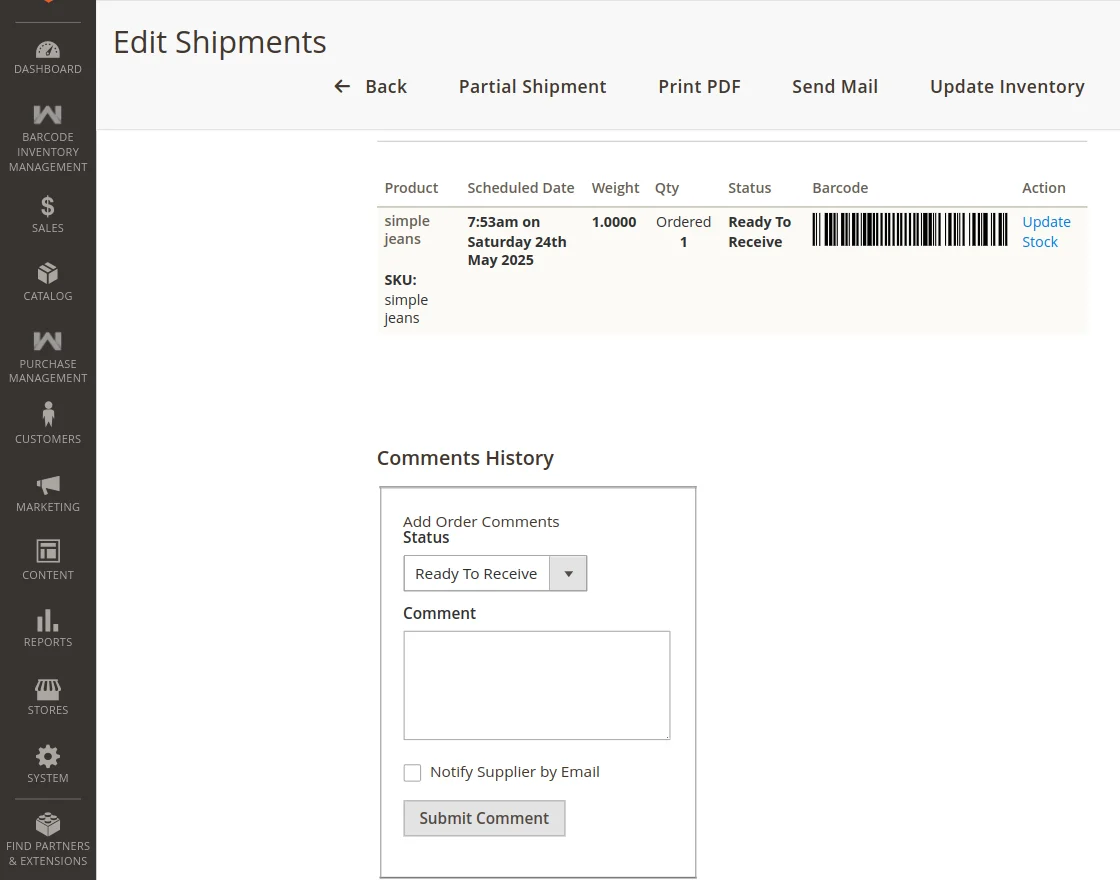
For this, the admin can click the Update link available under the Action column. This will change the product status to Received.
However, the admin can even bulk update the inventory of the shipment products.
For this, the admin can click the Update Inventory button available at the top.
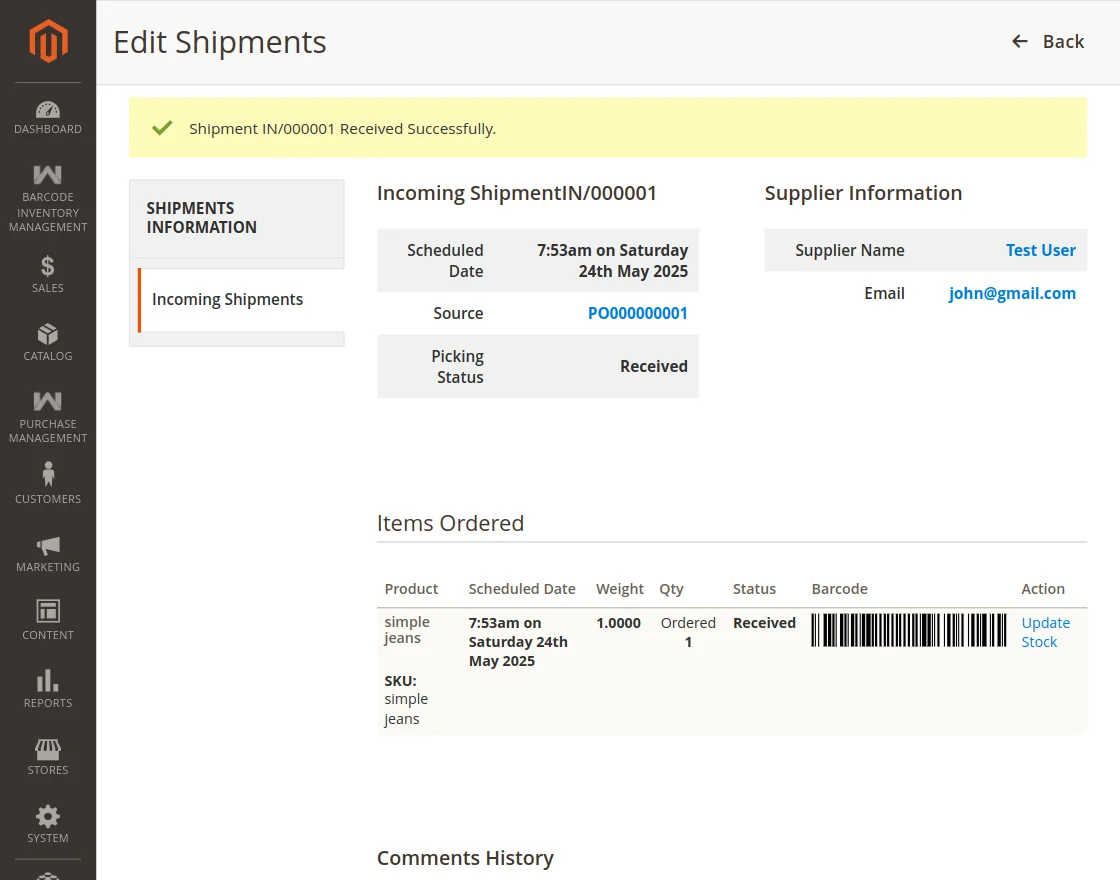
So, this will change the status to Received of all the shipment products.
Update The Inventory: Scan Barcode
The admin can even update the shipment products inventory through barcode scanning.
So, for this, the admin will navigate to Stores -> Configuration -> Webkul -> Barcode Inventory Management as shown below.
Here, the admin will click the Open Popup To Update Inventory button which will display a pop-up window.
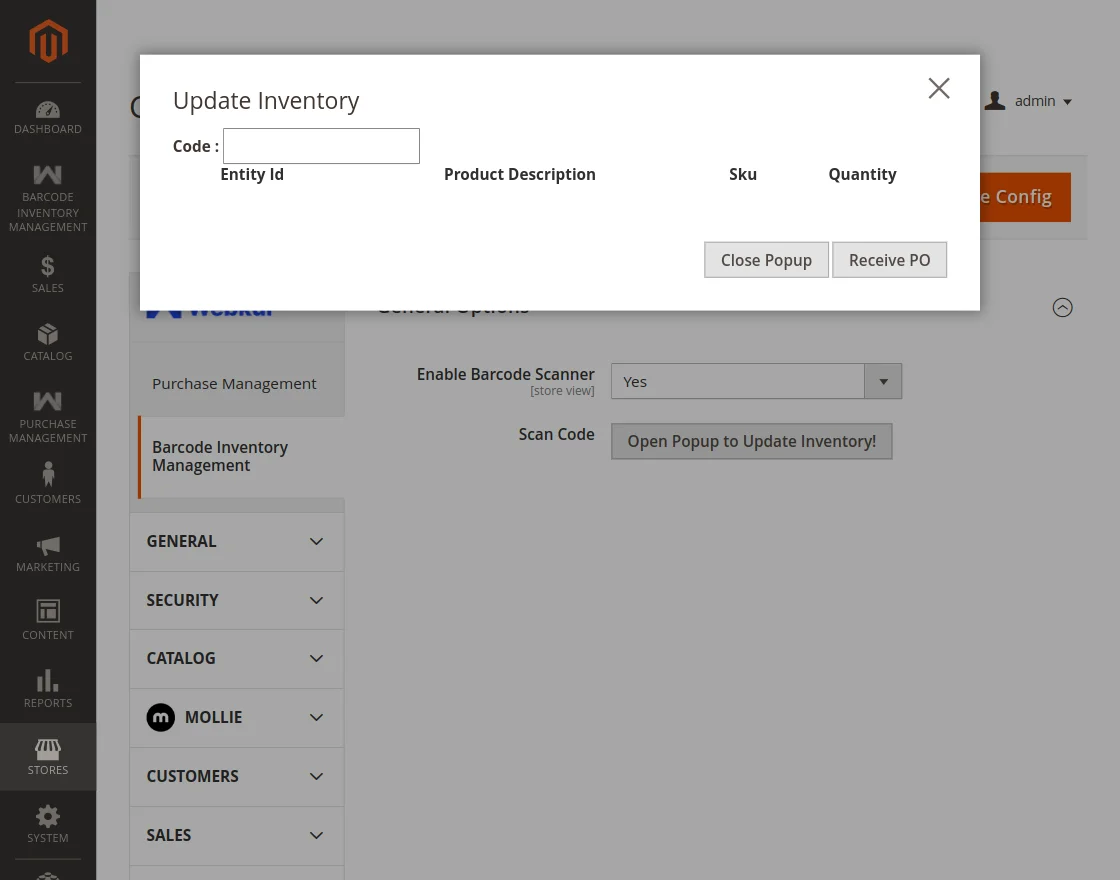
While scanning the barcode, the admin makes sure that the cursor should be in Code field.
Hence, on successful scanning of the barcode, the pop-up window will display the product details as shown below.

The admin will simply click on the Receive Now button.
Thus, updating the product status in the shipment and the product inventory as well.
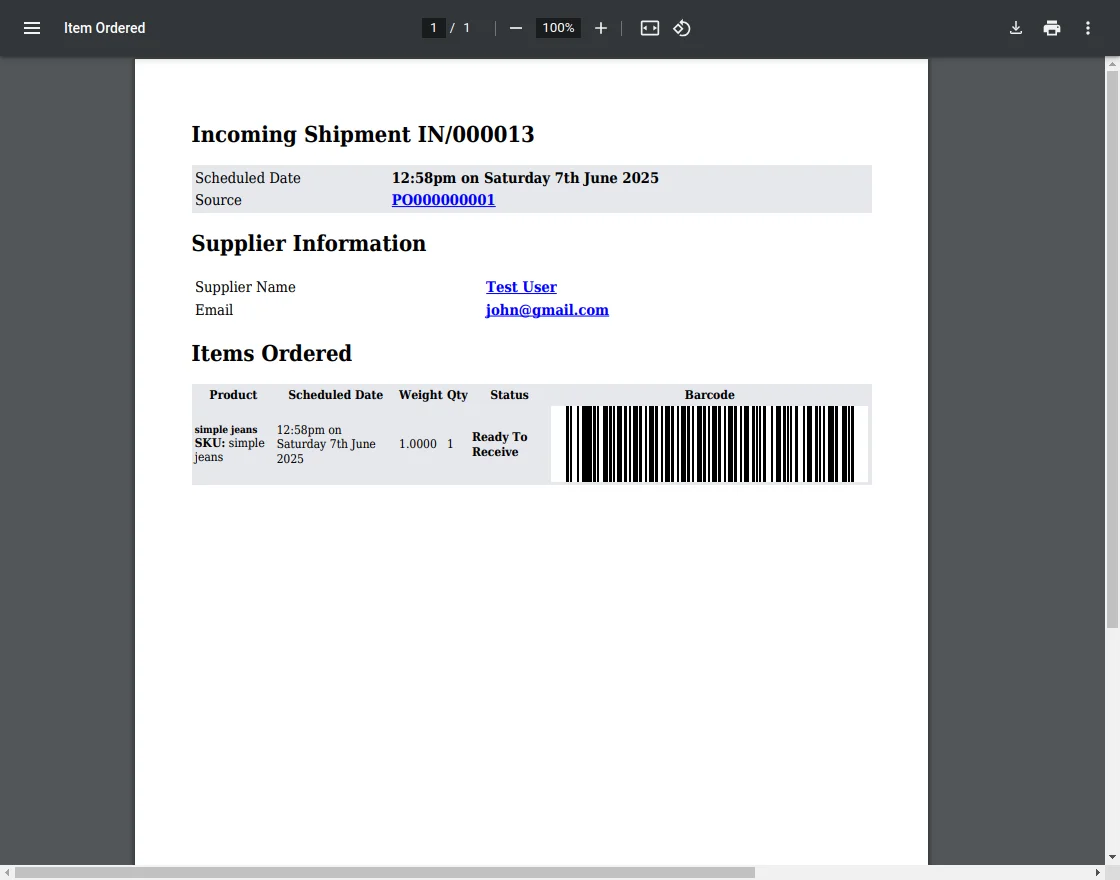
Generate Barcode PDF
The admin can generate the barcode PDF of a single shipment.
So, for this, the admin will simply click on the Print PDF link available at the top as shown below.

However, now clicking on the Print PDF link will generate the PDF.
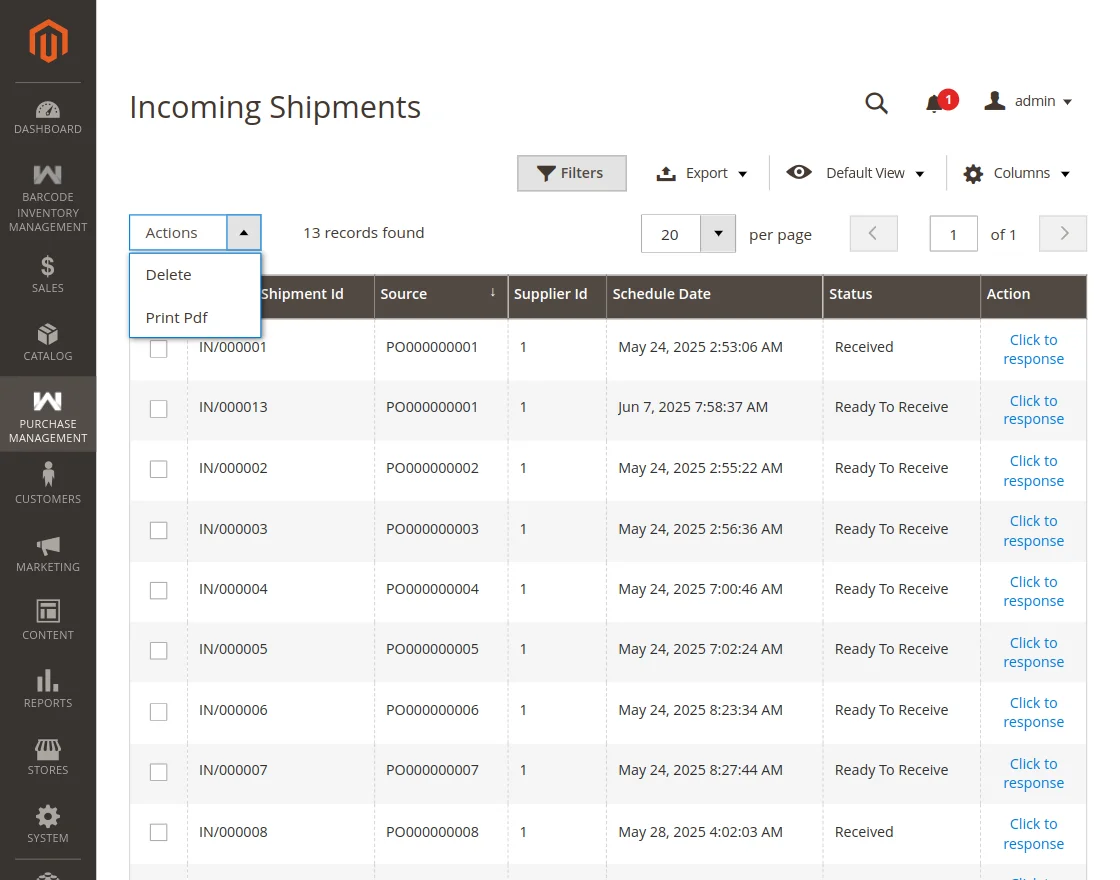
The admin can even generate the barcode PDF of multiple shipments in bulk.
For this, the admin will navigate to Purchase Management -> Incoming Shipment as shown below.
Note:
When the admin confirms or sends the quotation to the supplier, the supplier will not get the barcode in the mail.
Therefore, the admin needs to send this PDF to the supplier manually.
So, that supplier can use these barcodes while sending the shipments to the admin. And let the admin scan the shipments and update the inventory.
If you have any query or need more information, please contact webkul.uvdesk.com
Current Product Version - 5.0.4
Supported Framework Version - Magento 2.0.x, 2.1.x, 2.2.x,2.3.x, 2.4.x

Be the first to comment.