Magento 2 Google Translation helps store owners translate their Magento store content into multiple languages quickly and accurately.
You might have encountered a situation earlier. When the customer used to select any store view other than the default.
Then the category and product name didn’t get translated as per the chosen store view.
Also, you might have tried to translate category and product names as per the selected store view.
Magento 2 (Adobe Commerce) Google Translate module, makes it possible to fetch the translations using Google translator.
So, it eases your translation work by enabling the auto-translation of your store product and category attributes.
Further, this lets you go beyond one store and translate many stores. The customers can select any store view. And the entire store language will get translated accordingly.
Note:-
- Our module, Magento 2 Google Translate uses the Google Translation service. So, to enable this service, you must have the Google API Key to make use of this extension. You can generate one by clicking here
- Also, you need to enable billing for your google account project under which the API Key is created. Further, to know more please visit here
Check the overview of the plugin –
Features of Magento 2 Google Translate
- Supports Multi-Language Store Translation.
- Translates the language by using Google Translation API.
- Provides Translation functionality for Admin product attributes.
- Provides Translation functionality for Admin category attributes.
- The admin can enable/disable the module.
- Attribute label translation on attribute save.
- Mass action for attribute label translation.
- Also, the admin can enable/disable the translation functionality for the product and the category individually.
- Updated with Google API best practices.
- Attribute translation can also be done from mass action from the product attribute section.
- While saving the product attribute, the attribute Label will automatically translate for other store views according to their store view language.
Installation Of Magento 2 Google Translate
Customers will get a zip folder and they have to extract the contents of this zip folder on their system. And, the extracted folder has an src folder, in the src folder, you will find the app folder.
Then, you will have to transfer this app folder into the Magento 2 root directory on the server as depicted below.

After the successful installation of Magento 2 Google Translate, you have to run the command in the Magento 2 root directory.
First Command –
php bin/magento setup:upgrade
Second Command –
php bin/magento setup:di:compile
Third Command –
php bin/magento setup:static-content:deploy
Cache Management
Then, after running the commands, you have to flush the cache from the Magento admin panel. So, navigate through->System->Cache management as shown below.

Multilingual Support
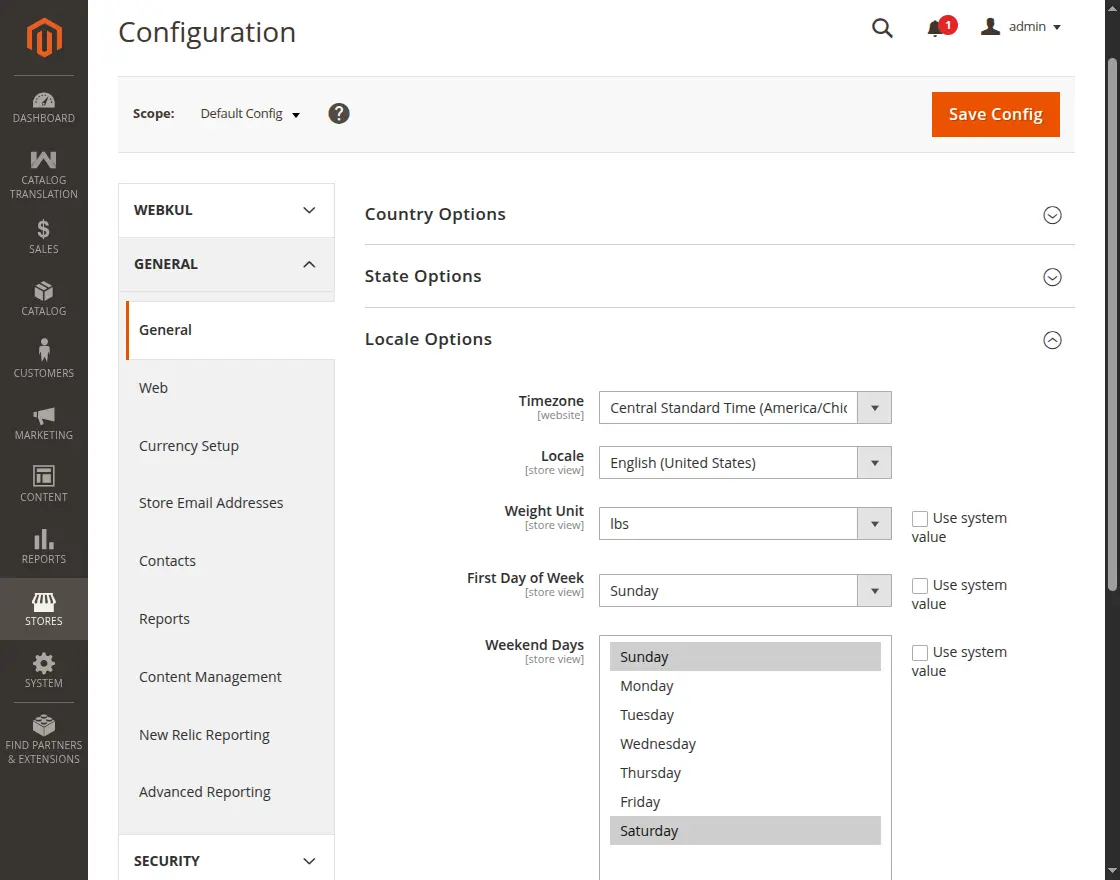
Now, the admin will navigate to Stores->Configuration->General ->Locale Options.
Here, you can select the locale as German. (Locale is the language into which the admin desires to translate his store content).
Note: Please enable developer mode to change the locale for using module functionality.
Module Translation
If you want to translate the module language from English to German.
Then, follow the following path in the unzipped Magento 2 web security folder src/app/code/Webkul/CatalogTranslation/i18n.
After that, you will receive a CSV file with the name “en_US.csv”. Now, rename that CSV on your region code and language code “de_DE.csv”.
Then translate all right-side content into your language.
After editing the CSV, save it and then you need to upload it where you have installed Magento 2 on the server.

Consequently, the module will get translated into your desired Language.

Admin Configuration
General Settings
After the successful installation of the module, the admin needs to configure the following sections in the admin panel.
So, configure them to integrate the Magento 2 Google Translate into the Magento 2 web. The admin needs to navigate to the Stores -> Configuration -> Catalog Translation
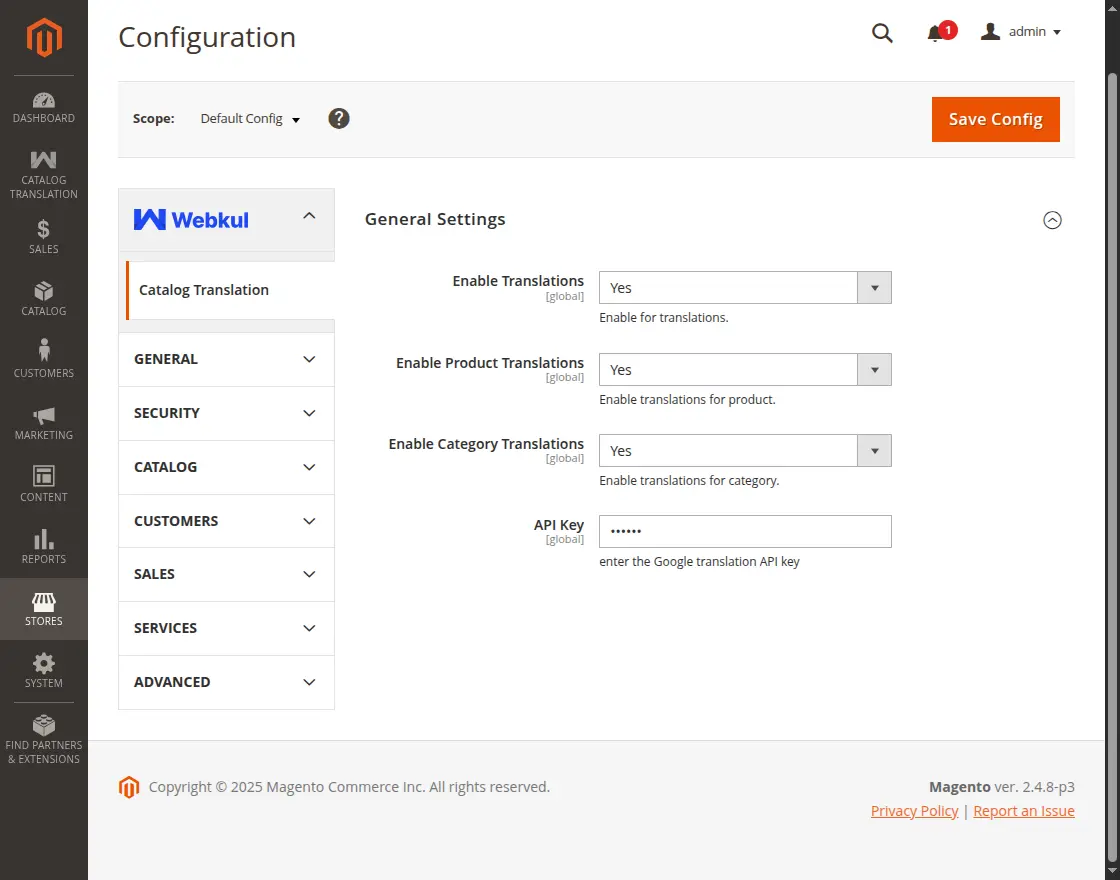
- Enable Translations:- You need to enable it (set it to ‘Yes’) to use this module.
- Enable Product Translations:- You need to enable it (set it to ‘Yes’). This will allow the translation functionality for the admin product attributes.
- Enable Category Translations:- You need to enable it (set it to ‘Yes’). This will allow the translation functionality for the admin category attributes.
- API Key:- Here you need to enter the Google API key for the language translation.
Note:-
This module provides translation functionality only for the newly added category and product attributes.
Yet, if you want to translate the category and product attributes for the existing categories and products (which have been created before the installation of the module).
Then the below-mentioned commands need to run in the Magento 2 root directory.
First command –
php bin/magento update:translation:category
Second Command –
php bin/magento update:translation:product
Run command: selected existing product translation
php bin/magento update:translation:product -p 1,2,3
Category Translation At The Admin End
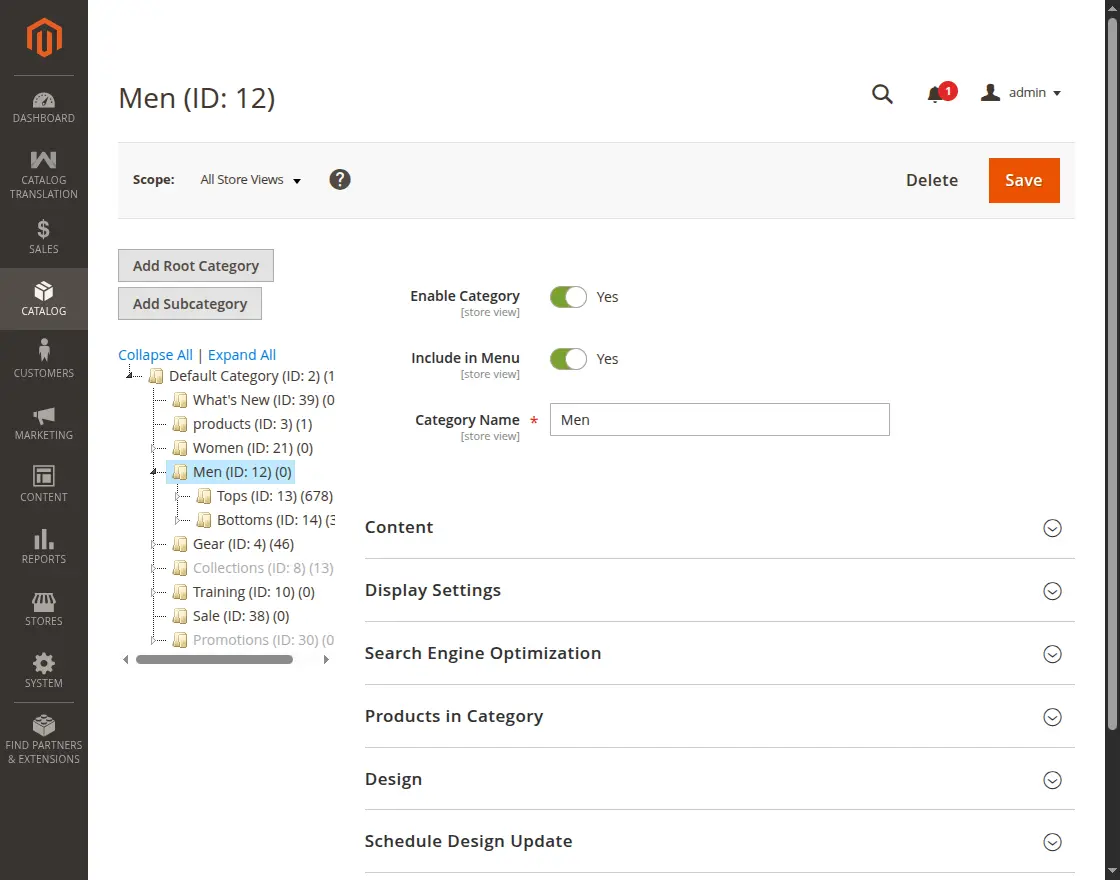
Now the admin needs to navigate to the Catalog ->Categories. Here, the admin can create a new category.
After saving the newly created category, the admin selects the Store View from the top left corner to view the translation.
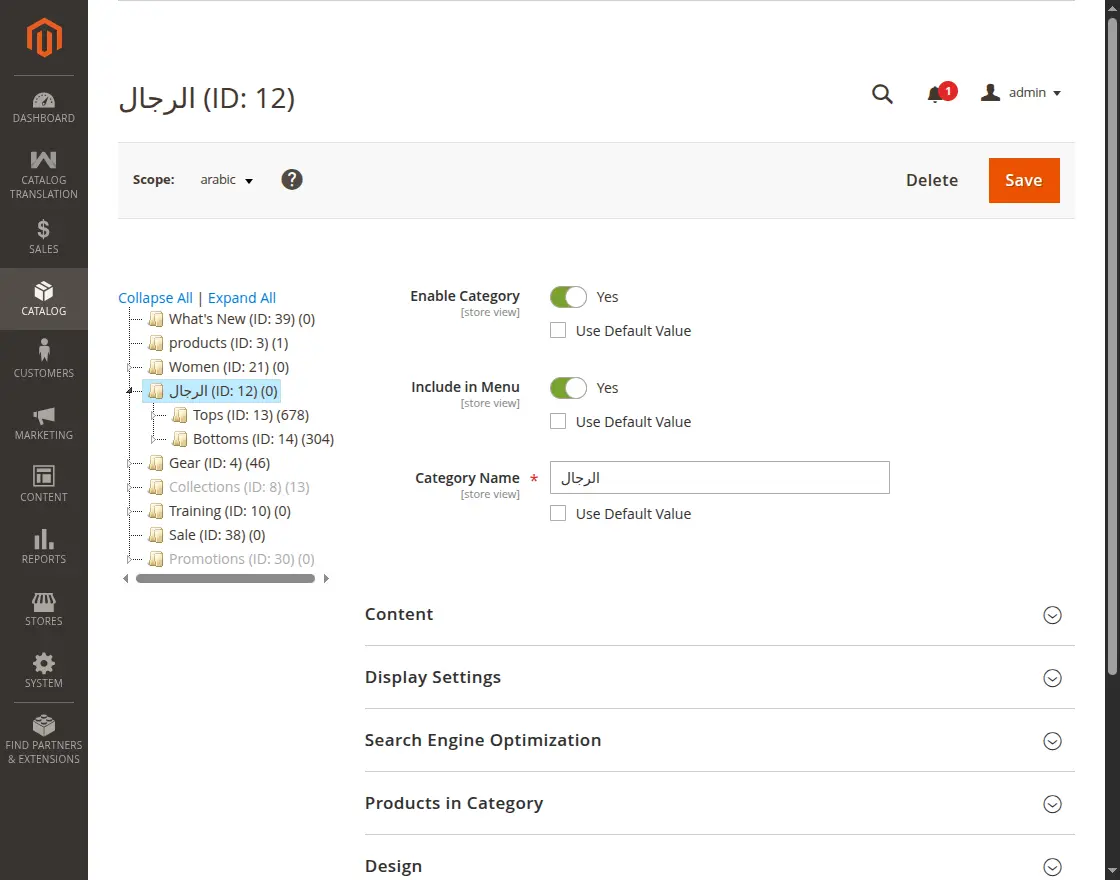
After selecting the store view, the category name will get translated into the language specified for the chosen store view. Here in Arabic, as per the locale set for the chosen store view.
It will appear as shown in the image below.
Product Translation At The Admin End
After that, the admin needs to navigate to the Catalog -> Products. Here, the admin can create a new product.
After saving the newly created product, the admin selects the Store View from the top left corner to view the translation.
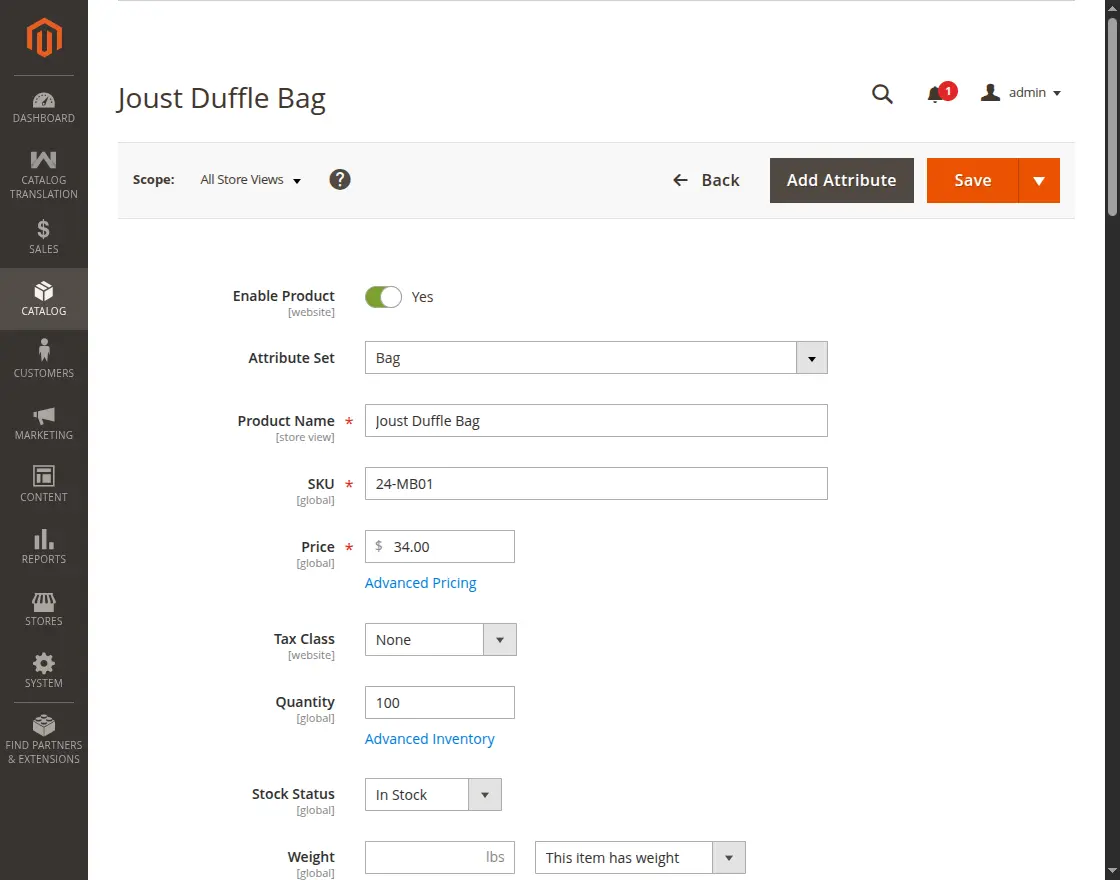
After selecting the store view, the product attributes (all the user inputs like product name, description, etc.) will get translated into the language specified for the chosen store view.
Here in Arabic, depending upon the locale set for the chosen store view. It will appear as shown in the image below.

Product Translation in the Product Attribute section
Now, the store admin will tap on the store button at the left side panel of the store.
Then, click on the product button below the Attribute menu.
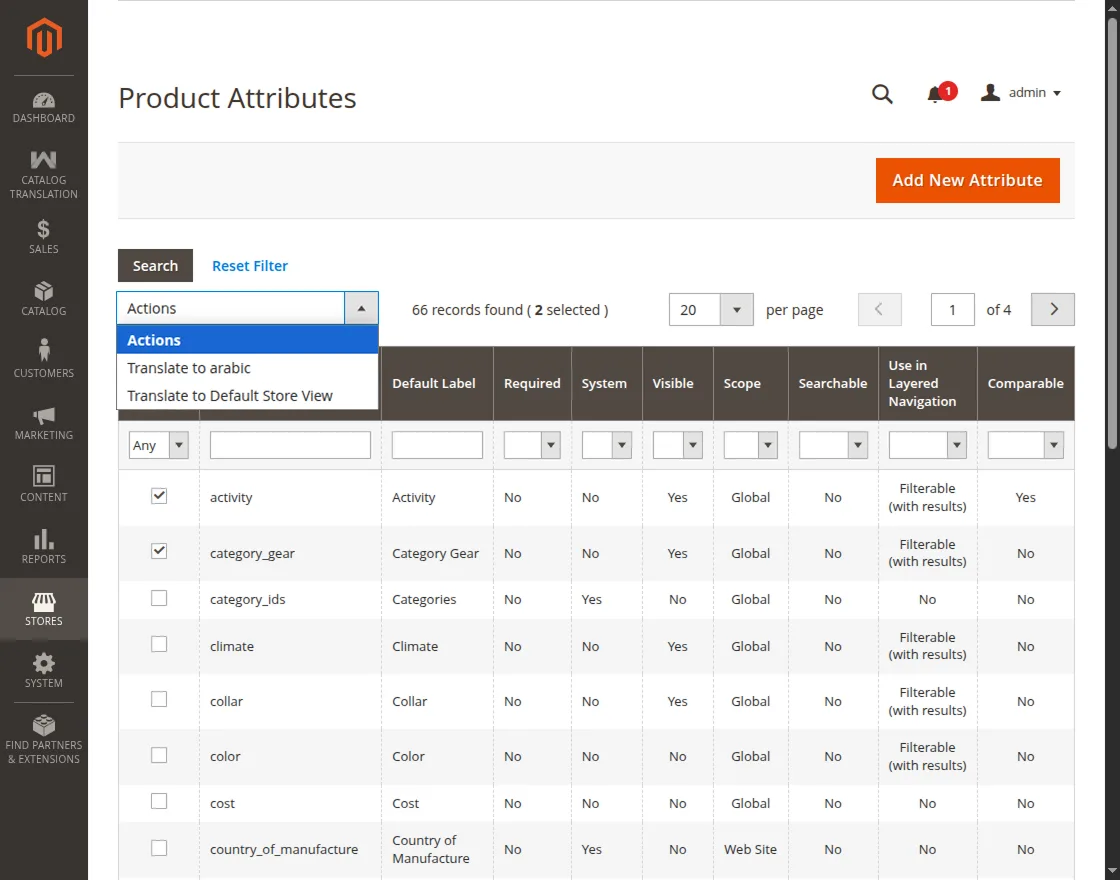
Here, the admin will select the multiple attributes and then tap on the mass action button.
Then click on “Translate to Arabic”. The selected attribute will be automatically translated.
New Product Attribute
Admin can also translate the while adding a new product attribute.
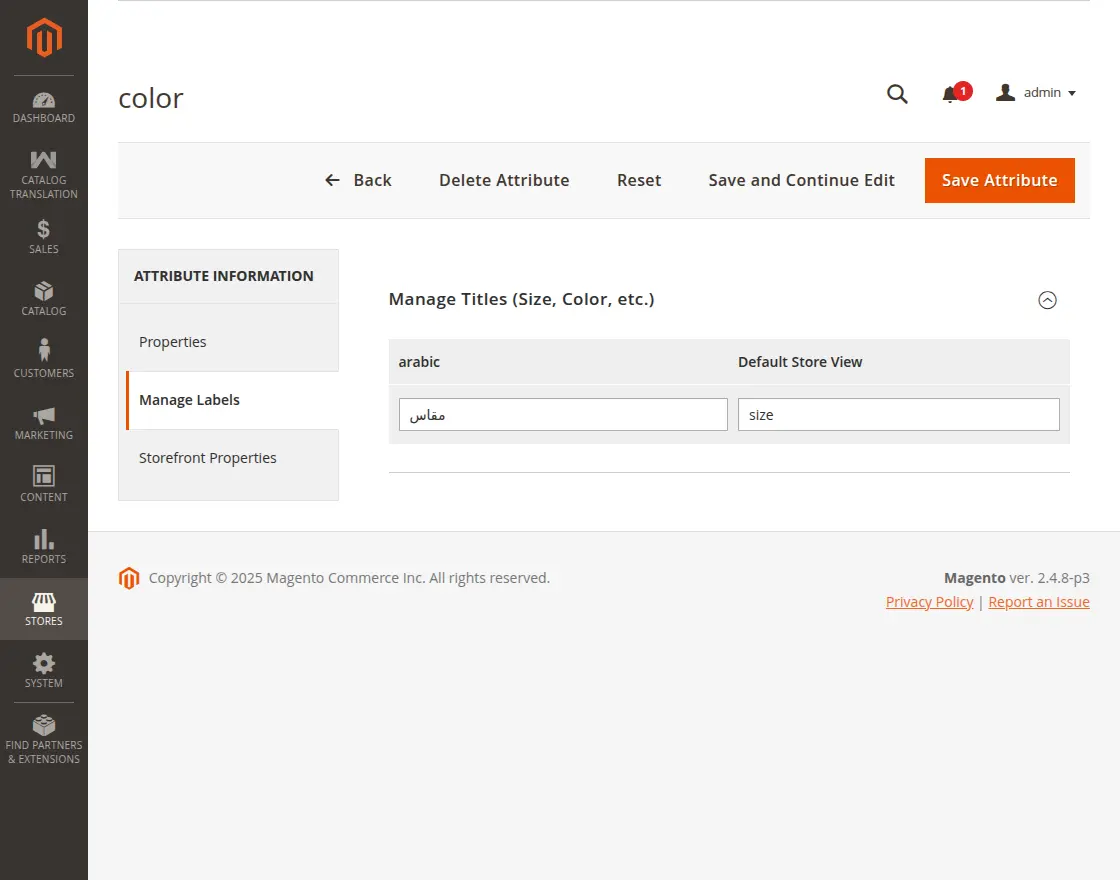
The attribute Label will automatically translate for other store views according to their store view language.
Front End
Further, you can perceive the changes in the front end by switching to different store views.
Category Translation At The Customer End
As shown in the image below, this is the default store view where the locale has been set to English.

Now when the customer selects a store view in the front-end. The category name also gets translated into the language specified for the chosen store view.
Here in Arabic, depending upon the locale set for the chosen store view. Thus, the same will reflect on the front-end as shown below.

Product Translation At The Customer End
As shown in the image below for the product page. This is the default store view where the locale has been set to English.

Now after changing the store view for this product. It got translated into the language specified for the chosen store view.
Here in Arabic, depending upon the locale set for the chosen store view. Thus, the same will reflect on the front-end as shown below.

So, that’s all for the Magento 2 (Adobe Commerce) Google Translate module. For any question/query, please raise a Ticket at our HelpDesk system.
We are more than happy to assist you with your queries. You can also get back to us via mail at [email protected].
Explore the Adobe Commerce Cloud development services by Webkul. You may also browse our quality Magento 2 extensions.
Current Product Version - 5.0.4
Supported Framework Version - Magento 2.0.x, 2.1.x, 2.2.x,2.3.x, 2.4.x

Be the first to comment.