Magento 2 Ajax Contact Form is an amazing module that allows the customers to contact the store easily. The contact form is Ajax based, which means the page doesn’t need to refresh, the customer stays on the same page. The customer can view the name, email, and store address with Google Maps location inside the contact form.
Please Note – For display Google Maps inside the contact form, you need to create the Maps API Key. Also, you need to get the store coordinates using the Google Maps.
Features
- The admin can enter the default address and coordinates of the store
- Select where to display the contact us button – top left or top right.
- Show Google Maps store location within the contact us form.
- The admin can select yes to Show Email Id on the Frontend.
- Customers see thank you message clicking send button.
- Display name, email, and full address inside the contact us form.
- Set the inbox email address for receiving the messages.
- Mail Template can be customized.
- The module source code is open for customization.
Installation
To install this extension, please follow each and every step carefully as follows:
Step 1:
After extracting the downloaded zip file and you will get the src folder. Inside src folder, you will find the app folder, copy the app folder to the Magento2 root directory. Please view the below screenshot.

Step 2:
After the successful installation, you have to run these commands in the Magento2 root directory.
First command –
php bin/magento setup:upgrade
Second Command –
php bin/magento setup:di:compile
Third Command –
php bin/magento setup:static-content:deploy
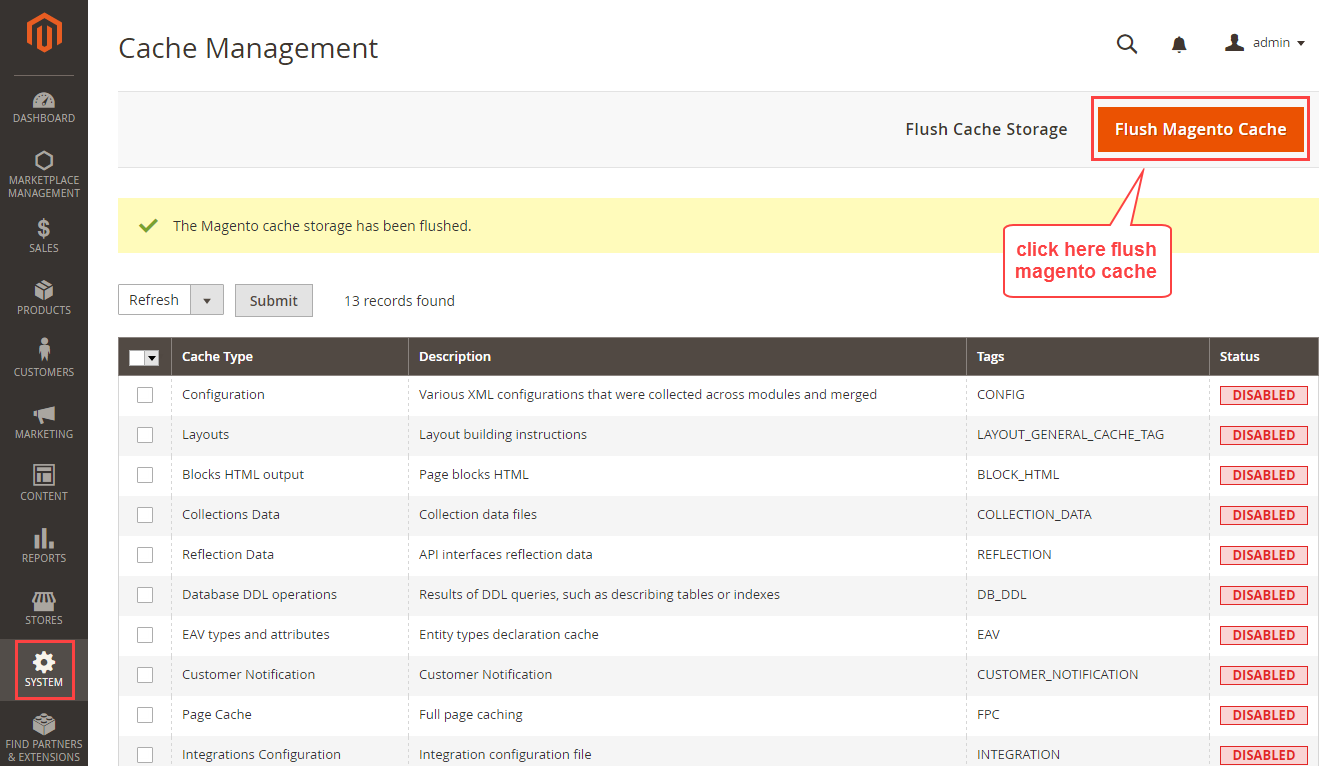
After running the commands, you need to flush the cache and reindex all from the Magento2 admin panel. Navigate through System>Cache Management. Click Flush Magento Cache button as shown below:
Multi-Lingual Configuration
For Multilingual support, please navigate. Store>Configuration>General >Locale Options. And select your desired language from the Locale option.

Language Translation
If you need to do the module translation, please navigate the following path in your system. app/code/Webkul/Ajaxcontactform/i18n. Open the file named en_US.CSV for editing as shown in below screenshot.

Once you have opened the file for editing. Replace the words after the comma(,) on the right with your translated words.
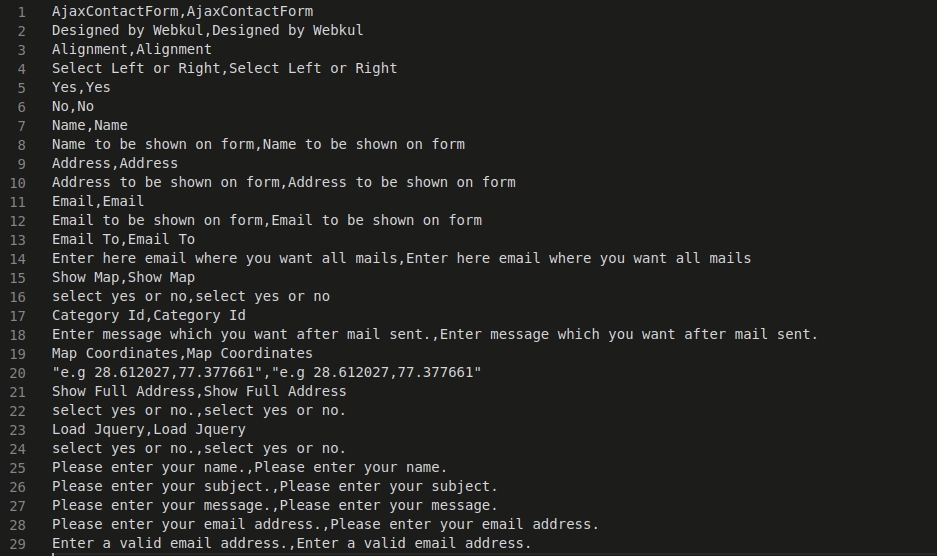
After editing the CSV file, save it and then upload it to the same folder. Now your module translation is complete.

Google Maps API Key and Coordinates
After the module installation, you need to get the Google Maps API key and store coordinates. These two things will be required at the time of widget configuration.
API Key
Please visit the following link for getting the API Key. Log into your Google account and then click GET A KEY button as visible below:

A pop-up window will appear, Create Project and give any name to it. Then, click ENABLE API.

After few seconds, the API Key will be generated. Copy the API key, it will be used at the time of widget configuration.

Store Coordinates
To find your store coordinates please go to the Google Maps website and enter your store name, address, locality, or any nearby place. After that, right-click on the place or area on the map and select What’s here?

Now, at the bottom, you’ll see a card with the coordinates. Copy the coordinates, it will be used in the widget configuration.

Admin Configuration
After the successful installation of the module, the admin needs to configure the module by navigating through Stores> Configuration> Ajax Contact Form.
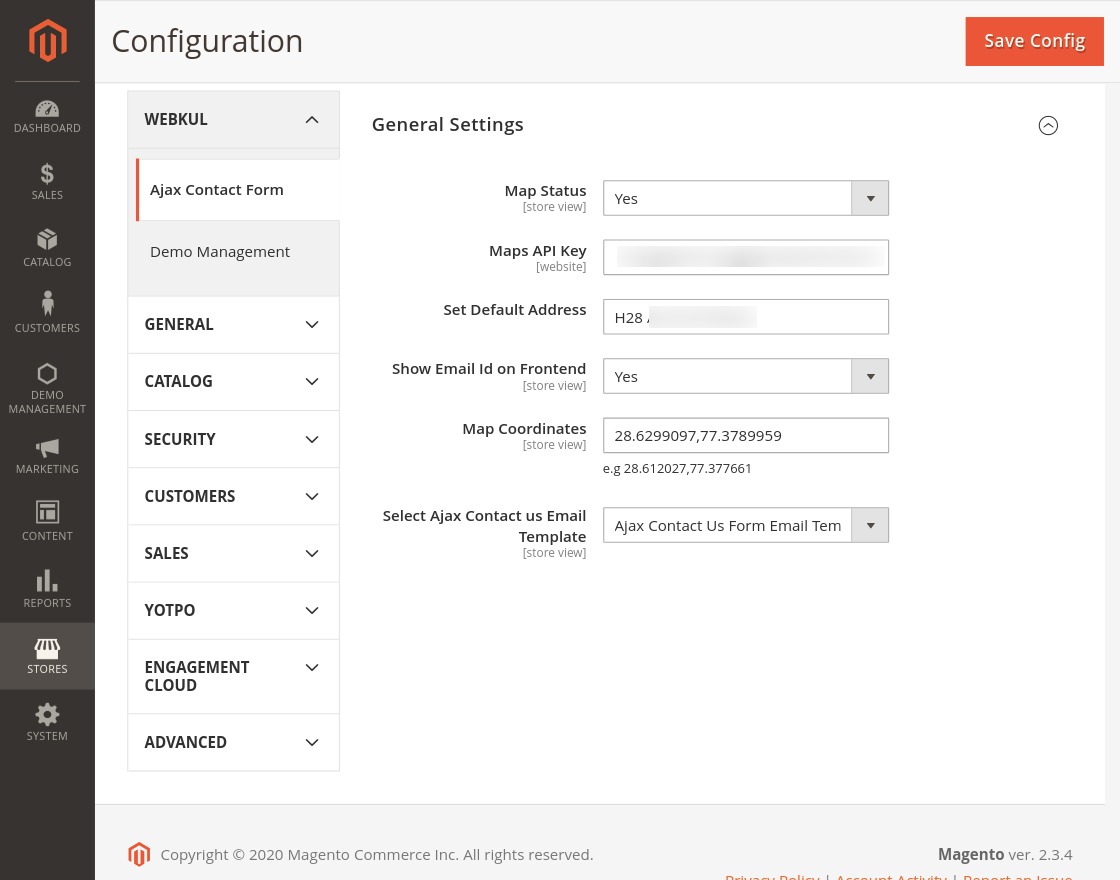
The admin needs to configure general settings:
- Map Status: The admin can enable/ disable map status.
- Maps API Key: Here, the admin needs to enter the generated Google API key.
- Set Default Address: The admin needs to enter the default address of the store.
- Show Email ID on Frontend: Select Yes to show the Email ID on the frontend.
- Map Coordinates: Here, the admin needs to enter the generated Google maps coordinates.
- Select Ajax Contact us Email Template: The selected email template will be used to contact the customer. The mail templates can even be customized.
Widget Configuration
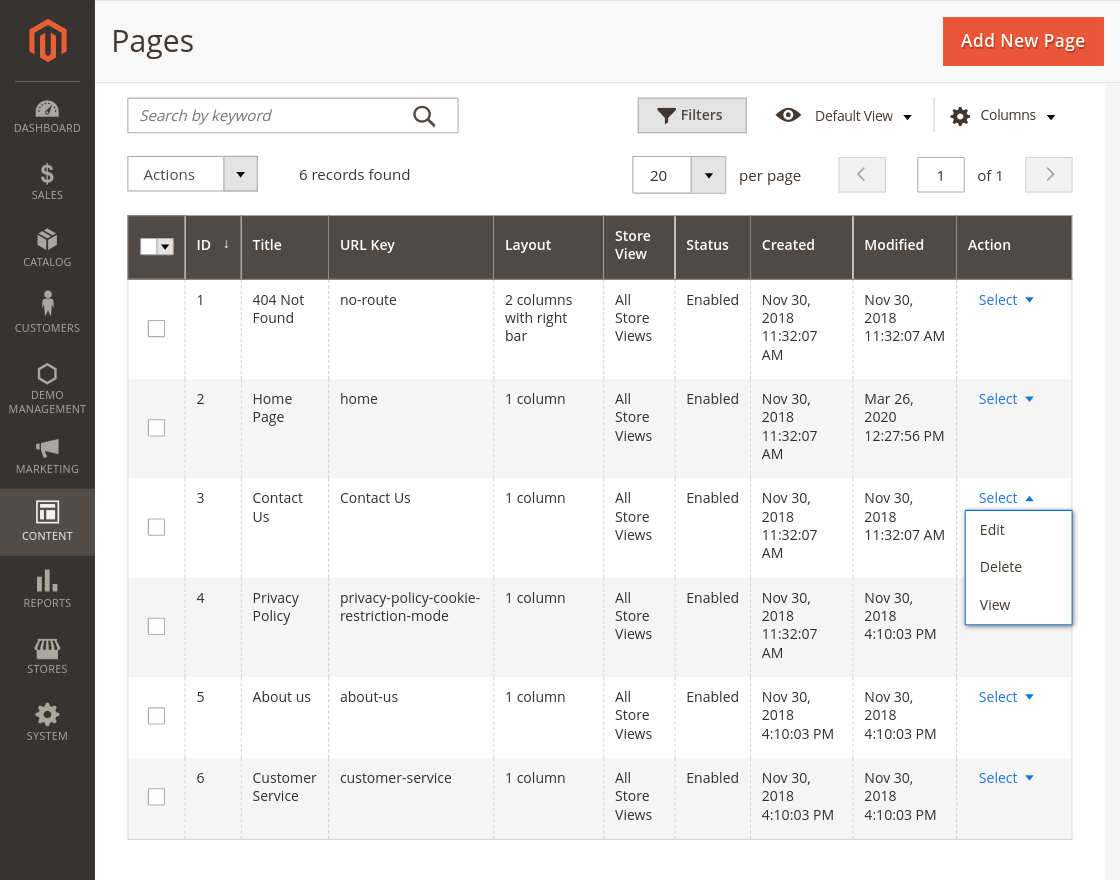
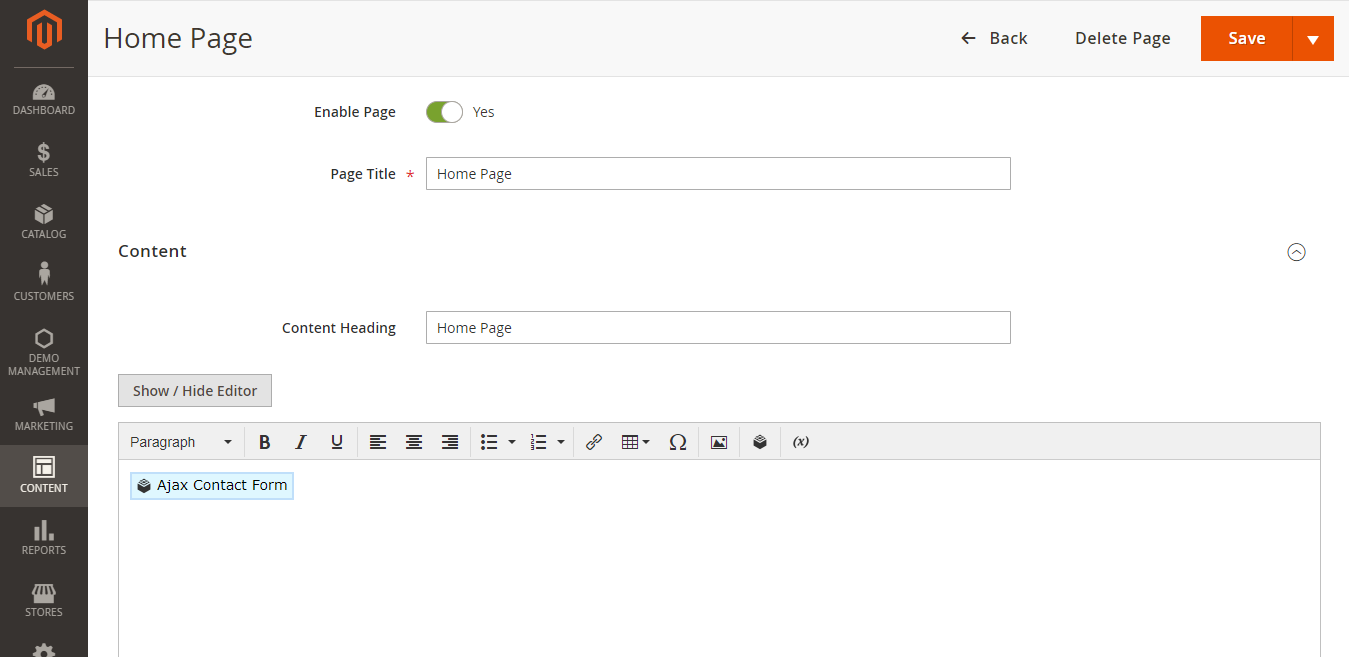
After the module configuration, the admin needs to navigate to Content>Pages. The following page will open, select the page where you want to display the Contact Form, click Edit option.
Now, go to the Content section, and click on the Insert Widget icon.

A pop-up window will appear, select Widget Type as Ajax Contact Form.

After that, the following options will be available for the Ajax Contact Form settings:
Widget Options:
Alignment – Select where to display the Contact Us button. Left or Right.
Title – Enter the title which will appear on the front-end in the contact us form.
Address – Enter the store address which will appear in the contact us form.
Email – Enter the store email which will appear in the contact us form.
Show Full Address – Select Yes to display the complete store address.
Thank You Message – Enter the content for the thank you message which will appear after clicking the send button.
Click Insert Widget when done.
 After setting up the widget options, the widget will appear in the content section. Click Save to apply your changes.
User Front-End View
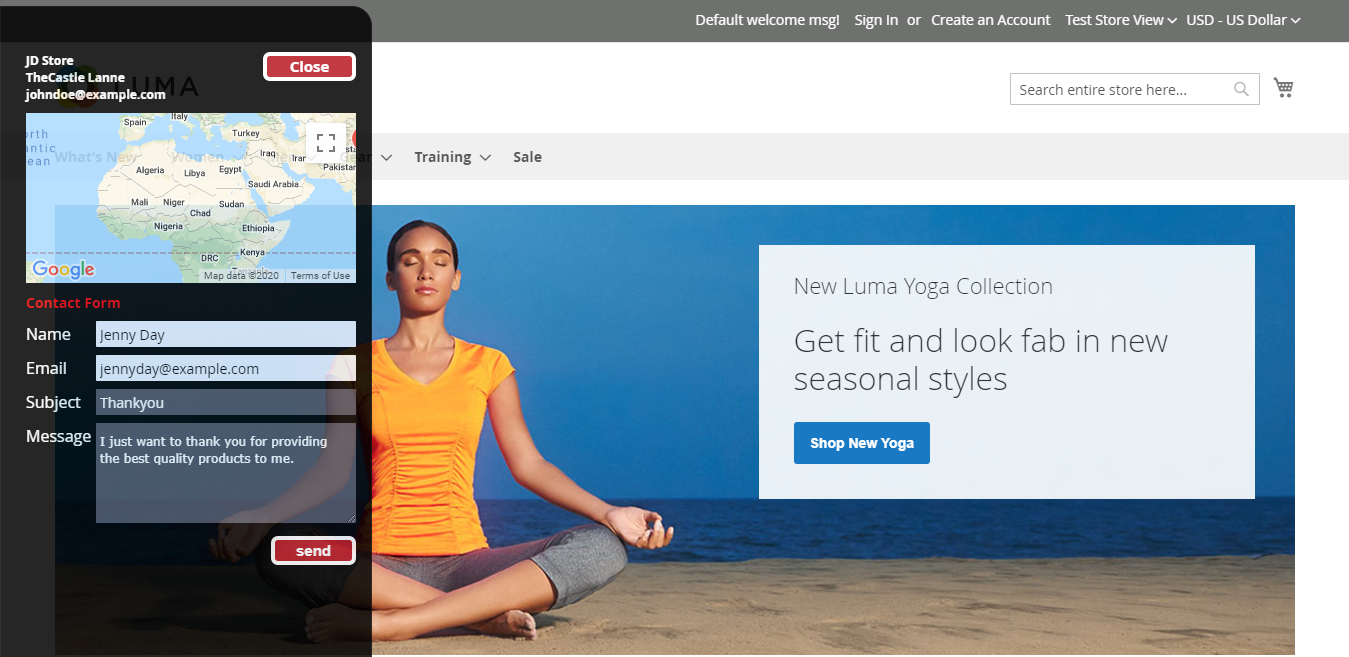
On the front-end, the users will be seeing the contact us button on top.

After clicking the Contact Us button, the following form will appear. The users will view the name, address, and email. It will also show the store location in Google Maps.
The users need to enter their name, email, subject, and message content. After that click Send button and the message will be sent to the configured email address.
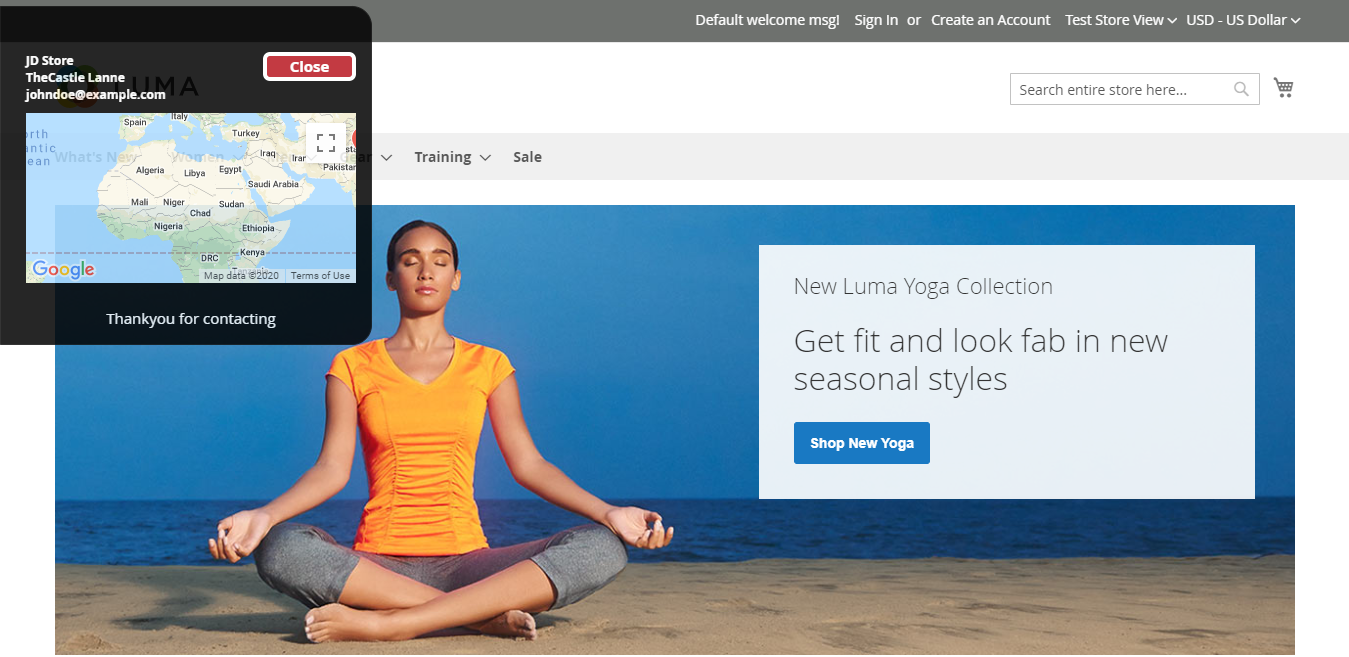
After clicking the Send button, the users will see a thank you message inside the contact us form.
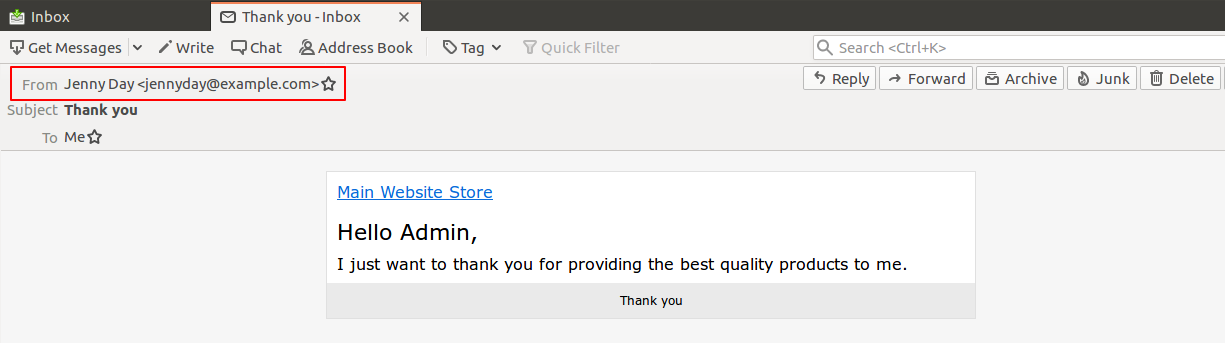
Just after the form is completely filled and send from the customer end, the admin will receive an email on the email ID that is configured in the backend. The email at the admin end will be similar as shown in the image below:
Thank you for viewing this blog for the Magento 2 Ajax Contact Form extension. If you have any query or need more information, please visit webkul.uvdesk.com
Current Product Version - 3.0.0
Supported Framework Version - Magento 2.0.x, 2.1.x, 2.2.x,2.3.x, 2.4.x

Be the first to comment.