Laravel eCommerce Marketplace Wallet System module allows the customers to make the purchase of sellers and admin products from their Wallet. The customers can select the Wallet System payment method for the admin and seller’s products at the time of the checkout process.
Both the Sellers and customers can easily add credit amounts, transfer money, view transaction details in Wallet System. The admin can set the minimum and maximum limits for adding money to the wallet. This module offers split payment for sellers’ products.
Note:
- At the time of adding balance to the wallet system, no other product can be added along at that very time.
- This module is an add-on of Laravel eCommerce Marketplace Module. To use this module you must have installed Laravel Multi Vendor Marketplace first.
Features
- The customer can add payee in his account to transfer amount in his wallet.
- Admin will receive notification to approve payee and to approve amount transfer to account.
- The admin can restrict to the approval required for payees.
- Admin can restrict for the customer to use discount codes when adding the amount in his wallet.
- The customer can request a bank account transfer from their wallet
- The customer can transfer the amount to other customers.
- Customer will get a monthly statement mail for the wallet amount
- This module offers split payment for sellers’ products
- Admin can create cash back rules for the customer.
- Cashback rules are based on product or on the cart.
- Admin can deduct wallet amount from the customer’s wallet.
- The customer can use Wallet Cash during the checkout.
- The customer can easily add credit to their wallet system.
- Admin can set the credit limit for the Marketplace Wallet System.
- Admin can view the customer details who are using Marketplace Wallet System for making the online payment.
- The customer will get the email notification for each transaction
- The Admin can configure the Marketplace Wallet System to set the limit (maximum and minimum) for Wallet amount.
- Admin and Customer/User can view credit and debit details.
- Admin can add custom wallet amount to the customer’s wallet.
Configurations
For installing the Laravel eCommerce Marketplace Wallet System Module the customers will get a zip folder and they have to extract the contents of this zip folder on their system.
Unzip the respective extension zip and then merge “packages” folders into the project root directory.
Goto the bootstrap/providers.php file and add the following import statement at the top of the file:
use Webkul\MarketplaceWalletSystem\Providers\MarketplaceWalletSystemServiceProvider;
Then, register the service provider inside the providers array:
MarketplaceWalletSystemServiceProvider::class,
Goto composer.json file and add following line under ‘psr-4’
"Webkul\\MarketplaceWalletSystem\\": "packages/Webkul/MarketplaceWalletSystem/src"
Run these commands below to complete the setup
composer dump-autoload
php artisan mp-wallet:install
php artisan vendor:publish
Add the following line to the crontab for automatic monthly wallet statements.
* * * * * php /project_root_folder_path/artisan send:wallet:statement
That’s it, now just execute the project on your specified domain.
Next Step
After the successful installation of the Laravel eCommerce Marketplace Wallet System, the admin can configure the module by navigating to the admin backend panel.
Firstly, the admin needs to configure the Payment Method/Wallet Module
Payment Method Configuration
The admin needs to navigate to Bagisto Stores > Configure > Sales > Payment Methods > Marketplace Wallet System.
Payment Method Title – Enter the title of the Marketplace Wallet system which will appear on the checkout page.
Description – Here you can describe the payment method
Status – Enable the toggle button to use the Wallet System module, else disable it.
Minimum Amount Add in Wallet – Set the minimum value of the amount that can be added to the wallet
Maximum Amount Add in Wallet – Set the maximum value of the amount that can be added to the wallet
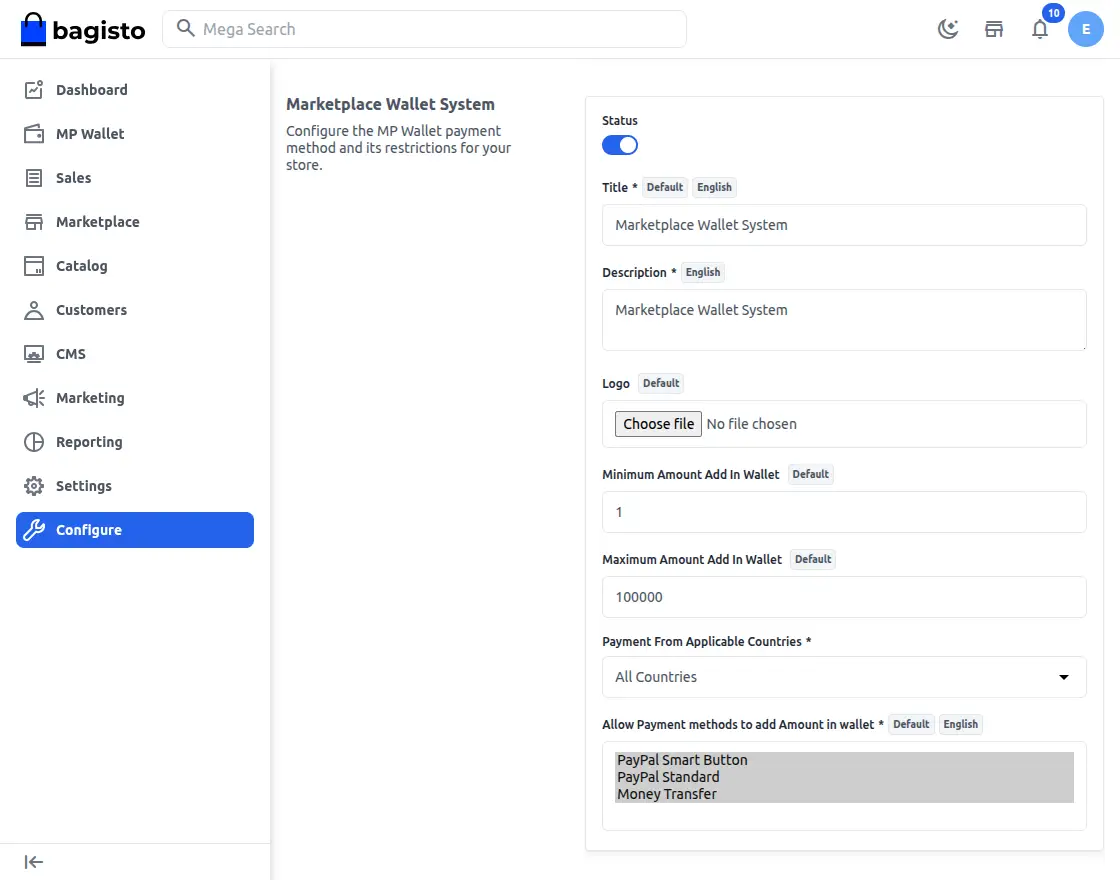
Payment from Applicable Countries – Select the applicable countries from the list for the wallet system.
Allow Payment Methods to Add the amount in Wallet – Admin will also select various payment methods which can be used by the customer to make payments while adding Wallet Cash into their Wallet System
Sort Order – Set the sorting order of the wallet system payment method.
For Marketplace Wallet System Configuration, the admin can follow the path Bagisto Stores > Configuration >Marketplace Wallet System.
General
- Status – Enable the toggle button to use the Wallet System module, else disable it
- Allow to use Discount while adding amount in wallet : Select Yes to allow the customers to apply the discount when the customer is adding wallet amount in his wallet else select No to not allow the customers to apply discount while adding wallet amount to his wallet.
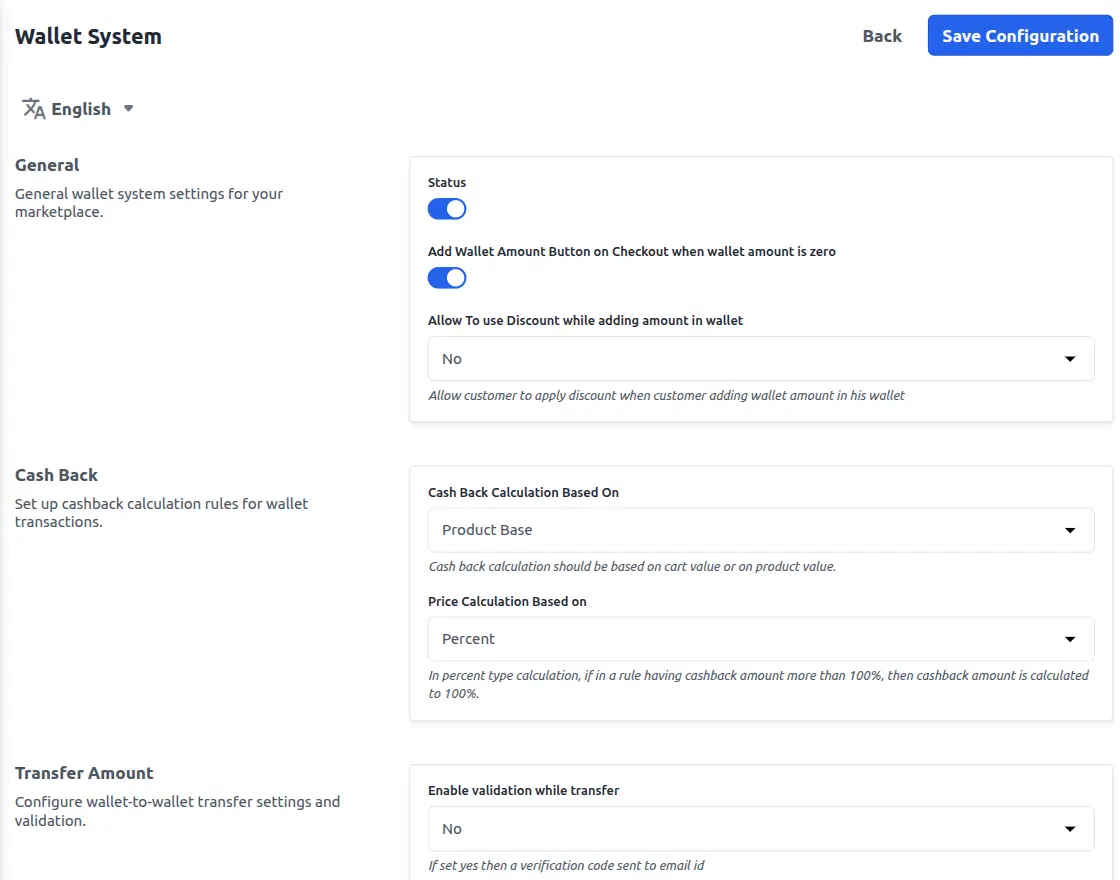
Cash Back
- Cash Back Calculation Based On – Cart Based or Product Based.
- Price Calculation Based On – Either select Fixed or Percent.
Transfer Amount
Here, the admin will configure –
- Enable Validation while Transfer – Select the Yes to send the verification code to customer email id
- Duration of code usage – Enter duration in seconds of the validation code. Example: (30)
- Customer Payee Approval Required – Select Yes if admin wants to approve the payee else select No to auto-approve the customer’s payee
- Display Custom Message – The admin will select the option as Yes to display the custom message else select No
- Message on Transfer Request Submission – The admin will enter the message text that will be displayed to the customer after transferring the wallet amount to the bank
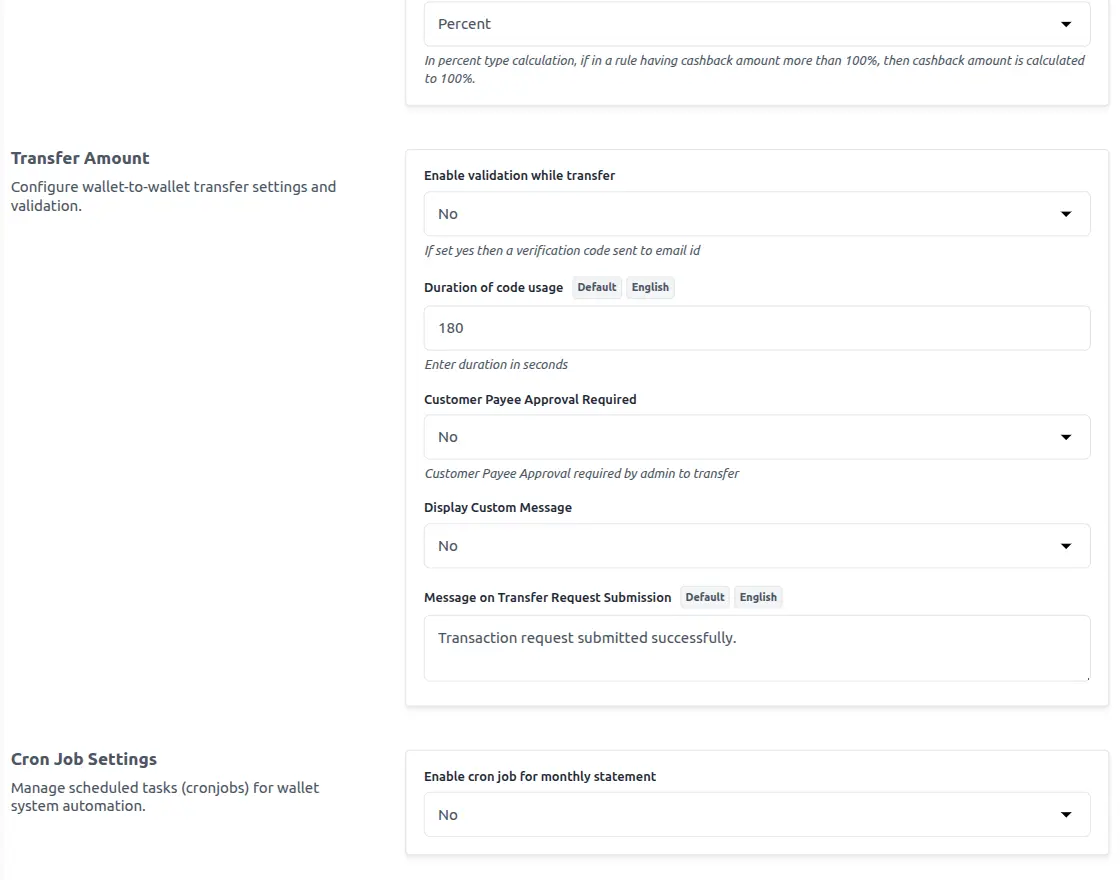
Cron Job Settings
Enable Cron Job for Monthly Statement – Select Yes, to send monthly statements to customers about their wallet transactions.

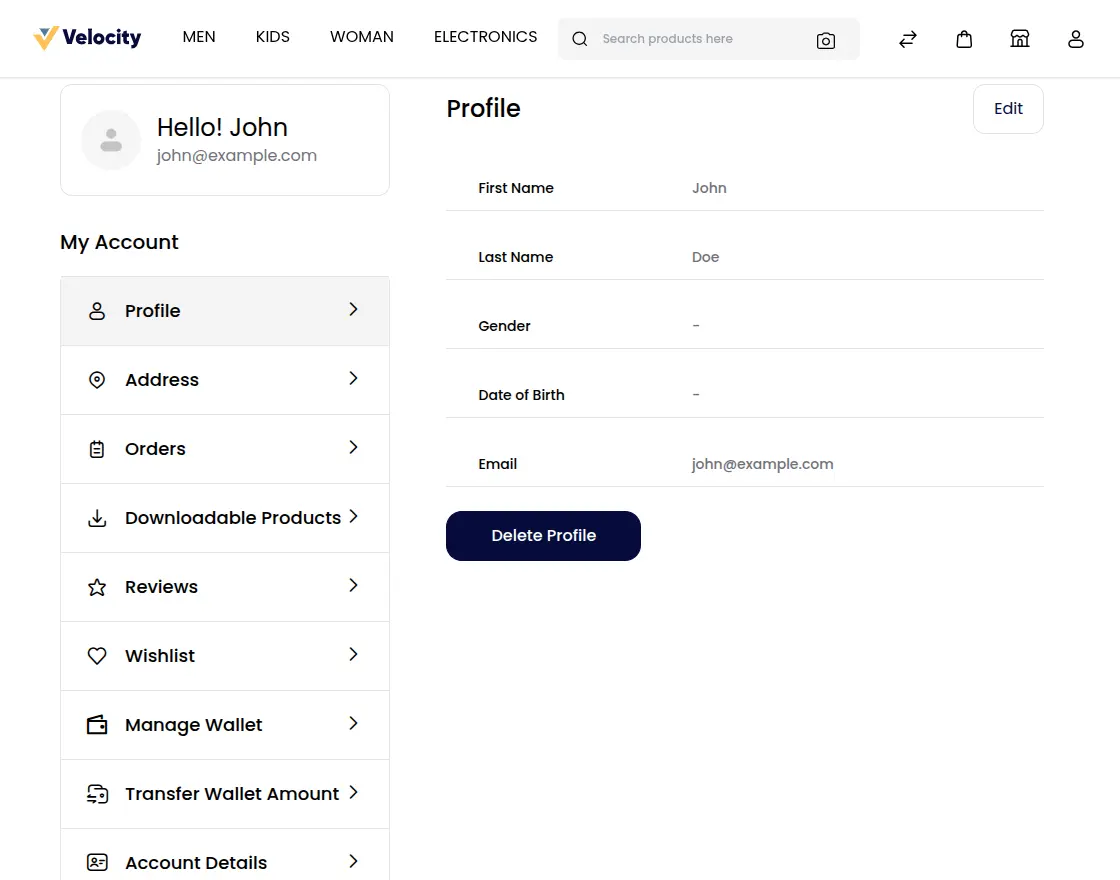
Customer Profile – Wallet Section
After the installation of the Laravel eCommerce Marketplace Wallet System, the customer and seller can see “Wallet Settings” with three menu options –
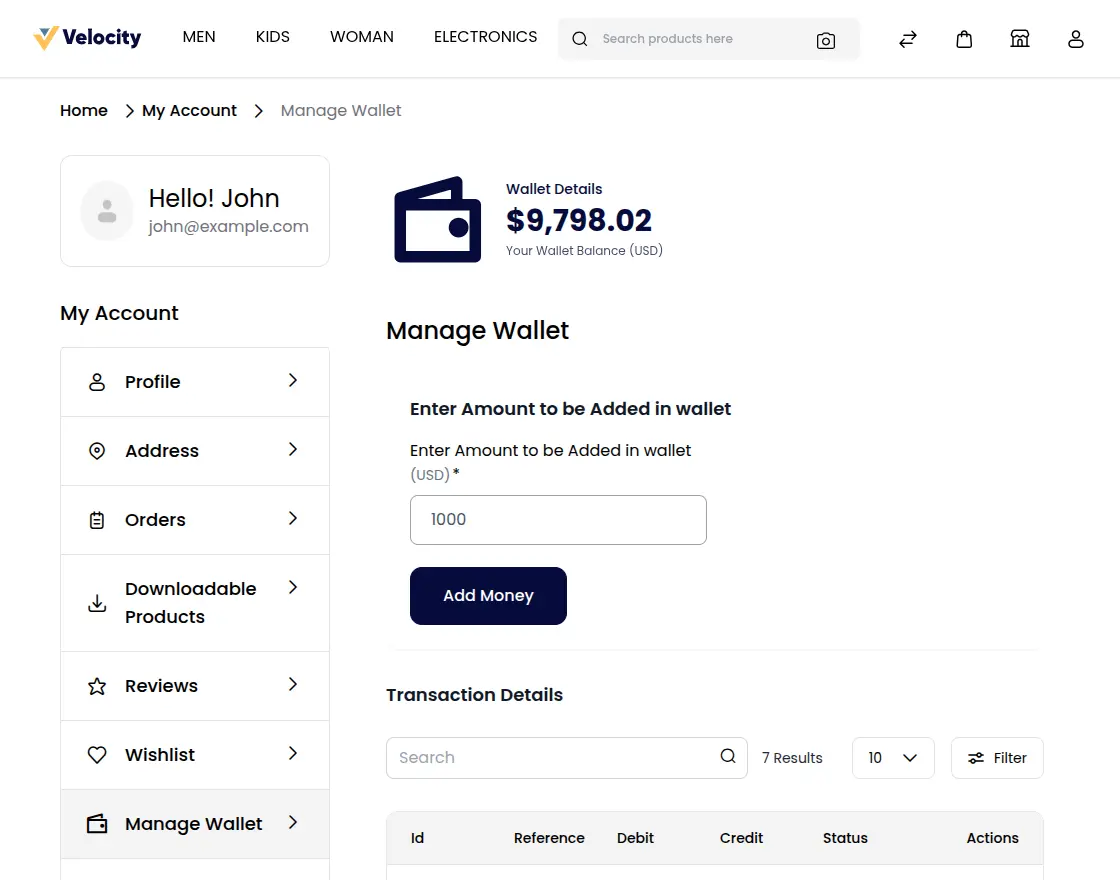
- Manage Wallet
- Transfer Wallet Amount
- Account Details
Clicking the Manage Wallet menu option brings up a section to manage the wallet amount. Here, the seller/customer will be able to see their total wallet balance, wallet transaction details(credit & debit), can transfer the amount to the bank account. The customer can also add a credit amount into their wallet system by entering the amount into the provided input box and clicking the added money to wallet button.

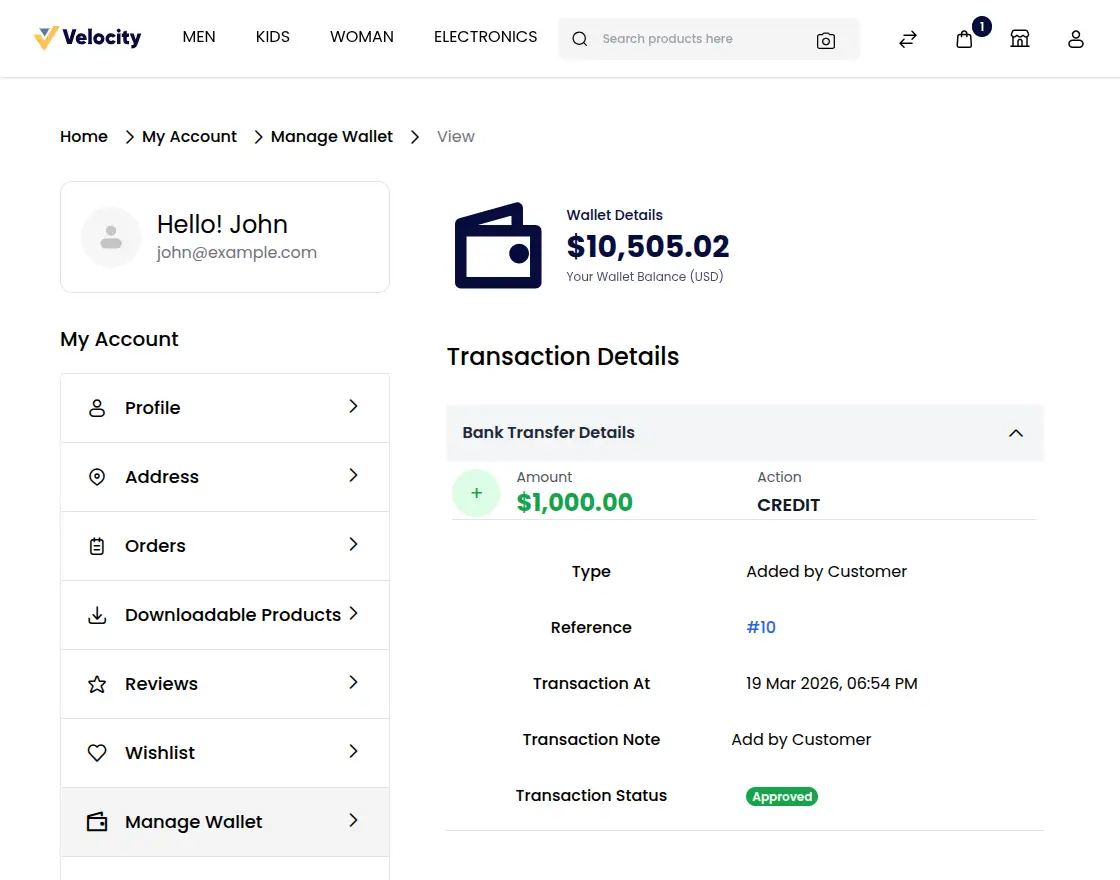
Transaction Details
The customers can click the Reference Number # to view the additional details for the respective wallet transaction.
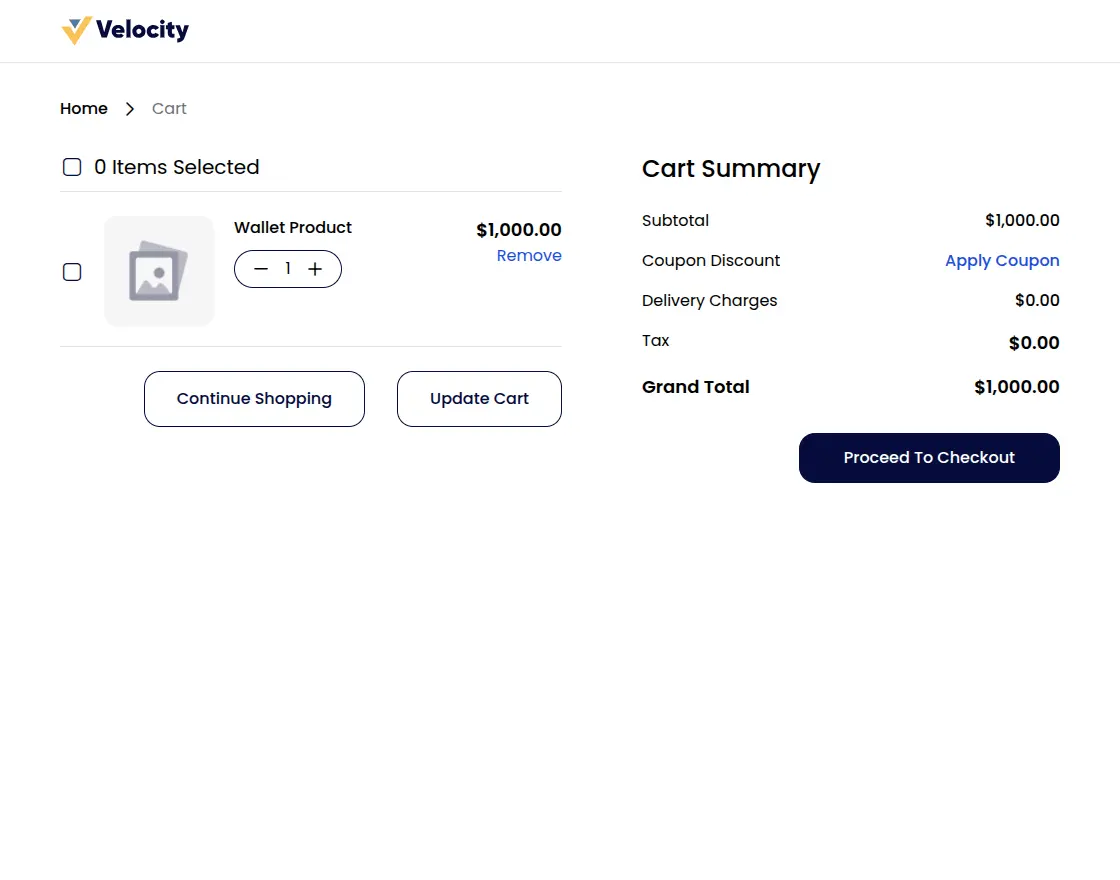
After entering the amount into the wallet the customer will click on the Add Money button. This will add the wallet amount to the shopping cart.
After that, click on the View Shopping Cart button .
Now click on the Proceed to Checkout button as shown below in the snapshot.
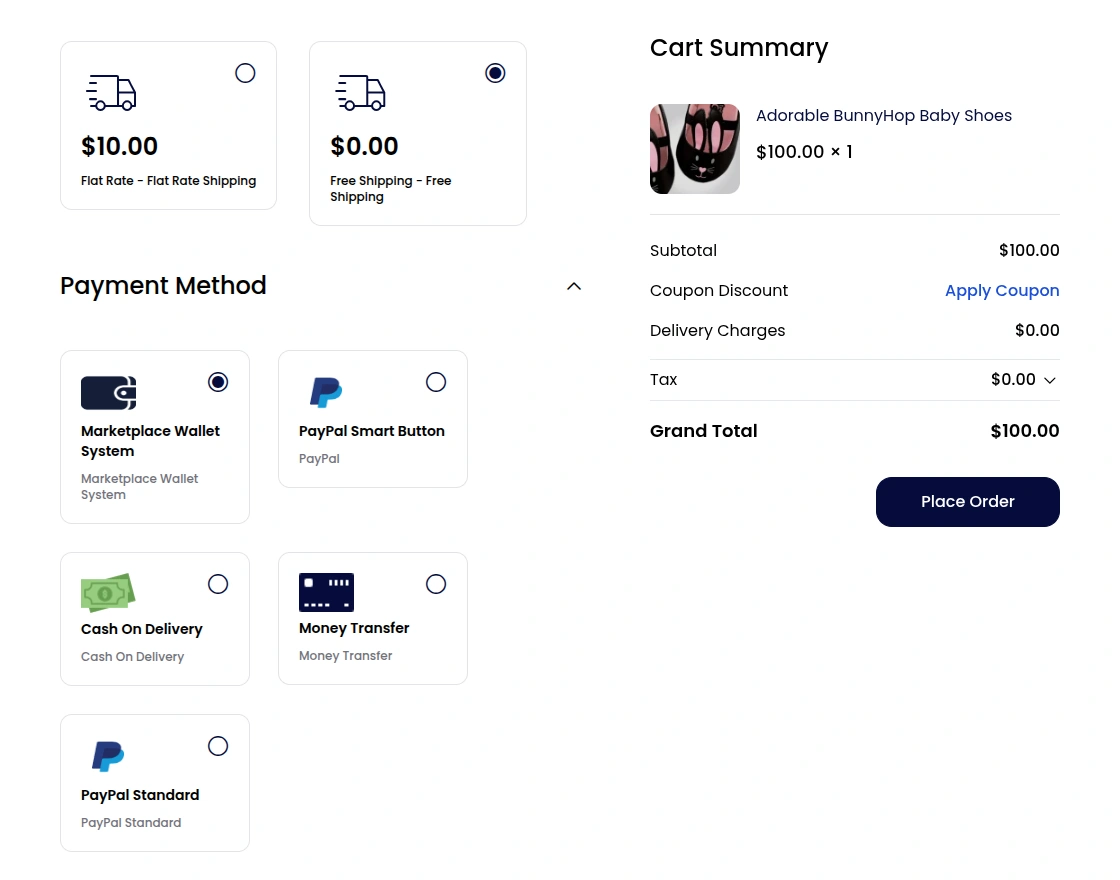
The seller/customer has to select the payment method as shown in the below image.
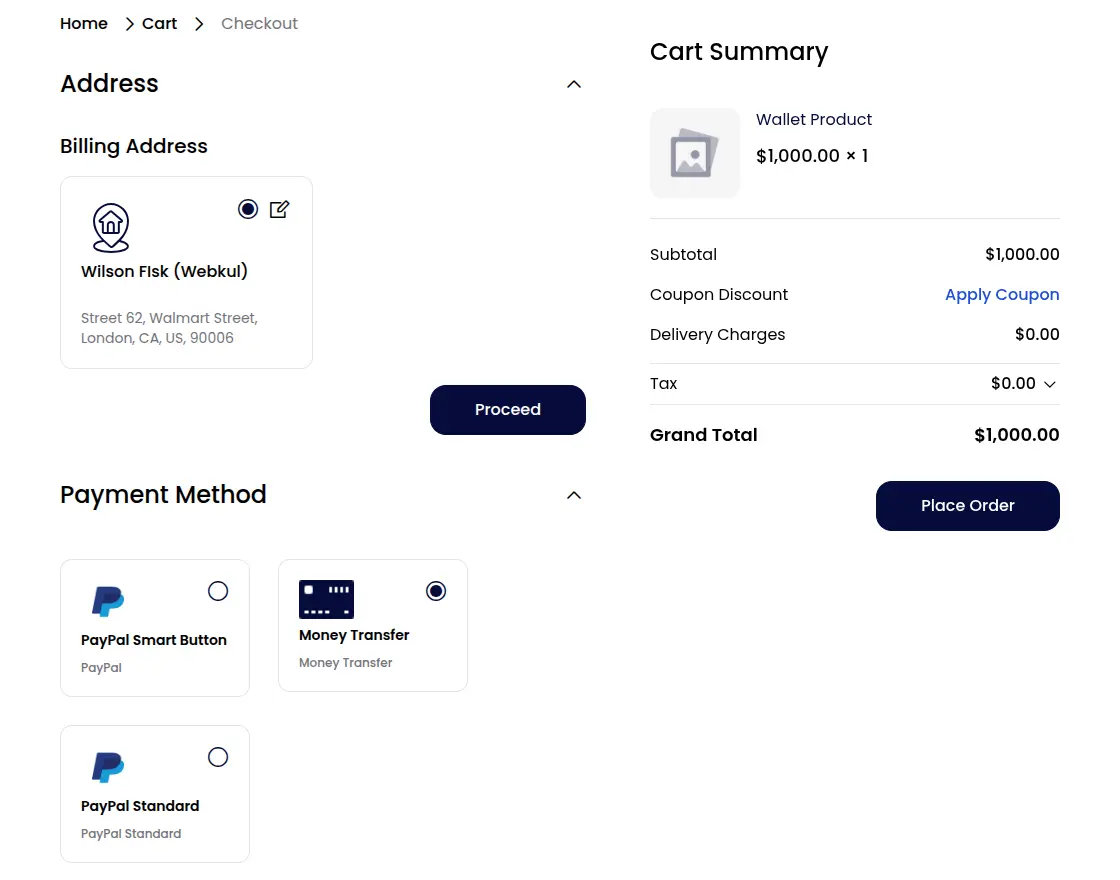
On the checkout page, the seller/customers can see the Order Summary for the wallet recharge. Here, the seller/customer will click the Place Order button to complete the wallet amount purchase.
If the payment method is selected as Money Transfer then the amount will be added after the admin Confirm Wallet Order.
After the confirmation, the wallet amount is added to the wallet as shown in the screenshot below.

Note: If the payment method selected is Paypal Smart Button/Paypal Standard, then the amount will be added to the wallet directly.
Transfer Amount To Bank:
The customer can send the transfer request to the admin to transfer the wallet amount to other banks also. To do so, click on the Transfer Amount to bank account button after that enter the transfer details as per the below image.

Here, the admin will enter – the amount to transfer, account details, mention a note, and lastly, click the Transfer Money button to submit the wallet amount transfer request.
Note: As soon as the customer submits a wallet amount transfer request, the amount to be transferred will get deducted from the customer’s wallet.
Now, the admin gets the wallet amount transfer request.
The admin approves this payment request from the admin back-end by clicking the Approve button and the status of the transfer will get changed to – Approved. Else, can Cancel the payment request by clicking the Cancel button.
If the admin disapproves the transfer request, this will credit the amount back to the customer’s wallet which was got deducted while submitting the transfer request.
The admin can also see the bank details.

Note: After approving the wallet amount transfer request, the admin will manually and out of the system transfer the amount to the bank using the details shared in the transfer request.
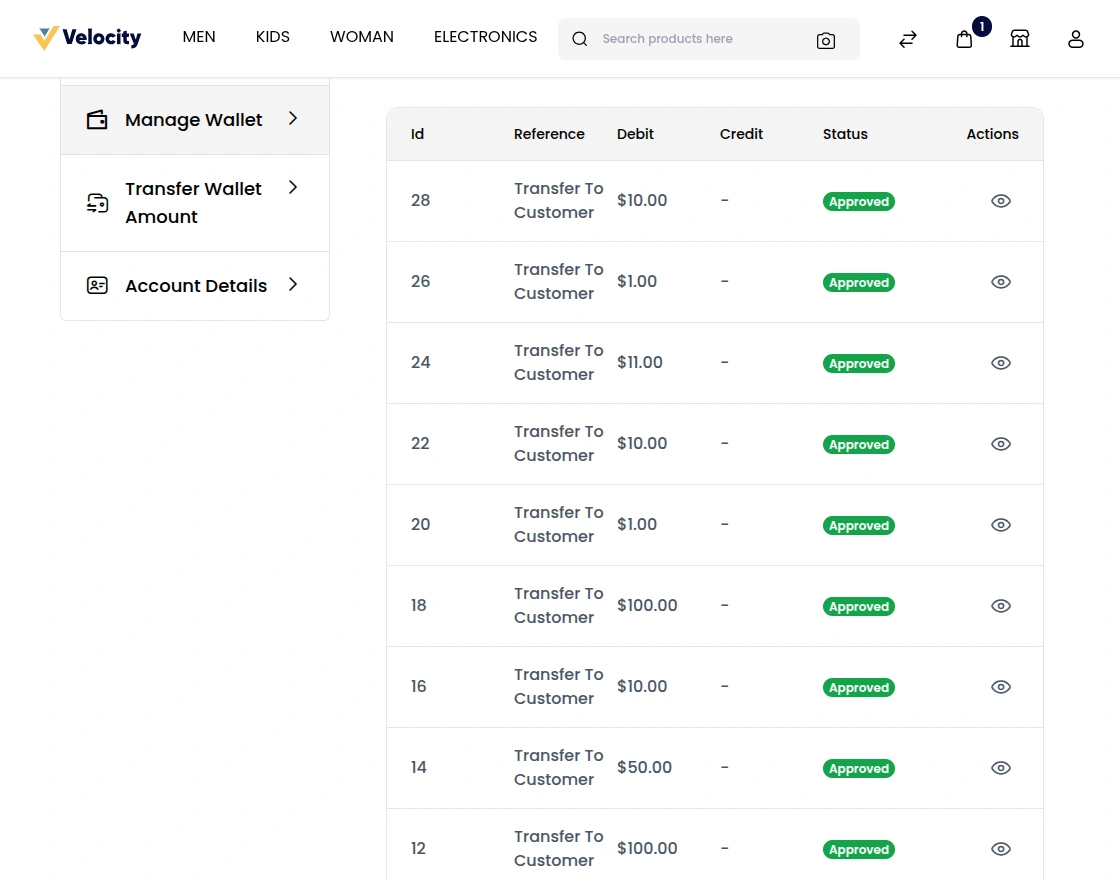
The customer will also be able to check the status of the transfer under their account panel.

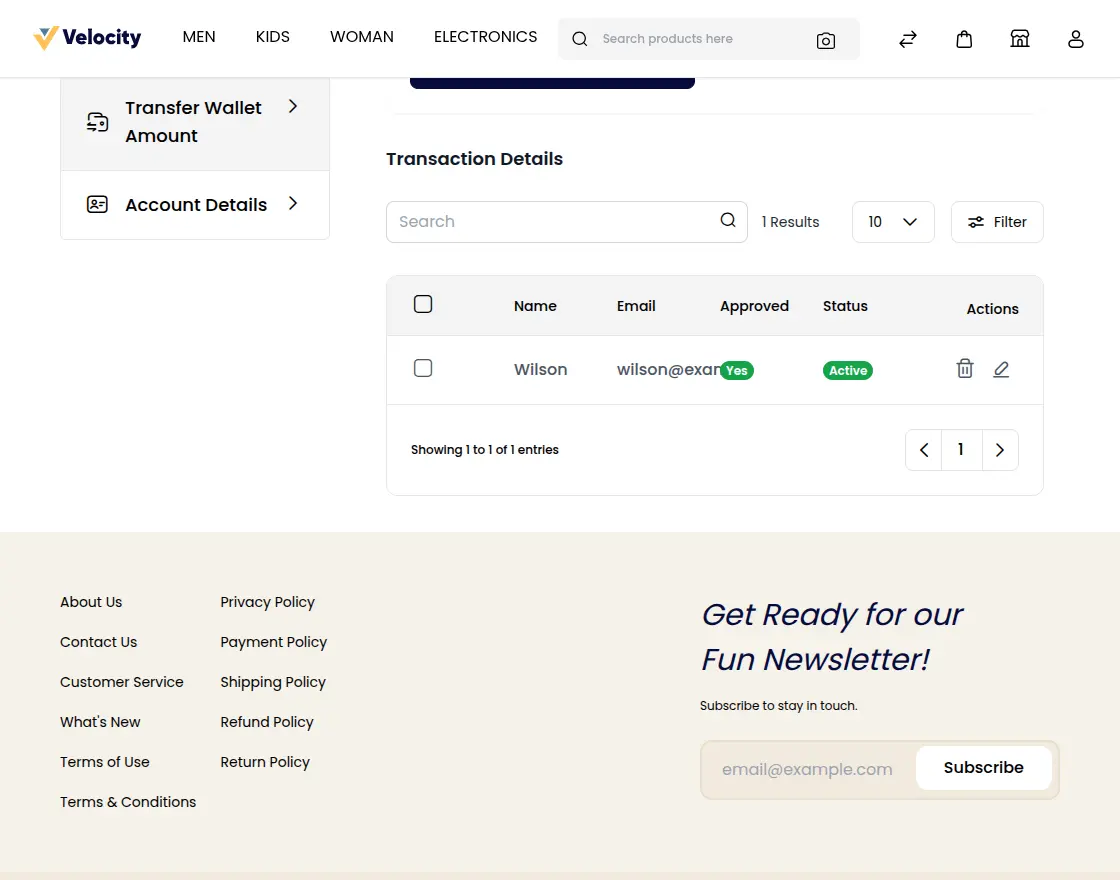
Transfer Wallet Amount
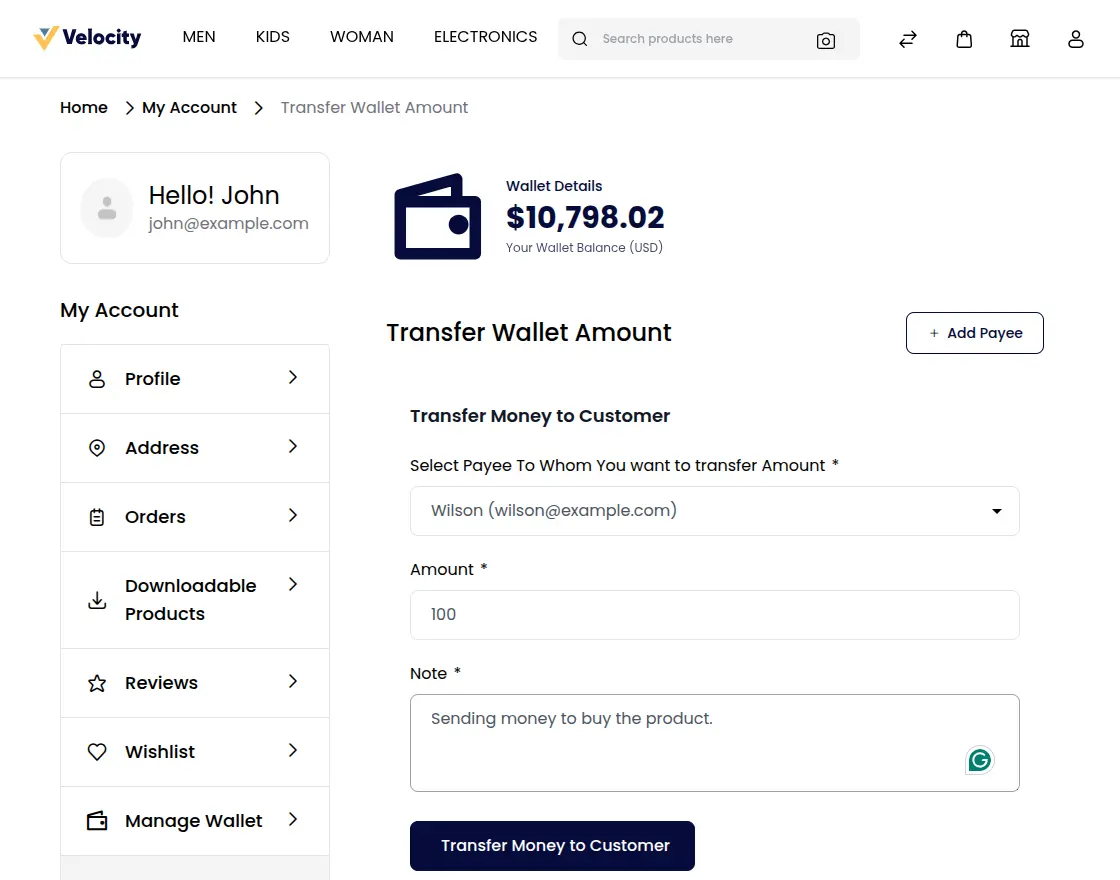
The customer can transfer his wallet money to another customer’s wallet. To do so, the customer will navigate to My Account>Transfer Wallet Amount. Here, the customer will see a list of added payees and can transfer the wallet amount to them easily.
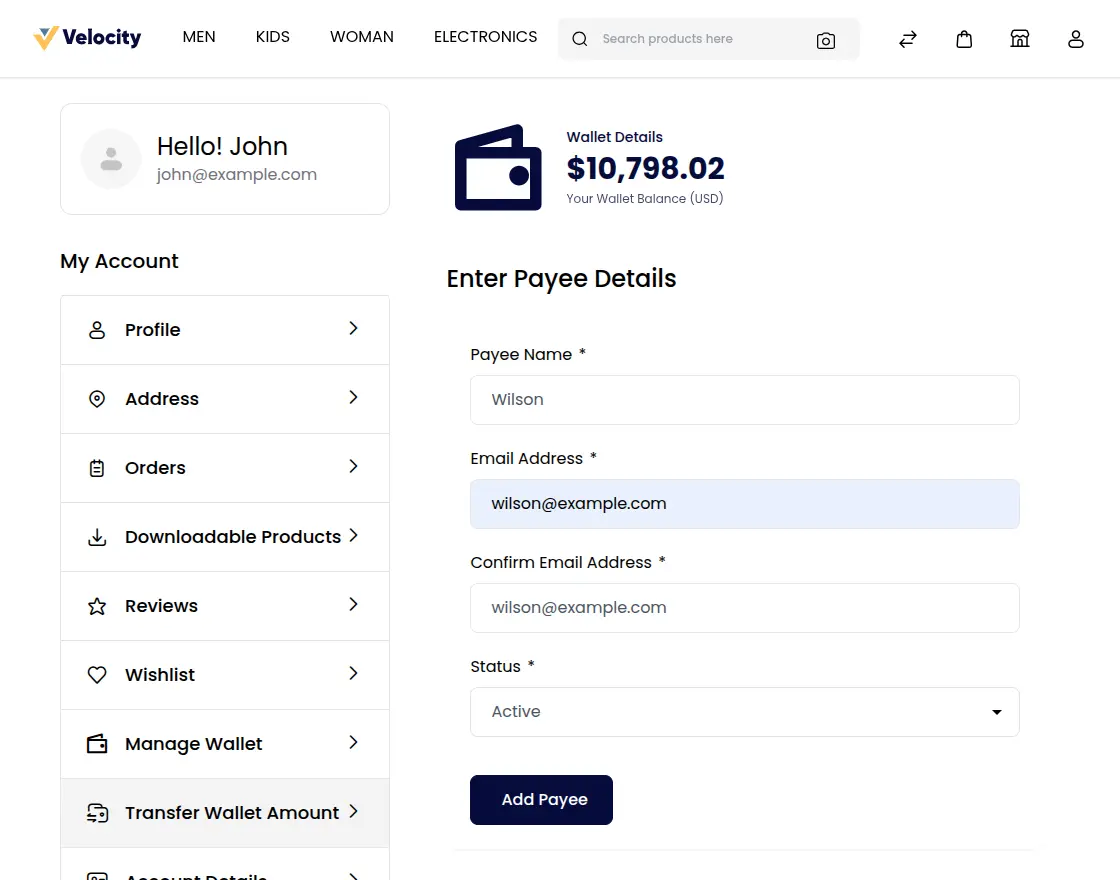
To add a New Payee click the Add Payee button as shown below in the snapshot.
This brings up a menu to add the payee details, enter the details and click the Add Payee button.
Now, select a customer from the drop-down menu option who will receive the wallet money and then enter the transfer amount. Customers can even add a small note with this transaction for any reference. Click the Transfer Money to Customer button, a verification step will appear next (if enabled).
Verification Code
Here the customers will need to enter the verification code for validation purposes.

The code will send to the customer’s email ID.

Enter the Verification Code and click on the Send button.
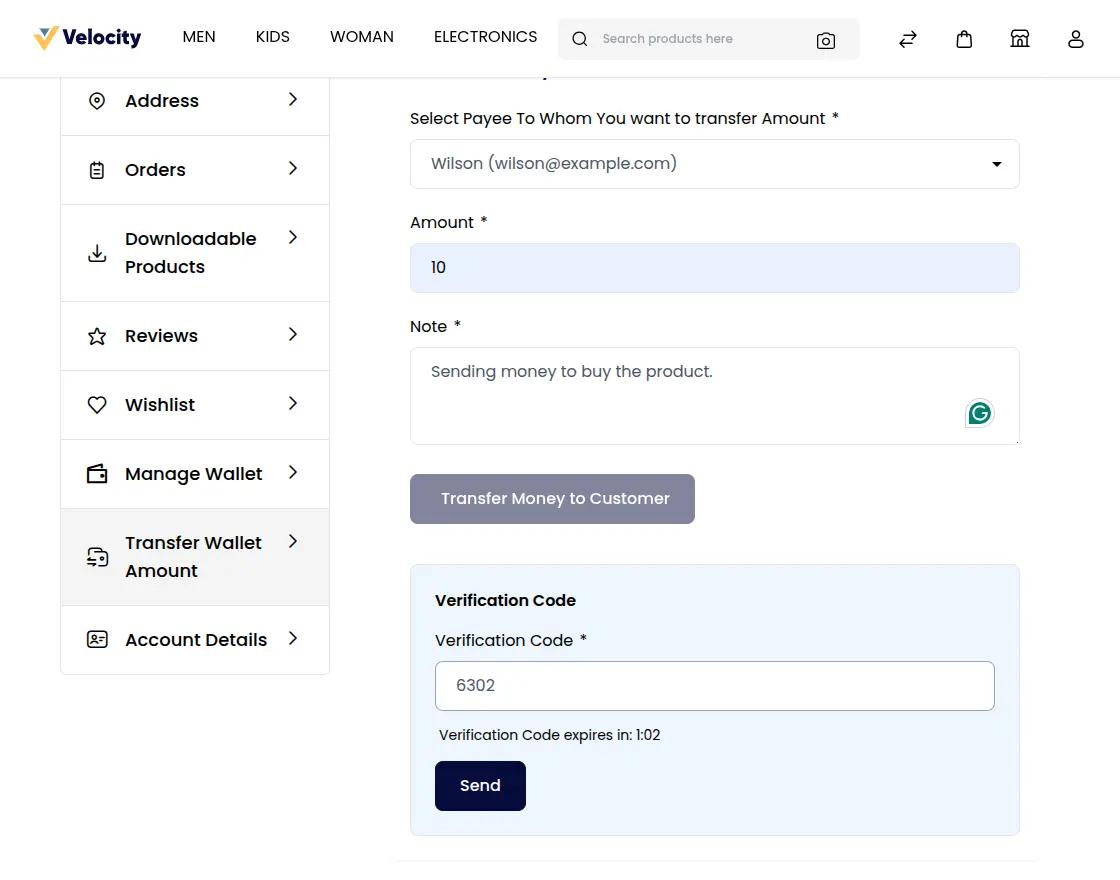
Once you enter the code the money will be transfer to the payee successfully .
After, transferring the amount the customer will navigate to Manage Wallet to check the transaction detail as shown below in the snapshot.
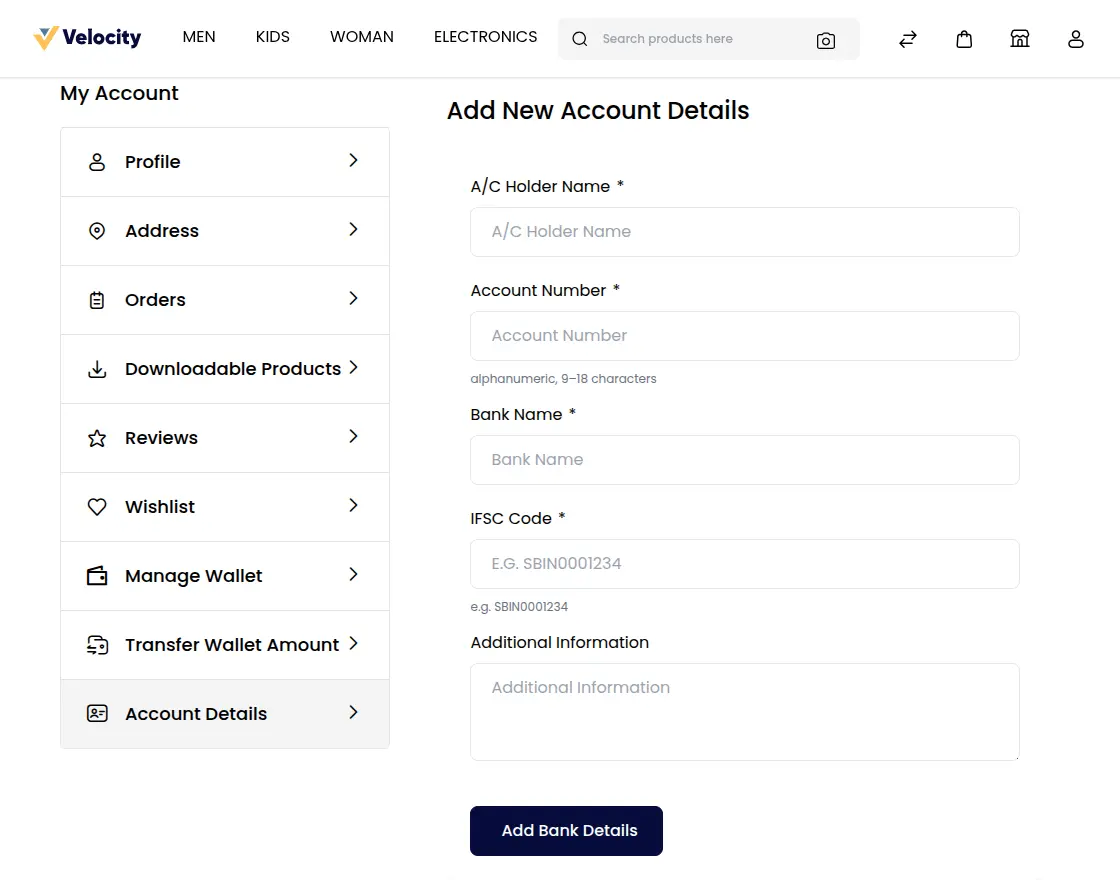
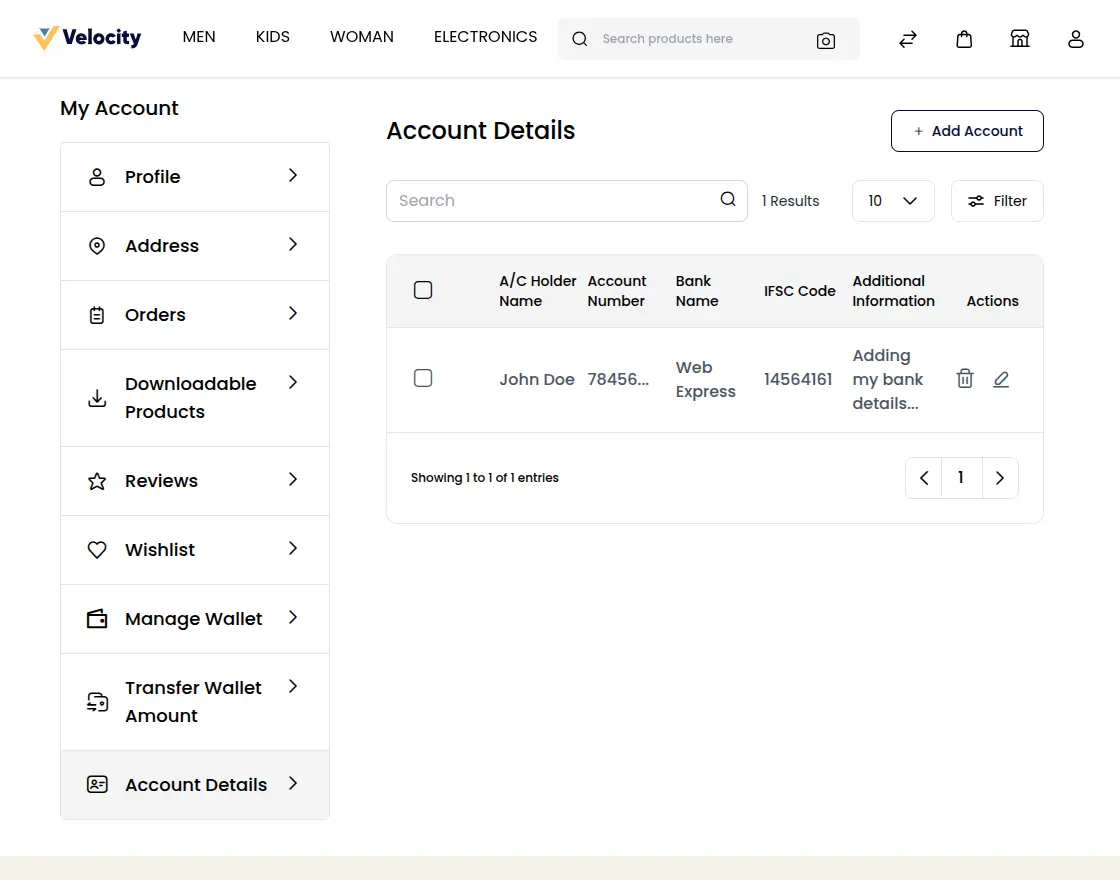
Account Details
Here customer can add their account details.
Also, they can see all their account details added to the system.
The customer can make payment for any seller using the Laravel eCommerce Marketplace Wallet System. On the checkout page, while making a payment the customer can select the Wallet system to make the purchase of the seller’s products. The total payable amount will deduct from the Wallet Amount and the customer can also see the remaining Wallet amount after making the payment.
Under the Marketplace Wallet, the admin will see a sub-menu as shown in the below image.
Let’s go through each of the sub-menu options one by one –
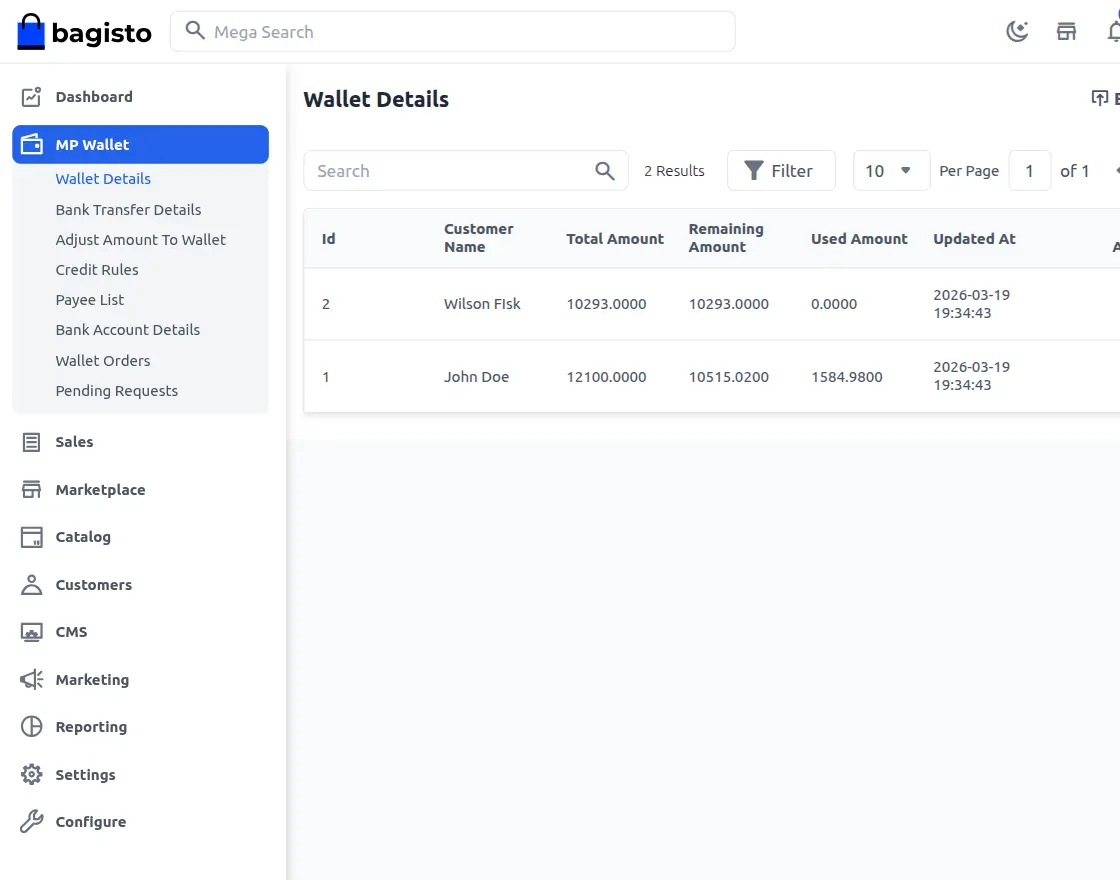
Wallet Details
When the admin will click on “Wallet Details”, then the admin can see the wallet history(credit & debit) for all of the sellers/customers. Here, the admin can see the details like – ID, Customer Name, Total Amount, Remaining Amount, Unused Amount, Updated at, Action(to check the individual details).
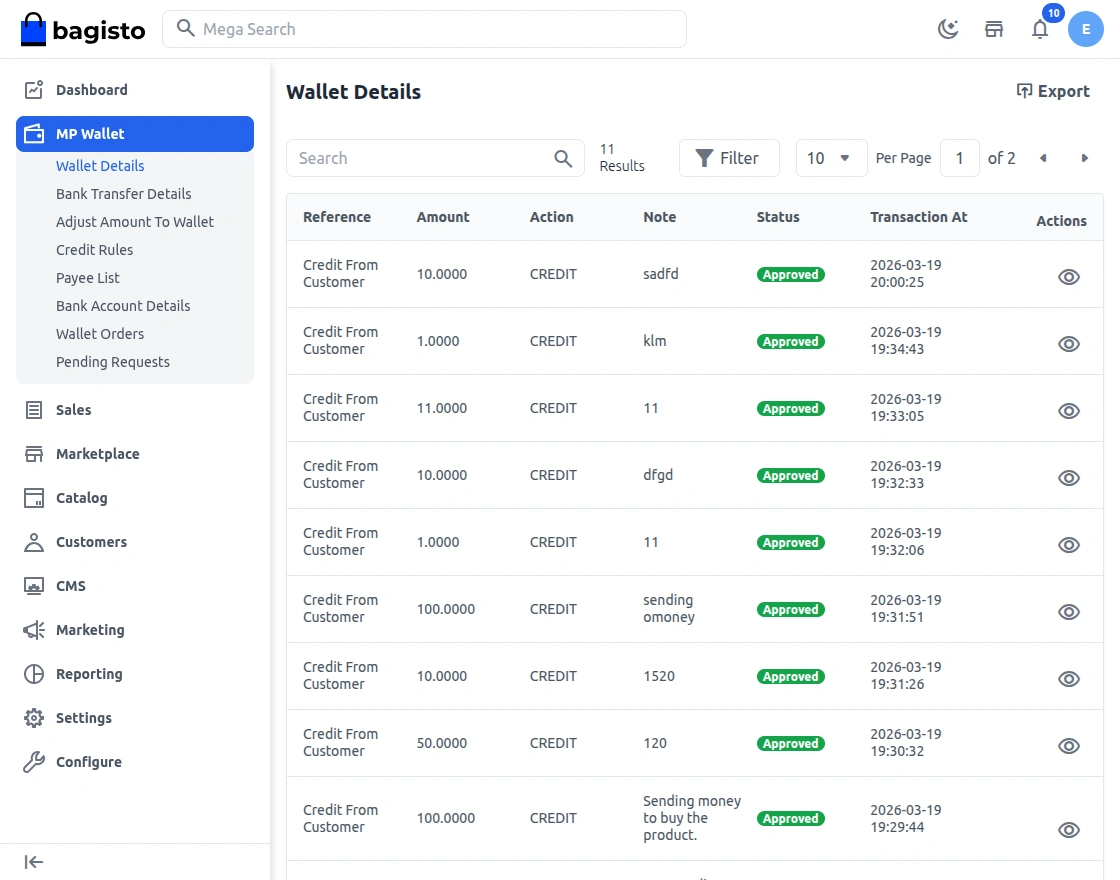
Here admin can also see each customer transaction details. To check a particular transaction click the Action Button as shown below in the snapshot.
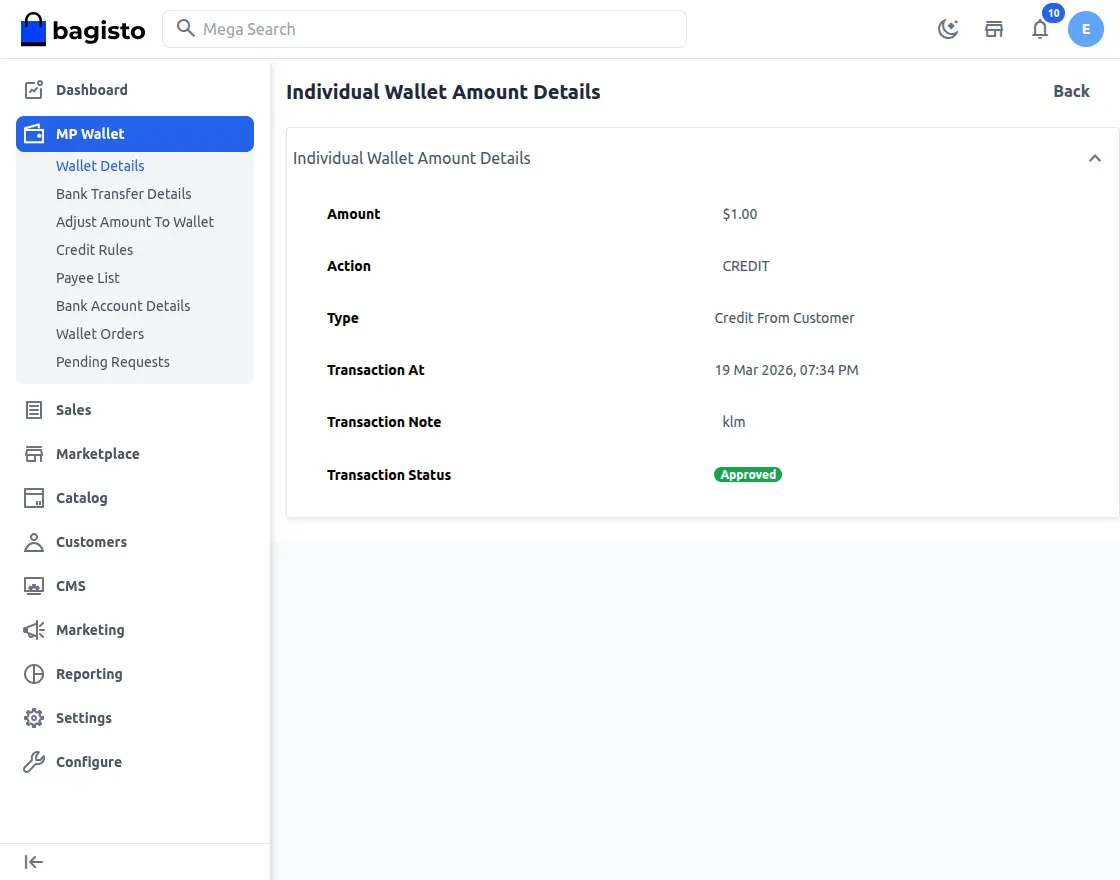
Clicking the Action Button brings up the section with complete transaction details of the customer’s individual transaction.
Bank Transfer Details
Under this section, the admin will be able to find all the details regarding the bank transfer details like – Reference, Customer, Amount, Action, Transaction At, Note, Status, and Action column. Whenever a customer goes for withdrawal from his wallet to his bank account, all of those transactions will be visible here. Initially, the status would be visible as pending.

The admin will be able to update the bank transfer transaction status as shown below in the snapshot.

Here, the admin will select the transactions from the list which the admin wants to update the transaction status. And then, select either of the status option mentioned below –
- Cancel Transaction – This will disapprove or cancel the transaction.
- Approve Transaction – This will approve or the transaction.
The admin can also view the complete details of the transaction. as shown in the below image by just hitting the action button.

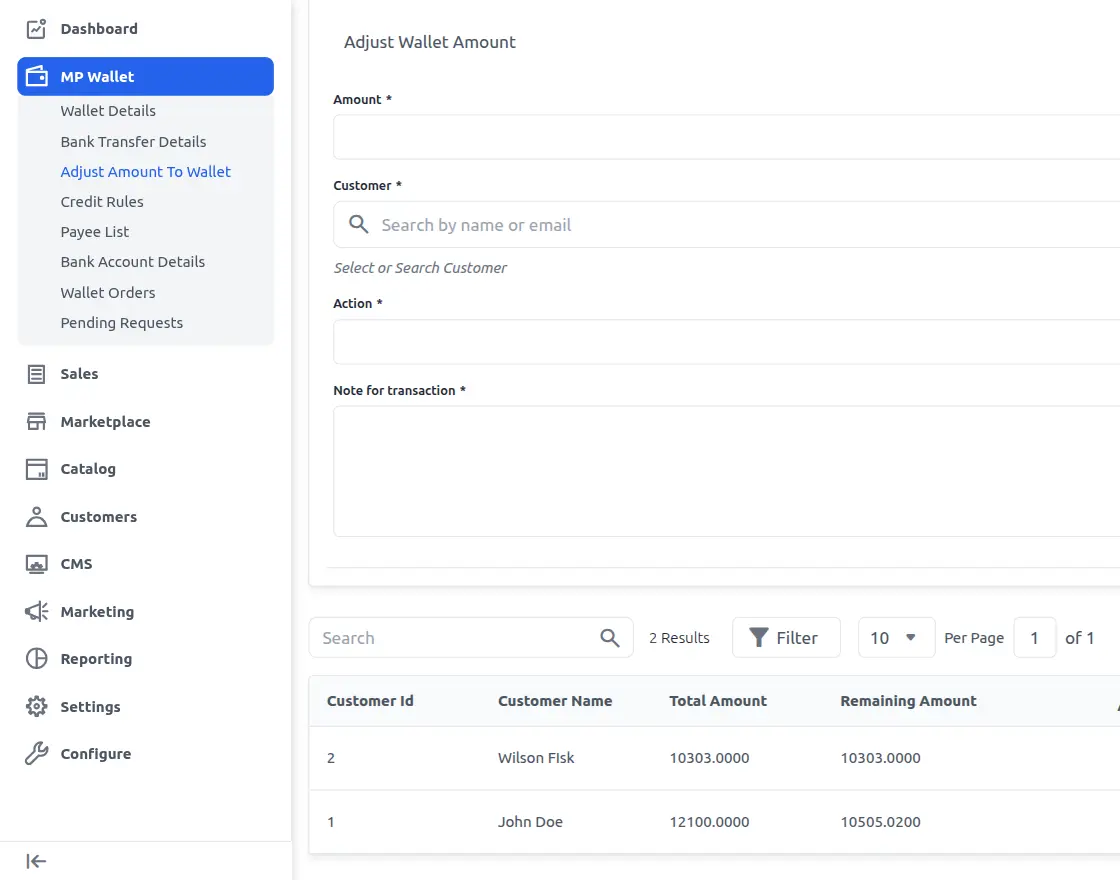
Here, the admin can Enter the Amount and Select Customer from the drop-down, also select what action they want to perform( Credit or Debit) from “Action want to perform on the amount” and add a “Note for the transaction“.

The admin can select the customer for whom they want to credit or debit the amount from the list of customers with the Customer ID, Name, Remaining Wallet Amount, and Action.
There is a button as “Adjust Amount” for each customer in the list of customers. With the help of this button, the admin can add or deduct wallet amounts from any particular customer.

When the admin clicks there, a page opens where the admin has to enter Amount, select what action they want to perform ( Credit or Debit) from Action perform on the amount, and add a Note for the transaction. Lastly, click the Update Amount button to credit/debit the amount.
The admin can see a success message after the transfer .
Credit Rules is for the efficient management of the Credit Amount process in the Wallet system. From here, the admin can easily create multiple rules for the Wallet Credit and apply them as per the condition. Mainly, there are two types of Credit Rules –
- On Cart
- On Product
The admin can see all the details for Wallet system Credit Rules in a grid
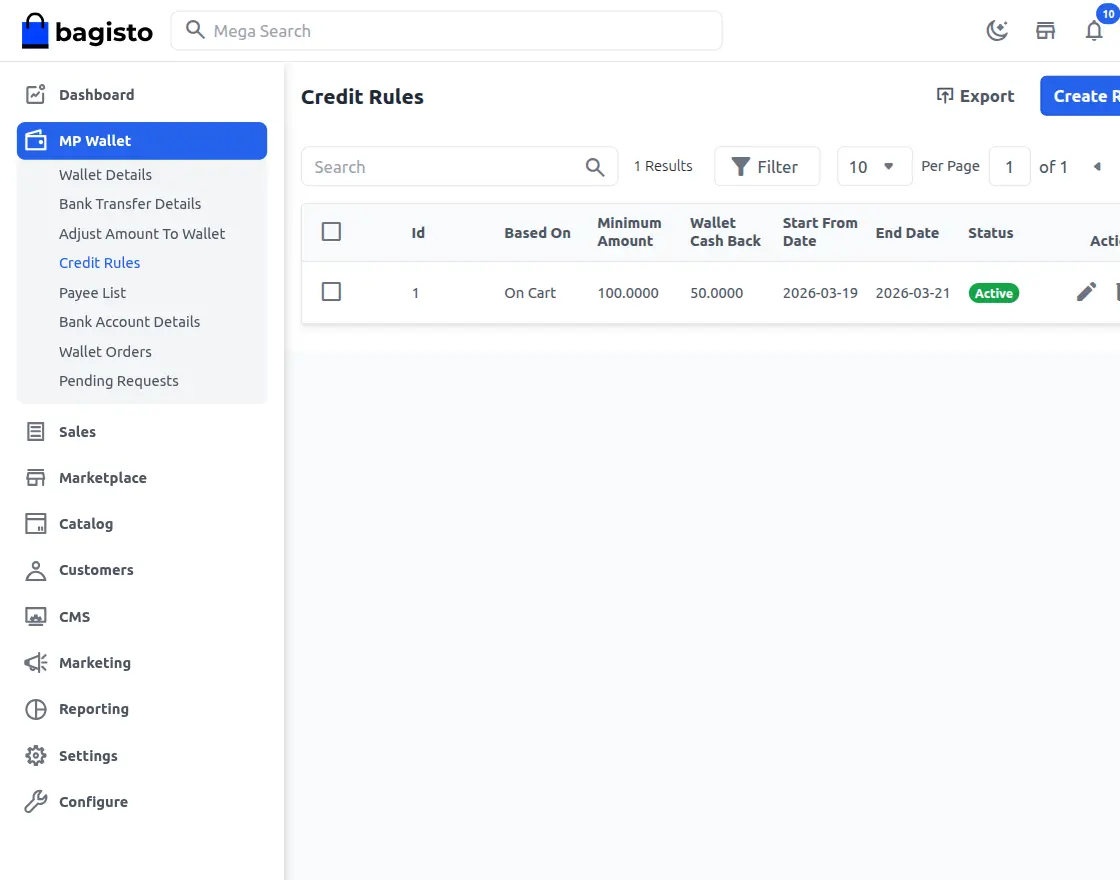
When Credit Rule is based on “On Cart”
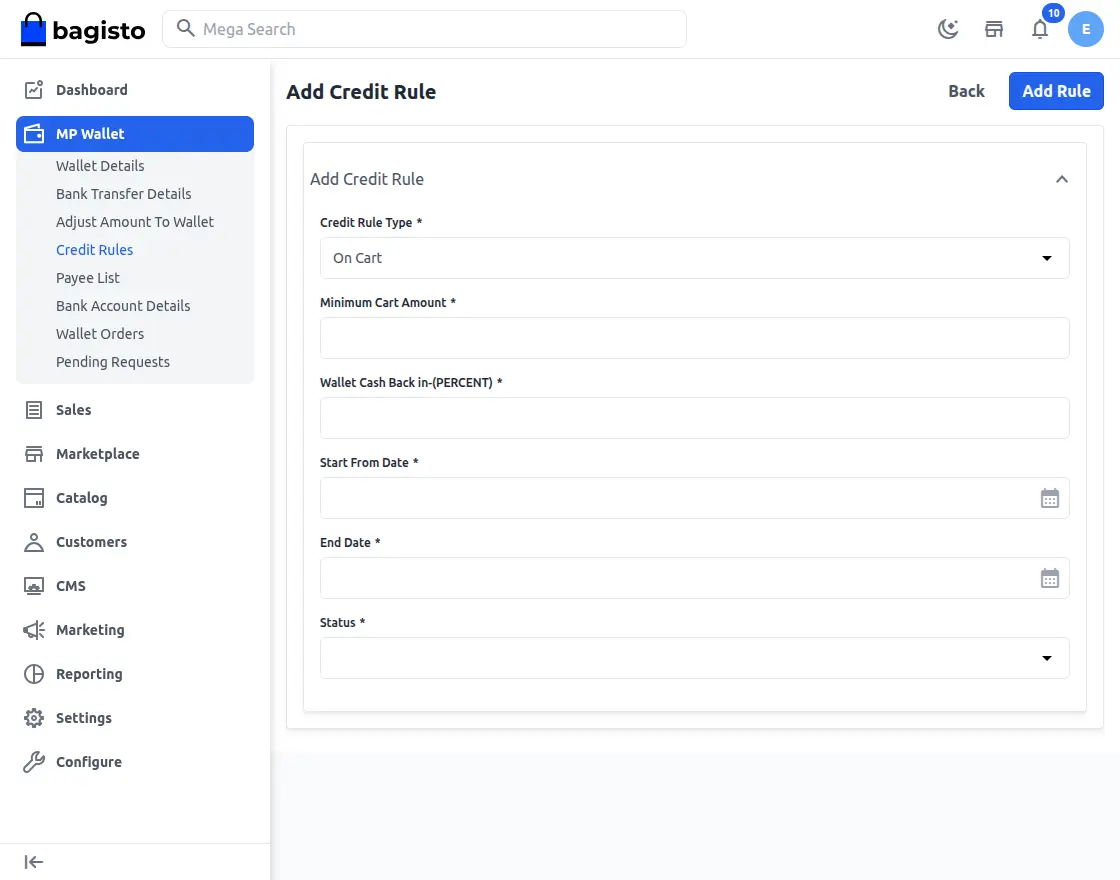
The admin can click on Create Rule button to add new Credit Rules.
Now the admin can select either “On Cart” or “On Product” for the Credit Rule Type. The admin can enter Minimum Cart/Product Amount, Cashback Amount select the Start From Date, select the End Date, and set Rule Status as Enabled or Disabled.
If the admin selects On Cart then Credit will be applied to the customer when his order value is greater than the set Minimum Amount for the Cart and if the orders between the dates set by the admin for that particular Cart Rule.
When Credit Rule is based on “On Product”
Here, the admin will go to Catalog > Product and can edit any product. They will see two fields – “Wallet Credit Amount Based On” in which the admin can either select “Product Credit Amount” or “Credit Rules“.If the admin selects “Product Credit Amount“, the amount entered for “Wallet Cash Back” will be credited back to the customer after the product purchase.
If the admin selects “Credit Rules” then, the amount entered for Credit Rule Based on Product will be applied.
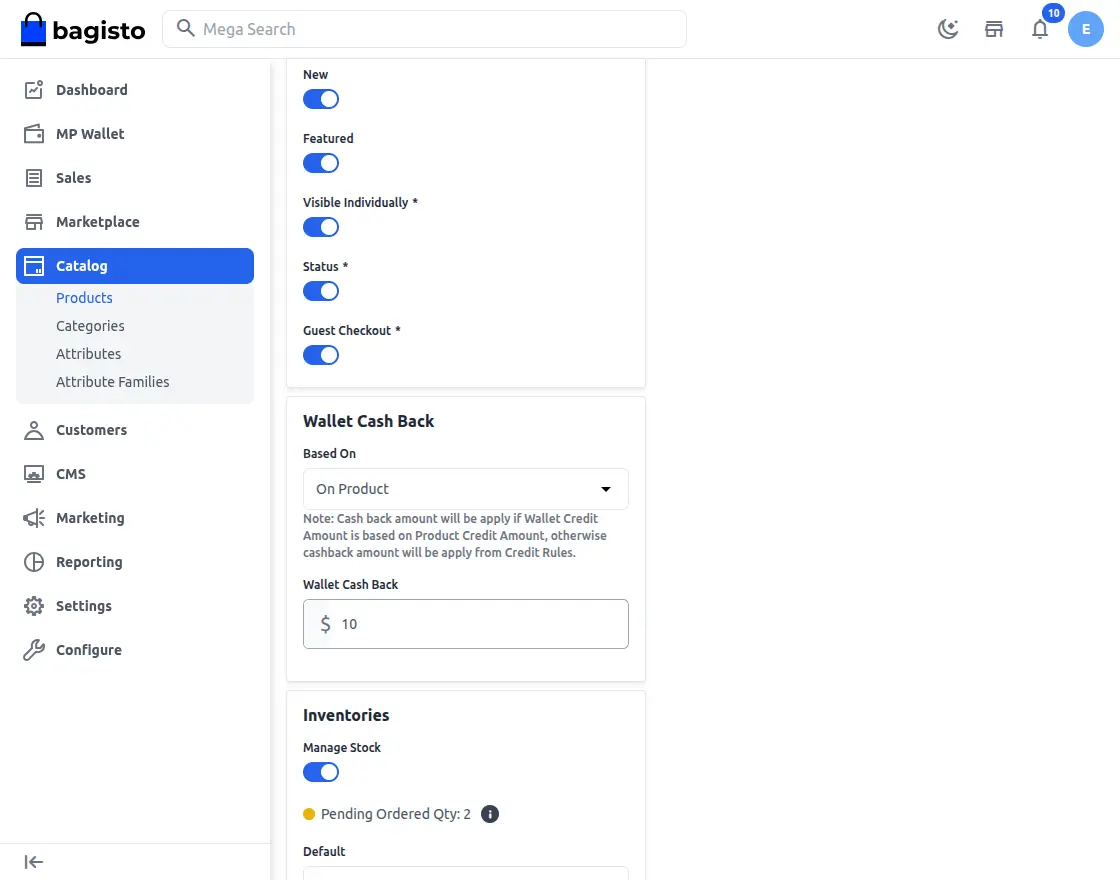
There is another field called “Cashback Amount” in which the admin will enter the amount which will be credited back to the customer when they buy this particular product
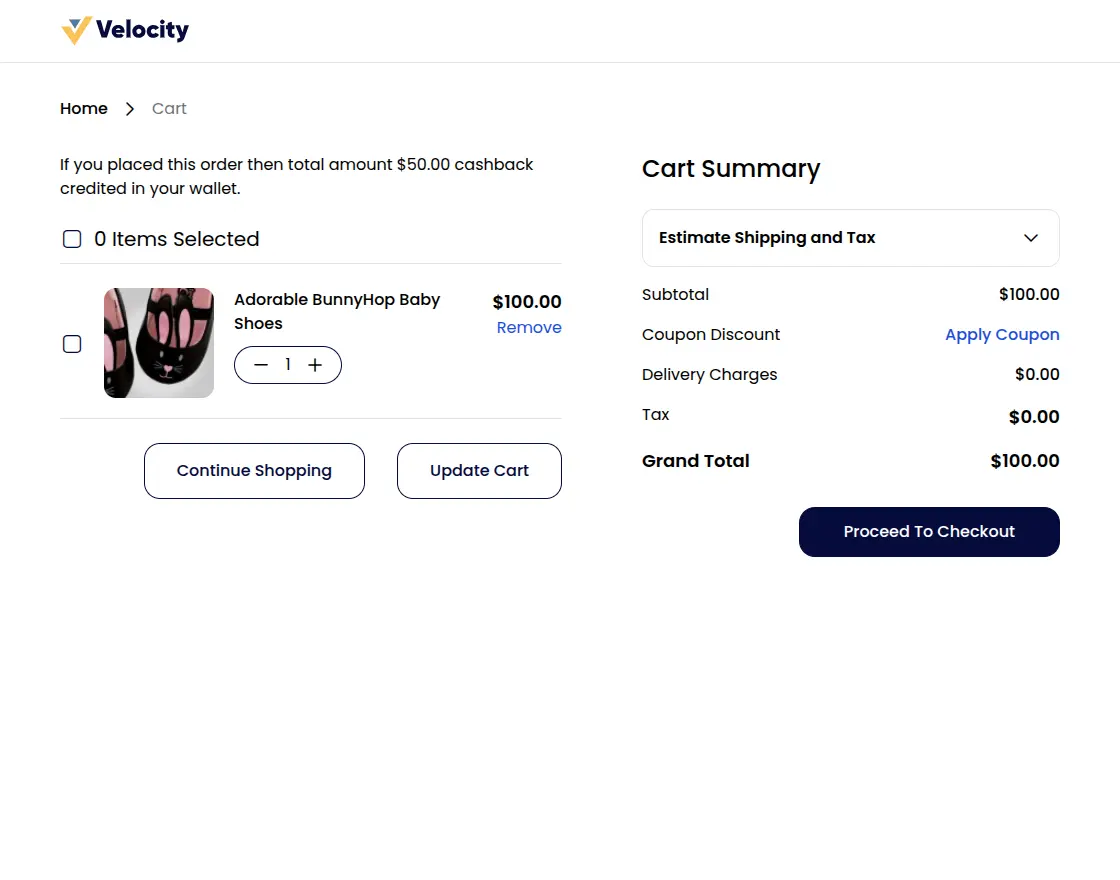
On the cart page, the customer receives a message of the amount getting credited in the Wallet. The credited amount will depend on the Wallet System Cash Back Configuration. If the “Priority for Cashback” is set as “Cart Base” then Cart Based Credit rules will be applied and if the “Priority for Cashback” is set as “Product Based” then either Product Based Credit rules or “Product Credit Amount” set for per product will be applied. The Credited amount is credited to the Customer’s Wallet after order completion.
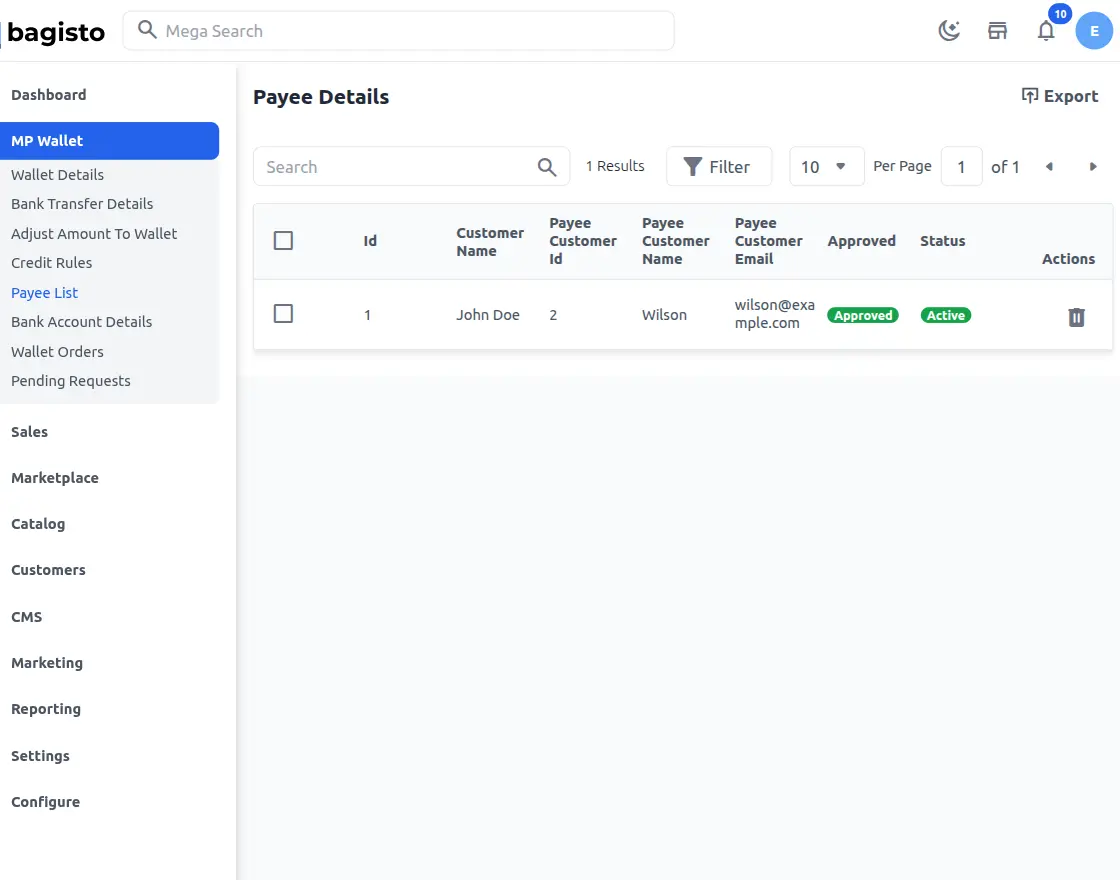
Payee List
Under this section, the admin will be able to see a list of all the marketplace wallet system payee’s details along with their status. The admin can delete or update the payee status as enabled or disabled as required.
To update the payee status the admin can select the payee and click on the drop-down option and click on the Update Payee Status option. After that click approve or delete as required.
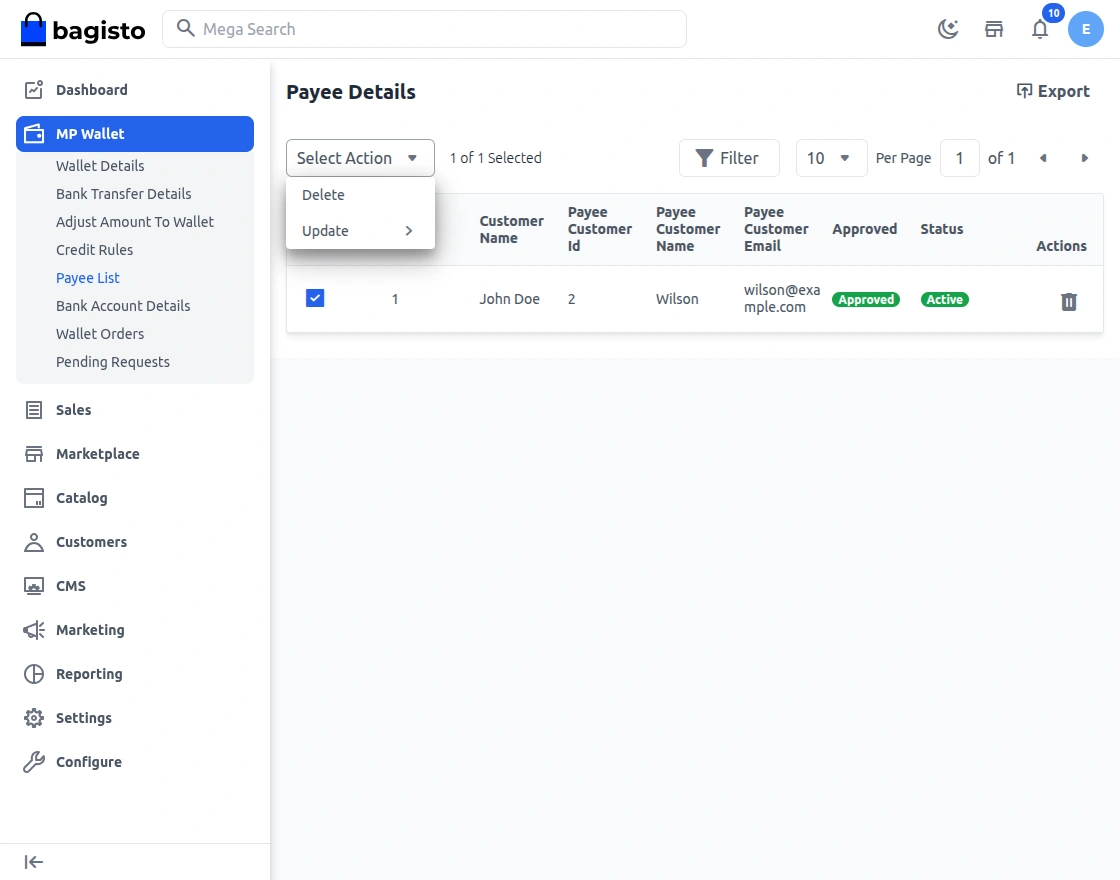
To delete a payee, the admin can simply click on the delete icon as shown in the above image
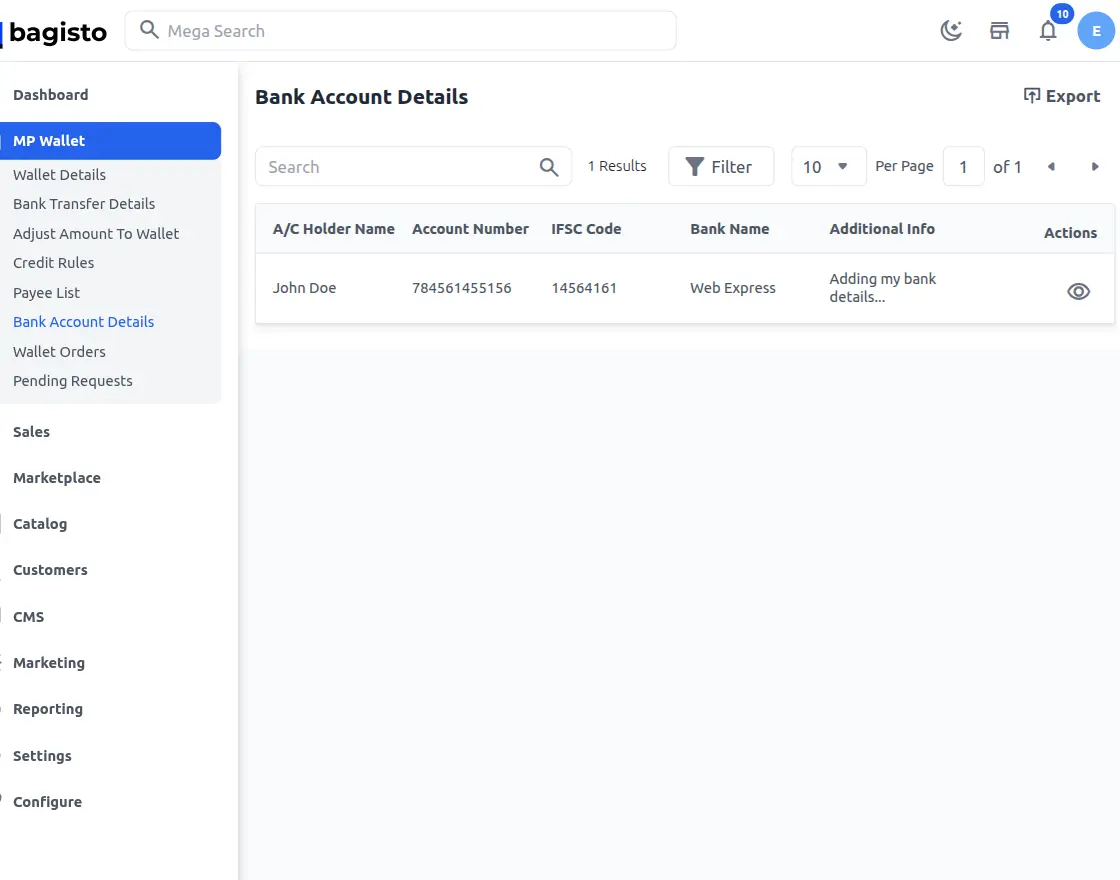
Bank Account Details
Here admin can see all the account details of their customers.
So, that was much about the User Guide of Laravel eCommerce Marketplace Wallet System Module for any queries or doubts reach out to us at [email protected]. You can also raise a ticket at our HelpDesk System.
Also, Please explore our Laravel Development Services and Quality Bagisto Extensions.
Current Product Version - v2.4.4
Supported Framework Version - Bagisto v2.4.4

Be the first to comment.