Magento 2 Google Shopping Feed Extension provides store owners with the ability to show their products on the Google search page in a visual manner.
Allow Magento 2 (Adobe Commerce) store owners to create Google Product feeds for their store’s products,
Export the products to their Google Merchant account, and map the categories (many to many) in Magento with Google shopping feed categories.
Apart from this, the Google Feed is auto-updated once the product gets saved on the store end.
Watch the video to understand the extension:-
Module Configuration Settings
Extension Workflow
Sign Up At Google Merchant Center
Generating Client ID & Secret Key
Features
- Store products add to Google Feed using Merchant API
- Google Feed Auto-update on product save on store.
- Using a cron schedule, export products to Google Shopping Feed automatically.
- Dynamic Attribute mapping.
- Map store category with Google shopping feed categories.
- Many to Many Category mapping available.
- Supports Simple, Virtual, Bundle Products, Downloadable, and Configurable product types.
- Option to Authenticate the Merchant account of the user.
- The product deleted at Magento is auto-deleted from the Google Feeds.
- Set account ID in case of multiple accounts in the merchant center.
- Products without identification number (MPN/ GTIN) admin can set as a custom product.
- Individual products can export to the google shopping feed.
- Store Product and Google Product Feed Map record grid.
- Admin can export products to a Google Merchant Account through OAuth and Service account.
Installation
Firstly, follow the below steps for installing the extension –
Step 1:
Unzip the respective extension zip and then move the “app” folder (inside “src” folder) into Magento root directory on the server.

Step 2:
Moreover, run the below-mentioned commands in the Magento 2 root directory via the terminal.
First Command –
composer require google/apiclient
Second Command –
composer require google/shopping-merchant-products
Third Command –
php bin/magento setup:upgrade
Fourth Command –
php bin/magento setup:di:compile
Fifith Command –
php bin/magento setup:static-content:deploy
For cron schedule run command:
php bin/magento cron:install
php bin/magento cron:run
Step 3:
Lastly, flush the cache and re-index all by navigating through System->Cache management.
Module Translation
Moreover, for translating the Google Shopping Feed for Magento 2 module language.
Please go to app>code>Webkul>GoogleShoppingFeed>i18n and edit the en_US.csv file.
Furthermore, translate the words on the right and upload the modified file to the same location.
The filename of the translated file should be according to the language and region code like de_DE.csv.

How to get the Credentials – Client ID and Client Secret
Create APP, Get the Client Id & Secret:
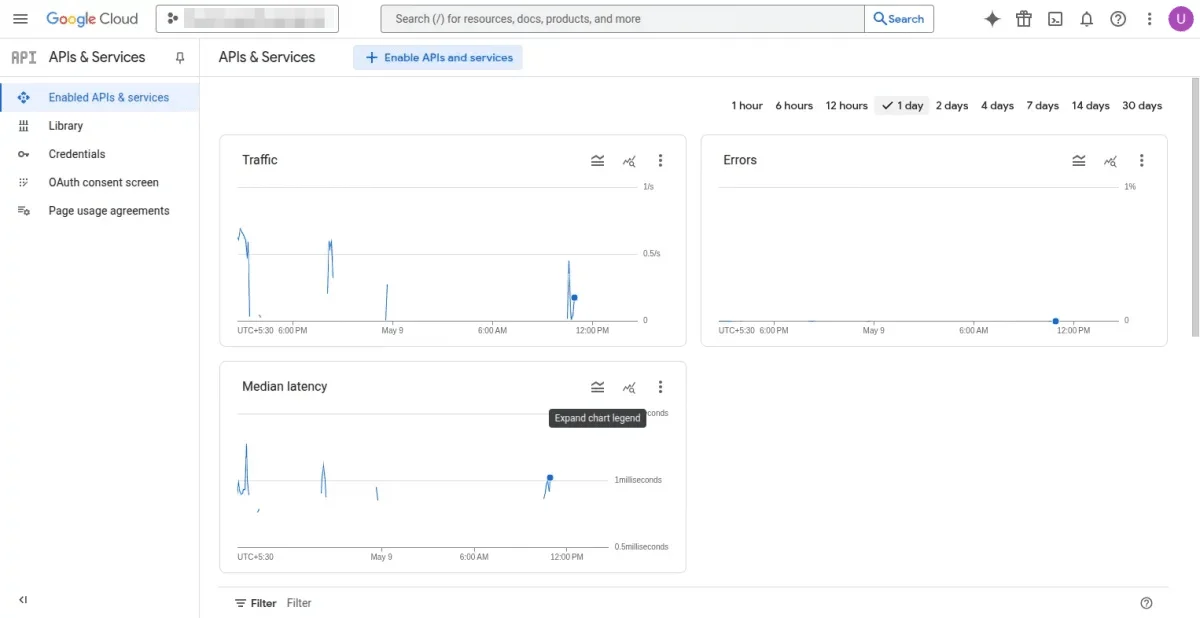
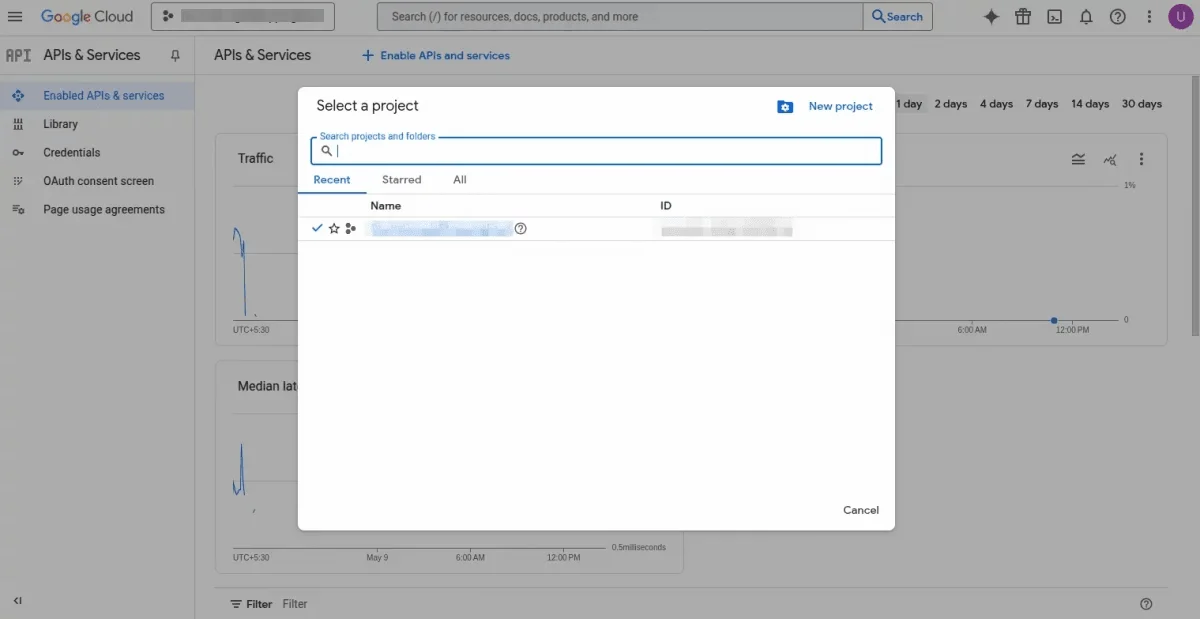
1: Go to console.developers.google and log in using your Gmail ID. After login click a dropdown arrow for the Select a Project option.
2: Click the NEW PROJECT option.
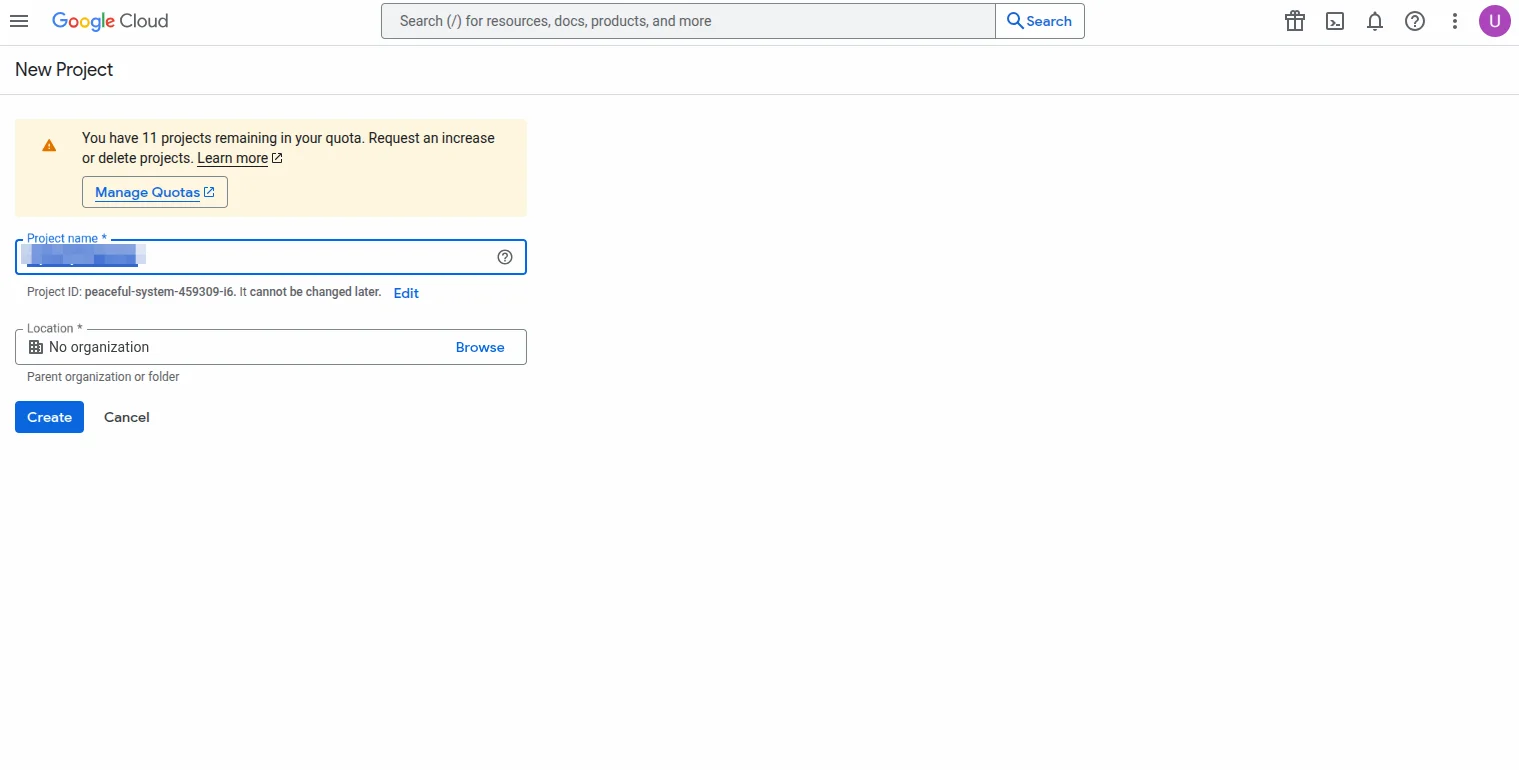
3: Enter your project name and select the location and click the Create button
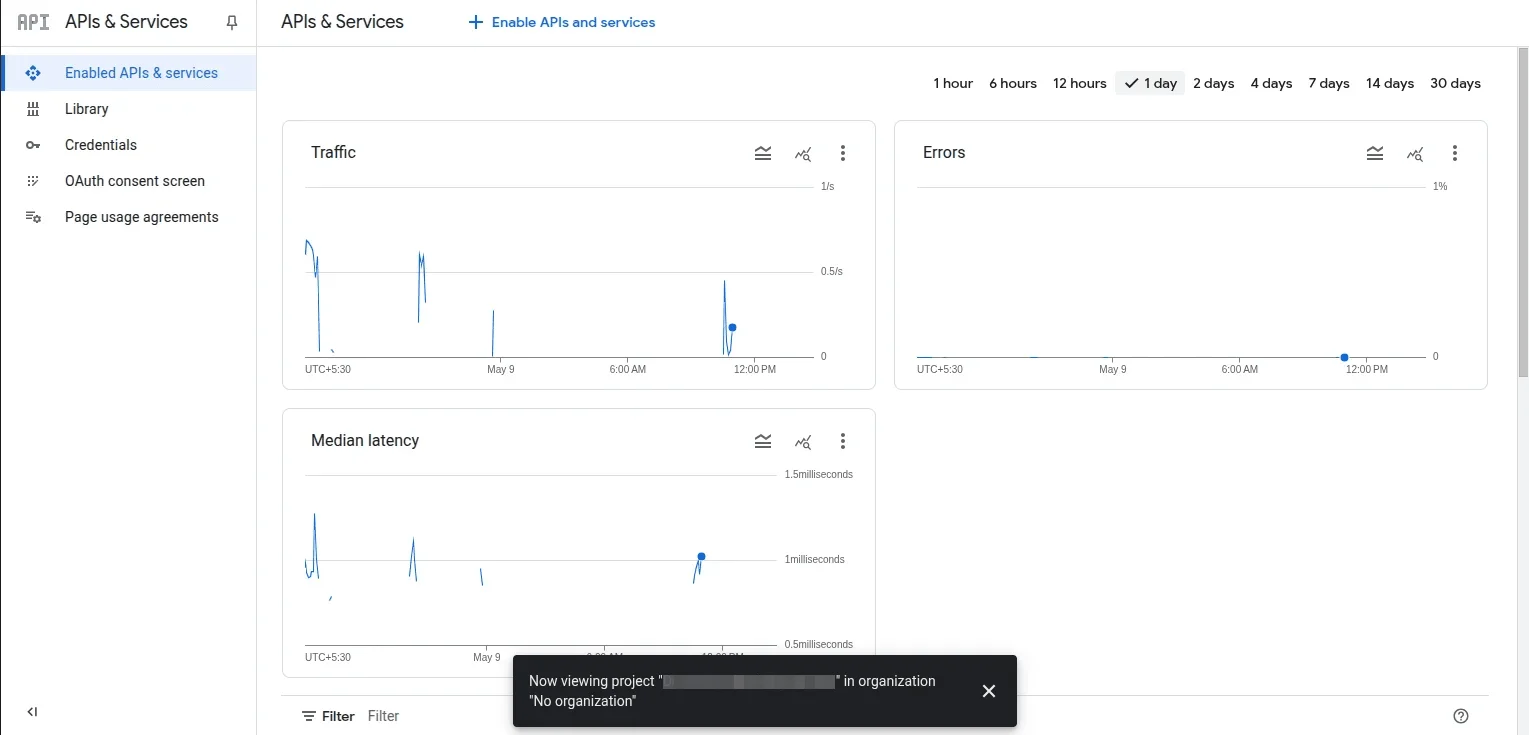
 4: Select your created project and then click ENABLE APIS & SERVICES button.
5: Now in the search box type in Shopping.
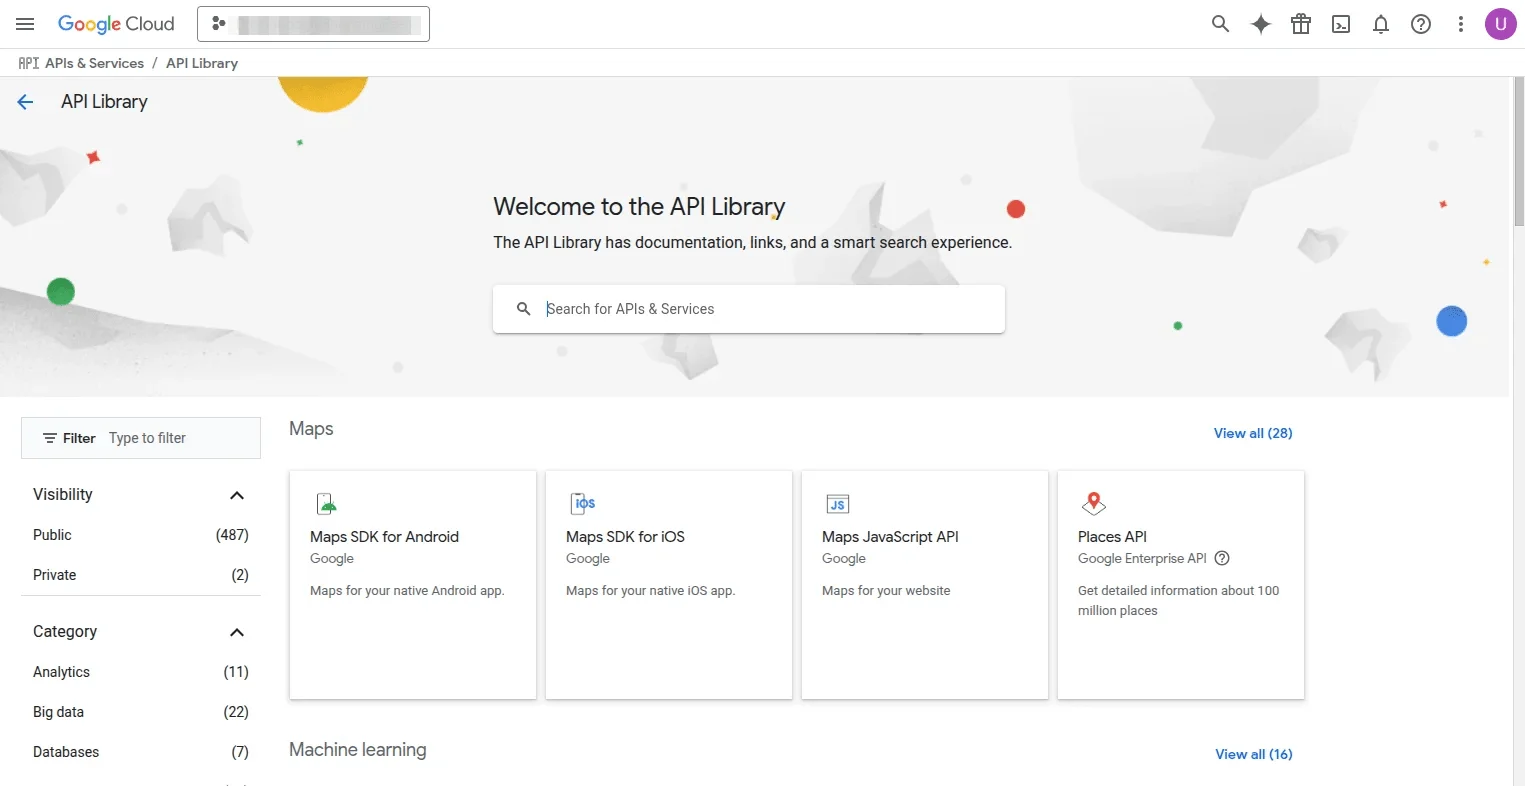
6: The results will populate and then select – merchant API for Shopping.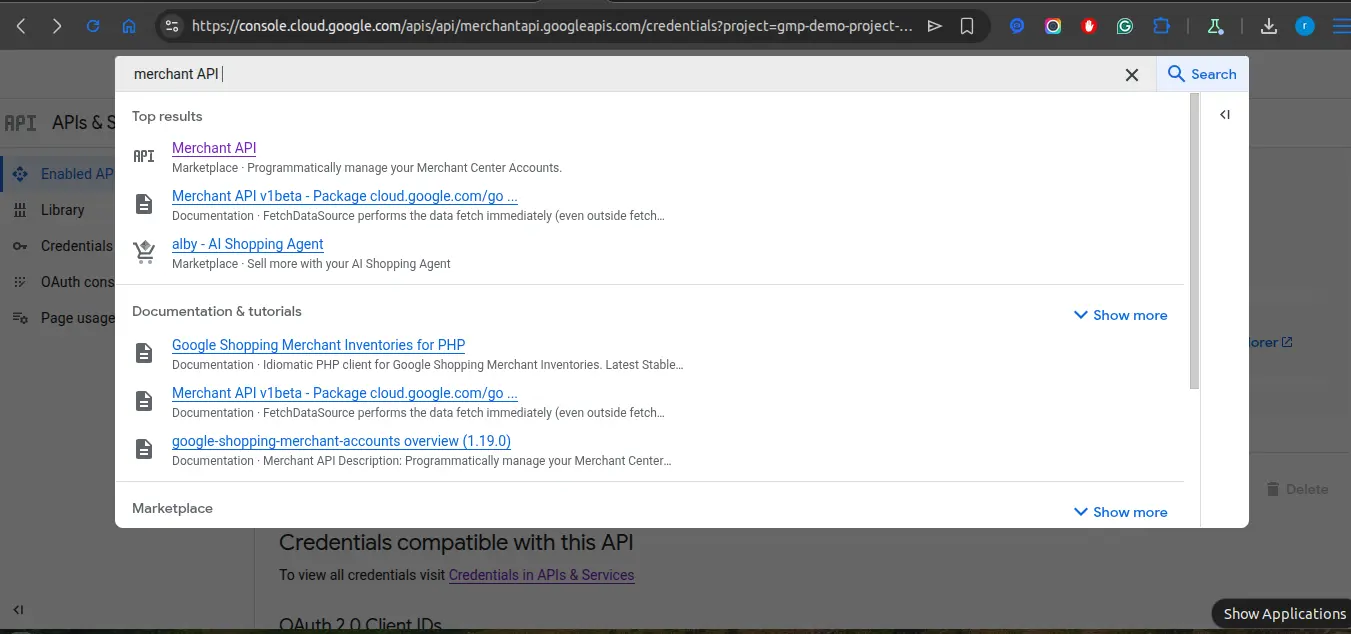
On clicking the same, another page, merchant API for Shopping will become visible as shown below.

7: After clicking on the “Enable” button now select the created app and then click on the Create Credentials butto
8: Now select OAuth client ID as shown below in the snapshot.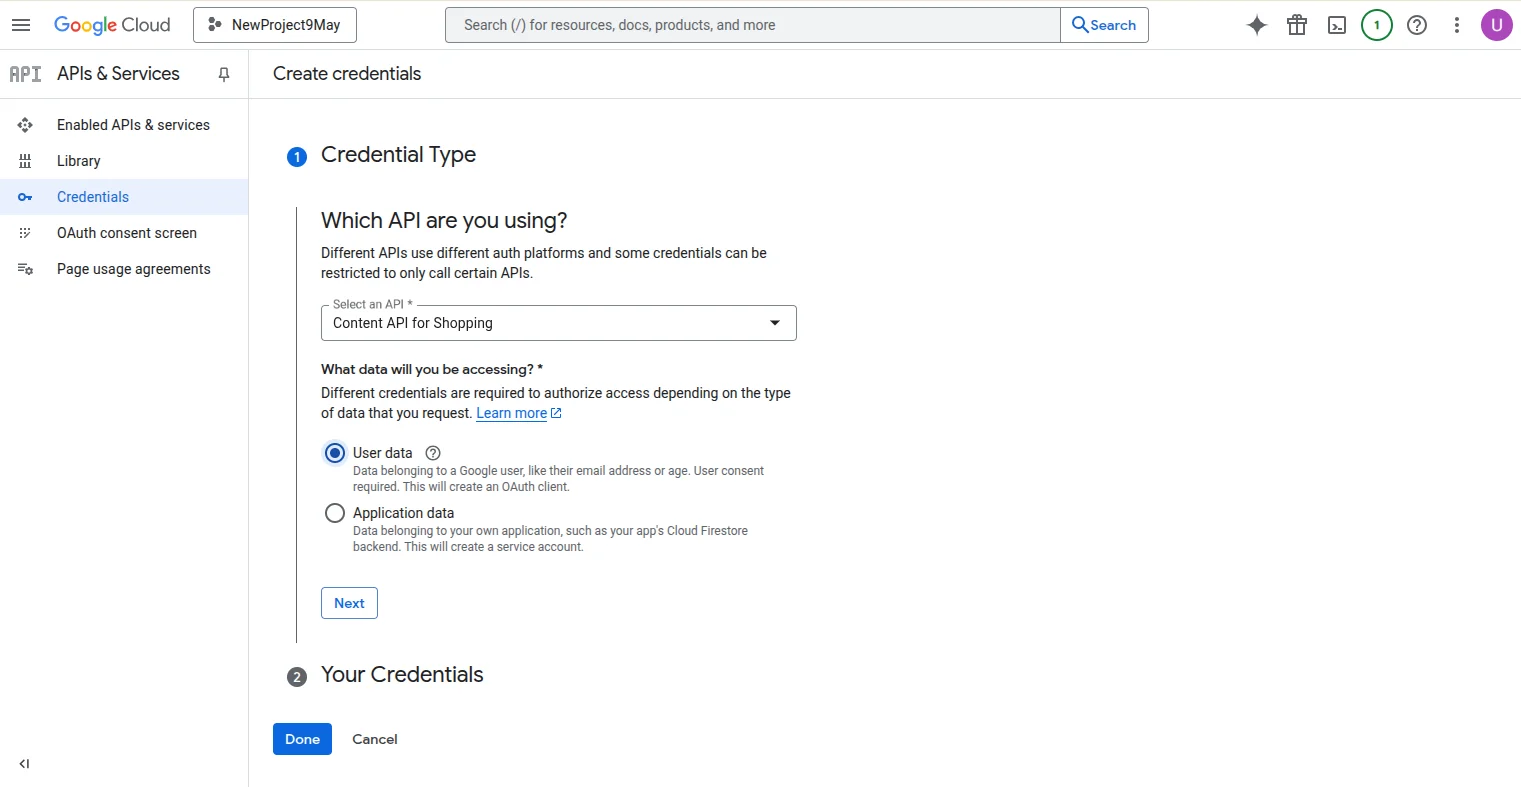

9: Now on the next screen to create an OAuth client ID, you must first set a product type on the consent screen.
For that, the admin will click on the “Configure consent screen”.
Configure And Register The App
After that, from the OAuth consent screen, the admin will choose how you want to configure and register your app, including your target users.
You can only associate one app with your project.

Selecting the user type will click on the “Create.“
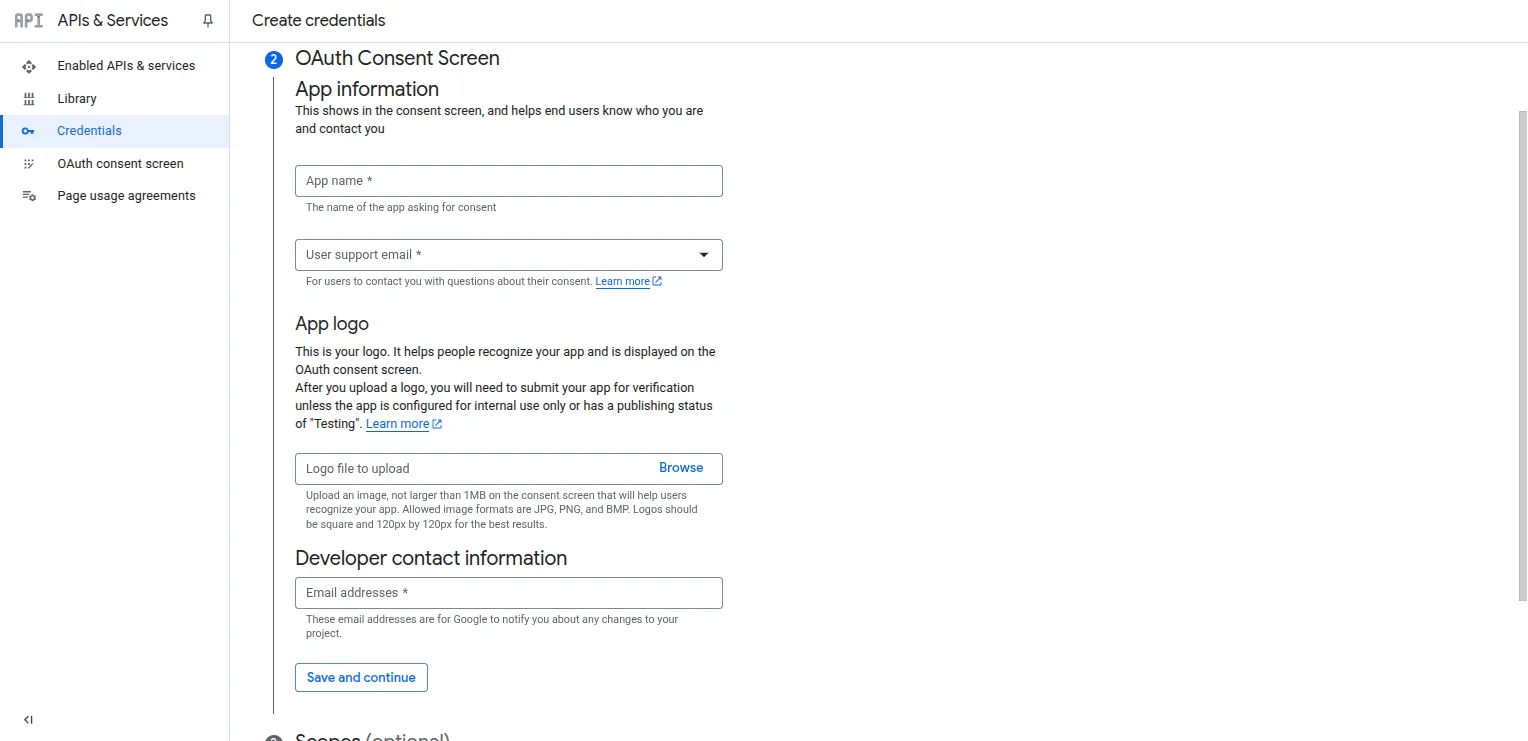
After clicking on the Create, now on the next screen, the admin needs to configure the consent screen for all applications in this project.
- The name of the app asking for consent.
- An image on the consent screen that will help users recognize your app.
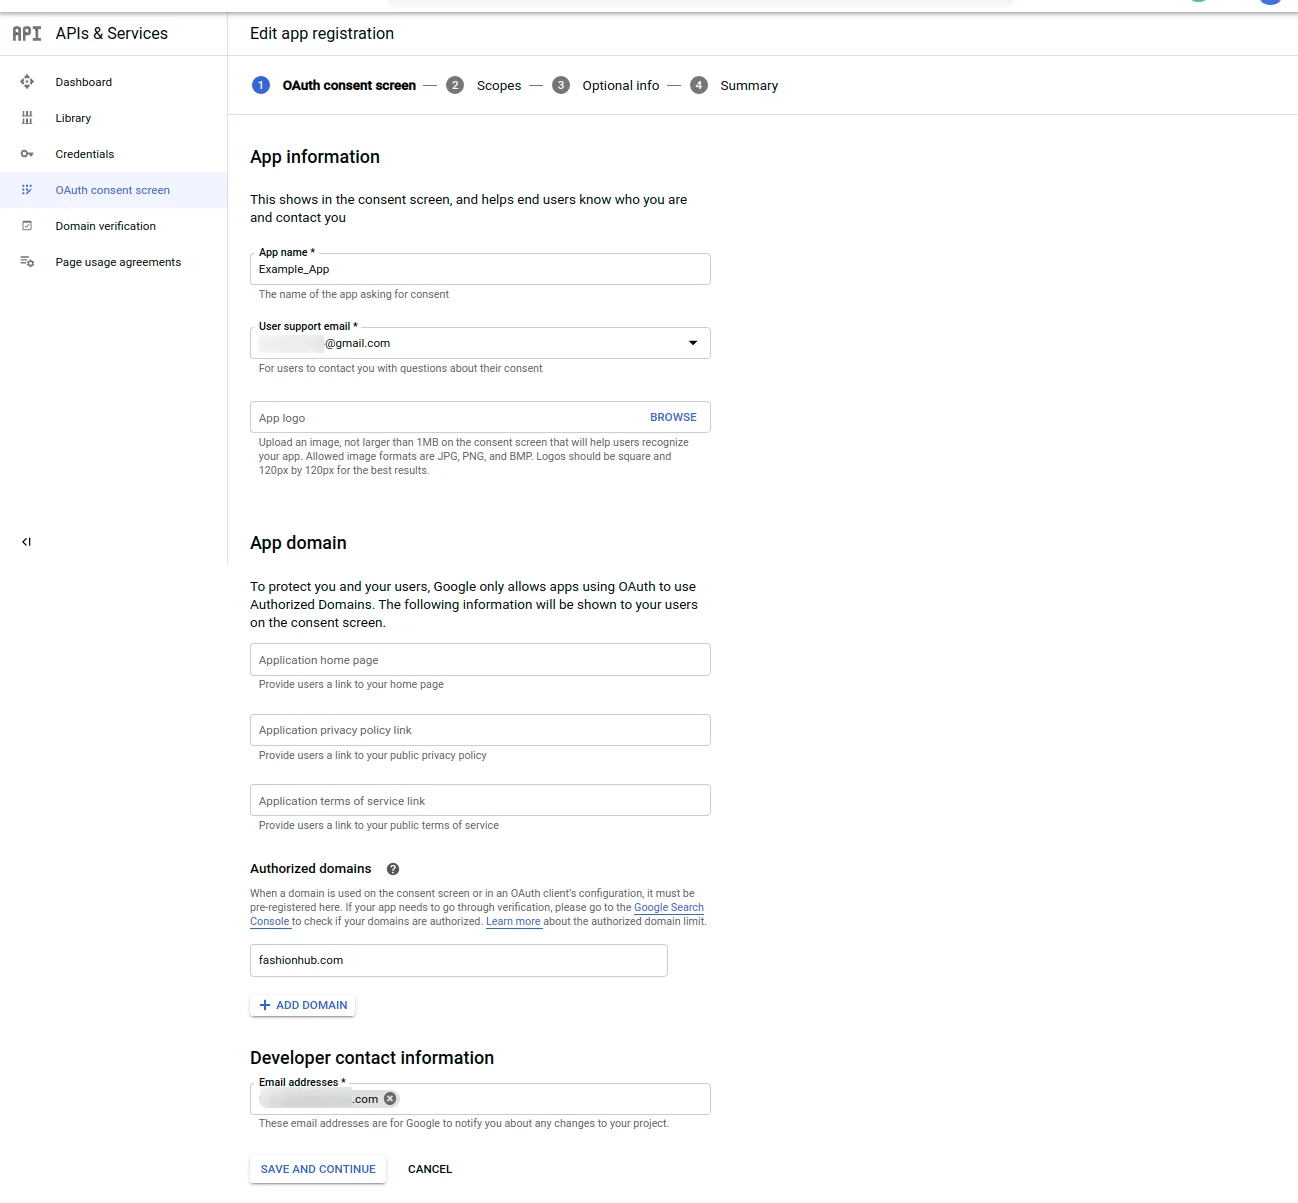
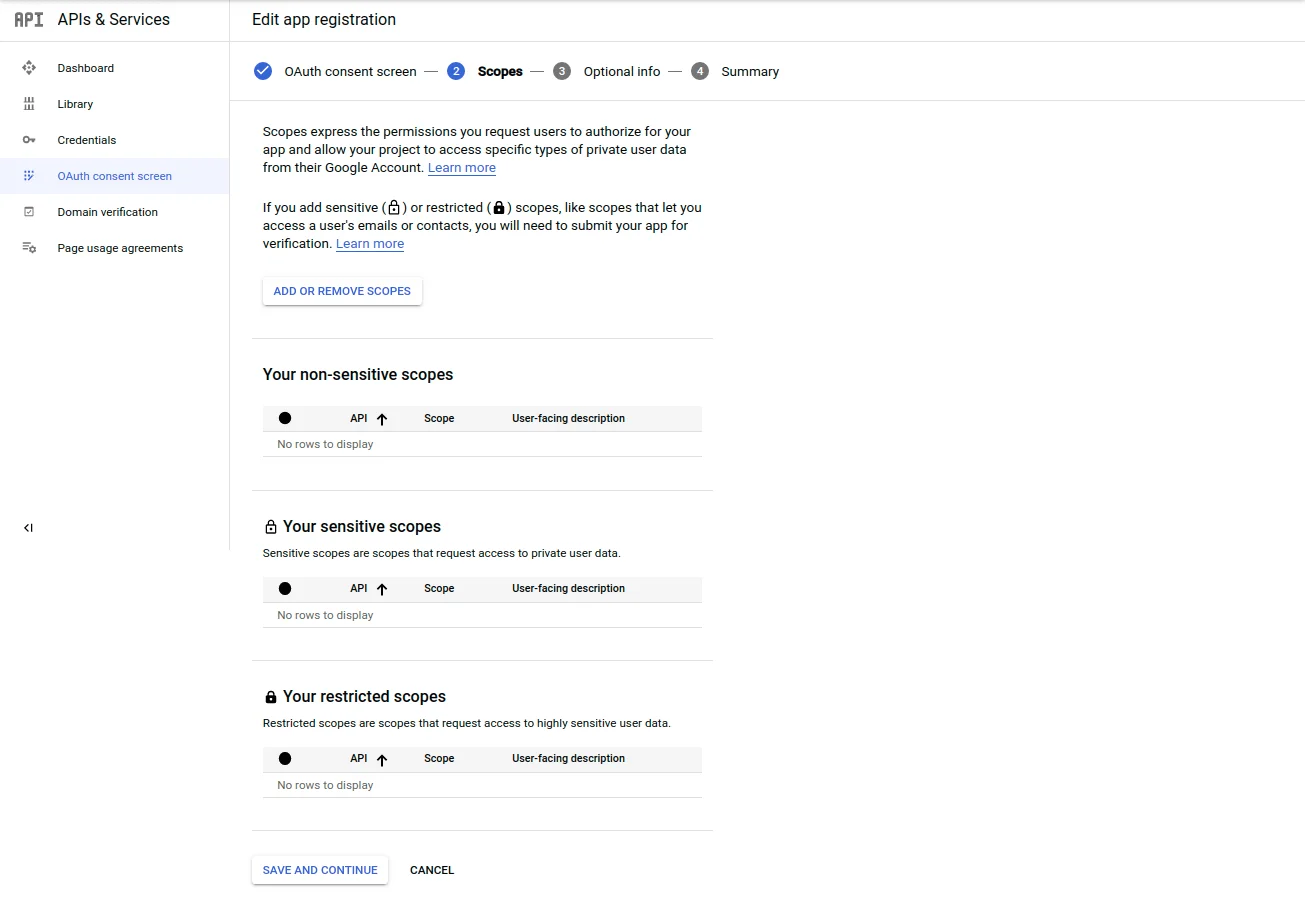
After adding details under OAuth consent screen, click on Save an Continue. This takes your to the Scopes section.
Here, your can Add or Remove Scopes and further Save and Continue.
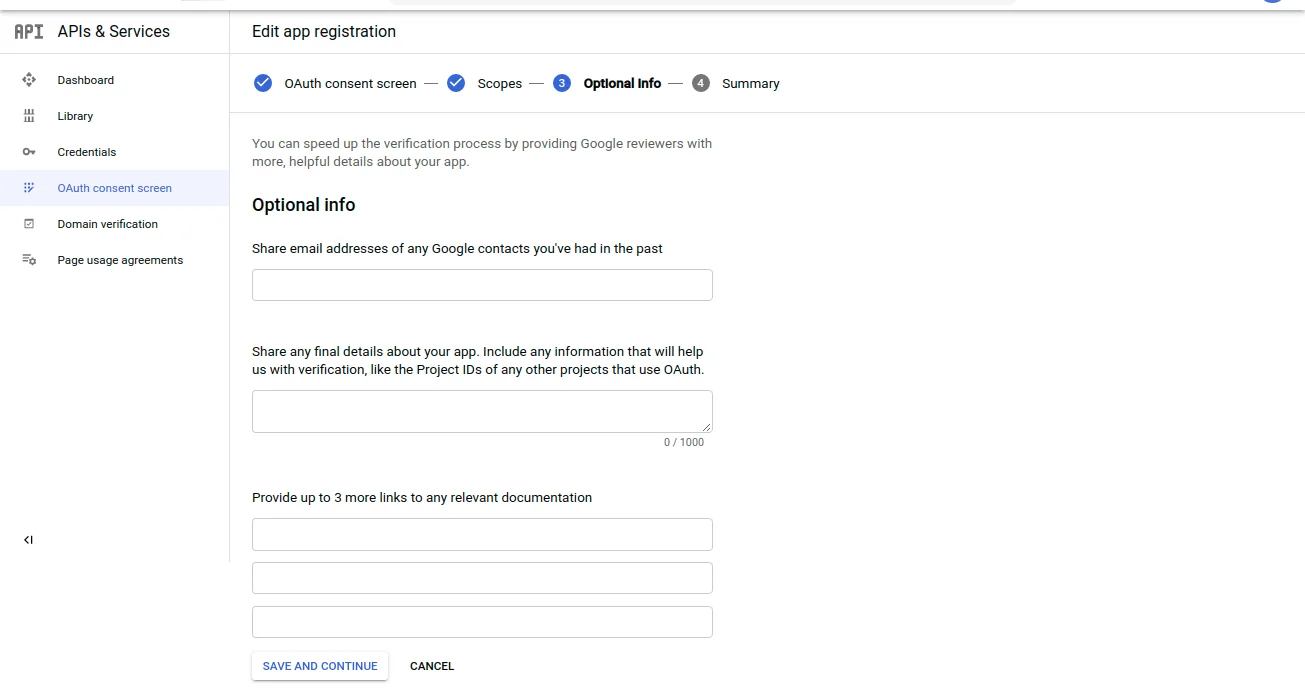
This takes you to the Optional Info Section, under which one can add the details necessary, and click on Save and Continue.
This navigates to the Summary section, under which all the details are visible as shown in the image below.
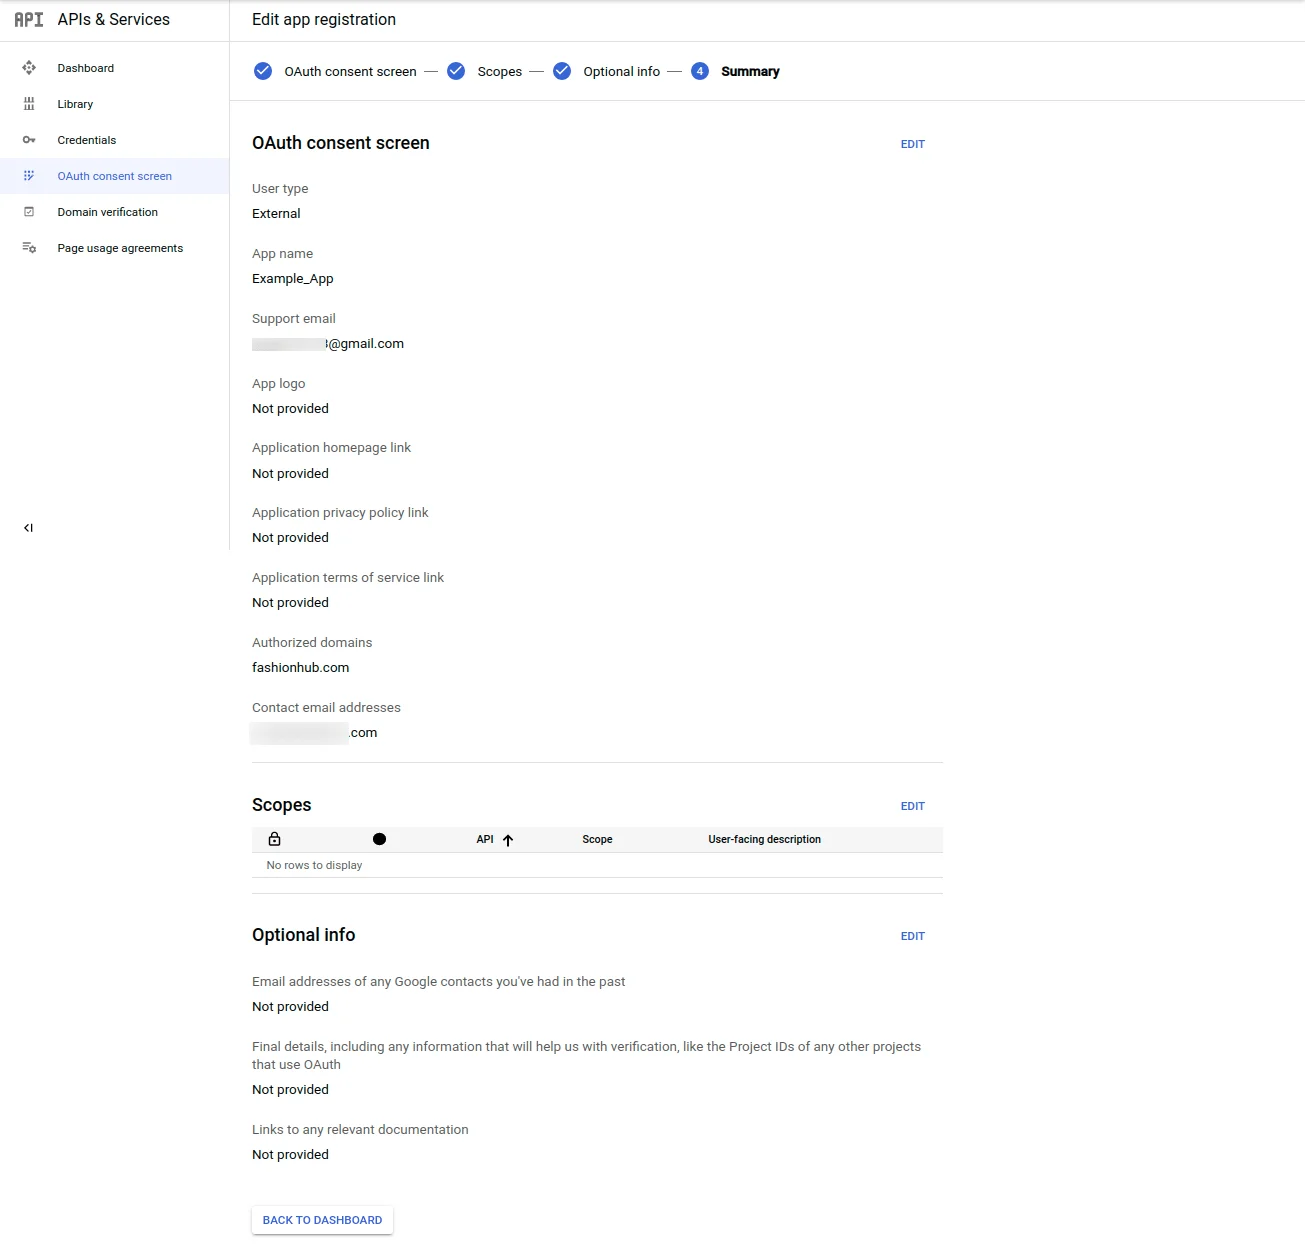
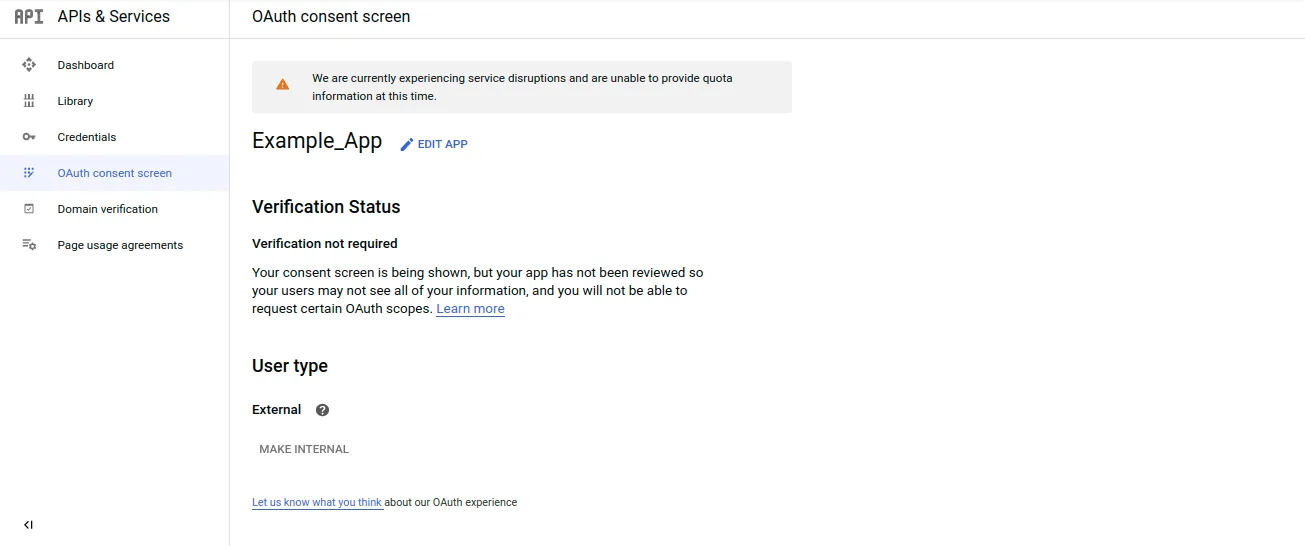
The one needs to click on the Back to Dashboard button. It navigates to the OAuth consent screen and displays the App name and its Verification Status and User Type.
After that move to the credentials section again.
The admin will click on OAuth client ID as shown below in the snapshot.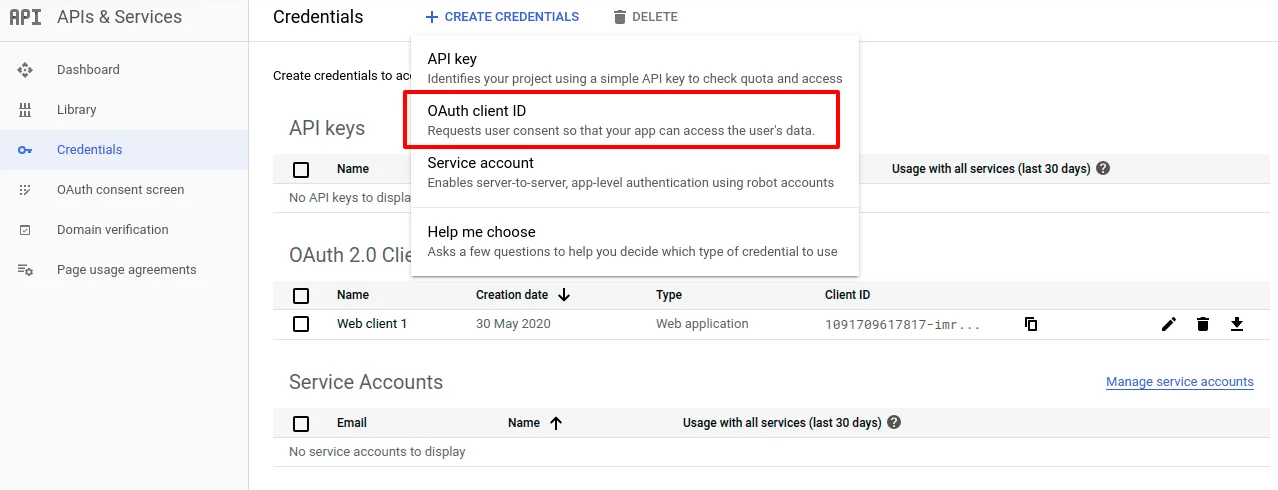
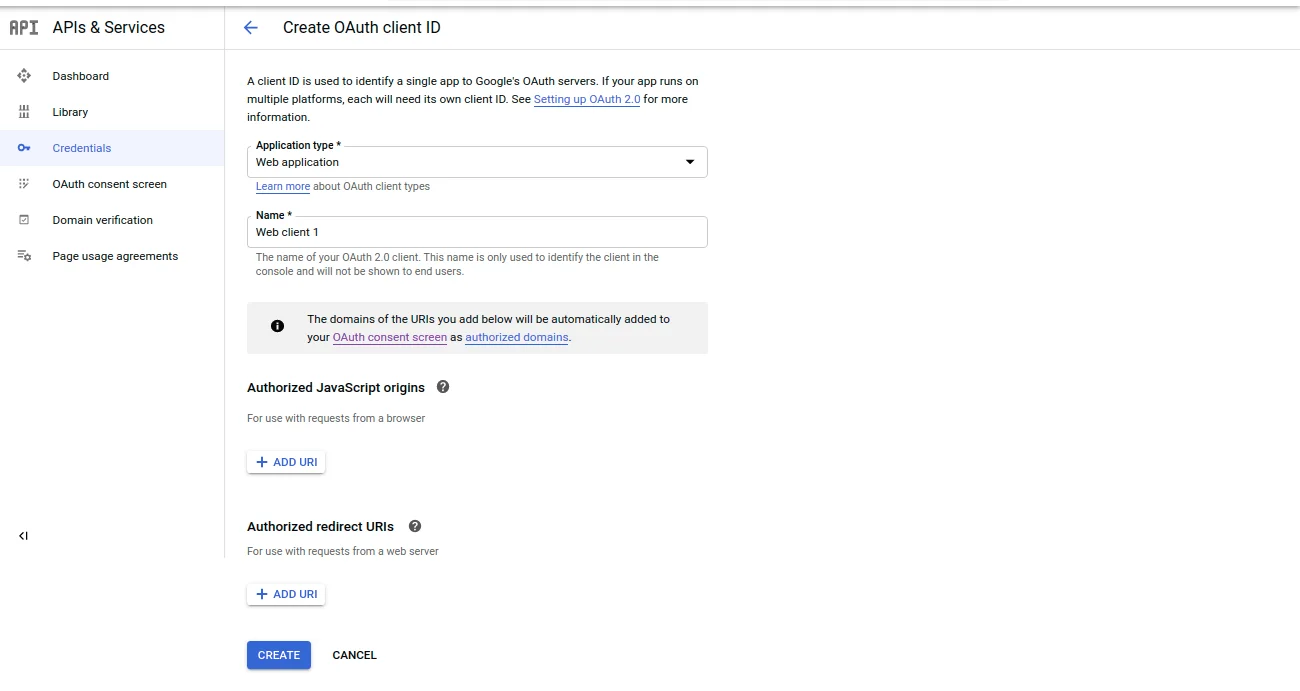
Step 10: Under Application, type selects the Web Application, under the Authorized redirect URIs enter the redirect URL
Now, click the Create button.
Note-
- The authorization URL should be in this format: https://example.com/googleshoppingfeed/oauth/index/
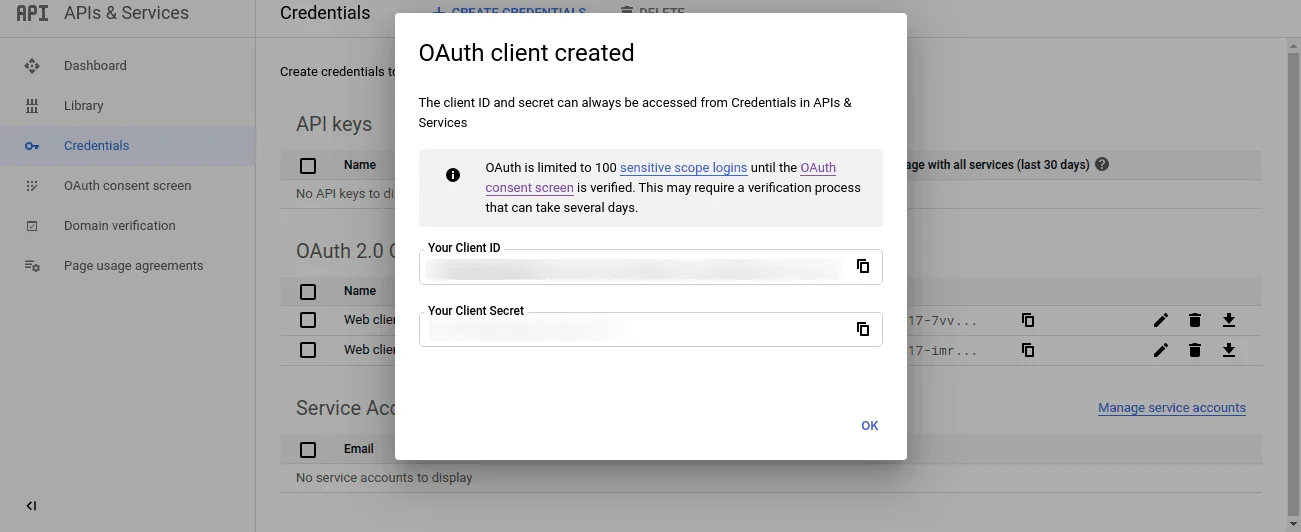
Step 11: Now you can see the client id and the client secret key. Copy them into the module configuration settings.
Sign Up for Google Merchant:
1) Go to Merchant Center and click on the Sign-Up button.

2) login with your Gmail address that you have used for creating the credentials and click the Next button.

3) As soon as one logs in, a Google Merchant Center page as shown in the image pop will display.

4) Navigate to the Enter your Business Information section and add the details as shown in the image.
Tickmark the Terms and Conditions checkbox, and continue and proceed further.

This navigates to the Google Merchant Center| Signup Complete page as shown below. Now the user must click on Continue.

5) Now, you need to verify and claim your website URL. To do so, firstly you need to select the Settings from the dashboard.

6) After this under the tools section, the admin will select the Business Information option then Website.

7) Add URL against the Website URL field and click on Save.

8) On doing so, another section, i.e. “Select an option so Google can help you verify your website” becomes visible.
9) Then choose the “Add Html tag and Upload Html File” option, and clicking which the “Select a method” section opens up.

Now follow the Upload HTML file to your website method.
Download the HTML file provided at the point no. 1
Now, using a file transfer wizard-like FileZilla transfer this file to where you have installed the Magento.

To Confirm this transfer, click the link provided at point no. 3 after which you can see the below-shown result.
 After the above steps click Verify URL button.
10) After clicking the Continue button in the image above, you can see that the website is verified and claimed.
Lastly, click the Finish button.
 Now, you can see the Google Merchant Center dashboard.

Module Configuration
After the successful installation, the admin can configure the module by navigating through
Stores > Configuration > Webkul > Google Shopping Feed or Google Shopping Feeds > Configurations.
Under Google shopping Feed, the admin will find the following configurations-
- General Settings, and
- Default Configurations
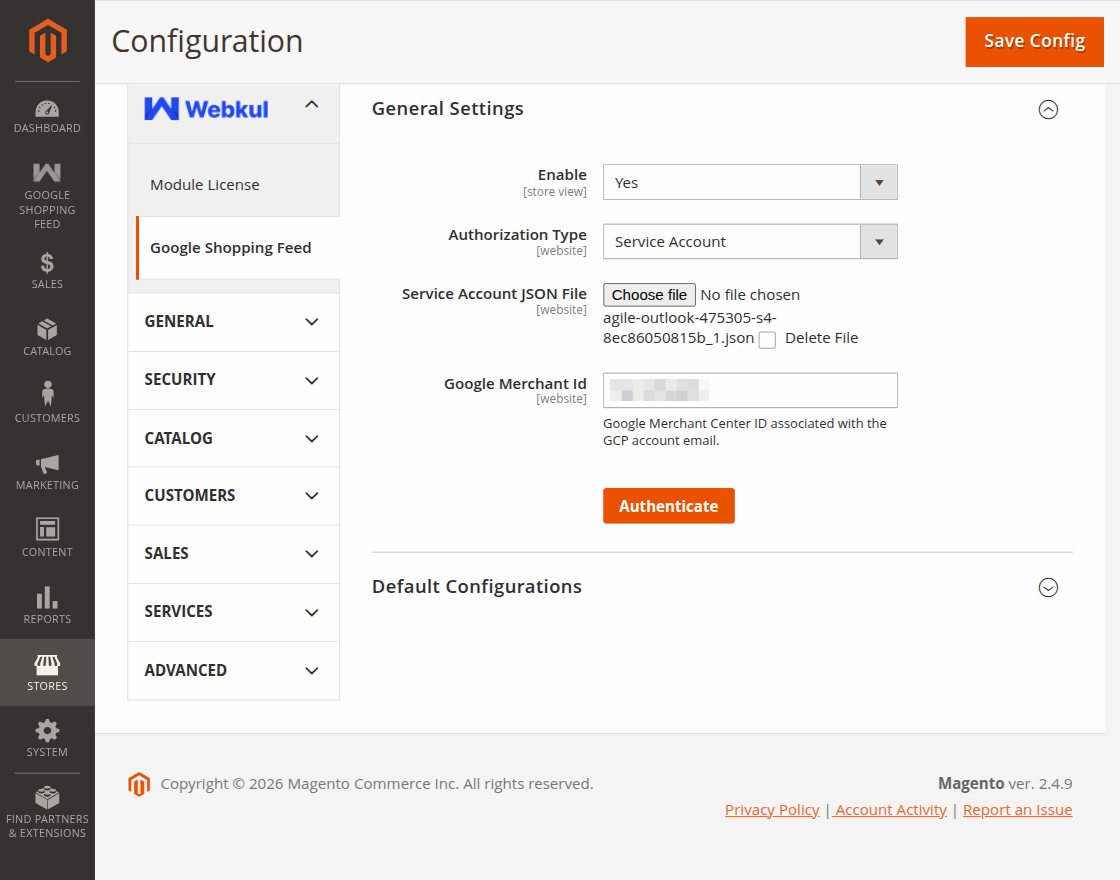
General Settings
Under General Settings, the admin needs to configure the fields such as –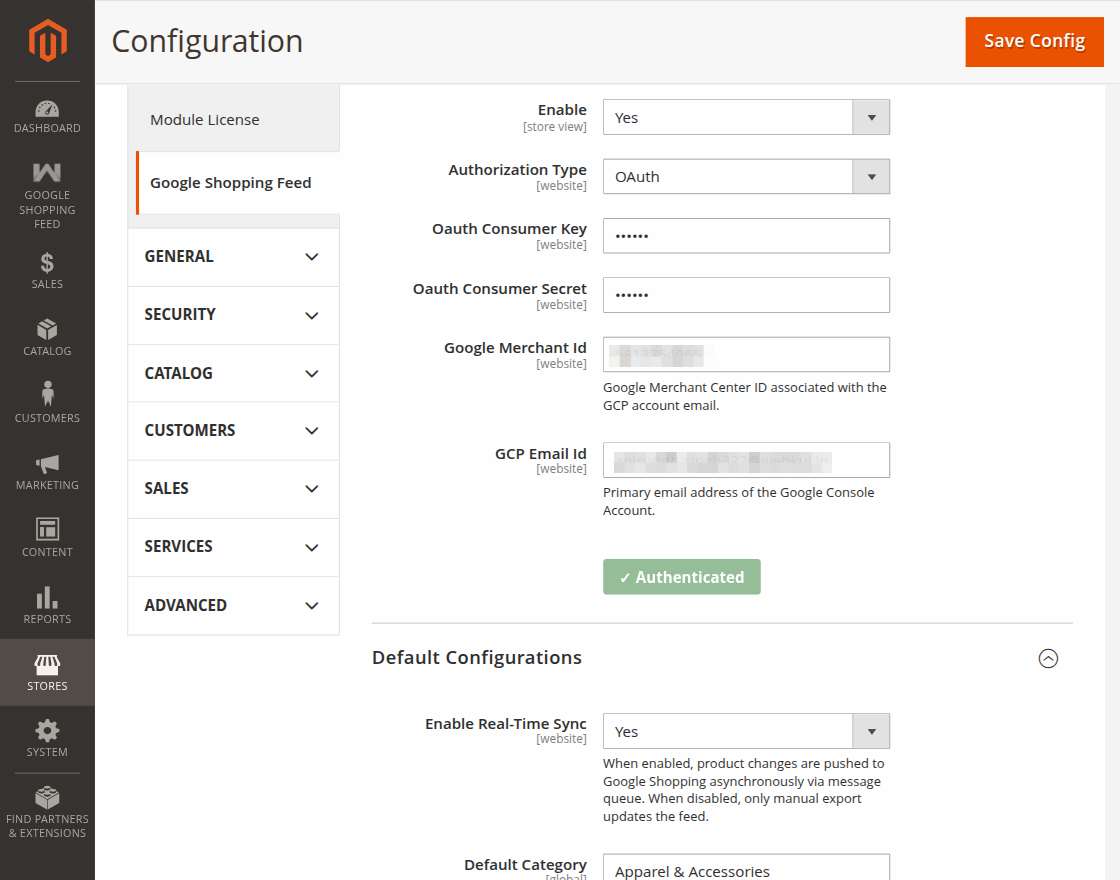
The admin can configure the General Settings under-
1. Enable – Admin can enable and disable module from here.
2. Authorization type – Admin can select authorization type as OAuth or Service account.
3. OAuth Consumer Key – Enter the OAuth consumer key that you received after registering at console.developers.google.com
4. OAuth Consumer Secret – Enter the OAuth consumer secret that you received after registering at console.developers.google.
5. Google Merchant ID – Enter your Google Merchant Center Account ID, which is used to link your Magento store with your Google Merchant Center account for product synchronization and management.
6. GCP Email ID – Enter the email address associated with your Google Cloud Platform (GCP) account, which is used to authenticate and manage the connection between Magento and Google services.
7. Authenticate – Interactive buttons to test and authenticate your Google connection.
Default Configurations
Under Default Configurations
The admin needs to configure the fields, such as –
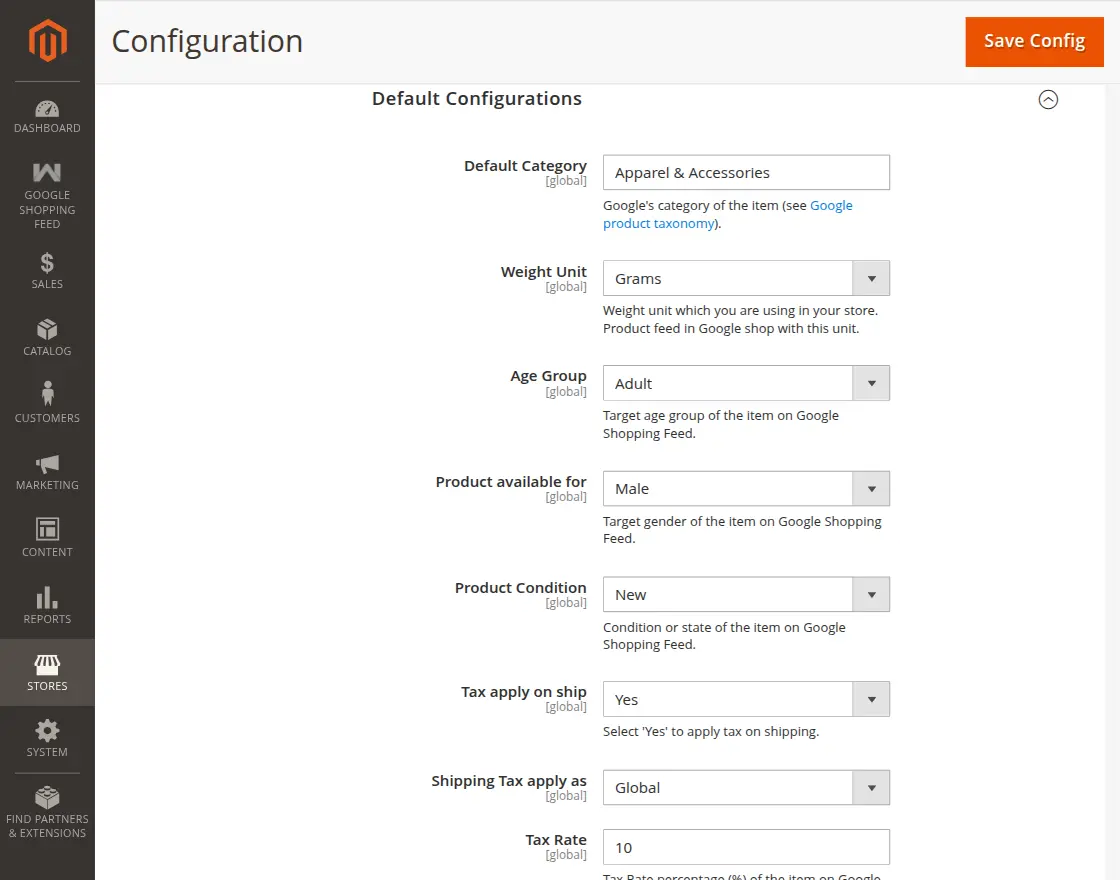
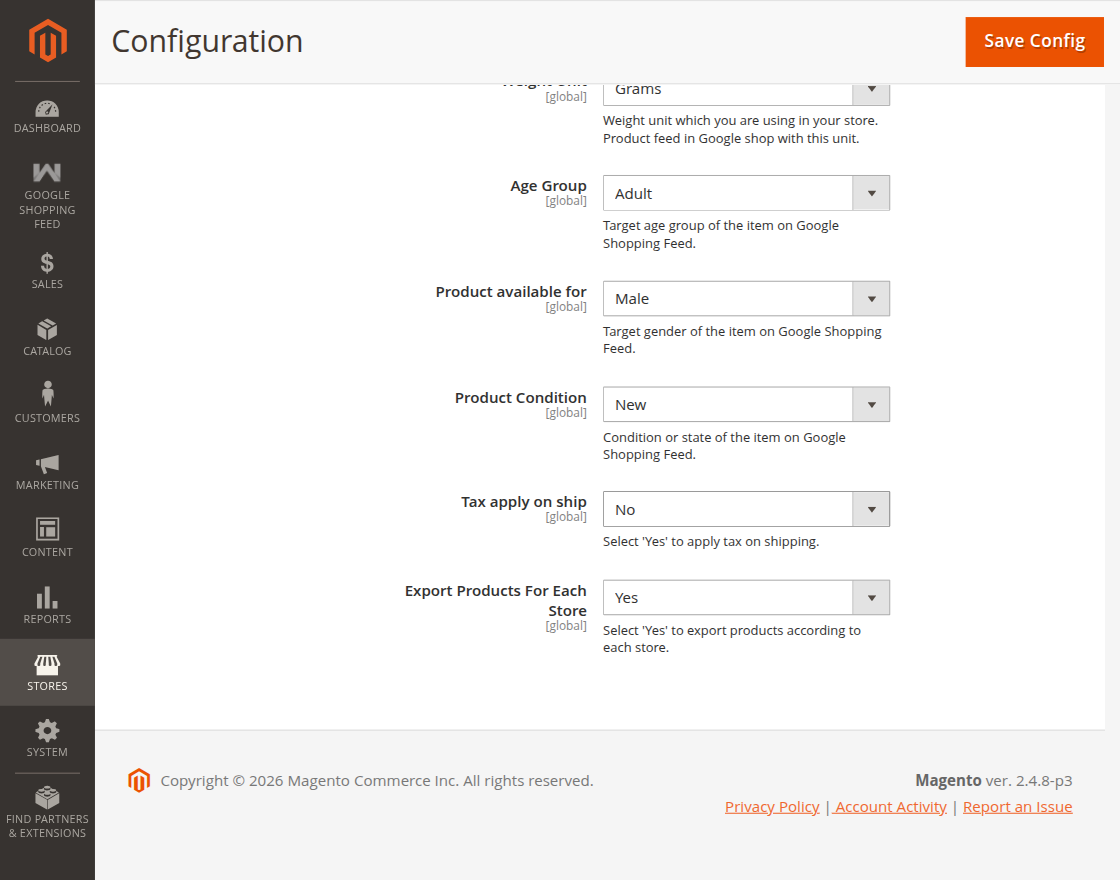
Default Category, Weight Unit, Age Group, Product Available For, Product Condition, etc.
The admin can configure the Default Configurations as under-
Default Category – Indicate the category of your item based on the Google product taxonomy.
Categorizing your product helps ensure that your ad is shown with the right search results.
Weight Unit– Enter the weight unit that you are using for your store. It will be applicable to the items on Google feeds.
Age Group – Select the target age group of the item on Google feeds.
Product Available For – Select the target gender of the item on Google feeds.
Product Condition – Select the product conditions as – New, Refurbished, or Used.
Tax Apply on Ship – Select Yes or No.
Export Products for Each Store – Select “Yes” if you want to export the products according to each store or else select “No”.
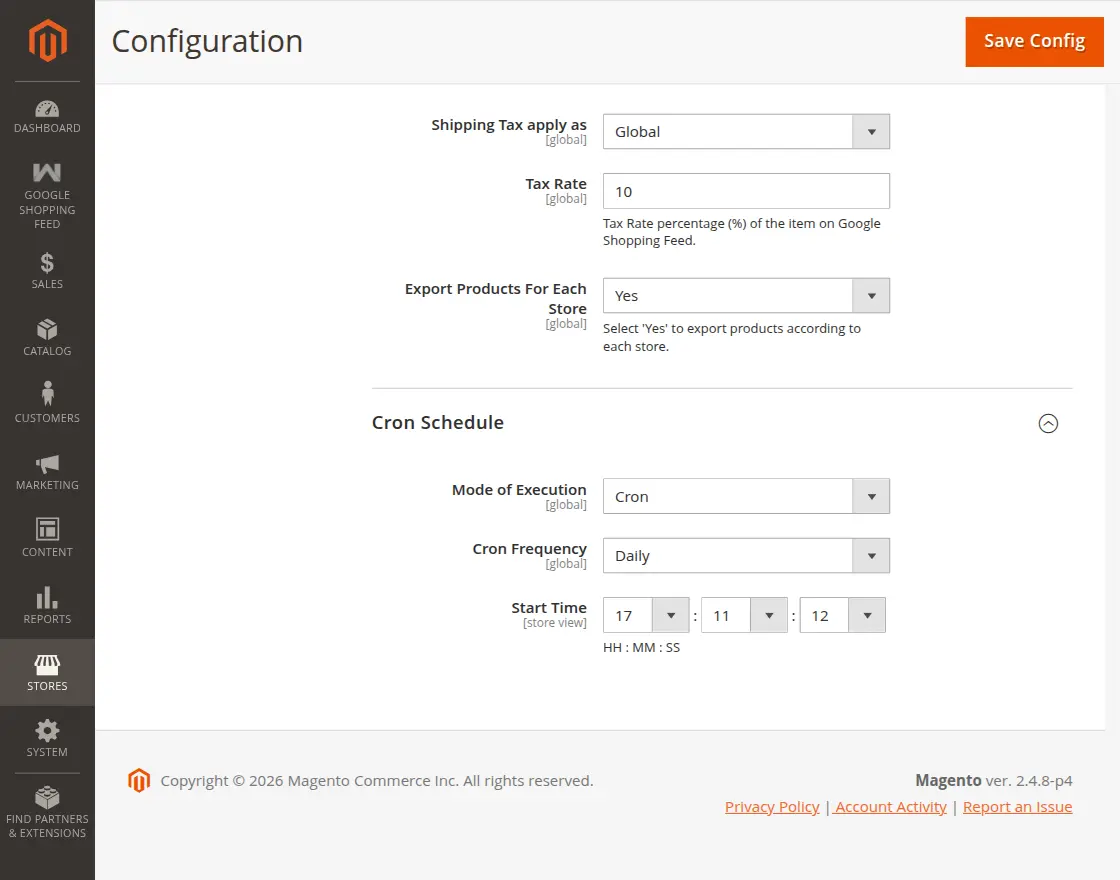
Conditions for Tax Apply on Ship Field.
If Tax Apply on Ship field is set as Yes as shown in the image below, the admin can further select two options, i.e. Global or As Product.
- Condition 1- Choosing Tax Apply on Ship as Yes and Shipping Tax Apply as Global.
On choosing Tax Apply on Ship as Yes, another field, i.e. Shipping Tax Apply as shall become visible as shown in the image below.
The admin can either select Global or As Product against the Shipping Tax apply as field.
On choosing Global, another field namely, Tax Rate becomes visible, where the admin has to select the tax rate, for instance, 20 in this case.
This rate (for instance, 20) shall be applicable to all the products that display on the Google Shopping Feed site after the admin exports the products.

- Condition 2- Choosing Tax Apply on Ship as Yes and Shipping Tax Apply as As Product.
On choosing Tax Apply on Ship as Yes, and selecting As Product against the Shipping Tax Apply as, the tax will be applicable Product Wise.

Furthermore, after setting up the configuration, click the Register GCP button to register your account.
Meanwhile, this brings up a pop-up, just select your email address or log in with your Google account to proceed further.

Now, the section that appears click the Allow button.

Lastly, you will see the GCP merchant center account successfully authorized message just click on the Ok button. After that, just refresh the configuration page.
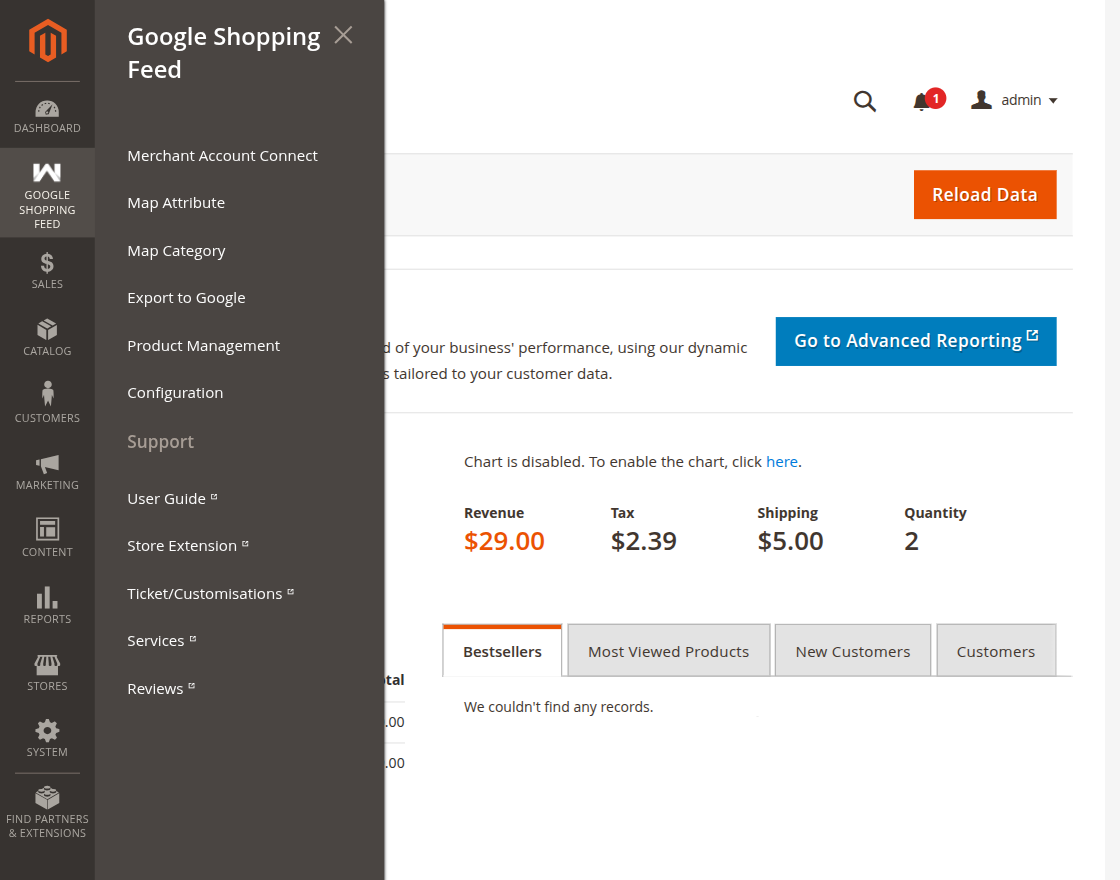
Workflow – Admin’s End
After the successful installation, the admin will be able to see the Google Shopping Feed menu option with mentioned sub-options :
- Merchant Account Connect
- Map Attribute
- Map Category
- Export to Google
- Product Management
- Configuration
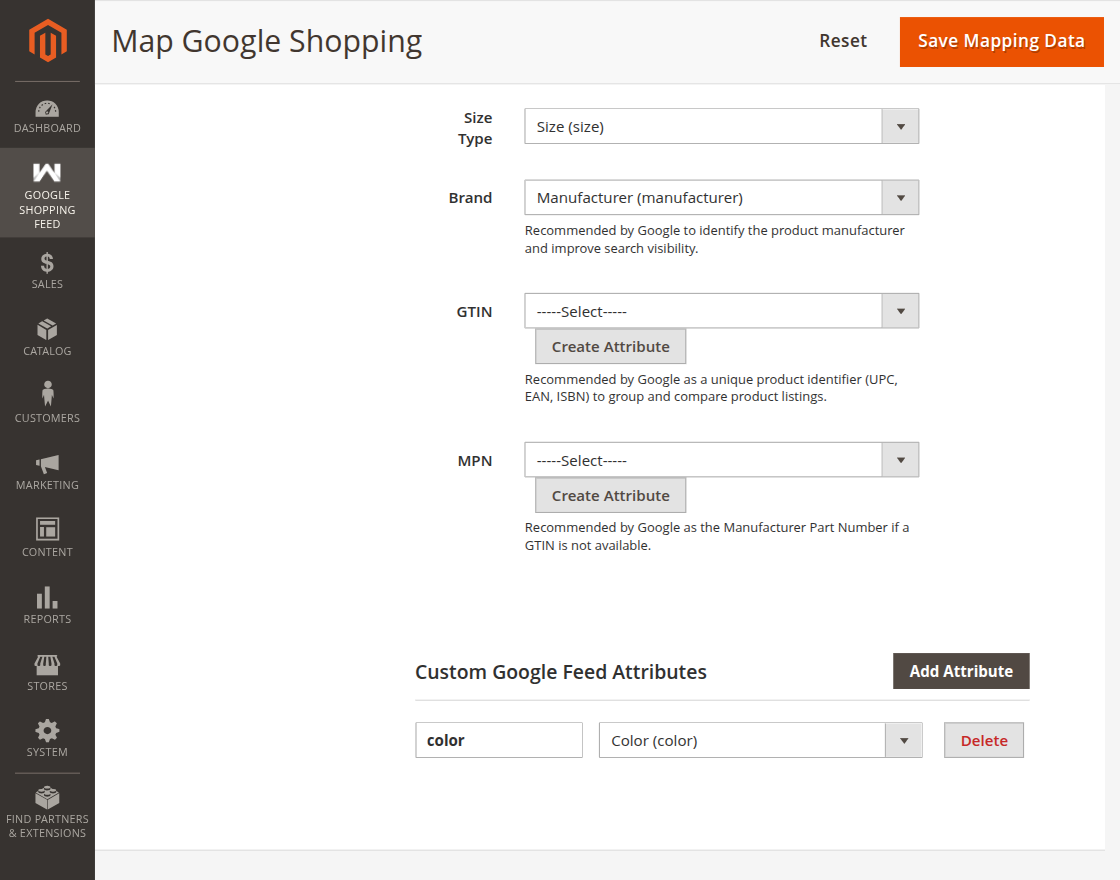
Map Attribute
Under this section, the admin will be able to map the Google Merchant Account attributes with your Magento store attributes as shown below in the snapshot.
Here, the admin can map the values, reset, and save the mapping data as required.
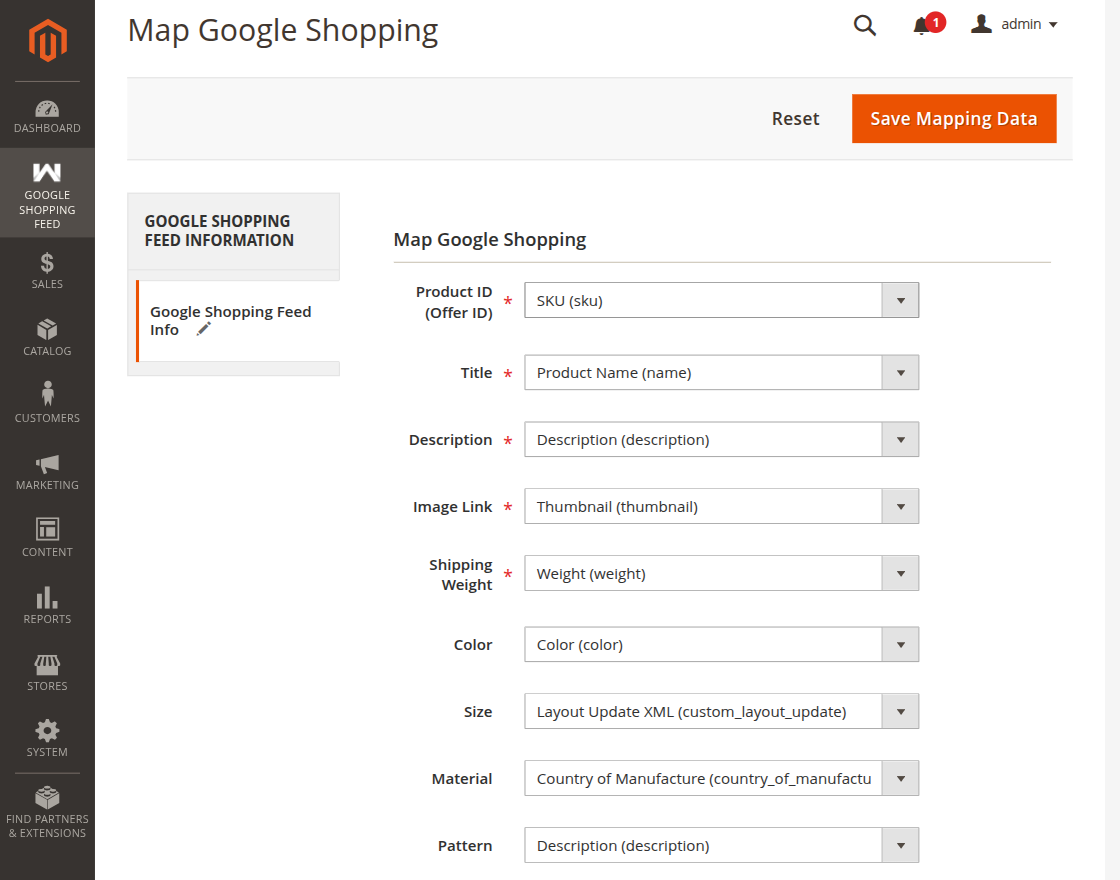
- You will see a list of Google fields (Title, Description, Image Link, Price, etc.).
- Choose the corresponding Magento EAV attribute from the dropdown list next to each Google field.
- If you do not have attributes for barcode data like GTIN or MPN, you can create them instantly by clicking the Create GTIN or Create MPN buttons next to their respective rows.
- Use the Add Attribute button to map additional Google Shopping feed fields with Magento product attributes
- Click Save Attribute Mapping to complete the process.
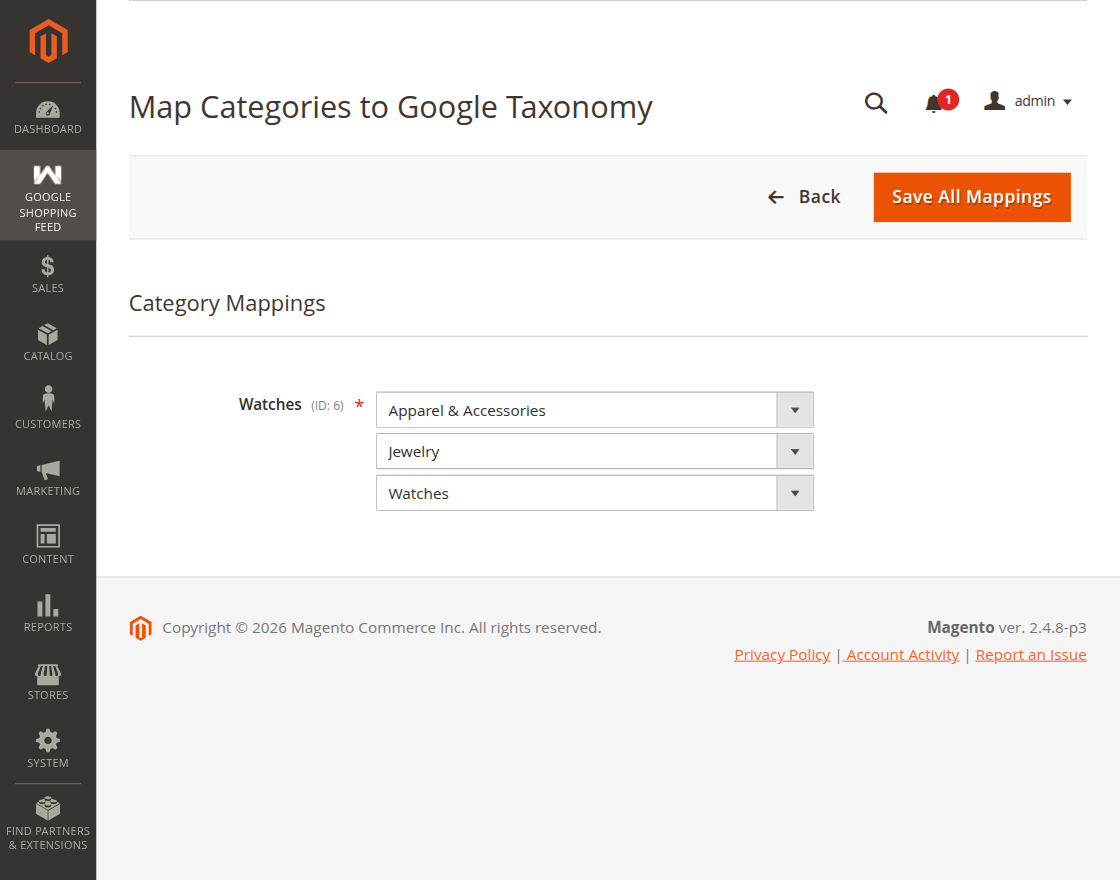
Map Category
Under this section, the admin will be able to find a list of all mapped categories, their details, and can map the categories of their Magento 2 store with the Google Merchant Account categories.
The mapping here is basically a Many to Many mapping.
Further, to map a new category click the Map Category button in the snapshot above.
This brings up the section to map the store categories with the Google Feed Category.
To map, select your store category and after that select the corresponding Google Shopping Category, it’s sub-categories if any as required.
Lastly, click the Save Mapping Data button to save the mapping and you can also see a success message for the same.
Here, you can do a many-to-many mapping.
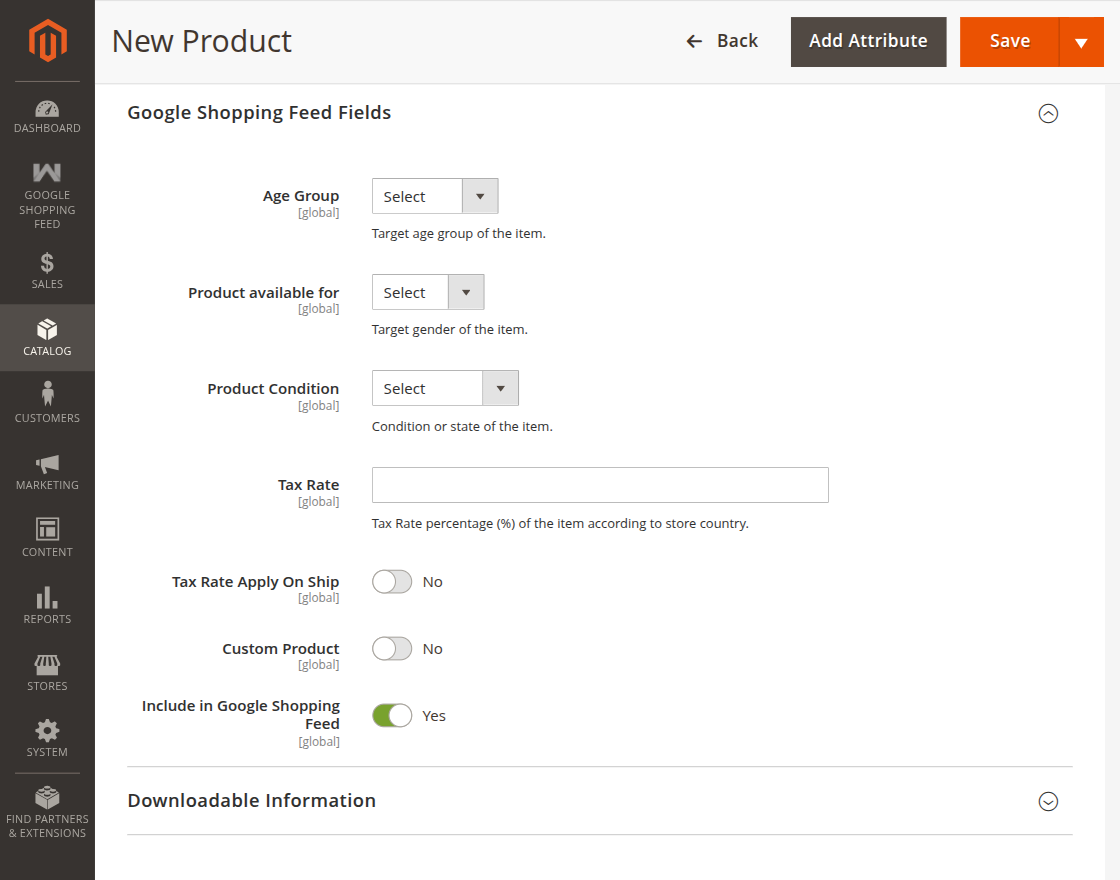
 Apart from the above options, the admin also needs to navigate to Catalog>Products>Add New Product.
On the add new product page, navigate to the Google Shopping Feed Fields.
Here, the admin will find the Google shopping fields for which you need to select their corresponding values.
Moreover, these are the new attributes that have been added via the extension itself.
How to export products according to store and Multiple languages?
In the configuration settings, we have the option for – Export Products For Each Store.
Here, the admin can select a “Yes” option for exporting the products according to store language to Google Shopping Feeds else select “No”.
How to Export Products to Google Merchant Account?
To export your Magento 2 products to the Google Merchant Account navigate to Google Shopping Feed > Export to Google.
Manual Product Export
- Select the products you want to sync from the grid.
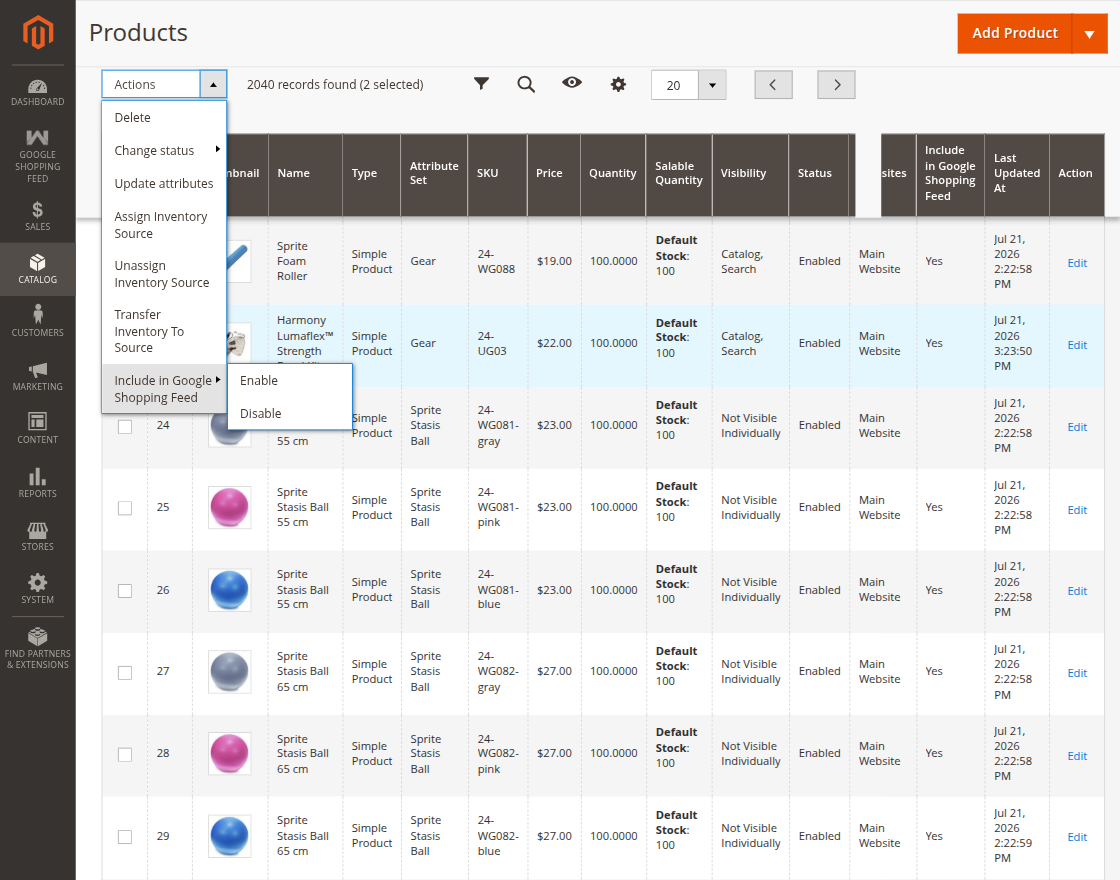
- Under the Actions dropdown menu, select Include in Google Shopping Feed and click Enable.
- A progress bar popup window will open, showing you the real-time status as your items are uploaded to Google.

Feed File Download
- Check the Pre-Flight Validation checklist at the top to ensure your account is authenticated and categories are mapped.
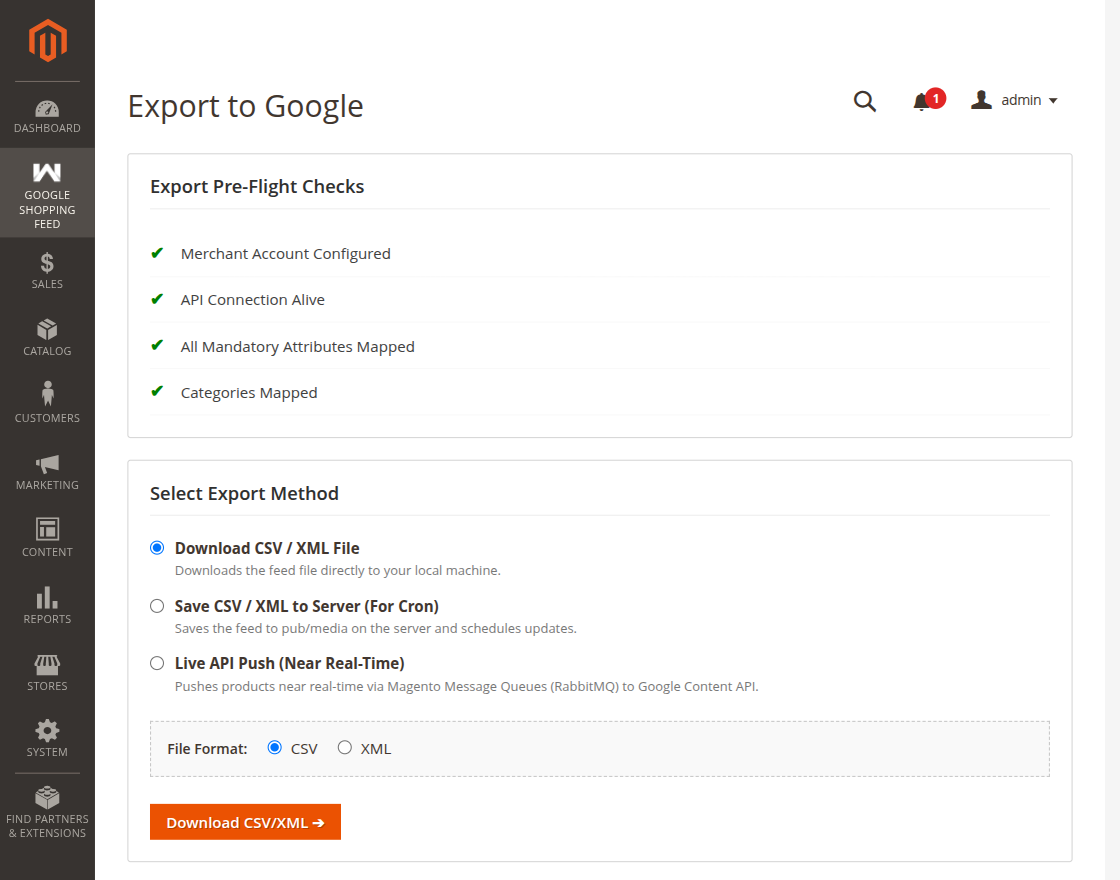
- Click Generate Feed to generate your CSV or XML data feed.
- Click Download to save the file to your computer.
- Once the feed file is downloaded, the admin needs to manually upload it to the Google Merchant Center (GMC).
Automated Cron Jobs
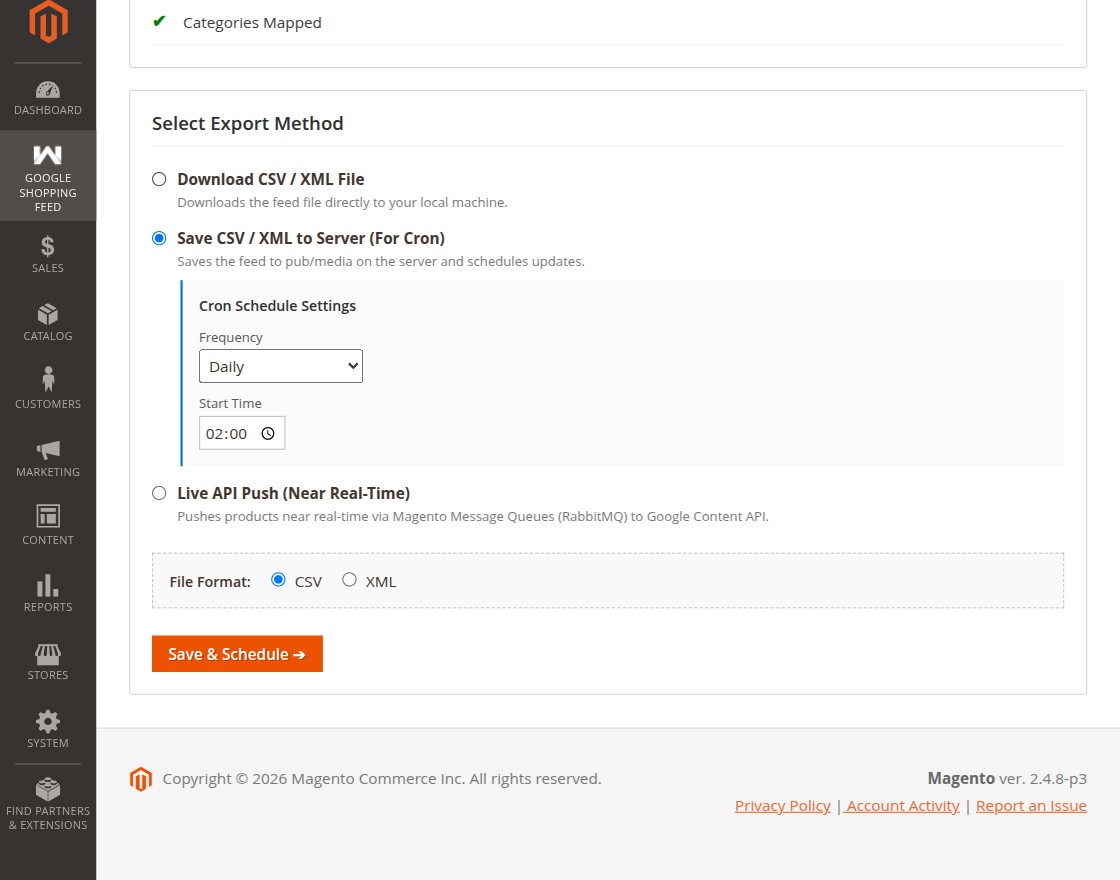
This extension automatically schedules exports at the frequency you selected (Daily, Weekly, Monthly, etc.).
Magento will execute these jobs in the background without any manual action required from your side.
Product Management
To check the approval status of your catalog, go to Google Shopping Feed > Product Management.
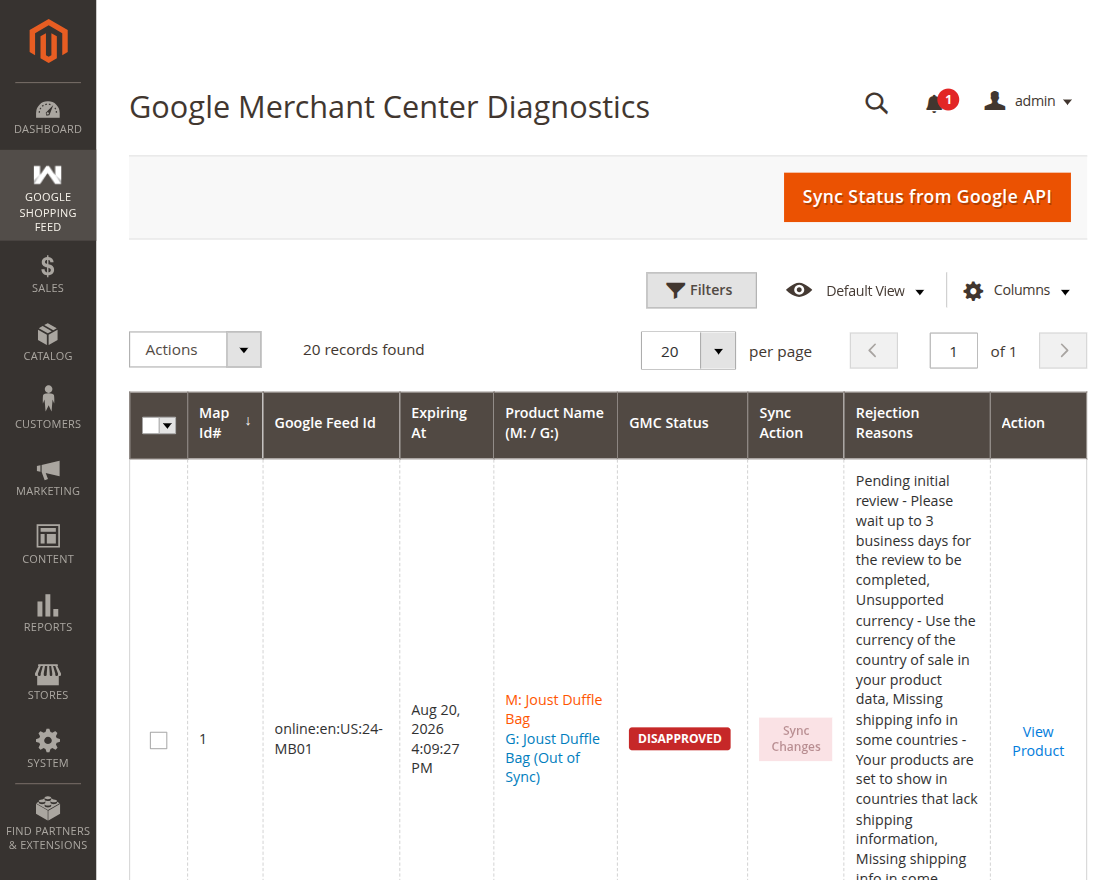
Understanding Grid Columns
- Magento Name vs Google Name: Displays the Magento store name in orange (
M:) next to the Google-indexed name in blue (G:). If the names differ, it highlights that a sync is pending. - Google Status Badges:
- 🟢 Approved: The product is accepted by Google and live on search results.
- 🔴 Disapproved: The product was rejected by Google. Look at the Disapproval Reason column to find the error (e.g.
Invalid barcode: GTIN). - 🟡 Pending: Google is reviewing the product data.
- ⚪ Unsupported: The item type is not supported or was manually excluded from the feed.
- 🟢 Approved: The product is accepted by Google and live on search results.
- Sync Changes Button: If a product is disapproved or out-of-sync, click the Sync Changes button inside that product’s row to instantly resubmit it to Google for review.
Exporting Product to Google shopping feed
After saving the configuration the admin will navigate to Google Shopping Feed -> Merchant Account Connect.

Here the admin will see the Merchant Account.
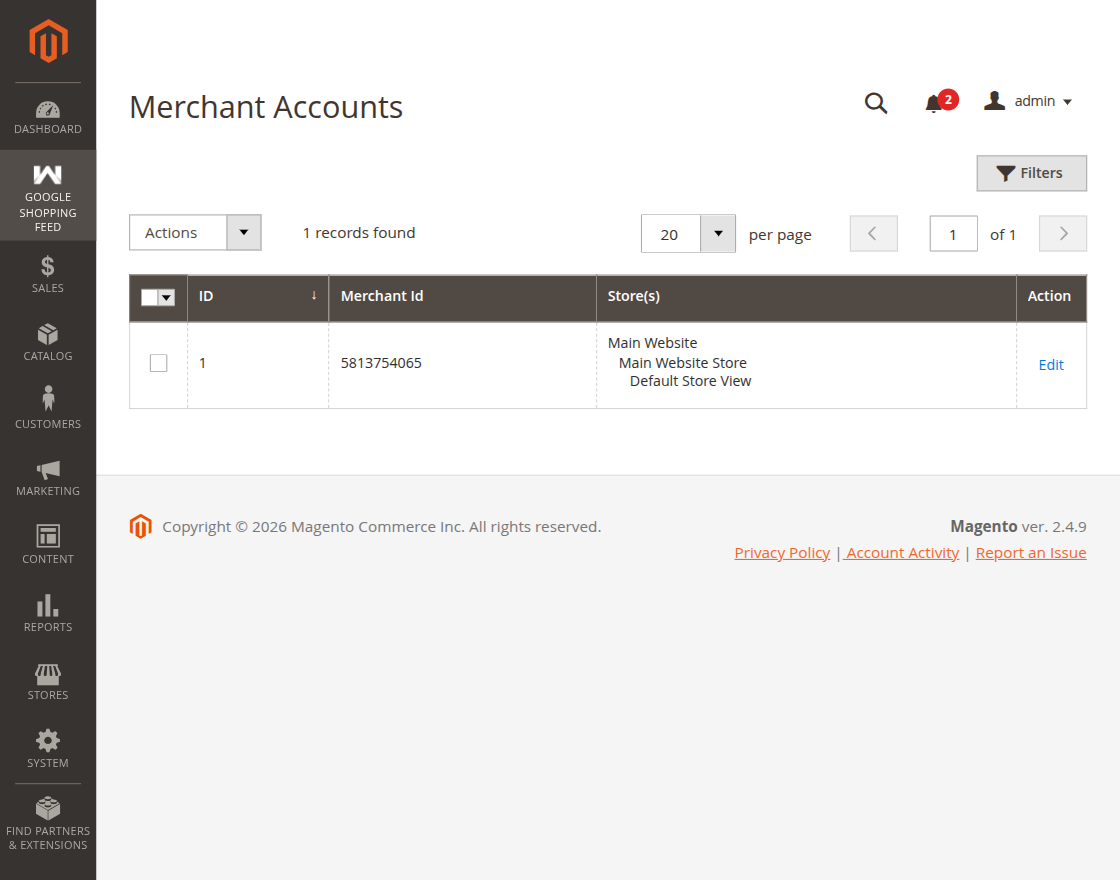
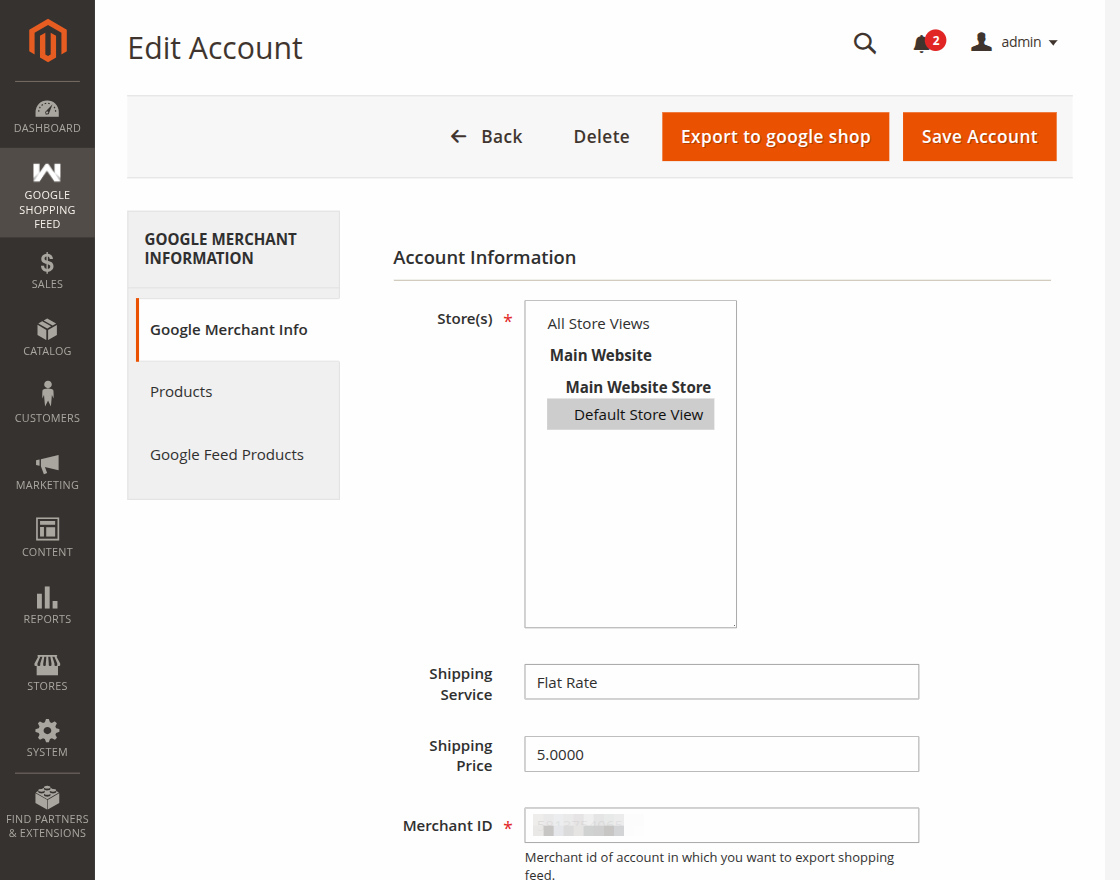
Admin will click on Edit button and check the details:-
Store(s): The admin will select the store.
Merchant ID: Enter the Merchant ID.
Shipping Service: Enter the Shipping Service.
Shipping Price: Enter the Shipping Price.
Then click on Save account.
Products
Here, the admin will select the item from the product list and export item on Google Feed.
then click on the submit button.

A new window will appear and all the selected items will move to the Google Feed.

Google Feed Products
You can check your Export product in Google Feed Products.

Workflow at Google Merchant Account
After the admin has configured the extension, mapped the attributes, and categories, and exported the products to Google’s Merchant Account.
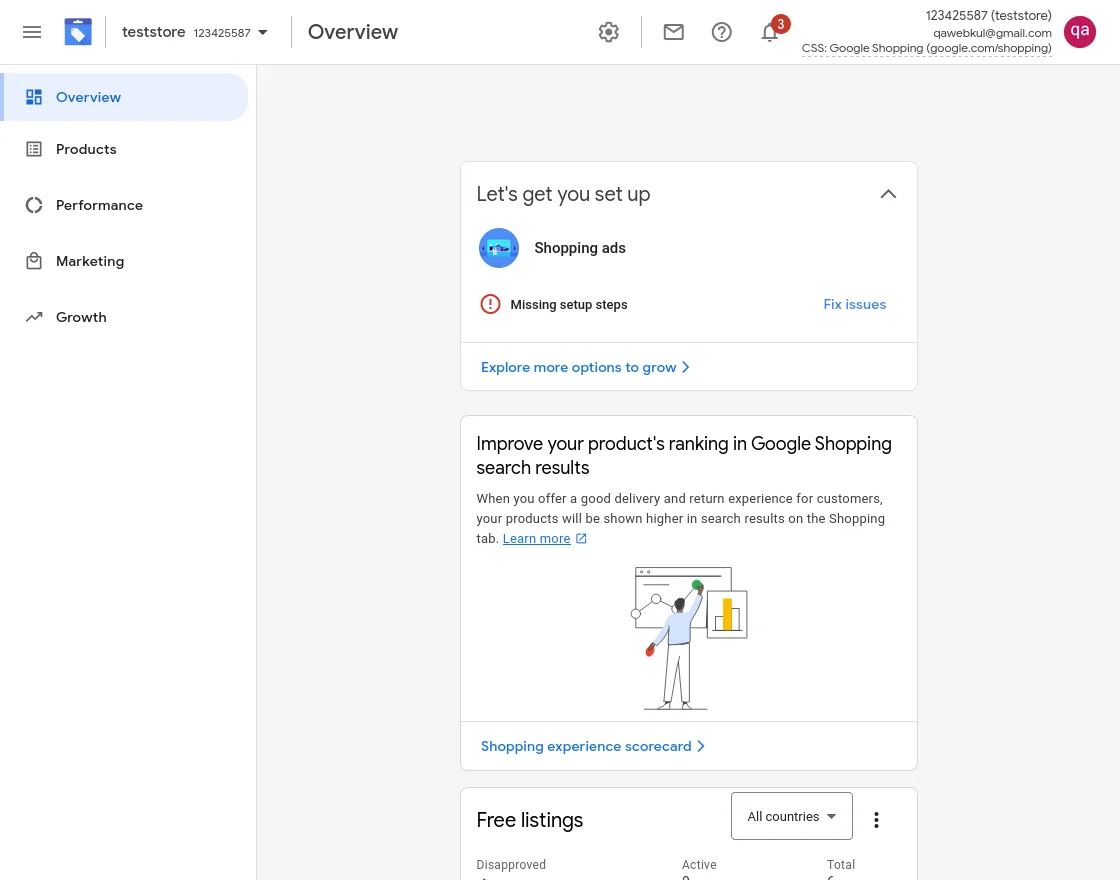
The exported products will be visible under the Products>List section.
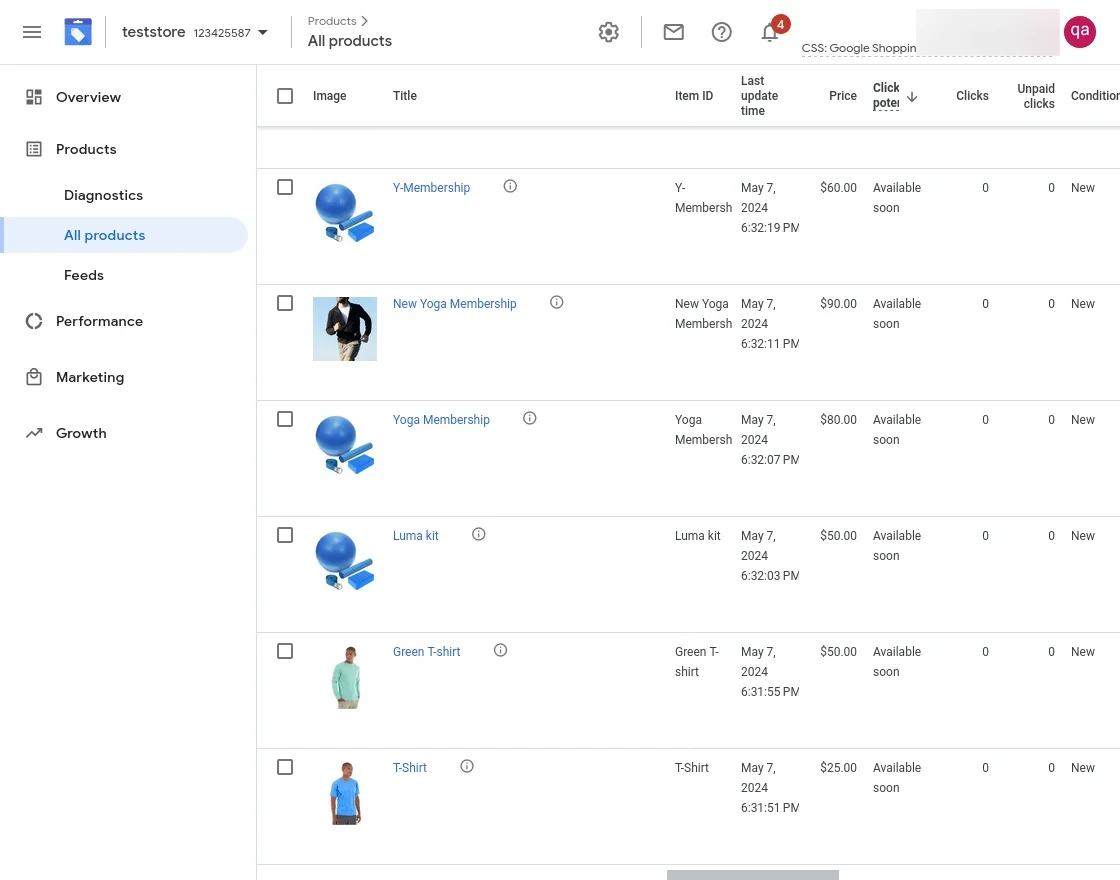
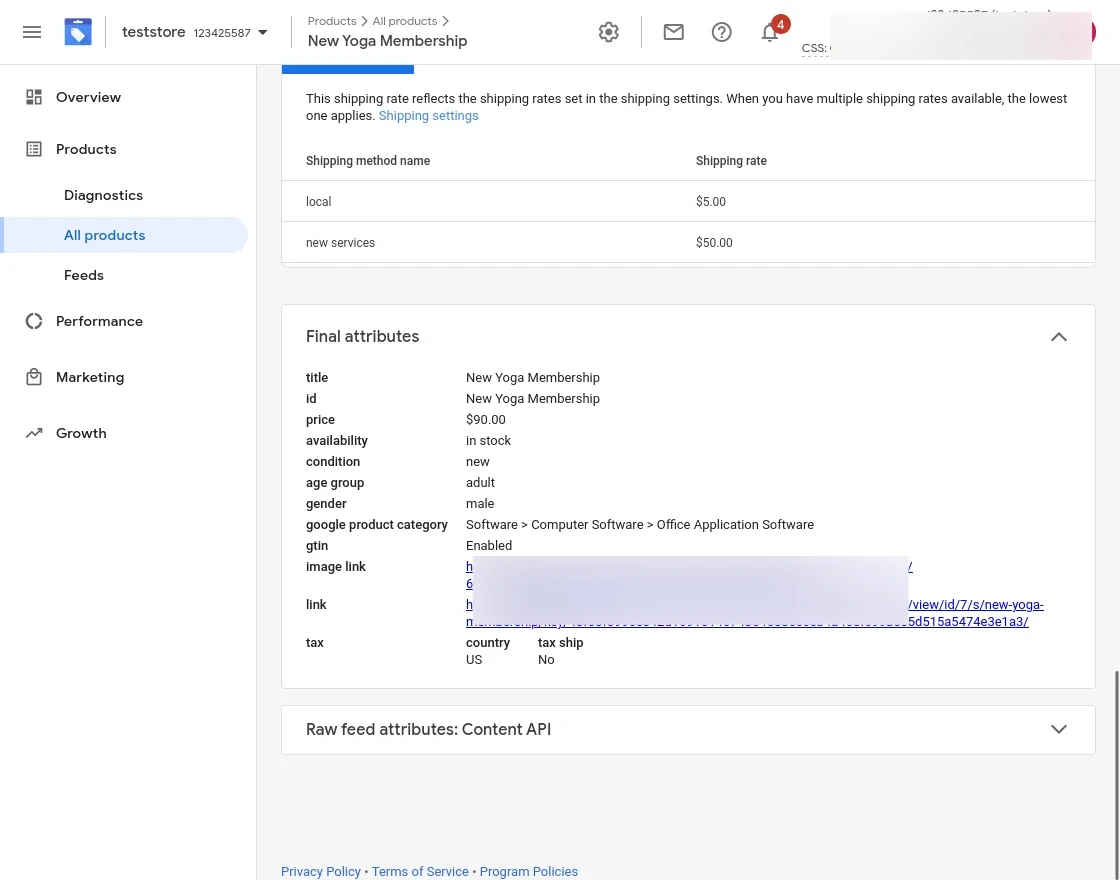
Final Attributes:
How to generate Credentials For Service Account
The admin will move to console.developers.google and log in using your Gmail ID.
Then the admin will navigate to Service Accounts -> Create Service Account.

Then the admin will fill in the details to create a service account.

After filling in all the details the admin will click on Done.
A new account will be created.

Then the admin will navigate to the keys.

Then Click on the Add key.
In the Dropdown menu select Create New Key. Admin will select JSON as a file type, to download the new key.
Then click on Create.

Now the Key is downloaded.

In the key admin will copy the Private key, Client ID, and Client Email in the module configuration.

Adding Service Account Email.
The admin needs to visit the Google merchant center.

Then click on the Sign In, then select the Sign In to Merchant Center.
After logging in to the merchant center, the admin will select the project and click on settings.

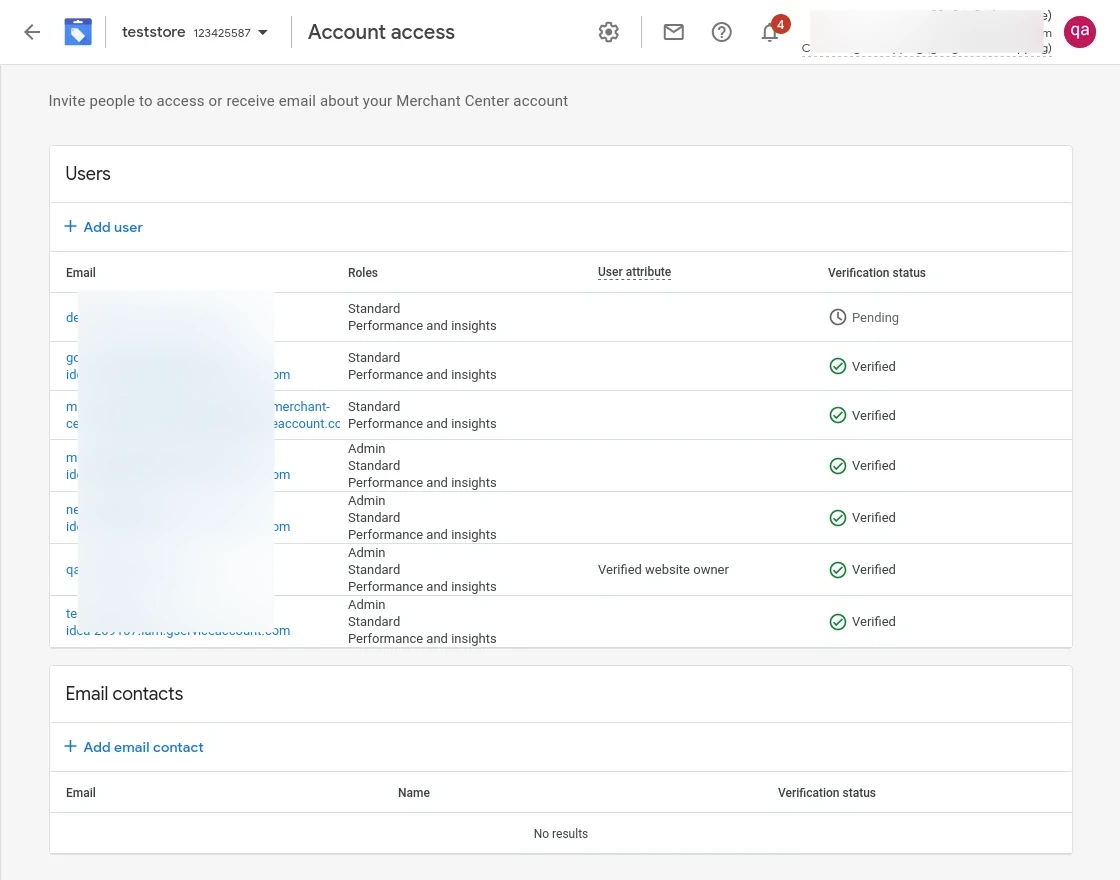
Then click on Account Access.
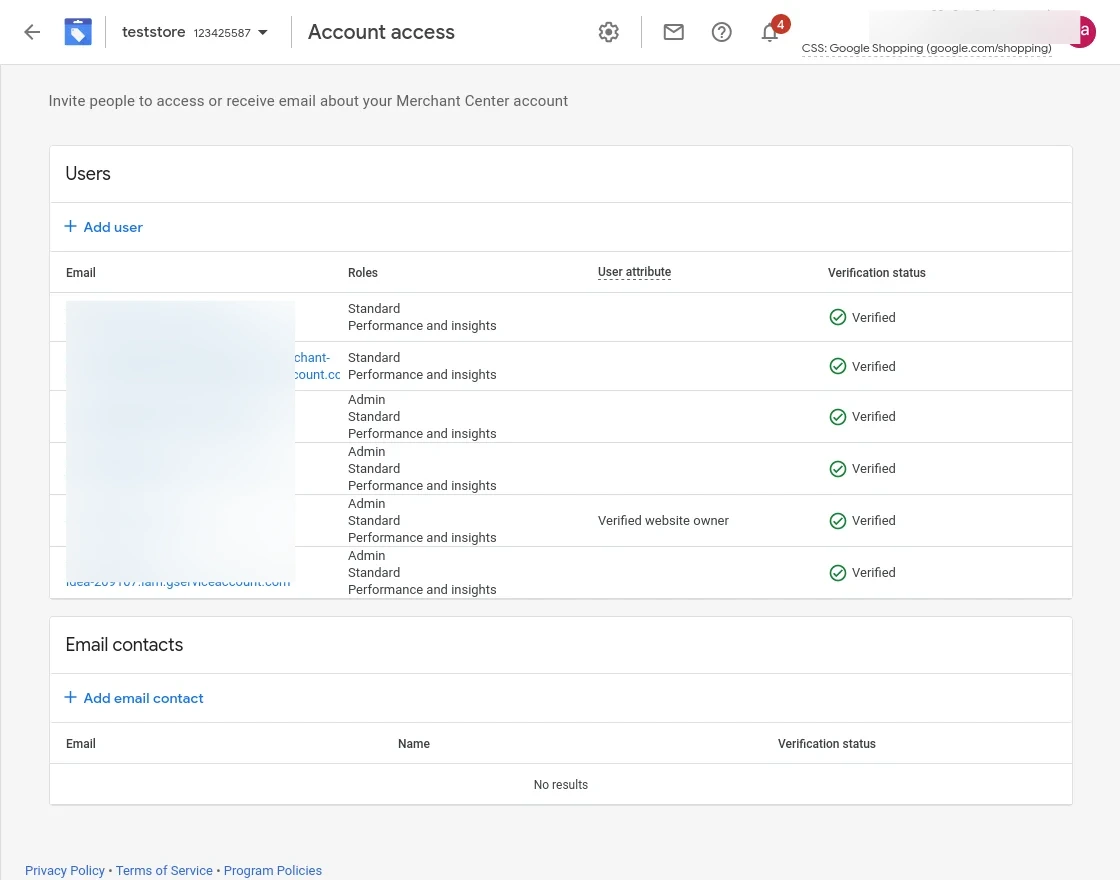
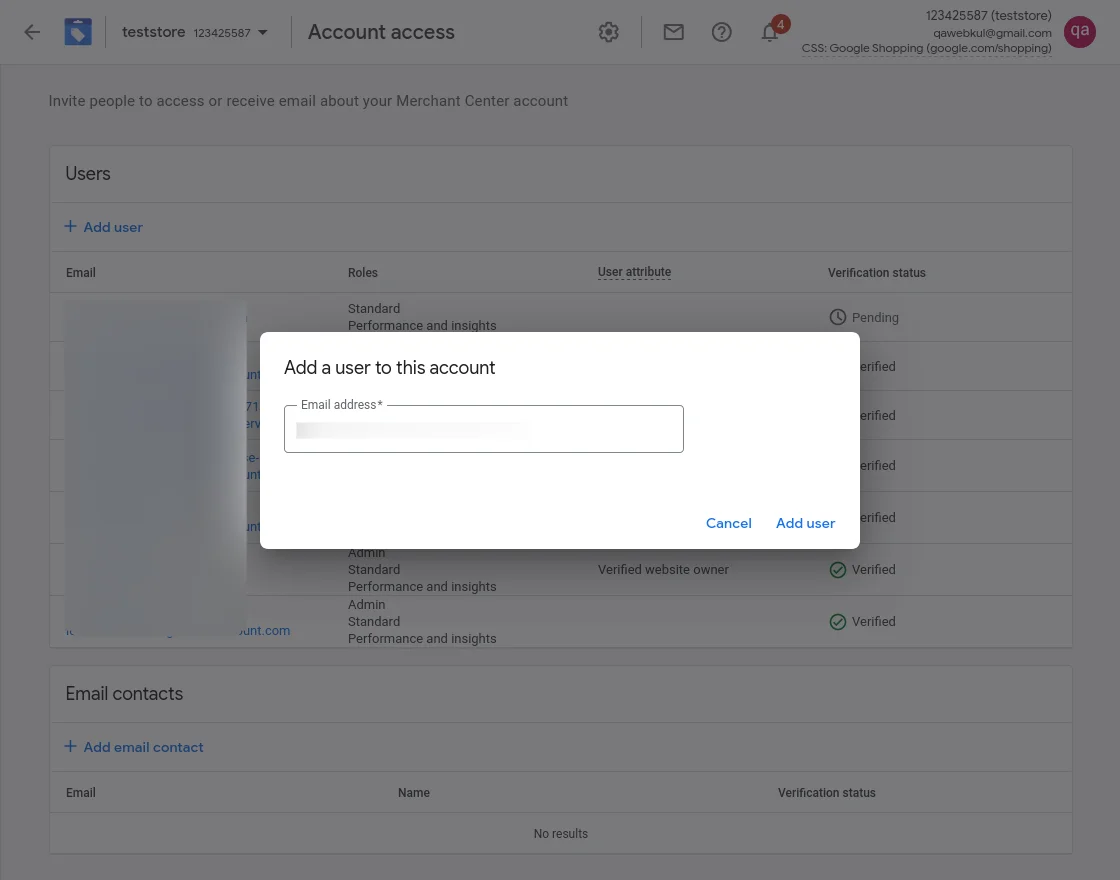
Select the user access. Then, click on the Save user.
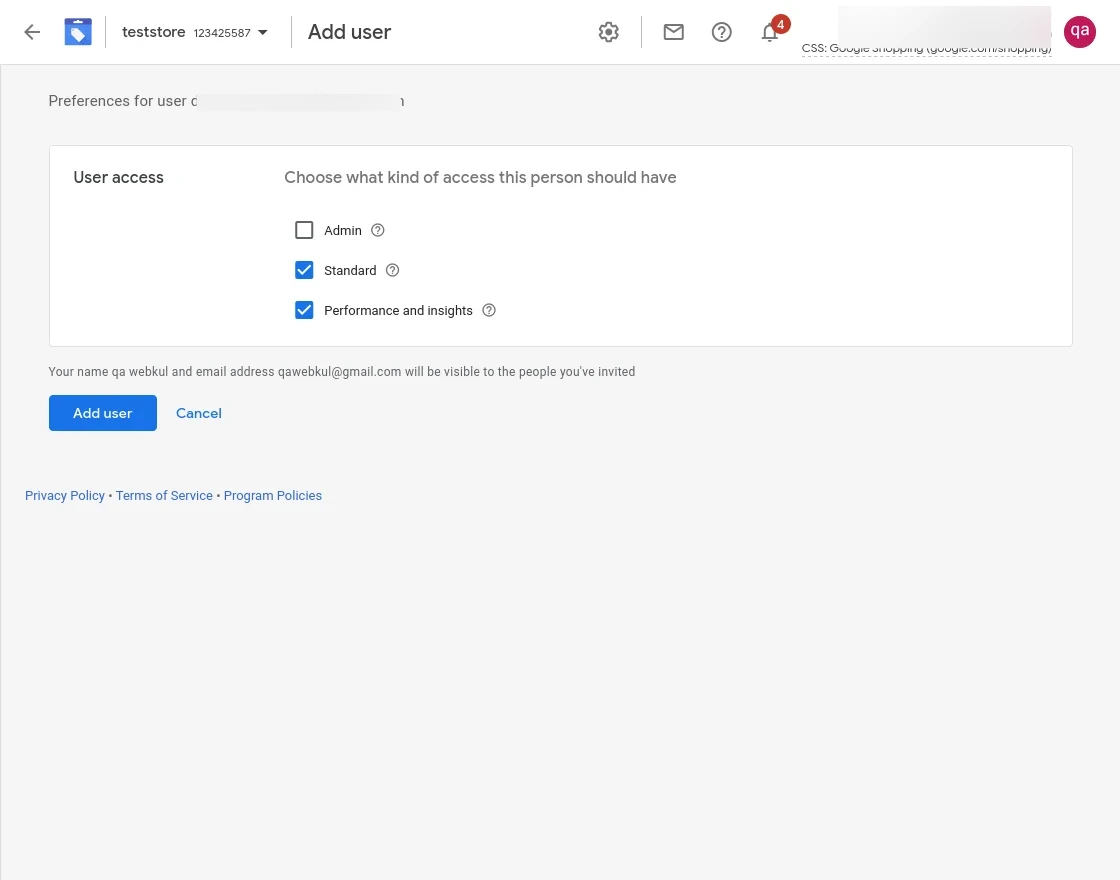
After saving the user is added successfully.
You can also check the verification status.
Export Products Through a Service Account
To export products through service account, the admin first configures the module.
Here the admin will:-
Service Account
Enable – Enable the Module.
Authorization Type- Set the Authorization type to Service Account.
After completing all this the admin will save the configuration.
Merchant Accounts
After saving the configuration the admin will navigate to Google Shopping Feed -> Merchant Account Connect.

Here the admin will see the Merchant Account.

In merchant account the admin will:-
Store(s): The admin will select the store.
Private key: Enter the private key.
Client ID: Enter the Client ID.
Client Email: Enter the Client Email.
Merchant ID: Enters the Merchant ID.

Then click on Save account.
Products
Here the admin will select the item from the product list and export the item on Google Feed.
then click on the submit button.
A new window will appear and all the selected items will move to the Google Feed.
Google Feed Products
You can check your Export product in Google Feed Products.

Also, you can watch your products on your Google Merchant Account.

Support
That’s all for the Google Shopping Feed For Magento 2 (Adobe Commerce).
If you have any queries or doubts get back to us at [email protected] or raise a ticket at webkul.uvdesk.com.
You may also check our quality Magento 2 Extensions.
Current Product Version - 4.1.0
Supported Framework Version - Magento 2.0.x, 2.1.x, 2.2.x,2.3.x, 2.4.x

We are using Google Merchant but we are feeding data manually. our concern is after integrating this module will we able to feed data in enhanced listing in google with Size colour and other custom values?.
Regards,
Ali