WordPress WooCommerce Multi Vendor Marketplace plugin explicitly developed to switch your WooCommerce website into a multi vendor platform that has multiple vendors with separate profiles.
Moreover, it gives vendors the functionality of adding products and order management from the vendor panel.
WooCommerce multi vendor marketplace plugin allows the vendors to view and edit their profile information and can view his product list and search, edit or delete products from it.
The vendor can view a record of his transactions and sales charts on his dashboard.
They can view his order history for all the orders, change his password, and even ask questions to the admin.
Apart from that, the admin can also manage the product list, vendor list, commissions, and settings as well.
The admin can edit or delete products, approve, disapprove, or assign vendors to products, and set separate commission rates for different vendors.
Even can change settings like product auto-publish and vendor auto-approval permissions within the WooCommerce Marketplace.
Note– This module is fully compatible with all standard WooCommerce themes.
Our demo is built using the WooCommerce Fashion Ethereal Theme, known for its clean design and seamless WooCommerce integration.
You can explore all the features and design elements of the WooCommerce Fashion Ethereal Theme in our detailed guide.
If you’d like to create a marketplace that looks just like our demo, you can also
purchase the Ethereal theme from our store.
Support
Dear Customers, if you have a question/query, please raise a ticket at webkul.uvdesk.com. We will do our best to answer as quickly as possible.
We provide a production version of the plugin. If you want a development version then you can get it at an additional cost. Please contact support@webkul.com for it.
Don’t give us a low rate without contacting support on the issue you’ve come across. We are always happy to help you.
Watch the video tutorials below to understand the plugin workflow:
Video Tutorial #1 – Backend Configuration within the WooCommerce Marketplace.
Video Tutorial #2 – Vendor Workflow within the WooCommerce Marketplace.
Video Tutorial #3 – Customer Workflow within the WooCommerce Marketplace.
Features – WooCommerce Marketplace.
- Multiple vendors can register and upload their products.
- Separate Vendor Profile, Shop Logo, and Vendor Collection Page with Banner Image.
- Vendors can Manage Shipping from their Own Account panel.
- Product by Feature on the product page is Introduced.
- Admin can allow a separate vendor dashboard for vendors which is the same as the admin’s dashboard.
- A vendor can easily switch to the default vendor dashboard view.
- Vendors can put up queries to the admin under the Queries option.
- The admin can reply to the queries of vendor.
- A vendor can edit their profile information.
- Admin and vendor both can edit or delete the vendor’s products.
- The vendor can add 4 types of products – Simple, Grouped, External/Affiliate, and Variable Product.
- The vendor can add their social network accounts, which will reflect on their profile page.
- Order management is very easy due to the visibility of the billing and shipping addresses of the customers.
- The vendor can also print the invoice of the orders.
- A vendor can ask questions to the admin.
- Admin can approve or disapprove a vendor or vendor’s products.
- Admin can assign a product to any vendor.
- In the marketplace, we are having an SEO-friendly URL structure.
- Also, allows the admin to set the default commission for every vendor.
- Admin can configure different commission percentages for different vendors.
- Admin can print the invoice for the order.
- A buyer can add any vendor on the marketplace as a favorite vendor.
- Admin can mass-assign products to a vendor.
- Vendors can add upsell and cross-sell products.
- The WooCommerce Marketplace Plugin is compatible with Multisite.
- WooCommerce multi vendor plugin is now compatible with WooCommerce’s new High-Performance Order Storage (HPOS) feature.
- This Woocommerce Mobile app is now compatible with WooCommerce’s latest feature Cart and Checkout block.
More Features – WooCommerce Marketplace.
- Admin can make transactions to the vendors against the orders for which he has transferred the money to the vendor’s account.
- Vendors can also check the transactions made by the admin from their account panel.
- Admin can set different categories for different vendors.
- Owner/Admin can set product types globally for all vendors in the marketplace.
- Admin can approve reviews for vendors from his end.
- Supports default WooCommerce email templates.
- The admin can configure the Endpoint and Title for a vendor’s Dashboard, Product List, Order History, Vendor Profile, etc.
- Vendors can manage refunds for their orders on the vendor’s end.
- The admin receives Product Notifications to publish a vendor’s product, whenever a vendor creates or edits a product on the vendor’s end.
- The admin can use Google Analytics to analyze website data and can check sales performance and product performance only currently.
- Compatible with WPML (The WordPress Multilingual Plugin)
- Frontend vendor dashboard endpoints to Woocommerce My Account Page.
- Admin can add Google Map API key for showing top billing countries on vendor dashboard properly.
- Settings and documents link in the plugin meta row.
- TineMCE editor on shop about section on vendor dashboard.
- Vendor mapping on creating an order from the admin end to list the order on the vendor dashboard.
- Simplified UI on changing product status on the vendor dashboard.
- Appropriate price validation message on vendor product edit as in WooCommerce.
- Default shop name as vendor name and shop slug as vendor’s username.
- Setting for Admin Dashboard endpoint text on vendor end.
- The admin can create a vendor profile.
- Google Analytics feature for vendors allows to configure events to track the product view and sales(support for GA-4).
- Vendors can create and use global product attributes and their terms while creating and updating products and variations.
Latest Features
- Seller Central Layout Shortcode and Onboarding Flow for new vendors.
- Vendor invoice feature to allow vendors to upload custom invoices to their orders. And now product images are also displayed on vendor invoices.
- Product filter grids on the vendor front-end dashboard product listing page – Published, Low-stock, Out of stock, Draft, and On sale products.
- Vendor can add return, shipping, and privacy policies section under their profile shop section. and visible to customers on the vendor’s profile page.
- Vendors will get an email notification when product stock goes below the low stock threshold.
- Admin can set the primary and secondary color code settings for vendor dashboard graph data.
- The coupon amount will be borne by the admin or vendor or both depending on the admin settings.
- On the single product page product Fulfilment label will be shown if configured by the vendor.
- Admin can publish news and these will listed on the vendor’s dashboard.
- Order filter grids on the vendor’s dashboard order history page.
- Admin can allow customers can report vendors with the help of vendor flags feature.
- Admin can also allow the customers to flag or report vendor products.
- Vendor email template for placing new order with vendor log and other details.
- Fixed commission along with percentage commission feature.
- Feature for admin to change a customer to vendor.
- Global attributes accessibility feature to vendor.
- Shipping title in email notifications.
- Feature to hide customer details from the vendor when enabled by admin settings.
- Feature to make own product non-purchasable for vendor.
- Feature to allow the vendor to set product tags and brands from their frontend dashboard.
Note:- For all orders including vendors, the tax amount will be credited to the admin.
Supported Shipping Methods – WooCommerce Marketplace
WooCommerce marketplace works with multiple shipping providers and we already have the respective integrations available.
| Marketplace Table Rate Shipping Plugin for WooCommerce | Multi-Vendor Shipstation Integration for WooCommerce |
| Marketplace Per Product Shipping Plugin for WooCommerce | Marketplace USPS Shipping For WooCommerce |
| Shipping Restriction Plugin for WooCommerce | WooCommerce Marketplace Avalara Tax Integration |
You can check out the plugin on CodeCanyon here:
https://codecanyon.net/item/marketplace-avalara-tax-integration-for-woocommerce/57330408?s_rank=1
Supported Payment Methods – WooCommerce Marketplace
WooCommerce marketplace works with multiple payment providers and we already have the respective integrations available.
| Multi-Vendor Stripe Plugin for WooCommerce | WooCommerce Marketplace PayPal Commerce |
| WooCommerce Marketplace Square Payment Gateway | Marketplace Adyen Payment For WooCommerce |
| Marketplace MangoPay Payment Gateway for WooCommerce | Marketplace DIBS Payment Method for WooCommerce |
| Multi-Vendor PayUmoney Payment Gateway for WooCommerce |
First of all, the user will get a zip file that needs to be uploaded in the “Add New” menu option in the WordPress admin panel.
For this login to WordPress Admin Panel and in the Dashboard hover your mouse over the “Plugins” menu option and select the “Add New” option.

Following this, the user will see an option on the top of the page that is “Upload Plugin”, click the option to upload the zip file.

Next, on clicking the “Upload Plugin” option, the user will see a “Choose File” button. Click on the button to browse for the zip file as per the image below.

After browsing the file, click on the “Install Now” button to install plugin as per the snapshot.

Furthermore, Once the user installs the plugin, a message “Plugin installed successfully” displays and an “Activate Plugin” is visible to activate the plugin.
In the end, the user needs to click on the “Activate Plugin” button to activate the woocommerce multi vendor extension.

Plus, on activating it, the Marketplace tab will appear in the admin panel as shown in the snapshot below.

Forthwith, update Permalink under “Settings > Permalinks” as “Post name” as shown in the below snapshot.
How do I activate WooCommerce Plugins?
Checkout the steps to activate WooCommerce plugins.
Update Modules Directly on the Plugins page?
Check the steps for module update on plugin page.
Module Translation
And, to know how to translate the module, you can click here.
How to Translate the plugin using the WPML
Multi-Vendor Marketplace for WooCommerce is compatible and certified by the WPML (The WordPress Multilingual Plugin).
A detailed guide is also available to know
Get Google Analytics Measurement ID
To get the Google Analytics ID, the user will need to get the Google Analytics Account first. Here, the user can click on the Sign in to Analytics or Get started today.

Now click on Get started today to create a google analytics account.

Sign in using the google account to create and set up analytics properties.
Now click on Start measuring.

Enter the further required details to continue.


So, after entering the required details click on the Next button.
Now, enter the property name, select the reporting time zone, and currency and tap Next.

Now, select from the available options for the describe your business and click on the Next button.

After that, select the business objective as required for and tap Next.

Accept the terms & conditions and process further.

Now, select the web platform.

A section appears, here setup the stream and tap Create & Continue.

After creating the stream tap the Next button.

This brings up the section from where you can simply copy the Measurement ID from the screen and paste it into the module configuration.

Note :
WooCommerce Marketplace is compatible with Elementor.
The admin can add the vendor page using Elementor’s shortcode widget and then add the shortcode [marketplace].
Now, the vendor registration and login page will be shown on this page and after login, vendors can see their profile details here as well.


Display Vendor Name on Single Product Page:
To show the vendor’s name on the product page, the admin has to add the following shortcode
“[wkmp_seller_profile_link]”
This shortcode will display the respective vendor’s name as a clickable link, redirecting to the vendor’s profile.
How to Use:
1. Edit the Single Product Page using Elementor.
2 . Add a Shortcode widget where you want the vendor name to appear.
2. Paste the shortcode: “[wkmp_seller_profile_link]”
The page is shown as in the image below.

Display Vendor List with Search and Product Count
To display a list of all vendors with a search option, heading, and the number of products for each vendor, the admin can use the following shortcode:
[wkmp-vendors-list show_search=yes show_heading=1 show_product_count=1]
This shortcode will display:
wkmp-vendors-list
Displays a list of all vendors with options to show/hide the search bar, heading, and product count.
Parameters:
show_search: Displays a search bar to filter vendors. Set to no to hide it.
show_heading: Displays a heading for the vendor list section.
show_product_count: Shows the product count for each vendor. Set to 0 to hide it.
How to Use:
Edit the desired page using Elementor or the WordPress editor.
Add a Shortcode widget or block where you want the vendor list to appear.
Paste the shortcode:
[wkmp-vendors-list show_search=yes show_heading=1 show_product_count=1]
The page is shown as in the image below.

Configuration
Henceforth, after the successful installation of WooCommerce Marketplace, the admin can configure it under “Marketplace > Settings > General”.
Configuration Tab

Default Commission – Default Commission will be used if the commission is not set on a vendor basis.
For example, there is a vendor “S1” and his/her product “P1”, and its price is 100 USD.
So on the sale of product “P1”, the vendor will get 80 USD and the admin will get 20 USD as a commission.
Deduct Discount From – If a discount is applied by customer how is the amount to be adjusted:
- Both Vendor Total amount and admin commission amount
- Vendor total amount
- Admin commission amount
Auto Approve Vendor – If checked then the vendor will be auto-approved after the registration as a vendor.
Ex – If the admin allows this option then the user who will sign up in the store as a vendor will convert into a vendor automatically. Otherwise, approval is required by the admin.
Separate Vendor Dashboard – If checked, then the vendor can have a separate dashboard like that of the admin.
Data delete after vendor delete – If checked, the data of the vendor will also get deleted along with the vendor else the data will get assigned to the admin.
Applicable Shipping Methods – From here the admin can select the Admin or Vendors shipping method that is to apply on the cart page.
Select Vendor Page – Updating a new vendor page will erase the previous content of the newly selected page. Kindly update permalinks after the change.
Note – Learn more about the Separate Login Form.
More about Applicable Shipping Methods
If the admin has selected the Admin shipping method under the Applicable Shipping Methods option then, the admin’s shipping will be applied to all products including vendors’ products.
Hence, it is independent of the customer adds vendor or admins’ product in cart admins’ shipping rate will be applied.
Now if the admin has selected the Vendor shipping method under the Applicable Shipping Methods option then, the vendors’ configured shipping rate will be applied to the vendors’ respective products.
moreover, if the order is having the products of both admin and vendor then in such case the shipping will total rate charged by the admin and vendor despite the Applicable Shipping Methods selected.
Shop Name on Registration: If Required is selected, the vendor must enter the Shop Name during the registration process.
Note: If the shop name is removed or is empty in the case of optional, the module will use the vendor name.
Shop URL on Registration: If Required is selected, the vendor must enter the Shop URL during the registration process.
Note: If the shop URL is removed or is empty in the case of optional, the module will instead use the Shop slug as the vendor’s username.
Vendor Terms & Conditions Page: Here, the admin can choose the terms and conditions page that is visible to the vendors at the time of registration.
Allow Vendor Registration on My Account: If enabled, vendor registration fields will be shown on the WooCommerce My Account signup form; otherwise, a link to the new Seller Central Registration form will be shown.
Product Settings Tab
The admin can configure it under “Marketplace > Settings > Product Options”.

Flag Settings
Customers can flag the vendor products from the frontend if admin has enabled it. Its configuration is displayed as below,

Enable: Toggle to Enable or Disable the vendor flags feature.
Vendor Flag Text: Text box to enter the vendor flag text which will be visible on vendor profile.
Guest Can Flag: If enabled, guest customers can flag vendors as well.
Accept Other Reasons: Customers can provide additional reasons other than listed ones as well if this toggle is enabled.
Other Fields Placeholder: Text box to enter the text for Other field.
Admin can also Add, Edit and delete vendor flag reasons by tapping on the Reasons tab.
Additional Settings
Allow Vendor to Publish – If checked then the products added by the vendor will be auto-approved. Otherwise, product approval is required by the admin.
Ex – If the vendor adds a product, every time product will be moderated by the admin.
Allow all vendors to translate their products using WPML – If checked, vendor can translate their products from their backend dashboard.
Note: This option is only available when the WPML plugin is installed and activated.
Allowed Product Types – next, the admin will select the product types to be available to the vendors while adding a product.
Allowed Categories – then, the admin will select the categories which will be available to the vendors while adding a product.
Minimum Order Amount Setting – The admin can enable and decide the minimum order amount that will be required to make a purchase for the vendor’s products.
Below the option, the admin can mark the “Amount Value for Vendor” as checked. Thus, if a vendor will not enter the minimum order amount at their end,
Then this value will be used by default if this feature is enabled by the admin.
Product Quantity Limit Setting – The admin can enable this option that allows the vendors to add a limit on the product quantity for the purchase to the customers.
Moreover, the admin can enter the default Maximum Quantity for the vendor’s products.
Product Notifications: For Admin to Publish the Products

Product Fulfilment Settings:
Here, the admin can set the feature which allows the buyers to see who is going to fulfil the product delivery.
The admin will –
- Enable the same for marketplace vendors.
- Upload fulfilment image
- Add the fulfilment label and text as required.
Note: The vendors can also use this feature under their account panel and their fulfilment image will appear as below.

Furthermore, an interesting feature of the WooCommerce Multi-Vendor Marketplace Plugin is –
The Product Notifications which the admin receives to publish a vendor’s product, whenever the vendor creates or edits a product on the vendor end.

Initially, in the admin panel, the admin must uncheck the “Allow Vendor to Publish” option.
Thereafter, if the vendor creates a new product or edits any existing product, the product status will change to draft and is to be approved by the admin.

Also, the product status of the product in the product list changes to Draft as shown in the image below.

Thereafter, the admin can Edit the respective product in order to publish it.

The admin can also enter the maximum purchase quantity for the product and the vendor can add quantity accordingly.

As the admin publishes the product, the status of the product changes to ‘Published, and the product count present with the Product menu option disappears.
Assets Visibility Tab

Email – Now configure whether the Vendor Email will be displayed on the Vendor Profile or not.
Phone Number – Then, configure whether the Vendor Phone Number will be displayed on the Vendor Profile or not.
Address – After that, configure whether the Vendor Address will be displayed on the Vendor Profile or not.
Social Links – Forthwith, configure whether the Vendor Social Links will be displayed on the Vendor Profile or not.
Hide Customer Details From Vendor: Allows the admin to hide customers’ billing and shipping details from vendors for privacy.
Show Legacy Vendor Profile – Check it to display the vendor profile on the frontend in legacy style. Keep it unchecked to display the vendor’s profile in a newer optimized layout, having new features like the ‘Report Flag’ section
Vendor Dashboard Statistics Data Style
Primary Color code: Set the primary color code for the Vendor Dashboard Statistics Data Style.
Secondary Color code: Set the secondary color code for the Vendor Dashboard Statistics Data Style.
Endpoints
Furthermore, the Endpoints tab provides dynamic functionality to the Woocommerce Multi-Vendor Marketplace Plugin.
Also, the admin can configure the Endpoint and Title for the vendors.
Endpoint: The extra part is present in the URL of any website.
Such as https://webkul.com/about-us/company-profile/ which is mainly to display different content without the need to navigate to multiple pages.
- For instance, a vendor can have a vendor profile page, which displays on the URL as example.com/vendorprofile.
- We can append an endpoint ‘edit-vendor profile’ to the URL to show the Edit page for the Vendor Profile such as example.com/vendorprofile/edit-vendor profile.
Then, the admin will have to navigate through Marketplace > Settings > Endpoints to configure the Endpoint and Title as shown in the image below.
Also, the admin can customize the URL for each Endpoint. The Endpoints must be distinctive to avoid conflicts.

For instance, in the above image, the admin has configured the Endpoint as “dashboard” and the Title as “Dashboard” in the Dashboard section.
Likewise, the admin configures the Endpoint as “order history” and the Title as “Order History” in the Order History section, and so on.
The Title is the Vendor Dashboard menu option as shown in the image below.

Google Analytics
The admin can use Google Analytics to analyze and record the data of their website.
It helps the admin to understand how the customers are interacting with their stores.

Enable Google analytics – If checked, google analytics data will be populated.
Measurement ID – Enter the Google Analytics tracking ID to be obtained from Google Analytics Account.
Allow vendor to use Google Analytics – Check this option to enable the vendors to enable their own GA.
Enable tracking events – check the :-
- Enable view item event or Enable purchase event as required for tracking purposes.
Enable debug mode – Enable to check real time analytics under analytic accounts(debug mode view) respectively by admin and vendors to check the events.
Debug mode in GA-4 dashboard:

Details of product Purchssed in realtime:

Google Map API – Here the admin can add the google map API which can be acquired by following the instructions.
Also, please note the admin can check in Product Performance product, Product Revenue, Unique Purchase, Quantity, Avg Price, Avg. Qty.
Further, in Sales Performance, the admin can check the Transaction id, Revenue, tax, and shipping the above information is only supported currently in the plugin.
Vendor Flags
The admin can enable the Vendor Flags feature to allows customers to report flags on vendor profile.
Enable: Toggle to Enable or Disable the vendor flags feature.
Vendor Flag Text: Text box to enter the vendor flag text which will be visible on vendor profile.
Guest Can Flag: If enabled, guest customers can flag vendors as well.
Accept Other Reasons: Customers can provide additional reasons other than listed ones as well if this toggle is enabled.
Other Fields Placeholder: Text box to enter the text for Other field.
Admin can also Add, Edit and delete vendor flag reasons by tapping on the Reasons tab. It is displayed as below,

Withdrawal
The admin can allow vendor to withdraw their amount in their default payment mode. To configure it, Admin taps on the Withdrawal section. It is visible as per the below image,

The following configurations are available to the admin,
Enable Withdrawal – Button to enable or disable the withdrawal function.
Withdrawal Limit -Minimum balance for creating a withdrawal request. Please note this setting will not be applied for automatic withdrawals.
Withdrawal Type – Select the withdrawal type as Manual or Automatic.
Manual: Vendors must create withdrawal requests manually by selecting eligible completed orders. They can update the withdrawal payment method and view charges and the final withdrawable amount before making the request.
Automatic: A withdrawal request will be created for all the active vendors for all their eligible completed orders on the last date of every month. The default payment method must be selected by the vendor to apply the withdrawal charges, if any.
Withdrawal Method – Enable or disable available withdrawal methods.
Withdrawal Charges – Set the charges for Withdrawal Methods as per requirement.
Once the configuration is done, Admin taps on the Save button.
Vendor Invoice
A vendor invoice in WooCommerce Marketplace shows the vendor’s earnings from orders, including product price, commission, shipping, and taxes.
The admin and vendor can also send the invoice to the customer as proof of purchase and for transparency.

Allow For The Vendor: Enable this to let the vendor generate and access the invoice.
Attach In The Mail: Attach the invoice automatically in order confirmation emails.
Allow File Types: Define the supported file formats for invoice uploads (e.g., PDF, JPG).
Allow File Size: Set the maximum file size allowed for invoice attachments.
Seller Central
A new Seller Central settings tab allowing the admin to configure the onboarding page for new vendors.
From here, the admin can set the banner heading, description, and image, as well as manage other sections like Features, Reviews, Workflow, Benefits, and Registration, helping create a customized vendor onboarding experience.
Banner: Set a banner heading, description, and image to display at the top of the Seller Central page.

Features: Highlight key marketplace features to attract and inform new vendors.

Reviews: Show vendor or customer testimonials to build trust and credibility.

Workflow: Describe the step-by-step process for vendors to start selling on the marketplace.

Benefits: List the main advantages of joining your marketplace as a vendor.

Registration: Configure vendor registration details and manage onboarding options for new sellers.

Order View – Admin End
The admin can view all the orders from the order section from the admin end. The order information also includes the name of the vendor as well.

At the admin end, the admin can send the invoice to the customer from the Orders section in the backend.

Marketplace Widgets Configuration
There are two widgets available in the marketplace and the admin can configure them under “Appearance > Widgets”.
Furthermore, the widgets can be placed as per the space provided by the theme.

Display Vendor Panel – It will display the vendor panel.
Moreover, with the help of this widget, the vendor can perform all the activities as a vendor.
Marketplace Vendor List – Therefore, it will display the available vendors of the marketplace in a list. It will display on the front end as snapshot below:

Vendor Registration Process
Thus, for the registration, the vendor will click the “Vendor” menu item, after which the vendor will be able to see the “Login Here” or “Register” option on the page.
Now, clicking the “Login Here” button will take the vendor to the login page, and clicking the “Register” button will take him to the registration page.

After clicking on the “Become a Seller” button, the vendor registration form will open, allowing the vendor to complete the registration process.


Henceforth, after choosing the “Register” option, the user will be redirected to a page containing a combined registration form for both buyers and vendors — if the admin has enabled the “Allow Vendor Registration on My Account” setting.

After clicking the “I am a Vendor” radio button, more fields will appear for the vendor registration.
Then, the vendor will input his Email address, Password for the account, First Name, Last Name, Shop Name, Shop URL, and Phone Number and check the terms and conditions.
Lastly, hit the “Register” button to register as a vendor.
Here we are using an ajax check for the vendor shop URL i.e when you enter a shop URL, if it is available then it will show as “Available” otherwise it will return as “Already Exists“.
On the other End, registration of the vendor will be using email and password as portrayed below.
After that, the user to become a vendor has a separate section option to become a vendor in the customer account panel.

Admin News:
Here, the admin can create news to notify the vendors, or can also hide news from specific vendors as required.

Add new news brings up a section to create and publish the news. You can also edit the news that was published.

Tapping see all news displays the complete list of published news.

After publishing the news the vendors can see it under their account panel.

Become a Vendor – Customer End
A customer can also request to become a vendor on the marketplace from the customer dashboard.
After filling the required details a request is sent to the admin and the admin can accept or rejct the request accordingly.

Vendor Panel Management
The vendor can easily manage the available options from the vendor dashboard.


Vendor Profile
The vendor profile displays critical information about the vendor.
After the registration, the vendor needs to complete the profile details under “Vendor Profile”.

Also, if the admin has enabled the separate admin like dashboard for the vendors then they can see the menu option Admin Dashboard on the left hand side account panel.
Here, the vendor can also add their own Google Analytics Account ID and choose to enable events – view item and purchase events.


The vendor can also add the details regarding their Return, Shipping, and Privacy policies as required.
And, if the vendor selects the admin-like view of the vendor dashboard, then the visibility of the vendor profile will be as shown in the image below:


Once the vendor enters all the details in the profile, the user can access it from the product page.
 Also, when a customer/user hovers their mouse over the add to cart button, the name of the respective vendor is displayed to the users.

Prevents vendors from buying their own products, helping to avoid fake orders and reviews.

Thereafter, the vendor profile and the rest of the pages will be displayed on the front end as images below:
Vendor profile view at the front-end

About the Shop section of the Vendor profile

Review the section of the Vendor profile

Policies Section of Vendor Profile

Vendor Dashboard – Regular View
Additionally, the vendor can see the Sales Order Summary, Sales Order History, Total Orders, Top Products, Top Billing Countries, and Recent Orders in the dashboard.
Forthwith, it is very useful in keeping track of his revenue and all other stats.
The stats are represented beautifully by meters, pie charts, doughnut charts, bar graphs, and maps.

Vendor Dashboard – Admin Like View
In the admin panel, the admin can check the option of “Separate Vendor Dashboard” so as to allow the vendors to have the admin-like dashboard view.
Thus see, the admin-like dashboard of the vendor dashboard is shown in the image below.
Consequently, the vendor may switch to the default frontend view of the vendor dashboard at any time by tapping on the “Frontend Dashboard” option in the menu bar.
Vendor Dashboard Menu
The vendors can also manage all the functionalities from the vendor dashboard same as the admin:
- Reports – Get the quick infographic report of recent orders, sale order history, and Life Time Sales, Total Payout, Remaining Amount, and Refunded Amount.
- Order History – Check order-related history from here.
- Transaction – Additionally, allows viewing the ID, date, and amount related to the transaction.
- Notifications – See the orders and product-related notifications from here.
- Shop Followers – This also facilitates checking the query list from here.
- My Profile – Manage profile information from this section.
- Ask To Admin – Moreover, the vendor can see the ask to admin query list from this section.

Vendor Product Management
Furthermore, the vendor can add these 5 types of products from the vendor panel –
- Simple Product
- Grouped Product
- External / Affiliate Product
- Variable Product
- Downloadable Product
Vendor Product List
Now, the vendor can view all the products under the “Product List” section and can search, edit or delete any product.
Apart from that, they can view the published, low stock, out of stock, draft, and on sale product counts

If he chooses to edit the product, he can modify the basic characteristics of the product as well as the inventory and product status options that appear after creating a product.
And, the vendor will be able to see only those products which are published by the admin if the product auto-publish is not configured by the admin.
Add Product
The vendor has the option to manage the minimum order amount to checkout for the customers.
Even, the vendor can manage the maximum product purchase quantity that is required to purchase the products by clicking on “Change Product Miscellaneous Settings.”

Now, to add a product, the vendor will click the “Add Product” menu item to open the add product page.
Then, the vendor will choose the Product Category to add and the Product Type to add and click “Next”.

Therefore, the vendor needs to enter the information about the product –
Product Name, About Product, Product Thumbnails, Product SKU, Regular Price, Sale Price, and Product Short Description as shown in the below snapshot, and click “Save”.

Enable Stock Management at the Product level
Now, under the Inventory tab, the vendor will select the option Enable Stock Management At the Product level.
Further, enter the Stock Quantity, Allow Backorders to “Allow”, “Not Allow” or “Allow But Notify Customer“, set the ‘Low Stock threshold‘,
choose if you want to sell the Product individually, and set the ‘Max purchasable Quantity’.

Under Shipping, the vendor can enter the Shipping details of the product.

Linked Products
Under the Linked Products, the vendor can add Upsell and Cross-sell products.

Attributes
Now the vendor moves to the Attributes tab where the vendor can add as many attributes to the product as per the requirement.
Here, the vendors can choose existing attributes by entering the name of the attribute in add existing field and choose to make it visible on product page.

The attribute gets visible on the additional information section.

Attributes Tab
When editing a product, a loading indicator (Ajax loader) now appears on the Attributes tab while existing attribute terms are being fetched.
This helps you know the system is processing and prevents confusion or repeated clicks during loading.
Now, vendors can also use all the attributes created by the admin and, if needed, request to create or update new attributes through the “Ask Admin” section available in their profile.

Product Tags & Brands Management by Vendor
Allows vendors to add and manage product tags and brands directly from their frontend dashboard, helping improve product categorization and searchability.

These tags and brands will reflect on the product page

Product Status
Lastly, the vendor will set the Product Status. Here, the vendor can set the product status as “Online” or “Draft”.

If the status is selected as Online, then the product will get published if permission has been given by the admin for the vendor to publish this product.
The vendor can also upload the image gallery for the product here and can make the product Virtual or Downloadable by first checking the Virtual or Downloadable checkbox.
For Downloadable products, the vendor can add the values for the File Name, File URL, Limit, and Expiry as shown in the image below.

Now the product will become available within the Product List.

And live on the front end as in the below image.

Vendor Order Management
The vendor can manage orders under “Order History”.
Vendors can now upload custom invoices to their orders directly from the order details page.
By clicking “View”, the vendor can access complete order information and manage or upload their personalized invoice file for that order.


The vendor can change the order status as well. 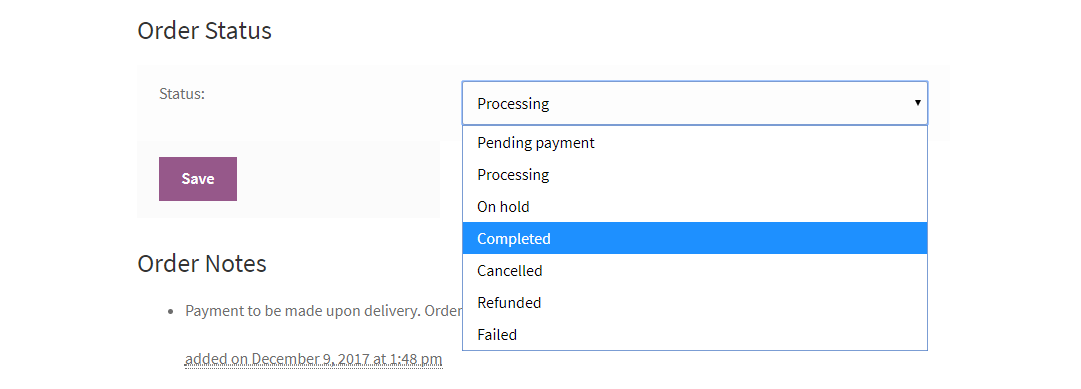
After the order status update, this information will be updated in the “Order Notes”. 
The vendor can print the invoice by clicking the “Print Invoice” button placed in the top right corner.

Generating Refund: Vendor End
The vendors have a feature to generate a refund request for a product. The vendor has to navigate to the Order History menu option in the vendor dashboard to generate a refund.
Under the Order History tab, the vendor needs to click on the View option for the order which vendor has to refund.
 The Order History page for the respective order (Order #897) opens up. On top of the page, the vendor will find the Refund tab as shown in the image below.
On clicking the Refund tab, the vendor can generate a refund for the respective order. 
As the vendor clicks the Refund tab, the Refund Quantity, Check to Refund for Shipping, Restock Refunded Items options appear, which the vendor has to configure, accordingly.
Thereafter, the vendor needs to click on the Refund Manually tab as shown in the image below.

As the vendor clicks on the Refund Manually tab, a message- “Refunded successfully” will display on top of the page as shown in the image below.
The Refunded amount will display under the order Total as shown below.
Vendor Transaction Management
The vendor can view the transactions made by the admin for the orders, for which the admin has received the payments from the buyers.

Here, vendors can view various transaction details such as Total Earning, Total Withdrawal, Total Pending, Total Refunded, Last Withdrawal. They can also view their Minimum Withdrawal Amount.
To create a Withdrawal, vendor taps on Withdrawal button. Then, they’re redirected to the below page,

Vendor can check the withdrawal payment methods and make them default as well. Further, they check the Recent withdrawals as well. To request a new withdrawal, tap on Request Withdrawal,

Once the details are filled out, Vendor taps on Submit Request.
The vendor can view the transaction details by clicking on the View option. Here the vendor can see his amount and the admin commission for the order.

Vendor Shipping Management
Now the vendors of the marketplace will be able to manage their shipping from their own account panel.
Vendors can easily set up the new shipping zones and can add the shipping methods for these zones. The vendor can manage shipping under “Shipping”.

Here, the vendor will find all the added shipping zones and can add zones as required by tapping the Add New Shipping Zone button.
Apart from that, the vendor will be able to edit and delete the created shipping zones as required.
Add New Shipping Zone
The vendor can add a new shipping zone by clicking “Add New Shipping Zone”.
Here, the vendor enters “Zone Name” and selects “Zone Regions”. Click “Add Shipping Zone” to add the shipping zone.

After adding the shipping zone above, go back to “Shipping” and click the “edit” button for the shipping zone you want to add the shipping methods as shown in the below snapshot:

Add Shipping Method
By clicking the “edit” button you will see the below page with an option in the last to add the shipping method, click “Add Shipping Method” to add the shipping methods.

After clicking the “Add Shipping Method” button in the image above, a popup window will appear to select the shipping methods.
Select the shipping method from the drop-down option and click the button “Add Shipping Method” to add this shipping method to your shipping zone.

After clicking the “Add Shipping Method” button, you will go back to the “Shipping Zone” page. Here click the shipping method name to configure the shipping cost.

A pop-up will appear to configure the shipping method. Here the vendor can enter the shipping cost as per their choice and “Save Changes”.

And fill in the other details like shipping class costs

Now click “Save Changes” to save the shipping method. And finally, the shipping method will be visible in front of the shipping zone.

Admin News – Vendor
Here, the vendors will find the news that has been sent out to the respective marketplace vendors.

Tapping on a news gives the complete description of the same.

Vendor Notification
The vendors can perform several actions in the marketplace like new orders, changes in order status, approval of a product, and many more.
In the notification area, the vendor will be notified as shown in the image below.
Vendor Notification

Vendor Shop Followers
The vendor can send notifications to their shop followers. A buyer can become shop followers from the product page by clicking on the heart shape icon.
 A vendor can view all the shop followers, and can send notifications as well under “Shop Followers”.

To send a notification, the vendor just needs to select the followers from the list and hit “Send Notification”.
A pop-up will be available to enter the details. And by clicking “Send Mail”, the notification mail will be sent to the followers.
Ask To Admin
The vendor can also inquire about anything from the admin by the “Ask To Admin” option.
In this section, the vendor can mention the subject and the query and click on the “Ask” button.
After the vendor asks the question, the admin will get a mail about the query.
Click on the Add button to ask queries from the admin.

Vendor Fulfillment
If the admin has enabled the vendor fulfillment from the backend by checking the Enable checkbox then vendors can also setup the fulfillment and display their fulfillment logo on their products.

Now, the vendors can login to their account panel and choose to display if they want to display their products with vendor fulfillment.
Navigate through Vendor Profile->Shop->Fulfillment checkbox and enable the same.

The vendor can also upload the vendor fulfillment image by navigating to the images tab.

After this, the vendor navigates to any of his products to enable the vendor fulfillment for them.
After editing a product, go to the Product Status tab. Here, enable product fulfilled by checkbox and save the product.

After this when a customer views the vendor’s product at the storefront the vendor fulfilled option/image is visible to the customer.

When the product status is changed to Draft, the Preview button becomes available, allowing vendors to review the product before publishing to ensure all details are accurate.

A Preview button is also available in the product listing table under the actions column, enabling vendors to quickly preview products directly from the list view.
The vendor can preview the product before publishing, as shown in the image below.
Admin Panel Management
After installing the plugin we can see an additional tab for the marketplace. This converts an ordinary WooCommerce store into an online marketplace.
Where the admin can manage products, vendors, commissions, and settings like product auto-publish or vendor auto-approval.
The admin can create all kinds of products including simple, virtual, downloadable, grouped, external/affiliate, and variable products and can also publish them.
The admin can also assign different vendors to the products.
Product List
In the product list, the admin can view his as well as the vendor’s products and can edit or delete products.
The admin has control over the vendor’s products and can view or change any specification of the product.
The admin can also mass assign products to a vendor or can filter the product as per a vendor. 
After filtering the product list on the basis of the vendor, the admin will see all the products of the vendor accordingly.

The admin will select the vendor and the products which he wants to assign to the vendor and then click on the Assign button to assign the selected products to the selected vendor.

In case the admin has configured “Allow Vendor to Publish” as “Unchecked” then the admin needs to publish the product manually within the WooCommerce Marketplace.

When the vendor adds a new product, it will be in the “draft” state.

The product will be visible in the Product List at the admin end.

Admin can “publish” the product by editing the product. Here admin just needs to hit “Publish” which makes the product available for the customers on the front end.
And on the front end, as shown below.
Assign product to the Vendor
The admin can also assign any product to a particular vendor from the right column on the product page by searching for the name of the vendor from the list and assigning it to the vendor.
Moreover, the admin can assign his product or the product of one vendor to another vendor.
Further, if the admin assigns the product of one vendor to another then the product will not be visible on the former vendor’s product list but would show in the latter vendor’s product list.

Vendor List – WooCommerce Marketplace.
In the vendor list, the admin can add and check the full bio of the vendor and can edit his profile in the “Username” tab in the WooCommerce admin panel with several options.
Which include personal options, name, contact info, about page, account management, billing, and shipping address. Here the admin can also approve or disapprove the vendor.
Add New Vendor
Now the admin can add a vendor by clicking “Marketplace>Vendors>Add New”.

Here the admin needs to fill in all the details of the vendor.

The admin can manage a vendor by clicking on the Manage button. Here he will be provided with several options to manage a vendor.
Details
The admin can see the details of the vendor like username, email, display name, shop address, etc. and can also enter the payment details of the vendor.

Orders
The admin can see all the orders of a vendor and can mark the order for which he has made a payment to the vendor.
The admin will click on the Pay button available on the order under the action to mark the order amount paid to the vendor.
By clicking on the Pay button admin can create a transaction for the order under Transactions.

Transactions within the WooCommerce Marketplace
After making a payment for an order the admin will mark the order as paid under Orders and a transaction for the order gets created under Transactions having the details like –
Order Id, Amount, Type, Method, and date Created On.

The admin can click on a transaction to view the details of the transaction.

Commission
The admin can manage the commission rate for the vendor and can see the total sale of the vendor and the admission commission from the sale.

Misc. Setting
The admin can assign categories to the vendor, which will be available to the vendor while adding a new product.

Product Category
Allowed Categories: Enter the allowed categories for a vendor to add products.
Order Approval
Enable: If checked, the Vendor can see the order and get notifications only after manual approval by the admin.
Dynamic SKU
Enable: If checked, below prefix will be prefixed with vendor actual SKU.
Product SKU Prefix: Enter Prefix for Vendor’s SKU.
Translate Products
Allow the vendor to translate their products using WPML: If Checked, Vendor can translate their products from their backend dashboard.
Note: This option is only available when the WPML plugin is installed and activated.
Reported Flags
Under this section, admin can check the list of reported flags against the vendor.

Withdrawal Requests Management
The admin can manage withdrawal requests submitted by vendors, including approving, rejecting, or processing them based on the available vendor balance.

Order Approval within the WooCommerce Marketplace –
The admin can enable the order approval for the individual vendor. If enabled, the admin will have to approve the received order of the particular vendor, first.
Then, the vendor will be notified about the received order.
Dynamic SKU –
The admin can enable dynamic SKUs for the particular vendor. The admin can enter the Product SKU Prefix.
And it will be applicable to the particular vendor’s actual product SKU when adding the products.

Vendor Approval
In the case of the admin configuring “Auto Approve Vendor” as “Unchecked” then the admin needs to approve the vendor manually.

After successful registration, the vendor will appear in the Vendor List for the approval of the vendor.

Admin can approve or disapprove the vendor by hitting the “Approve or Disapprove” button in the Vendor list.
After approval, the vendor can perform all the actions like adding a product, viewing orders, etc.
Commission Management
In the Marketplace configuration, the admin can set a fixed + percentage commission rate, which will apply to all vendors.
For example, if the fixed commission is 5 USD and the percentage commission is 10%, and a vendor
“S1” sells product “P1” for 100 USD — the admin will get 5 USD (fixed) + 10 USD (10% of 100) = 15 USD total commission, and the vendor will receive 85 USD.

Order Management –
Under the Orders tab, the Order Id, Product, Quantity, Product Total, Shipping, Discount, Total Commission, Total Vendor Amount, and Action tabs are visible as shown in the image.

After clicking on the Vendor Name, the user will go to the commission page.
Here the user can set the commission for that particular vendor.

Manage feedback
The admin can manage the feedback from the customers. The admin can approve or disapprove the reviews and ratings from the customers for the vendor’s products.
Thereafter, the vendors can view the approved reviews from their panel.

Vendor Queries
Under the “Marketplace” tab, a ‘Queries’ option is also present. On clicking the ‘Queries’ option, a Query List is present where the admin can check the queries put up by the vendors.

Further, the admin can forward replies for the vendor’s query by clicking on the Reply button against the query as shown in the image below.

Email Configurations – WooCommerce Marketplace.
The admin can manipulate templates for emails and can configure the settings of the emails under WooCommerce > Settings > Emails. 
Under the Email Template section, a Hyperlink “Click here to preview your email template” is present, on clicking which the layout of the email will display.
 The admin may create mail templates for various Marketplace email templates such as Ask to Admin, Product Publish, Vendor Approval, Vendor Register, etc.
These mail templates are listed under WooCommerce > Settings > Emails as shown in the image below.

On clicking the “Manage” button present against the respective mail template, the admin can configure the settings for the same.

Admin Notification – WooCommerce Marketplace.
The admin can perform several actions in the marketplace like new orders, changes in order status, approval of a product, and many more.
Further, in the notification area, the admin will be notified as shown in the image below.

The admin can see the notifications related to products, orders, and marketplace vendors as well.

Customer Order Placement
On the store front, the customer will choose the desire product and will add it to the cart.

After adding the product to the cart , you will see the the structure of the cart blocks on the cart page.

Now click on the proceed to checkout, again you will see the structure of the checkout blocks on the checkout page.

After a successfull order placement in WooCommerce Marketplace, the customer will receive the order with the order details within the WooCommerce Marketplace.

Support
That’s all for the WordPress WooCommerce Marketplace.
However, in case of any query or questions regarding the WooCommerce Plugins, you can create a ticket at webkul.uvdesk.com.
Current Product Version - 6.3.4
Supported Framework Version - WordPress: 6.8 Woo-commerce: 10.3.3

53 comments
Dear Raju,
We request you to immediately email us at support@webkul.com with all the issues you’re facing so we can assist you faster & better.
Thanks
If you buy our WooCommerce Multivendor mobile app then the customer who are already registered on your website do not need to register again on your mobile apps.
To know more kindly email us at support@webkul.com. So we can assist you out faster and better.
Thanks
Your vendors should have added their ShipStation keys on the marketplace to print labels for their orders.
Thanks
Thanks for contacting us!
We would like to tell you that for now we do not have any marketplace UPS add-on that can work with our Multi vendor marketplace plugin. We to need first develop the same for you by the help of customization.
So regarding other query and to know more about customization, kindly email us at support@webkul.com
Thanks
we want to centralize the quality control and shipping process to end customers. By keeping customer data anonymous to vendors.
Is it possible to realize this workflow with your plugin?
Thanks for showing interest!
For this we need customization. Kindly revert us on support@webkul.com.
Thanks and Reagrds
– Are vendor shipping methods compatible with the plugin flexible shipping
– Is it possible to set a min cart per vendor
2. Is it possible to set a min cart per vendor
What do you mean by min cart per vendor? Please contact us at support@webkul.com with your complete requirements so that we can assist you accordingly.
Thanks!
There is no such option available to display the vendor categories (Not all categories) on each vendor page. But if you want this feature then it can be done through the customization. You can share your requirements by contacting us at support@webkul.com and we will assist you accordingly.
Thanks!
There are no such options available in the plugin so that the admin can assign an order to the vendor manually. But if you want this feature then it can be implemented through the customization. Please share your complete requirements at support@webkul.com so that we can assist you accordingly.
Thanks!
We didn’t get your point “Seller’s orders are marked with only ten, why?
”
Please let us know your complete details at support@webkul.com so that we can assist you accordingly.
Thanks!
The main pages that I would like to change are the Seller Profile page, Single Product page etc.
As the source code of the plugins are opened so you can customize the plugin as per your need.
If you want any further requirements in the plugin, then please share your complete requirements at support@webkul.com so that we can assist you accordingly.
Thanks!
We haven’t done it yet but if you want to have it in the plugin, you can email us at support@webkul.com.
Thanks
Is there a option to purchase the product by the seller?
If yes, can the commission be different for orders placed by customers and orders added by sellers from dashboard?
the seller can not create an order directly from the seller dashboard. If you want any additional functionality in the plugin please contact us at support@webkul.com so that we can assist you accordingly.
Thanks!
Endpoints are appended to your page URLs to handle specific actions on the accounts pages. They should be unique. This is missing from the plugin that was just purchased. The demo has these settings.
if you want any additional functionality in the plugin please contact us at support@webkul.com so that we can assist you accordingly.
Thanks!
then it is not displayed and reported Uncaught ReferenceError: acf is not defined
The third-party plugins may create a conflict with the marketplace plugin. Please contact at support@webkul.com so that we can assist you accordingly.
Thank you!
By default, all the payment for the order will go to the admin and after that, the admin will transfer the seller’s payment from his account manually for the order after deducting his commission.
You can also use our marketplace stripe plugin – https://codecanyon.net/item/woocommerce-marketplace-stripe-connect-plugin/19214558 Using the plugin the payment for the order will directly split between the admin and the seller and the payment will directly get transferred to the admin and the seller account accordingly.
For more information, you can directly contact us at support@webkul.com.
Currently, the seller can create simple, virtual, variable, grouped, external/affiliate products and if you want the seller to create sponsored products then we can customize the module as per your requirement. Please contact us at support@webkul.com with your requirements so that our team can assist you accordingly. Thanks!
Q.1: In case seller not able to fulfill order, admin/manager can assign to order any other service provider/Vendor for fulfill order?
Q.2: Is it possible admin can manage “processing” fee individual order?
Yes, we can deactivate all the payments, add to cart, commission, and checkout features from the marketplace to make it a simple announce website of multiple sellers with their contact info.
These features can be achieved via customization. Please email us at support@webkul.com for more information.
Yes, the seller can have their own shop URL in WooCommerce Multi Vendor Marketplace. The seller can enter his shop URL at the time of registration.