Magento 2 SMTP Extension is a module by which the store owner can easily set up an SMTP server on his Webstore so that all the emails sent through his store will get sent by the selected host.
With Magento 2 SMTP extension, tracking and sending emails through the online store become easy.
Follow up with customers who have left their shopping cart abandoned. Send email reminders to complete the checkout process with Adobe Commerce Abandoned Cart Reminder extension.
Also, we have the SMTP feature for the Marketplace vendors that can be achieved through Magento 2 Multi Vendor SMTP extension.
Features
- The admin can easily setup SMTP Host.
- Choose various Host Providers.
- Test the host by sending test emails.
- The admin will be able to see the success message for test emails.
- The receiver will receive the email successfully.
- View an error message for test mails if email sends failed.
- There will be an error message if the mail is not sent to the receiver.
- SMTP configurator works with Multi-Store and Store-Views.
- The same configuration of the Host will apply on all Store-Views and Multi-Stores.
Install Extension from Webkul Store
#1 Download Module
Firstly, you need to log in to Webkul Store, go to My Account>My Purchased Products section, verify and then download and extract the contents of this zip folder on the system.
#2 Upload Folder
Once Magento 2 Custom SMTP Extension zip is extracted, follow path src>app and then copy the app folder into the Magento 2 root directory on the server as shown below:

#3 Run Commands
After uploading the module folder, you need to run the following commands in the Adobe Commerce Cloud root directory:
php bin/magento setup:upgradephp bin/magento setup:di:compilephp bin/magento setup:static-content:deployphp bin/magento indexer:reindexphp bin/magento cache:flush
Install Extension from Adobe Commerce Marketplace
If you have purchased this Magento 2 Extension from the Magento Marketplace then please follow the below process or visit this link.
#1 Get Access Keys
You need to get access keys, navigate to My Profile in Adobe Commerce Cloud Marketplace, then choose Access Keys in the My Products section.

Go to Magento 2 and then you need to copy both the Access Keys – Public Key and Private Key. These access keys will be needed in the next steps for authentication.

If access keys are not created earlier, click Create A New Access Key, enter any name and click OK.

#2 Update composer.json File
To know the component name and version number, go to your Adobe Commerce Marketplace account section, My Profile>My Purchases, then find this extension to view the details.
Please note – Below is an example image, every extension will have its unique component name and version.
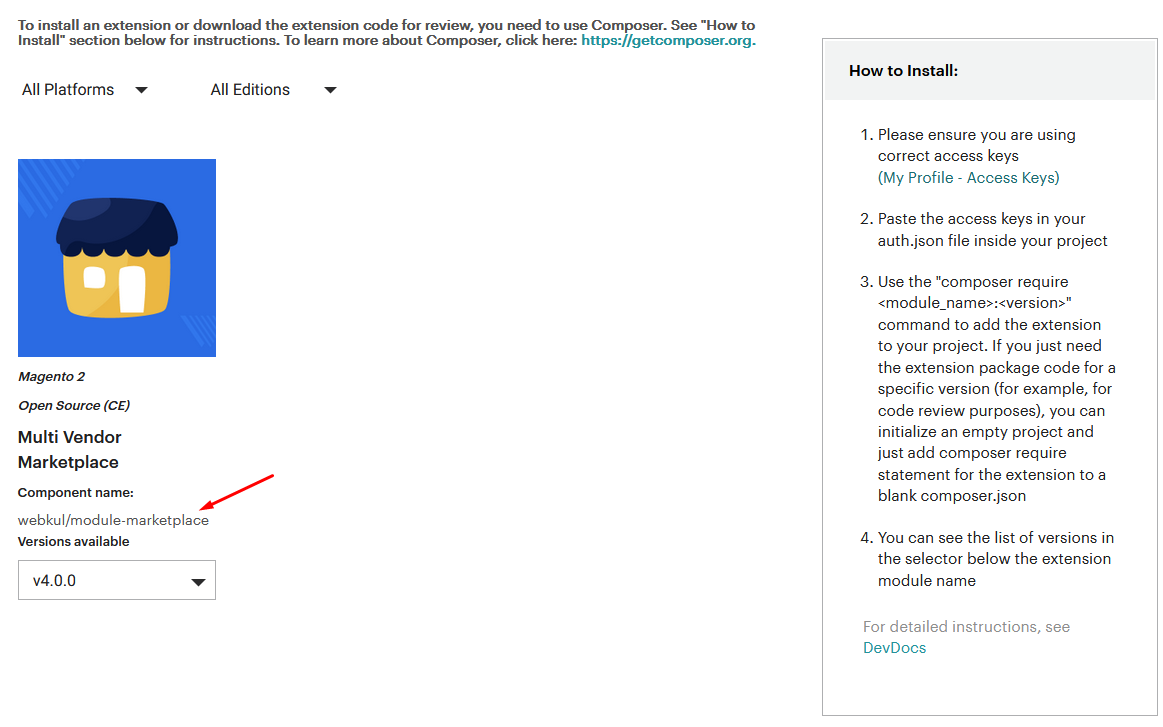
After that, navigate to your Adobe Commerce Cloud project directory and update your composer.json file in the following format.
composer require <component-name>:<version>
For example, to install version 4.0.0 of Magento 2 SMTP Email extension you need to run the following command:
composer require webkul/smtp-configurator:4.0.0
#3 Enter Access Keys
Now you will need to enter the Access Keys that you obtained as explained in the first step #1 Get Access Keys.
Wait for Composer to finish updating your project dependencies and make sure there aren’t any errors.
#4 Run Command
You need to run the following commands:
php bin/magento setup:upgradephp bin/magento setup:di:compilephp bin/magento setup:static-content:deployphp bin/magento indexer:reindexphp bin/magento cache:flush
SMTP Extension for Adobe Commerce
Store Owner can configure SMTP setting by going to Stores –> Configuration –> Webkul –> SMTP Setting.
The store owner can also test this feature by sending a test mail, and all the messages, such confirmation message for mail send, error message, etc, will be displayed on the SMTP settings page only.

Select the SMTP provider from the drop-down menu. You can select Zimbra, Gmail, Amazon SES, Hotmail, Yahoo, GMX, Mail, Zoho, Spark Post, SendGrid, and Custom.

The store owner will see a success message if the mail is successfully sent.

The receiver will receive the mail successfully.
There will be an error message if the email fails to deliver to the receiver.

That’s all for Adobe Commerce SMTP extension, if you still have any issues feel free to add a ticket and let us know your views to make the module better at webkul.uvdesk.com.
Current Product Version - 4.0.3
Supported Framework Version - Magento 2.0.x, 2.1.x, 2.2.x,2.3.x, 2.4.x

5 comments
If you are facing any issue then please email us at [email protected] and our support team will assist you.