Opencart Store Locator V2 is a brilliant module by which admin can add many more store locations with product search and location search based on their store location.
Note – You can display a custom store close message on your store with the help of the OpenCart Store close extension.
Features – Opencart Store Locator V2
- Search based on location and product.
- Fancy Tool Tip with store information.
- Very handy Module to add many more store locations.
- Easy to use and manage module from Opencart admin.
Note – Google Map API feature is a paid service.
Check the workflow of the plugin at the storefront and the initial configuration settings as well –
Installation – Opencart Store Locator V2
Customers will get a zip folder and they have to extract the contents of this zip folder on their system.
After extraction of the contents, you have to select your preferred Opencart version folder which is having the – admin, catalog, and ocmod folders.
Now, just transfer the admin & catalog folders into the Opencart root directory on the server as shown below.

Now, you will navigate to Extension Installer and upload the XML file “add_store_locator.ocmod.xml“ according to your Opencart version which you will find inside the ocmod folder.

Then in the admin panel go to System->User->Usergroup and edit ‘Top Administrator‘ and choose – Select all for both access and modify permission and save the configuration.

After that under Extensions ->Modules -> you will find the Store locator module. Here you can install the module.

After the module installation, navigate to Extensions>Modules and find Store Locator from the module list. Click Edit to the module configuration.

Now, you can enable the module to show the store locator at the front end or disable the module to not show the store locator on the front end & click save. If enabled, the store locator tab will be displayed in the header on the front end.
Enter Google Maps API Key. If you do not have the key, click Get Google Map API Key to create a new key.

How to Get Google Maps API Key
To get a Google Maps API Key, please Log In to your Google account and visit this link. After logging into your account you will see the below page. Click the Get an API key link as shown below screenshot.

After clicking the above link you will arrive at this page. Click Google API Console link as shown below.

A new page will be open, select Yes button and then click Agree and continue button.
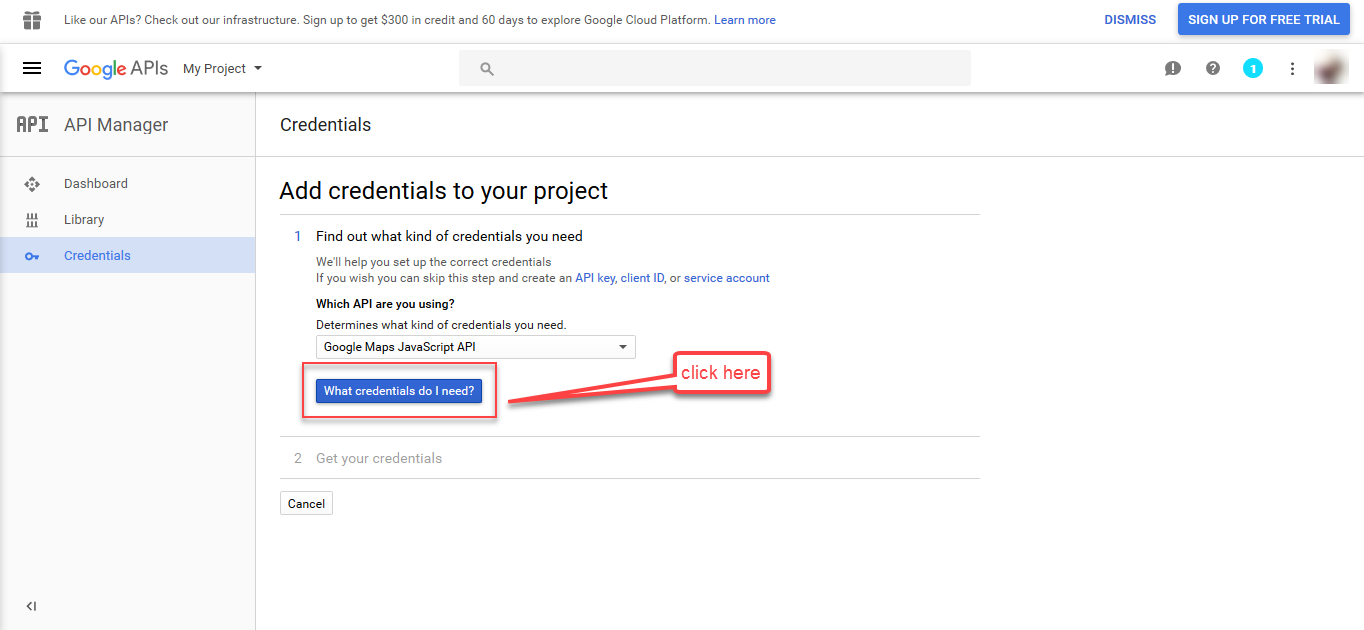
 After clicking Agree and continue button, you will arrive at API Manager Credentials page. Please click the button named What credentials do I need?
After that, you will get your Google Maps API-key as shown in below screenshot. After copying the key, click Done button and paste this key to your Opencart Store Locator Configuration.

Domain Verification
The user needs to follow the given steps for verifying the domain.
Initially, on the Google Cloud Platform page, the user must navigate to APIs & Services > Domain verification as shown below.

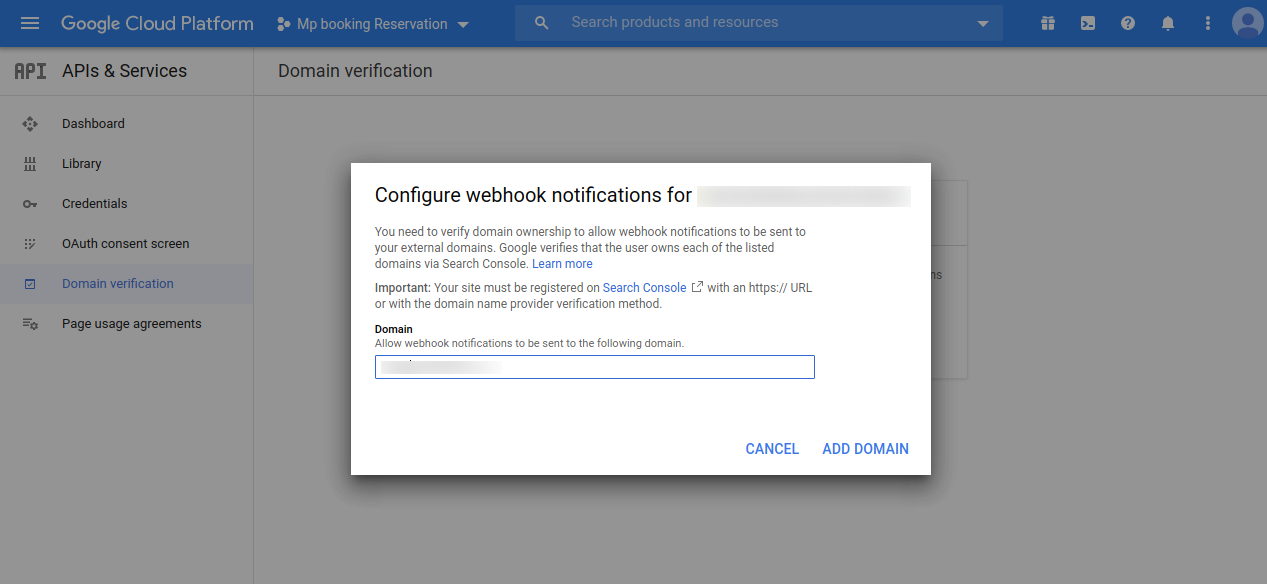
This navigates the user to the Domain Verification page, where the user needs to click on the Add Domain button.

A popup shall appear as shown in the image, where the user needs to fill in the Domain URL (https://example.com/) in the text box and click the ADD DOMAIN button.
On clicking the ADD DOMAIN button, another popup opens up bearing a name Verify ownership.
The user must click on TAKE ME THERE, to proceed further.

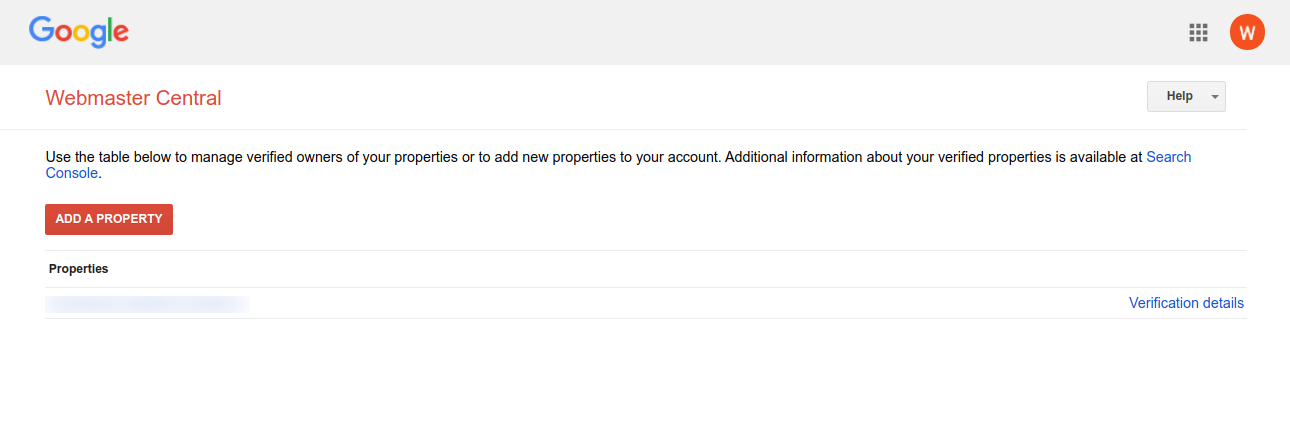
On clicking the same, it redirects the user to the Webmaster Central page as shown in the image below.
The user must click on ADD A PROPERTY button present on this page.
A textbox opens up where the user needs to add the URL of the property that the user wishes to verify and click on Continue.

Google recommends some steps that the user must follow to verify the URL of the property.

Thereafter, the user can tick-mark the I’m not a robot checkbox and further click Verify button.

Once the verification process is completed, the following page shall appear.

Enable Google API Keys
To enable the Google APIs, the user must open up the Google Cloud Platform page and navigate to the Credentials page.
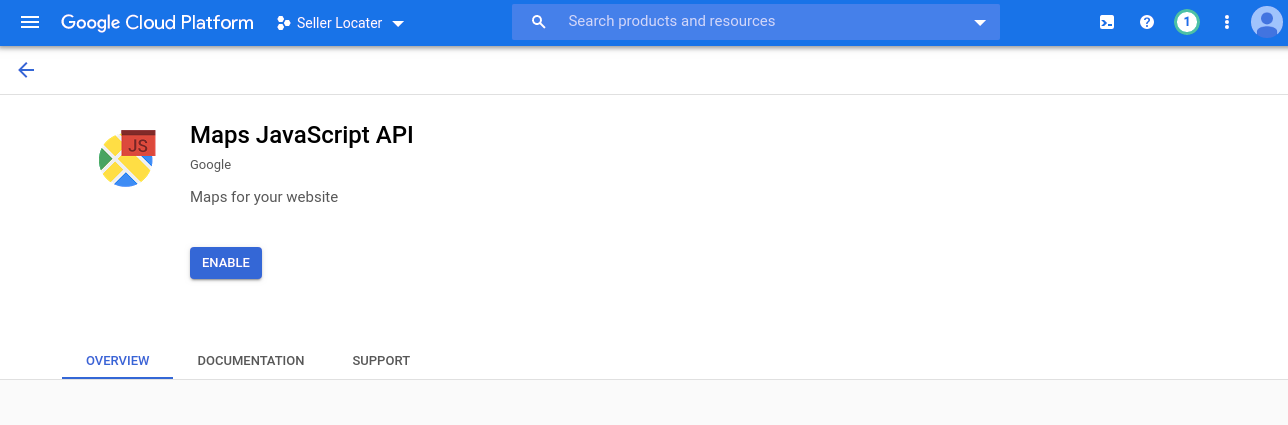
The user will find the All Google Maps APIs dropdown, clicking which the user needs to click on the ENABLE API.

In doing so, a list of Google APIs opens up. If users don’t find the required API, they can type the name of the API in the search box and search for it.
To enable the API, the user needs to click on it.
Geocoding & Maps JavaScript APIs

Geocoding API: Enable

Maps JavaScript API: Enable
Places API

PLaces API: Enable

Admin Management – Opencart Store Locator V2
Add/Manage Store
Click the store locator > add/manage stores. At first, the admin has to insert stores using insert.

After clicking on the insert button, another page opens where the admin clicks on Search and Add Store and enters the store details in the store. Admin can select a location using a map or using the search option.

Enter your store title, link, logo, etc. and select status as Enable for display at store front end else select Disable. Then in the Assign product tab admin has to select products and then save them.

After saving store locations will be displayed here, and the admin can edit & delete them. Admin can open any store location, and edit & save the settings after that.

Admin can add as many store locations as desired.
Store Settings
The admin can enter the distance of the store accordingly it will display on the front end.

Front End
After saving this your Store Locator look like this, with all locations and with a link in your header.

Users can search locators after clicking Store locator, based on product and location.

After a search, the results depend upon the admin entered distance.

After clicking the searched location on the map it shows all the info. All of that information was much self-explanatory, still, have any doubts kindly add a support ticket at https://webkul.uvdesk.com/.
Current Product Version - 3.0.0.4
Supported Framework Version - 3.x.x.x

Be the first to comment.