Magento Image Gallery module allows the admin to add/manage images into various gallery and galleries into various groups according to requirement. Admin can easily manage photo gallery and gallery groups on their site. In this module, everything is configured by admin. Magento Image Gallery is the best Gallery module for Magento platform.
Note – Magento Image Gallery is also Available for Magento 2
Features Of Magento image Gallery
- Ability to add/manage images into various galleries.
- Admin can bulk upload images into the image gallery.
- Assign galleries into various groups.
- Add various effects for display images.
- Awesome controls you can zoom images, change images using mouse enter etc.
- The code is fully open & you can customize it according to your need.
- Multi-Lingual support / All language working including RTL.
- Compatible with Multistore.
Installation Of Magento Image Gallery
Customers will get a zip folder and they have to extract the contents of this zip folder on their system. The extracted folder has a src folder, inside the src folder you have the app, media & skin folders. You need to transfer this app, media and skin folders into the Magento2 root directory on the server as shown below.

After moving the app, media and skin folders, flush the cache from Magento admin module. Under system > cache management.

Configuration Of Magento Image Gallery
After the successful installation of the Magento Image Gallery module admin will be able to see the Magento Image Gallery configuration setting under “Webkul Image Gallery”. Let’s explain each menu one by one.

How To Add/Manage Images
Admin can add/manage the images for gallery under Webkul Image Gallery > Add/ Manage Images. Admin can also delete or change the status of the image.

After click on “Add Image” below page will appear. Here admin can enter image information and save image.
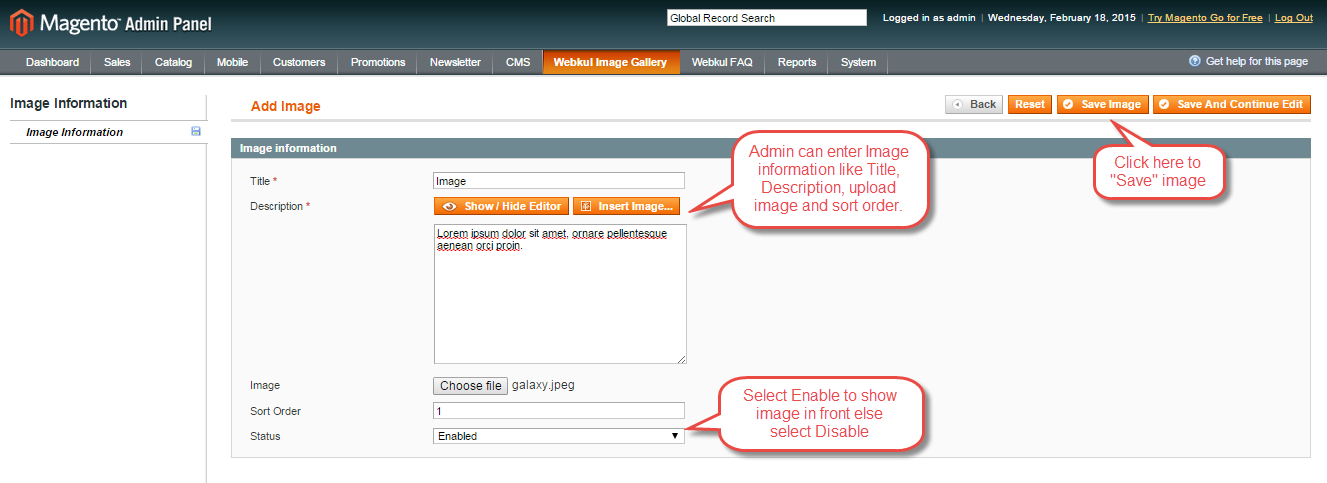
Admin can also upload the cropped image instead of the original image. Refer to the below screenshot for the same.

How To Mass Upload Images
Admin can bulk upload images into various galleries. Admin will navigate through ->Webkul Image gallery->Mass Upload Images. After clicking the Mass Upload Images menu item, another page will appear with the options for bulk uploading the images as shown below.

Here admin will first download the sample CSV file. After that, the admin will fill the details of the products to be uploaded.

How to create a zip folder for the images – You just need to place all your images in a folder. Now compress the folder containing images, this compressed zip folder is to be uploaded.
Now admin will upload the CSV file and the images.zip folder(that contains the images for the products being uploaded through the CSV) and then click Save.

After the upload, you will see a confirmation for the product upload.

How To Add/Manage Gallery
This module also provides the feature for admin to add/manage gallery under Webkul Image Gallery > Add/Manage Gallery.

After clicking on Add Gallery below page will appear which contains two tabs in the left section.
In this section, you need to enter your gallery code which must be unique and select status for the gallery.

Here you need to select the images and thumbnail image for your particular gallery.
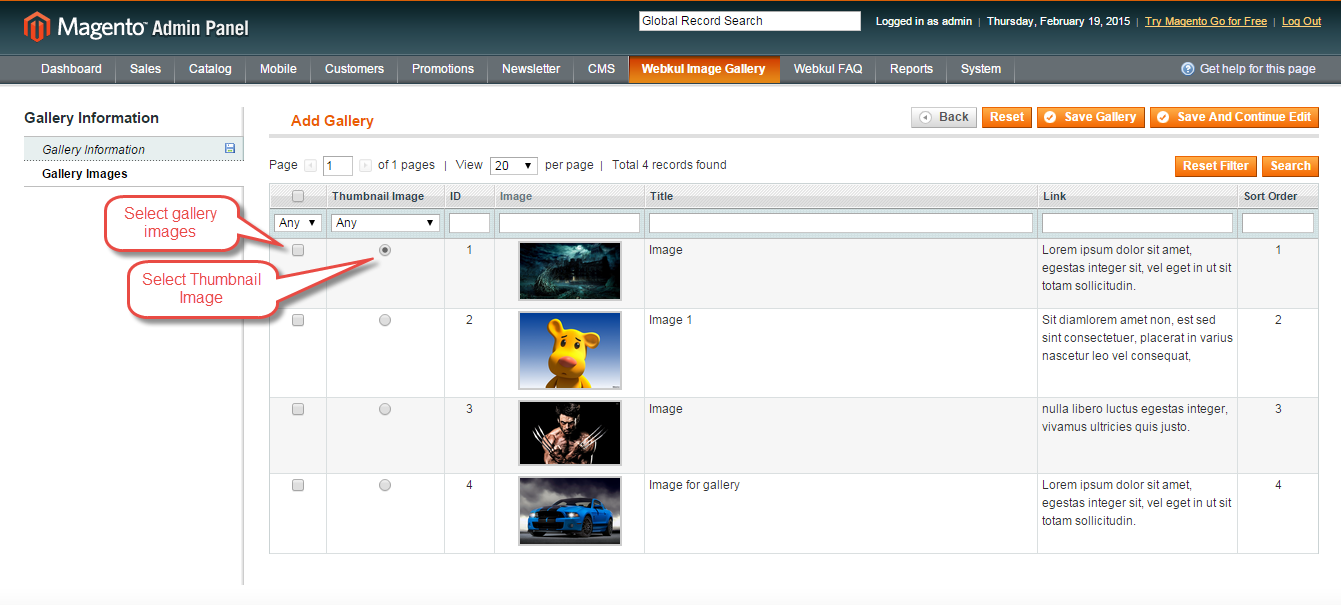
Admin can also edit the existing gallery by clicking “Edit”. Here admin can edit Gallery Information and Gallery Images both.

How To Add/Manage Gallery Group
This menu is responsible for adding or Managing gallery group details. Admin can create Gallery group using the created gallery.

For adding new group click on Add Group. It contains two tabs in the left section.
Here you need to enter your group code and status of the group. Group code must be unique and containing no space.

Here you need to select the gallery for your particular group. Select gallery which you want to add to your group.

You can also edit the added Gallery Group. Just click on Edit option.

Gallery Setting
If you follow Webkul Image Gallery>Gallery Setting, you can customize the image gallery as per your requirements. The following options are available:
Gallery (Opening) Effects – Select the animation effect when the user clicks the gallery image for viewing. Options available – Normal, Fade, or Elastic.
Closing Effects – Select the animation effect when the user closes the image after viewing it. Options available – Normal, Fade, or Elastic.
Caption Status – You can show description on each image, select Enable. To hide the description, select Disable.
Caption – Select the caption style available:
- Bottom Center Outside Dark
- Bottom Center Outside Light
- Bottom Left Outside Dark
- Bottom Left Outside Light
Background Status – Select the background status as Dark or Light.
Thumbs – While viewing the image, the thumbnails can be shown at the bottom of the gallery, click Yes to show thumbnails. Otherwise, click No for hiding the thumbnails.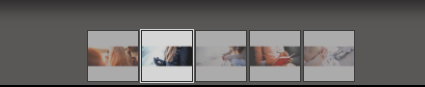
Cyclic – Select Yes option to cycle back to the first image after viewing all the images in the gallery. This will create a continuous movement of gallery images.
Autoplay – Select Yes option to automatically move the gallery images. Else, if you want the user to manually move the images select No option.
Interval – Set the time interval in milliseconds for changing the images. Note – this option only works for Autoplay setting.
Mouse wheel – Select Yes option to allow users to slide the images using the mouse wheel.
Border – Select Yes to show the borders for the images, else select No to make the images borderless.
Slide count – Select Yes option for showing the count of the gallery images. ![]()
Controls – Select Yes to show the navigation controls for the gallery images. 
Control Position – Select position of the control either Top or Bottom.
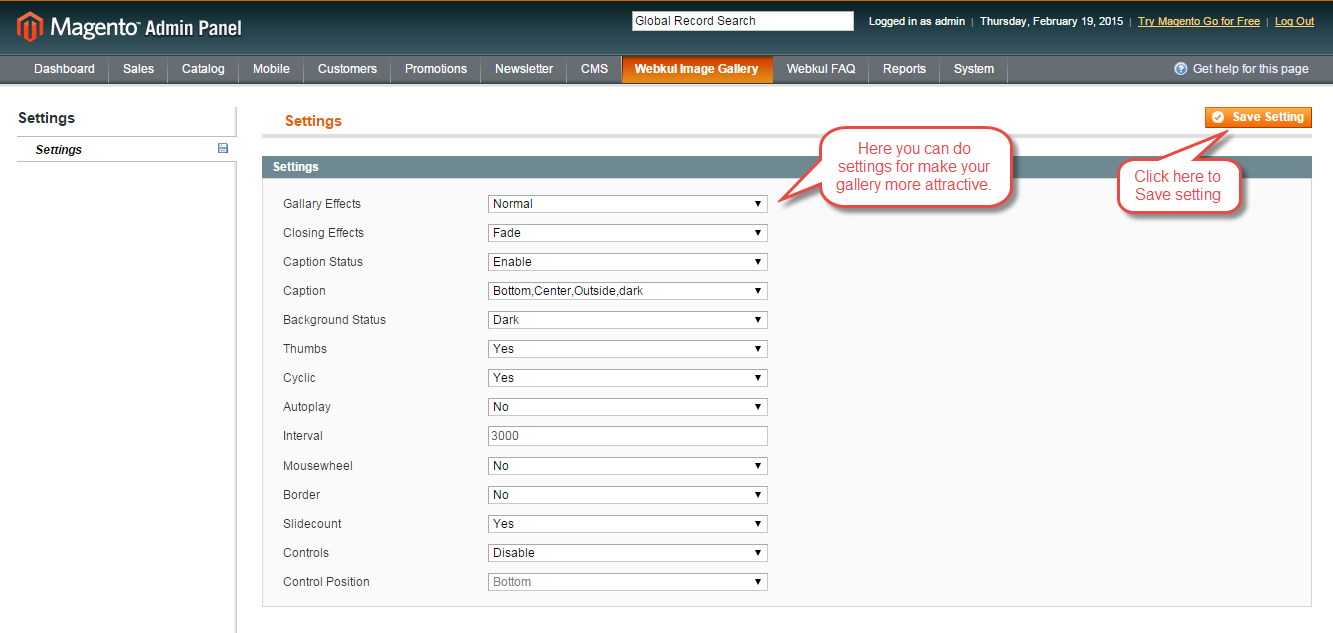
Under Gallery Setting, you can add effects, caption, thumbs, autoplay, border and many more features to make your gallery more graceful.
You need to call block code at your cms pages with group_code, gallery_code attribute which Gallery and Group gallery you want to show at frontend.
If Group Code is executed and called directly then on the frontend Group Gallery is shown.
{{block type="imagegallery/imagegallery" group_code="groupcode1" template="imagegallery/gallery_group.phtml"}}
If Gallery Code is executed and called directly then on the frontend Image Gallery is displayed.
{{block type="imagegallery/imagegallery" gallery_code="code1" template="imagegallery/gallery.phtml"}}
If both the commands are executed simultaneously at the same time then the Group Gallery and Image Gallery will be shown together.
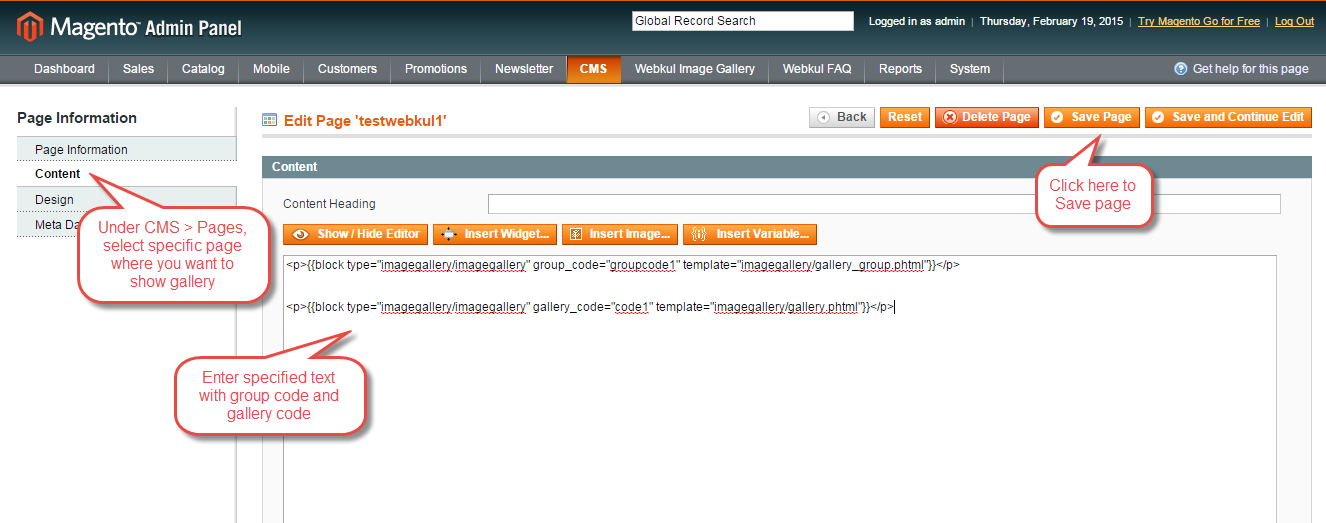
In the case of block call at CMS page, You will have to write (“) in HTML otherwise, if you simply copy these codes on WYSIWYG editor then it will convert the double quote into some ASCII code and you will unable to call block on CMS page.
It will look like this in CMS page.

Here you need to add block so that the Image gallery can be displayed. Magento 1.9.2.0 and newer versions admin must need to add and enable the block for the image gallery.

Admin can easily add the image gallery block and allow that block to display at the front-end.
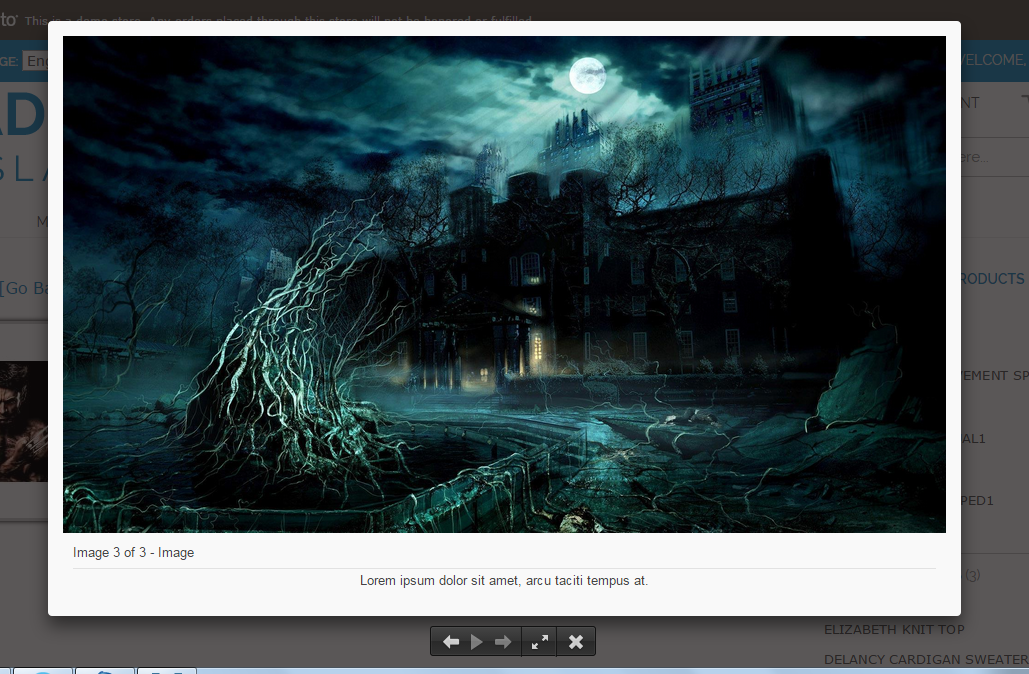
Image Gallery Displayed on Front-End
After inserting all required details and block code your gallery looks like this screenshot.

On clicking particular gallery you can see all the images of your gallery.

After click on any image below, you can see that image like this.
That’s all for the Magento Image Gallery. Still, have any issue feel free to add a ticket and let us know your views to make the module better webkul.uvdesk.com
Current Product Version - 1.3.1
Supported Framework Version - 1.6.x.x, 1.7.x.x, 1.8.x.x, 1.9.x.x

5 comments