WordPress WooCommerce Marketplace Seller Price Comparison Plugin allows customers to compare prices among different sellers for a single product.
Now different sellers, selling the same product will be displayed on the product page. The buyer can choose from them as per the product reviews or on the basis of price.
A seller can add the product that is available in the global catalog with different prices and stock units.
This plugin allows the sellers to add and update products with their chosen price and quantity and also remove them.
This plugin is now compatible with WooCommerce’s latest feature Cart and Checkout Blocks.
Also, it is now compatible with WooCommerce’s new High-Performance Order Storage (HPOS) feature.
WordPress WooCommerce Marketplace Seller Price Comparison Plugin is an add-on to WordPress WooCommerce Multi-Vendor Marketplace Plugin.
We provide a production version of the plugin. If you want a development version then you can get it at an additional cost. Please contact [email protected] for it.
To use this plugin you must have installed the first WordPress WooCommerce Multi-Vendor Marketplace Plugin.
Support
Dear Customers, if you have a question/query, please raise a ticket at webkul.uvdesk.com. We will do our best to answer as quickly as possible.
Don’t give us a low rate without contacting support on the issue you’ve faced with. We are always happy to help you.
Features
Multiple sellers can add the same product with different prices, and stock units.
Multiple sellers can add a product that is available globally in the marketplace.
For example, there is a product Apple iPhone which is available in the marketplace and a seller wants to sell the same product only with a different price and quantity.
So it can be done with the help of this plugin, now sellers A, B, C, … can add the same product with different prices and stock units.
Admin can make a simple product or a variable product as a global product.
The admin can make a simple product or a variable product as a global product to make the product available to the sellers so that different sellers can sell the same product at different prices.
Sellers can add products with their own price and quantity and also remove them.
Once a seller adds a product then, it will work as a normal product. A seller will be able to update or delete the added product.
Display different sellers on the product page with their prices.
On the product page, a buyer can see all the available sellers who are selling the product.
Now a buyer can compare sellers and add to cart the product from a seller having good reviews and low prices like Amazon, Flipkart, or any genuine marketplace.
Product stock management for sellers.
A seller can manage the stock of added products. He can update the quantity of the product as per his requirements.
Installation
The user will get a zip file that needs to be uploaded in the “Add New” menu option in the WordPress admin panel.
For this login to WordPress Admin Panel and in the Dashboard hover your mouse over the “Plugins” menu option and select the “Add New” option.

After this, the user will see an option on the top of the page that is “Upload Plugin”, click the option to upload the zip file.

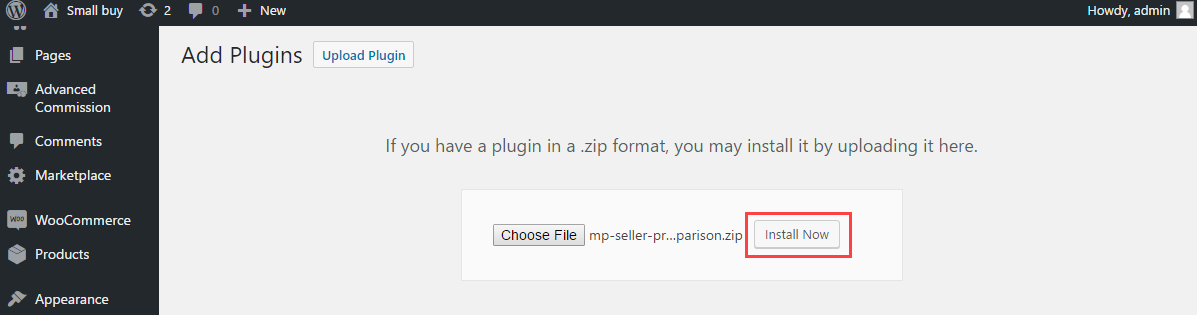
On clicking the “Upload Plugin” option, the user will see a “Choose File” button. Click on the button to browse for the zip file as per the image below.

After browsing the file, click on the “Install Now” button so as to install the plugin as per the snapshot.
Once the user installs the plugin, a message “Plugin installed successfully” displays, and an “Activate Plugin” is visible to activate the plugin.
The user needs to click on the “Activate Plugin” button to activate the plugin.

Admin End Workflow for Seller Price Comparison
After the installation, the admin will navigate to the ‘Marketplace’ section in the left side menu and then click on the ‘Seller Price Comparison’ option.
Here it will show a list of all simple and variable products that the admin can globally allow or remove for the sellers to add these products in their store with different prices and quantities.
The admin can also bulk allow or bulk remove the products for the sellers globally.

The admin has the ability to hover over any individual product listing, which then activates the ‘VIEW‘ option.

The view option next to a product previews the product as it appears on the front end, including details such as different sellers listing that product with different prices and stock.

Seller End Workflow for Seller Price Comparison
The seller first needs to navigate to the left side menu ‘Global Products’ section.
Here it will show a list of all the products allowed by the admin to the sellers to add the products in their store with different prices and stock.
To add any product to their store, the seller simply needs to click on the ‘Sell’ button beside the product showing under the Global Products list.

The seller will now enter the Price, Quantity and set the Product status as Publish, and click on the ‘List at Your Store‘ button below.

After adding the product, the product will be visible on the seller’s store to the customers.
The seller can view all the products under the ‘Global Products’ section and also search for the products in the search box.
Seller can view or edit the details for the product from the ‘Global Products’ section. The seller needs to hover over the product and click on the ‘Edit’ option to update the details.

The seller can update the product price, product quantity, and product status and click on the ‘Update’ button to save the changes.

Seller can also remove the added product from selling over his store by clicking on the ‘Remove’ button beside the product in the Global Products list.

Customer Flow at Front-End
Now a buyer can see products under the Shop tab as shown in the image below:

On product the page a buyer can see all the available sellers of that product with different prices.

Further, the customer will add the products of the desired seller and price and click on the Add to Cart button for the respective product.
The selection will be done from the available Other Sellers list.
Customer Checkout
After that, the customer will navigate to the Cart page where the details of the products and their seller will be displayed as shown in the image below.
The customer can also update the product quantity here:

The customer will click on the Proceed to Checkout button. By this, the customer will navigate to the Checkout page to fill in the billing and order details.

Once the details are added the customer will click on the Place Order button to complete the order.
After that, the customer will navigate to the order details page where the seller’s name will also be visible as shown in the image below:

That’s all for the WordPress WooCommerce Marketplace Seller Price Comparison Plugin.
Still if you have any issues feel free to add a ticket and let us know your views to make the plugin better at webkul.uvdesk.com
Current Product Version - 1.2.0
Supported Framework Version - WordPress - 6.5.4, Woo-commerce: 8.9, WooCommerce Multi-Vendor Marketplace Lite: 1.1.1, WooCommerce Marketplace - 5.5.4

Be the first to comment.