WooCommerce WhatsApp OTP Login plugin helps the admin to allow their store users to log in and register at the store using the OTP received on their WhatsApp phone number.
The guest user can sign up as a customer using their WhatsApp number and create their account within the WooCommerce store.
The plugin also allows the admin to log in to the admin backend panel using the OTP received on their registered WhatsApp mobile number.
The admin can also configure the received OTP length on WhatsApp, the login, and register text message content.
Also, you can easily sell the product only to the verified customer in your store using the WooCommerce Customers Verification plugin.
Note:
- This plugin also works seamlessly and offers WhatsApp OTP login functionality for WordPress.
- We provide a production version of the plugin. If you want a development version then you can get it at an additional cost. Please contact [email protected] for it.
Features
- Admin can allow users to register and log in to the WooCommerce store through WhatsApp OTP authentication.
- WhatsApp OTP login feature is available for the WordPress as well.
- The admin can also login to their account through WhatsApp Mobile OTP.
- The store admin can also set the length of the received OTP.
- The admin can customize the Login and Registration text messages received on WhatsApp.
- The admin can enable/disable the mobile number edited feature.
- The customer can also change the WhatsApp mobile number after Login.
- This module is compatible with WooCommerce’s High-Performance Order Storage (HPOS) feature.
- This module is compatible with WooCommerce’s latest feature Cart and Checkout blocks.
Installation
The user will get a zip file that needs to be uploaded in the “Add New” menu option in the WordPress admin panel.

So, for this login to the WordPress Admin Panel, and in the Dashboard hover your mouse over the “Plugins” menu option and select the “Add New” option.
After this, the user will see an option on the top of the page, “Upload Plugin”, and click the option to upload the zip file.

On clicking the “Upload Plugin” option, the user will see a “Choose File” button. Thus, click on the button to browse for the zip file as per the image below.

After browsing the file, click on the “Install Now” button so as to install the plugin as per the snapshot.

Once the user installs the plugin, a message “Plugin installed successfully” displays and an “Activate Plugin” is visible to activate the plugin.
So, the user needs to click on the “Activate Plugin” button to activate the plugin.

Check how to activate your WooCommerce plugin through the purchase code.
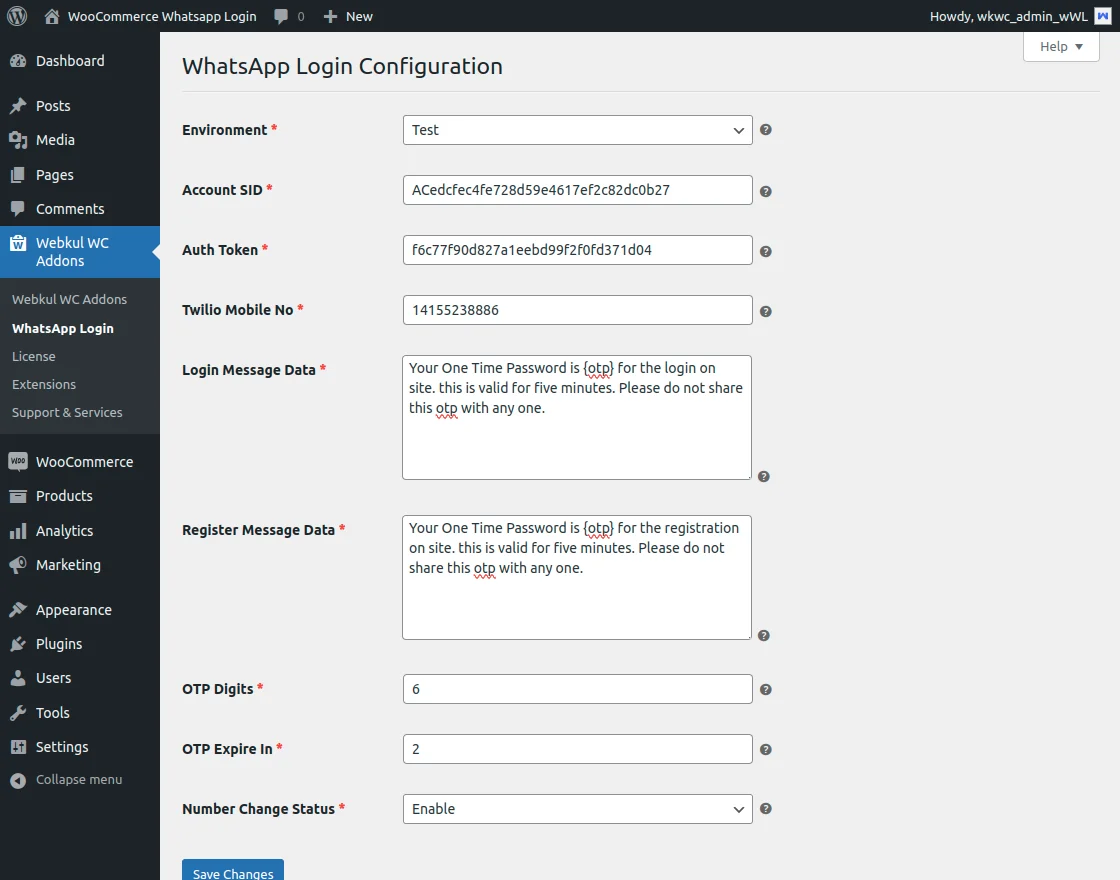
Test Environment – Module Configuration
- Account SID: Enter the Account SID provided by Twilio.
- Auth Token: Enter the Auth Token.
- Twilio Mobile No.: Enter the Mobile number.
- OTP Digits: Set the length of the OTP required.
- Login Message Data: Enter the text to show on mobile while receiving WhatsApp Login OTP.
- Register Message Data: Enter the text to show on mobile while receiving WhatsApp SignUp OTP.
- OTP Expire In: Enter the validity in minutes of the OTP.
- Number Change Status: Enable/Disable the Mobile number. change status.
Sign Up – Twilio Account
To initiate your Twilio account. Now, enter your name, and email address. Then set your password and click on the start your free trial button.

Therefore, as a result, a verification email is sent to your registered email ID.

Now, verify your email by clicking on the Confirm your Email link enclosed within the mail.

Further, you need to enter your Phone number and click on the Send verification Code button.

Now, enter the verification code received on the number provided by you, and then click on the submit button.

A pop-up will appear on your screen click on the Confirm button to activate your sandbox account as shown below.

Log in – Twilio Account
Moreover, if you already have a Twilio account, to log in enter your email ID and further click over the Continue button.

WhatsApp Configuration
To send and receive the messages from the Sandbox to the Application, the store admin needs to go to the following web page.
Note – To receive OTP on your WhatsApp you need to send join “Content visible in the Twilio Account” from your WhatsApp number to the Twilio number (+14155238886).
- Send a message to the Twilio number with the verification code to join.

You will receive a confirmation text on your device as shown below.

- Send a One-Way Message.
- Two-Way Messaging.

Live Environment – Module Configuration
The admin will:-
- Account SID: Enter the Account SID provided by Twilio.
- Auth Token: Enter the Auth Token.
- Twilio Mobile No.: Enter the Mobile number.
- Message Service ID: Enter the message SID.
- Login Template ID: Enter the Login TID.
- Register Template ID: Enter the Register TID.
- OTP Digits: Set the length of the OTP required.
- Login Message Data: Enter the text to show on mobile while receiving WhatsApp Login OTP.
- Register Message Data: Enter the text to show on mobile while receiving WhatsApp SignUp OTP.
- OTP Expire In: Enter the validity in minutes of the OTP.
- Number Change Status: Enable/Disable the Mobile number. change status.

After configuring the plugin, click the Save Changes button to save the configuration.
Message service Credentials
Firstly, the admin needs to log in to the Twilio account.
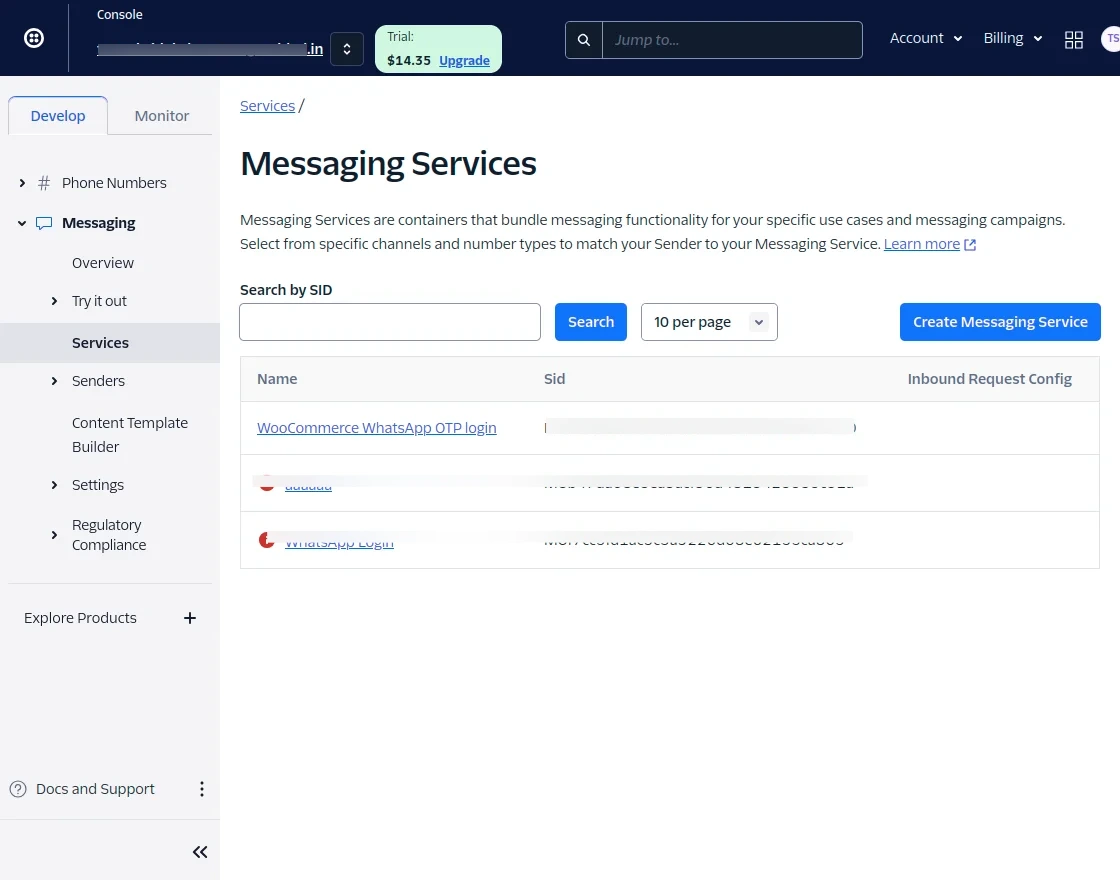
The admin will navigate to Messaging -> Services in the Twilio side panel.

In the Services dashboard, the admin will click on Create Messaging Services.

Then, the admin will enter the name for friendly messaging services.
After this, the admin will click on Create Messaging Services

In the next step, the admin will add Senders to Service by clicking on Add Senders.

Then, the admin will select the sender type as a phone number and click on Continue.

Next, the admin will select the phone number and confirm it.

Now, senders have been added and the admin assigns the sender to their service by clicking on add sender.

Next, the admin will move to the next step.

After configuring step 3, the admin will move toward the Next step: Add Compliance info.

Now, the admin will click on the Complete Messaging Service Setup.
Then, a popup notification of a successful update will appear.

Finally, the admin can see the Service ID and use it in the WooCommerce WhatsApp OTP plugin.
Login and Registered Template ID Credentials
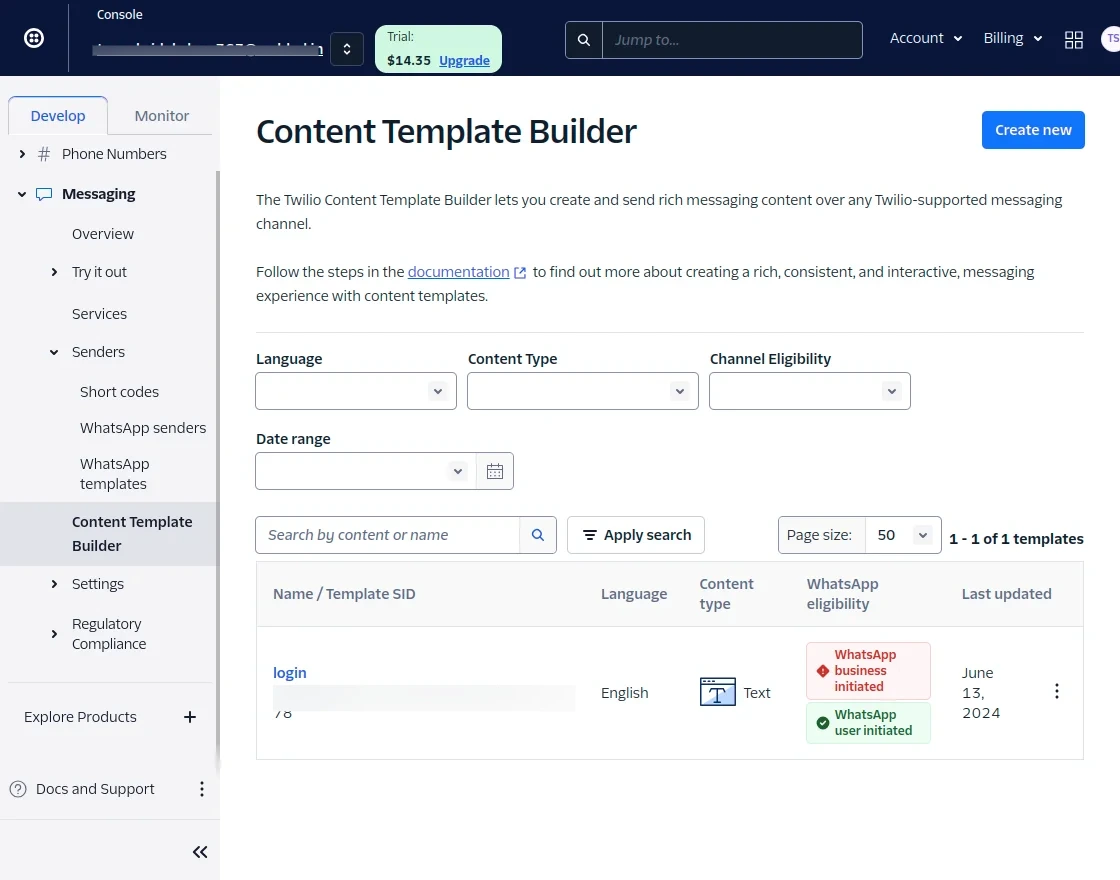
In the Twilio dashboard, the admin will navigate to Messaging -> Content Template Builder at the Twilio side panel.
Now, the admin will click on the Create New.
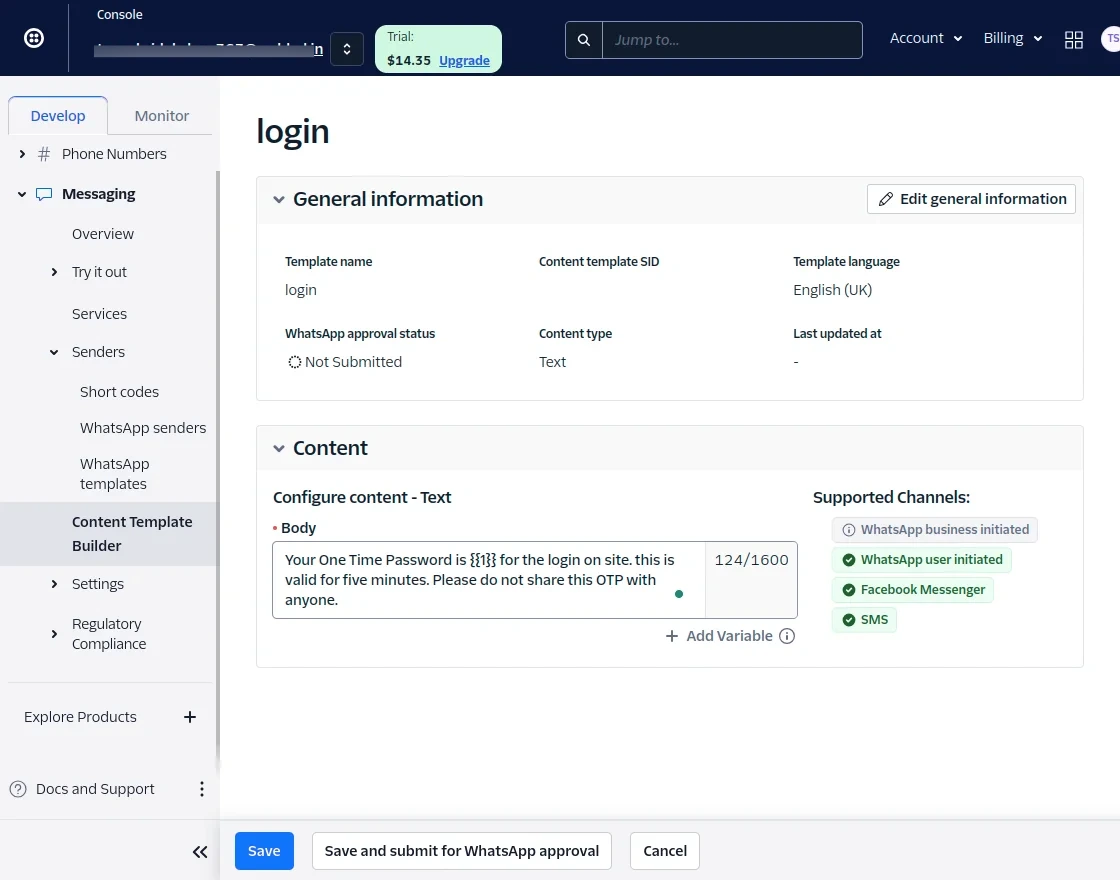
Then, the admin will add the template name and the template language.
Next, select the content type. Then, click on Create.

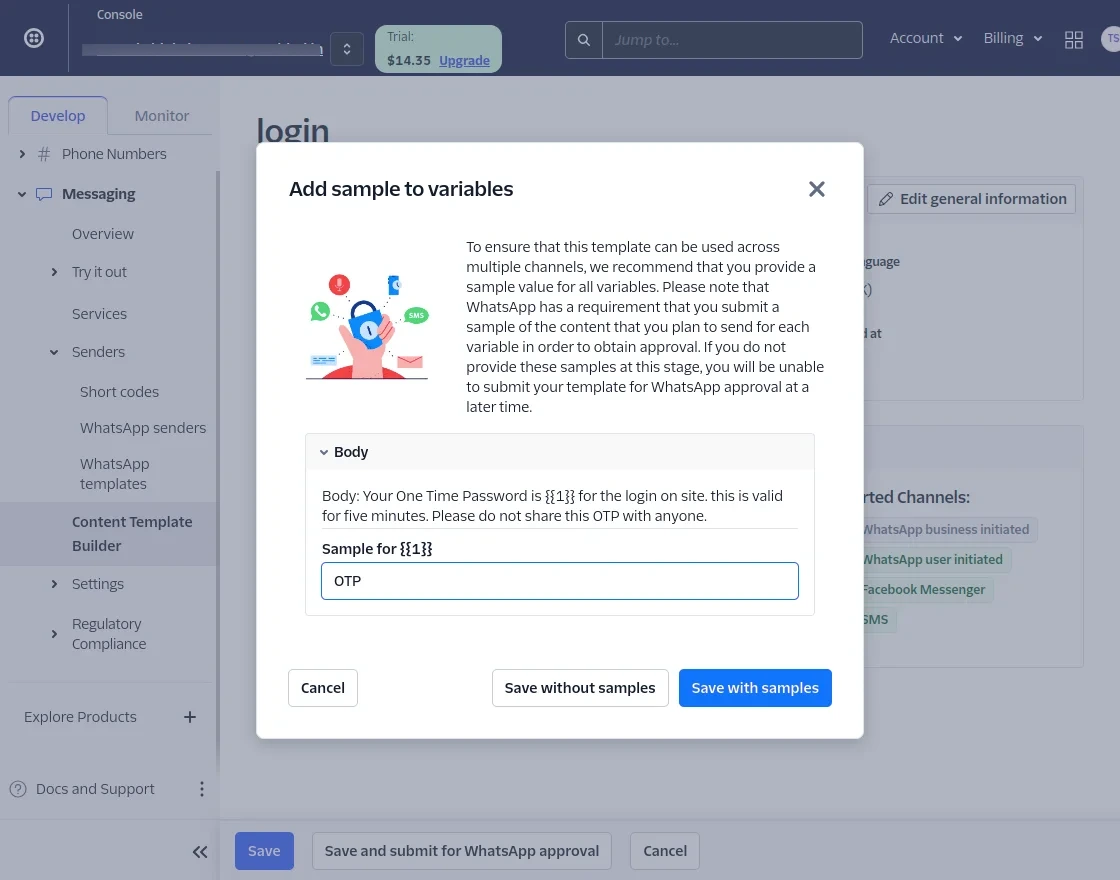
Then, add the content in the Content body section and write ” {{1}} “, where the OTP shows.
Example: “Your One Time Password is {{1}} for the login on site. this is valid for two minutes. Please do not share this OTP with anyone.”
Then, the admin will add sample text and click on save with samples.
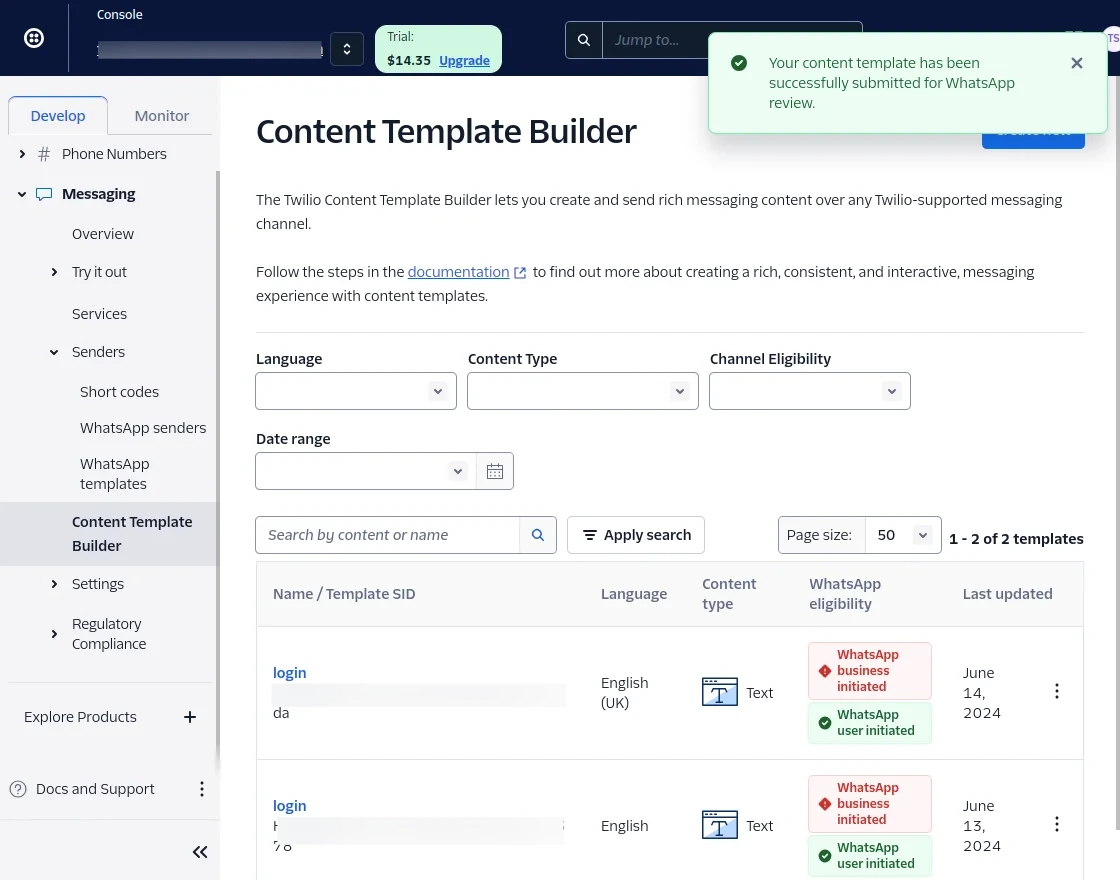
Then, submit it for WhatsApp review.
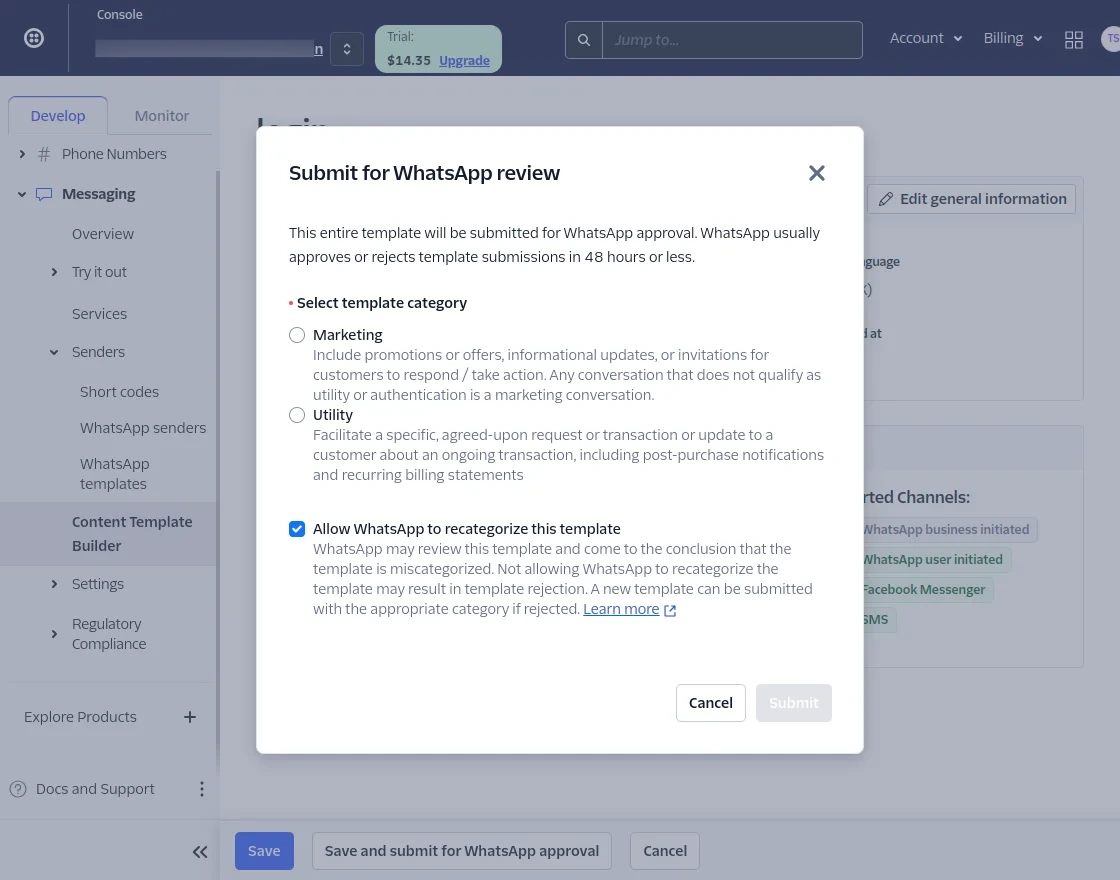
A pop will show the Successful message and the Login Template SID will be created.
Note: To create a Registered Template ID kindly follow the same process.
Example: “Your One Time Password is {{1}} for the registration on site. this is valid for two minutes. Please do not share this OTP with anyone.”
Note: After creating templates you need to submit the same for approval, once your template is approved then you will be able to send a message on live environment.
Admin Login
The WooCommerce WhatsApp OTP Login extension allows the admin to log in to the store admin panel using their existing WhatsApp mobile number.
On the backend login page, the store admin will click on the Login With Mobile OTP.

Now, the store admin will enter their registered WhatsApp mobile number.
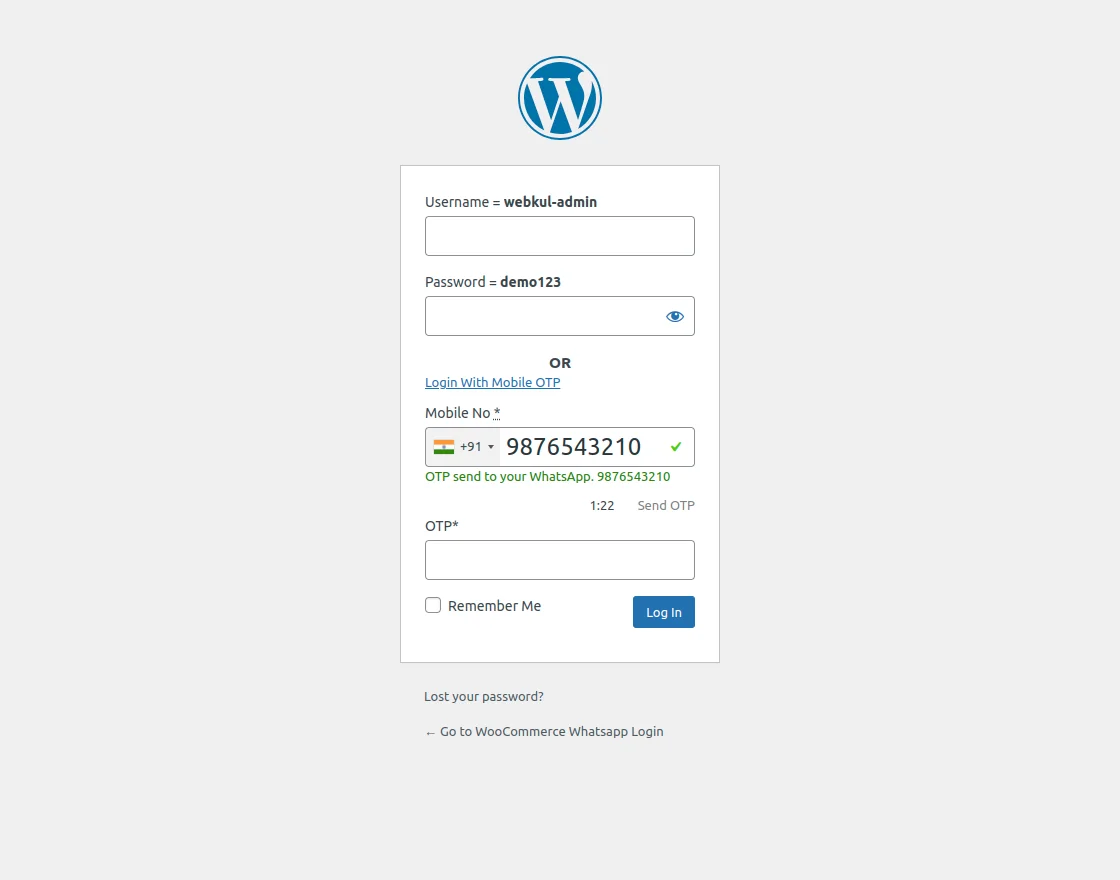
Then, enter the OTP received on the registered WhatsApp mobile number.
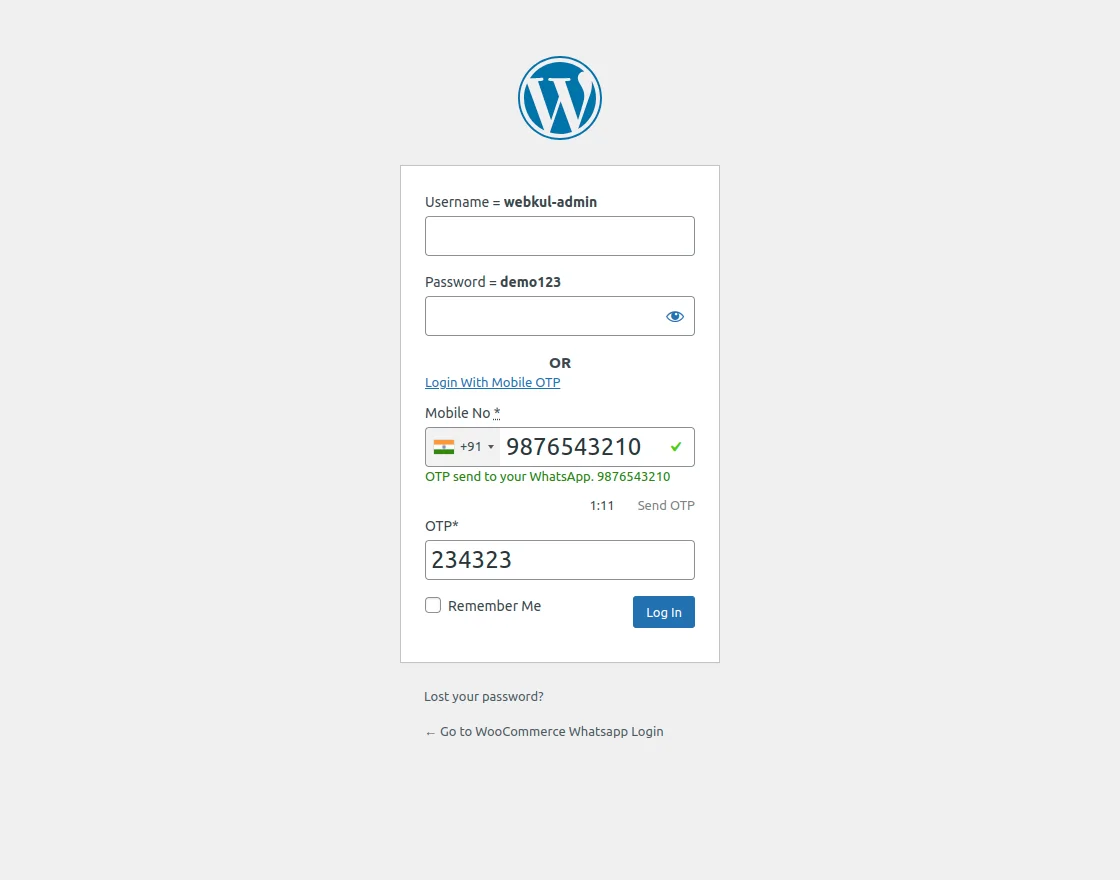
After clicking the Login Button, the store admin will successfully log in to the admin panel.
The admin will be authenticated and logged in using the OTP received on his registered WhatsApp number.
Users Registration – Workflow
The users can register on the WooCommerce Store using WhatsApp OTP Based Authentication.
To register on the store, the user will enter their email address and password.
Then the user will enter their existing WhatsApp mobile number.

Then click on the Sent OTP.

Enter the OTP received on their registered mobile number.

After entering the OTP, click on Register.

The user will be successfully registered on the WooCommerce store as a customer.
Customer Login – Workflow
The WooCommerce WhatsApp OTP Login plugin allows customers to log in to the WooCommerce store using their WhatsApp mobile number.
On the WooCommerce storefront log-in page, the customers will click on the Login With Mobile OTP.
Then, the customer will enter their existing WhatsApp mobile number.

Then click on the Sent OTP.
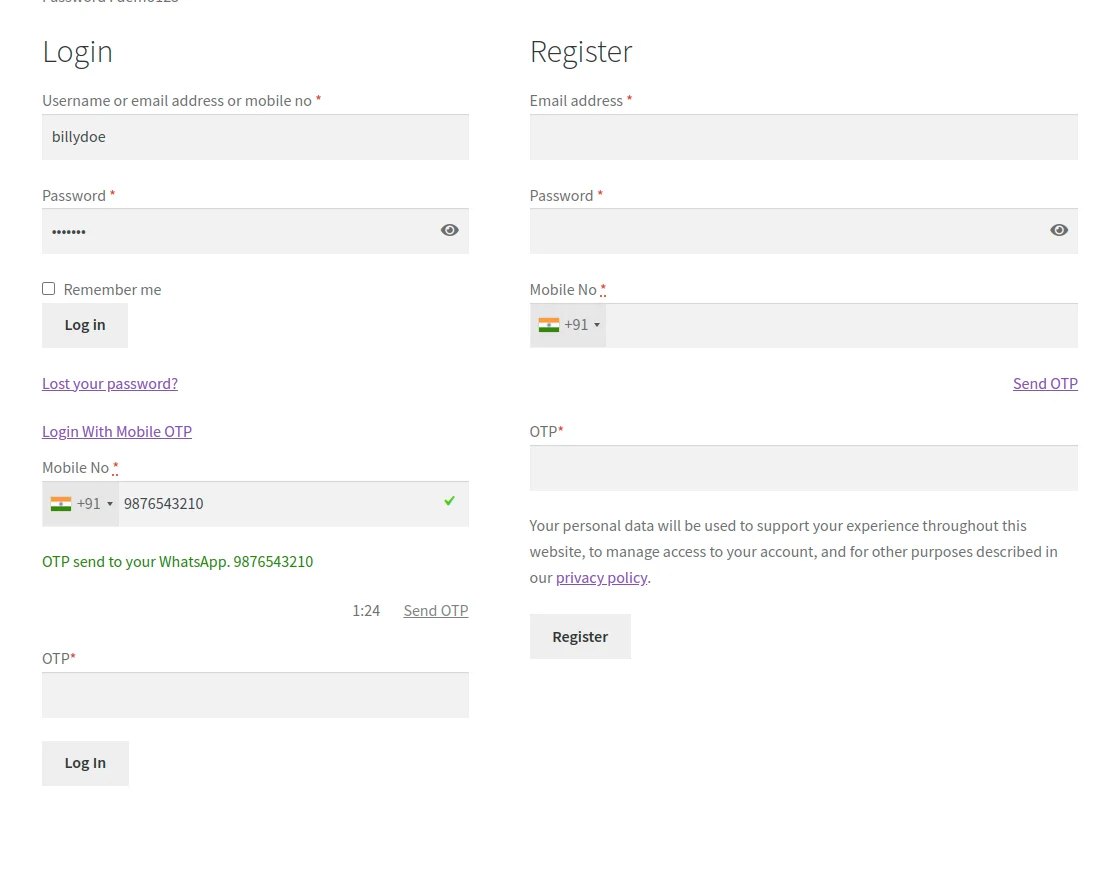
Enter the OTP received on their registered WhatsApp mobile number.

After entering the OTP, click on Log In.
Now the customer has successfully logged in to the WooCommerce Store and the account is created.
If you want to sign in to the Woocommerce eStore using social networks like Facebook, Twitter, Google, Github, and Microsoft, check the WordPress Social Login plugin.

Update WhatsApp Mobile Number.
The customers can also update their registered WhatsApp mobile number in the WooCommerce store.
For that, customers will navigate to Account -> Account Details.
Now, the customer clicks the edit button in the mobile number section.
Then, the customer will enter the updated WhatsApp mobile number.

After that, click on the Sent OTP.

Enter the OTP received on their updated mobile number and click on Save Changes.

The Customer’s WhatsApp mobile number has been updated successfully.
Support
So, that is all about the WooCommerce WhatsApp OTP Login extension. If you have any queries regarding the plugin, contact us at Webkul Support System.
Current Product Version - 1.0.0
Supported Framework Version - WordPress - 6.4.3 WooCommerce - 8.7.0

Be the first to comment.