WordPress WooCommerce Product RMA (Return Merchandise Authorization) allows you to organize a system for customers to request a return without any effort.
With the help of WooCommerce RMA Plugin, the customer can return the products, and have them replaced or refunded within the admin-specified time limit.
Notes
- WordPress WooCommerce Product RMA is compatible with multisite.
- This plugin is now compatible with WooCommerce’s latest High-Performance Order Storage (HPOS) and Cart and Checkout block.
- We provide a production version of the plugin. If you want a development version then you can get it at an additional cost. Please contact [email protected] for it.
- Check the overview for the plugin in the video mentioned below:
Support
Dear Customers, if you have a question/query, please raise a ticket at webkul.uvdesk.com. We will do our best to answer as quickly as it is possible.
Don’t give us a low rate without contacting support on the issue you’ve faced with. We are always happy to help you.
Features of Product RMA
- Using Product RMA, the customer can cancel/return/exchange the products.
- Admin can manage RMA status as well as reasons.
- The admin can set the order status for RMA.
- The admin can manage the return policy.
- The buyer and the admin both can communicate at the store end.
- The customer can upload images while requesting an RMA.
- Email notification of RMA for the admin and the customer as well.
- The customer can print RMA details and shipping labels easily.
- The guest user also can generate an RMA request.
- The customer can choose the resolution type.
- The admin can set per-product RMA time management.
- Provide shipping label upload option to Manage RMA page itself.
- Introduced mail notification for conversation.
- Supported multi-language feature, added .pot file for translation.
- Warranty option is displayed based on the admin selected order status.
Installation of Product RMA
The user will get a zip file, which he has to upload in the “Add New” menu option in the WordPress admin panel.
For this login to WordPress Admin Panel and Under the Dashboard hover your mouse over the “Plugins” menu option which brings out a Sub-Menu and then select the “Add New” option.

After that, you will see an option on the top of your page that is “Upload Plugin”, then click the option to upload the zip file.

By clicking on the “Upload Plugin” option, below that you will see a button “Choose File” Click on the button to browse for the zip file as per the snapshot below.

After browsing the file, click the “Install Now” button to install WooCommerce RMA Plugin as per the snapshot.
 Now, when the plugin is installed correctly, you will see the success message and an option to activate the plugin. Click on “Activate Plugin” to activate the installed plugin.

Update Permalink under “Settings > Permalinks” as “Post name” as in the below snapshot.

Module Translation
To learn how to translate the module, you can click here.
Module Activation
Check out how to Activate the WooCommerce Plugin through the purchase code and get updates on Webkul Modules directly on the Plugins page.
Configuration of Product RMA
After successful installation, the admin can configure WooCommerce Product RMA under “Webkul WC Addons > Configuration > General”.

General
Returned Status –Select the default status that will be assigned when a customer submits a return request for the first time.
Order Status – Select the order status where required to show the warrant request option.
Return Request Types – Choose the return request types in which cases the customer can select the return request while creating warranty requests.
Return Address – Enter the return address which will be the return address for the product after sending the shipping label to the customer.

Default Warranty
- Label – The warranty label will be visible as default on the product page.
- Type – Choose the default warranty type, it can be customized for each individual product(no warranty, included warranty or price base warranty).
- Length – Select the time limit of your warranty (limited or lifetime).
- Length Value – Enter the time limit in days, weeks, months and years.
- Hide Warranty Text – Check the box to hide the warranty details on the product, cart and checkout pages. It should only be visible to the admin and customers on the order page.
- Length Duration – Select the time limit in days, weeks, months and years.
After doing all the above-mentioned changes, save the settings.

Frontend
Request Button Label – Set the button text for requesting a warranty from the customer’s “my order” page.
Request Menu title – Set the menu title text that will be displayed on warranty requests on the customer’s “my account” page.
Per Page Request Number – Enter the number of requests that can be displayed on a page in the “Customer My Account” requests menu.
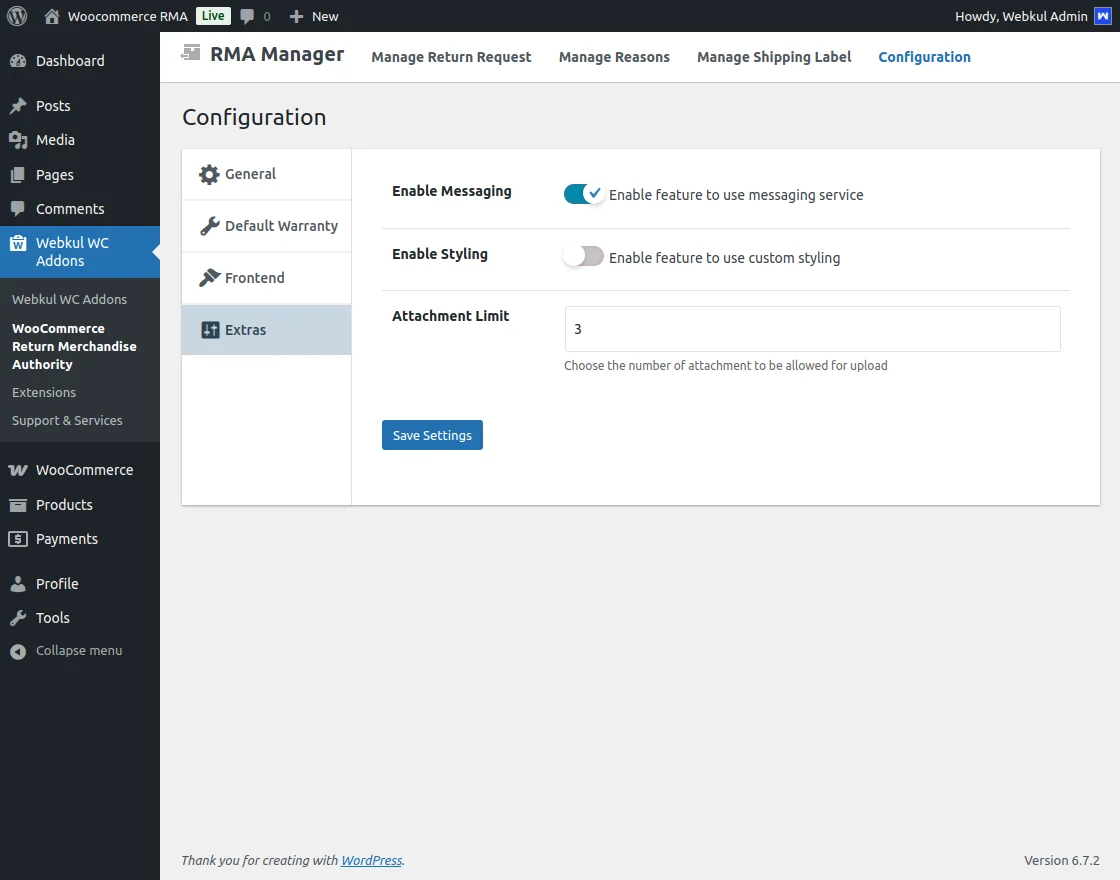
Extras
Enable Messaging: Enable or disable the messaging service for RMA.
Enable Styling: Adjusts the visual design of the RMA pages to maintain consistency with your store’s theme and overall layout.
When enabled, this option modifies the appearance of RMA pages, such as the ‘Manage Return Request’ page (shown below).
This ensures a consistent design across the customer journey.
Attachment Limit: Specify the maximum number of attachments allowed for upload.
Atlast, save the settings.
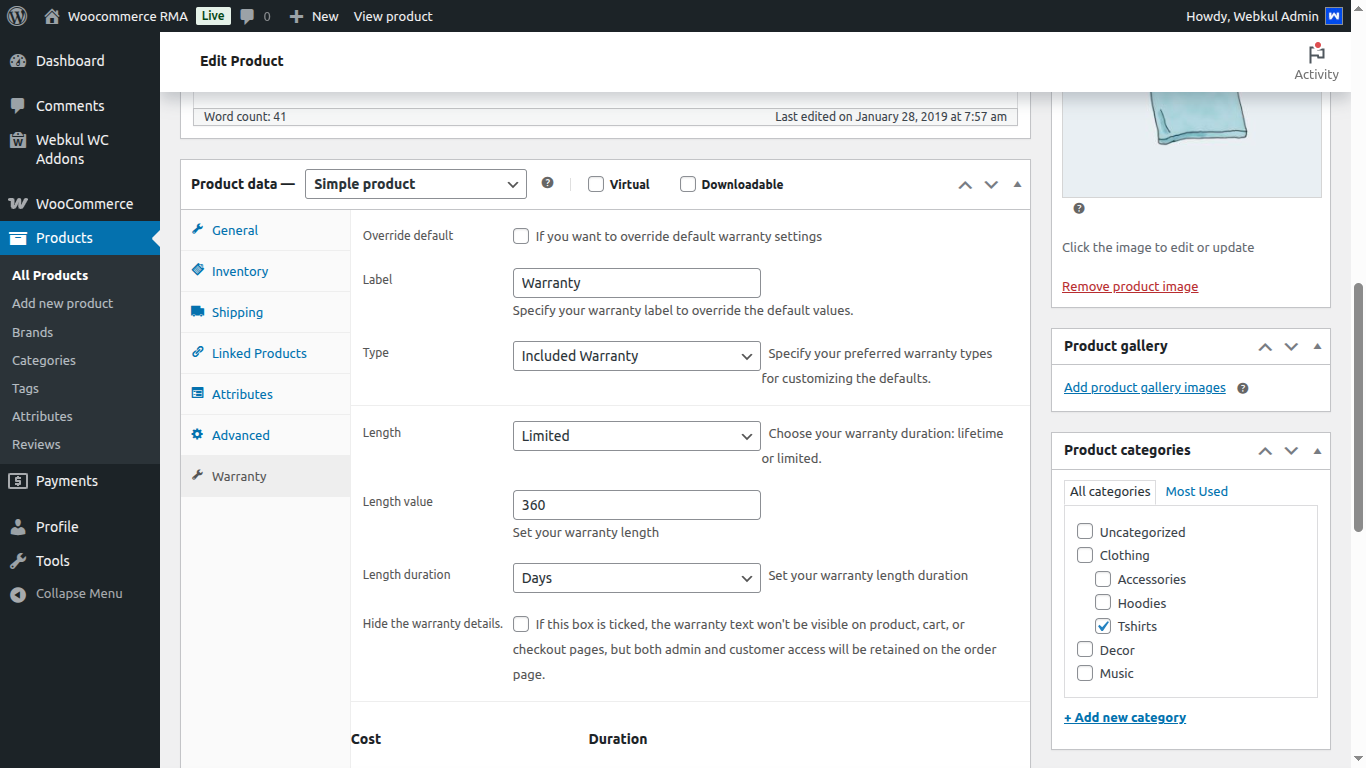
Per-Product RMA Time Management
The admin can configure RMA settings such as label, type, length, length value, and duration for each product.
Manage Shipping Label
The admin can add Shipping Labels under “Webkul WC Addons > Manage Shipping label”. Here admin uploads the shipping labels to use while processing RMA.

Manage Reasons
The admin can create RMA reasons under “Webkul WC Addons > Manage Reasons”. All the created reasons will be listed here.

After that the admin can add a new reason under “Webkul WC Addons > Manage Reasons > Add Reason”.

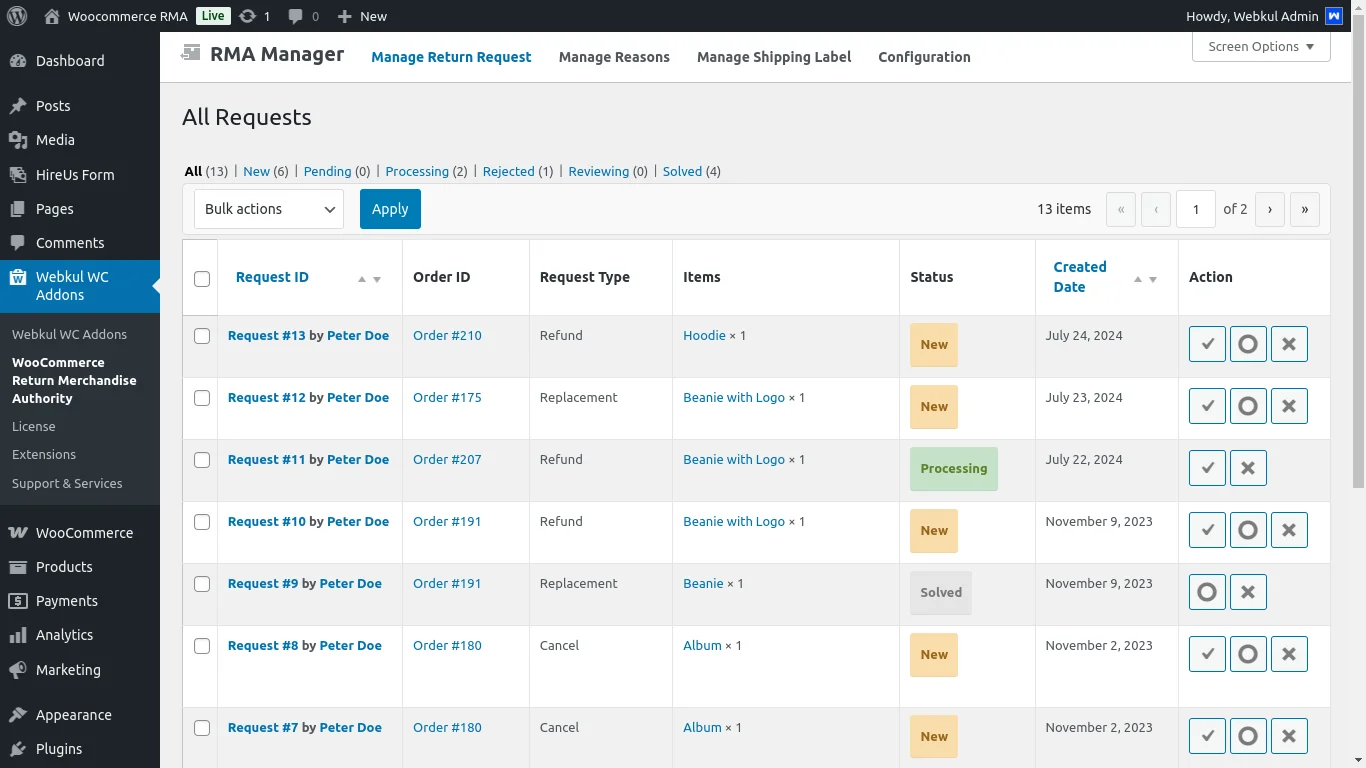
Manage Return Request
The admin/store owner can manage RMA under “Webkul WC Addons > Manage Receive Request”. The list of all the requested RMA will be available here.

Then, by clicking “View” the admin can manage an RMA. All the RMA information will be visible under “RMA Details”.

Under “Conversation” the admin can check the conversation with the customer and reply to the customer as well.
There is an option available “Enable notification mail for any reply on this thread”, then admin can use the same to get an email notification if there is any response from the customer.

After that, the admin can manage the status of the RMA under “Action.”. Then choose the status as Solved, Processing, or Rejected.

Note: Users may regenerate the RMA if it has been declined by the agent.
By clicking on “Refund,” the admin can check the refund details.

Here, the admin can choose the custom fields or add new custom fields, then proceed with the Refund part.

Front End Workflow of Product RMA
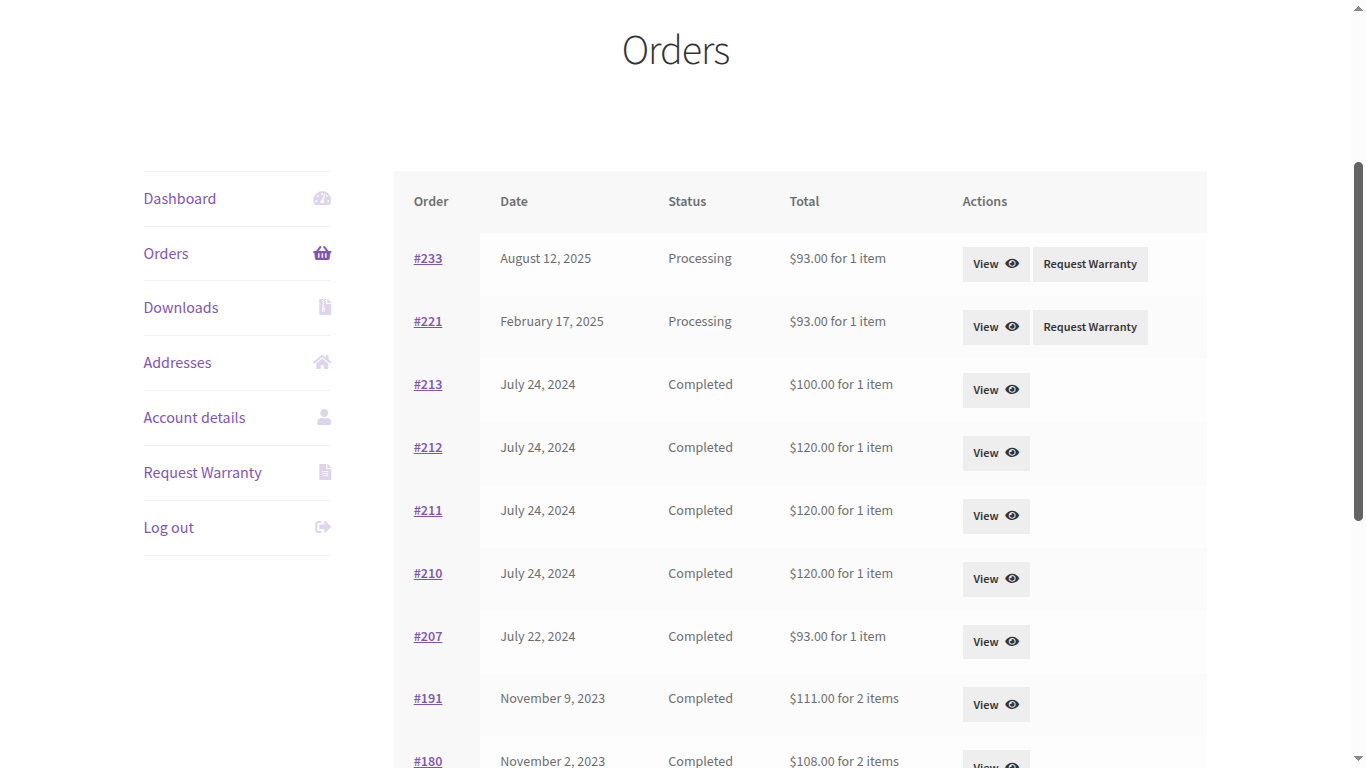
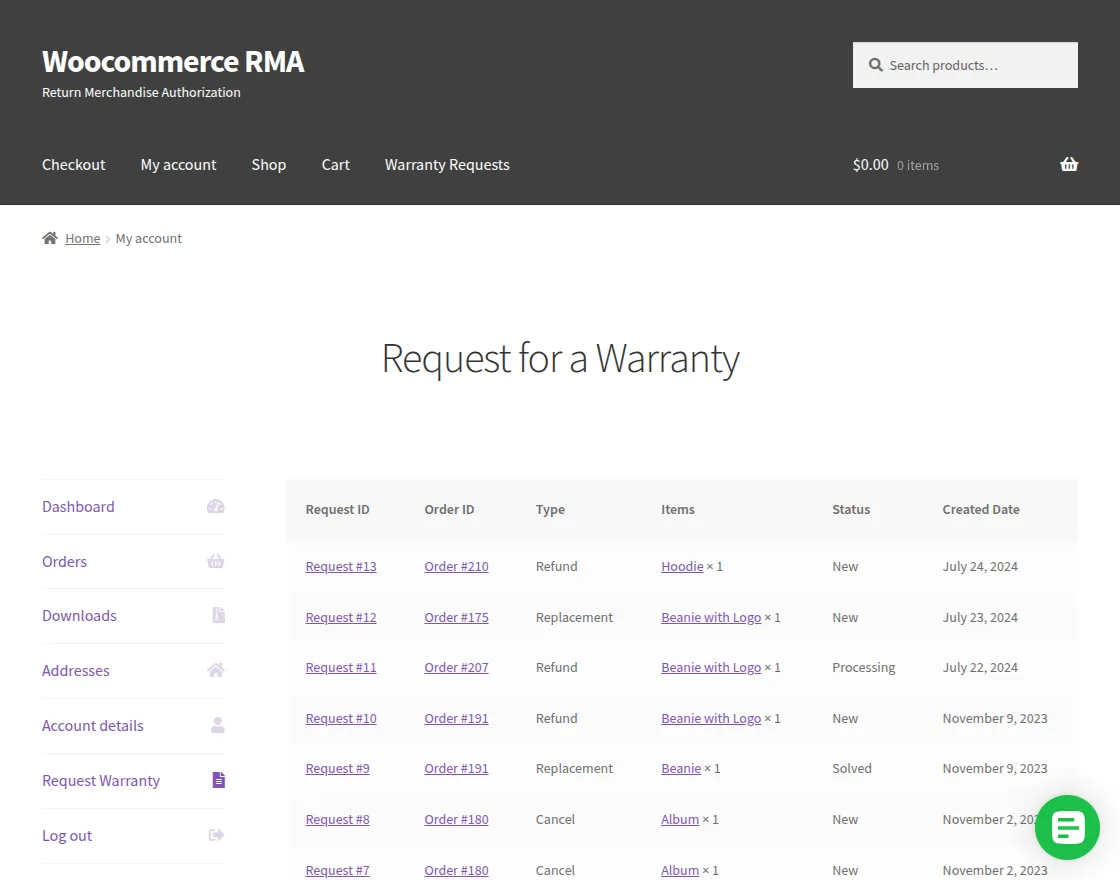
The customer can raise an RMA request by navigating to My Account > Orders and selecting Request Warranty for the specific order.

A list of all the RMAs created can be viewed under “Warranty Request”.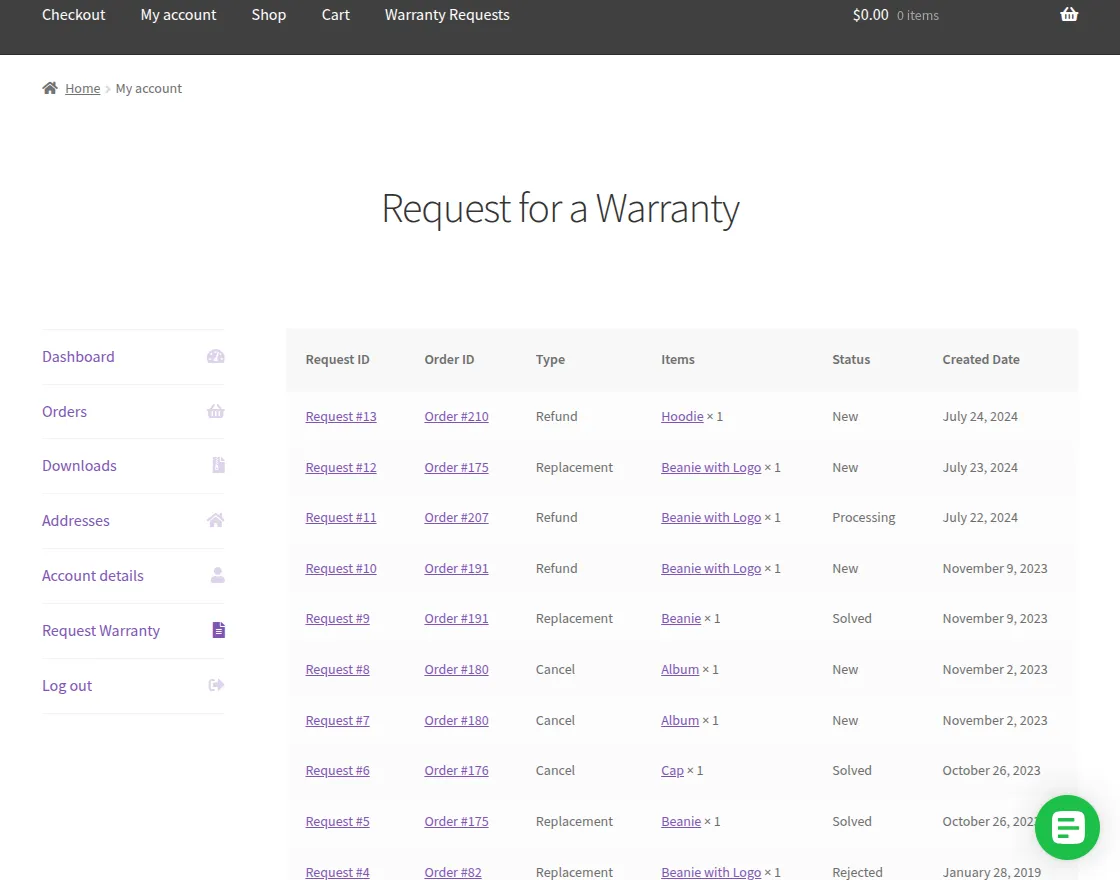 Then by Clicking the “Request ID” the customer can view the details of the RMA and can send the message to the admin as well.
There is an option available “Enable notification mail for any reply on this thread”, the customer can use the same to get an email notification if there is any response from the admin.

After that the customer can check the product details, including price, quantity, reason, and expiry date under the “Products” option.

Then here, the customer can check the RMA images and video by clicking on the “RMA Images” option.

In the event that the customer’s problem is solved, they can check the box to mark it as solved under the Manage option.

By clicking on “Order ID” the customer can check the order details that they have placed.
Here, the customer can view order details like product name, total amount, shipping method, payment method, billing address and shipping address as well.
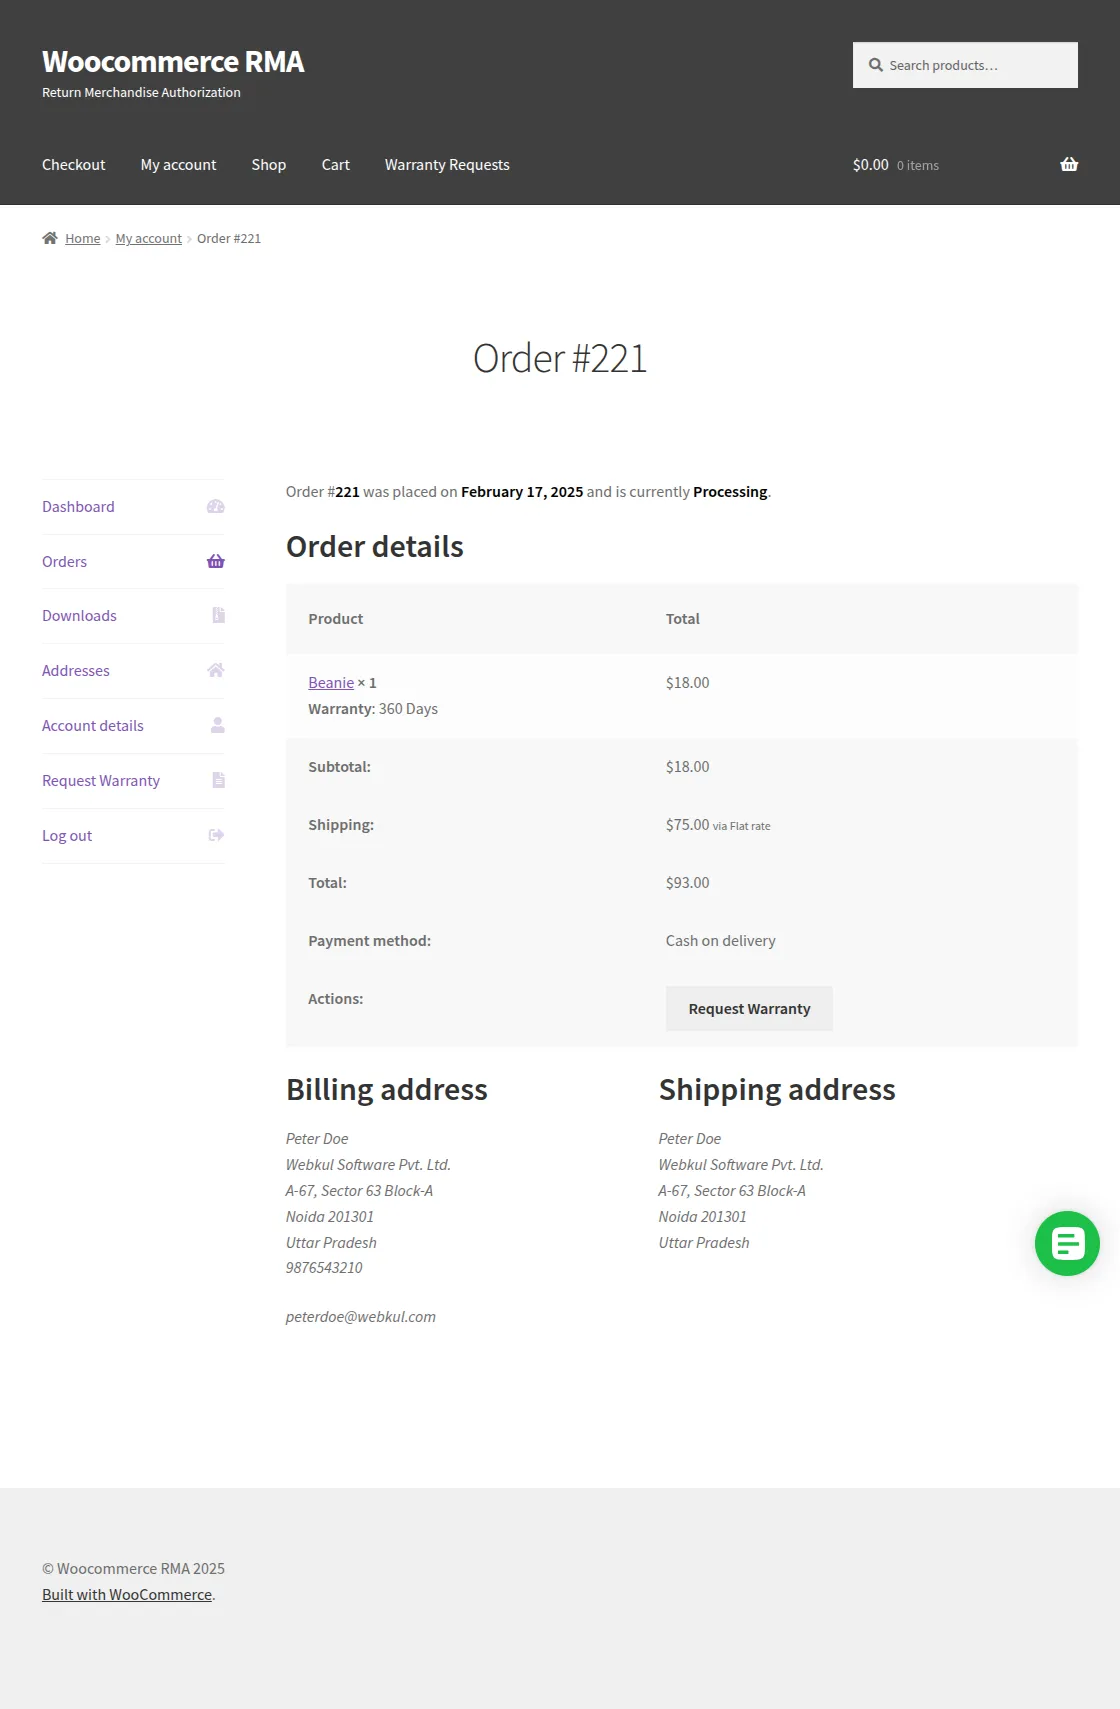
Then, by clicking on the “Items” option, the customer can view the product ordered, and its details, including the description and product specification, as mentioned in the snapshot below:
![]()
If the customer purchases the product as a guest user and wants to generate RMA, then by clicking “Warranty Requests,” he can provide details and proceed further.

Here, the user provides “Order ID” and an “Email” to verify the purchase. The rest of the workflow will be the same as for a normal customer.
That’s all for the WordPress WooCommerce RMA extension, still, have any issue, feel free to add a ticket and let us know your views to make the plugin better at [email protected]
Current Product Version - 2.3.1
Supported Framework Version - Wordpress - 6.8.2, WooCommerce - 10.1.2

13 comments
We have created a ticket on your behalf and our team will connect with you soon regarding your queries.
Thanks and Regards,
Team Webkul
A Product is enabled rma webkul after ordering the product. How can I enable rma for that order.
Dear Prasobh,
Yes, it will work. We request you to kindly look into the plugin user guide to know more about the plugin.
In case of any query feel free to revert us at [email protected].
Thanks,
Team Webkul
Is this plugin also provide REST API Integration, If yes then what would be the endpoint should use.
Please let me know ASAP.
Greetings for the day!
Currently, this plugin doesn’t provide REST API Integration. Further, if you have any other specific requirements then please email us at [email protected] and we will assist you accordingly.
Thank you
Yesterday I bought your plugin ‘WordPress WooCommerce Product RMA’ @ Envato Market. But plugin can’t be installed. WordPress says;
The package cannot be installed. No valid plugins were found.
Plugin installation failed.
I already contact Envato. But i think you guys can help me better?
Can someone help me?
Thanks!
Great content, You have summed up all the points very efficiently. Thank you for sharing your views as it was quite helpful.
Thanks
Thanks! We will work on the continuous update of the guide as per the updates in our plugin so the users will get the latest updates.
Thanks for the information you shared, it was really helpful.
I am a web developer and I have clients who are using WooCommerce for their online store. I have installed WooCommerce RMA for Return Refund & Exchange on that website and it works like a charm for him.
It’s just a recommendation.
Thanks for the recommendation.
In RMA can we dufine our own resolution like “ refund to customer wallet if we are using wallet (terawallet) ?
Yes, you can customize the module as per your requirements. If you want us to implement the required changes then this will require extra efforts from our end.
Thanks & Regards,
Webkul Team