WooCommerce POS Stripe Reader M2 Integration plugin allows POS user to take card payment using stripe terminal.
POS user can swap/insert/tap the card on the stripe terminal machine and take the payment from customer’s debit/credit card.
Note:
- This module is compatible with WooCommerce’s new High-Performance Order Storage (HPOS) feature.
- This is compatible with WooCommerce’s latest Cart and Checkout blocks.
- To use this plugin, you must first install the Point of Sale System for WooCommerce.
- For the Android version, the module will be delivered immediately after purchase, including the Android build.
- For iOS, we need the Apple Developer account details in order to generate and share the app link with the client.
- Once you’ve purchased, we’ll provide the iOS build. For an iOS demo, kindly contact support at [email protected].
- We provide a production version of the plugin. If you need a development version, it can be provided at an additional cost. Please contact [email protected] for further details.
Features of WooCommerce POS Stripe Reader M2 Integration
- Admin can set the default reader for the posuser.
- The store manager can take payment through the cards.
- The POS agents can make a default payment gateway as a stripe.
- Admin can allow simulators for test payments via stripe.
- Support for almost all kinds of cards including Visa, Mastercard, American Express & Discover.
- Multiple stripe reader connection.
- WooCommerce POS Stripe Reader M2 Integration is not multisite compatible.
Installation
The user will get a zip file for the WooCommerce POS Stripe Reader M2 Integration plugin that needs to be uploaded in the “Add New” menu option in the WordPress admin panel.

For this login to WordPress Admin Panel and in the Dashboard hover your mouse over the “Plugins” menu option and select the “Add New” option.
After this, the user will see an option on the top of the page that is “Upload Plugin”, click the option to upload the zip file.

On clicking the “Upload Plugin” option, the user will see a “Choose File” button. Click on the button to browse for the zip file as per the image below.
After browsing the file, click on the “Install Now” button so as to install the plugin as per the snapshot.

Once the user installs the plugin, a message “Plugin installed successfully” displays, and an “Activate Plugin” is visible to activate the plugin.
Therefore, the user can click on the “Activate Plugin” button to activate the plugin.
Activate Woocommerce plugin and get updates
Note: Checkout how to Activate WooCommerce Plugin through the purchase code and get updates on Webkul Modules directly on the Plugins page
Module Translation
You can check more about Woocommerce Plugin Transalation.
How to get the API keys – For Configuration
To use this module, you must have an active Stripe account. To register with Stripe:

Go to the Stripe Dashboard and Enter the Login Credentials.

Complete the registration process.
After logging into your account, navigate to Developers > API Keys.

Copy the Publishable Key and Secret Key and configure them in the admin backend under Stripe Payment . As you can see we have already linked a reader as shown in image below.

To set location click on register reader.

Register your reader following the registration code displayed on the reader.To set location enter the details for setting the location of the reader.

After location is assigned, it will be displayed on the layout page of your reader in terminal settings.
Admin Configurations of WooCommerce POS Stripe Reader M2 Integration
Once the installation is complete, the admin will go ahead and set up the WooCommerce POS stripe Reader M2 Integration Plugin by going to WooCommerce > Settings > Payments.
Further, the admin will enable WooCommerce POS stripe Reader to receive the payment using this particular payment method.
Meanwhile, the user will click on the Manage button to configure the module.

After that, admin can enter necessary details for configuring the WooCommerce POS stripe Reader Plugin.

- Enable/Disable: The admin can enable or disable the Stripe Reader gateway.
- Default Gateway: Choose Stripe as the default payment method for POS transactions.
- Title: Add a custom title for the Stripe payment method (visible at checkout).
- Description: Add a description that will be displayed during the POS checkout process.
- Test Mode: Enable or disable test payments for Stripe.

Enter the Publishable Key and Secret Key you received from Stripe into the appropriate fields.
Once configured, click Save changes to activate Stripe as a payment gateway in your store.
Node Server Configuration
Admin can configure the Node Server Settings for server connection.
Payment Configurations
The admin can configure payment method settings by navigating to Point of Sale’s Settings > Payment.
Afterward, the admin can view the list of available payment methods and enable or disable them as needed.

Now, the admin can edit the payment method. By default, this option becomes available once the admin activates the plugin.

After that payment configuration, the admin can assign the payment gateway to the POS outlet by navigating to the POS > Outlet.

After that admin can edit the POS outlet and select the payment method.
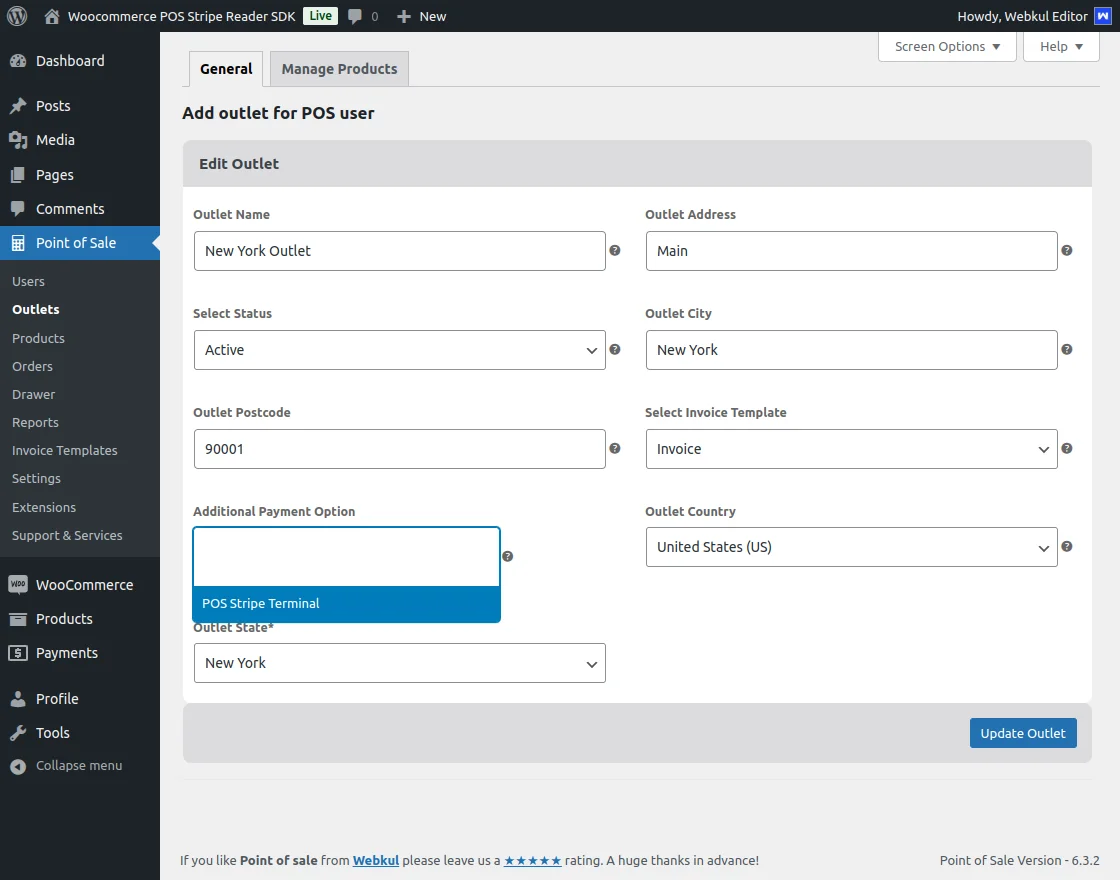
Admin can select the payment method, then it will be available in the POS outlet.

Workflow of WooCommerce Pos Stripe Reader M2 Integration
After the admin configuration, POS users can log in directly from the POS terminal.
Note: Before checking the Pos configurations ensure that Node Server is running.

When the Stripe server is not connected, the Stripe payment gateway symbol will appear as “No Reader Found” on the POS as per the below image :

The POS user can now open the Stripe Reader Terminal, log in to their Stripe account through the application, and connect it to the POS terminal.
Connect with POS
The POS user can connect to the WooCommerce POS server through the app by entering the website URL, User Name, and password.
Connect with Pos
The POS user can connect to the WooCommerce POS server through the app by entering the website URL, User Name, and password.

Once connected, Stripe will display confirmation “Device Connected ” and “Ready to accept the payment “in the application.
Device Connected
The Pos stripe Payment terminal is connected to the POS store. Now, the application can proceed with the payment procedure.
Device Connected
The pos stripe Payment terminal is connected to the POS store. Now, the application can proceed with the payment procedure.

Once connected, stripe will confirm that the application is successfully linked by changing the symbol to connected with reader pop up.

After that, the POS user can select the customer’s product and add it to the cart.
Next, the POS user can proceed to the checkout page. Then select POS Stripe Terminal as the payment method for the customer’s product purchase.

Now, Pos user will login to stripe device to complete the payment process through stripe card payment gateway. The Device opens with stripe Homepage.

Pos user need to tap or Insert the card to complete remaining amount to pay.

After Inserting card or tapping it the payment processes and as soon as the amount is deducted it processes the payment and after it status is set to complete as shown after this image.

The payment is Approved and Completed from the desired card and device.Status for the payment of the product is confirmed by the device and approved.

Here’s how Payment process in IOS device is directed:
- IOS device directs POS user to complete the payment from Pos device (insert or Tap Card to card machine device)
- Once the Payement Process is completed by device the IOS device Payment is also approved and redirected to POS panel to generate invoice.


Once the Payment is confirmed by device the IOS Device redirects the details along with confirmation of Order payment to POS panel after it pos generates Invoices of the product as shown below.

You can track you orders from sale history related to whether order is completed or cancelled etc.

Support
For any technical assistance kindly raise a ticket or reach us by email at [email protected].
If you have any queries or custom development need, you can connect with our WooCommerce POS Development Services.
Also, you can explore various solutions to add more features and enhance your online store by visiting the WooCommerce plugins.
Current Product Version - 1.0.0
Supported Framework Version - Wordpress - 6.7, Woocommerce - 9.5, WooCommerce point of sale - 6.2.1

Be the first to comment.