The ONDC Connector for Shopify helps you connect your Shopify store to the ONDC network through Ecomviser, which works as a Seller App in ONDC.
With this, you can easily manage your orders, products, and all related operations in one place on ONDC and reach more customers while managing everything from your Shopify store.
If you want to connect your Shopify store to the ONDC network, you can check out the ONDC Connector App by Webkul.
With the help of this app, you can provide your sellers the flexibility to make their products visible on the ONDC network, expanding their reach and boosting their sales opportunities.
How to configure ONDC Connector for shopify?
So the very first, you need to install the application from the Shopify app store.
After successfully installation, you need to open the application from the Shopify store >> App > ONDC Connector app.

While configuring the application if you select the admin as a merchant type then it will be working as the existing functionality or you can say that it will be working with multiple stores only.

But if you selected the seller as the merchant type then you can simply sync your products to the store where the Multivendor Marketplace app for Shopify by Webkul is installed.
NOTE: The process of selecting the merchant type is irreversible.
How to add merchants in ONDC Connector for shopify?
To add the merchant you need to click on the add merchant button.

Select store type as ONDC Merchant Store and then validate it.


Are you currently an existing seller of this merchant?
Here you need to select yes if you are already a seller on the store that has a multi-vendor marketplace app by Webkul.
Enter your Multivendor Login Credentials
Email :[Enter your Multivendor email address]
>>>Here you need to enter your registered seller email.
Password :[Enter your Password]
>>>Here you need to enter the login password.

But if you are not a seller in that store then select NO.
Please provide the necessary information to create a new seller
Please enter the Seller’s name (your name)
>>>Here you need to enter your name which will be visible in the Multivendor Marketplace App.

How to complete the ONDC Onboarding process
To complete the ONDC process, click on the button “Click here”, then login to the dashboard and fill in the process details given in the images below.
Refer to the screenshots below:


After login, the Onboarding process starts, fill in the required details .
You have to Select the Product type and then click on Save and next button .
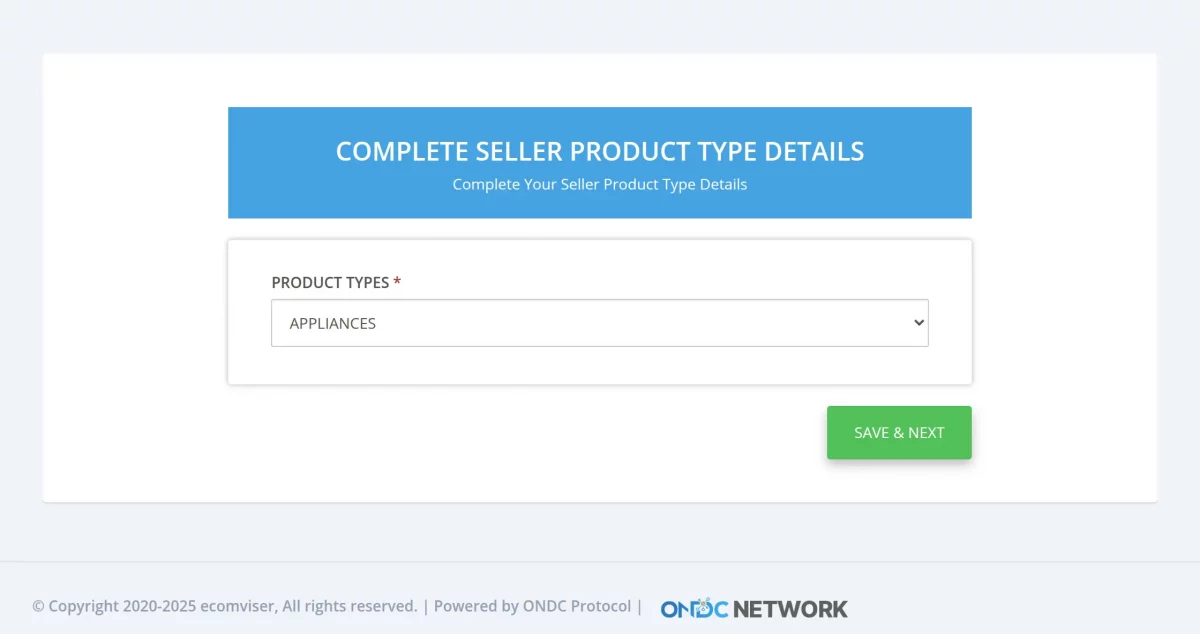
Please select one of the following product categories to proceed to the next step:
Food & Beverages, Grocery, Fashion, Electronics & Appliances, Home & Kitchen, Beauty & Personal Care, or Health & Wellness.
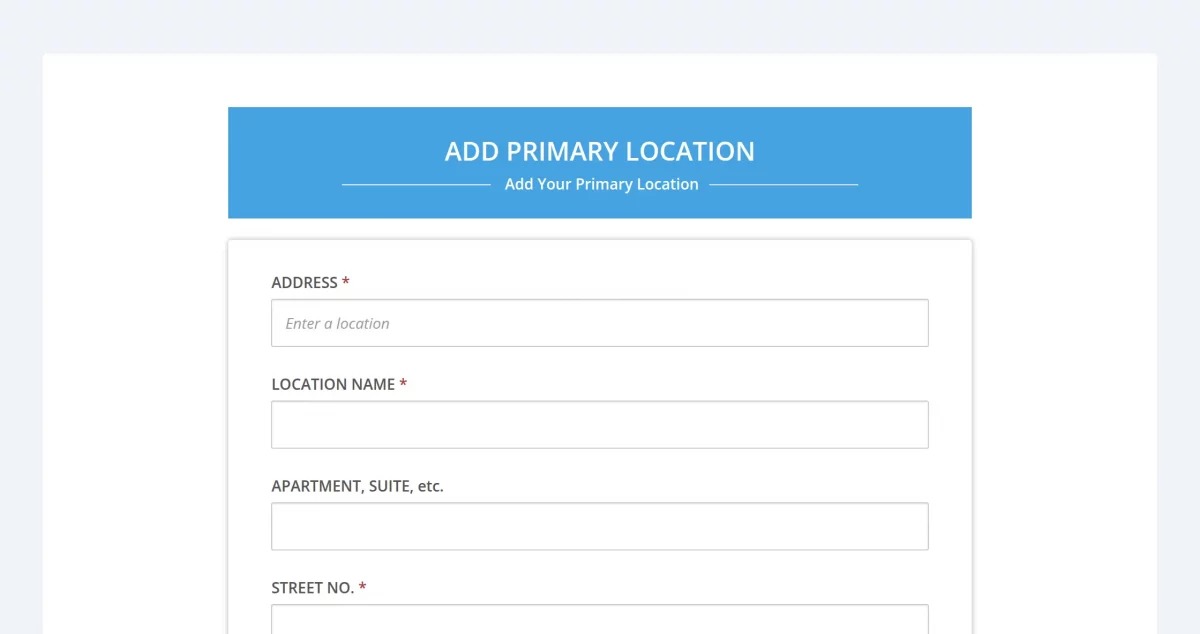
After this you have to add the primary Location details and then proceed to the next step .
Once it’s done you have to complete the KYC Verification

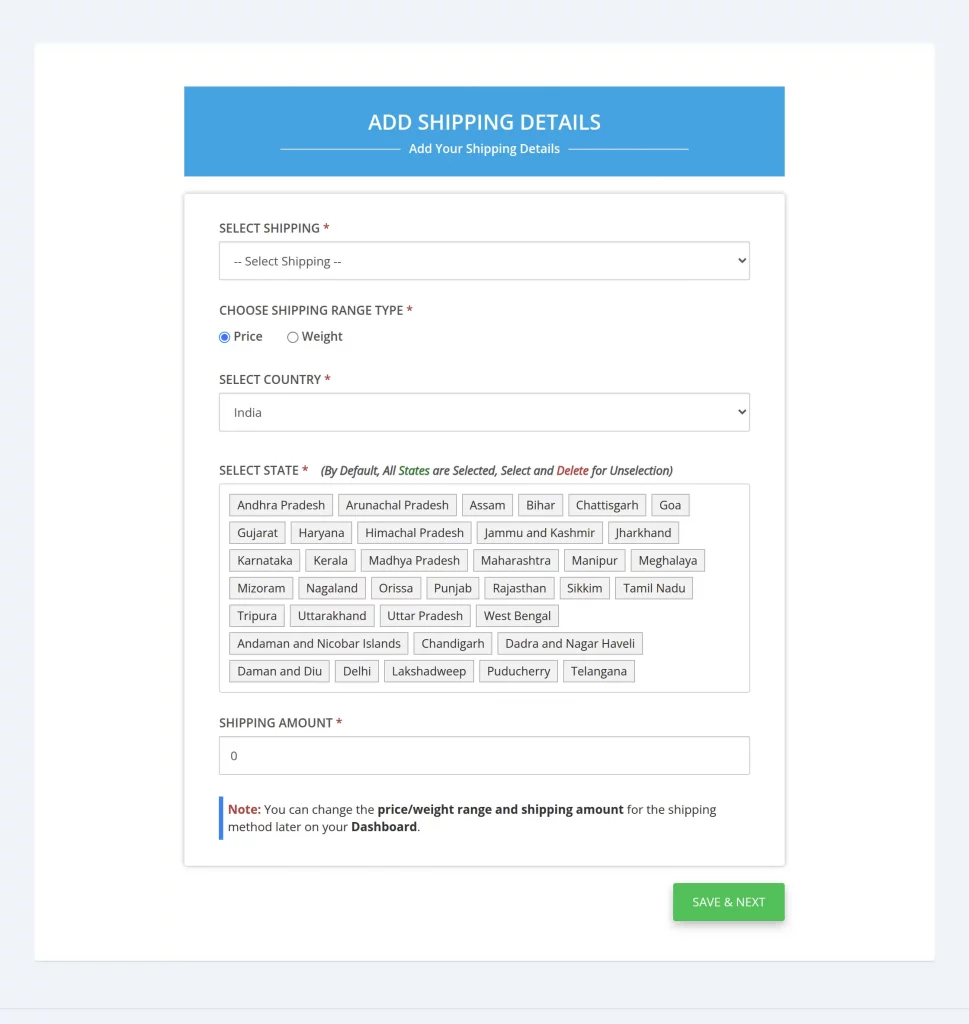
Once the KYC is done you have to enter the Shipping details .
Select the default payment method- Internet Baking,

Fill required bank details,

Enable the hyperlocal status tab, to select the delivery distance according to your seller.

Complete time slot details.

Then select your E-commerce platform.


After completing the process the onboarding status will be changed as completed. Then the admin will be performing the actions of import products.

Mapping Product Types
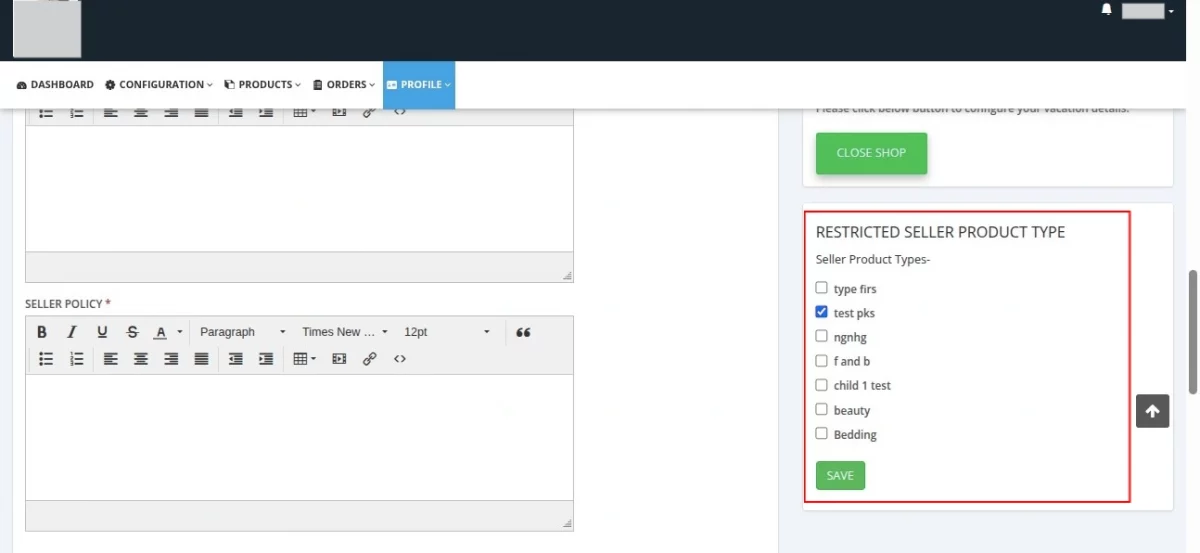
As a seller, you can select one or more product types that you want to include in your store.
To do this, simply go to Profile >> My Account, scroll down, and find the Restricted Seller Product Type option. From here, select the product types you want and save the changes.
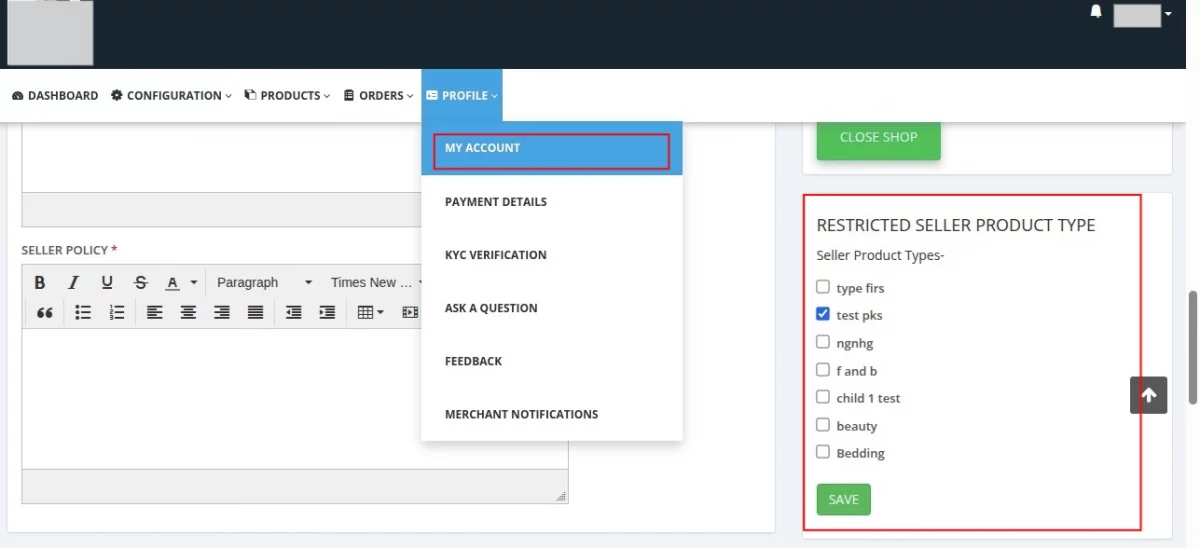
It is important to ensure that whenever you add products, the product type matches exactly with the ones you selected during the initial configuration.
To map the product type correctly, follow these steps:
- Log in to your Shopify store.
- Go to Apps and open ONDC Connector.
- Click on the three dots under the “Action” column.
- Select MVM Dashboard.
- Navigate to Configuration → Seller Sync App Configuration → Type Mapping.
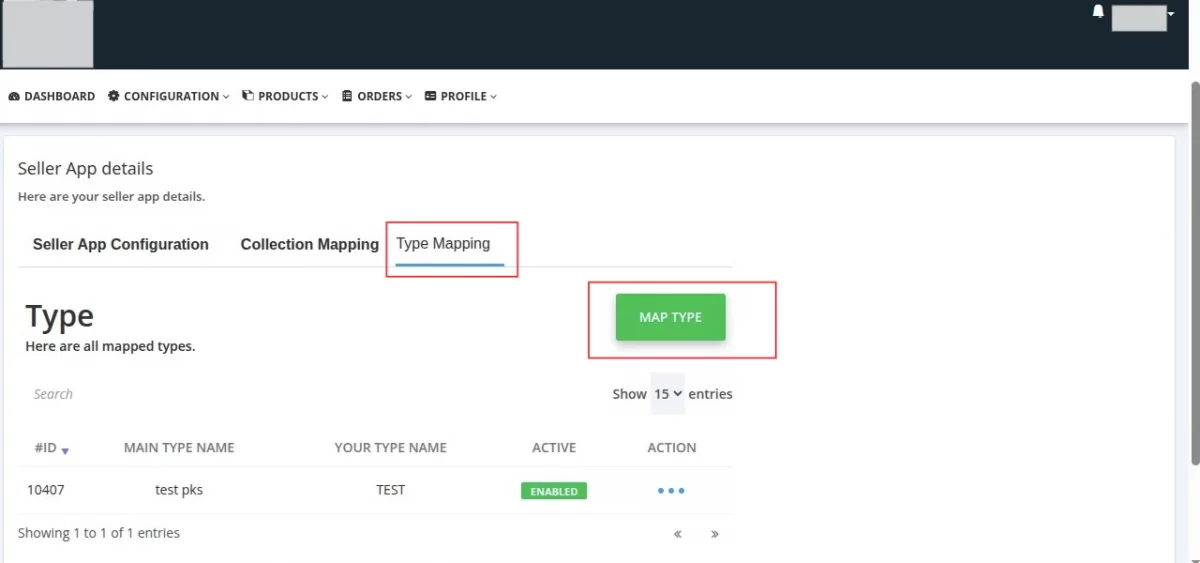
- On the right side, under the option Map Type, enter the following details:
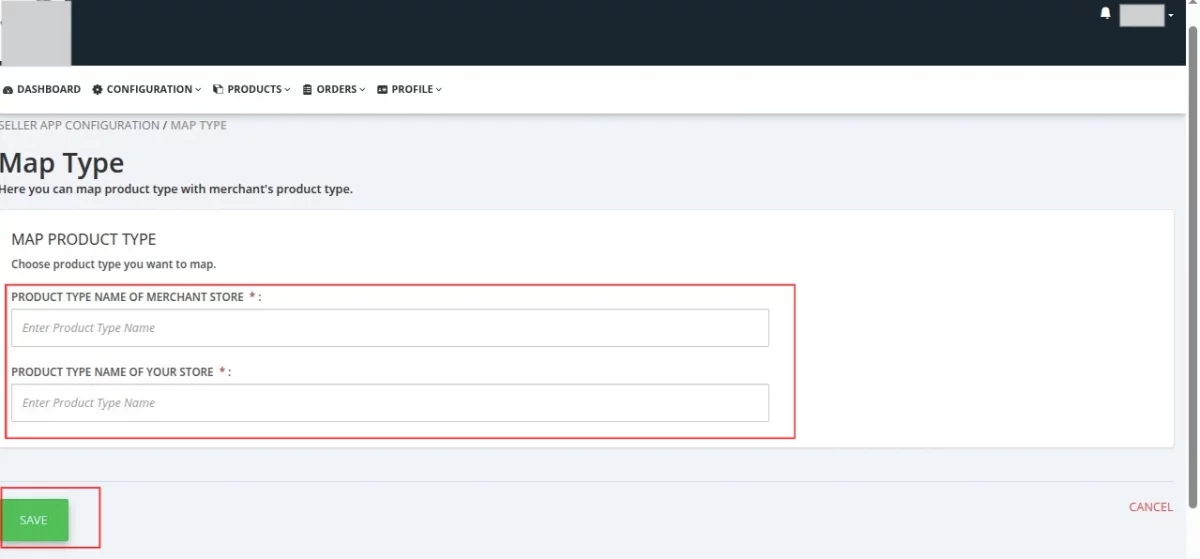
- Product Type Name of Merchant Store – This must be exactly the product type you selected in your store.
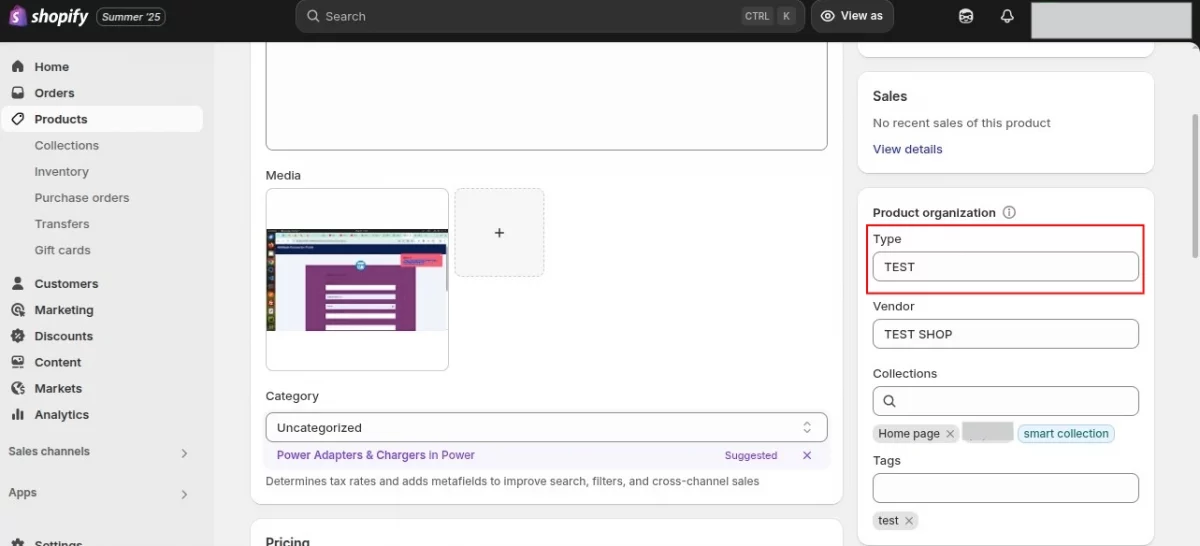
- Product Type Name of Your Store – This must match the product type listed in Shopify under the “Product Type” field.
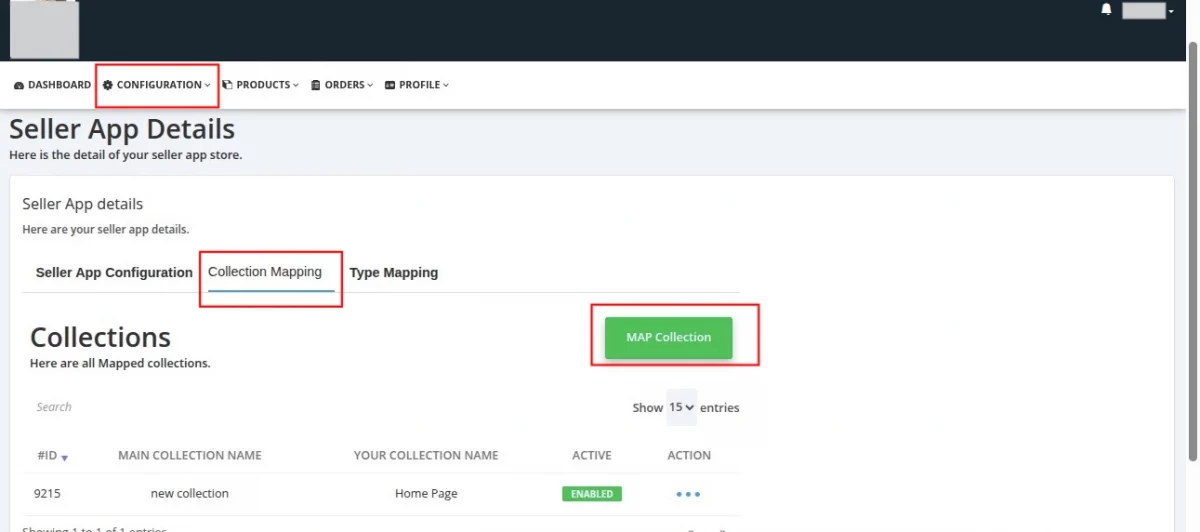
Collection Mapping
Collection Mapping allows you to connect your collections with the merchant’s collections. This ensures proper synchronization.
To set it up, follow these steps:
1. Go to Seller Sync App Configuration
Under this section, select Collection Mapping and click on Map Collection.
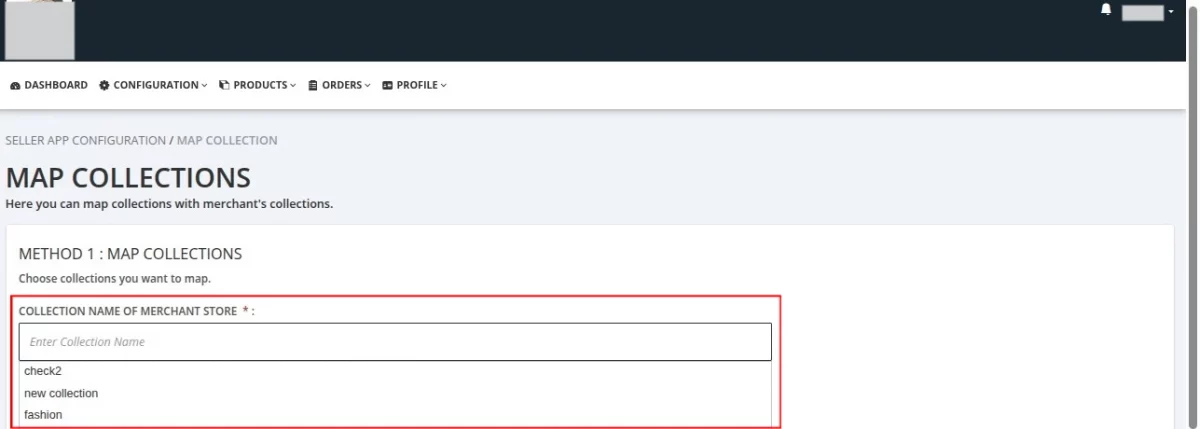
2. Enter Merchant’s Collection Name
In the field Collection Name of Merchant Store, enter the collection name that is already available for sellers.
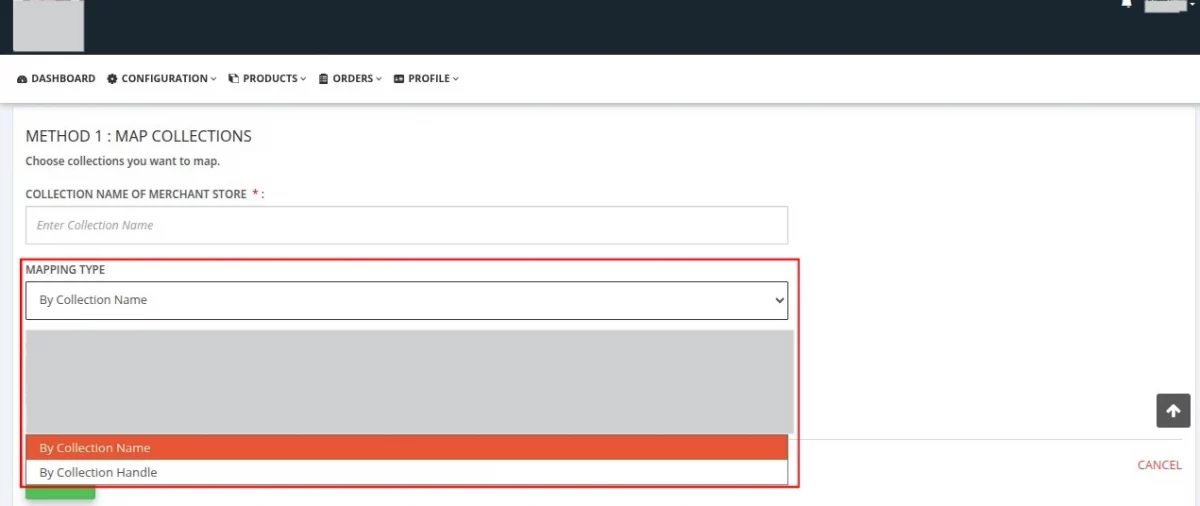
3. Choose Mapping Type
You can select from two mapping options:
- By Collection Name – Map using the collection name.
- By Collection Handle – Map using the collection handle.
4. Enter Your Store’s Collection Name
Finally, in the field Collection Names of Your Store, enter the Shopify store collection name that you want to map with the merchant’s collection.
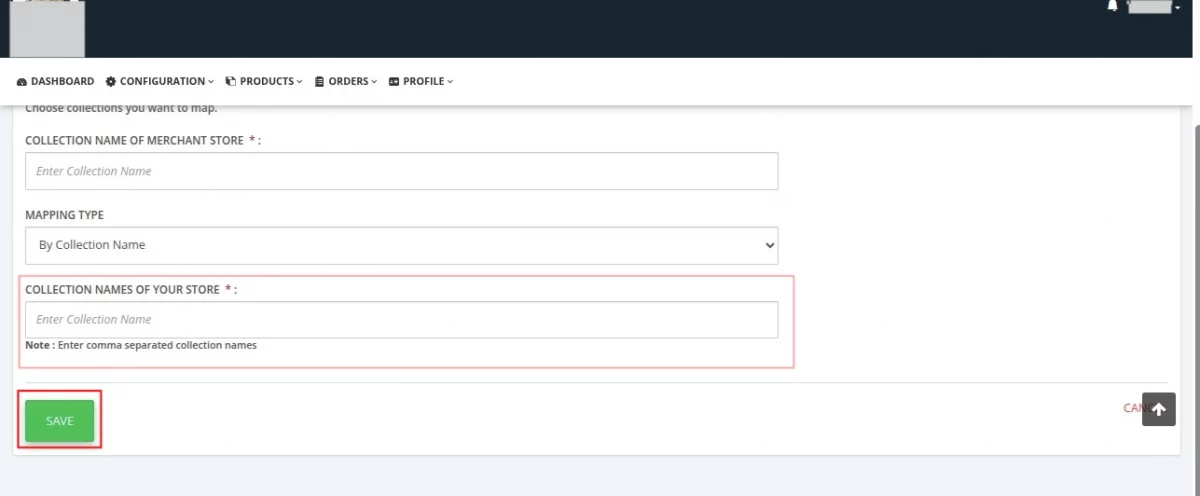
Once saved, your collections will be successfully mapped.
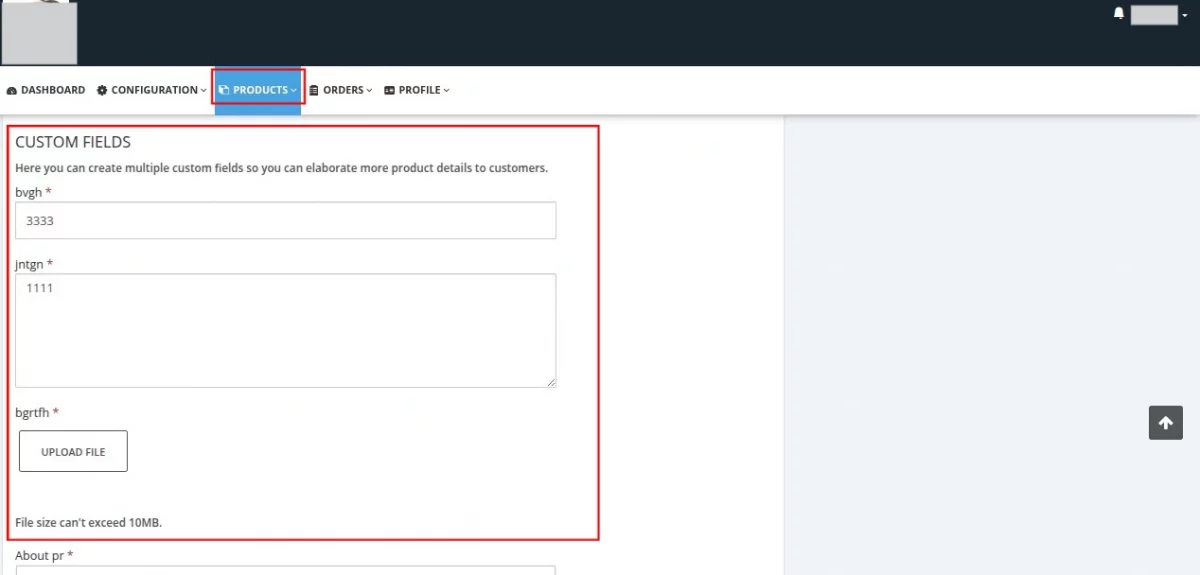
Multiple Custom Fields for Products
To provide more detailed information about your products, you can create multiple custom fields.
These fields allow you to share additional product details with your customers, making the shopping experience more transparent and informative.
While creating a custom field, it is important to set a default value.
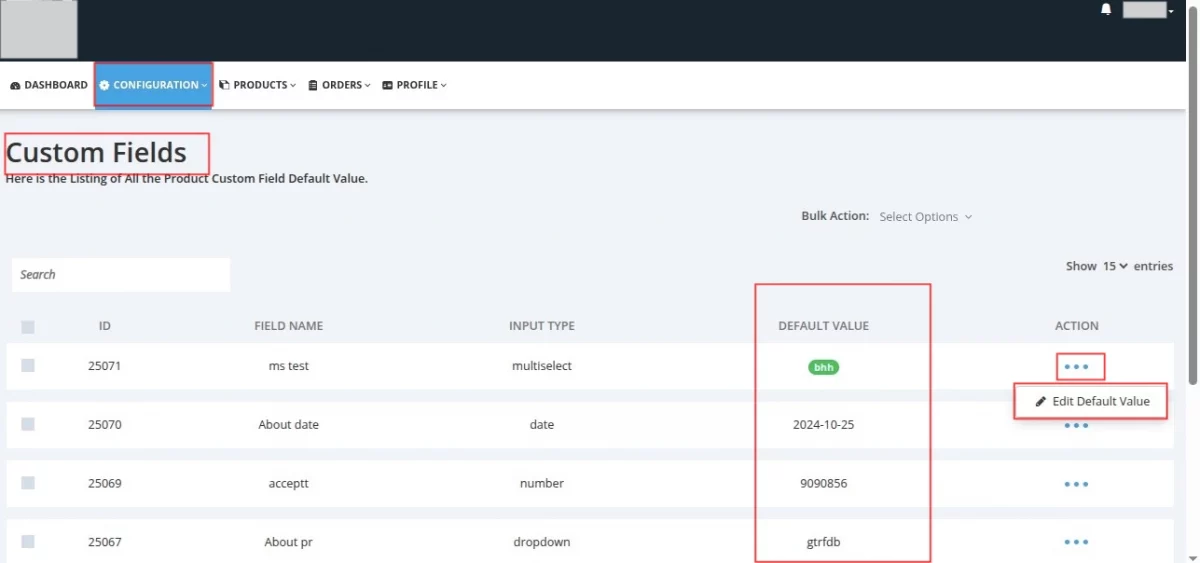
This ensures that when a product is added to the store, the field will always display the default information instead of appearing blank.
A blank field may confuse customers or leave them uncertain, whereas a pre-filled value improves clarity and consistency.
By using custom fields effectively, you can highlight important product details such as material, care instructions, size guide, or any other specification that adds value for your buyers.
Note:
For successful product approval, it is essential to complete the following steps before importing products: map product types, configure collection mapping, and set default values for custom fields.
Failure to complete any of these steps may result in the product being denied.
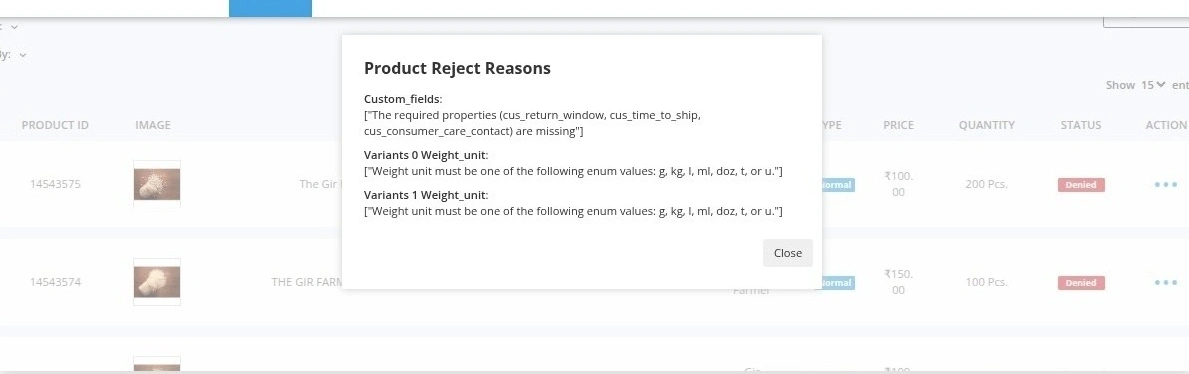
A product submitted for approval may be denied. But don’t worry you can easily check the reason for denial and take the necessary steps to fix it.
Once a product is denied, the reason for rejection will be displayed under the Action section.
This helps you quickly understand what went wrong, whether it’s missing details, incorrect category mapping, or policy violations.
After reviewing the reason, you can update the product information accordingly and then resubmit it for approval.
By following this process, you ensure that your products meet the required standards and get published smoothly on the ONDC.
How to Import Products?
If you want to sync your product to the merchant store then you need to click on the import product button as mentioned in the image.

Then you need to select the merchant store name from the drop-down option.
And proceed further by clicking on the pick your store products button.


Now you need to select the product and click on the add button, and then you will get a message (Products importing in the background).
Then, to check the imported products go to the MVM Dashboard, and the products will be visible in the product listing.


Need Help ?
For any kind of technical assistance, just need to raise a ticket at http://webkul.uvdesk.com, and for any doubt contact us at [email protected].

Be the first to comment.