Introduction
Odoo S3 Backup feature allows customers to create personalized backups for their Odoo data on Amazon S3.
Odoo S3 Backup module offers a secure way to safeguard your Odoo database with cloud-based storage. It automatically handles backups, reducing its risk of data loss or downtime.
Simple to configure, this module connects Odoo with Amazon S3 in just a few steps. Odoo S3 Backup provides reliable data safety and quick recovery to keep your business running smoothly.
Prerequisites for using Odoo S3 Backup
Odoo S3 Backup works in conjunction with Odoo Database Backup module, which you can download from our Odoo App Store.
Features
- Automatic secure Odoo database backups directly to Amazon S3.
- Set scheduling backups at custom intervals to match your business needs.
- Supports storing multiple databases, ensuring complete data protection.
- Retains only a defined number of backup files and deletes older ones.
- Odoo S3 Backup lets you manage backups in your S3 bucket.
- Enable quick download and instant restoration for disaster recovery.
- Simplify Amazon S3 integration with easy access key and bucket setup.
Installation
- Once you purchase the App from the Webkul store, you will receive a link to download the module’s zip file.
- Extract the file to your system after the download is complete. As a result, you will be able to see a folder named ‘wk_s3_backup’.
- Copy and paste this folder inside your Odoo Add-Ons path.
- Now, open, Odoo App and click on the Settings menu. Here, click on Activate Developer Mode.
- Then, open the Apps menu and click on ‘Update Modules List.’
- In the search bar, remove all the filters and search ‘wk_s3_backup’
- You will be able to see the module in the search results. Click on the ‘Activate’ button to install it.
Workflow
1. Configuration at Amazon S3
Before you create an Access Key and Secret Key in Amazon S3, you first need to register for an AWS account.
Once your account is set up and you can log in to your AWS Management Console, you’ll be able to create users, generate keys, and start using AWS services.
After setup, log in with your root account or with an IAM user, and click on IAM below S3.

2. Generate Access Key & Secret Key
To generate an access key and secret key, go to the home dashboard, click on IAM, then go to security credentials. Here you can generate the access key and security key.

Note:
Once you generate the access key, both a Secret Access Key and an Access Key ID will be provided. Please note that this Secret Access Key will only be visible once.
These credentials (Secret Access Key and Access Key ID) will be required while configuring Odoo S3 Backup module for establishing the connection.
3. Create a Bucket On S3
Once you have your Access Key and Secret Key, you need to create a Bucket.
To create a bucket in AWS S3, go to the home dashboard, then click on the S3 section from the AWS menu.
Now, click Create bucket, enter a unique name, select on nearest region, and finish by clicking Create bucket.
4. Create a Folder Inside Bucket
Once you create a Bucket, you need to make a Folder inside your bucket to store your backup data.
To create a folder in your S3 bucket, open the bucket, click “Create folder,” enter a name, and click “Create.”
After completing the Amazon S3 configuration, proceed to set up the configuration in Odoo. The next section guides you through this process..

Once you complete the configuration on the Amazon S3 side, the next step is to set up the configuration within Odoo.
The following step-by-step instructions will guide you through configuring at Odoo end of Odoo S3 Backup module.
5. Configuration at Odoo End
Open your Odoo Backend and open your Backup Operation module, and click on Configuration button. There, you’ll find settings for Amazon S3 Configuration and Remote Servers.

Note: If you are an Odoo Saas Kit user and have configured a Remote Server, then you will see remote servers in the configuration menu.
Here, click on the New button to configure a new Server.
6. Configuring a new Amazon S3 Server
Here, you will find several fields that need to be filled in to create a new server, with each field corresponding to a specific configuration parameter.

Secret Key:
This is your AWS secret key used for authenticating and securely connecting to your S3 account, which we had generated at Amazon S3.
Access Key:
This is an AWS access key that pairs with your secret key to allow access and manage resources on S3, which we had generated at Amazon S3
Bucket Name:
This is the name of your S3 bucket that you created at Amazon S3. You need to put that bucket name; otherwise, a default bucket name will be generated, where all your backup files will be stored.
Bucket Location:
It specifies the AWS region (e.g., us-east-1) where your S3 bucket resides, defining the physical storage location of your database backup.
Default S3 Backup Directory:
It is a primary folder within your S3 bucket where all backups are stored by default, and you can also use this directory during your backup process.
Temporary Backup Directory:
It is a local folder on your server where backups are stored temporarily before being uploaded to the S3 bucket.
After entering the required details, click on the Test Connection button to verify and establish a connection with your S3 bucket.
Test Connection:
This button checks if your entered details (Secret Key, Access Key, Bucket Name, and Location) are correct.
When clicked, it tries to connect to your S3 bucket and confirms if the setup is working.
After the connection is established, click on the Validate button.
Validate:
Once the test connection is successful, the state of this newly configured server will be in a validated state.
Here, you will see a different server list you had configured in Odoo S3 Backup.

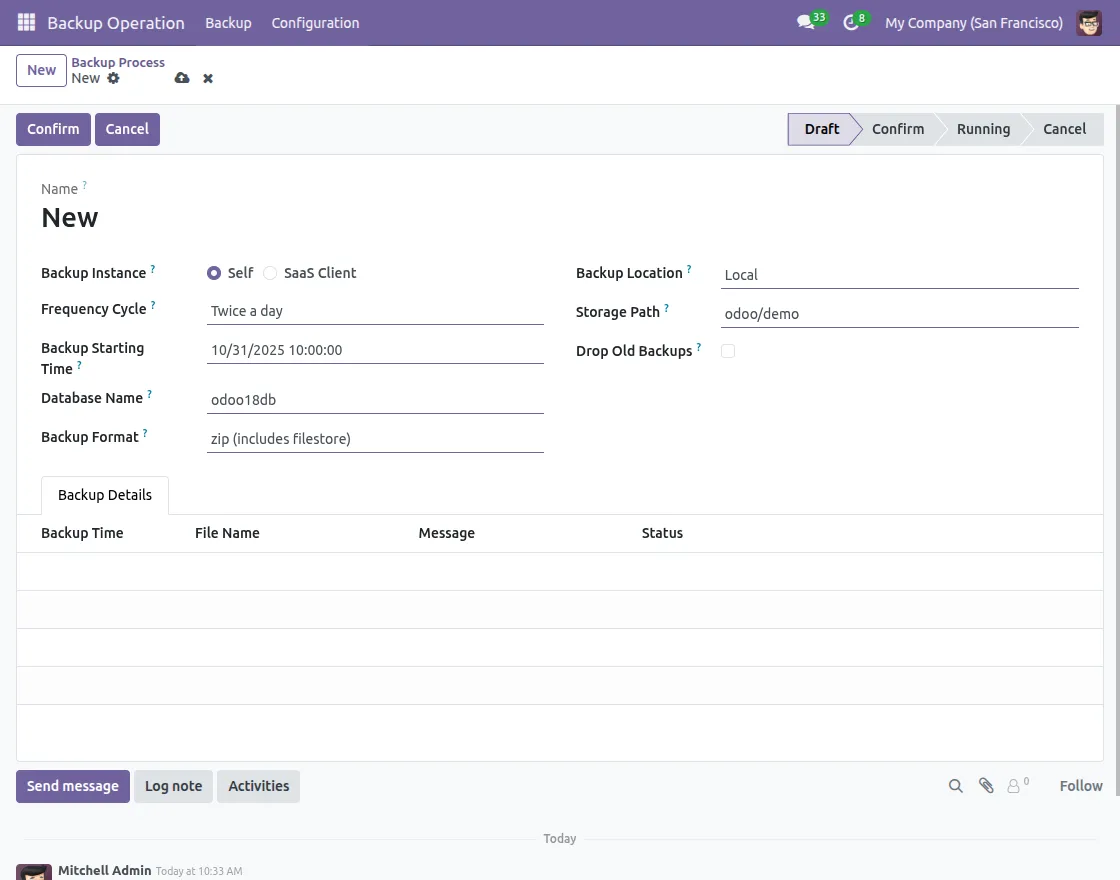
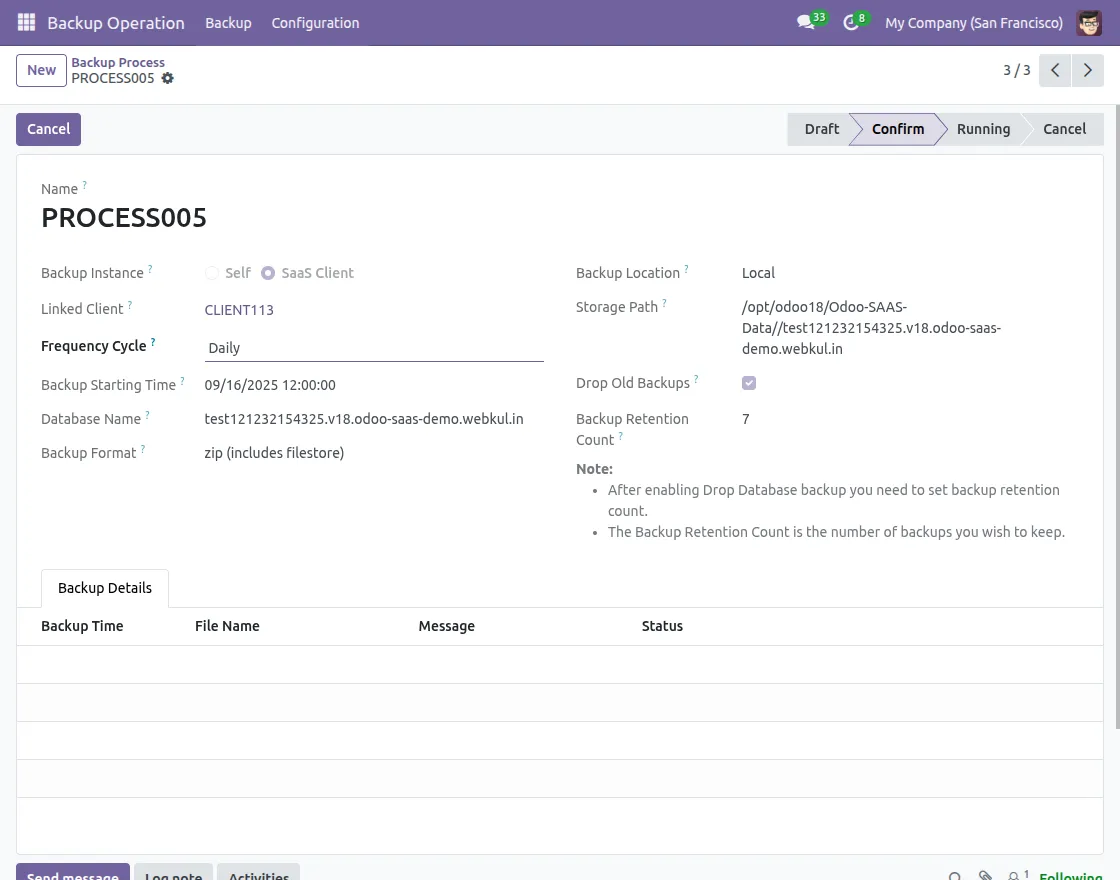
7. Configure a New Backup Process
Open Backup Operations by navigating to Backup >> Backup Process and clicking on the New button to create a backup process.

To create a new backup process, you need to enter all required details as shown in the image below:

Backup Instance:
In this Backup Instance field, you can select either Self or SaaS Client to define for whom the backup will be applied.
Note:
a) Select Self if you want to create a backup for your main Odoo instance.
b) Select SaaS Client if you are using Odoo SaaS Kit and want to create a backup for your SaaS client.
Frequency Cycle:
From the dropdown menu, select how often your backup should run, for example, Daily, Twice a Day, Weekly, or Monthly.
Backup Starting Time:
You can set your exact time when your backup will begin, so you can set it according to your convenience.
Database Name:
The Database Name is where you specify which database to back up. For example, if your database is called bkp_db, that’s the one whose backup will be stored.
Backup Format:
It decides how backup is saved. You can use zip, which saves both the database and all related files, or pg dump custom format, which only saves the database itself.
Backup Location:
For this backup process, you will need to decide where you want to keep your backup. You can choose local storage, AWS S3, or a Remote server from the dropdown menu.
Storage Path:
Storage Path is a specific folder on your S3 server where your database backup will be saved, helping you keep files organized.
Drop Old Backups:
When enabled, this option automatically removes older backups. It helps free up storage space by keeping only the latest backups.
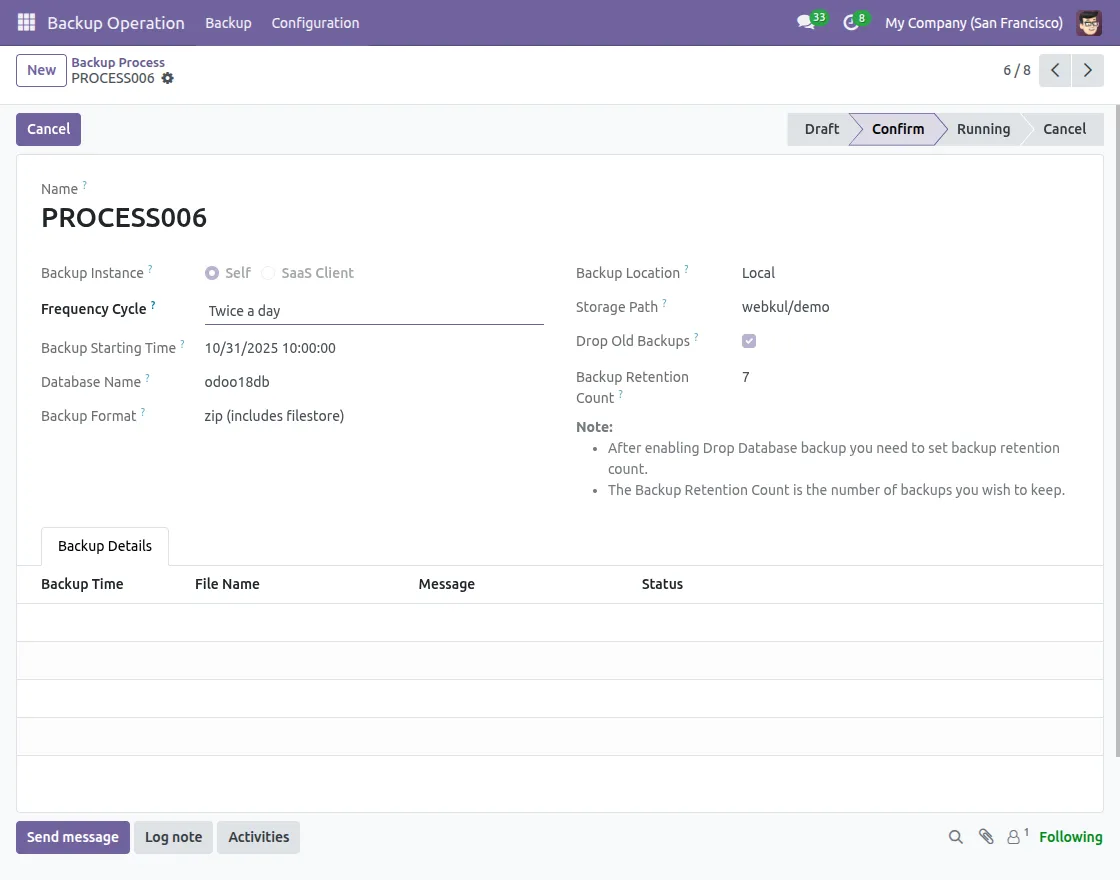
Backup Retention Count:
This decides how many old backups to keep before they are deleted, letting you maintain a history of backups while managing storage efficiently.
Note:
If “Drop Old Backups” is enabled, you need to set a retention count. Retention count controls how many past backups are saved.
After entering all the details, click the Confirm button to initiate your backup process.
Backup Failure Alerts:
If the backup doesn’t complete, internal users will instantly get notified via email to save data from loss.
8. Cron for Backup Process
There are generally two basic CRON that are configured to automate the process of backing up data.
a) Backup Process Ignite Cron:
This cron checks for confirmed backup processes that are scheduled to start before its run time. Once found, it marks them as running and creates a system cron to perform your backup.

Backup Transition: Confirm to Running
This Backup Process Ignite cron ensures that your scheduled backups move forward automatically.
When this cron runs and your backup start time is reached, your backup process state changes from Confirmed to Running, allowing your backup to begin without manual intervention.

b) Backup Process File Remove Cron:
This Backup Process File Remove cron handles the removal of older backup files. It checks if “Drop Old Backup” is enabled for your backup process that is in a running state.
The system retains only the number of backup files defined in the retention count for your backup processes, and automatically drops your old backup.
This way, storage stays optimized and older files are dropped automatically without manual work from your server as well as from your main Odoo.

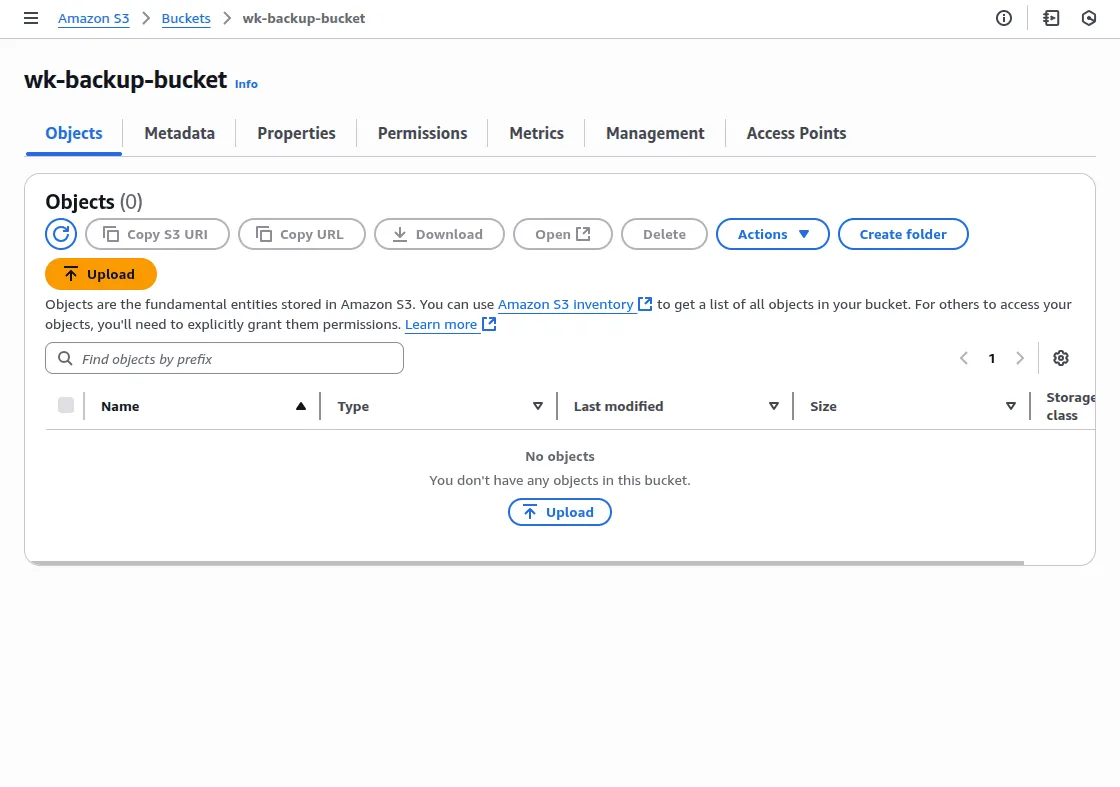
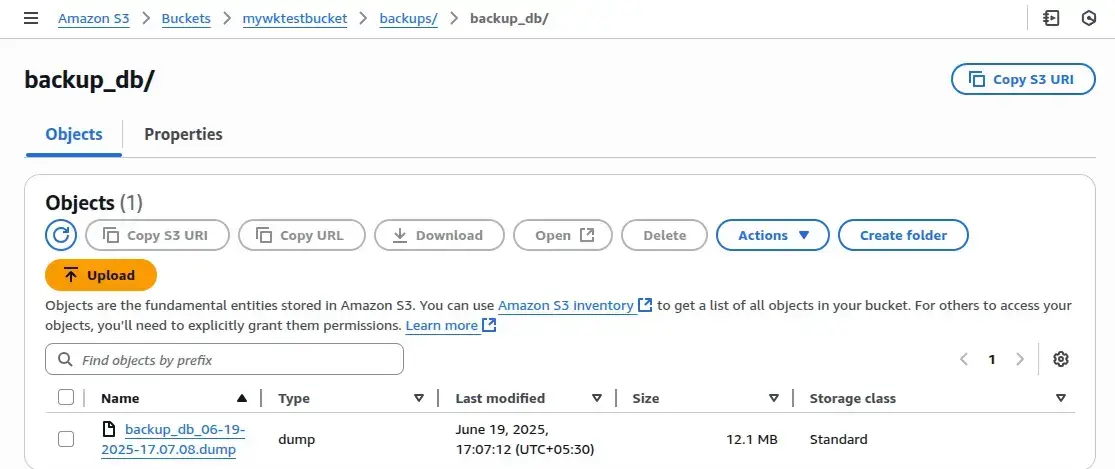
9. View backup file on the Amazon S3 side
Once your backup process is started and the backup is being created, you will see your backup file in your Amazon S3 account inside your bucket.
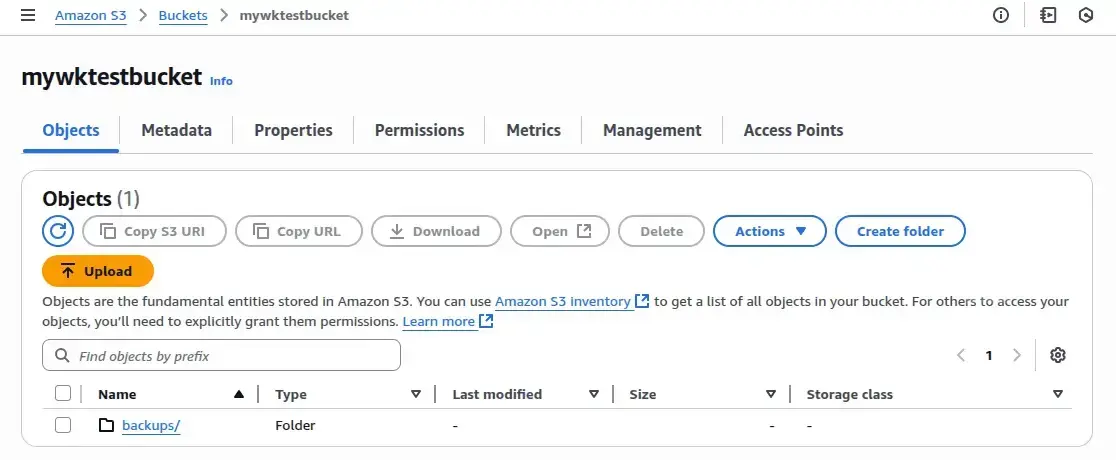
Open your backup file in S3 to view and download the saved data.
10. How to create a backup process for your SaaS Clients
If you need to create a backup process for your Saas clients, go to Backup Operations and click on the New button, and select SaaS client in the backup instance field.
Here, you will then see a Linked Client option, which specifies the client for whom the backup process needs to be created.
All other steps for creating a backup process are same as we do in Self–backup process.
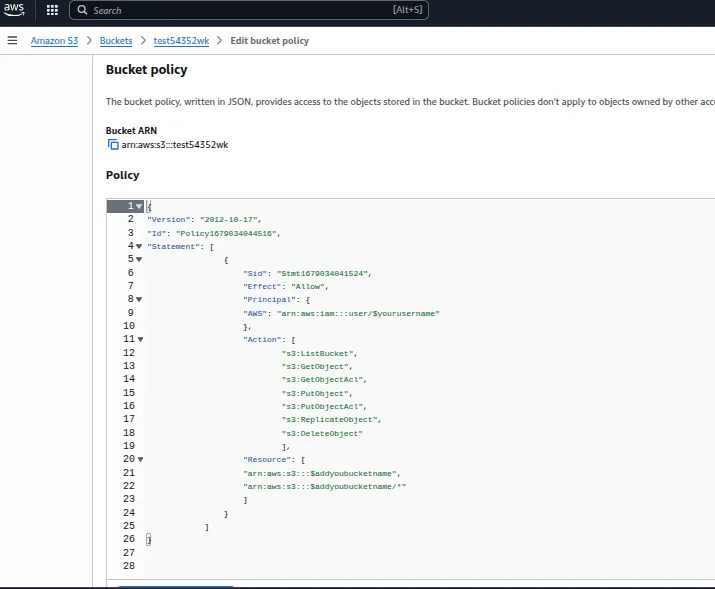
11. Security Policy for adding Amazon S3 account to Odoo S3 Backup
S3 bucket permissions are managed through bucket policies, IAM policies, or ACLs, defining who can access and what they can do.
Bucket Policy: JSON-based rules attached to your bucket, typically used for cross-account or public access.
IAM Policy: Assigned to users, roles, or groups to allow access to specific buckets or objects.
ACLs: Legacy method for granting permissions to individual AWS accounts or public accounts.
Need Help?
We hope this guide has been helpful. Share your feedback in the comments section below.
For any issues or further inquiries, please raise a ticket at UV Desk or contact our support team via email.
Thank you for choosing us, and we’re here to assist you further!
Current Product Version - 1.0.0
Supported Framework Version - V17, V18, V19.

Be the first to comment.