INTRODUCTION
Simplify GST invoice JSON creation with Odoo GST e-Invoicing System!
Filling GST Form is a hectic job as you have to fill every detail and column, which takes a lot of time. But there is an alternative that eases the process and reduces the time consumption. While filling GST, you can upload a JSON file of details that saves time and smoothens the process.
But the question is, how to get and generate a JSON file as it’s not a human-readable document?
To assist you in this operation, we have created Odoo GST e-Invoicing System that will generate a JSON file for your invoices and any other data saved by you.
NOTE: Odoo GST e-Invoicing System Module works in conjunction with the following module:
Odoo GST – Returns and Invoices
You would require to install this module first for Odoo GST e-Invoicing System to work correctly.
FEATURES
- Enables you to generate JSON format for B2B, export, and credit note
- Generate summary month-wise or quarter-wise in Odoo.
- Also, you can create the summary directly from Odoo invoices.
- Upload CSV of GST e-invoice summary response in a single place.
- Further, you can upload a CSV of GST e-Invoice summary response directly from Odoo invoices.
- View detailed information about GST e-Invoice response.
- Get Detailed Information About GST e-Invoice response on Invoice report such as, (Acknowledgement Number, Acknowledgement Date, Invoice Reference Number/IRN], Qrcode).
- Manage and check the status of GST e-invoices directly from the invoices.
- The module has all validation of the data which is used to prepare the GST e-Invoice.
- Odoo GST e-Invoicing System can help share the mail to the customers whose invoices are in a paid state and IRN is generated.
INSTALLATION
- Once you purchase the App from Webkul store, you will receive the link to download the zip file of the module.
- Extract the file on your system after the download finishes. You will be able to see a folder named- ‘gst_einvoice_system.’
- Copy and paste this folder inside your Odoo Add-Ons path.
- Now, open the Odoo App and click on the Settings menu. Here, click on Activate the Developer Mode.
- Then, open the Apps menu and click on ‘Update Modules List.’
- In the search bar, remove all the filters and search ‘gst_einvoice_system.’
- You will be able to see the module in the search result. Click on ‘Install’ to install it.
WORKFLOW CONFIGURATION
1. Firstly, log in to your Odoo backend and go to ‘GST> GST Tool> GST e-Invoice’ and click on the ‘Create’ button.

2. On the page, fill in the details and click on the ‘Add a Line.’

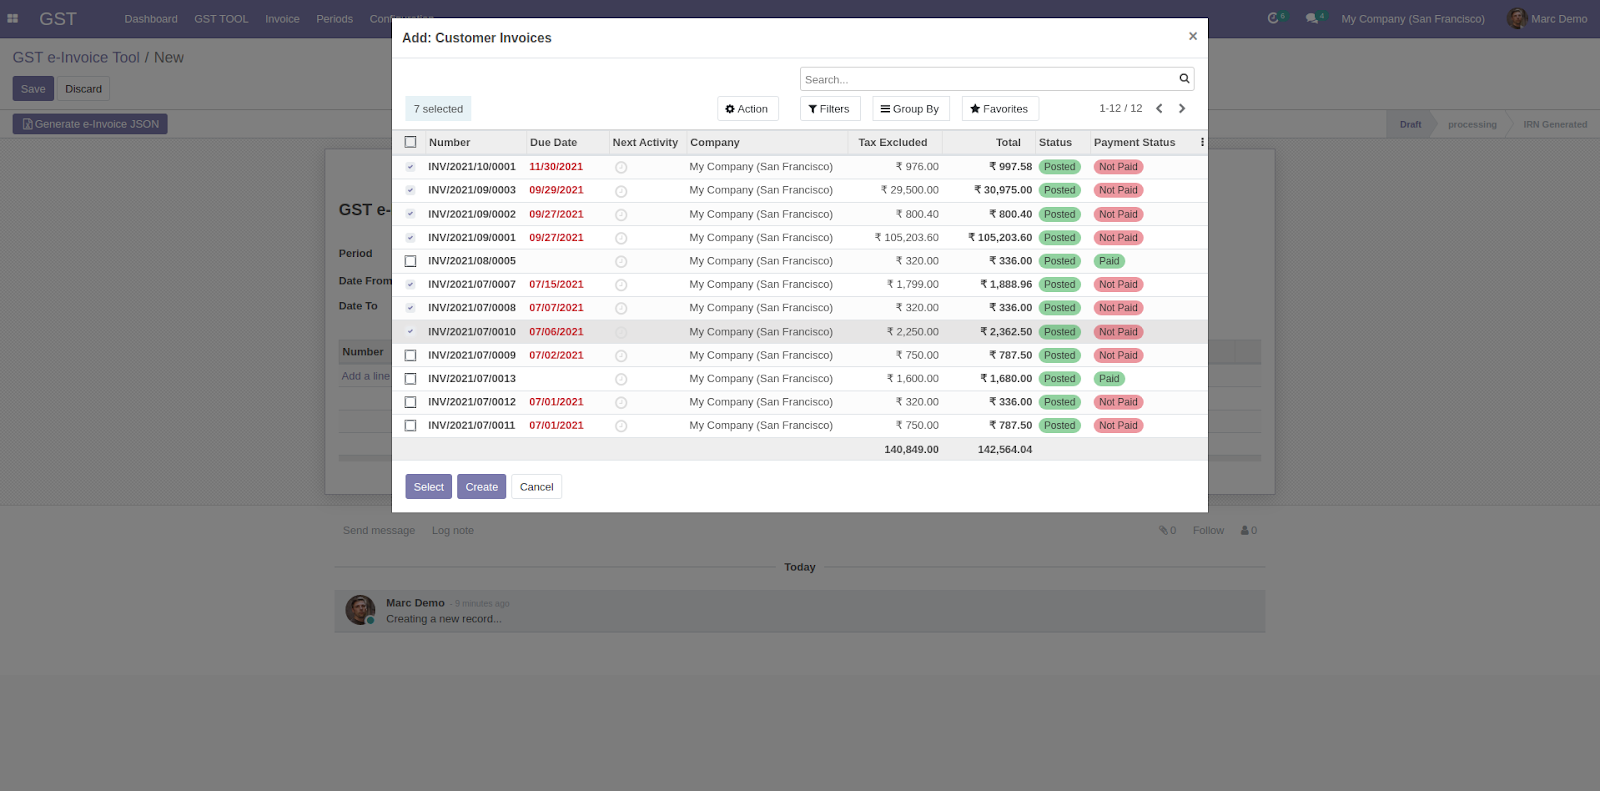
3. In the popup, select the invoices and click ‘Select’. After that, click on the ‘Save’ button.
4. Now, in the ‘Invoice Type,’ you can see the invoice type, and if you click on the ‘Invoices,’ you can see all the invoices added. Once done, click on ‘Generate e-Invoice JSON’ to generate JSON.
4.1. Moreover, when you click ‘Generate e-Invoice JSON,’ the page refreshes and shows the ‘B2B JSON, Export JSON, Credit Note JSON’ options. Click on any of them as per ‘Invoice Type’ to download them.


5. Moreover, while generating JSON of the invoices, if an error occurs, then it will be displayed in a popup with details of the error.

6. On the ‘GST e-Invoice Tool’ page, you can see all the generated JSON and their status.

7. Now, click on any invoice, and in the popup, click ‘Download JSON.’

8. After that, a popup will appear on the screen asking you to choose a file and tick the box next to ‘Sent Mail’ to pick whether to send mail or not.

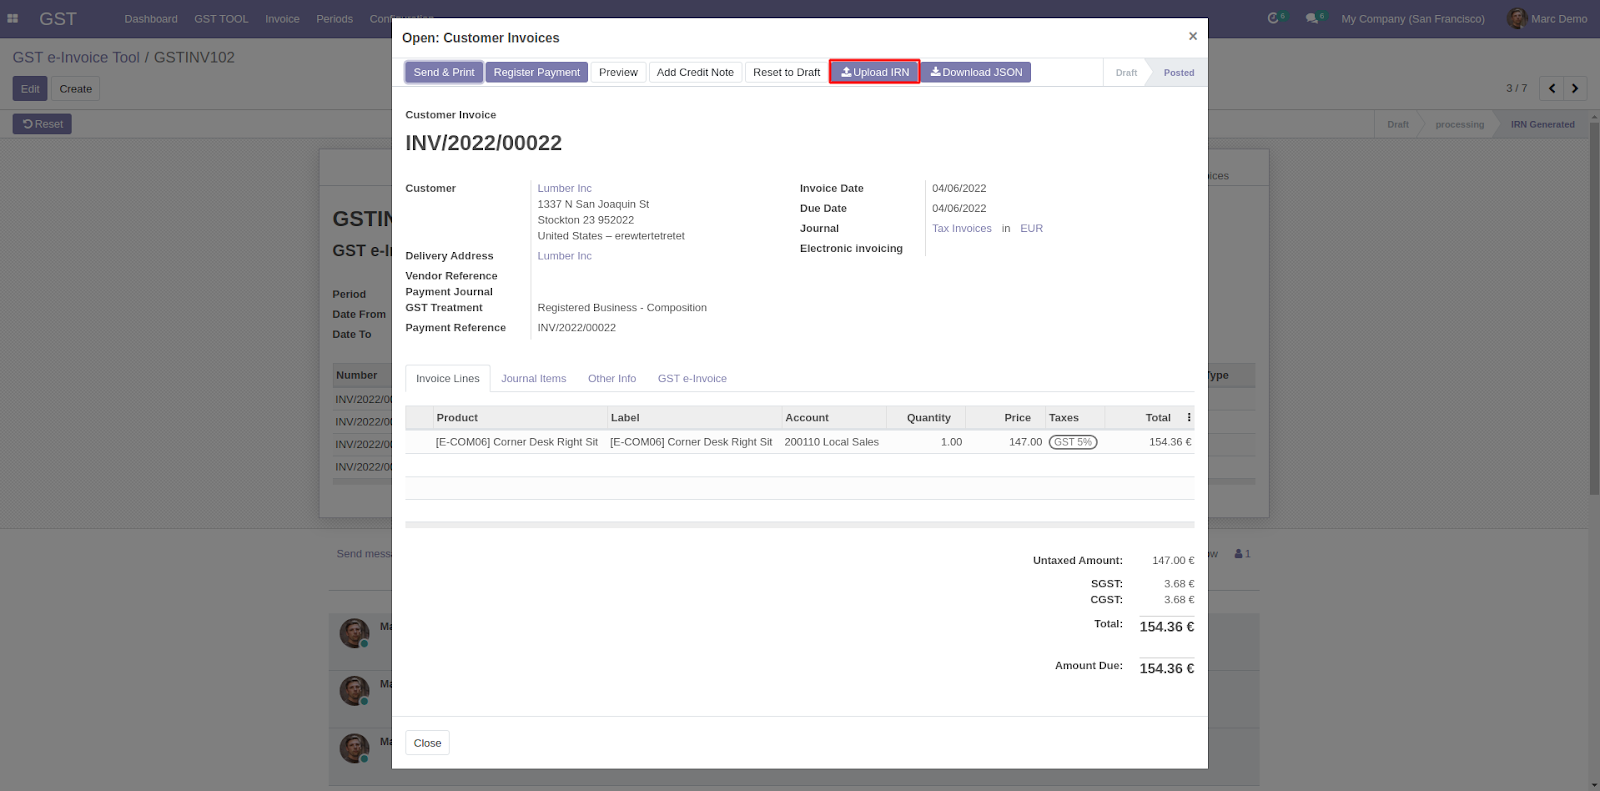
9. Next, in the ‘Customer Invoices’ click on the ‘Upload IRN.’
10. In the pop-up, you will have two options:
10.1. Upload IRN via CSV: On choosing this option, you have to upload an IRN file and choose to send mail by ticking the box next to it.
10.2. Manually add GST e-Invoice Response: In this option, enter the details manually like ‘Acknowledgement Number, Acknowledgment Date, Invoice Reference Number, Signed QR Code, and Signed Invoice’. After filling every column, it will show the QR next to it. Now, click the ‘Import’ button.


11. After that, go to the ‘GST e-Invoice’ tab of ‘Customer Invoices’ to view the entered GST Invoice Details. Further, the downloaded invoice will also contain the QR.


OTHER ODOO MODULES
- Odoo GST Ewaybill
- Odoo Invoice Tax Stamp
- Price Inclusive For Group Taxes
- Odoo POS Tax Details
- Odoo Marketplace Product Tags
- Website Social Network Tabs
- Odoo Custom Product Tabs
- Odoo Website Product Tags
- Marketplace Seller Profile Tabs
- Odoo View Records In New Tab
- Odoo Website General Product Tabs
- Marketplace Custom Product Tabs
NEED HELP?
Hope you find the guide helpful! Please feel free to share your feedback in the comments below.
If you still have any issues/queries regarding the module, please raise a ticket at https://webkul.uvdesk.com/en/customer/create-ticket/.
Also, please explore our Odoo development services & an extensive range of quality Odoo Apps.
For any doubt, contact us at [email protected].
Thanks for paying attention!!
Current Product Version - 1.0.0
Supported Framework Version - V15

Be the first to comment.