Opencart Marketplace Seller Buyer Chat module establishes a real-time chat between buyers and sellers.
This is a socket-based chat module due to which it is very fast and the message is received in real-time.
Sellers can chat with multiple customers at one time. Both the Sellers and customers can see their chat history also, customers can email the chat transcription.
Also, the Sellers have the option to block/unblock customers from chat.
This module will help the customers in a significant manner and allow them to directly chat with the seller for their queries.
Also, this module is an add-on of Opencart Marketplace. You need to first install the Marketplace module to use Opencart Marketplace Seller Buyer Chat (Socket Based).
Note:
1. This module supports all templates and themes including the Journal theme.
2. Opencart Marketplace Seller Buyer Chat (Socket Based) module supports the Multi-Store feature of default Opencart.
Watch the video to understand the extension workflow:-
Features Of Opencart Marketplace Seller Buyer Chat
- Socket based chat module due to which it works fast.
- Template-based using handlebar.js.
- Sellers can chat with multiple customers at one time.
- The Sellers can block/unblock customers from chat.
- Sellers can delete the conversation with customers.
- The Sellers can change their online status to busy or offline.
- Sellers can use emojis in chat.
- Both the sellers and customers can add attachments in their respective chat windows.
- Also, emojis can be sent along with the messages at both the sellers and the customer end.
- Customers can email their chat transcripts.
- Chat transcript is sent in PDF form.
- The Customers can check their complete chat history.
- Customers can set their profile images for the chat.
- The Customers have the option to report the manager.
- A push notification icon to lets you know that chat is still active.
- Admin has many options to configure the appearance of the chat window.
- The Admin can see all the conversations between sellers and customers.
- Admin can delete any conversation.
Installation of Opencart Marketplace Seller Buyer Chat
Prerequisites –
1. Node should be installed.
2. If you are using Shared Server then you have to provide SSH login details with root access, so we can configure the module. For root access, ask your Host Provider.
3. PHP version should be 5.5.x.
4. Port that you are using, should be open for your IP Address.
5. The module will only work for LAMP server.
Note 1 : Before starting the server you have to write the port that you are using for chat module into the server.js file that is parallel to Opencart root directories.
Note 2 : If you are using cpanel then you can use either domain name or IP address but if using CloudFlare on the server then must use IP address as hostname don’t use the domain name.
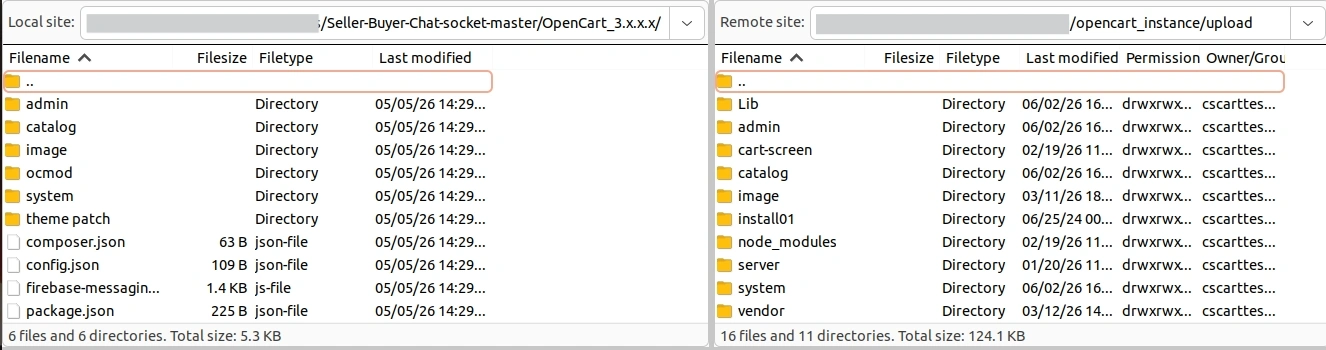
Under the zip file, you will find 5 folders namely- admin, catalog, image, ocmod, system and files- Info, package.json, running.php and server.js.
Now transfer the admin, catalog, image, system folder and all other files into the Opencart root folder without the ocmod folder as shown below in the screenshot.
Now Before installing the module and starting the server, open the server.js file in the Opencart root folder and manually type the port number into the server.js file that you will be using for the chat module.
After this you have to run some commands :
-> to install node run command from terminal:
$ npm install
-> to install socket.io run command from the terminal:
$ npm install socket.io
->to run the node server used the following command
node server.js (for http)
node secure_server.js (for https)
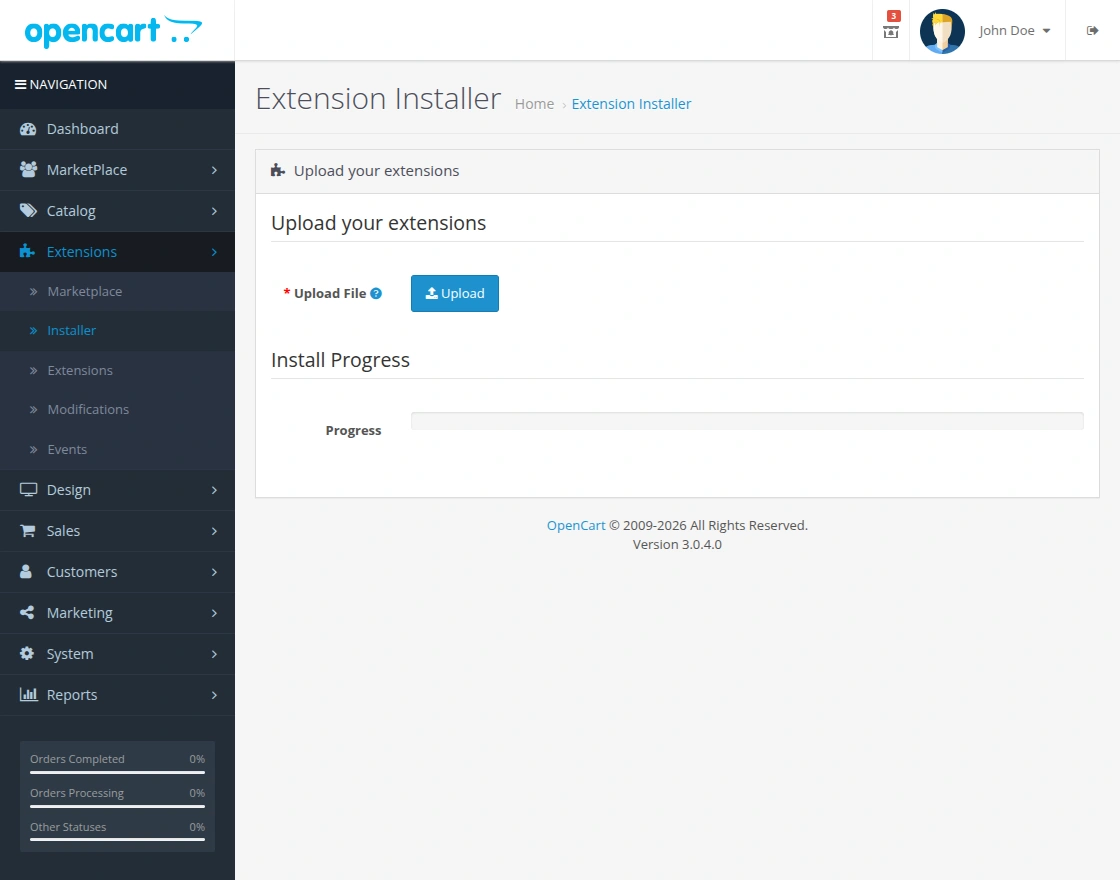
Once you have made all the changes then login to admin and go to Extensions> Extension installer and upload the Zip file store_chat.ocmod.zip. The Zip file can be found on the ocmod folder.
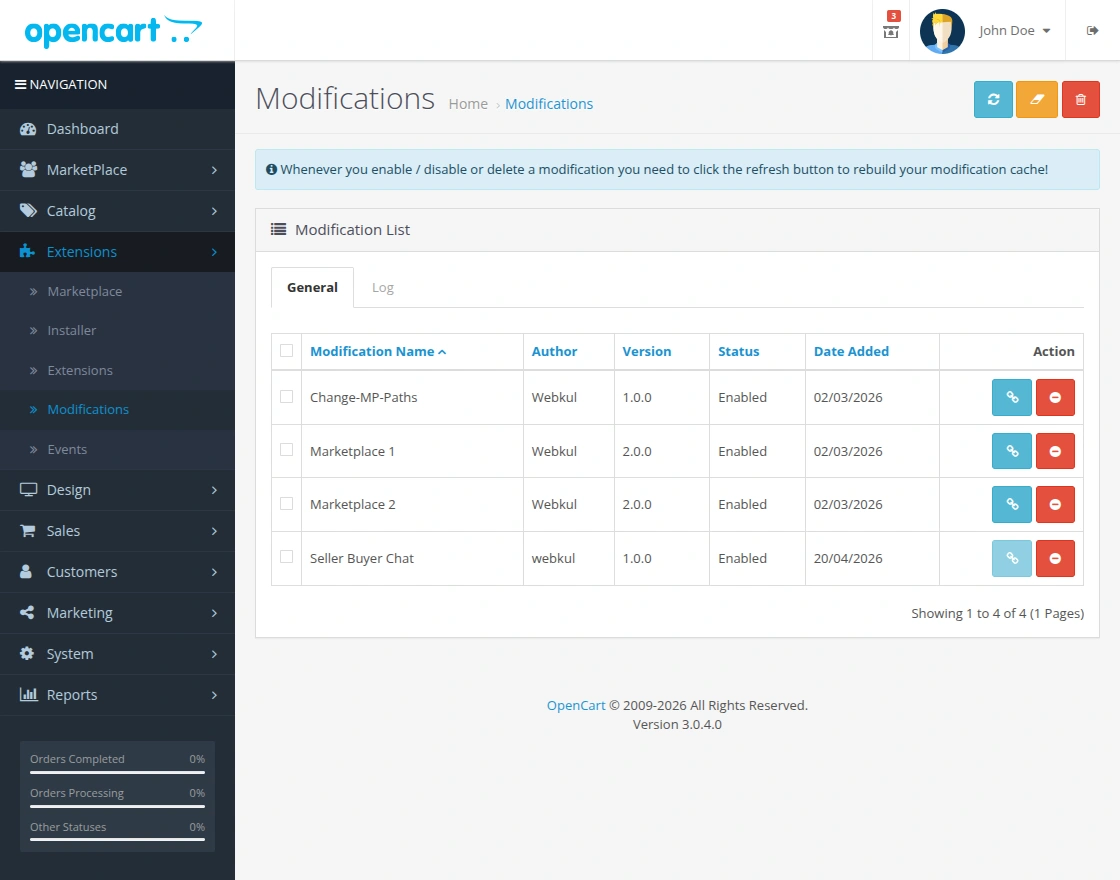
After uploading the Zip file go to the Extensions > Modification and click on the refresh button.
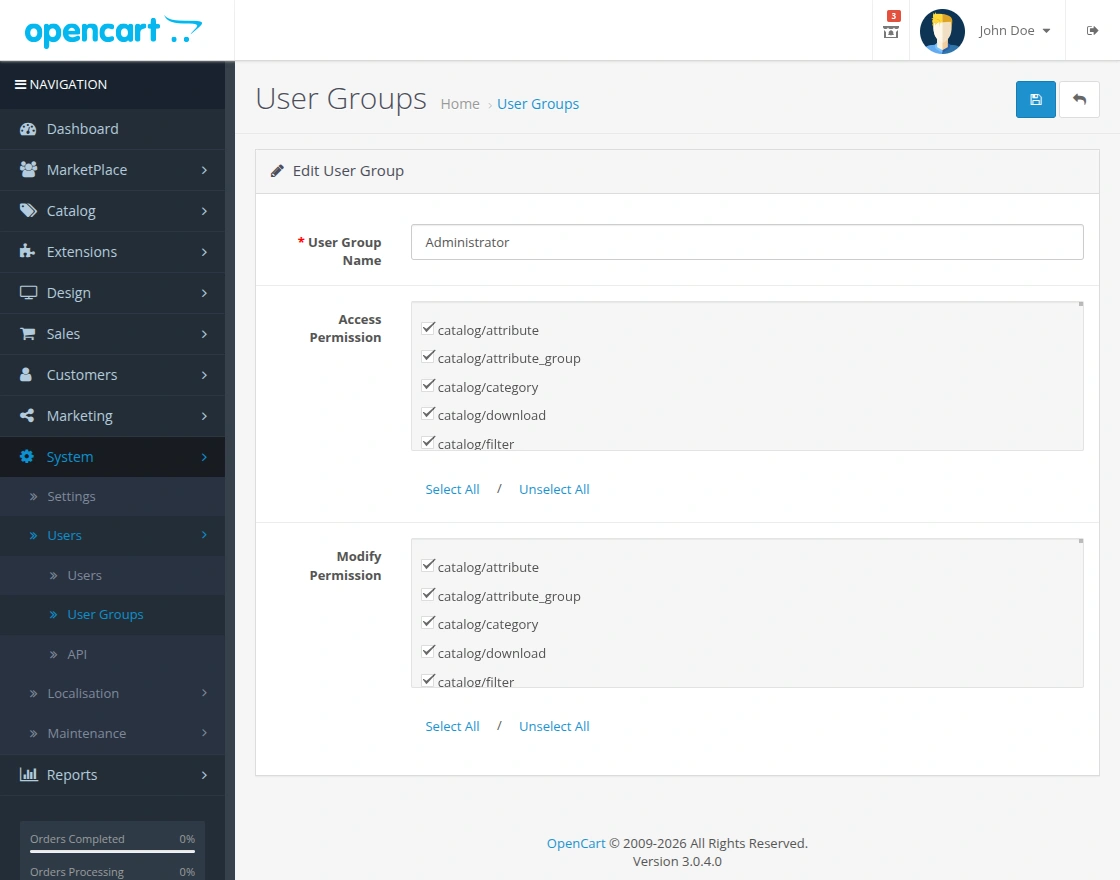
Also, After that in Admin panel go to System -> Users -> Usergroup and edit ‘Administrator’ and select all for both Access and Modify Permission then save it.
After that under Extension > Module, install the Marketplace buyer-seller chat like this way.
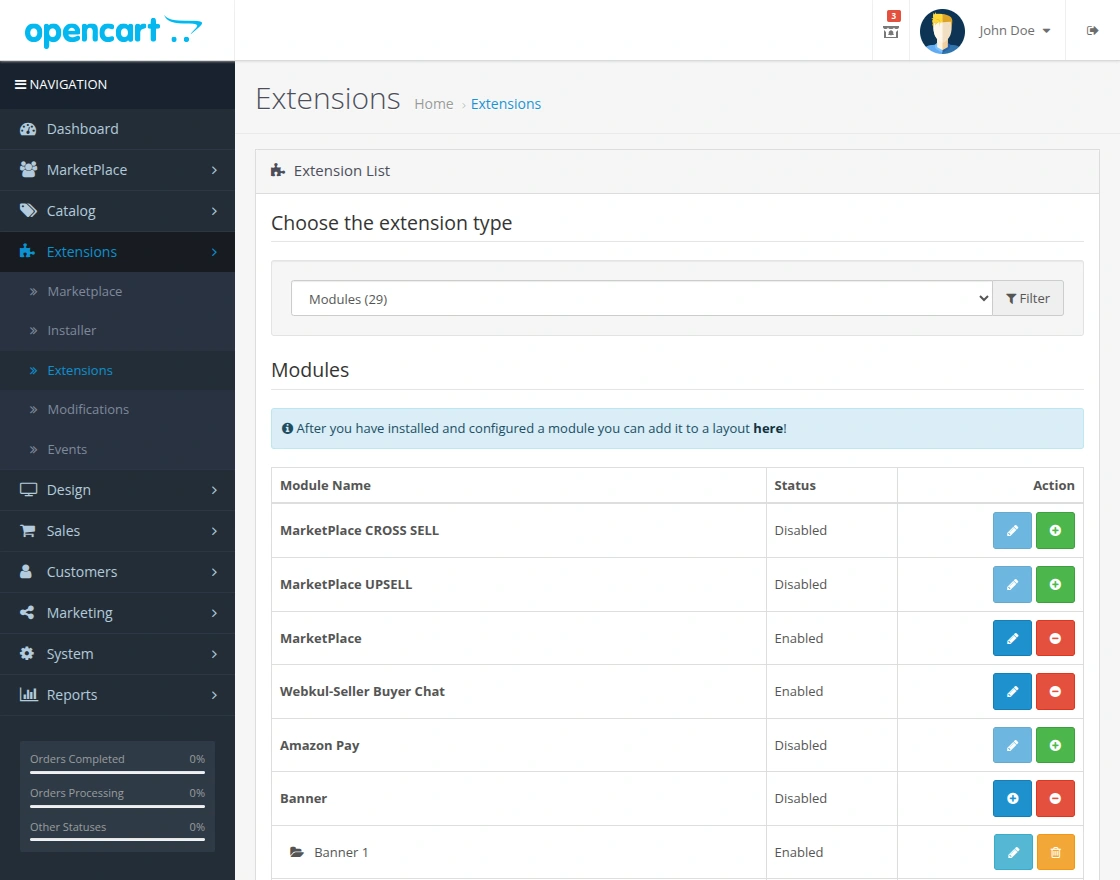
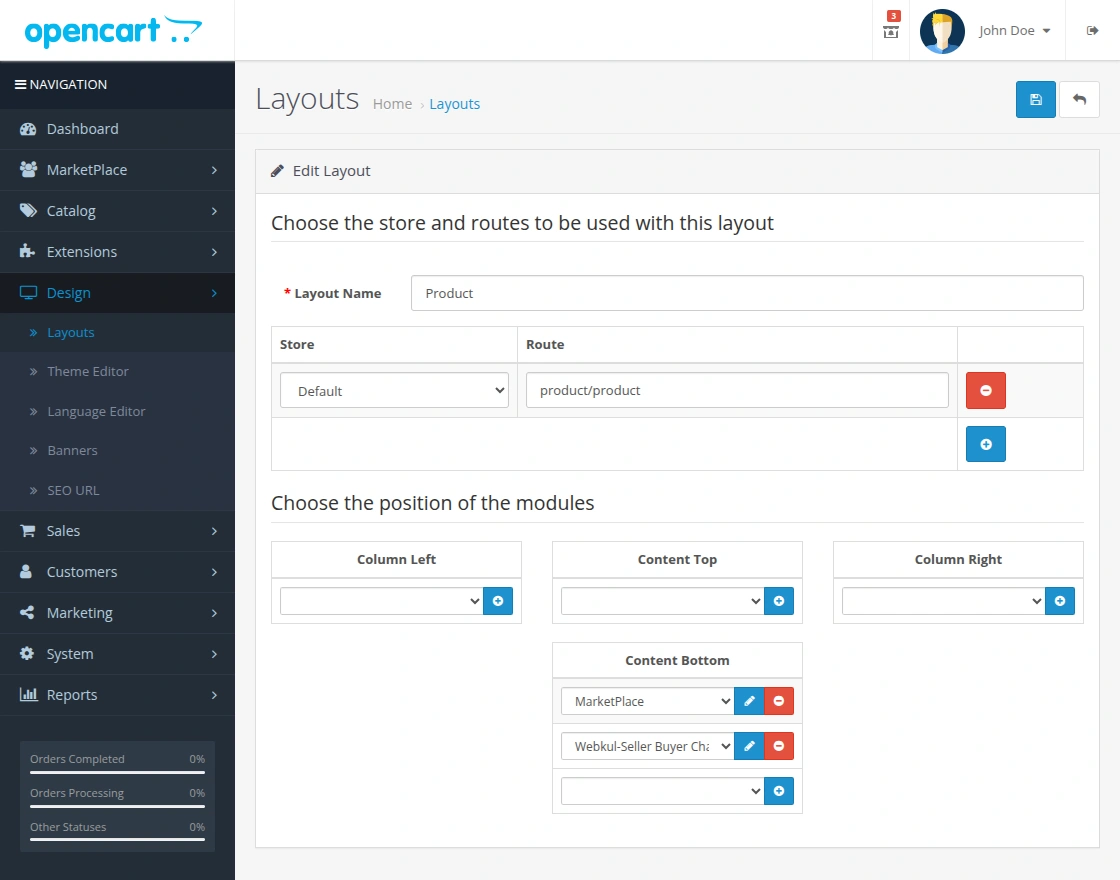
Also, After installation of the module go to Design->Layouts and select ‘Product’ to edit. After that set ‘Webkul Seller Buyer Chat’ on the content bottom position.
Module Translation
As this Opencart Marketplace Seller Buyer Chat (Socket Based) module supports multiple languages so this section will describe how to make the module work in different languages. Please check this link for language translation
Configure Firebase Credentials for Push Notifications
To configure the Opencart Seller Buyer Chat, you need to generate Firebase project credentials. Follow the steps below:
- Click here, to create a new project with your Gmail account.
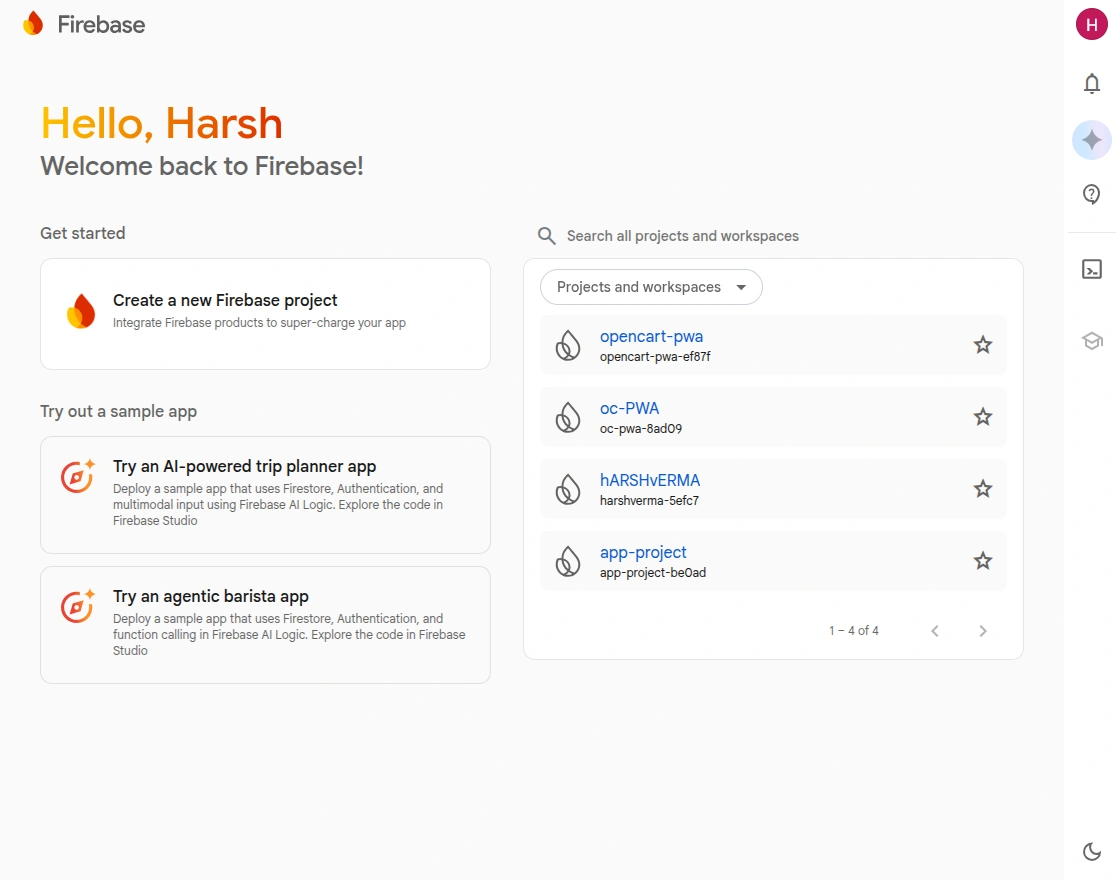
Step 1: Login to Firebase Console
First, visit the Firebase Console and log in using your Google account.
Here, you will see the dashboard with existing projects and an option to create a new project.
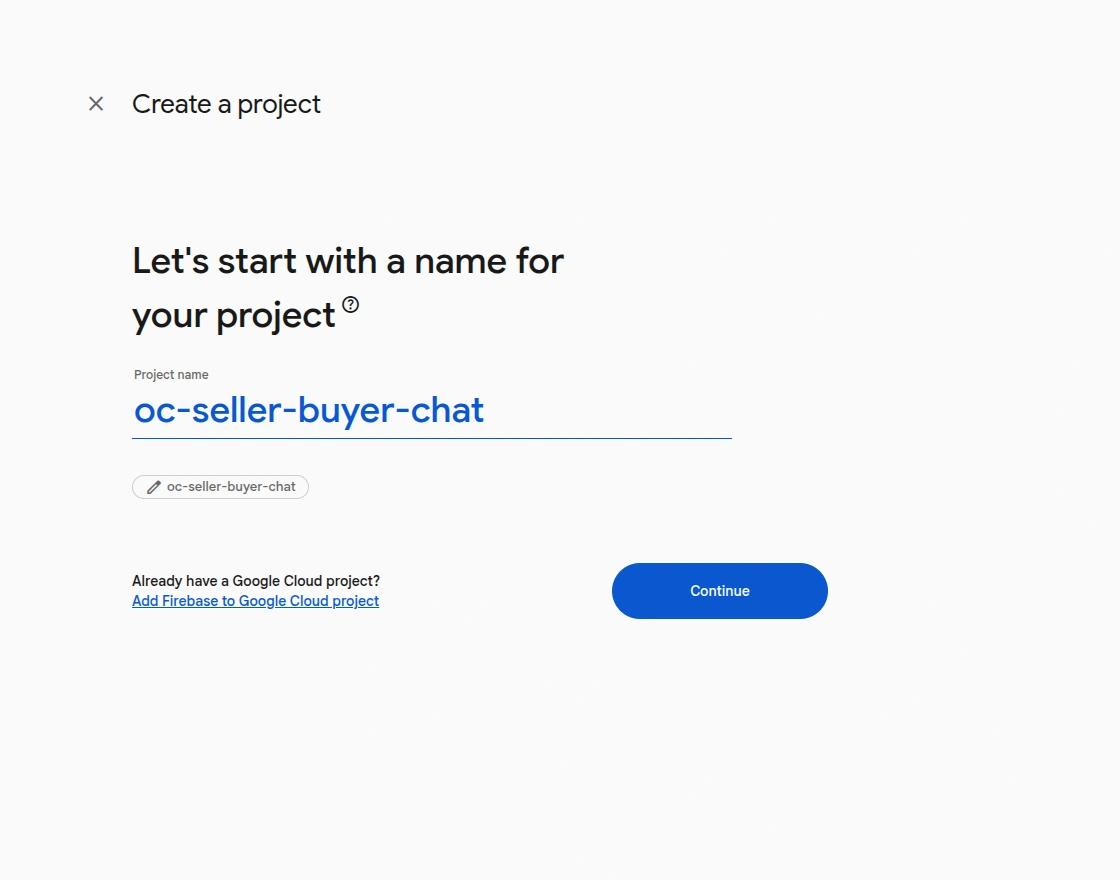
Step 2: Create a New Project
Click on “Create a new Firebase project”.
Enter your project name (e.g., oc-seller-buyer-chat) and click on Continue.
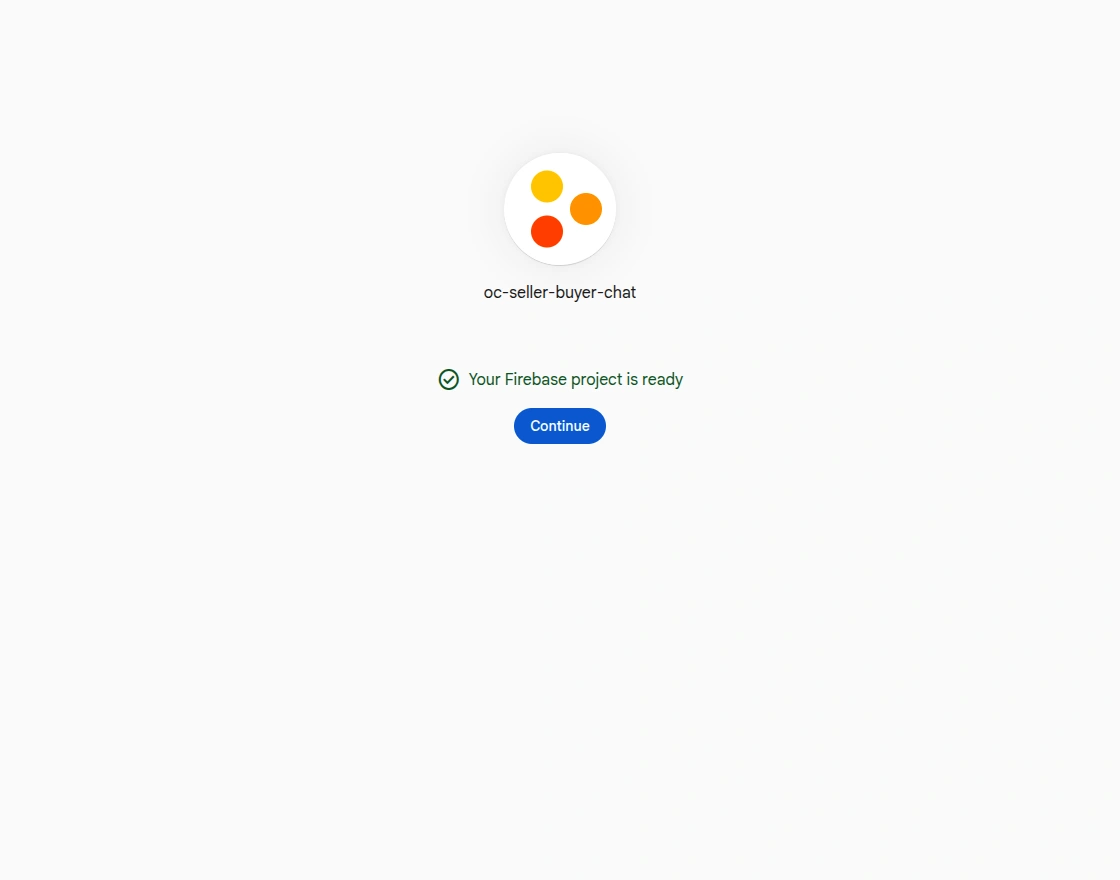
Step 3: Project Setup Completion
After entering the details, Firebase will create your project.
Once done, you will see a confirmation screen.
Click on Continue to proceed.
Step 4: Open Project Dashboard
Now, you will be redirected to the Firebase project dashboard.
From here, you can manage all Firebase services and settings.
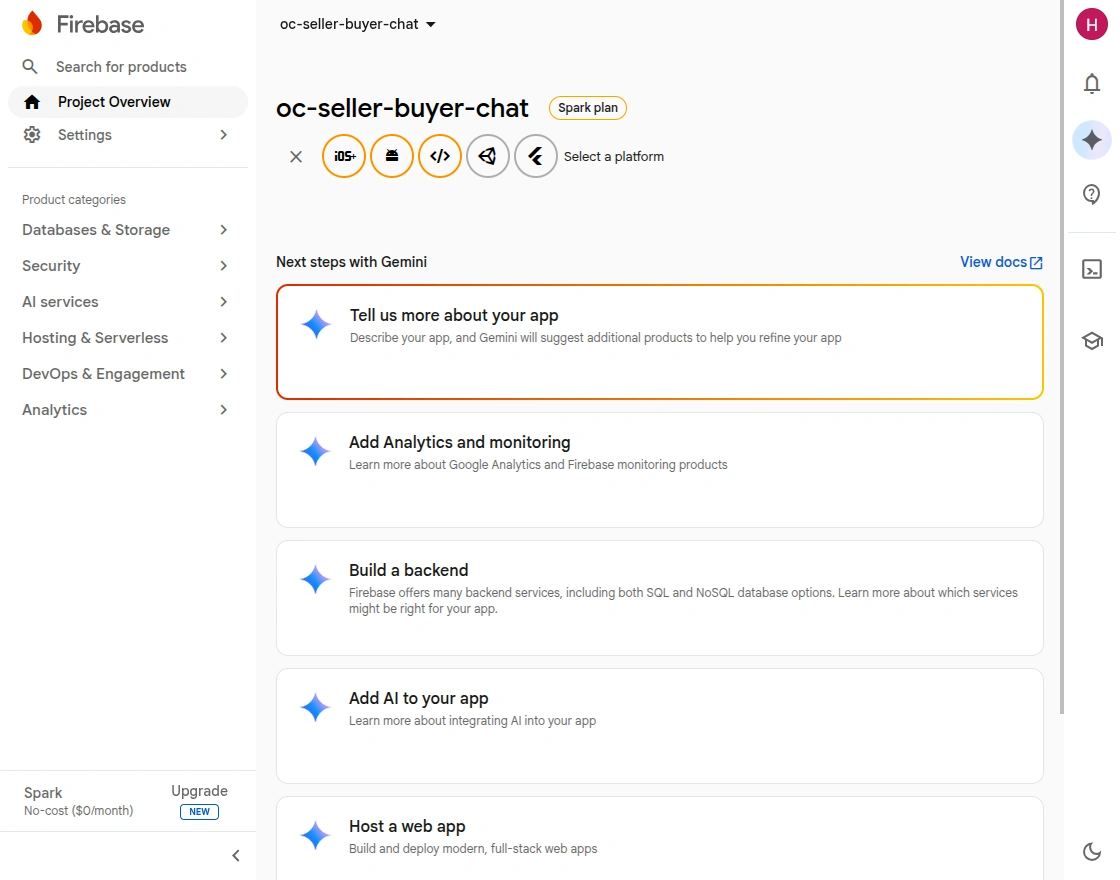
Step 5: Add Web App & Get Configuration Details
Click on the Web (</>) icon to add your web app.
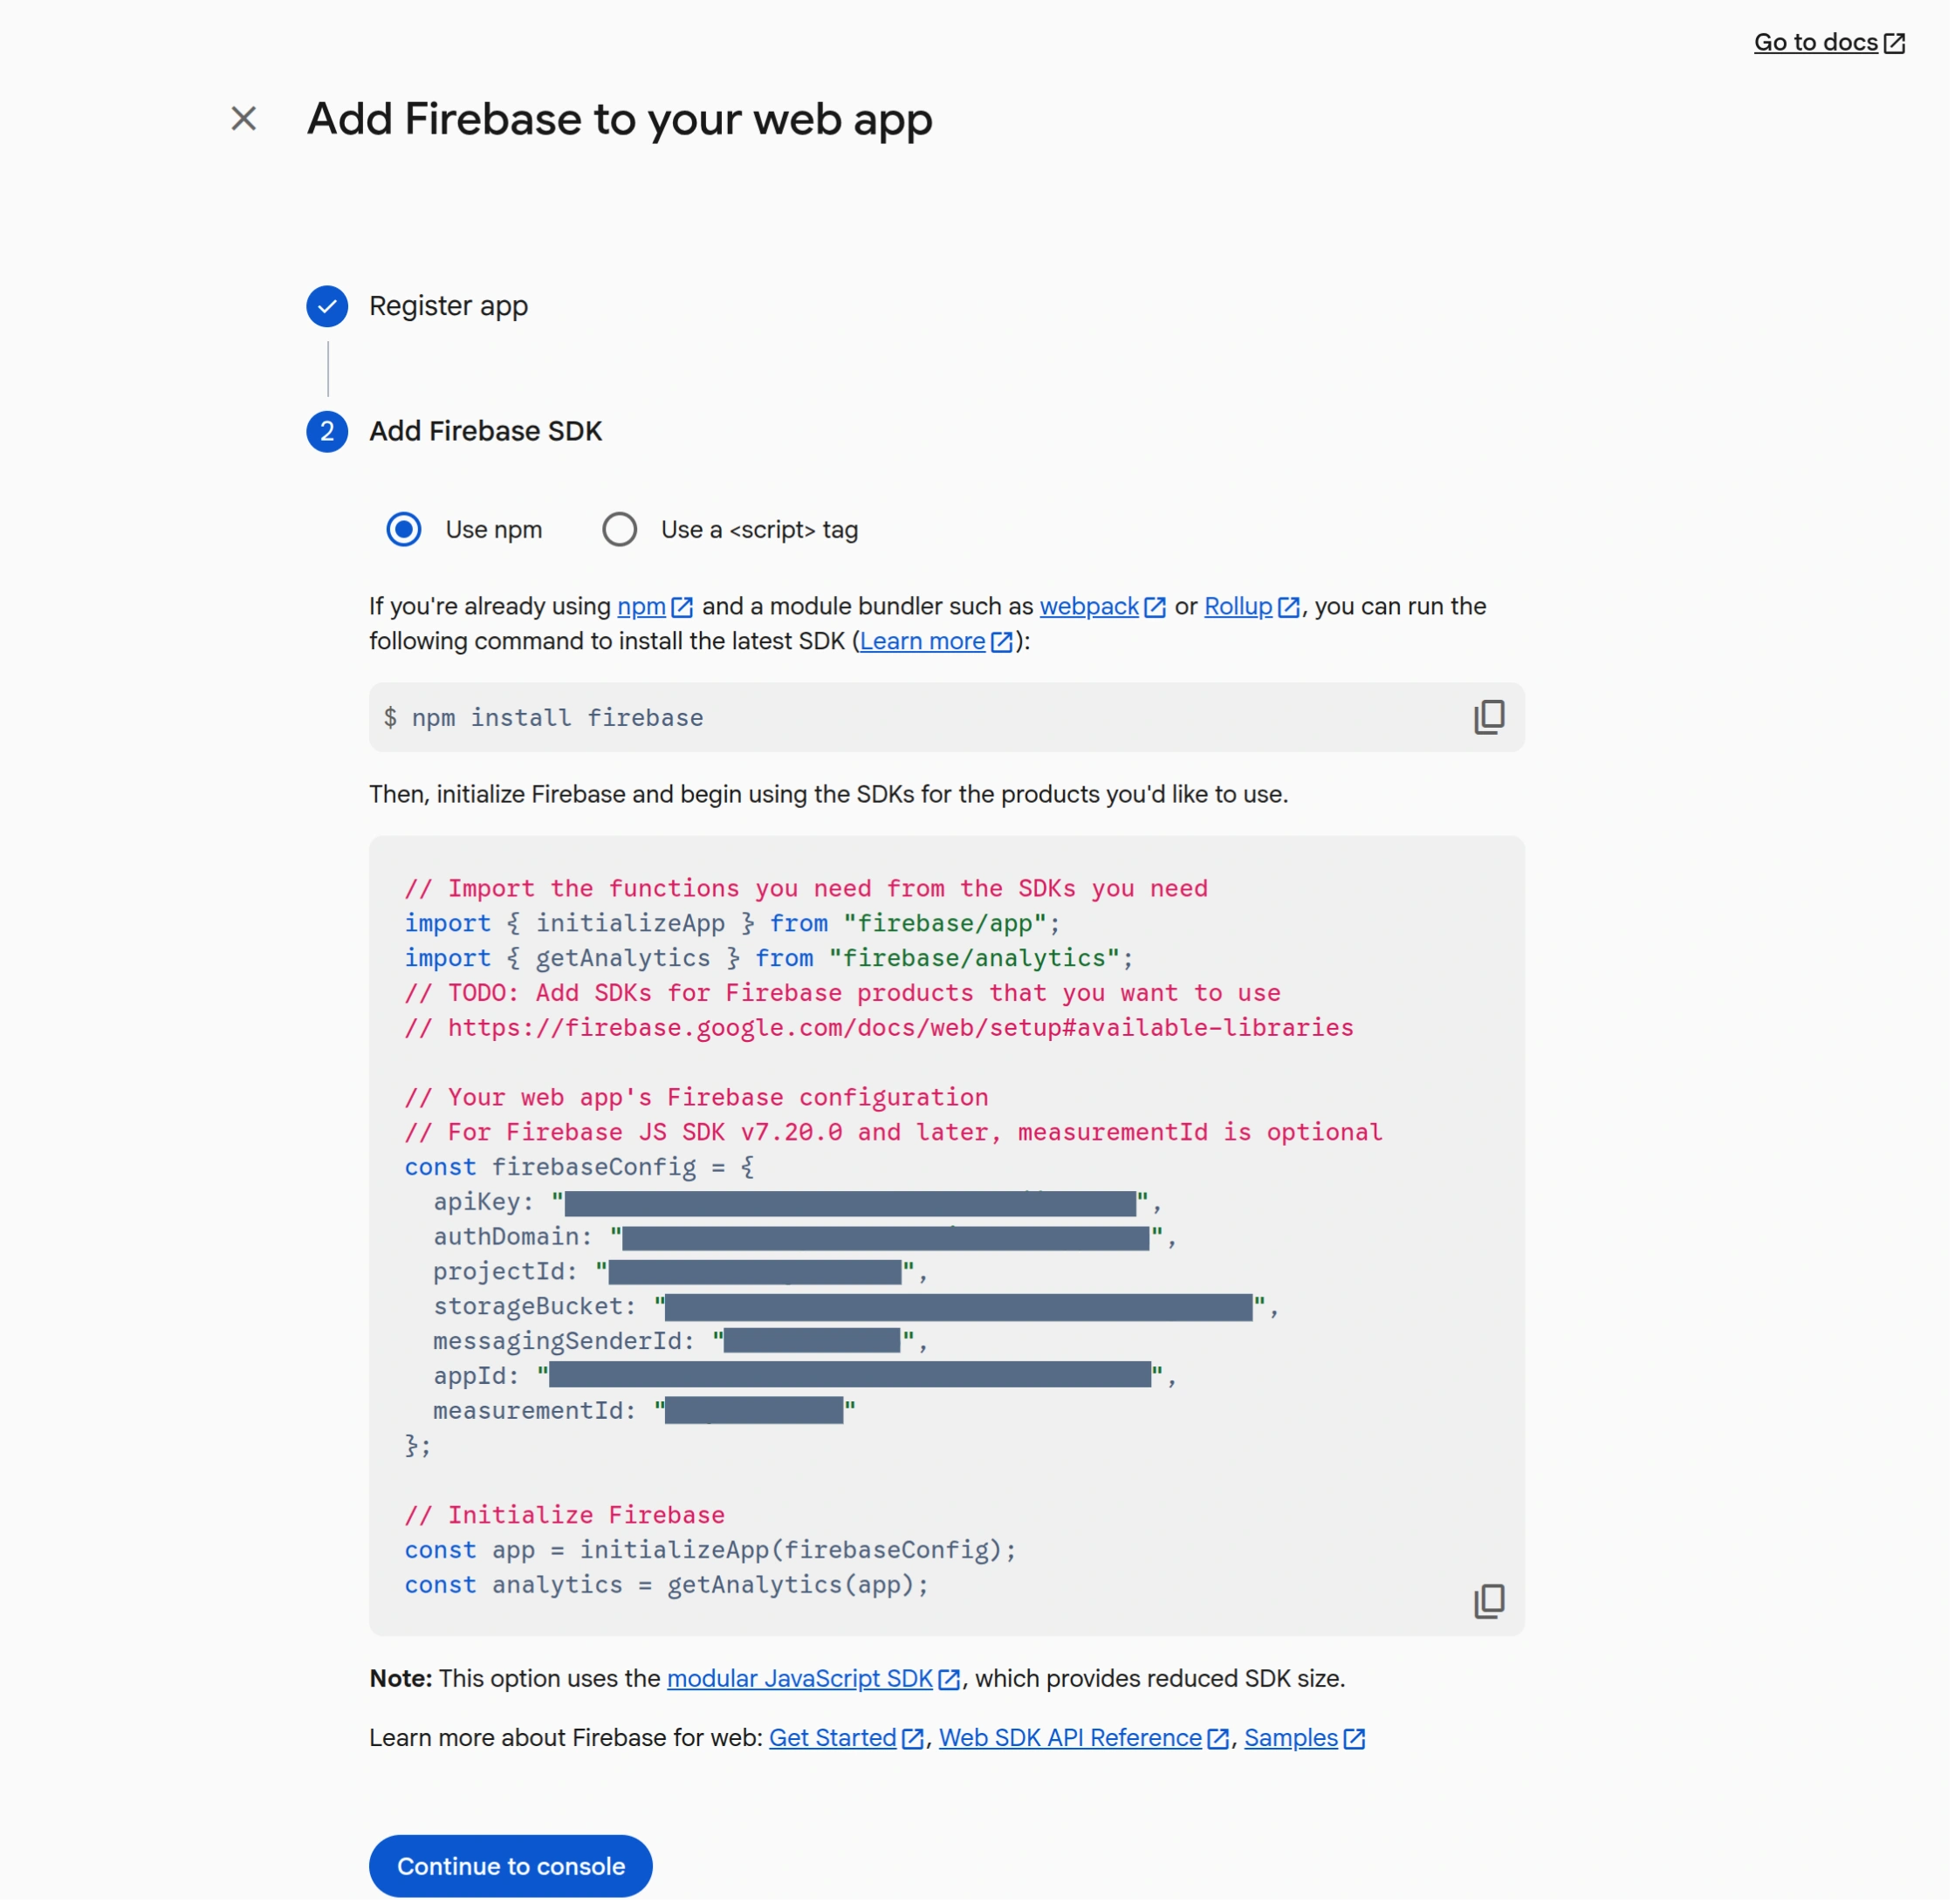
After registering the app, Firebase will generate configuration details like:
- API Key
- Auth Domain
- Project ID
- Storage Bucket
- Messaging Sender ID
- App ID
Copy these credentials and paste them into the Opencart Seller Buyer Chat module configuration.
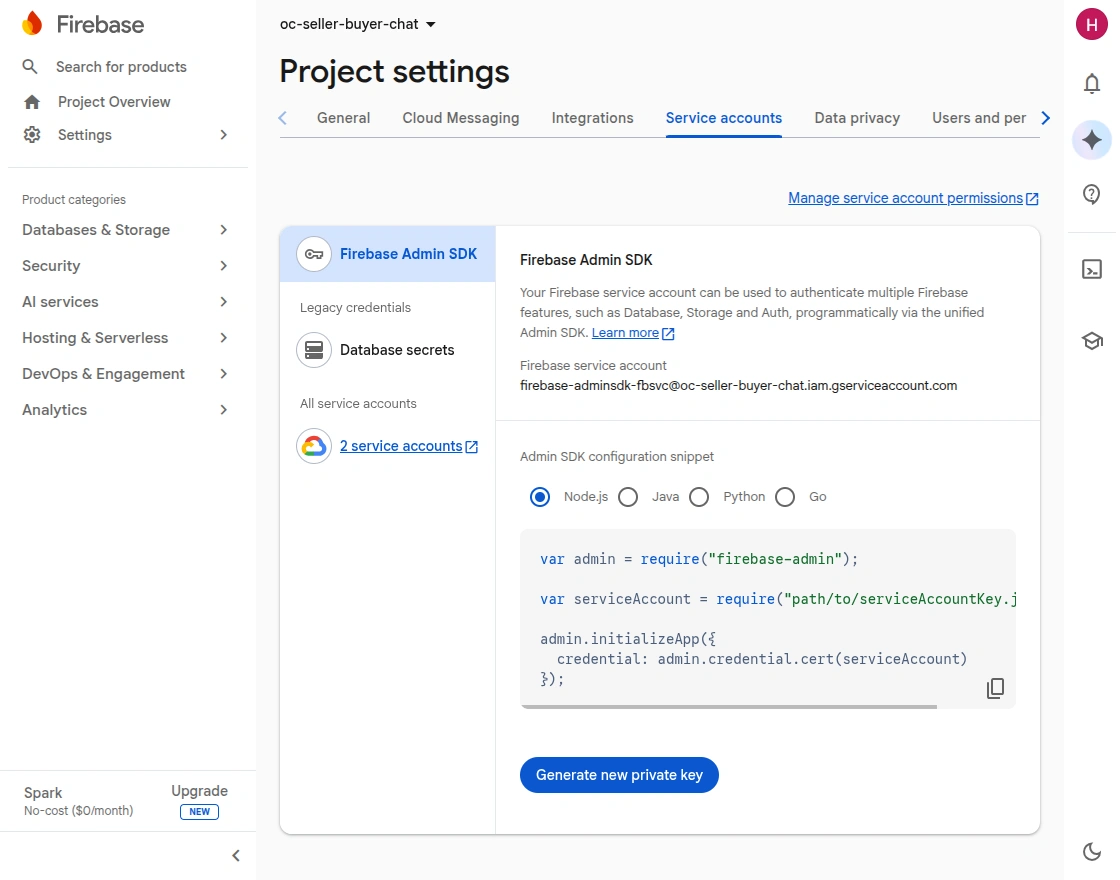
Step 6: Generate Firebase Private Key
Go to:
Project Settings > Service Accounts tab
Click on “Generate new private key” to download the JSON file.
Upload this file in the Firebase Private Key field in your module.
Configuration Of Opencart Marketplace Seller Buyer Chat
Admin will configure the module after installation by navigating to Extensions->Modules.
Here admin can click on the edit button of the seller-buyer chat module to configure it.
Here admin can server settings, general settings, the appearance of the chat window and the default messages.
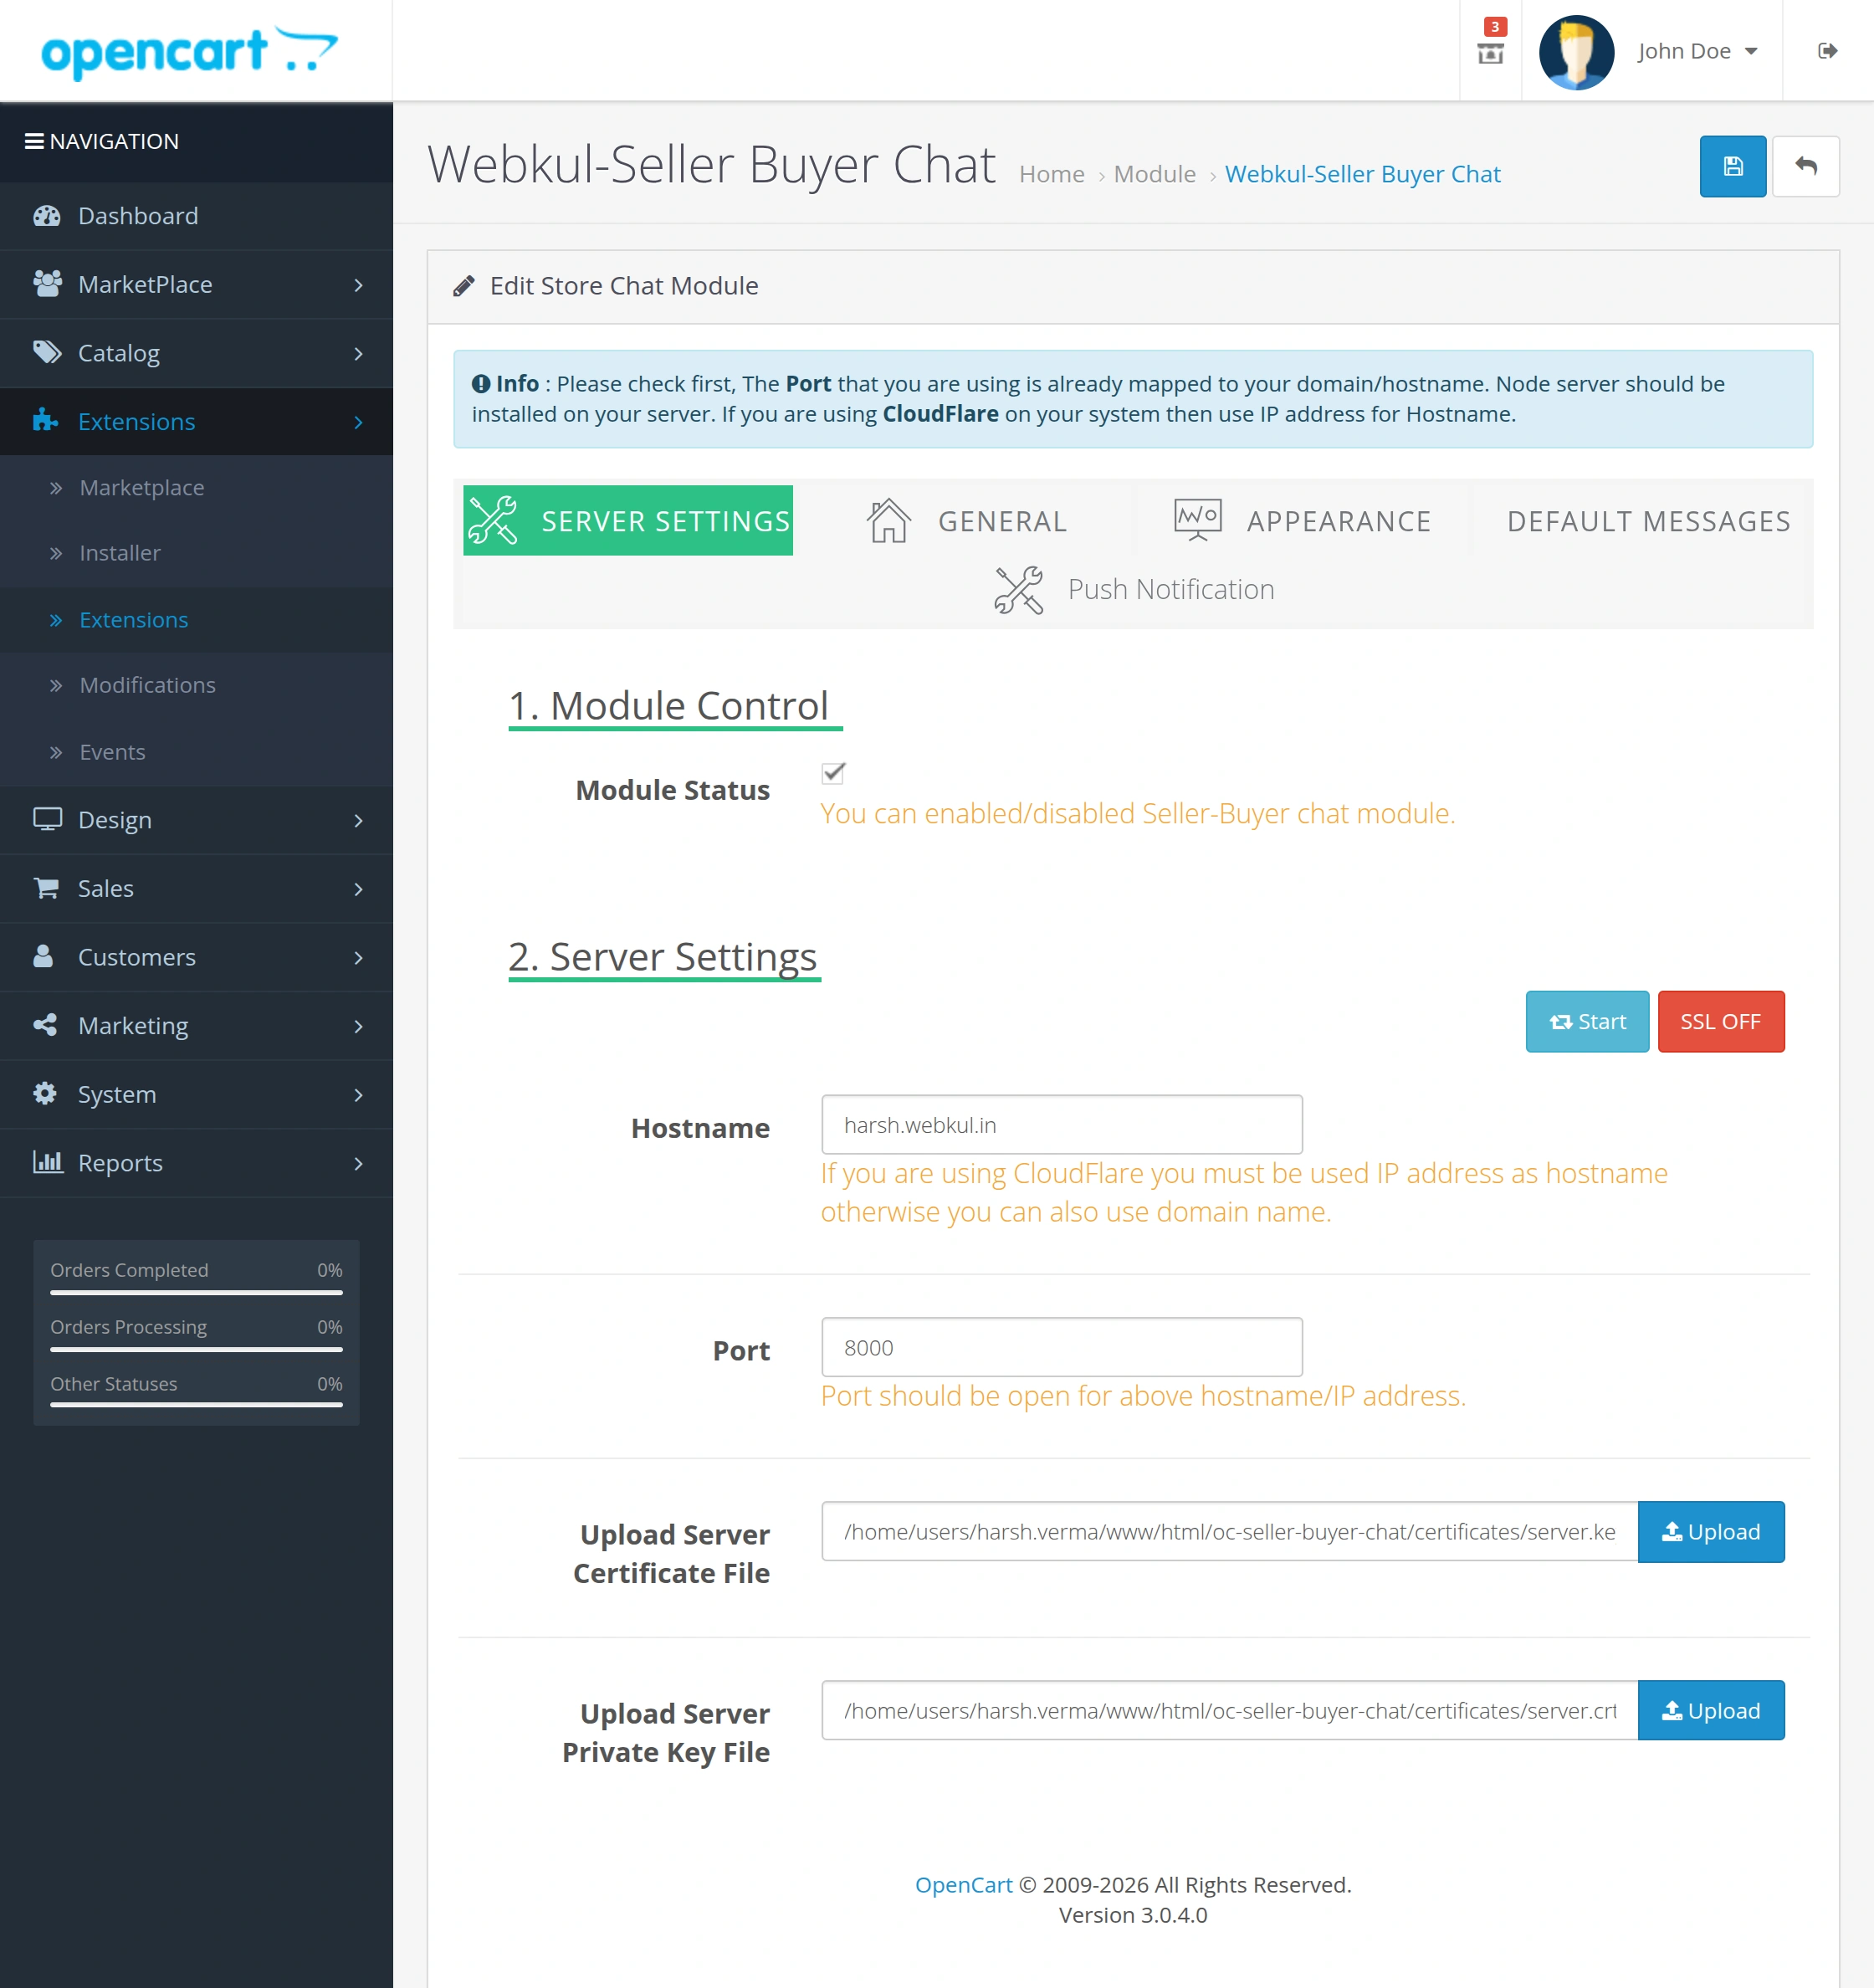
Configure Server Settings
Under the Server Settings tab, the admin can configure the server-related settings required for establishing socket-based communication between buyers and sellers.
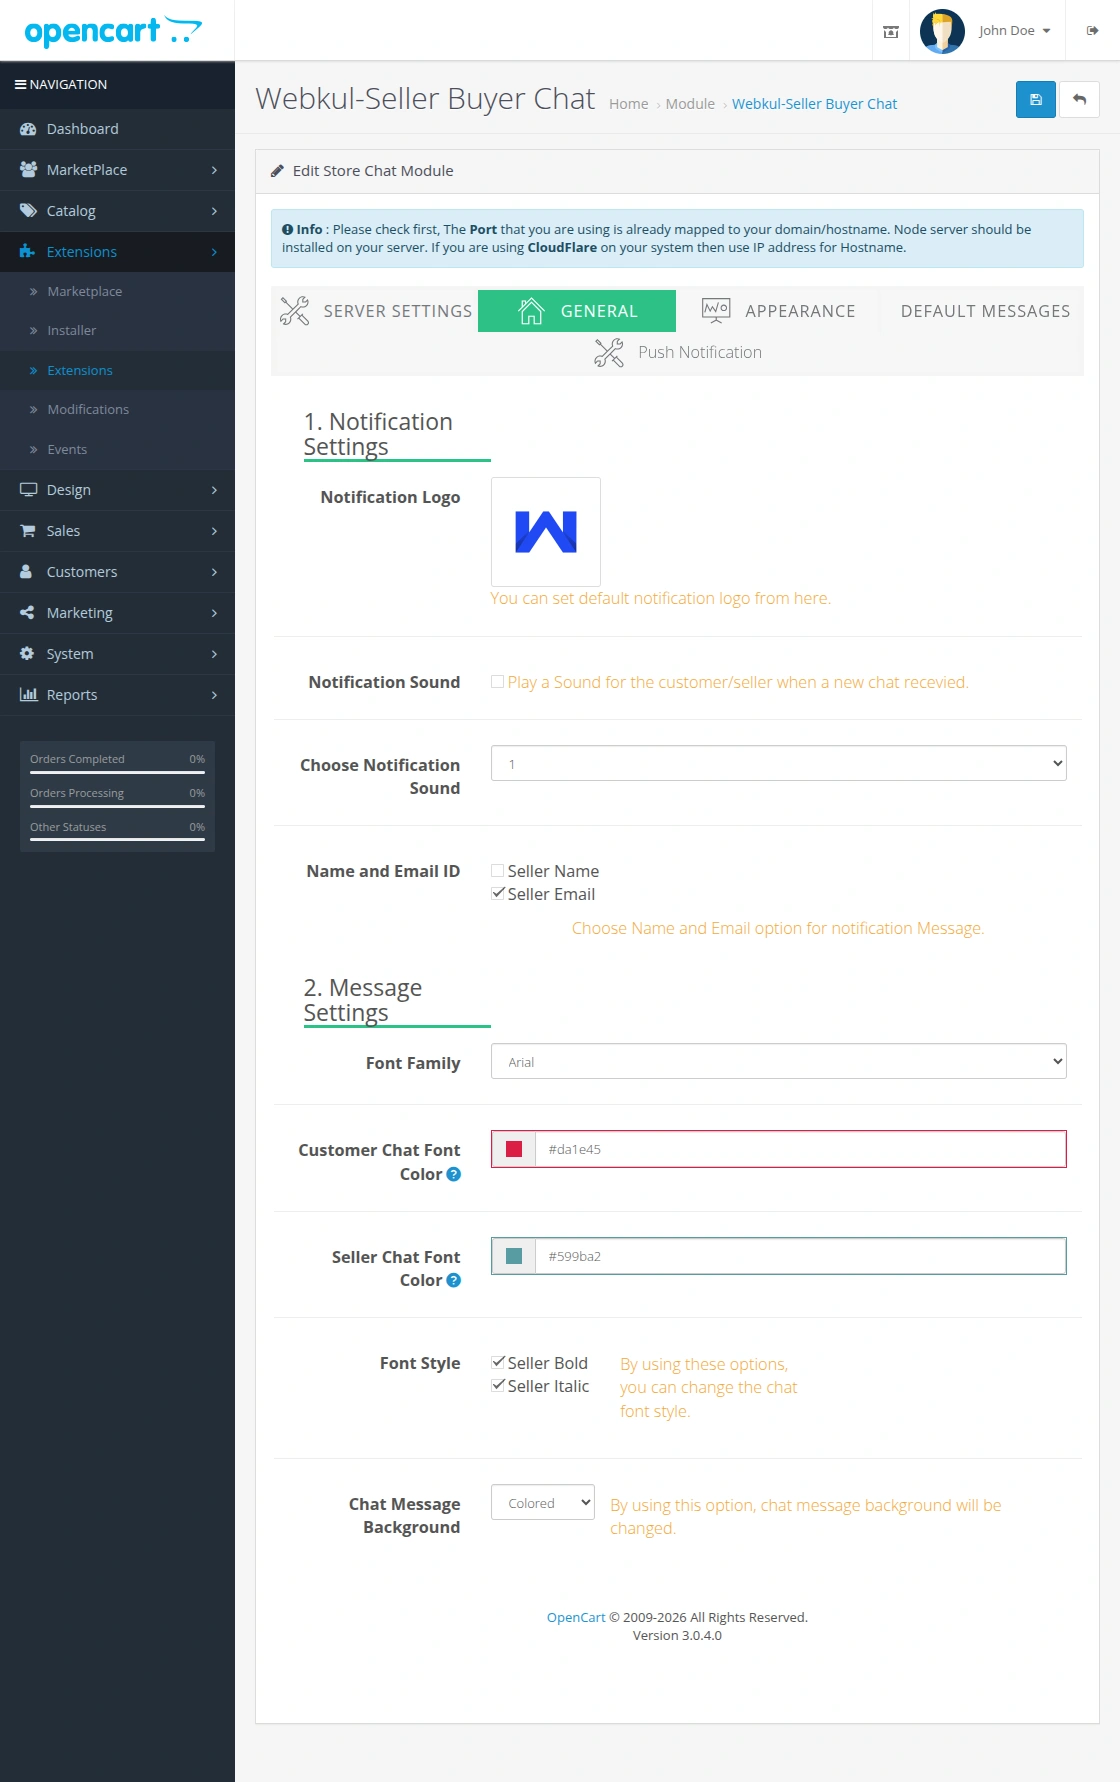
Configure General Settings
The General tab allows the admin to configure the basic settings of the Seller Buyer Chat module, including notification and messaging preferences.
Configure Chat Appearance
The Appearance tab allows the admin to customize the look and feel of the chat window.
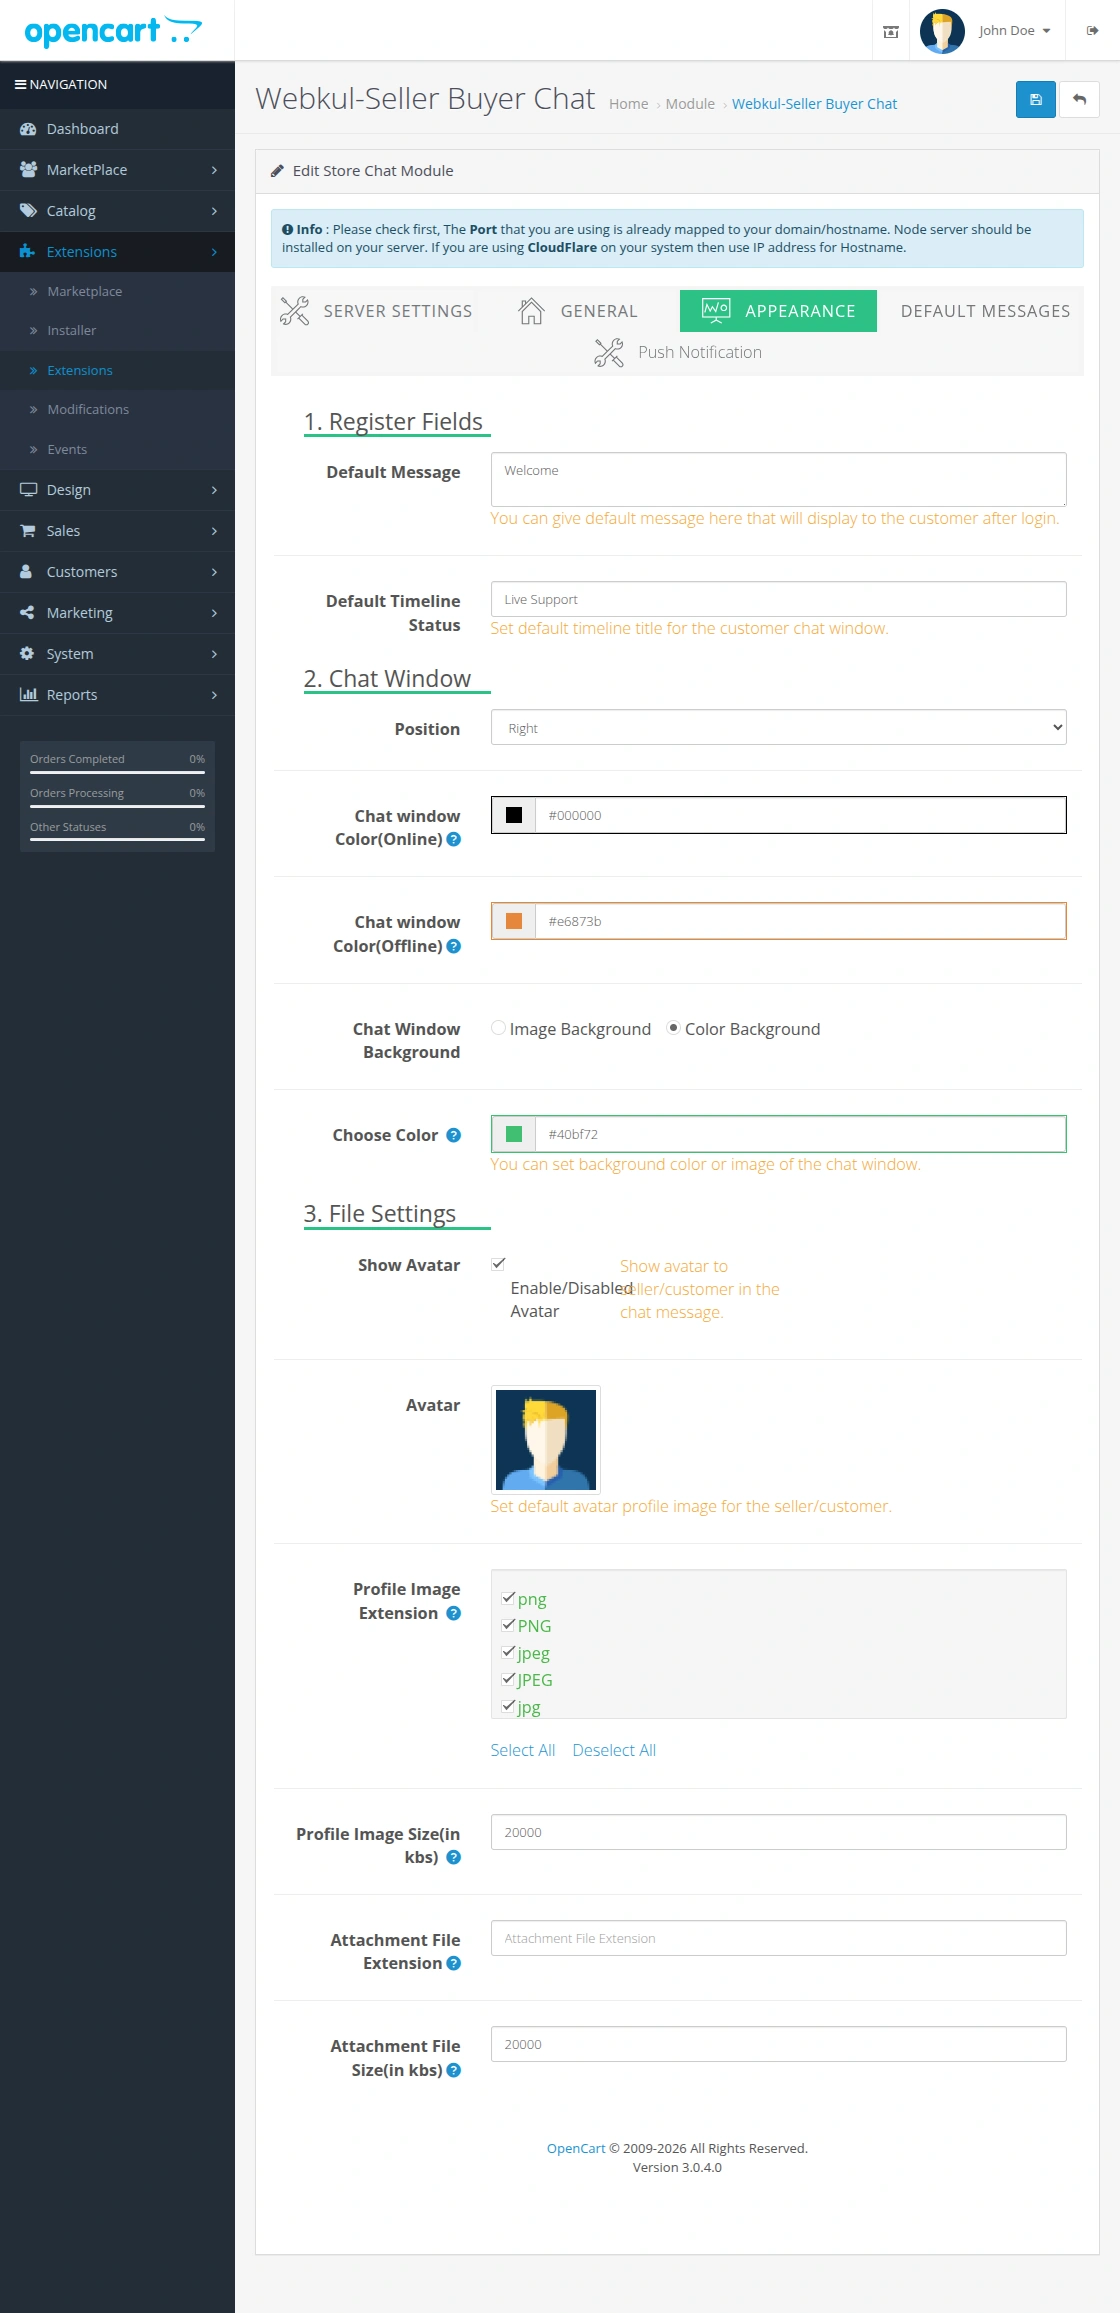
The admin can configure the following options:
Default Message
Enter the default welcome message that will be displayed to customers when they start a new chat.
Default Timeline Status
Configure the status message displayed on the chat timeline.
Chat Window Background
The admin can choose either an image or a color as the chat window background.
- If Image is selected, upload the desired background image.
- If Color is selected, choose the preferred background color.
Show Avatar
Enable this option to display profile images of both buyers and sellers during chat.
Default Avatar
Upload a default avatar image that will be shown whenever a buyer or seller has not uploaded a profile picture.
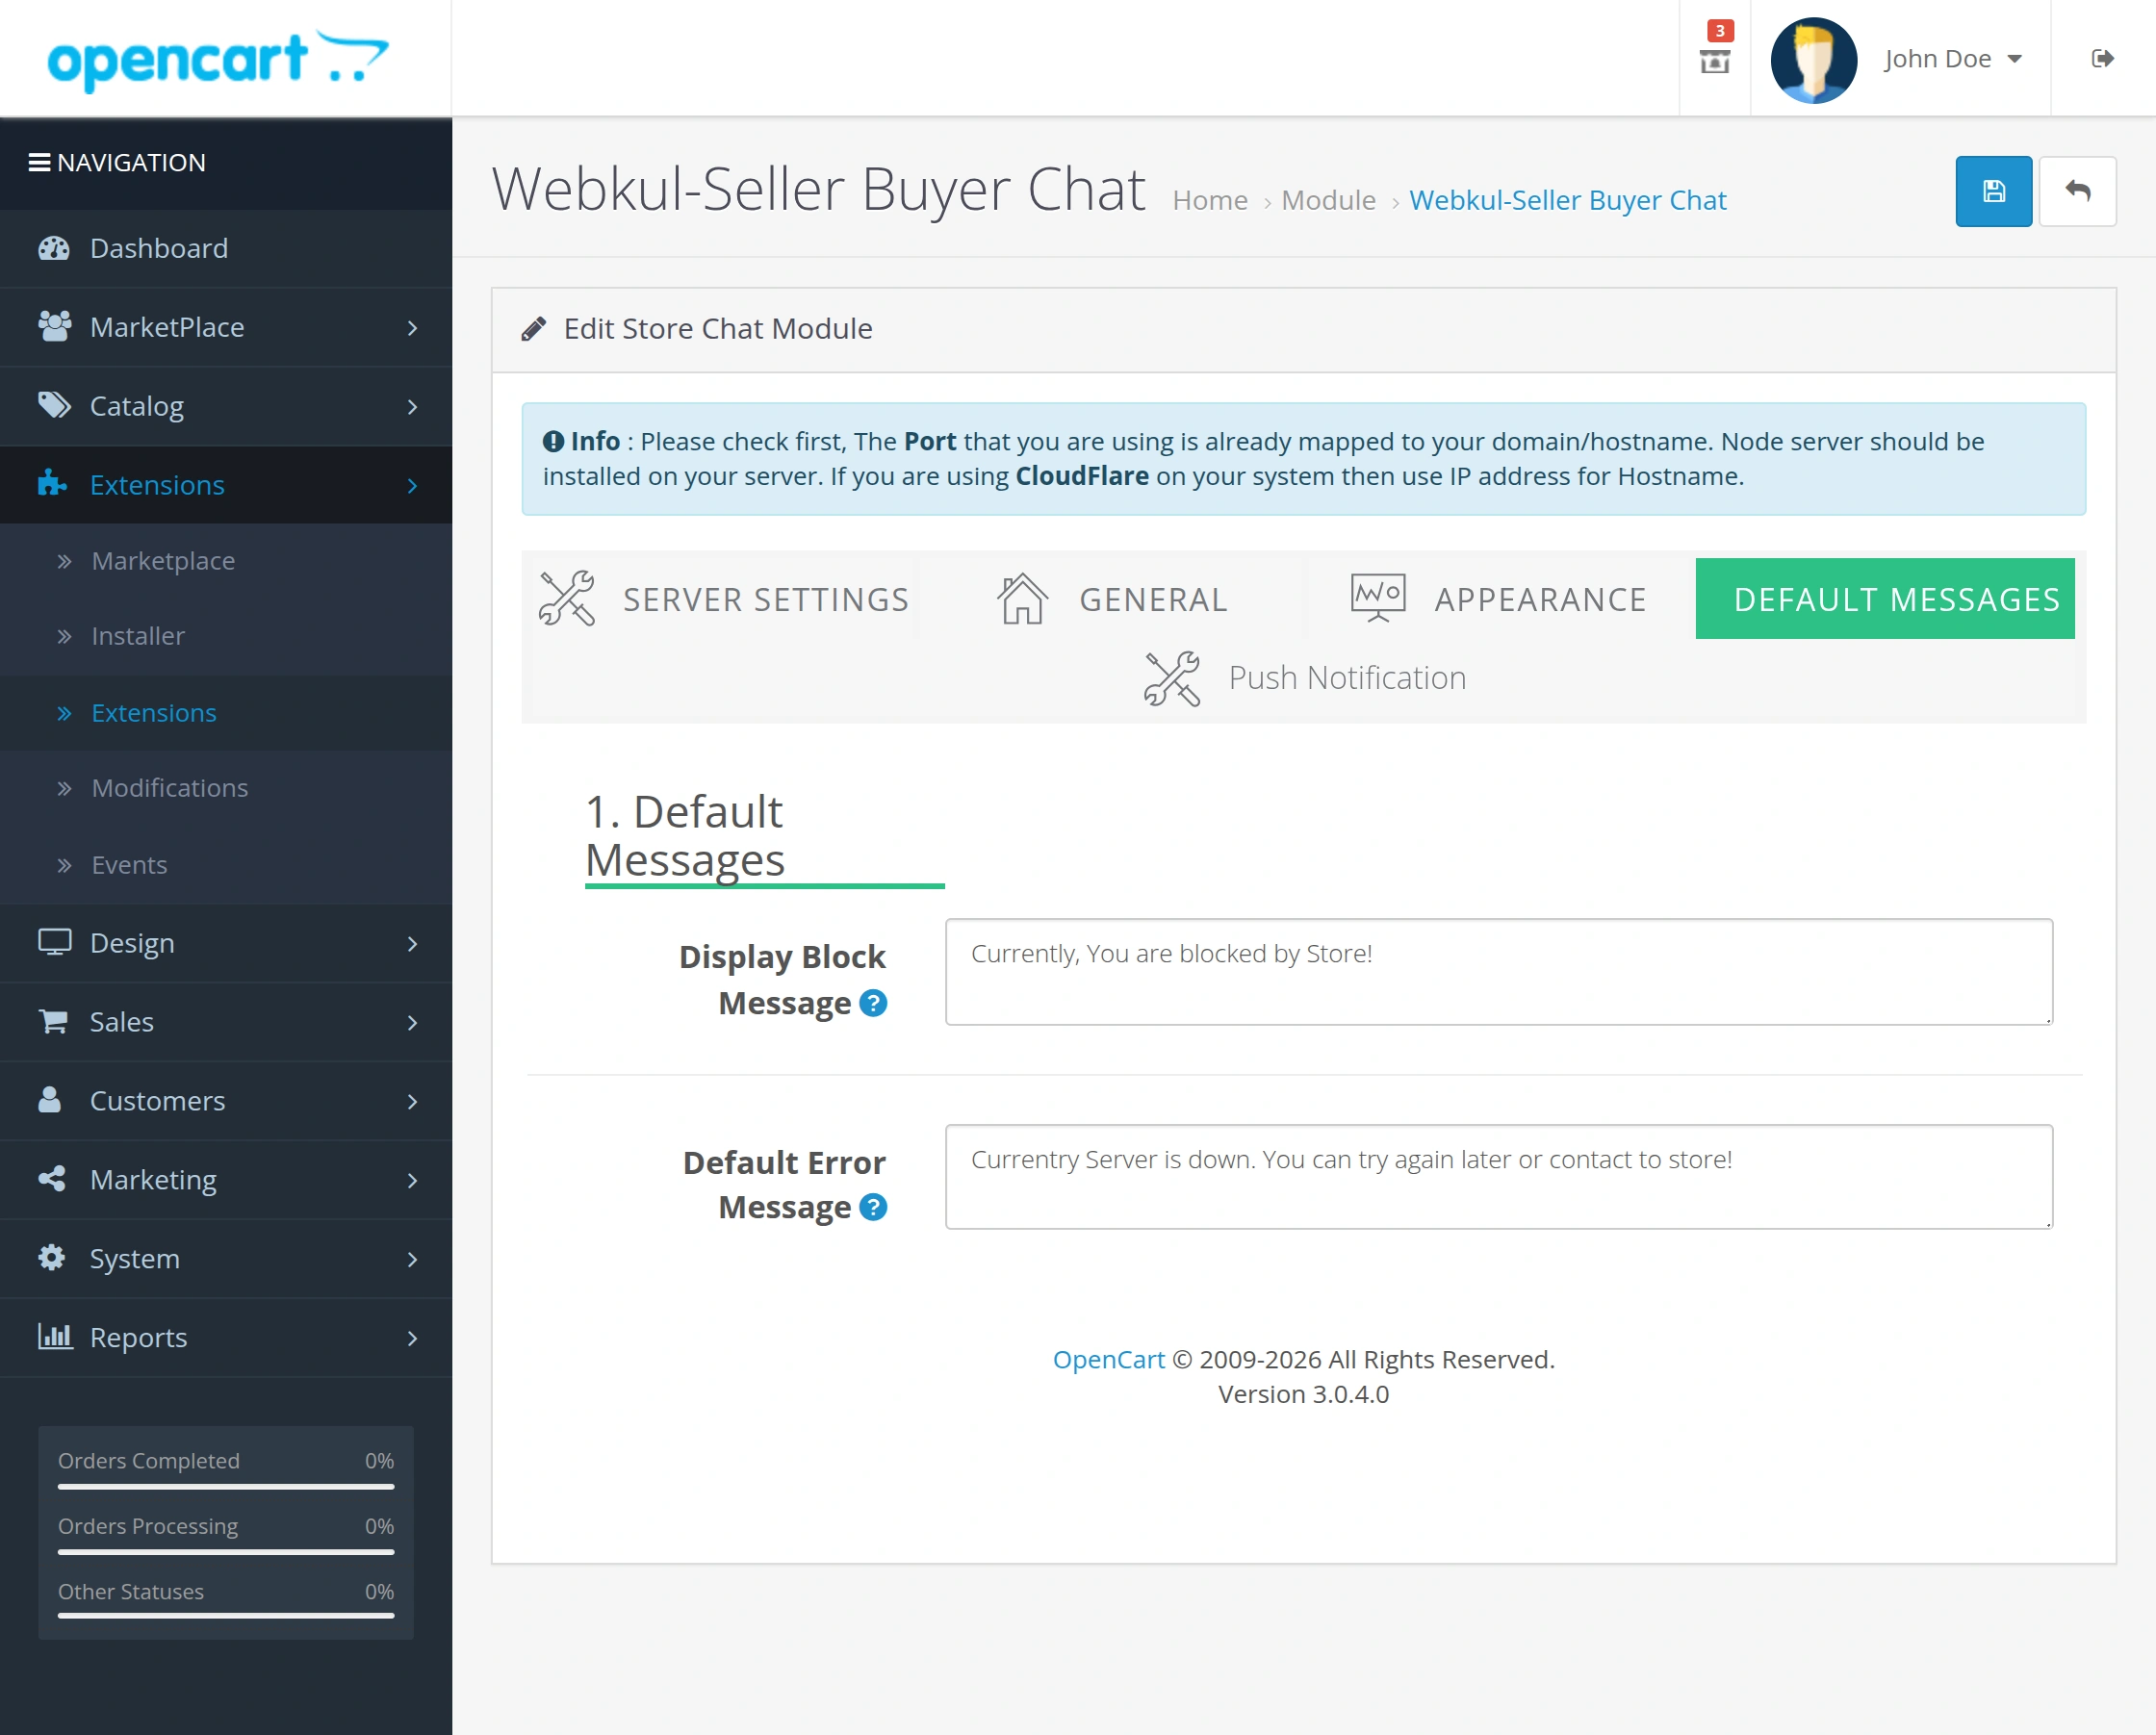
Configure Default Messages
The Default Messages tab allows the admin to define predefined messages that will be displayed to customers during different stages of the chat.
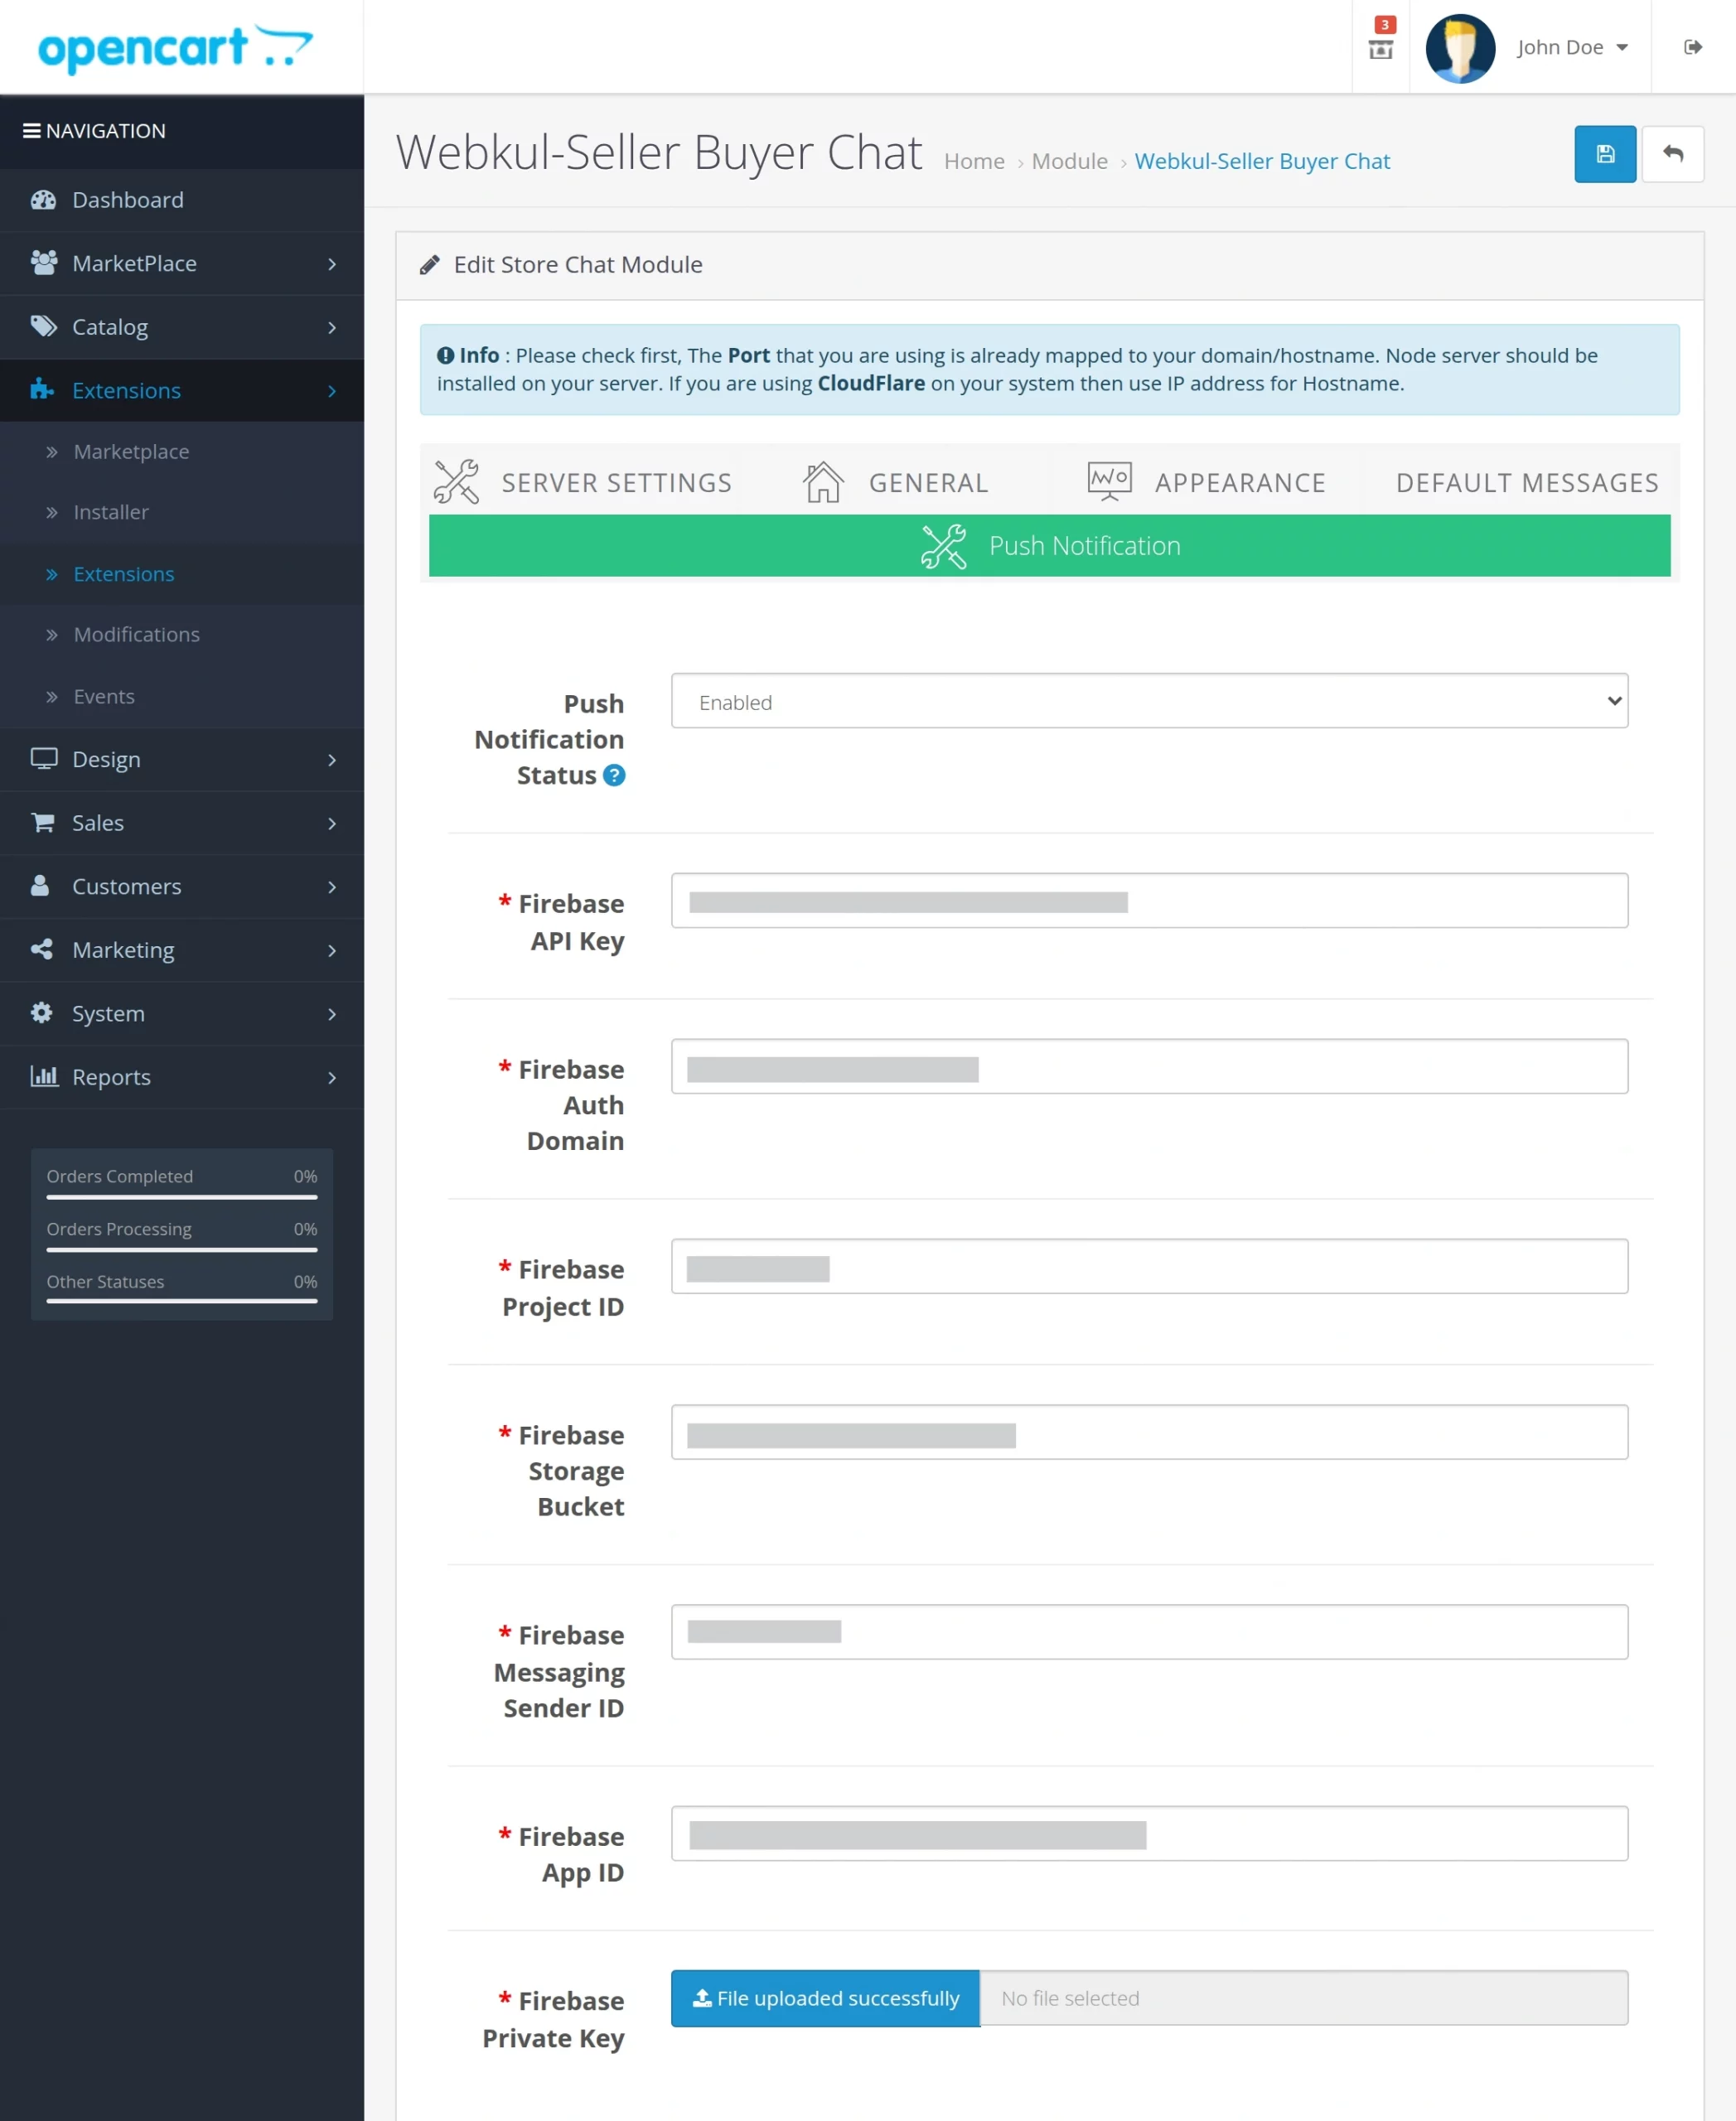
Configure Push Notifications
The Push Notification tab allows the admin to configure Firebase Cloud Messaging (FCM) for sending real-time chat notifications to buyers and sellers.
Under this section, the admin needs to configure the following fields:
- Push Notification Status – Enable or disable push notifications for the chat module.
- Firebase API Key – Enter the Firebase Web API Key generated for your project.
- Firebase Auth Domain – Specify the Firebase Authentication Domain.
- Firebase Project ID – Enter the Firebase Project ID.
- Firebase Storage Bucket – Specify the Firebase Storage Bucket associated with the project.
- Firebase Messaging Sender ID – Enter the Firebase Sender ID used for Cloud Messaging.
- Firebase App ID – Provide the Firebase App ID of the web application.
- Firebase Private Key – Upload the Firebase Service Account Private Key (JSON) required for secure notification delivery.
After entering all the required Firebase credentials, save the configuration.
Once configured successfully, buyers and sellers will receive real-time push notifications whenever a new chat message is received.
How customers can chat with sellers
After configuration of the module, a customer can find the option to chat with the seller on the product page. Here customer needs to login or register to start a chat.

Also, After logging in the customer can chat with the sellers. A customer can see whether the seller is online or not. A customer can also change their online status.

To see the chat history customers can click on the clock icon and select the time period for which they want to see the messages.

Customers can change their availability status like this.

Also, the Customers can see the notification whenever a seller sends the message.

Customers can email the chat transcript to their email ID, have the option to report to admin, change profile image, and end chat.

After clicking o the ’email transcript’ the chat transcript is sent to the customer’s email and the customer receives a confirmation message like this.

Also, After clicking on the ‘Report Manager’ option a new page will open in the chat box. Here the customer can write and send the message. This message is sent to admin’s email address.

After clicking on profile settings the customer will receive a pop-up. From here the customer can remove the profile image or upload a new image.
Also, After clicking on the ‘End Chat’ option the chat ends. After that, a customer can start the chat again like this.

Customers also have the option to send emojis to sellers from the chatbox.

If a customer is blocked by seller then the following message appears in the chat window.

Seller Buyer CHAT Management by Seller
After logging in the account, a seller can see the chat icon. Also, After clicking on it the seller can see the customers list and have the option to block and delete the conversation.

Now, After clicking on the button, the seller can see the list of the customers.
From here a seller can open the conversation and chat with the customer. A seller can also block the customer and see the block list.
")
After clicking on the block button, a window will pop up. From here the seller can send the message to the customer stating the reason of block. 
Also, After clicking on the block list, a seller can see all the blocked customers and from there seller can unblock the customers.

A seller can chat with the customers who sent them messages.

The seller can see the notification whenever a customer sends the message.

Admin End Of Seller Buyer chat
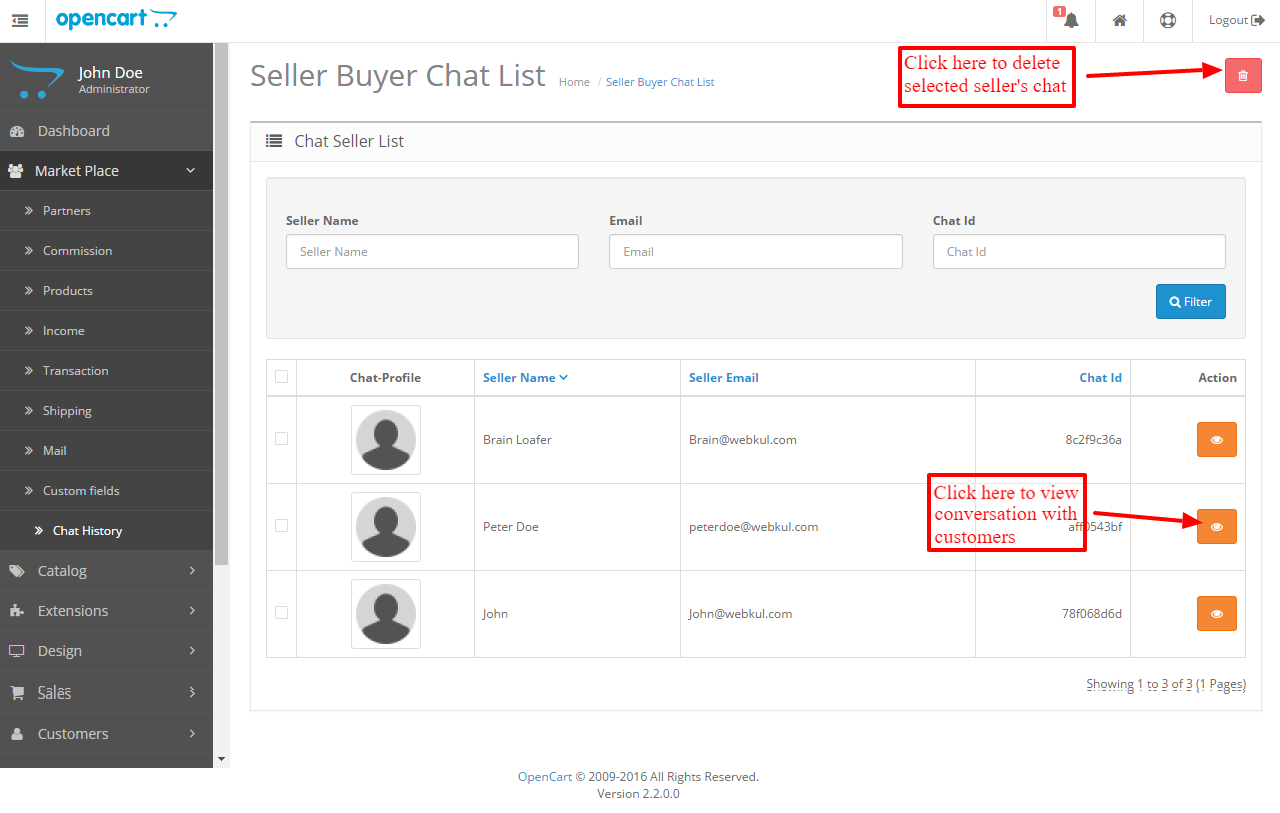
Admin has the option to see and delete the conversation between buyer and seller. The Admin can see the conversation from Marketplace-> Chat History.
From here admin can see the chat list of all the seller’s chat. If admin will delete the chat from here then all the chat conversation related to the seller will get deleted.
After clicking on view button admin can view chat of each customer with the seller.
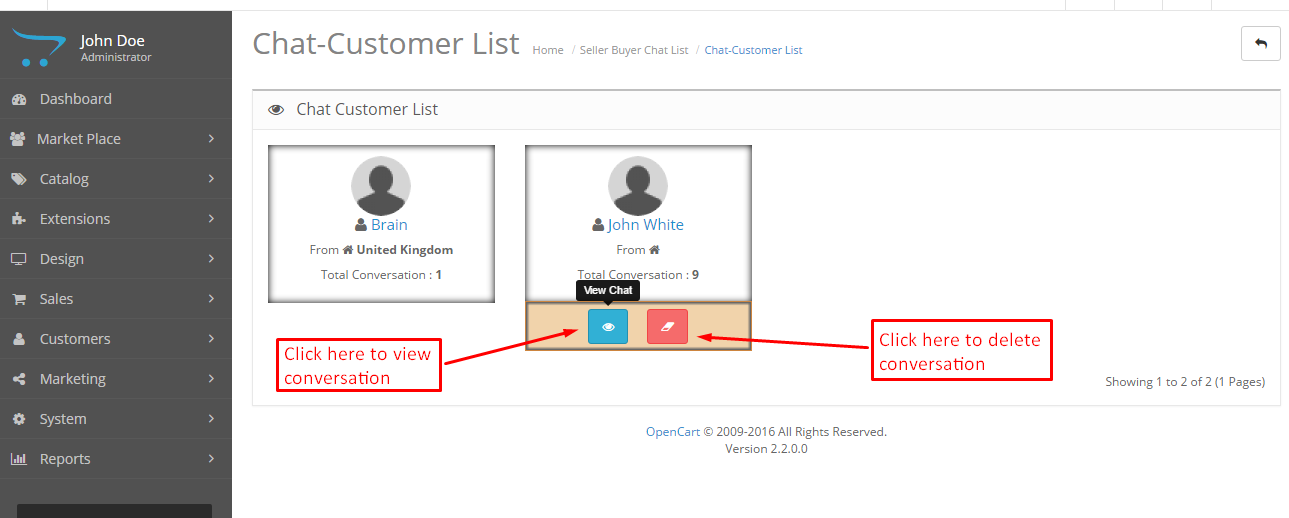
Also, After clicking on view button admin can see the list of conversations of the seller and customers.
From here admin can delete and view the conversation of the particular customer with the seller.
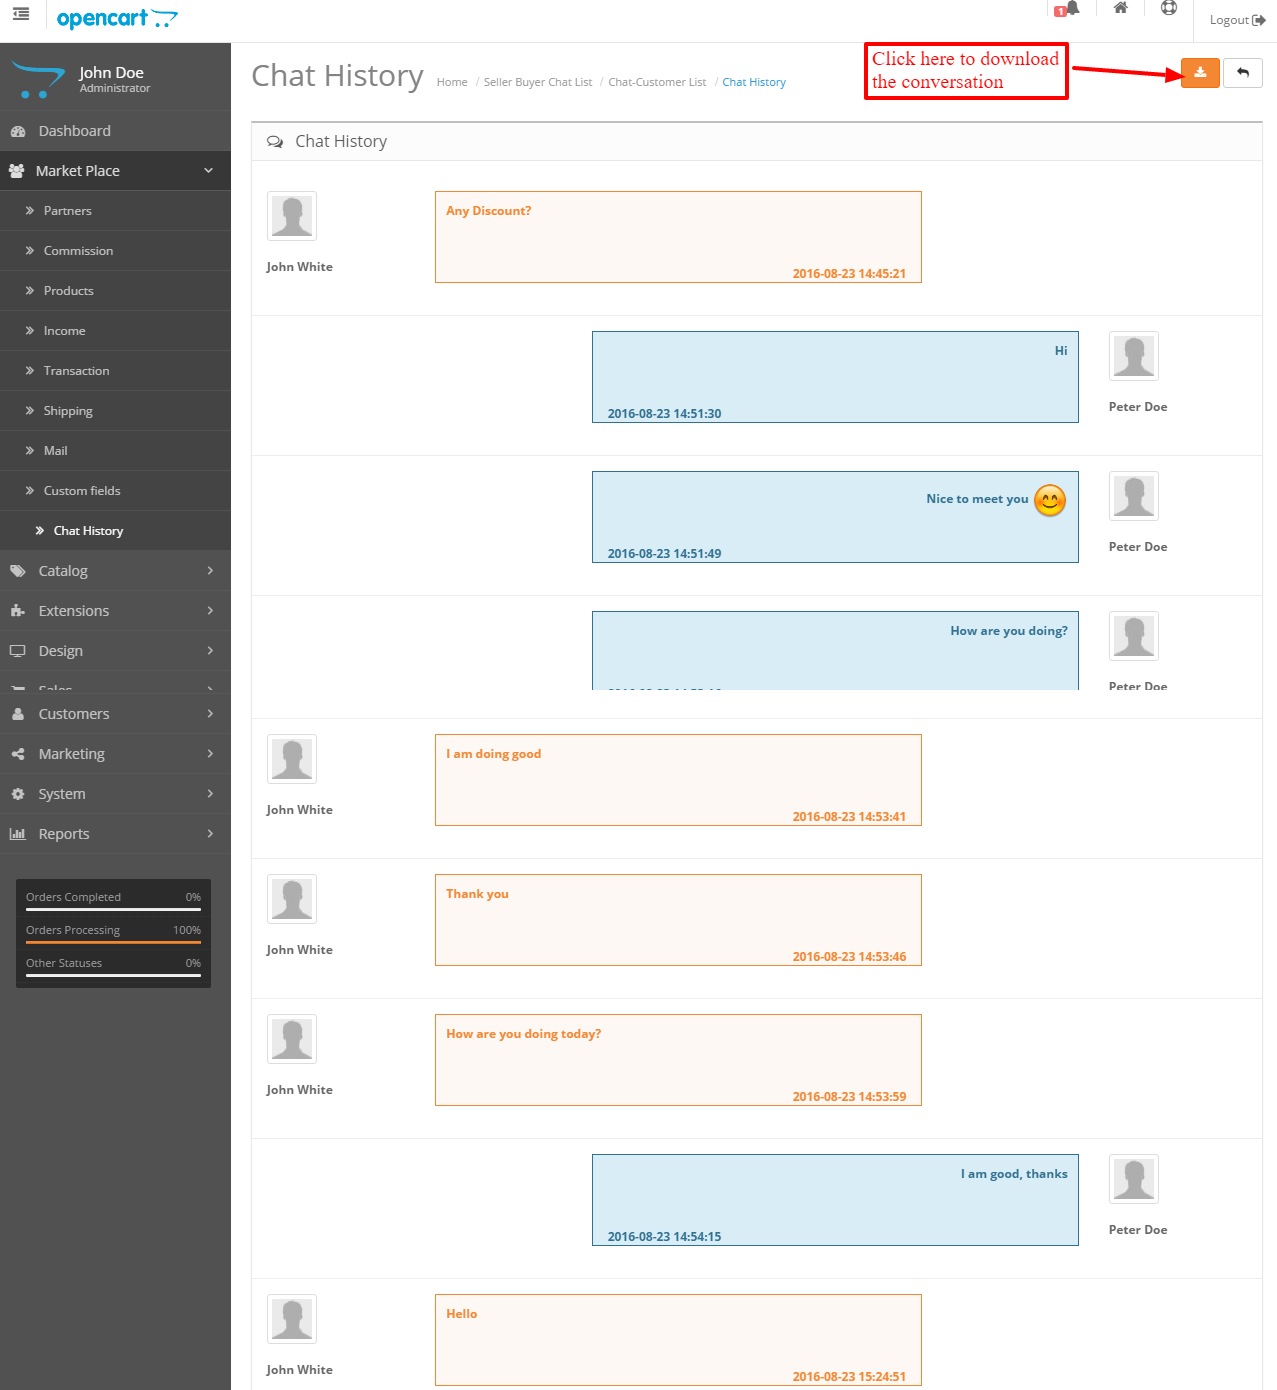
Admin can click on the view button to see the complete conversation of the buyer and seller. From here admin can also download the conversation.
Support
If you have any questions, suggestions, or customization requests, feel free to contact us at [email protected] or submit a ticket at webkul.uvdesk.com.
Explore our premium-quality Opencart Extensions to enhance your store functionality.
Current Product Version - 3.2
Supported Framework Version - 3.x.x.x

2 comments
All of our User Guides are updated to the latest versions. If you are facing any issues then you can mail us at [email protected] so that we can assist you regarding the same. Thanks