INTRODUCTION
Boost product sales by Odoo Website Warranty Management!
Providing a warranty on products helps boost customer confidence in it and lets them take buying decisions quickly. Also, it’s easier to sell products with a product warranty rather than ones without a warranty.
Odoo Website Warranty Management allows you to provide and manage product warranties in Odoo. You can set the warranty details at the product level and can configure the warranty, renewal, and auto-approval settings.
Product warranty commences on delivery validation of the product. The warranty management admin can see the warranty details in the sales orders and picking section. While the customer can view the same in the My Account section.
If the admin permits, customers can also renew the product warranty. And the renewal commencement and end date mail are automatically sent to the customers.
FEATURES
- Warranty management module permits the admin to add a warranty on products in Odoo.
- The admin can specify the details like warranty type (Free or paid), warranty period, auto-approve warranty, etc at the product level.
- You can also allow a warranty renewal option by setting the renewed warranty period and renewal price at the product level.
- Customers have the option to renew the product warranty with the ‘Renew’ option available on the warranty page.
- The module further sends a mail notification about the warranty details and product registration steps once the delivery is confirmed in Odoo.
- System automatically records the warranty start and end dates on delivery validity.
- Odoo admin can check the warranty details in sales orders and stock picking.
- Customers can check warranty details through the My Account section and can download the warranty details pdf.
- Customers can also place warranty renewal requests from their accounts.
- Admin can further check the previous warranty details for the product in the warranty registration menu on receiving a warranty renewal request.
- On successful renewal, the customer receives a mail notification.
INSTALLATION
- Once you purchase the App from Webkul store, you will receive the link to download the zip file of the module.
- Extract the file on your system after the download finishes. You will be able to see a folder named- ‘warranty_management.’
- Copy and paste this folder inside your Odoo Add-Ons path.
- Now, open the Odoo App and click on the Settings menu. Here, click on Activate the Developer Mode.
- Then, open the Apps menu and click on ‘Update Modules List.’
- In the search bar, remove all the filters and search ‘warranty_management.’
- You will be able to see the module in the search result. Click on ‘Install’ to install it.
WORKFLOW
After installing, let’s move to the configuration of Odoo Website Warranty Management.
CONFIGURATION
1. First of all, go to ‘Settings> Website’ and locate the ‘Warranty’ section. Here, set the ‘Warranty Expiry Notification’ number of days before the warranty expires to send out the notification alert. And choose the ‘Warranty Renewal Product.’
NOTE: The warranty Renewal product will be a service-based Product.

2. Now, navigate to ‘Website> eCommerce> Products> Products’ and create a product or open an existing one. You can see a new option ‘Allow Warranty.’ Tick the checkbox, to enable the ‘Warranty’ tab.

3. Here, select the warranty type (free or Paid). Then, set the warranty period in days, months, or years. Check the ‘Auto Warranty Confirm’ option to automatically approve warranty requests.
3.1 You can also tick the box ‘Can Be Renew’ to enable warranty renewal. In it, configure the renewal period, Max renewal times, and Renewal Cost.

3.2 On selecting the ‘Warranty Type’ as paid then you also have to define the ‘Warranty Fee.’On choosing the paid option the warranty cost will automatically be added to the cart upon buying the product.

4. Once done, click the ‘Save’ button/icon to save the changes.
5. Open the Odoo Website, Add a product with a warranty to the cart and proceed to checkout to place the order.

VALIDATING THE PRODUCT DELIVERY
6. In the Odoo, confirm the order and click on ‘Delivery.’

7. On the delivery page, click the ‘Validate’ button for delivery validation.

PRODUCT WARRANTY DETAILS
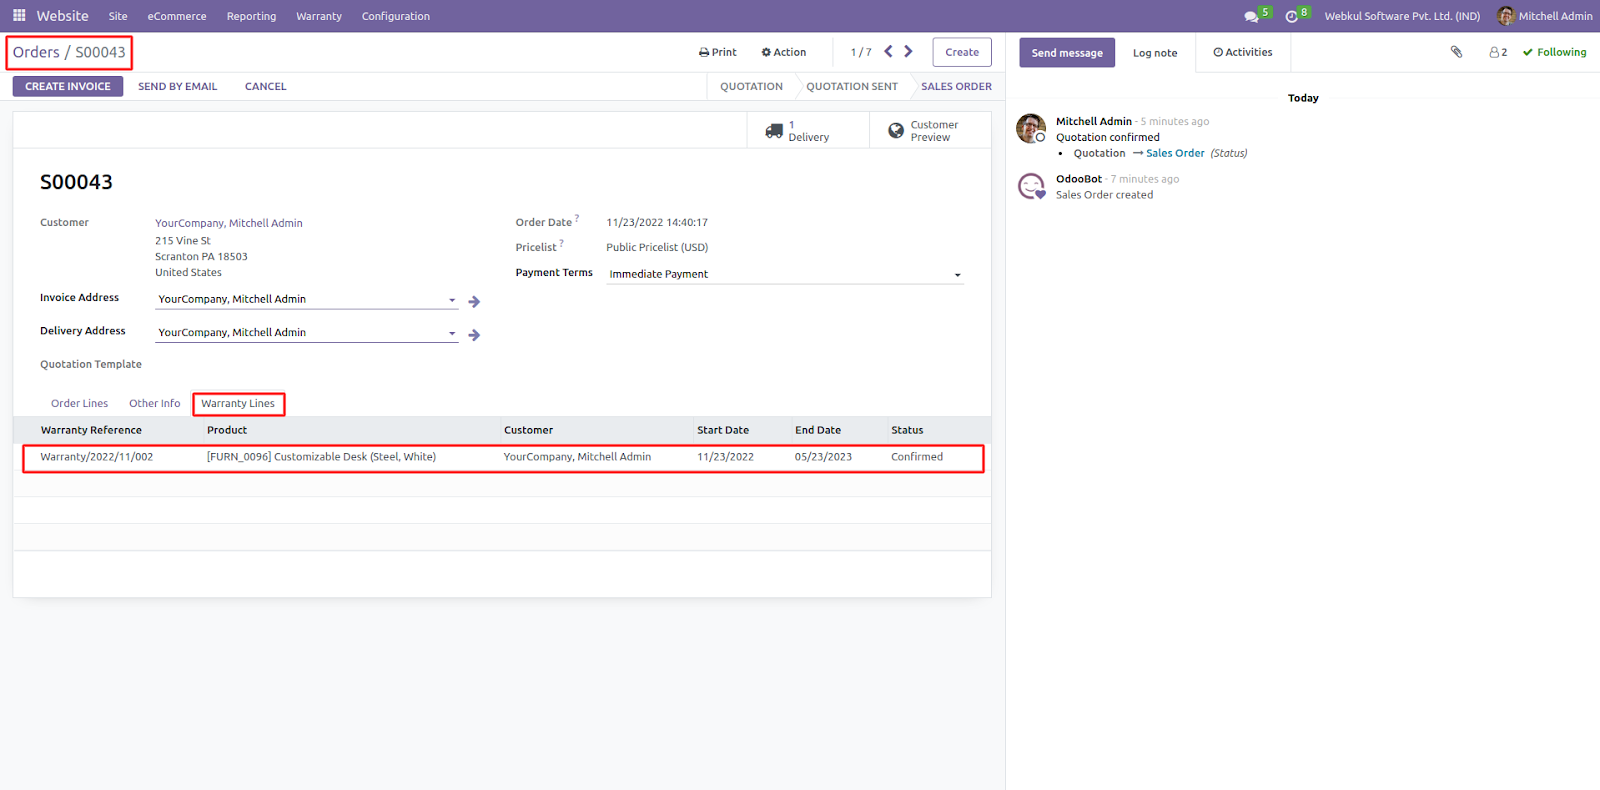
8. Once you validate the delivery, the product warranty information is recorded under the ‘Warranty Lines’ tab. And it shows the Start and End Date of the product warranty.

9. The sales order also shows the warranty details under the ‘Warranty Lines’ tab.
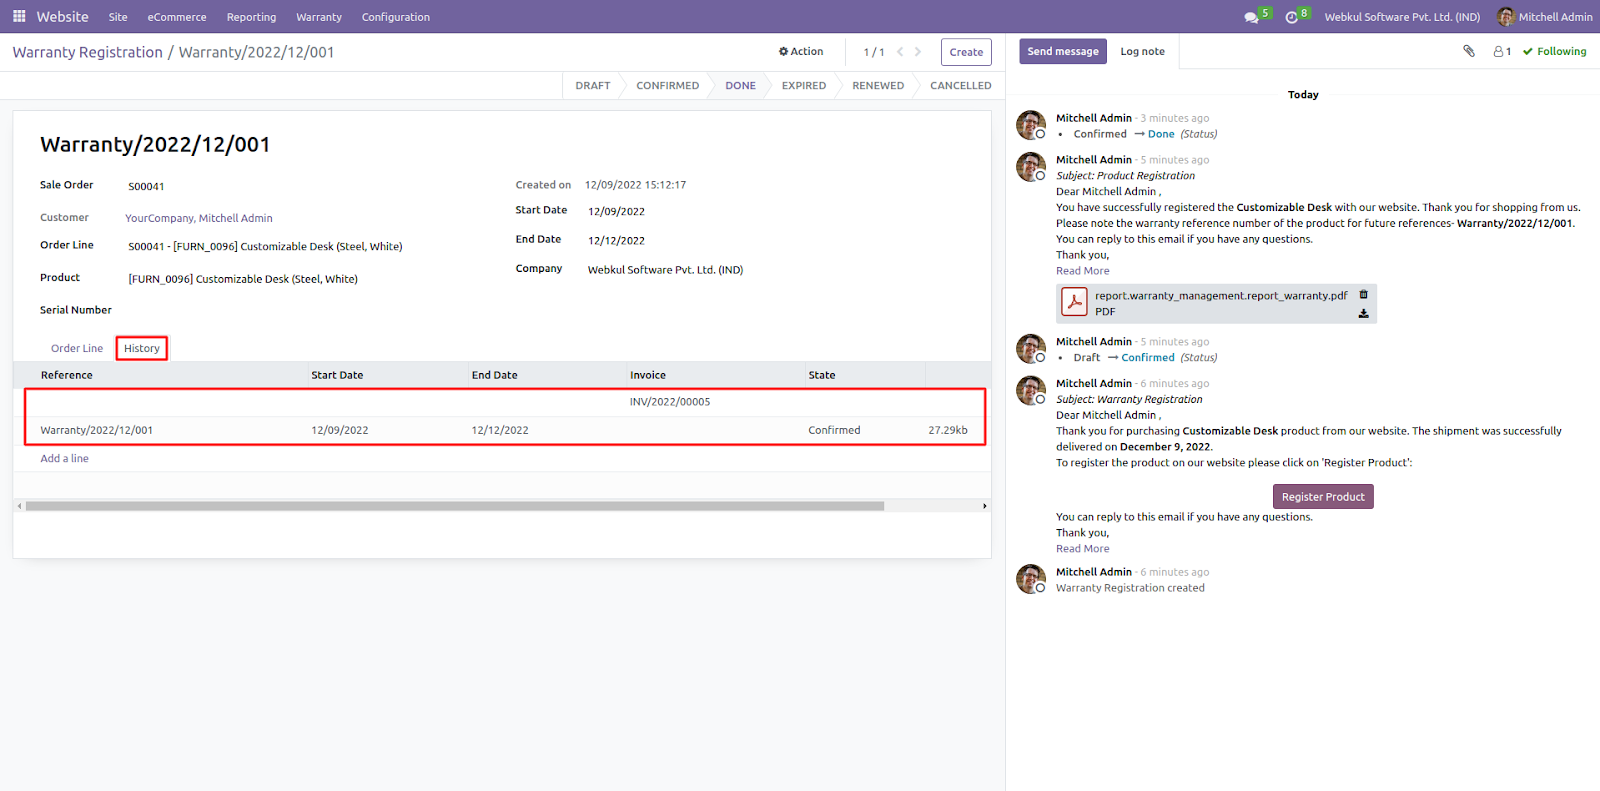
10. Now, go to ‘Warranty> Warranty Registration.’ Here, you can see all the warranty records generated for the orders. Click on any record to open it and view details.
10.1. The Order is already confirmed because ‘Auto Warranty Confirm’ was enabled. If it was not enabled then the warranty will remain in the draft state.


WARRANTY REGISTRATION BY CUSTOMERS
11. Customers can also register the warranty from their account after sales order confirmation. In the ‘Sales Order’ section open the order and click the ‘Register’ button.

12. On the new page, click the ‘Register Now’ button to confirm delivery and warranty registration.

13. After that, the data will change and you can view the ‘Expiry data and Warranty’ button to download the warranty documents.

RENEWING THE EXTENDED WARRANTY
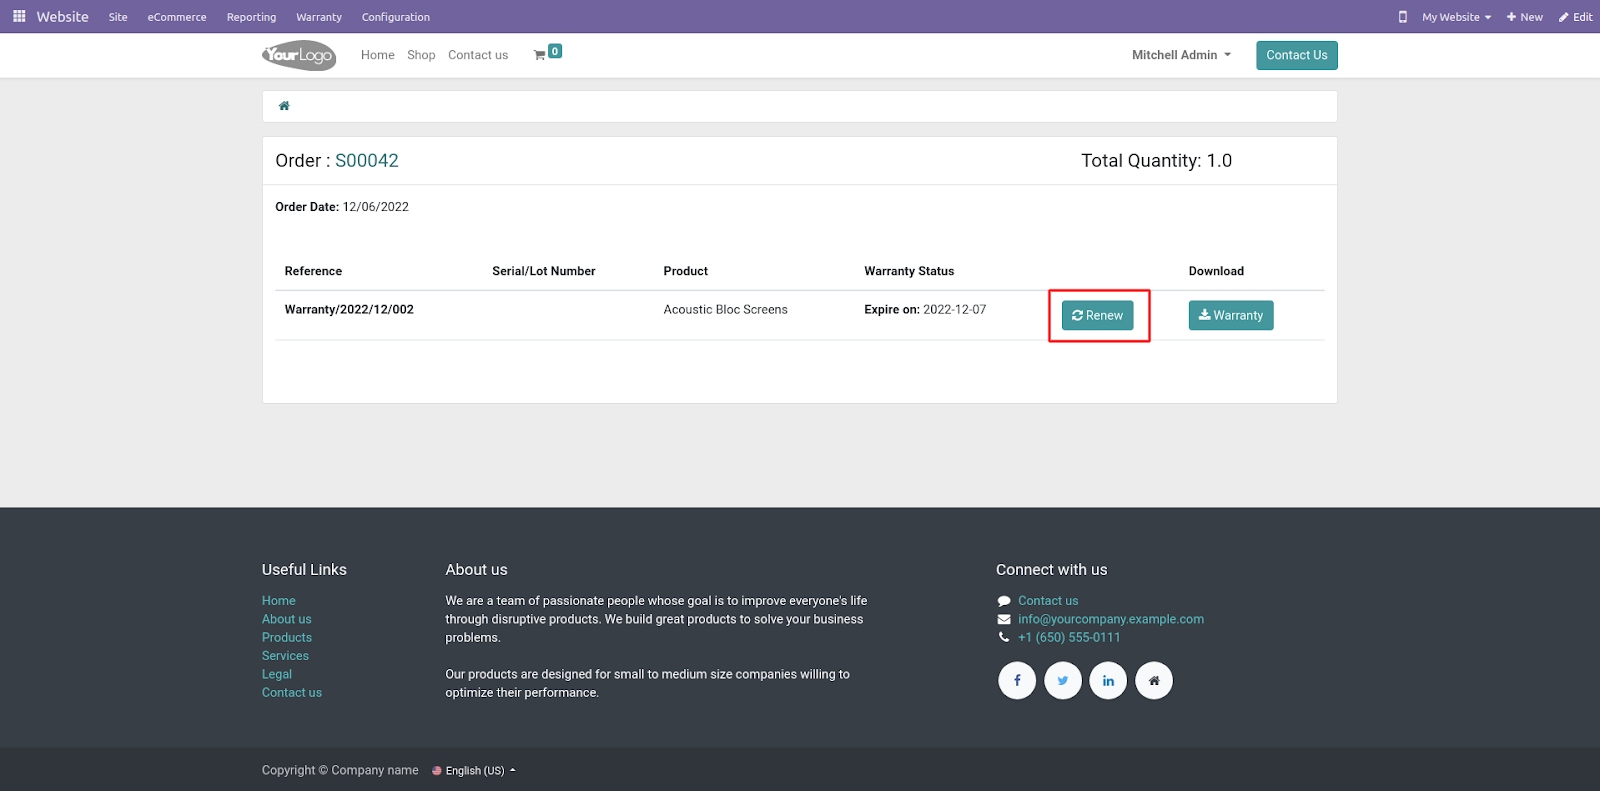
14. If a product warranty is about to expire, the customers can renew it if the settings allow it. To renew the warranty, click on the ‘Renew’ button.
15. The ‘Renew’ button will generate the renew quotation, which the customer has to ‘Sign & Pay.’ After payment, the admin will verify the renewal request and approve or reject it accordingly.

16. Once done, a new order is created in the Odoo backend. Open the order to see the details containing the information for the warranty renewal request.

17. Confirm the order to renew the product warranty successfully. In the screenshot below the start and end date of the new warranty are not visible because the current warranty has not expired yet.
OTHER ODOO WEBSITE MODULES
- Odoo Website Debranding
- Advance Website Product Attachments
- Odoo Website Rental Sale
- Odoo Website Custom Options
- Website Product Review After Purchase
- Odoo Website Advertisement Manager
NEED HELP?
Hope you find the guide helpful! Please feel free to share your feedback in the comments below.
If you still have any issues/queries regarding the module, please raise a ticket at https://webkul.uvdesk.com/en/customer/create-ticket/.
Also, please explore our Odoo development services & an extensive range of quality Odoo Apps.
For any doubt, contact us at [email protected].
Thanks for paying attention!!
Current Product Version - 1.0.0
Supported Framework Version - Odoo 16, 15, 14

Be the first to comment.