Introduction
Odoo Tamara payment Integration helps businesses accept Buy Now Pay Later payments via Tamara directly from Odoo. It connects the Tamara payment with the Invoicing module for fast and smooth payment processing.
The module allows users to configure the Tamara payment, create invoices, and send payment requests from a single backend interface. It also supports real-time payment status tracking and duplicate payment prevention.
Odoo Tamara payment Integration ensures complete visibility of all Tamara transactions with reference, date, status and amount for easy payment management.
Features
- Accept Buy Now Pay Later payments via Tamara
- Configure Tamara Payment from the backend
- Set Sandbox or Production environment
- Add API Token and Store Code for secure connection
- Register Webhook URL for live payment updates
- Send payment requests from the invoice screen
- Check live payment status with one click
- Prevent duplicate payments with instant warning messages
- View all transactions in Tamara Payment Transaction screen
Installation
- Once you purchase the App from Webkul store, you will receive a link to download module’s zip file.
- Extract the file on your system after download finishes. As a result, you will be able to see a folder named- “wk_tamara_payment_integration“
- Copy and paste this folder inside your Odoo Add-Ons path.
- Now, open Odoo App and click on the Settings menu. Here, click on Activate Developer Mode.
- Then, open Apps menu and click on ‘Update Modules List.’
- In the search bar, remove all the filters and search “wk_tamara_payment_integration”.
- You will be able to see module in the search results. Click on ‘Activate’ to install it.
Workflow
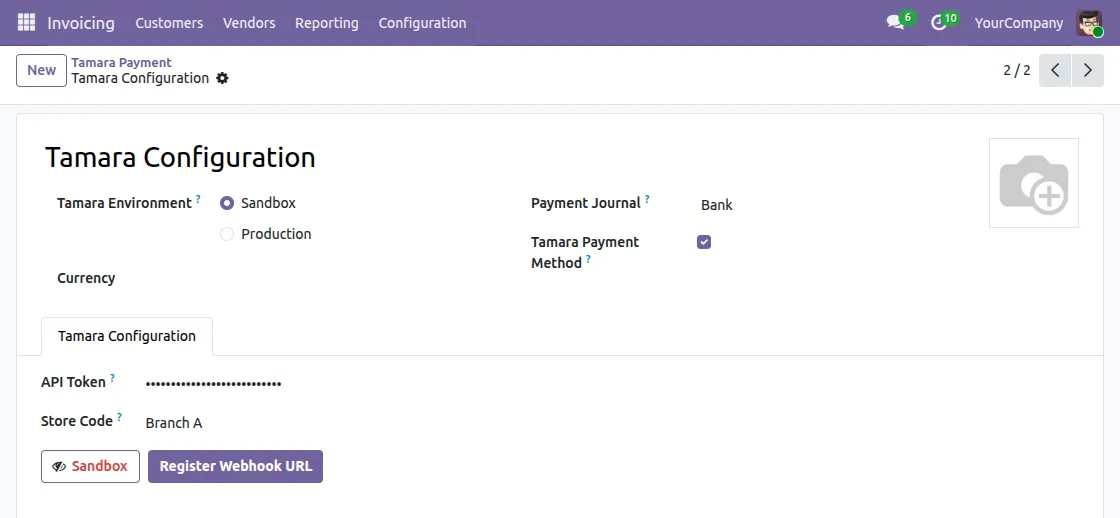
1. Configure Tamara Payment Method
Go to the Invoicing module and open Tamara Payment Method from the Configuration menu. Then, enter your API Token and Store Code to connect with the Tamara payment gateway.
Next, select Sandbox or Production as your environment. Finally, click Register Webhook URL to enable live payment updates.
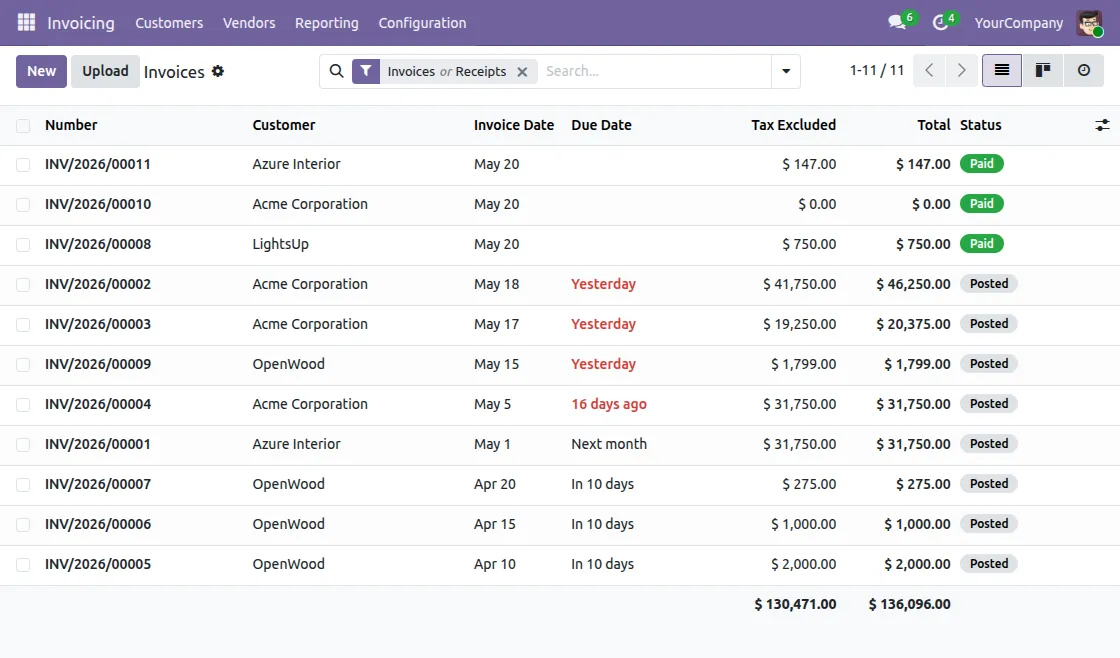
2. Invoicing Module Support
Open the Invoicing module to view all customer invoices. Furthermore, you can create new invoices and track their status from this screen.
Then, click New to create a new invoice and start the payment process.
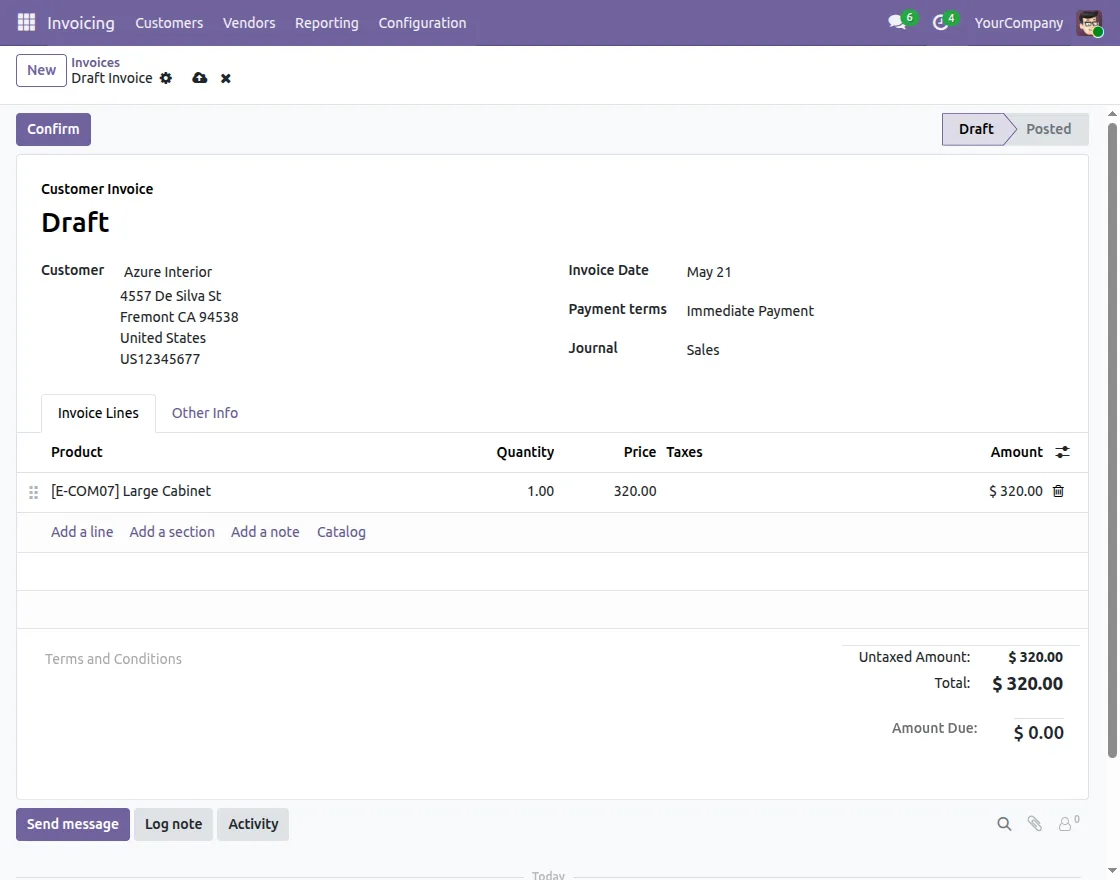
3. Create New Invoice
Click New to create a new customer invoice. Add customer details, products, quantity, and price.
Confirm the invoice to post it and make it ready for payment.
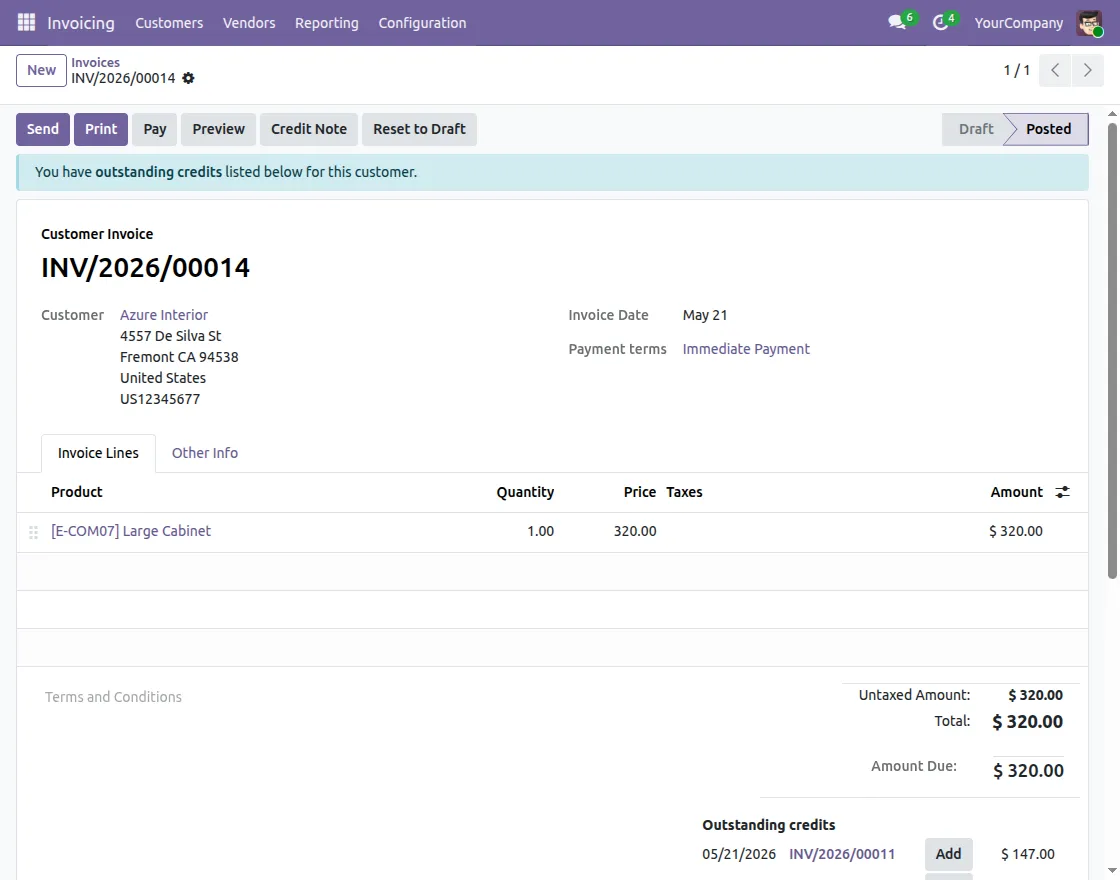
4. Open Invoice for Payment
Open the posted invoice and click Pay to start the payment process.
The Pay popup will open with payment details ready to fill.
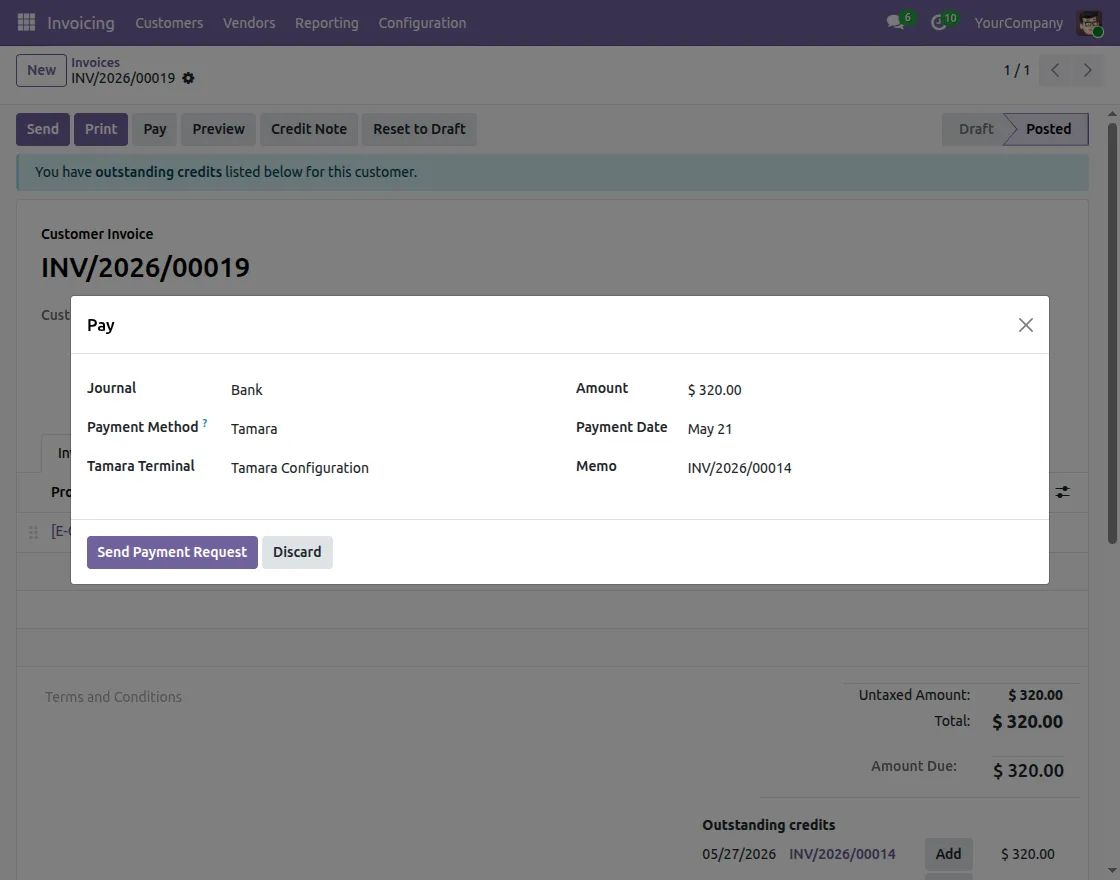
5. Send Payment Request
Select Tamara as the payment method and choose your Tamara payment. Review the amount, date, and memo.
Click Send Payment Request to process the Tamara Invoice Payment instantly.
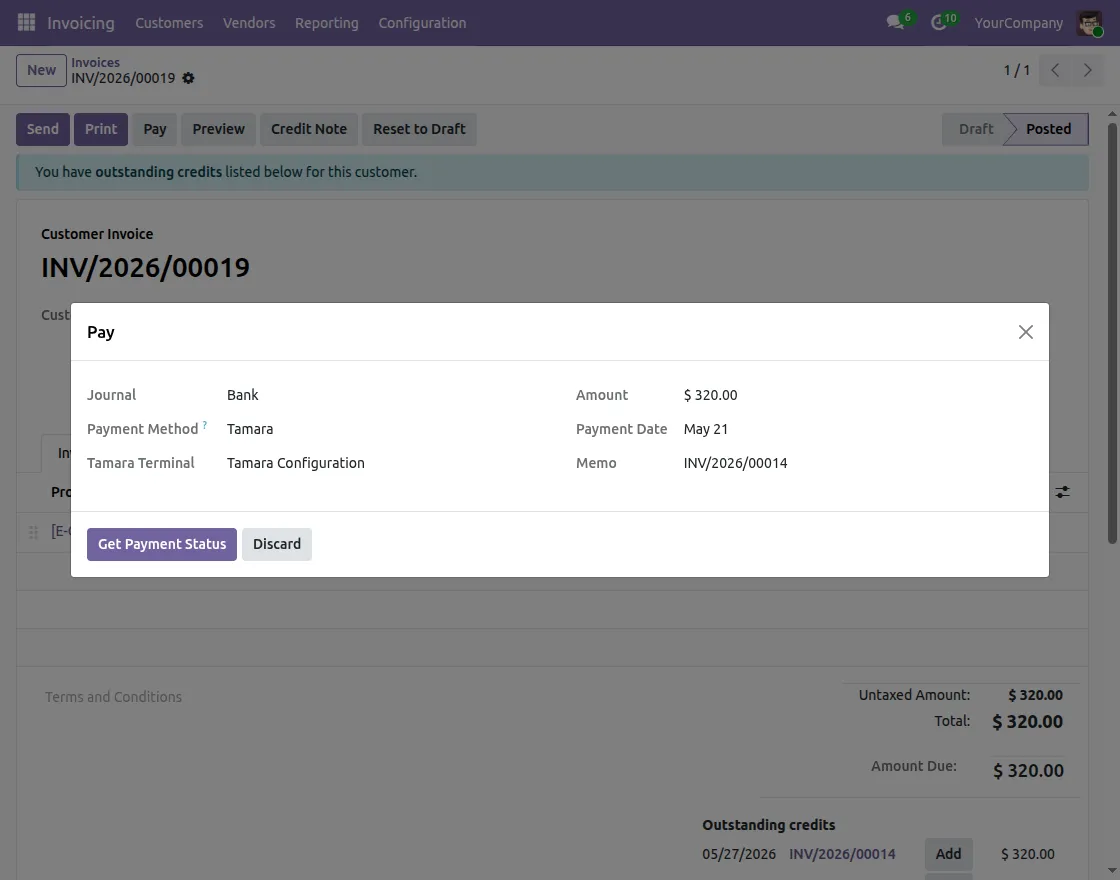
6. Get Payment Status
After sending the request, click Get Payment Status to fetch the latest update from Tamara.
The payment popup updates automatically based on Tamara’s response.
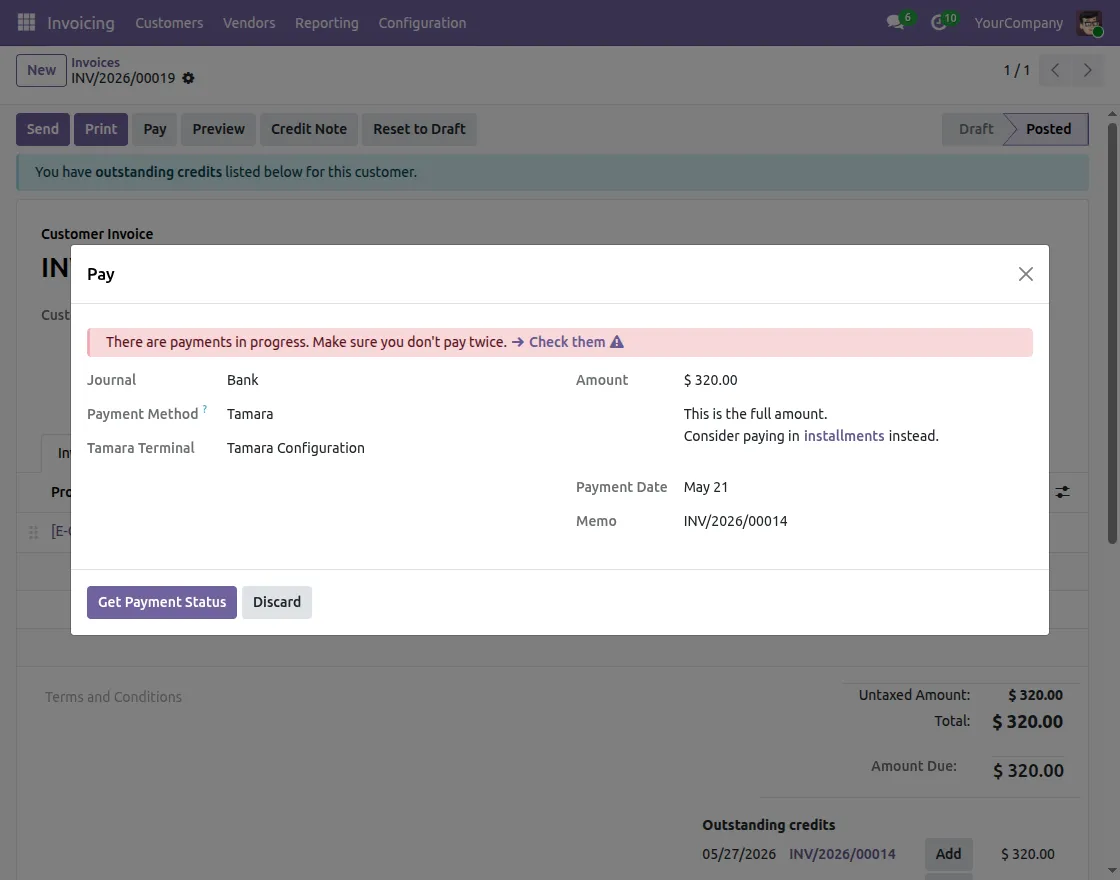
7. Duplicate Payment Prevention
If a payment is already in progress, the system shows a warning message instantly. As a result, this prevents double charging the customer.
Furthermore, you can click Check them to review the existing payment before proceeding.
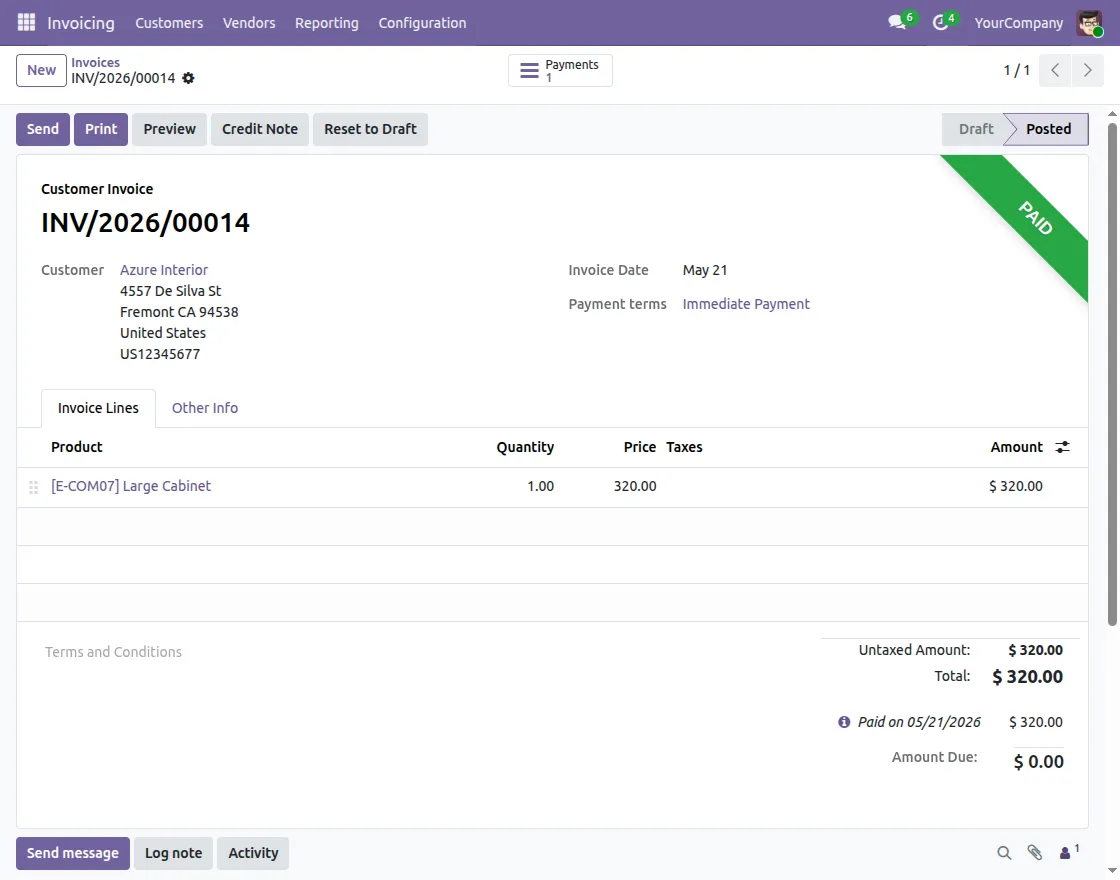
8. Payment Confirmation
Once the payment is confirmed, the invoice is automatically marked as Paid. As a result, the Amount Due becomes zero and the payment count is updated on the invoice.
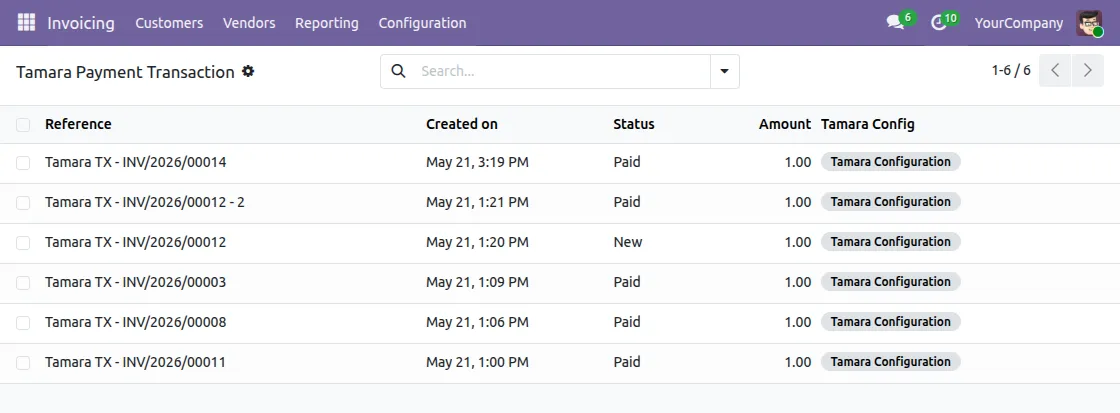
9. Tamara payment Transactions
Go to the Tamara Payment Transaction screen to view all transactions. Each record shows the reference, date, status, amount, and Tamara configuration.
Furthermore, use filters and search to find any transaction quickly.
Need Help?
Hope you find guide helpful! Please feel free to share your feedback in the comments below.
If you still have any issues/queries, please create a ticket at the UV Desk.
I hope this helps. In case of any further queries, contact us at our support mail.
Thanks for paying attention!!
Current Product Version - 1.0.0
Supported Framework Version - Odoo V19, V18

Be the first to comment.