This User Guide only describes the workflow of Odoo GSTR3B – Return And Invoices. Read the User Guide of Odoo GST -Return And Invoices to know the workflow of base modules.
Introduction
Odoo GSTR3B – Returns and Invoices helps businesses file GSTR3B returns quickly. It generates tax reports in JSON, CSV, and Excel formats, reducing manual effort.
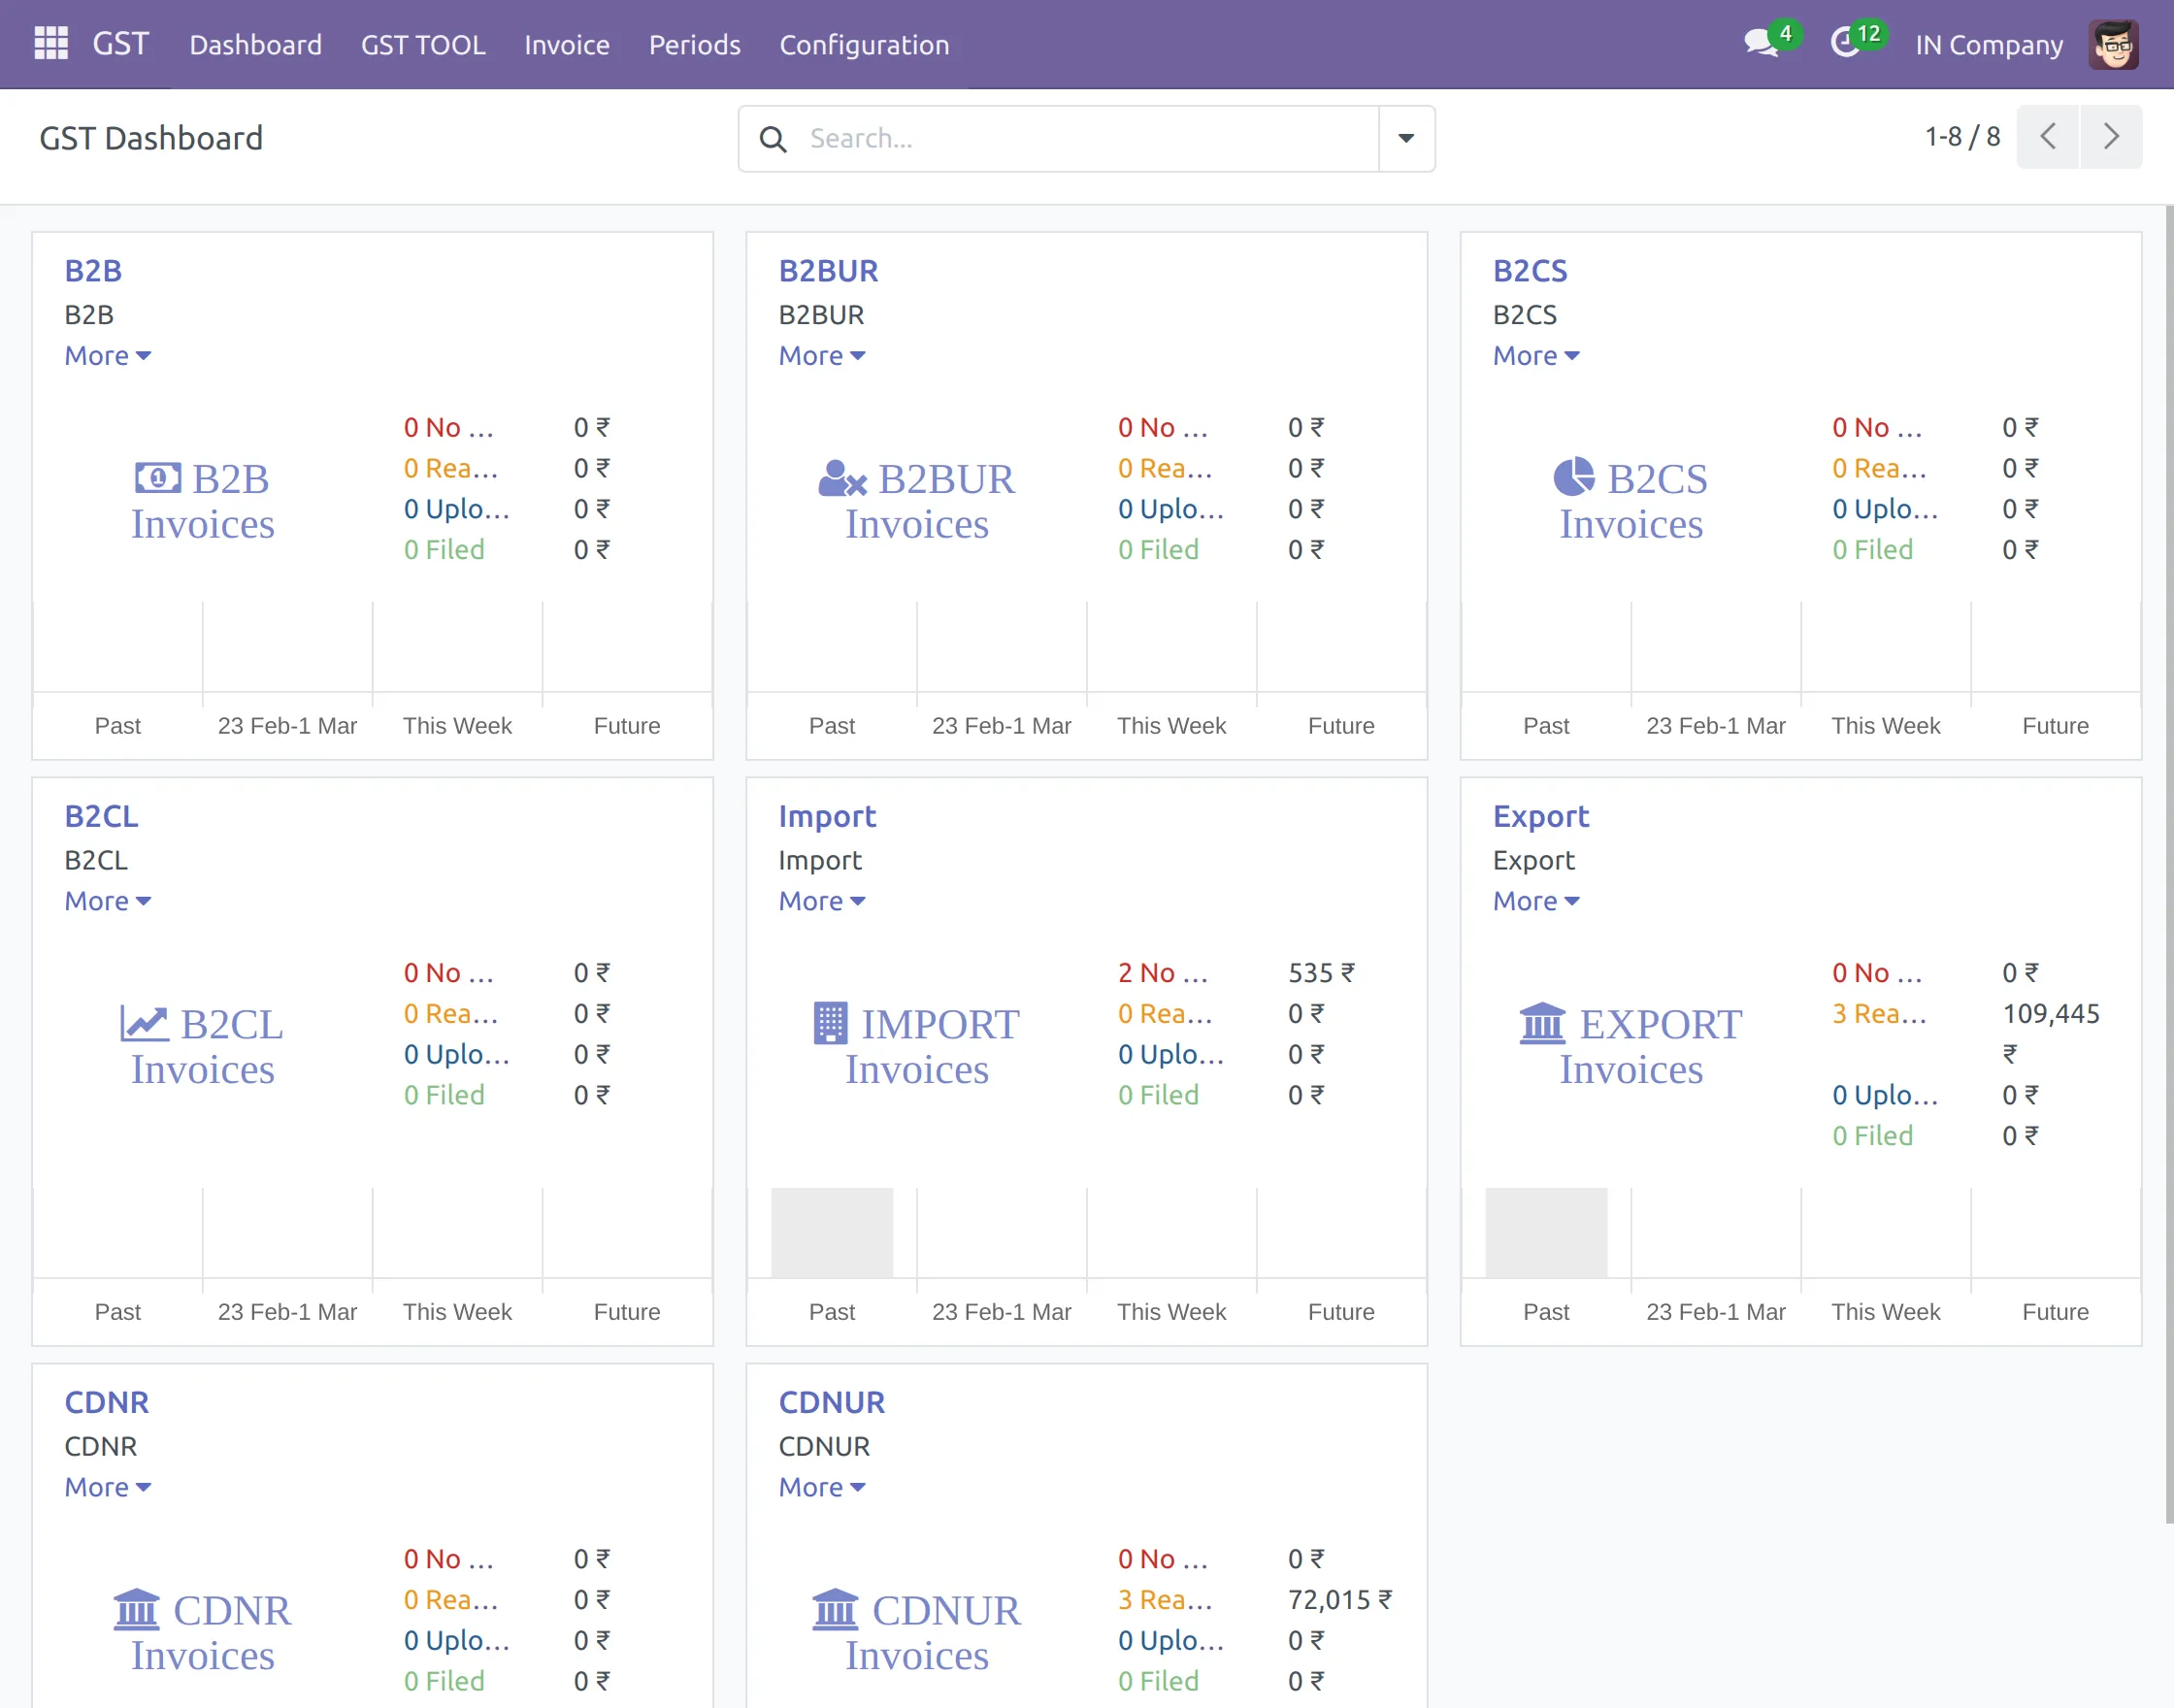
This module fetches invoices from Odoo with a single click. It allows users to set reporting periods as monthly or annually. GST Dashboard helps track invoices efficiently.
By using Odoo GSTR3B – Returns and Invoices, businesses can ensure compliance and streamline tax filing. Users can upload reports directly to the GST portal, simplifying tax management for companies.
Prerequisites for using Odoo GSTR3B – Returns and Invoices
Odoo GSTR3B – Returns and Invoices work in conjunction with the following module:
Odoo GST – Returns and Invoices
You must install the above-mentioned module to use Odoo GSTR3B – Returns and Invoices.
Features
- Generate GSTR3B reports instantly in JSON, CSV, and Excel formats.
- Users can fetch invoices from Odoo with just one click.
- Odoo GSTR3B – Returns and Invoices, upload tax reports directly to GST portal.
- Users can set reporting periods as monthly or annually according to their needs.
- Multi-company support allows for managing multiple businesses efficiently.
- This module avoids manual data entry and ensures compliance.
- A pop-up confirmation after successfully report uploading.
Installation
- Once you purchase Odoo GSTR3B – Returns and Invoices from Webkul store, you will receive a link to download module’s zip file.
- Extract file on your system after download finishes. As a result, you will be able to see a folder named- ‘gstr3b_invoice’
- Copy and paste this folder inside your Odoo Add-Ons path.
- Now, open Odoo App and click on a Settings menu. Here, click on Activate Developer Mode.
- Then, open Apps menu and click on ‘Update Modules List.’
- In the search bar, remove all filters and search ‘gstr3b_invoice’
- You will be able to see the module in the search results. Click on ‘Install’ to install it.
Workflow
- After installing Odoo GSTR3B – Returns and Invoices module, click on GST to access the GST Dashboard.
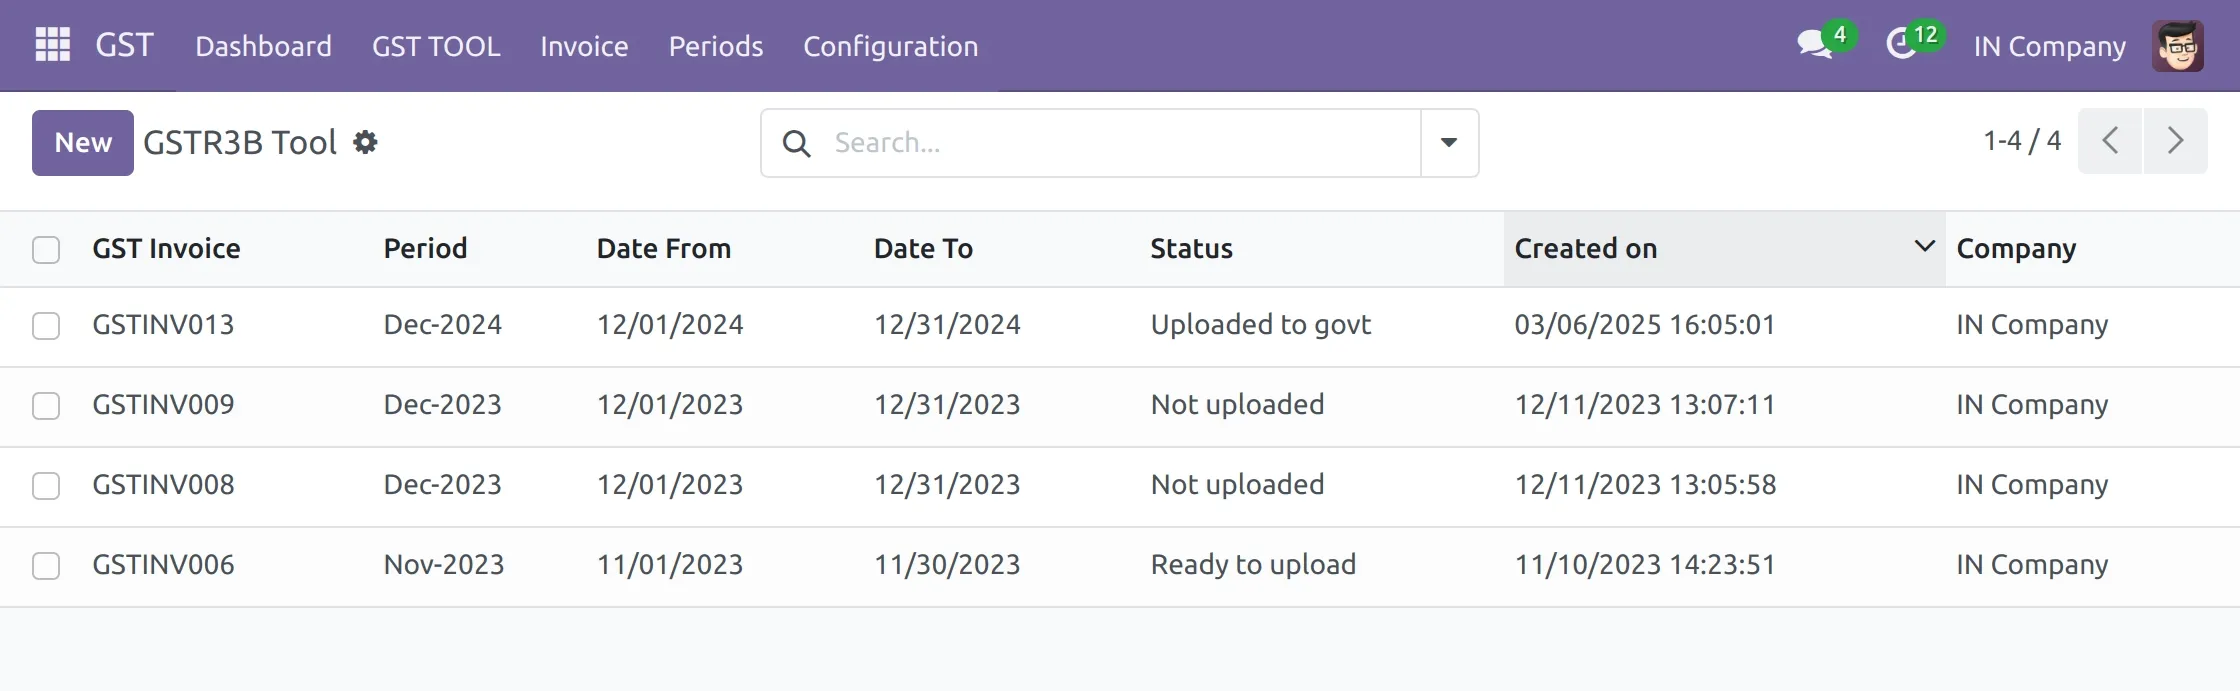
2. To create a new GSTR3B, you can navigate to GST Tool > GSTR3B > New.
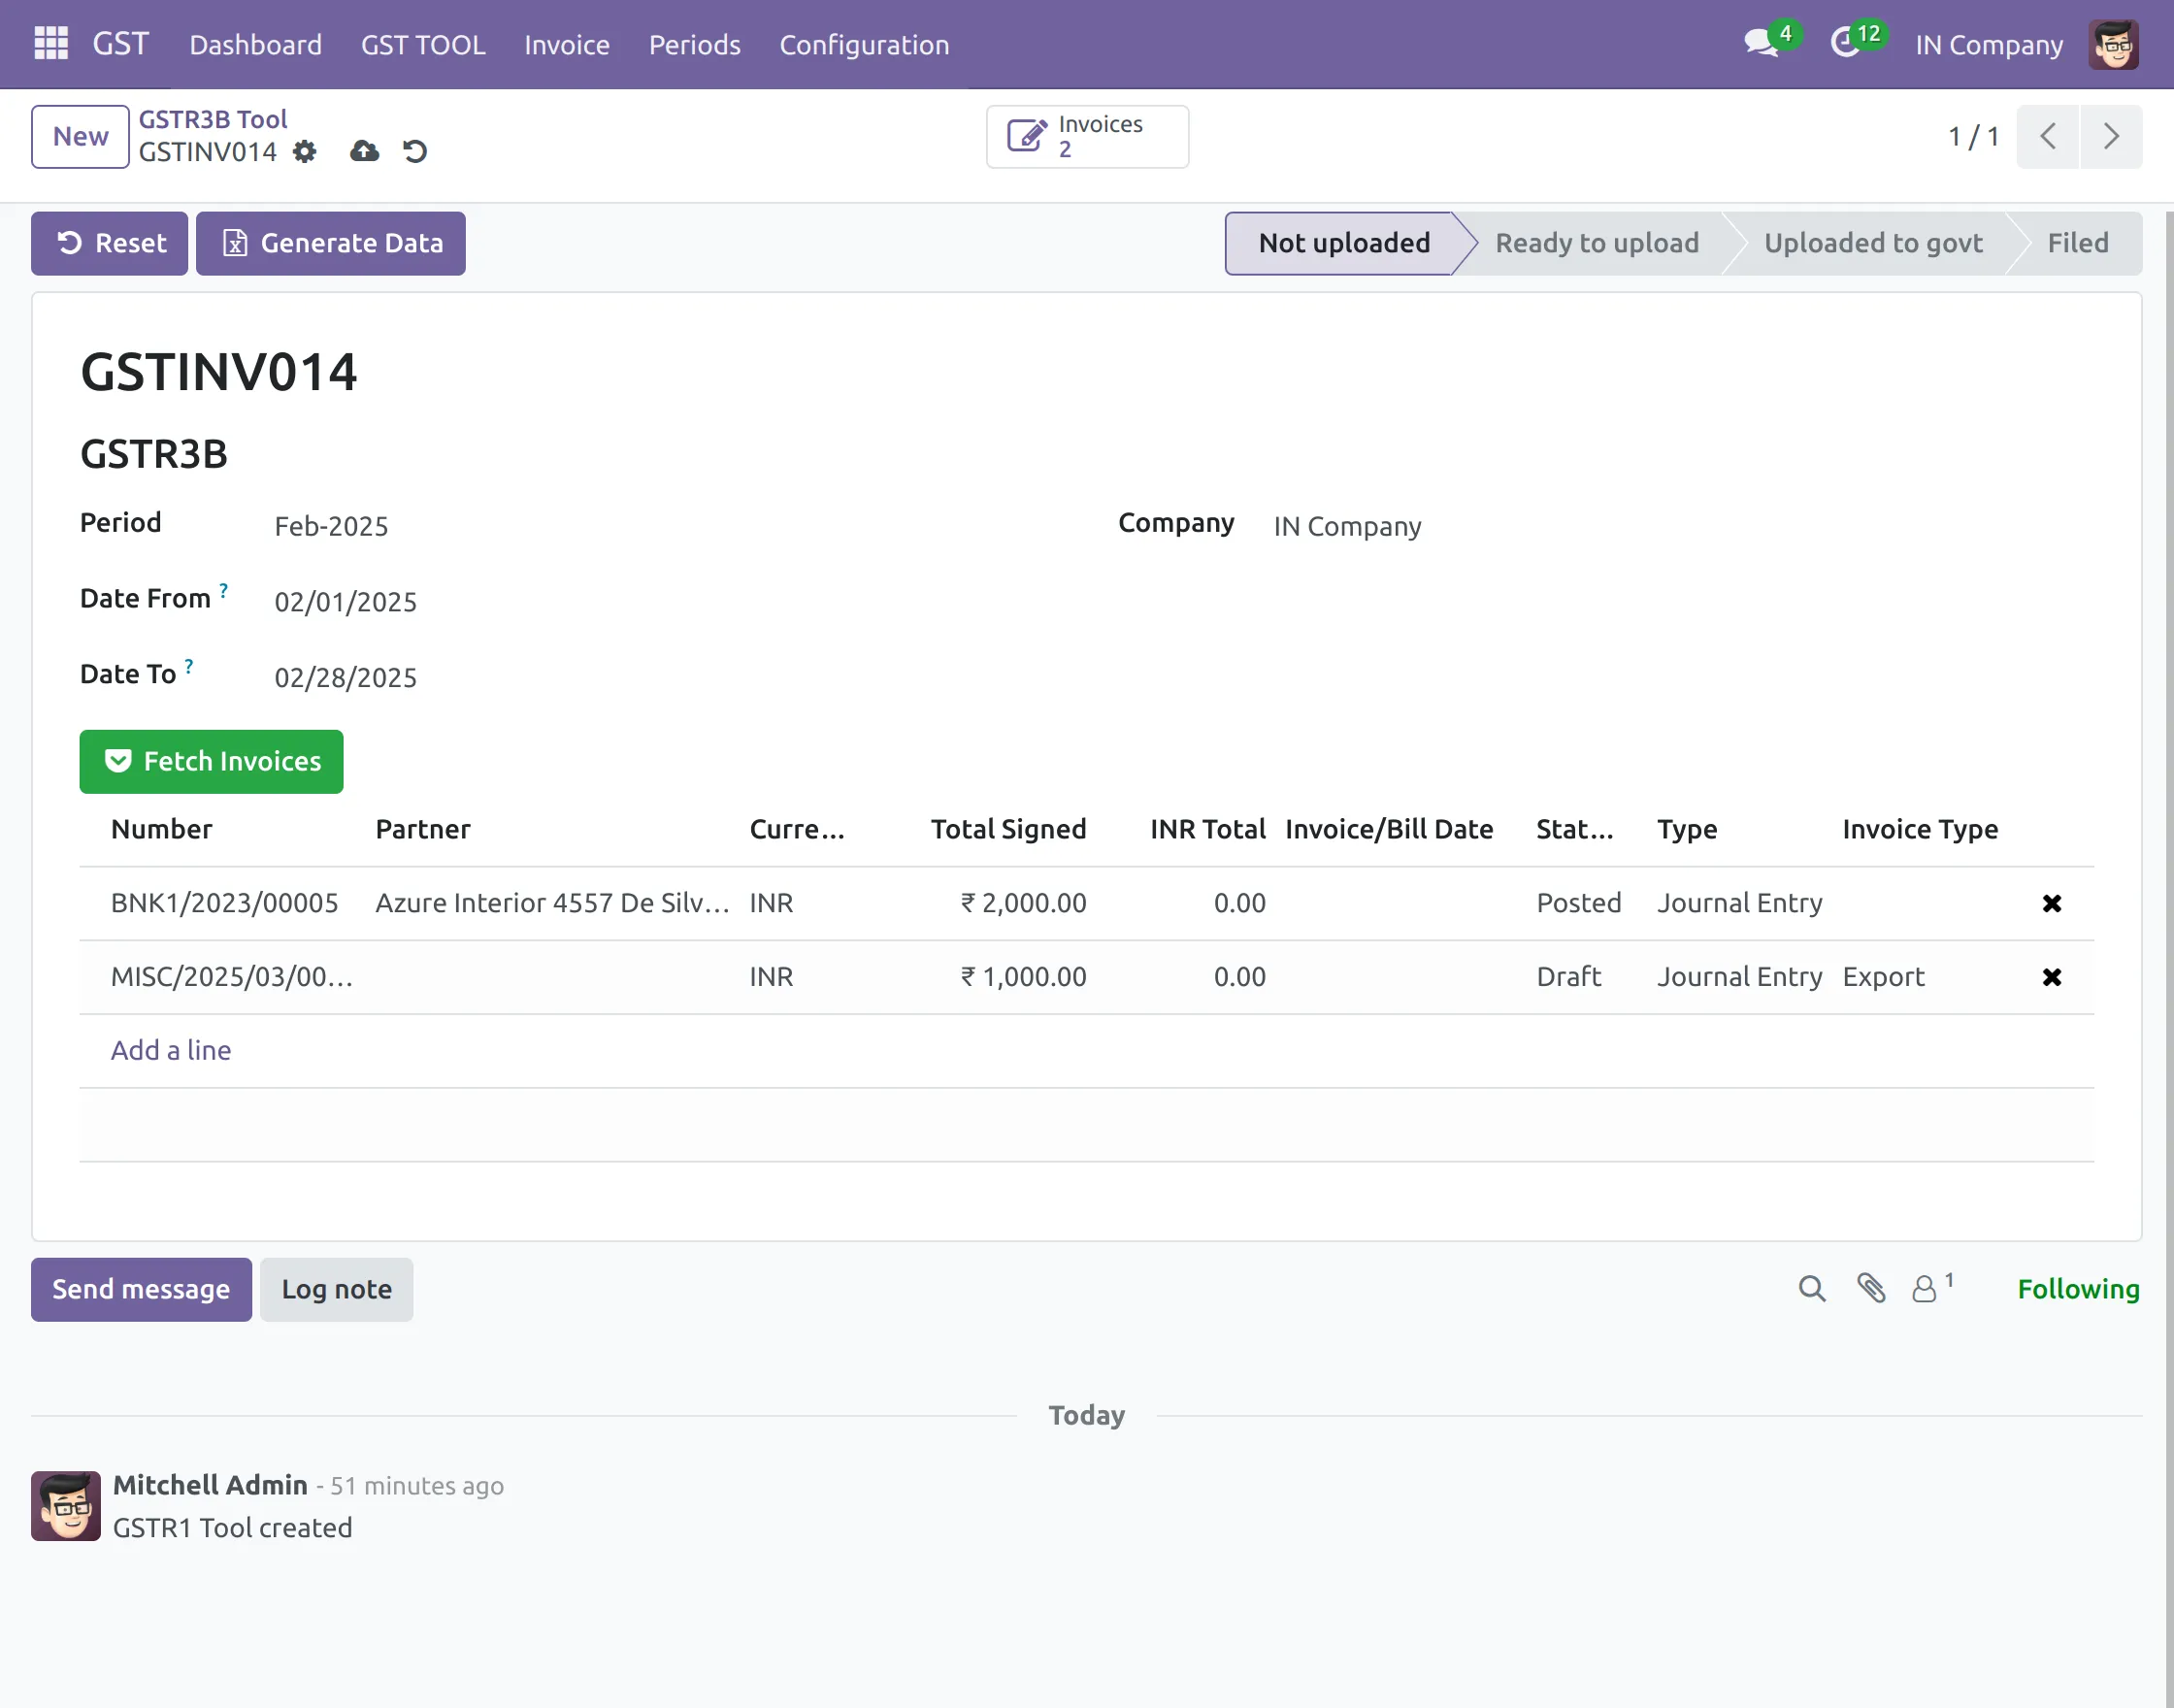
3. Add ‘Period, Date From, and Date To’ to create a new GSTR3B. After that, click ‘Fetch Invoices’ to fetch the invoices for GSTR3B. Or click ‘Add a Line’ to manually add invoices.
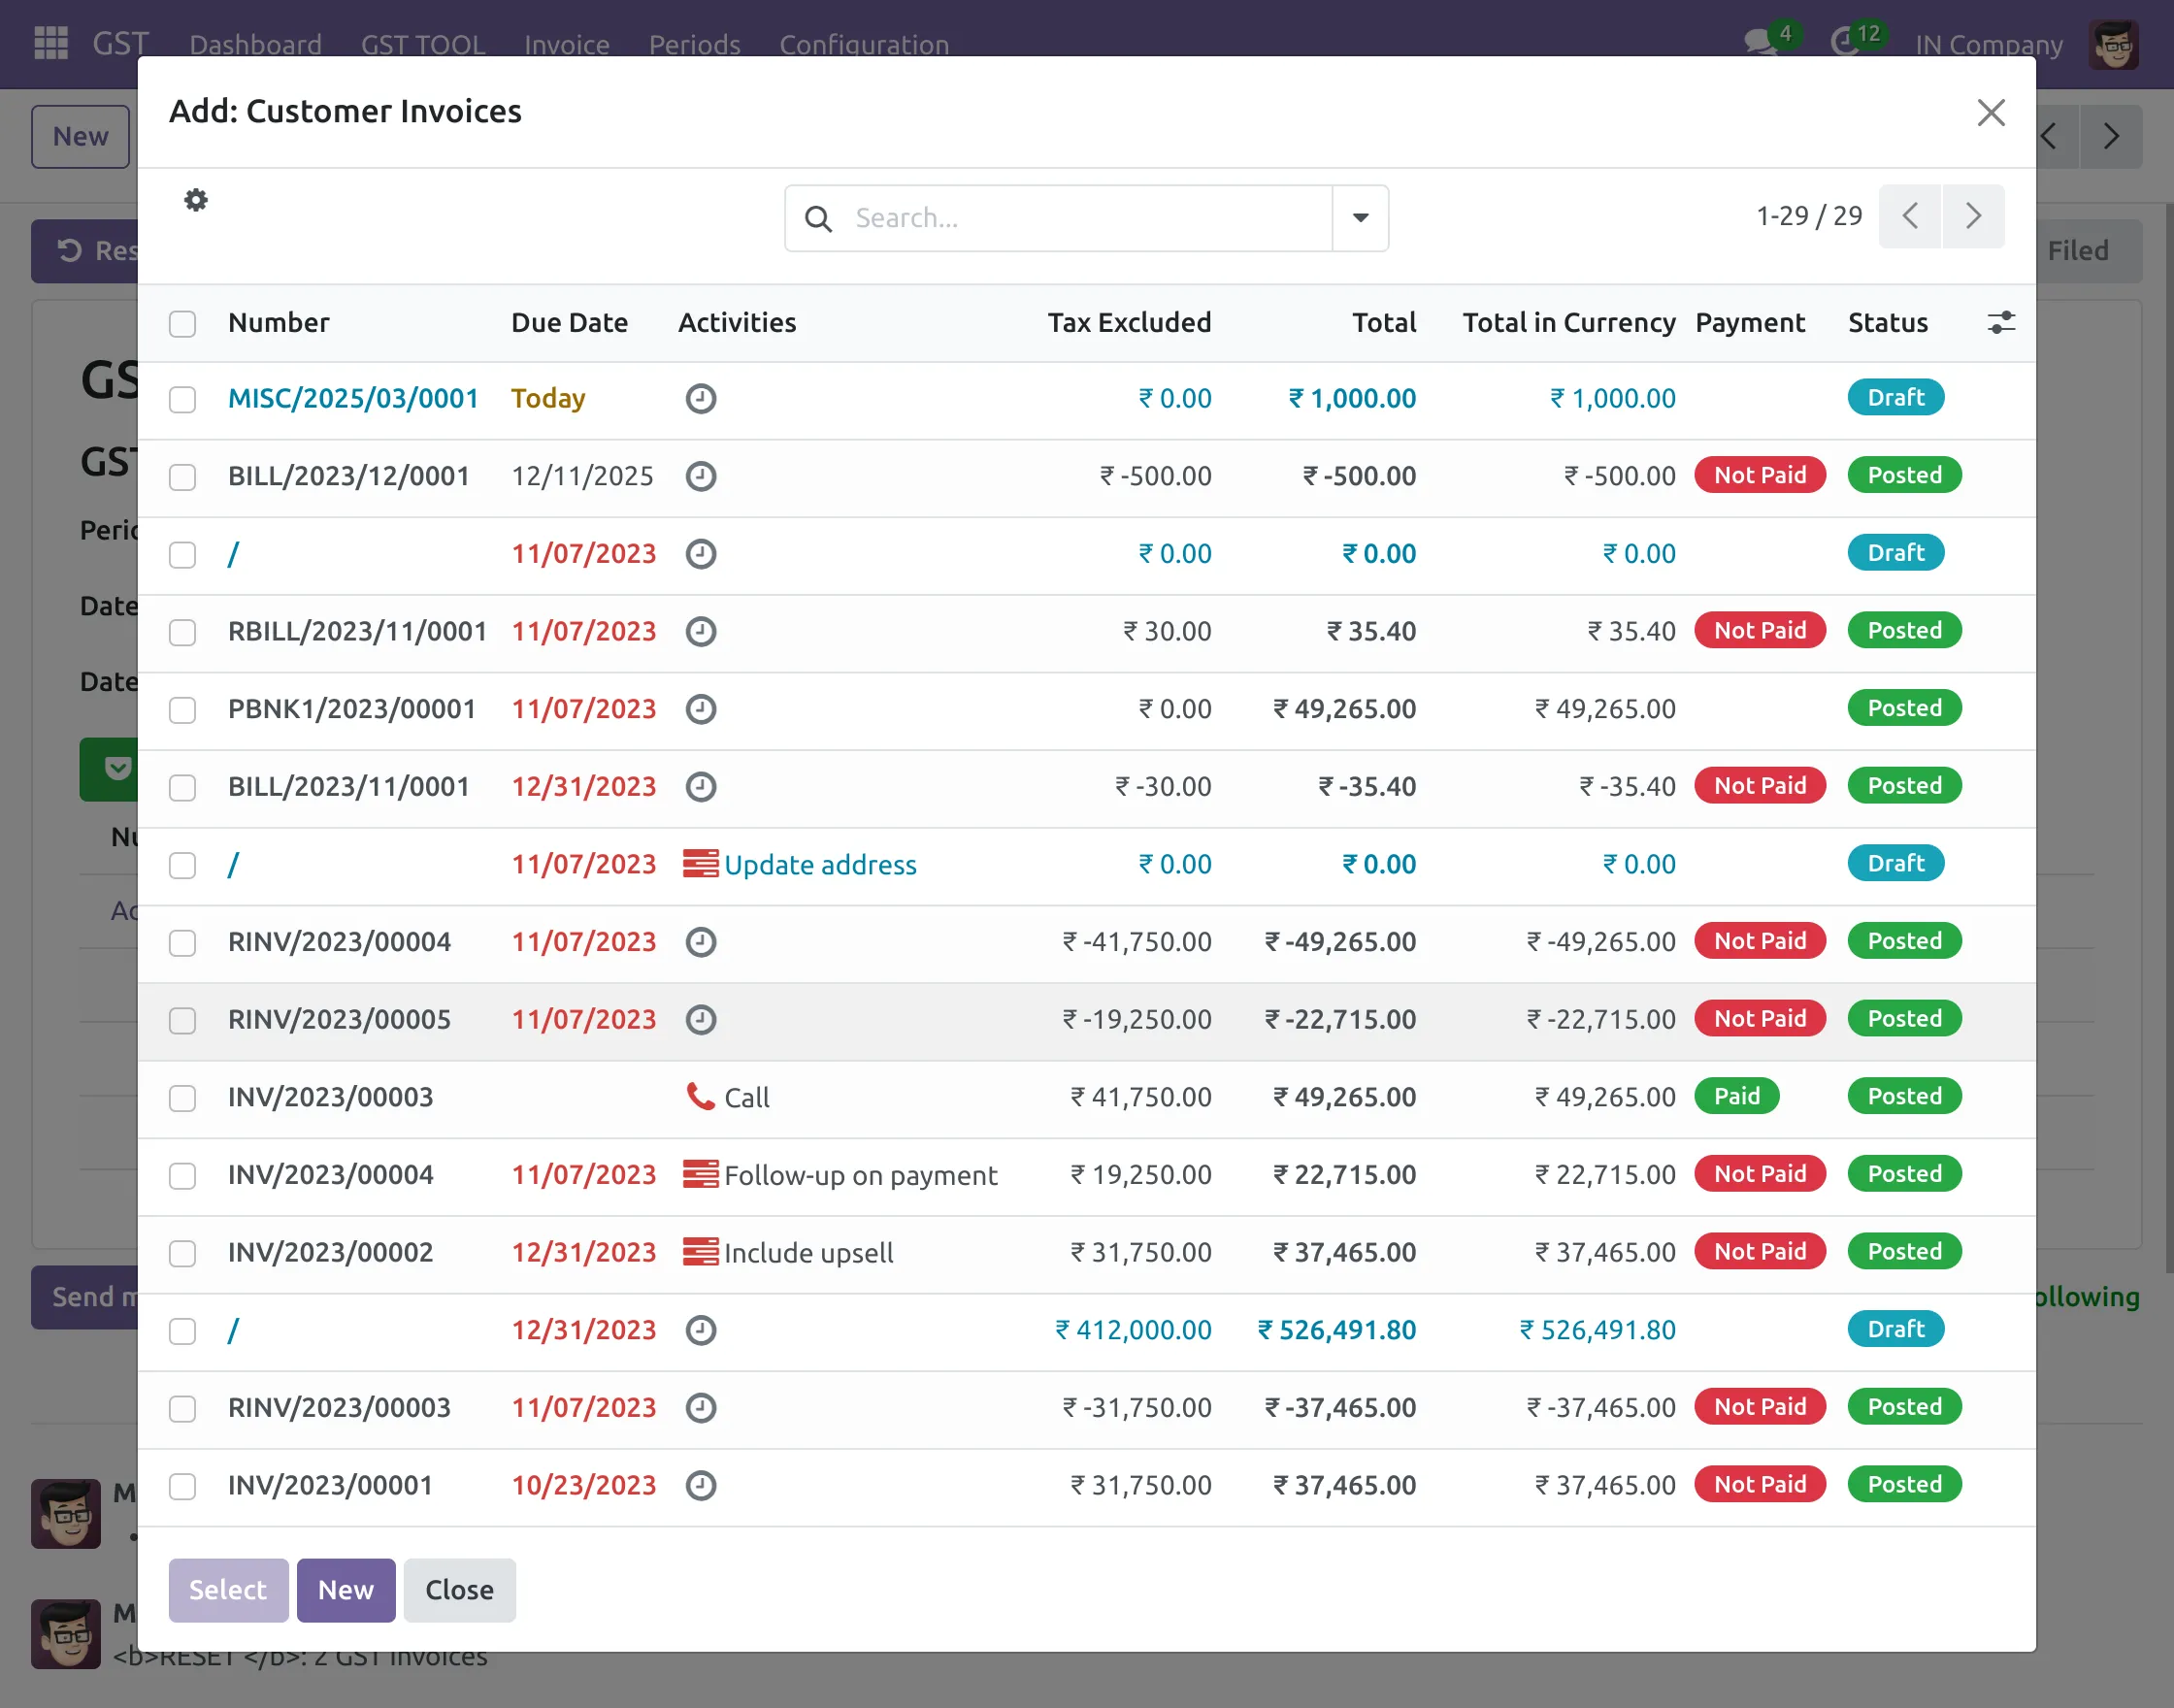
4. After clicking Add a Line, a pop-up will appear on screen, choose the invoices and click ‘Select’ button.
5. Next, click on ‘Generate Data’ to generate the required data.

6. After that, module will generate ‘CSV’, ‘JSON’, and Excel files, download the desired one, and upload the file on the government website. Now click on Upload button.
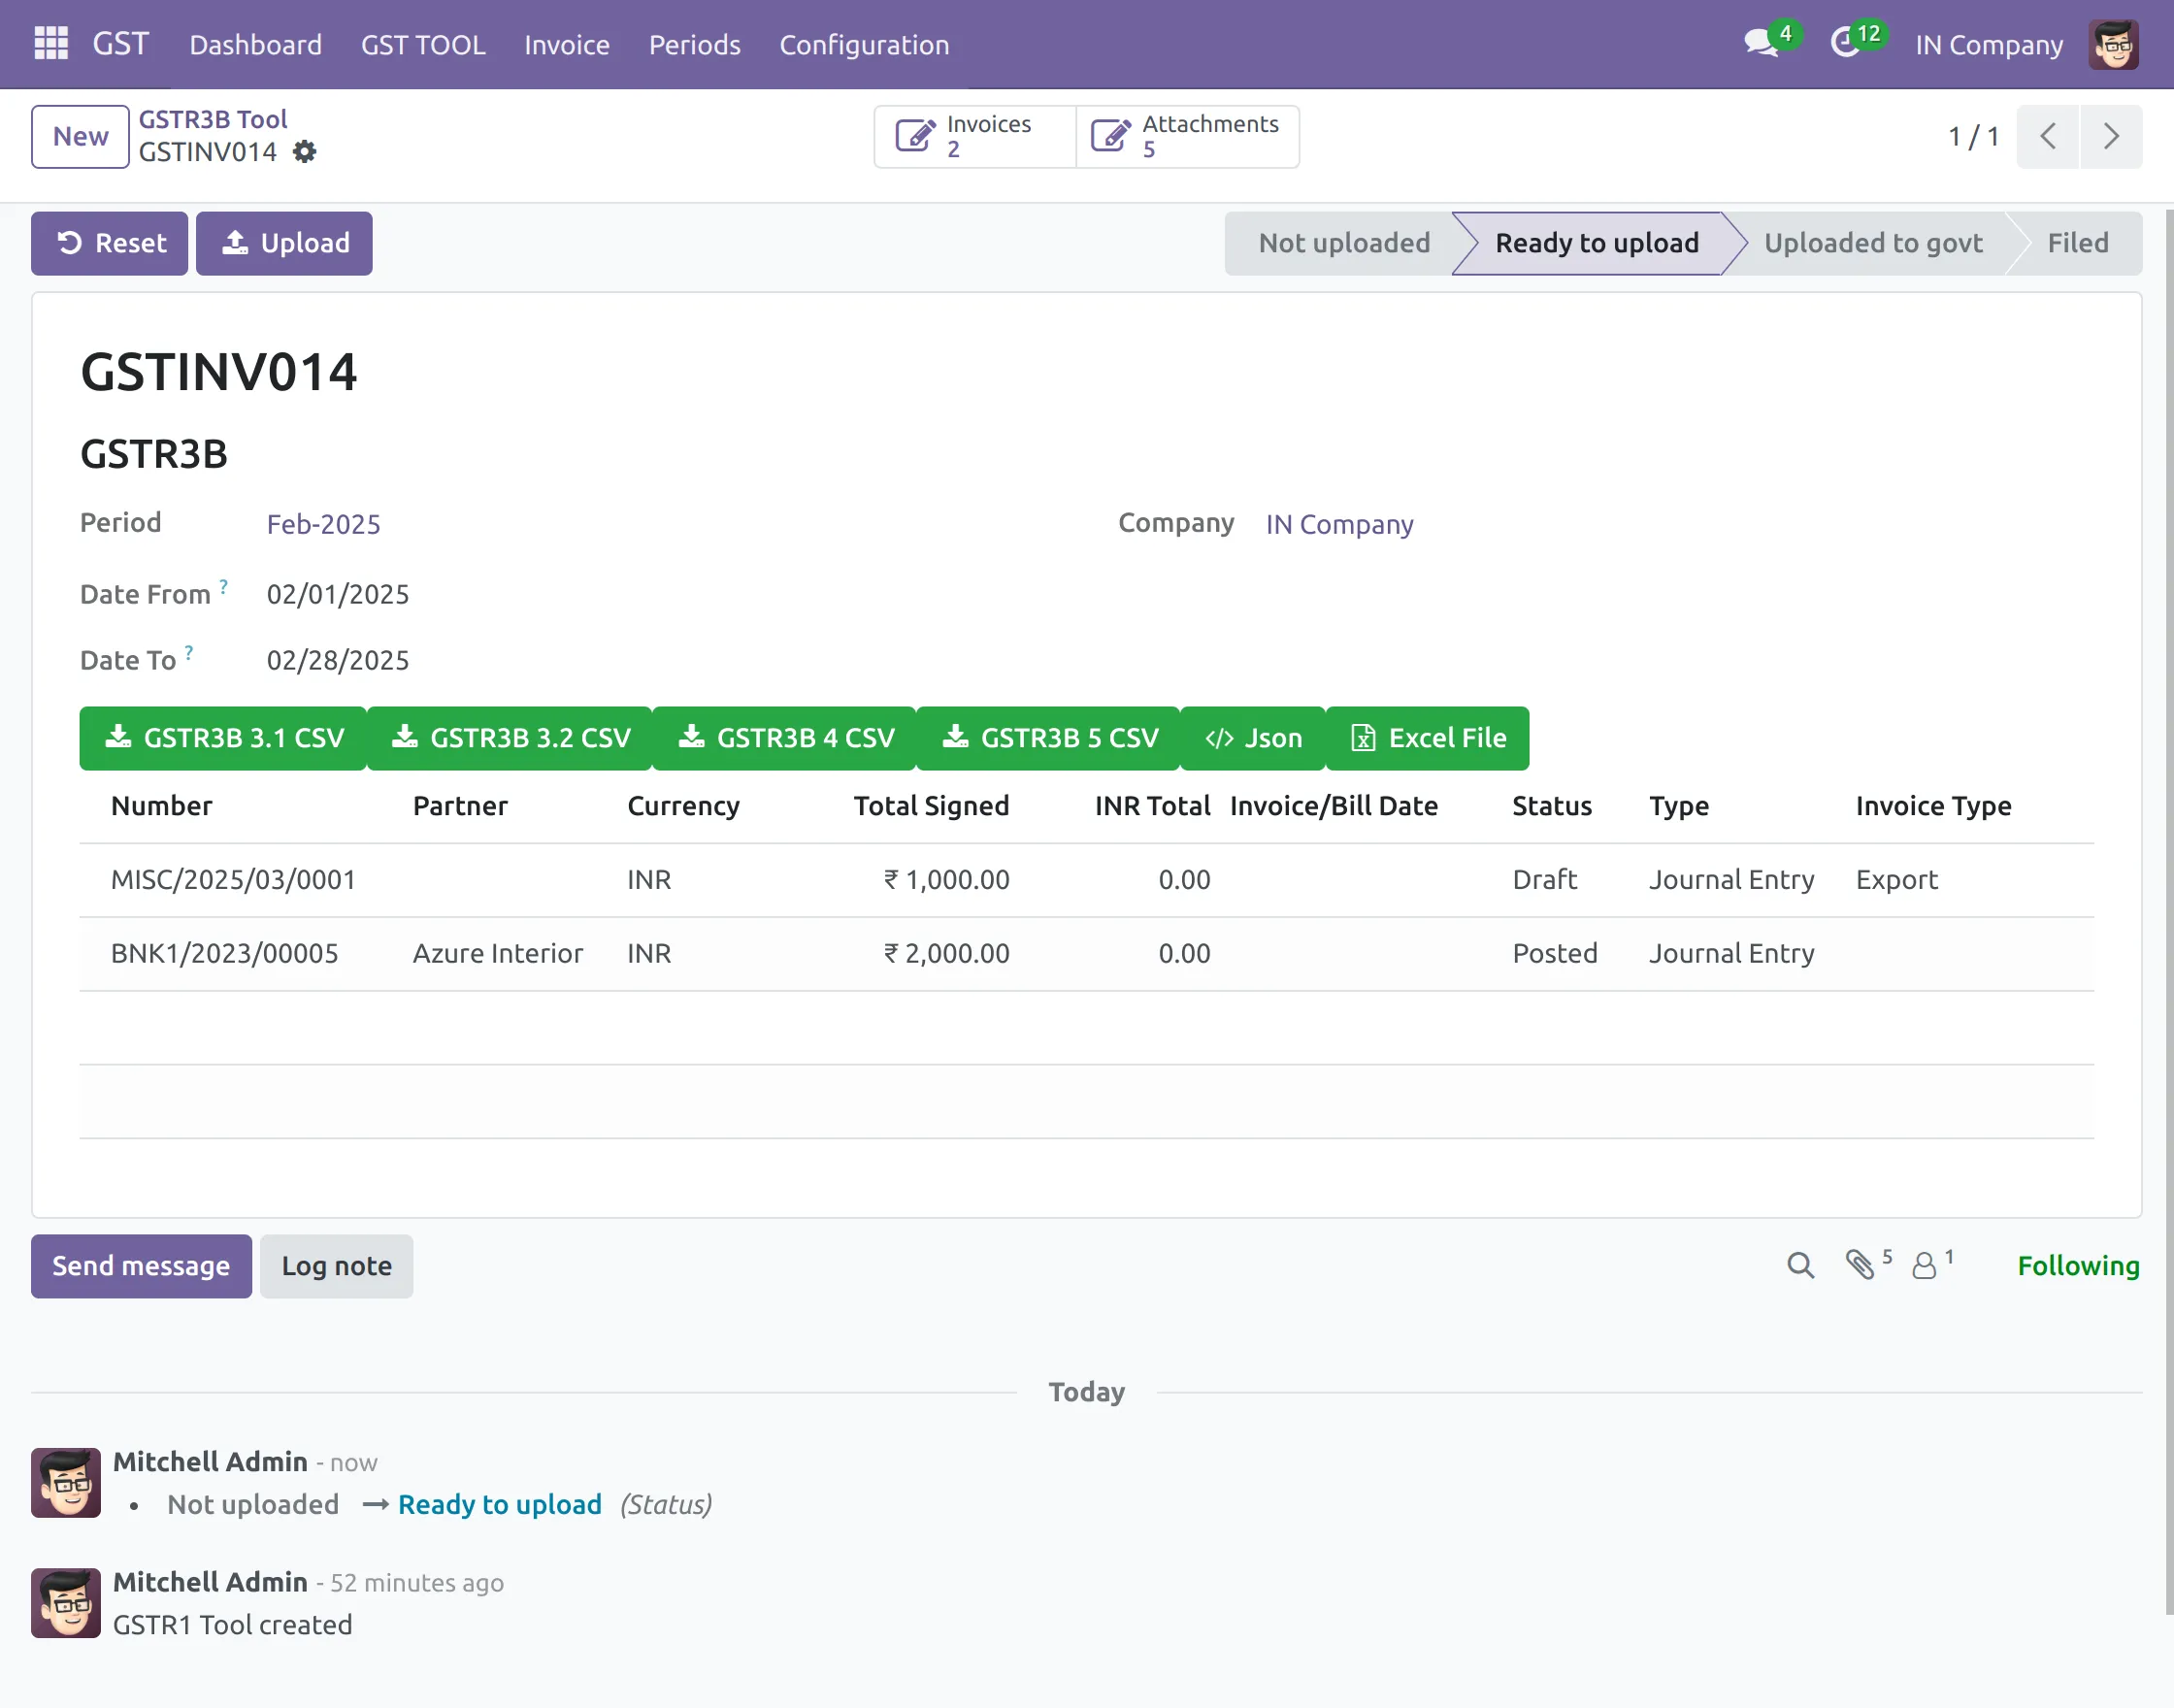
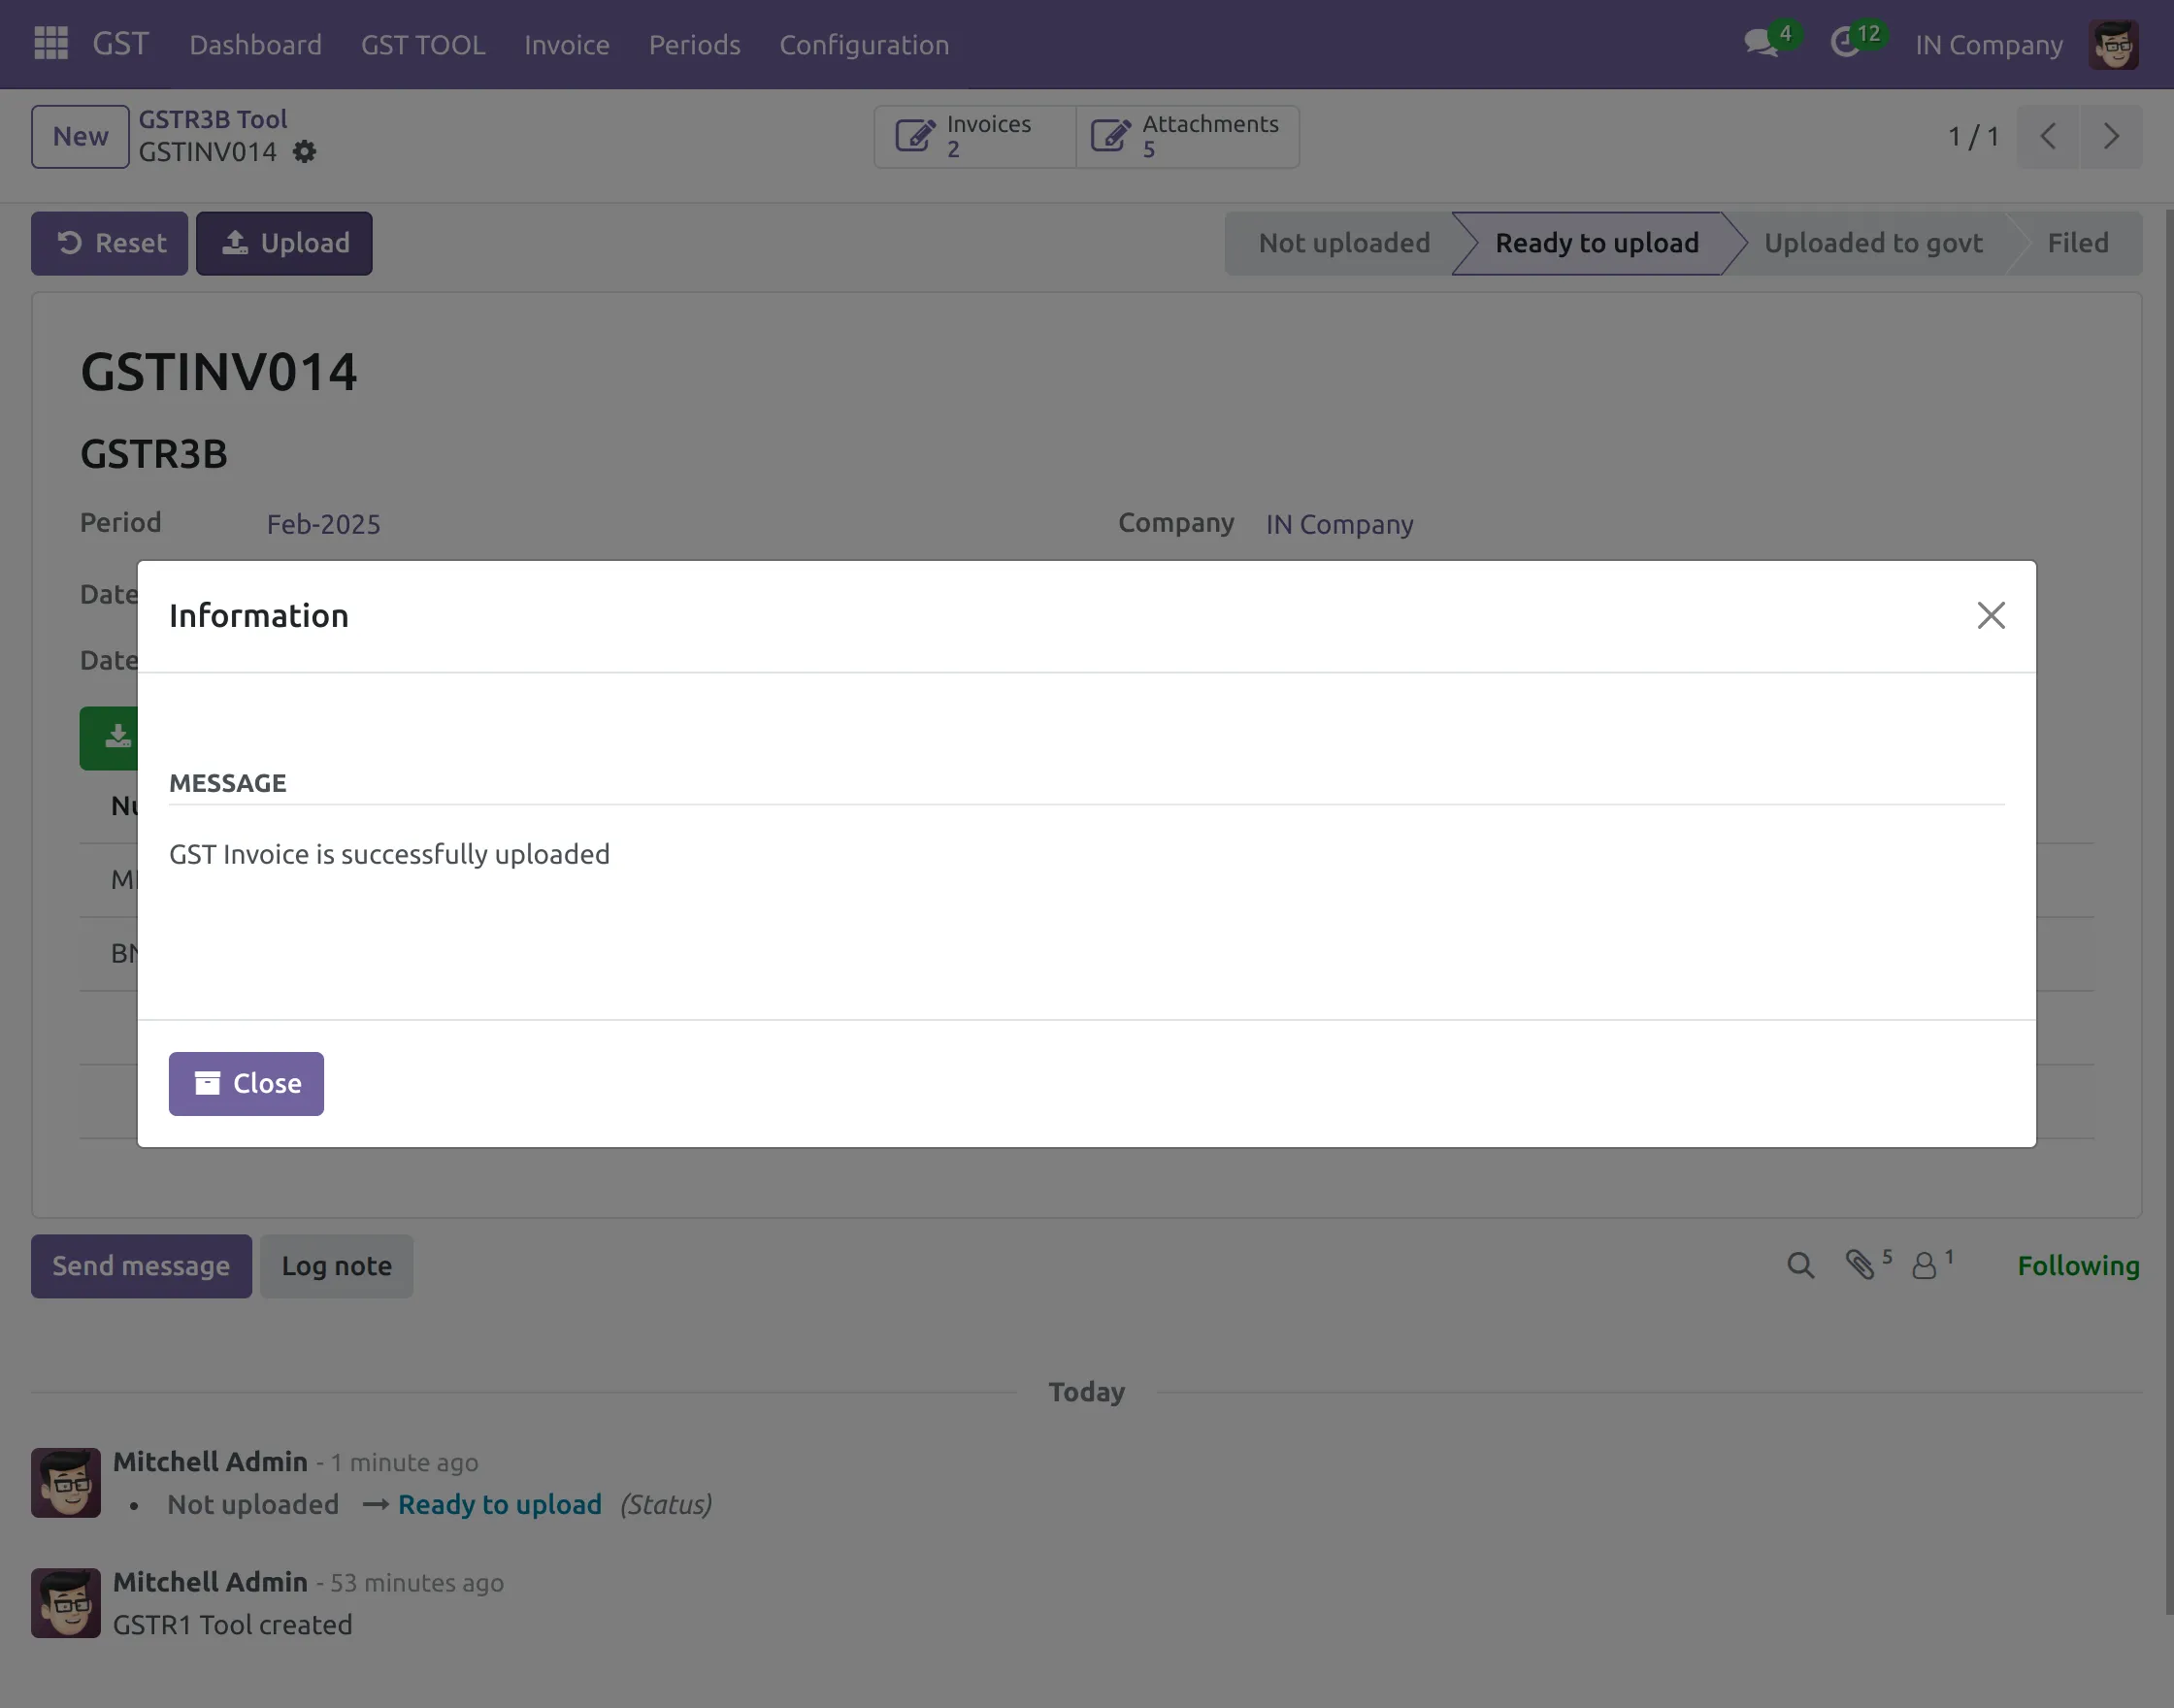
7. Now, a pop-up will appear on the screen telling you about file upload. Click on ‘Close’ button as the invoices are uploaded. GSTR3B invoice will be in the stage ‘Uploaded to government.’
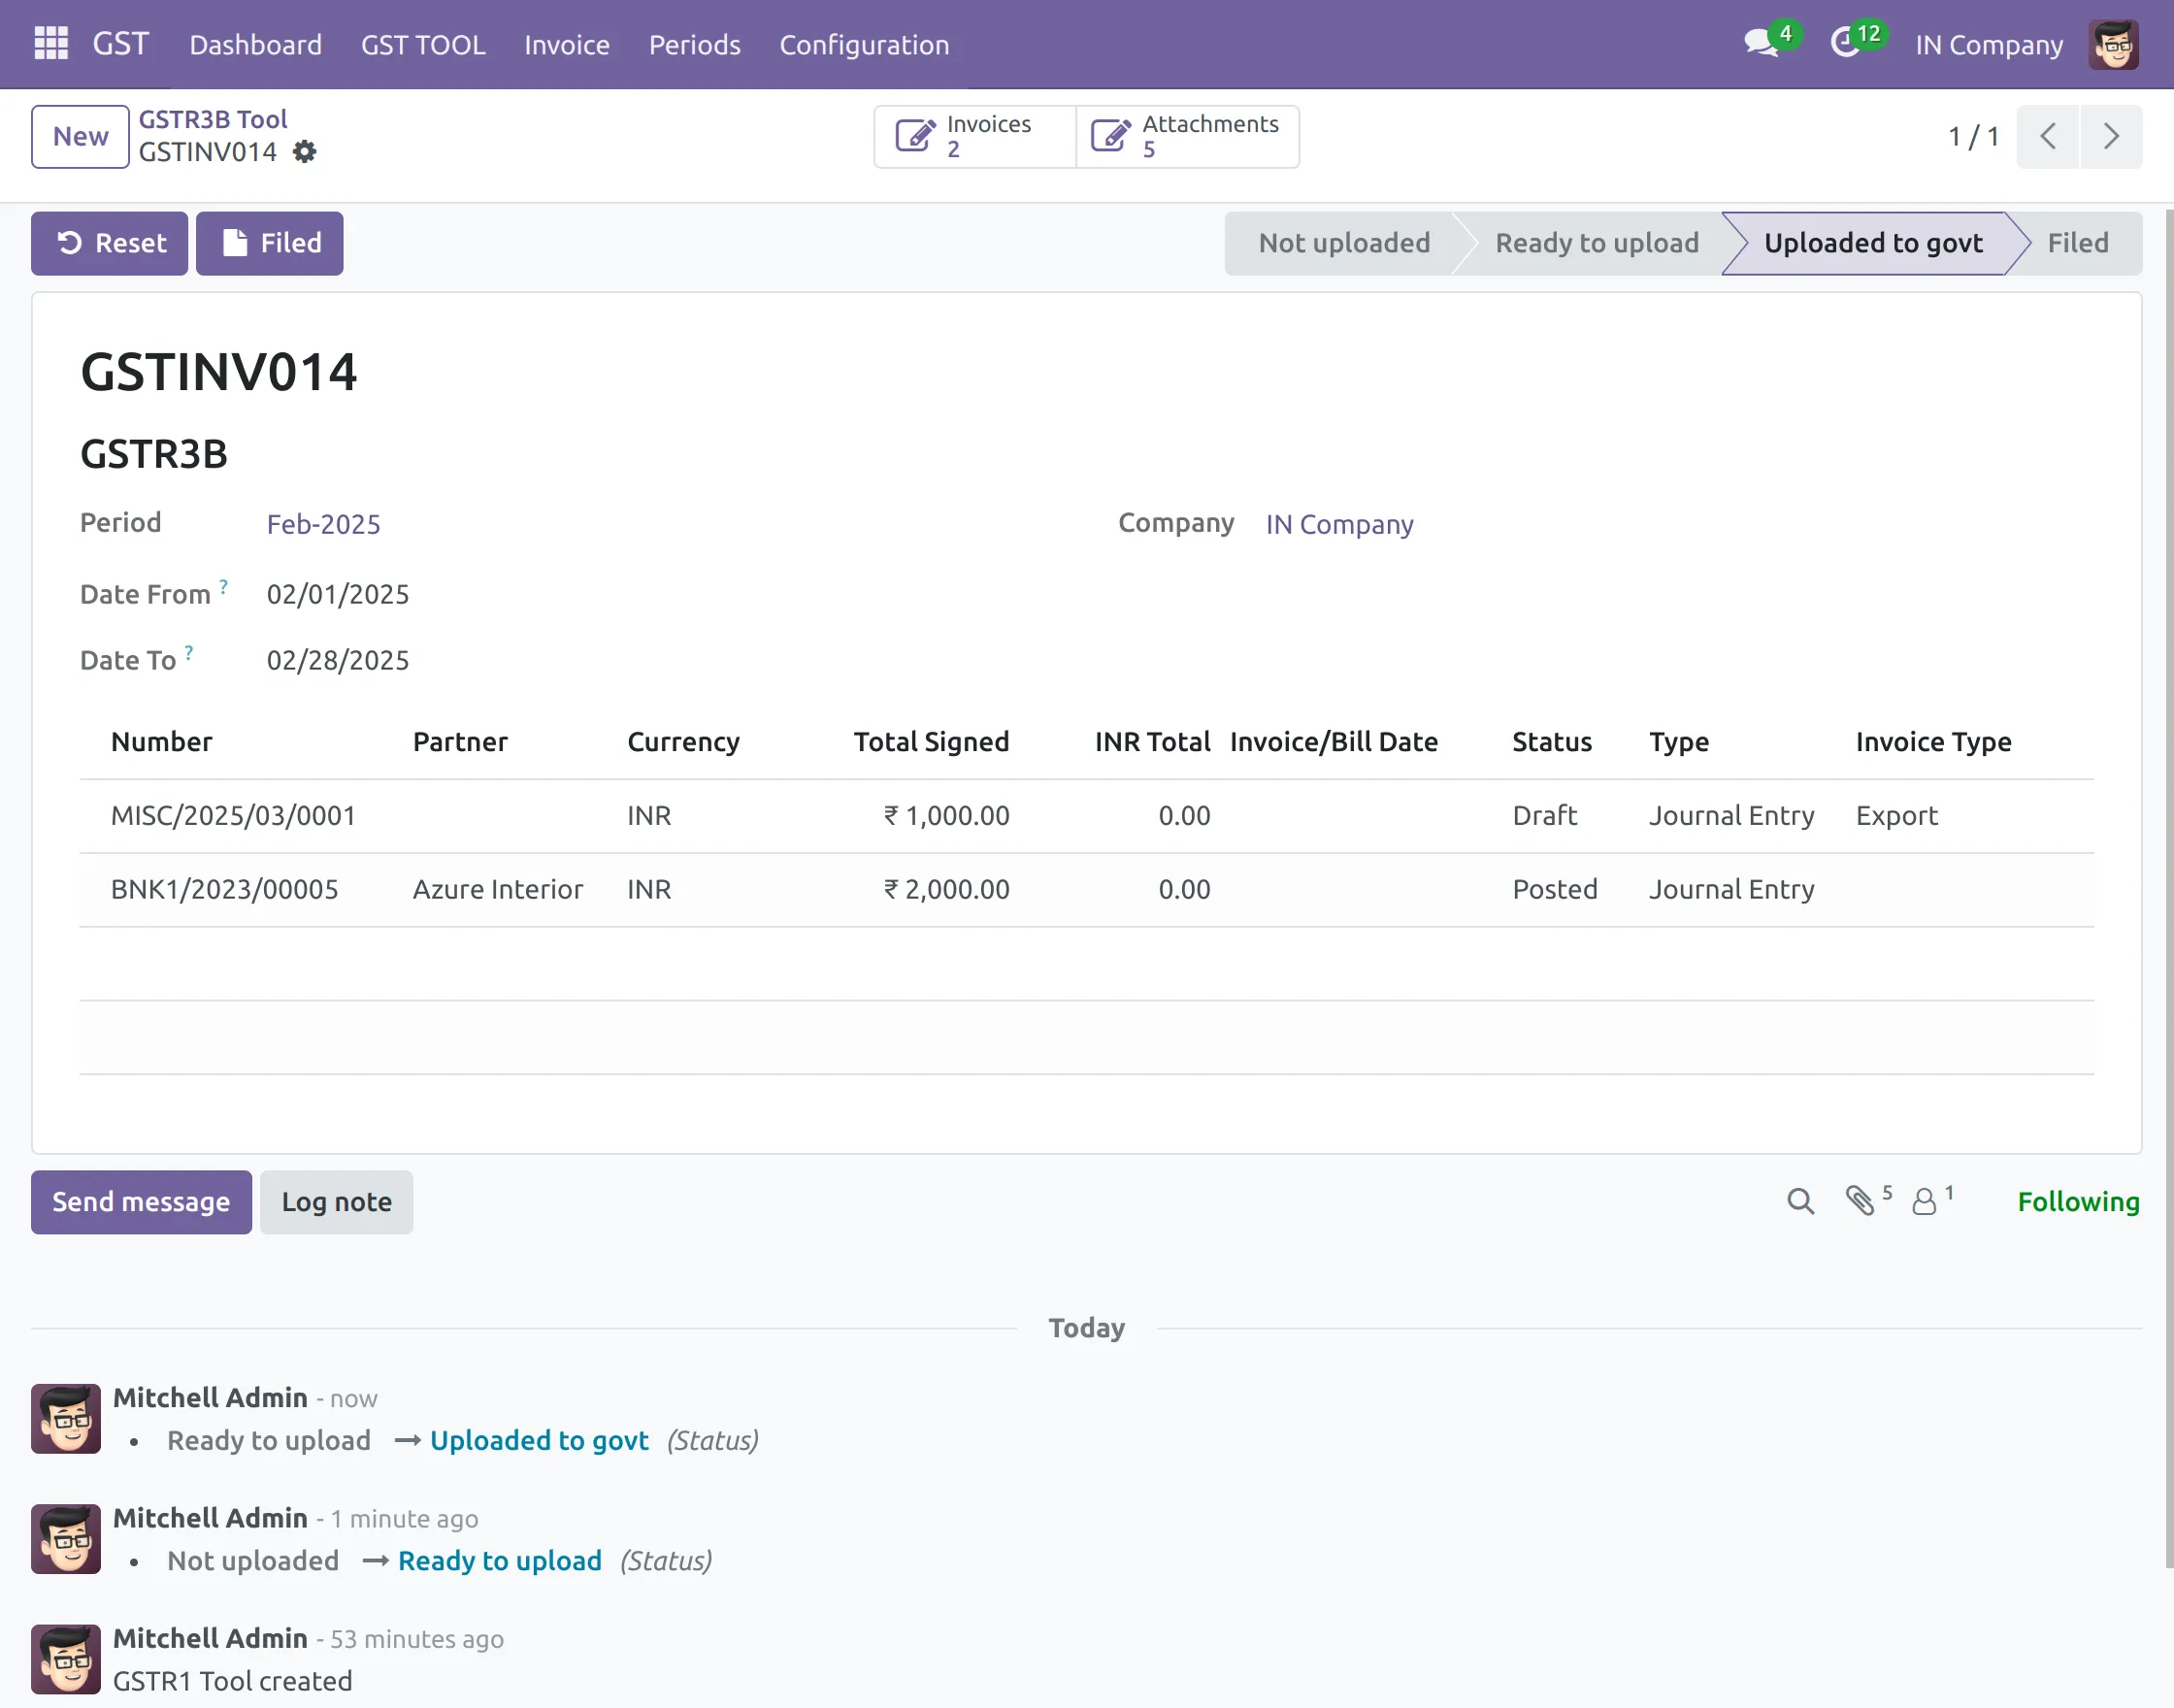
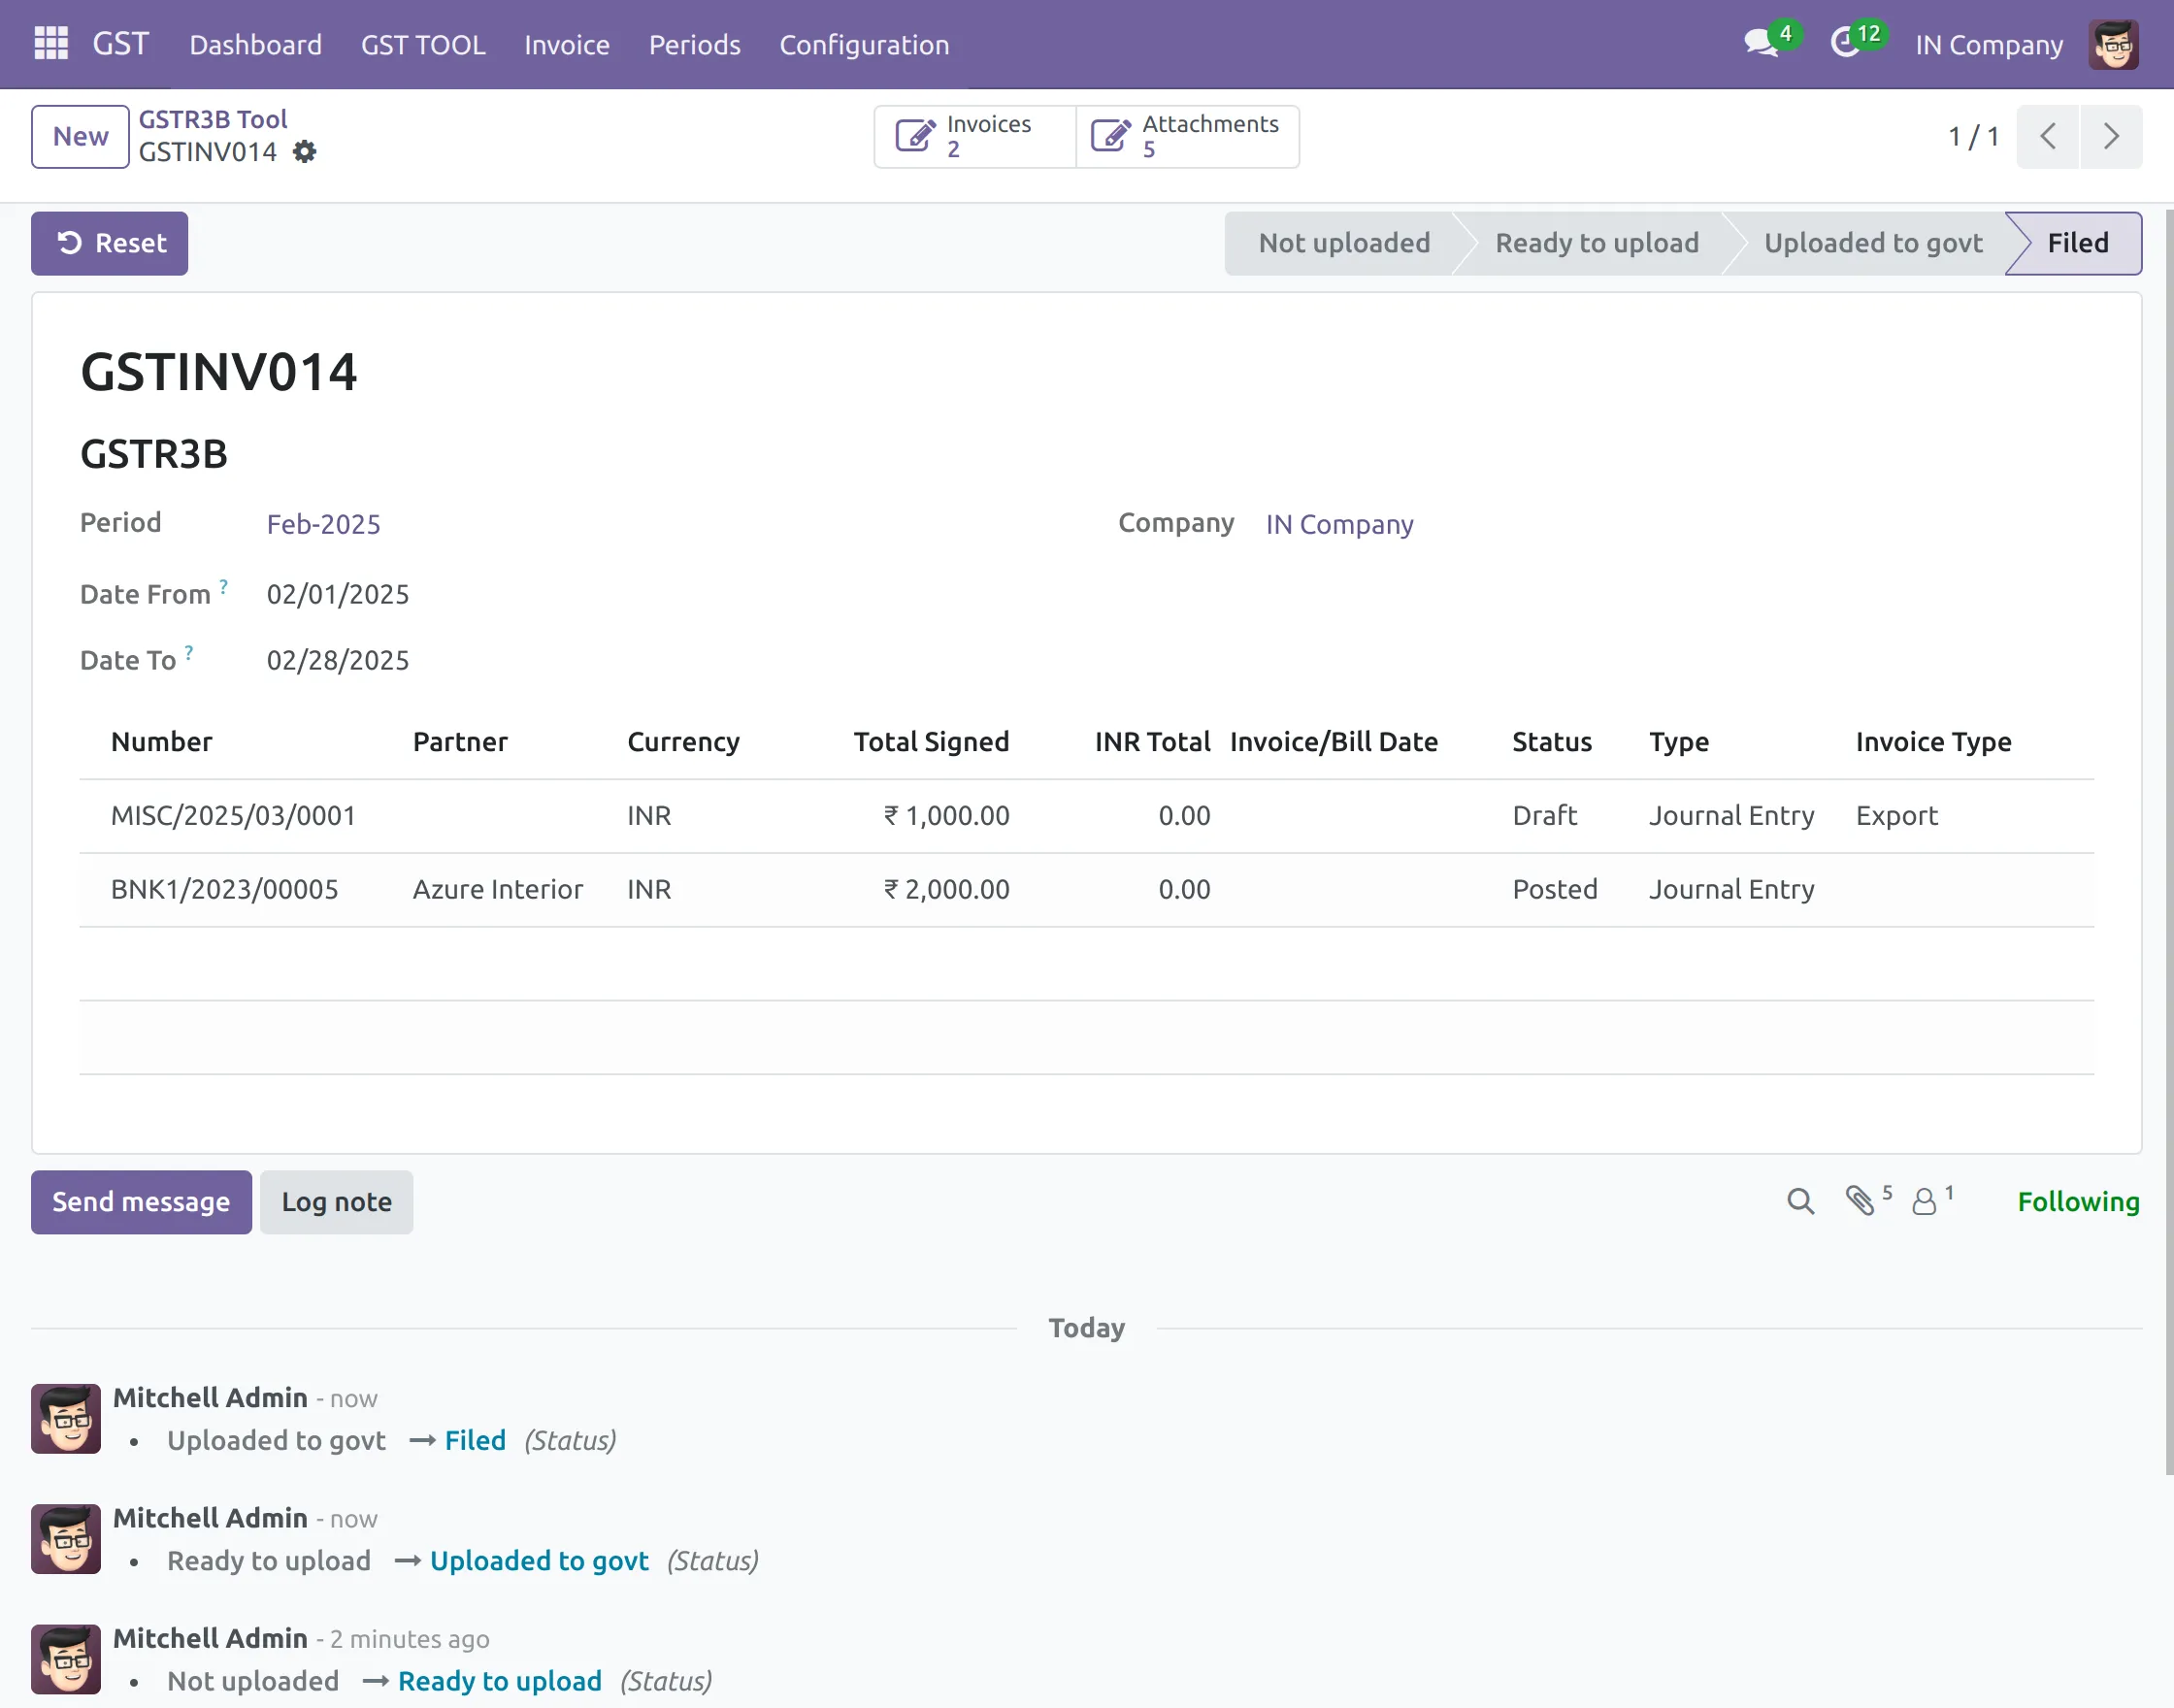
8. Next, Click on ‘Filed’ button. Once filed the GSTR3B, the stage changes to ‘Filed.’
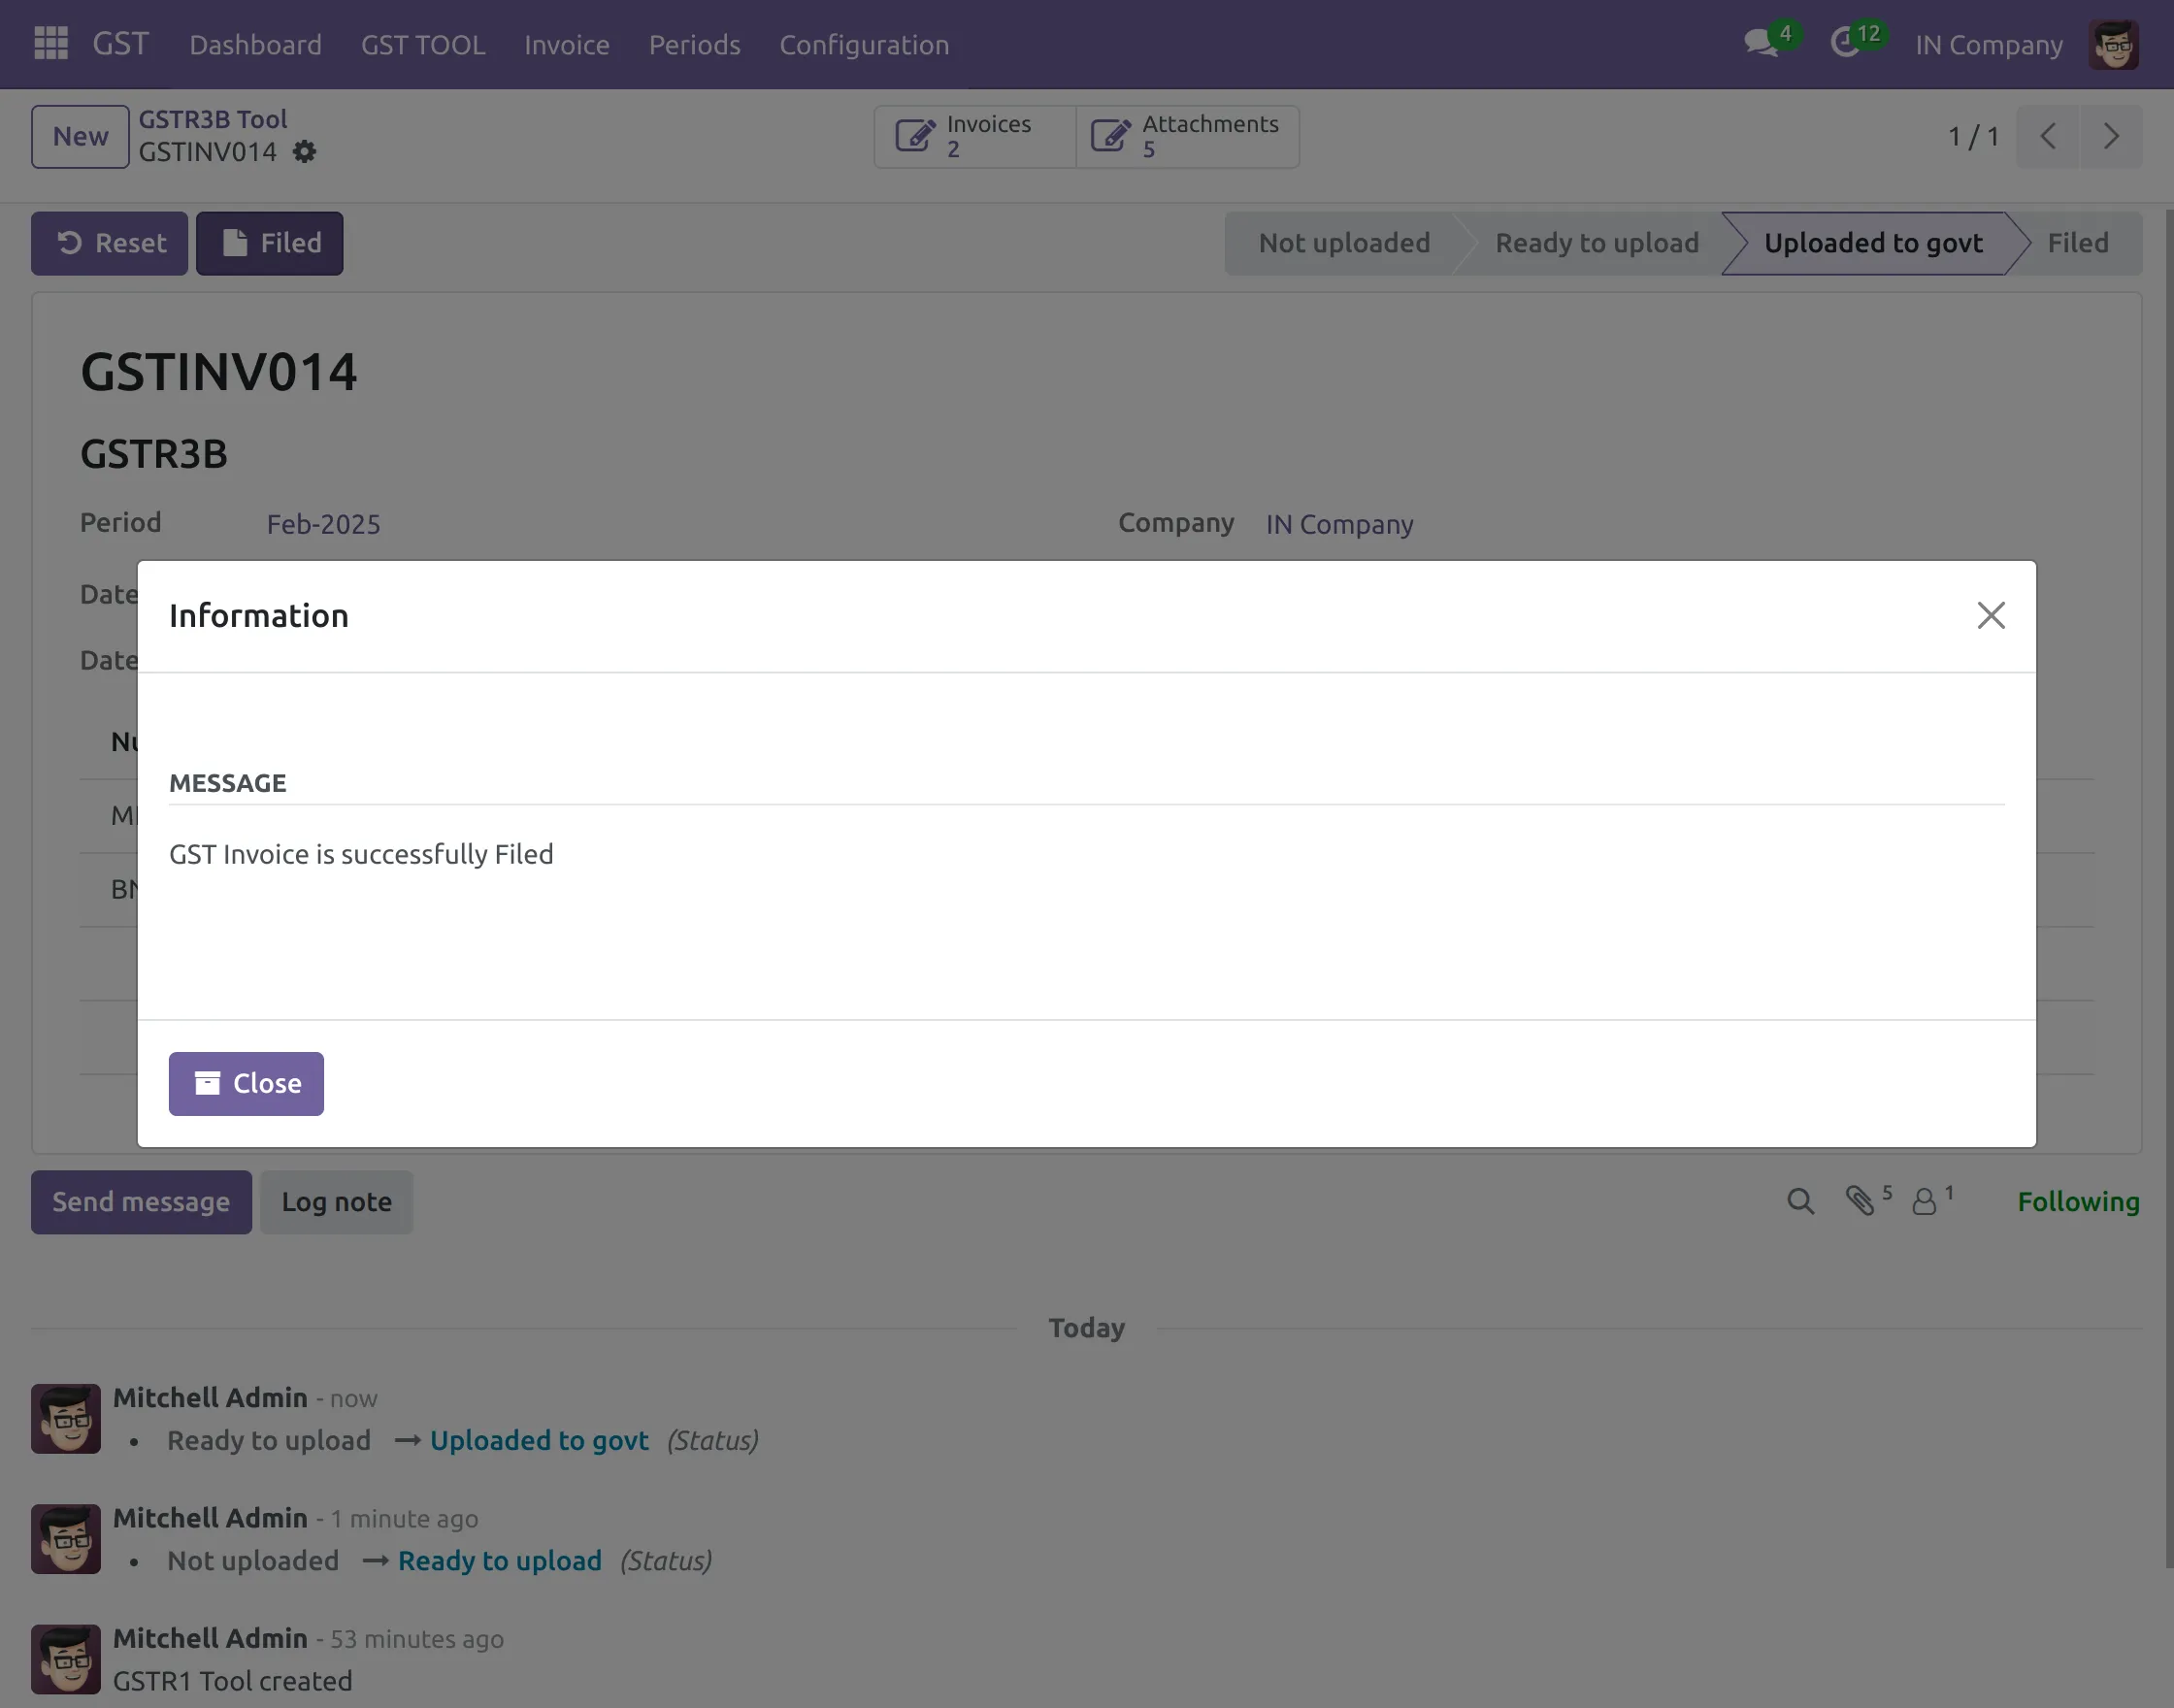
9. After that, a pop-up will show you the success message of filing. Click on the ‘Close’ button. Now, stage of the invoice will change to ‘Filed.’
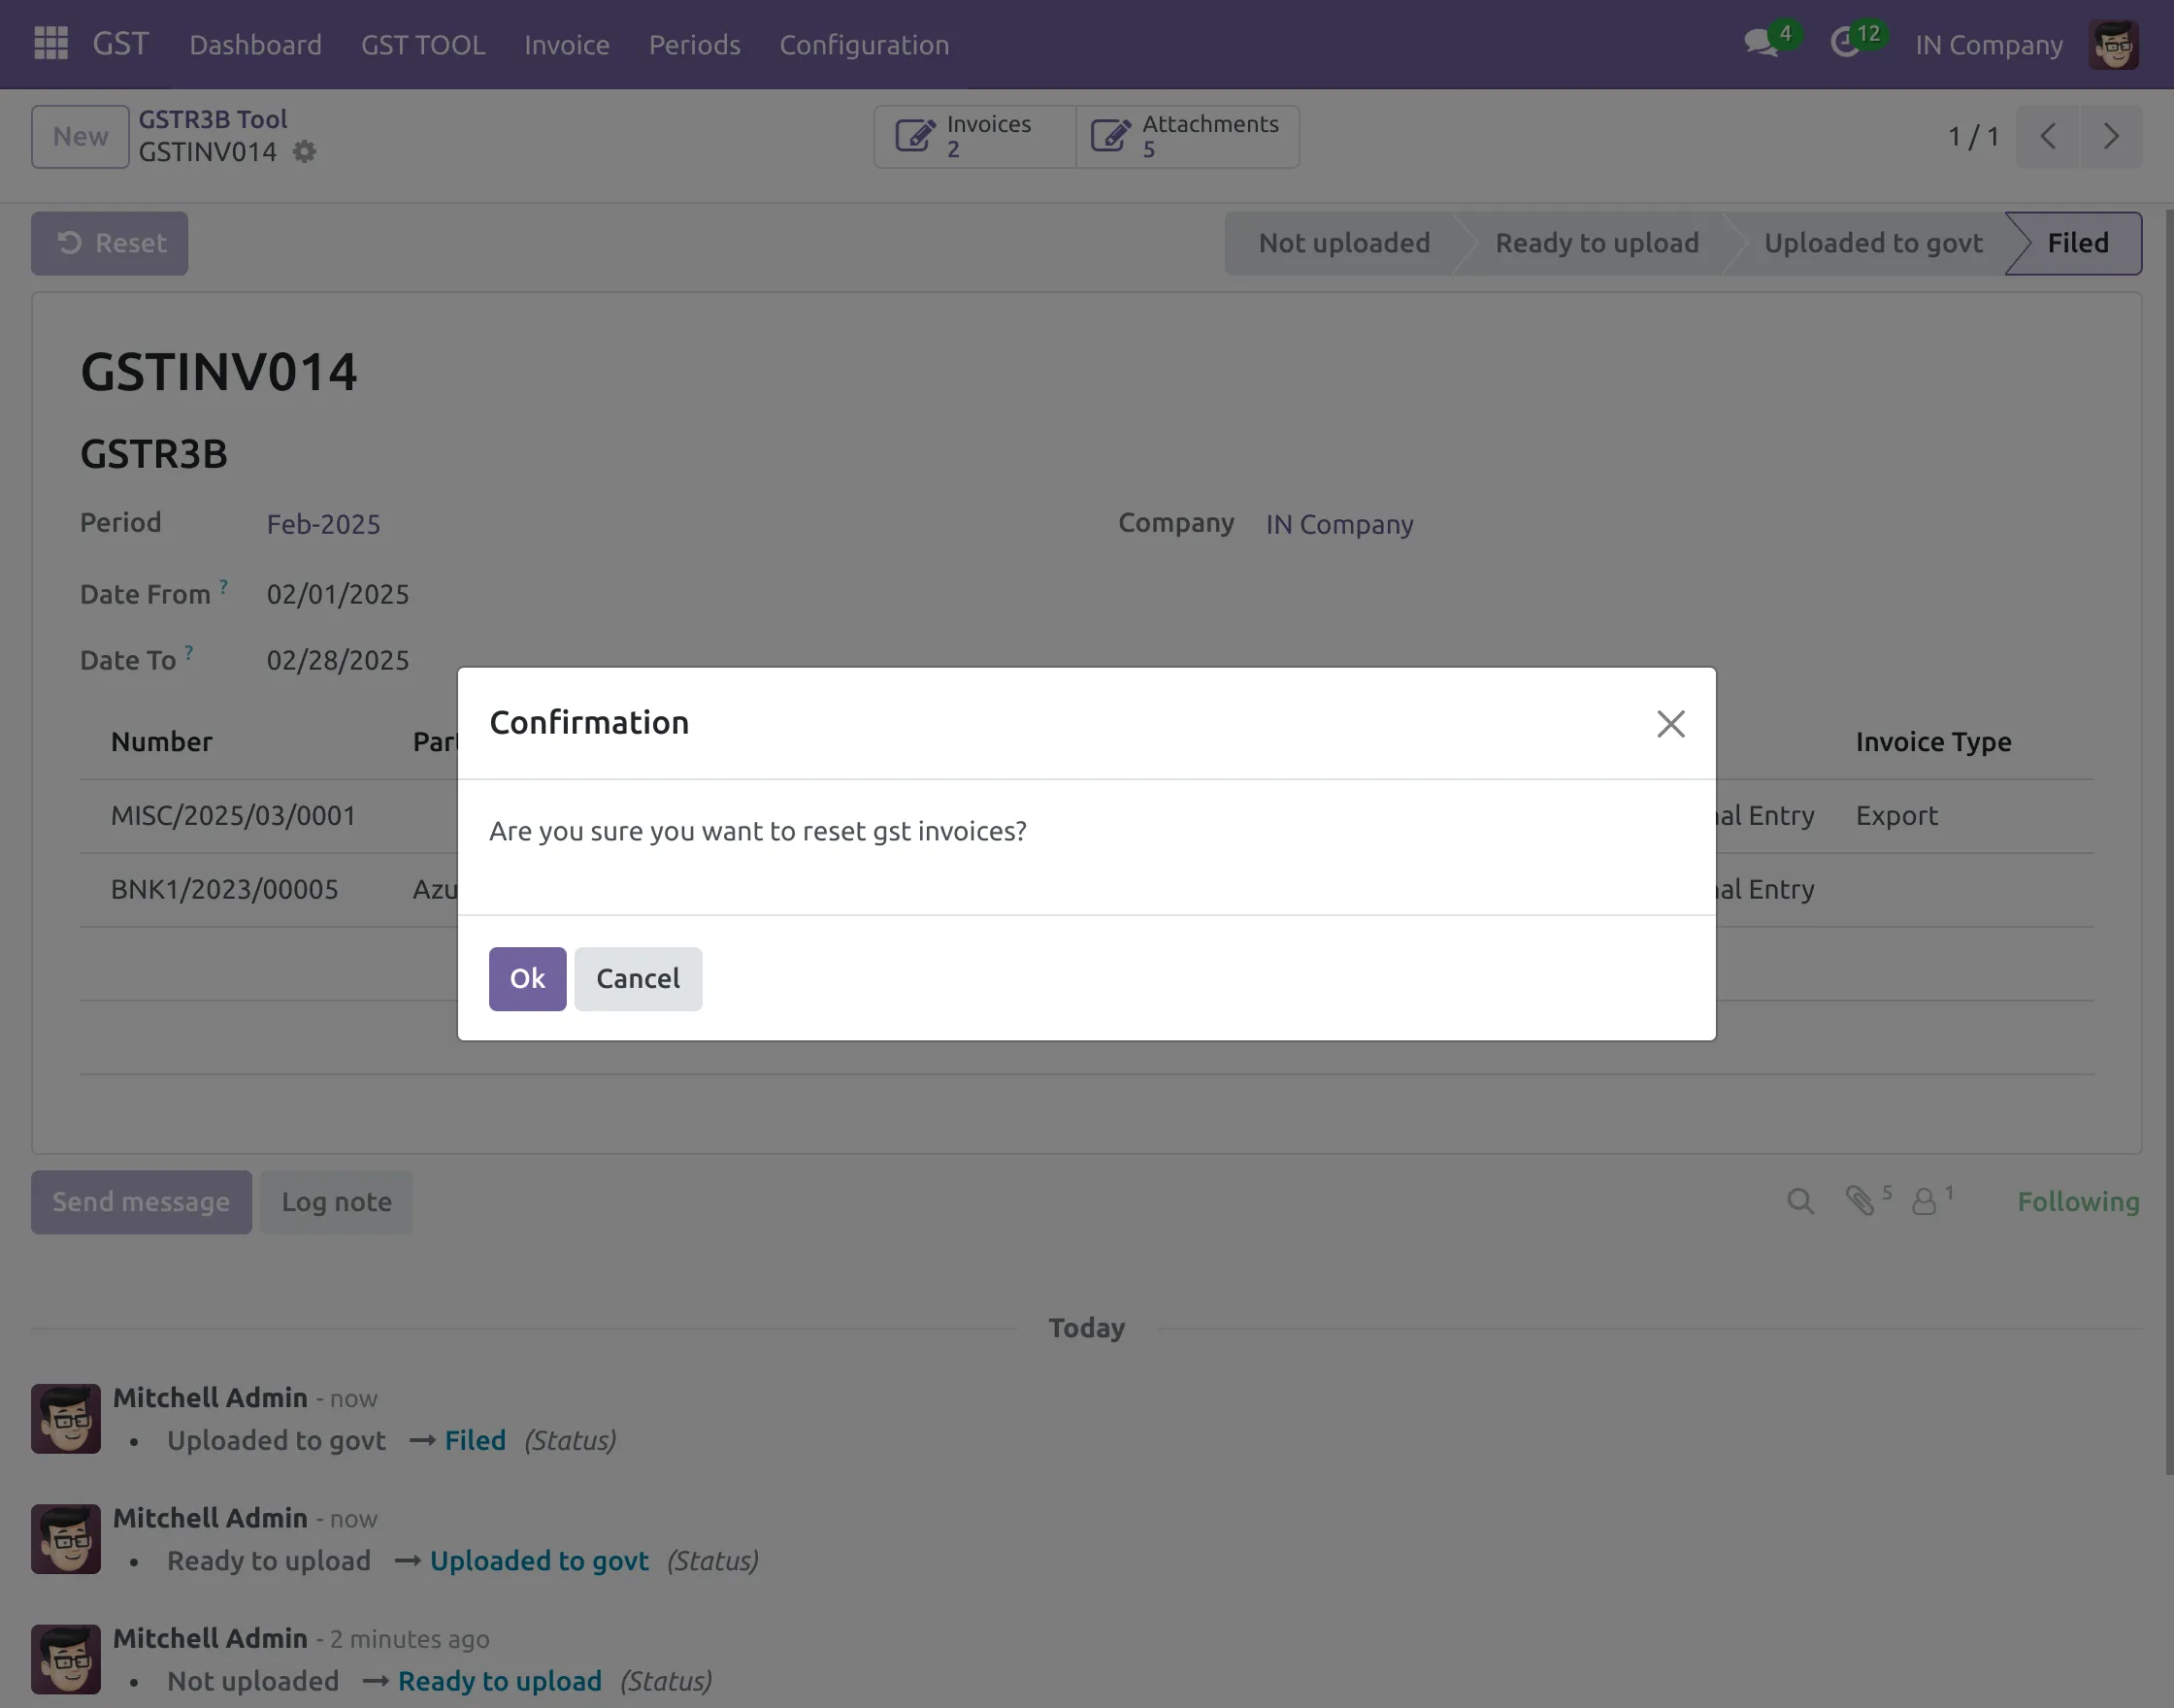
10. Click the ‘Reset’ button to reset the GSTR3B invoices.
11. A pop-up will appear when you click ‘Reset’ button. Click on ‘OK’ button to reset the GSTR3B invoice.
Need Help?
Hope you find guide helpful! Please feel free to share your feedback in the comments below.
If you still have any issues/queries regarding the same, please raise a ticket at the UV Desk.
I hope this helps. In case of any further queries, contact us at our support mail.
Thanks for paying attention!!
Current Product Version - 1.0.0
Supported Framework Version - V15, V14, V13

2 comments
Thanks for giving it a read! Stay tuned…
Regards
Anisha Bahukhandi