Introduction
Odoo Employee Loan Management System helps companies manage employee loans in a simple and organised way.
It allows employees to request loans while enabling HR to handle approvals and repayments smoothly.
In the module, HR can define loan types and set the repayment rules. The system also calculates the interest automatically and supports multiple interest types.
The module tracks loan approvals, payment schedules, and deductions from paychecks, all in one place.
This makes the loan history clear and easy for everyone to see and manage.
Features
- Create and manage multiple employee loan types.
- Define eligibility rules based on employee experience.
- Set loan limits, tenure, and repayment terms.
- Configure interest types: Interest-free, Simple or Compound interest.
- Automatically calculate EMI based on interest settings.
- Employees can submit and track loan applications.
- Multi-level loan approval workflow for HR and managers.
- Automatic EMI generation and payroll deduction.
- View loan history, outstanding balance, and repayment status.
Installation
- Once you purchase the App from Webkul store, you will receive a link to download module’s zip file.
- Extract the file on your system after download finishes. As a result, you will be able to see a folder named- ‘emp_loan_management(you can get the technical name from odoo app of the respective module)’
- Copy and paste this folder inside your Odoo Add-Ons path.
- Now, open Odoo App and click on the Settings menu. Here, click on Activate Developer Mode.
- Then, open Apps menu and click on ‘Update Modules List.’
- In the search bar, remove all the filters and search ‘emp_loan_management’
You will be able to see module in the search results. Click on ‘Activate’ to install it.
Workflow
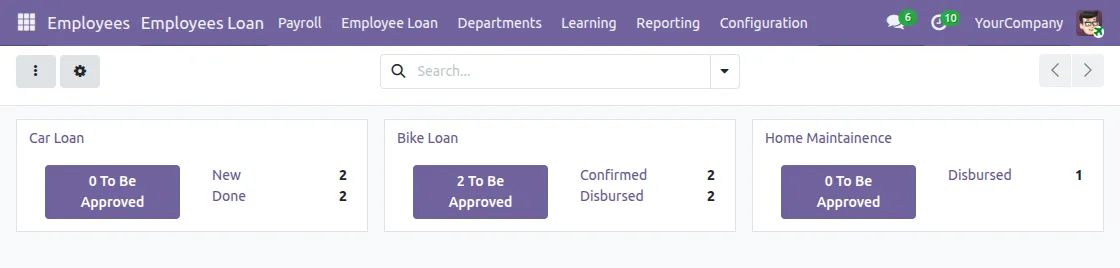
1. Odoo Employee Loan Management System Dashboard provides a quick overview of all loan activities.
At a glance, HR can see total loans, approved loans, pending requests, and closed loans.
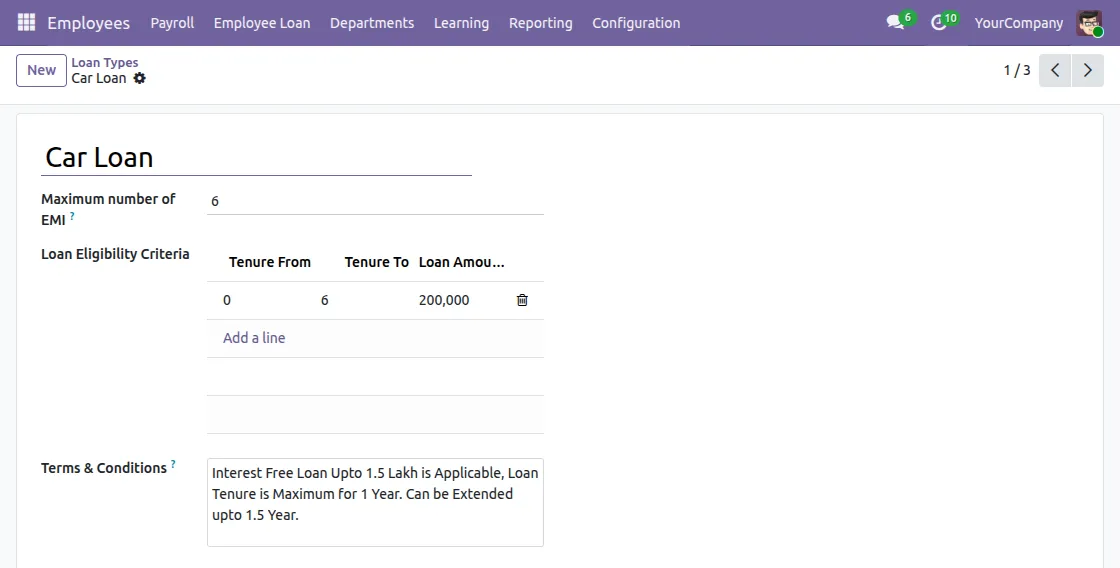
2. Firstly, the admin/HR creates different loan types. Each loan type includes a maximum amount, tenure, and eligibility rules.
3. In Odoo Employee Loan Management System, employees create a new loan request by clicking the New button on the Employee Loan page.
They first select the loan type and enter the required amount; subsequently, they submit the request for approval.
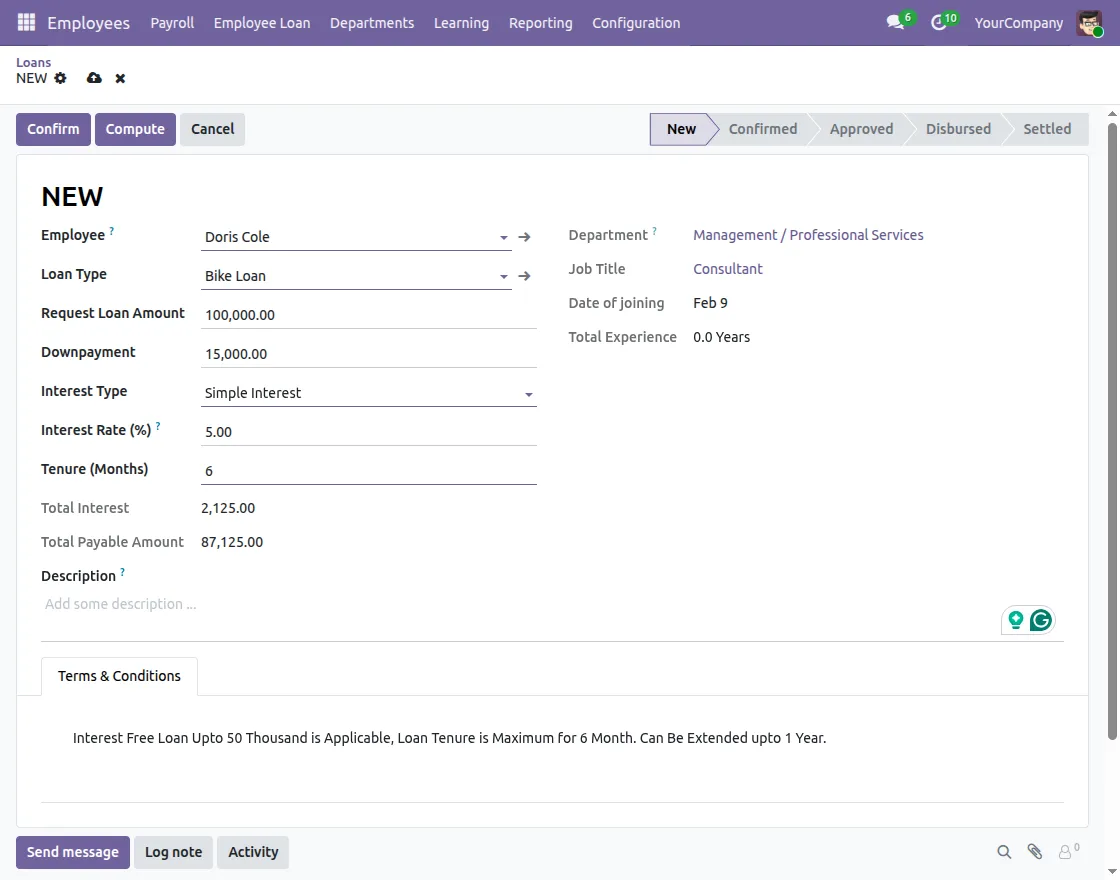
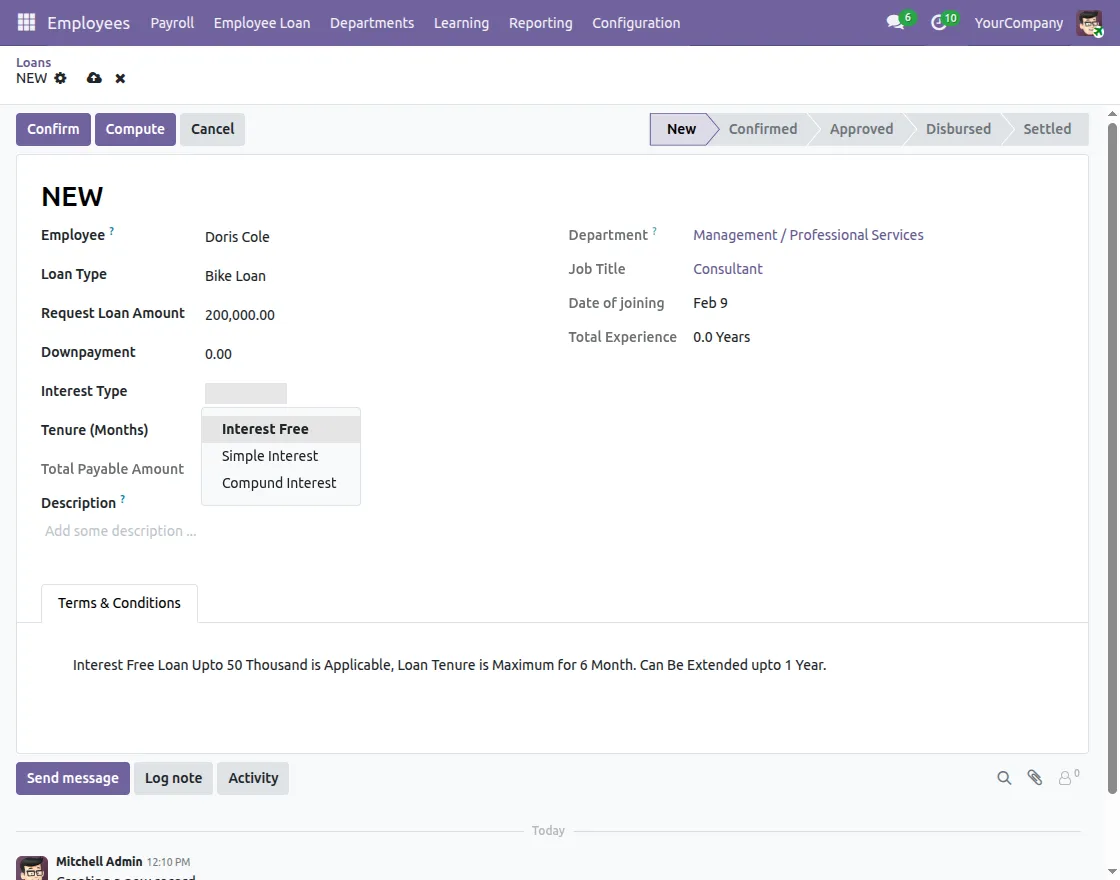
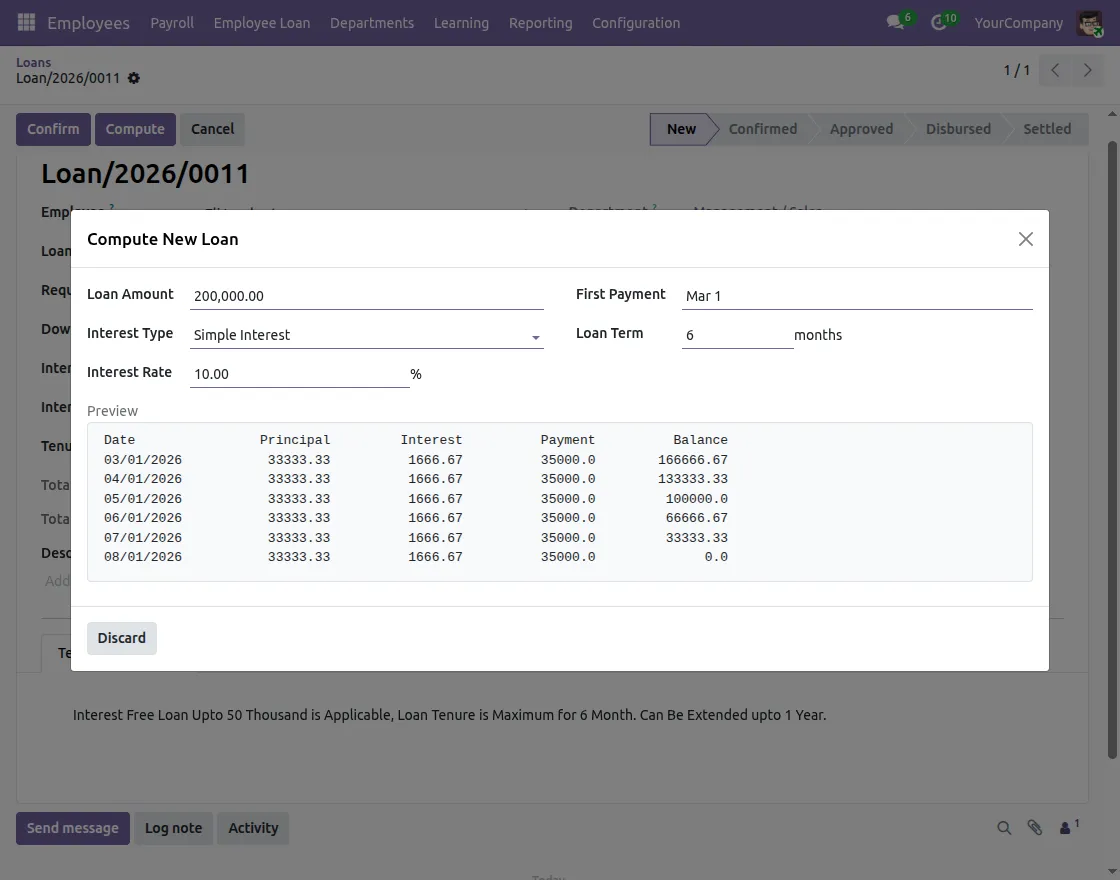
4. While configuring the loan type, the employee can choose the interest method. The system calculates EMI automatically based on the selected method.
5. Employees can preview the EMI breakdown before confirmation. As a result, employees understand the repayment details before final confirmation.
6. Once employees submit the loan request, it goes to HR or the manager. Then, they review eligibility, the requested amount, and company rules.
Based on this review, HR approves or rejects the request.
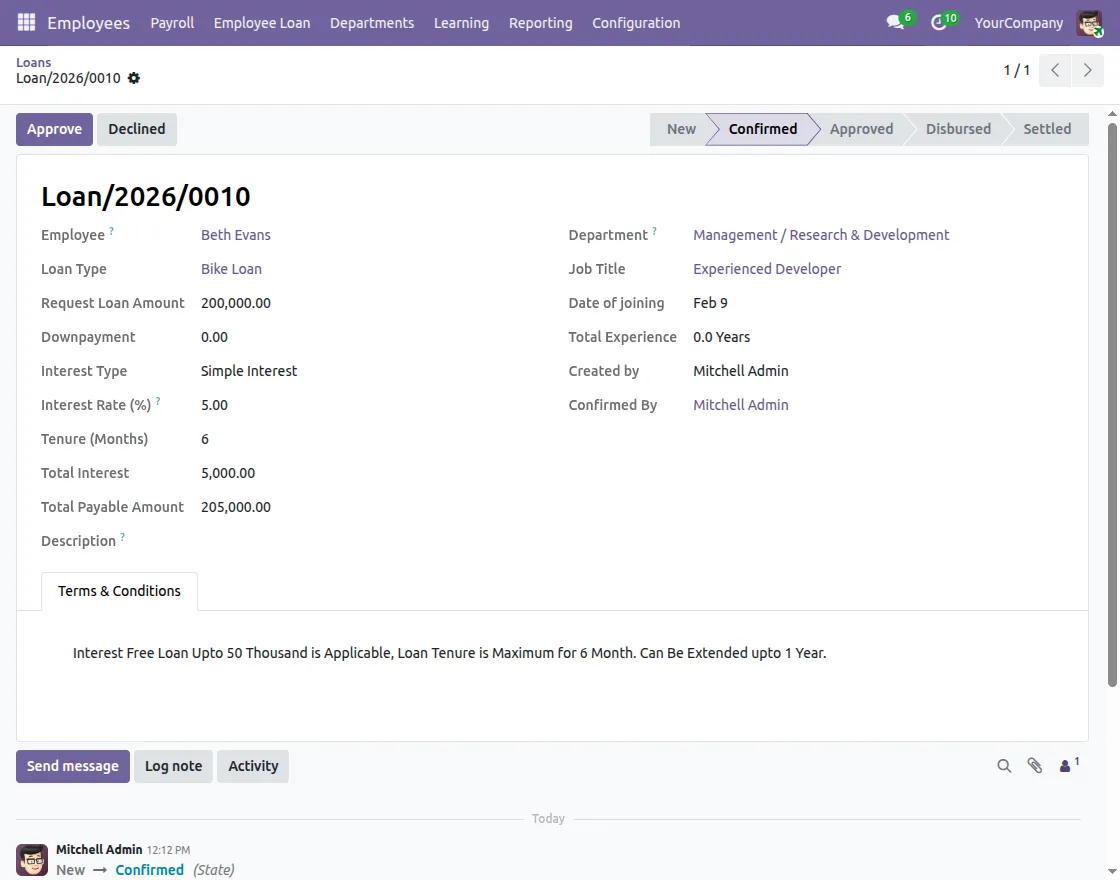
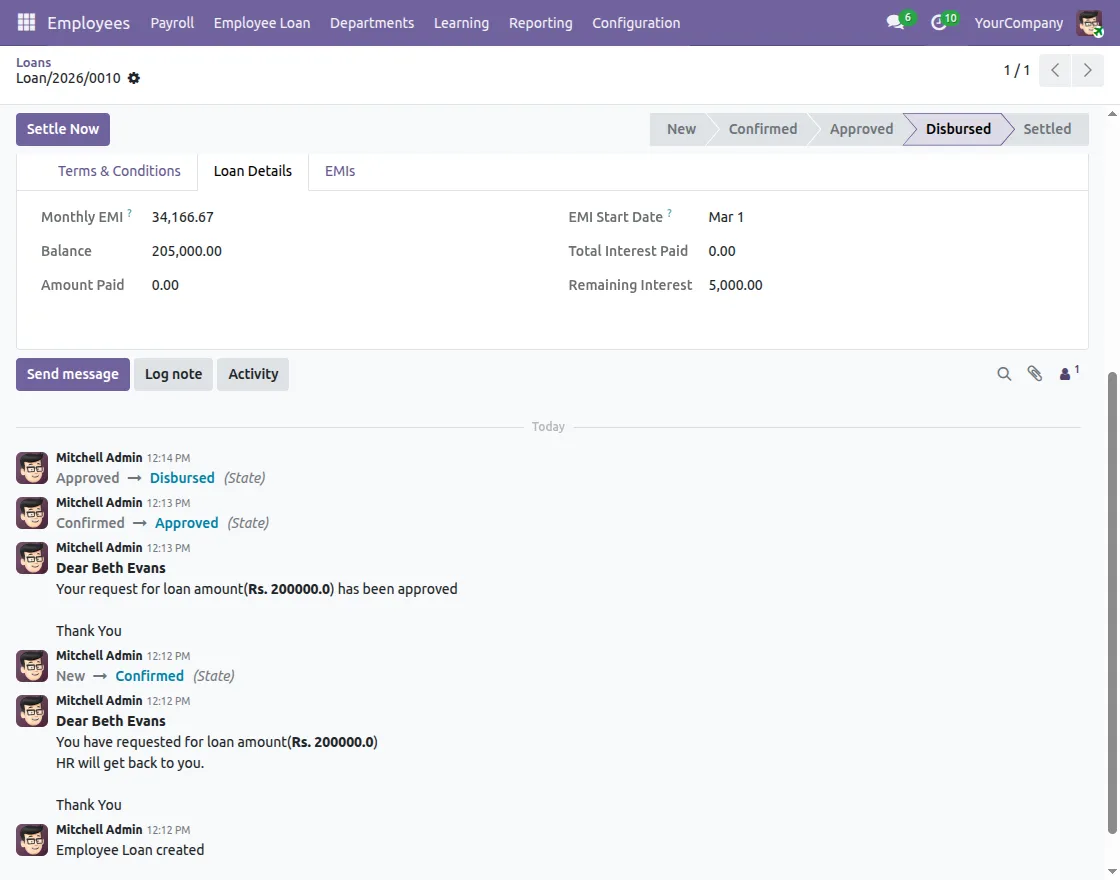
7. If HR approves the request, the system marks it as Approved. Then, employees can view the generated EMIs, and the loan becomes ready for disbursement.
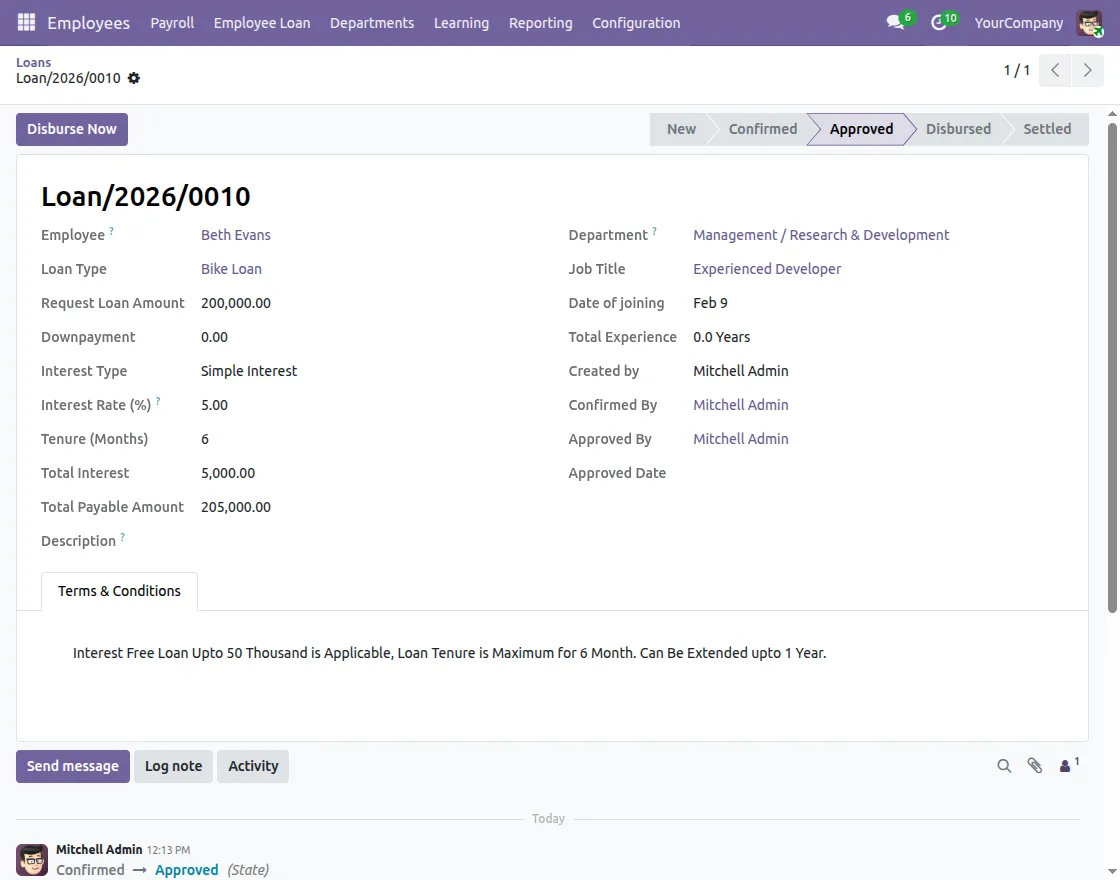
8. HR verifies the EMI details before disbursement to ensure the installment amount and schedule are correct. Afterwards, HR can safely disburse the loan.
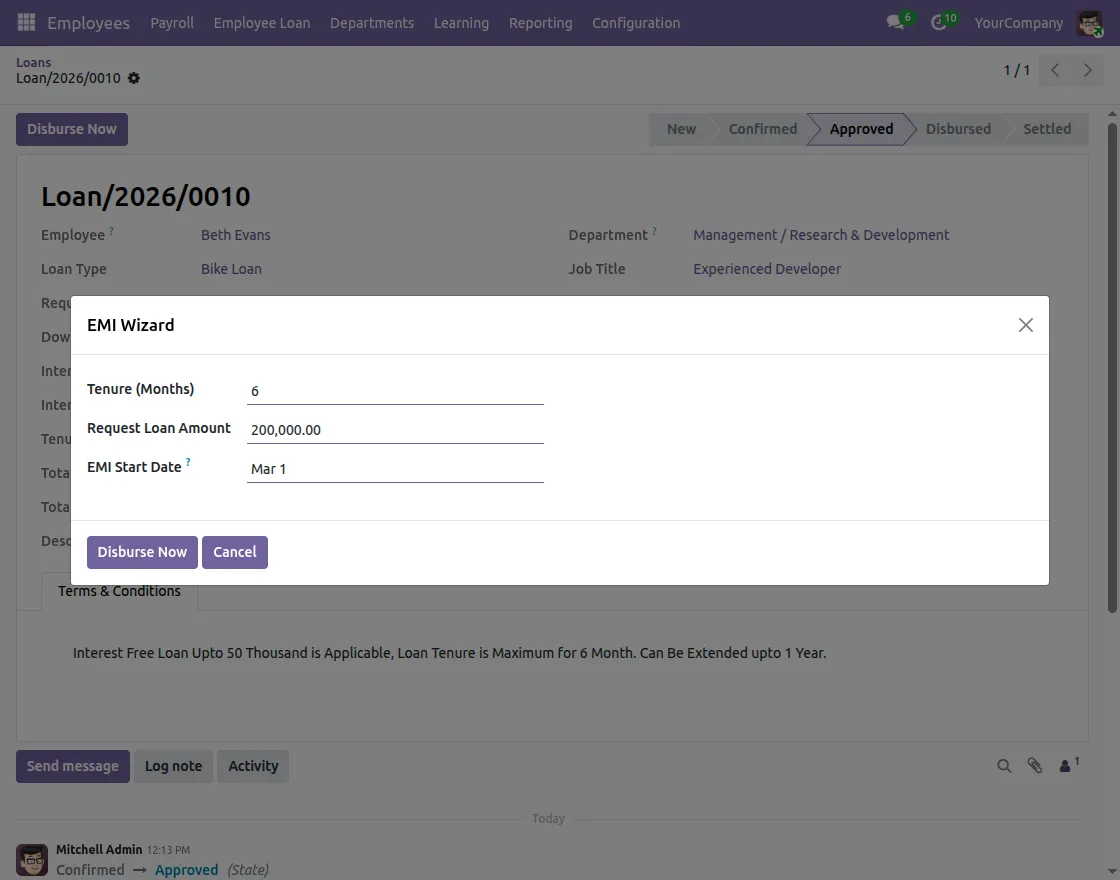
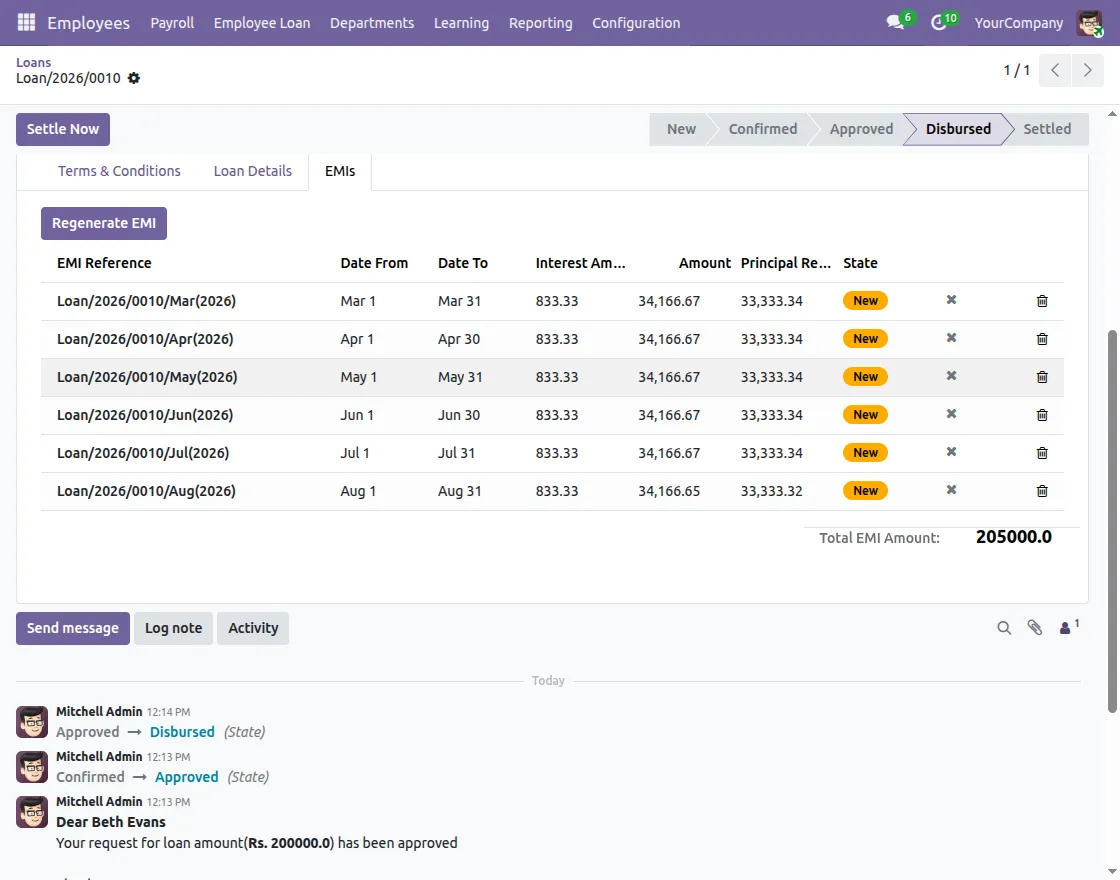
9. When HR disburses the loan, the system releases the amount to the employee.
At the same time, it records all actions in the activity log; therefore, the entire process remains transparent and traceable.
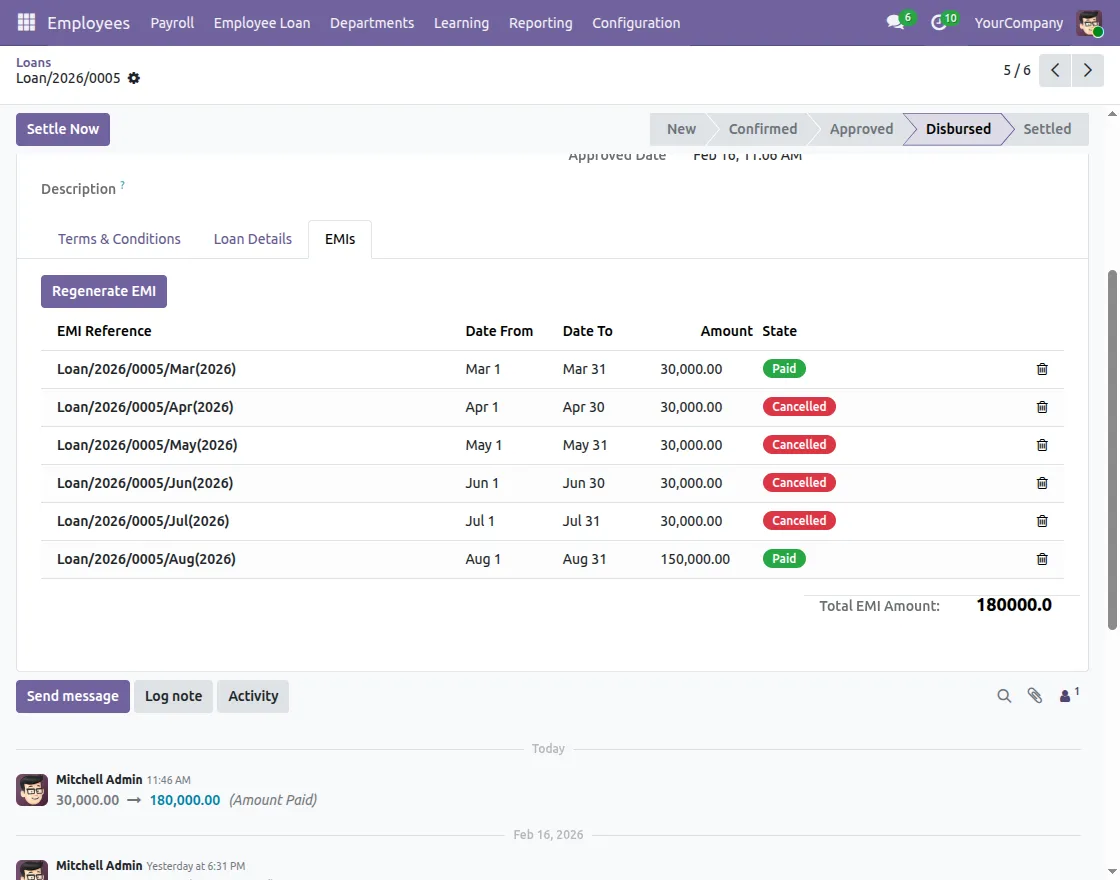
10. After disbursement, EMI records are generated automatically. Each installment is linked with payroll for deduction.
The system tracks paid and pending installments clearly.
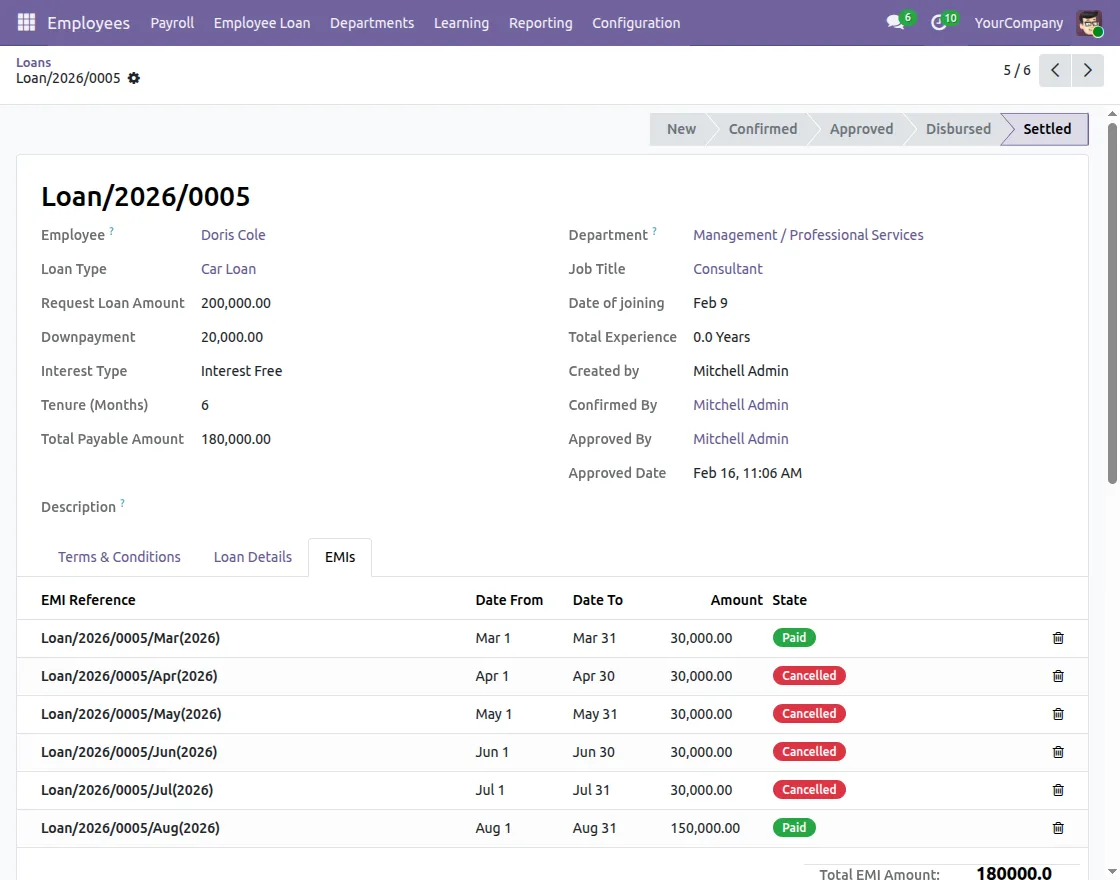
11. When all EMIs are paid, the loan becomes eligible for settlement.
After verification, HR can officially close the loan. As a result, the loan is marked as completed.
12. Once HR settles the loan, the system updates its status to Settled.
Even then, the employee can view the full loan history at any time; therefore, a complete record remains available for future reference.
Need Help?
Hope you find guide helpful! Please feel free to share your feedback in the comments below.
If you still have any issues/queries, please create a ticket at the UV Desk.
I hope this helps. In case of any further queries, contact us at our support mail.
Thanks for paying attention!!
Current Product Version - 1.0.1
Supported Framework Version - Odoo V19, Odoo V18, Odoo V17

3 comments
Thanks for the feedback.
Regards,
Megha
Webkul