Introduction
Odoo Delivery Boy App helps businesses manage daily deliveries from Odoo. Admins can assign orders, manage delivery staff, and follow delivery progress.
Delivery staff can use the mobile app to view orders, update status, confirm deliveries, and record payments. The app keeps delivery data in sync with the backend.
Built with Flutter, the app supports both Android and iOS devices. It helps delivery teams complete orders with less manual work.
You can also convert your Odoo Multi Vendor Marketplace website into a mobile app by using the Odoo Multi Vendor Mobile App module.
Check the video mentioned below for a brief overview of the delivery boy mobile app –
Features
- Manage delivery staff and assigned orders from one easy mobile app.
- Assign delivery orders quickly and keep delivery staff fully updated.
- View customer, address, product, and payment details with ease.
- Update the delivery status directly from the mobile app.
- Confirm completed deliveries with OTP and delivery proof when required.
- Record payment details during the delivery process when enabled.
- View assigned delivery tasks and recent updates from the dashboard.
- Check delivery reports for different dates and selected time periods.
- Use the app in multiple supported languages with simple controls.
- Receive instant alerts for new orders and important updates.
- Sync delivery data securely with Odoo backend.
- Use the Flutter app on both Android and iOS devices.
Note – Customers can easily manage their orders, notifications, and account information on their Android digital smartwatch by using the Odoo Watch App.
Installation
- Once you purchase the App from Webkul store, you will receive a link to download the Module’s zip file.
- Extract the file on your system after the download finishes. As a result, you will be able to see a folder named- delivery_boy
- Copy and paste this folder inside your Odoo Add-Ons path.
- Now, open Odoo App and click on the Settings menu. Here, click on Activate Developer Mode.
- Then, open the Apps menu and click on ‘Update Modules List.’
- In the search bar, remove all the filters and search ‘delivery_boy’
- You will be able to see the module in the search results. Click on ‘Activate’ to install it.
Note – Now you can bring Odoo POS to your mobile devices with the help of Odoo Mobikul POS Mobile App Builder!
Workflow
1.) Go to backend settings and open the Delivery Boy configuration section. Set the required options before using the mobile app.
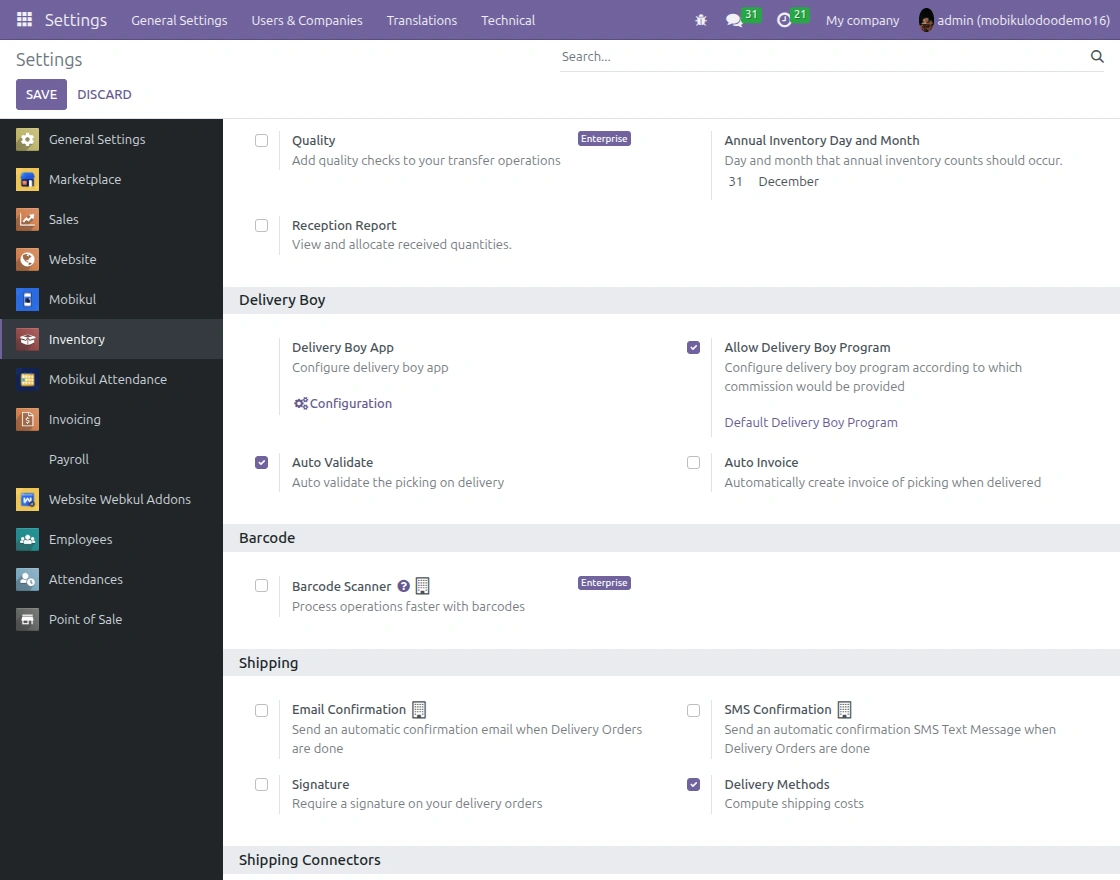
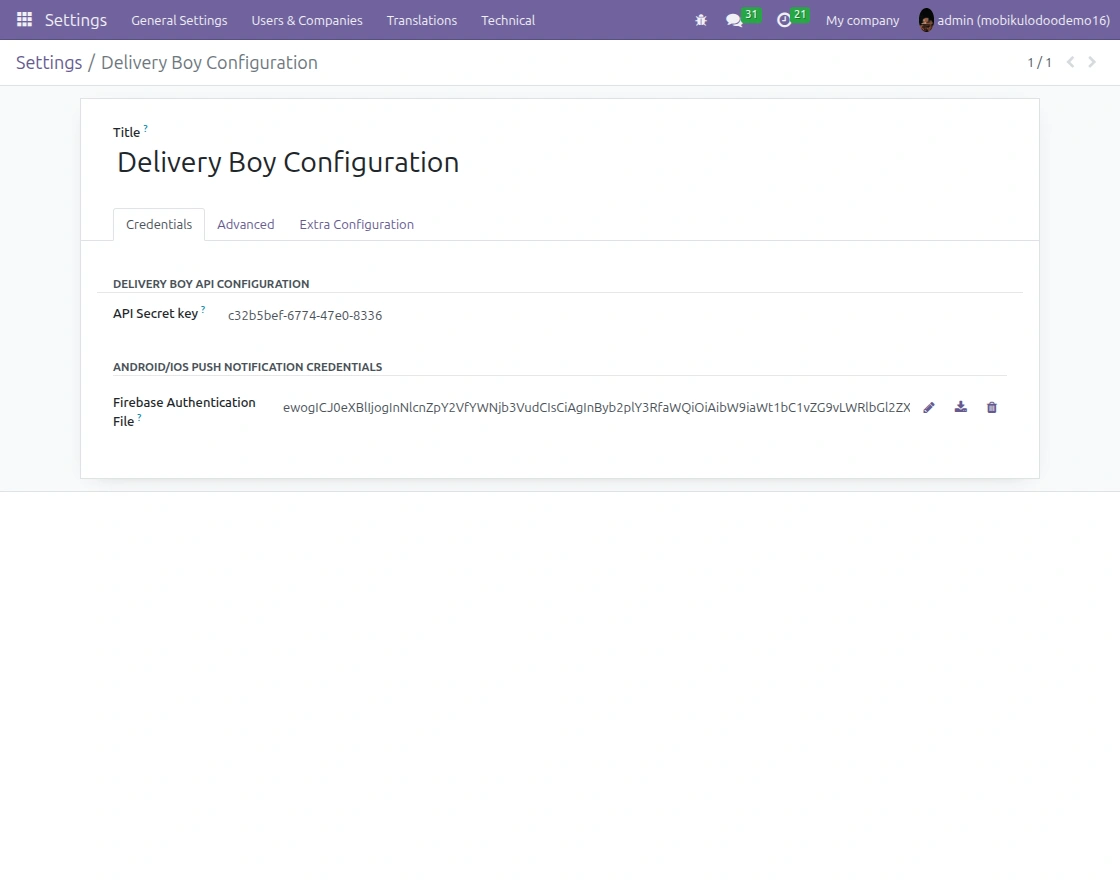
2.) Open the app credentials settings and enter the required details. These credentials help connect the mobile app with the backend.
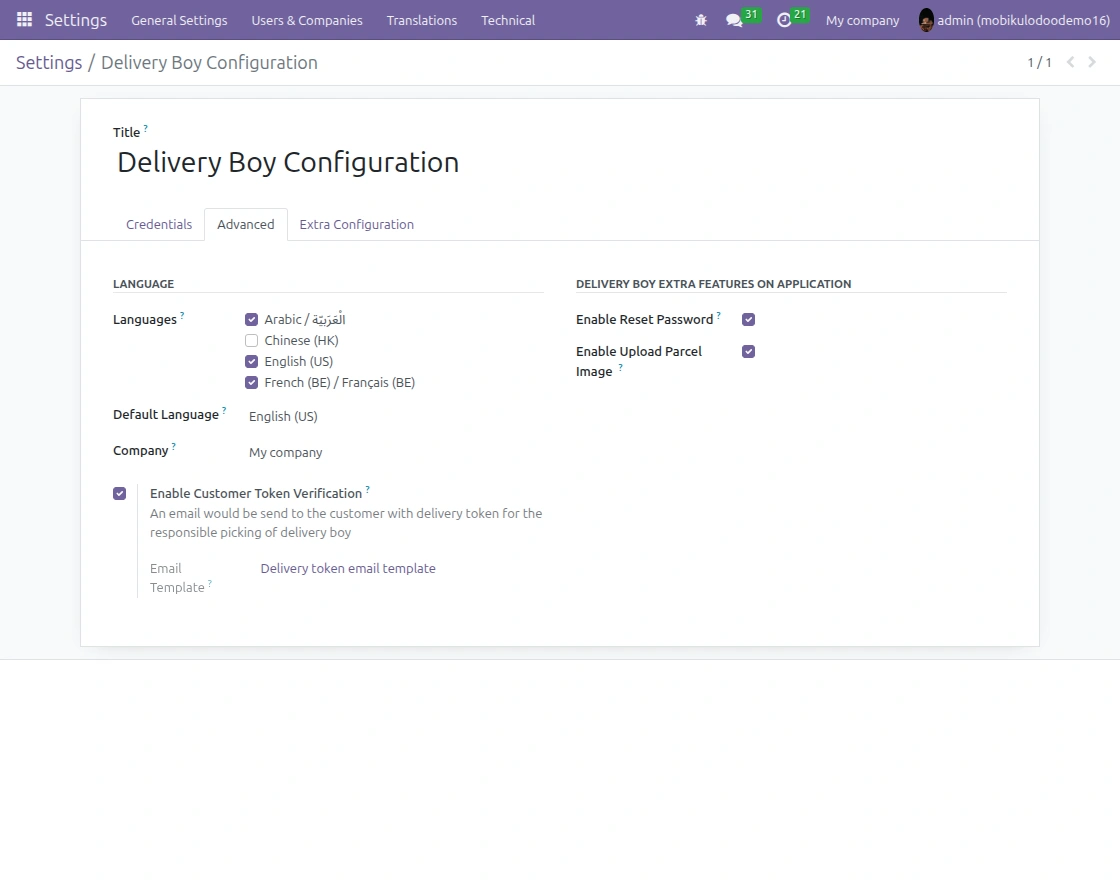
3.) Open the advanced settings to manage extra app options. Configure the required settings based on your delivery workflow.
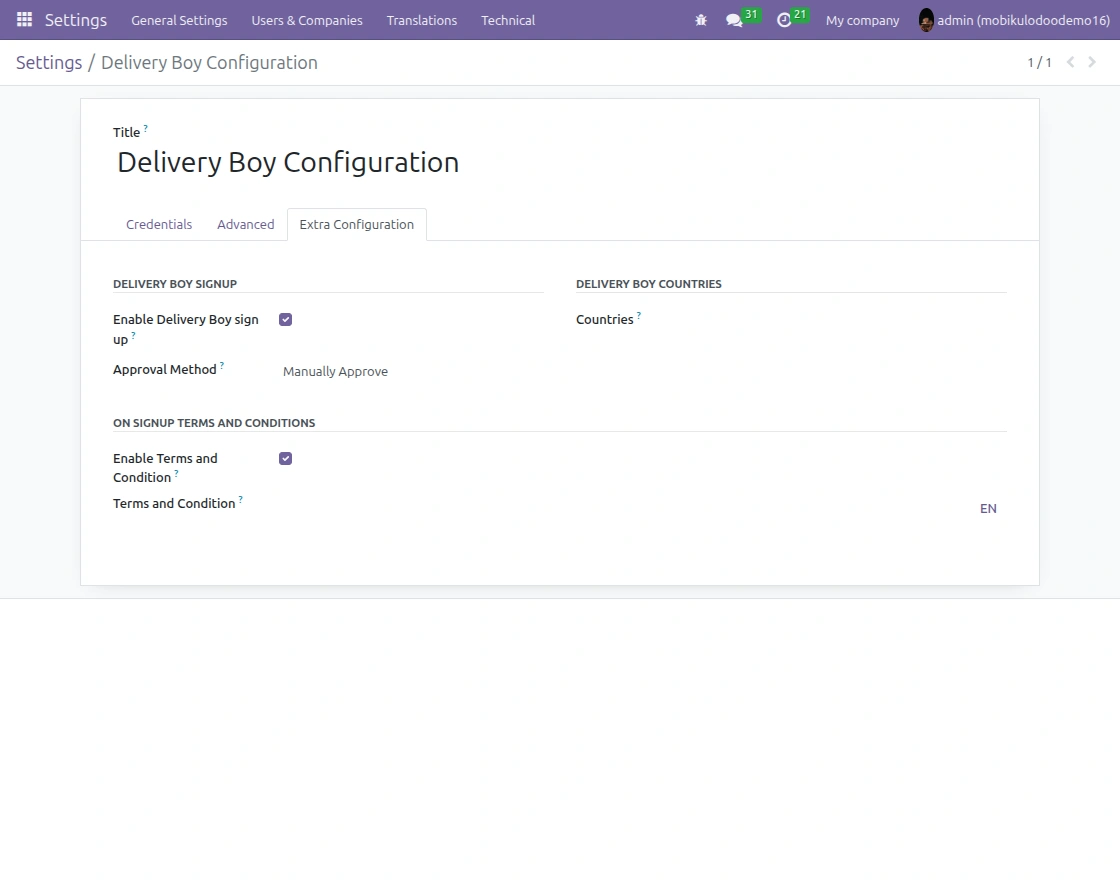
4.) Review the extra configuration options available for the delivery app. Enable the required options for your delivery process.
5.) Create a user account for the delivery staff in Odoo. Add the required user details and enable the delivery boy access.
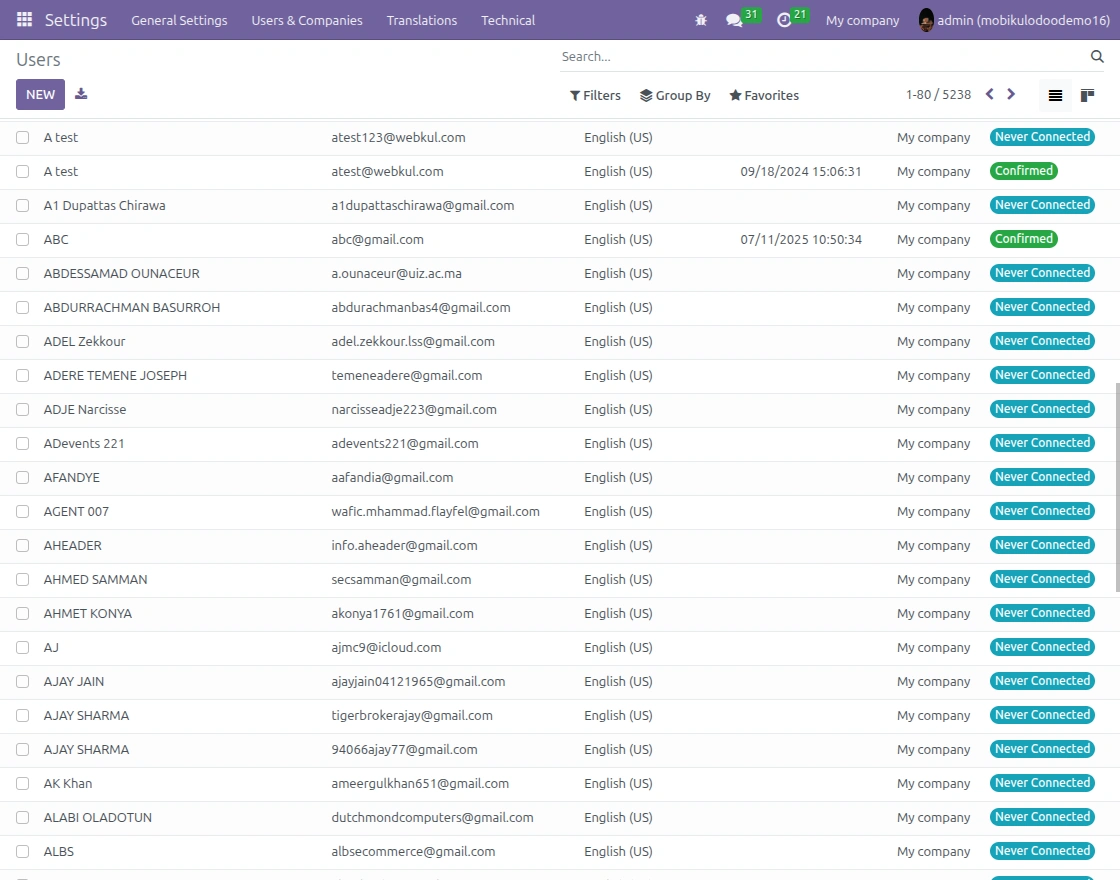
6.) Open the delivery order in Odoo and select the Assign Delivery option. Choose the delivery staff who will handle the order.
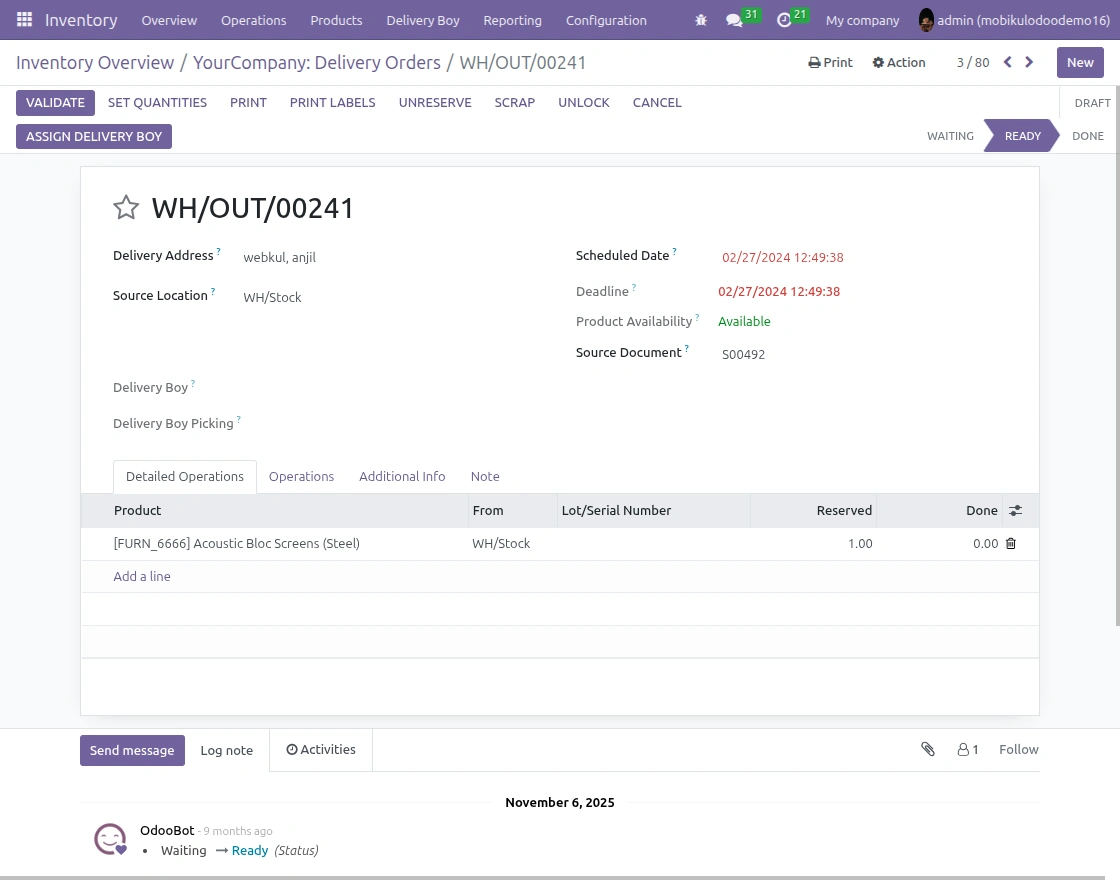
7.) Select the required delivery boy from the available users. Confirm the selection to assign the order.
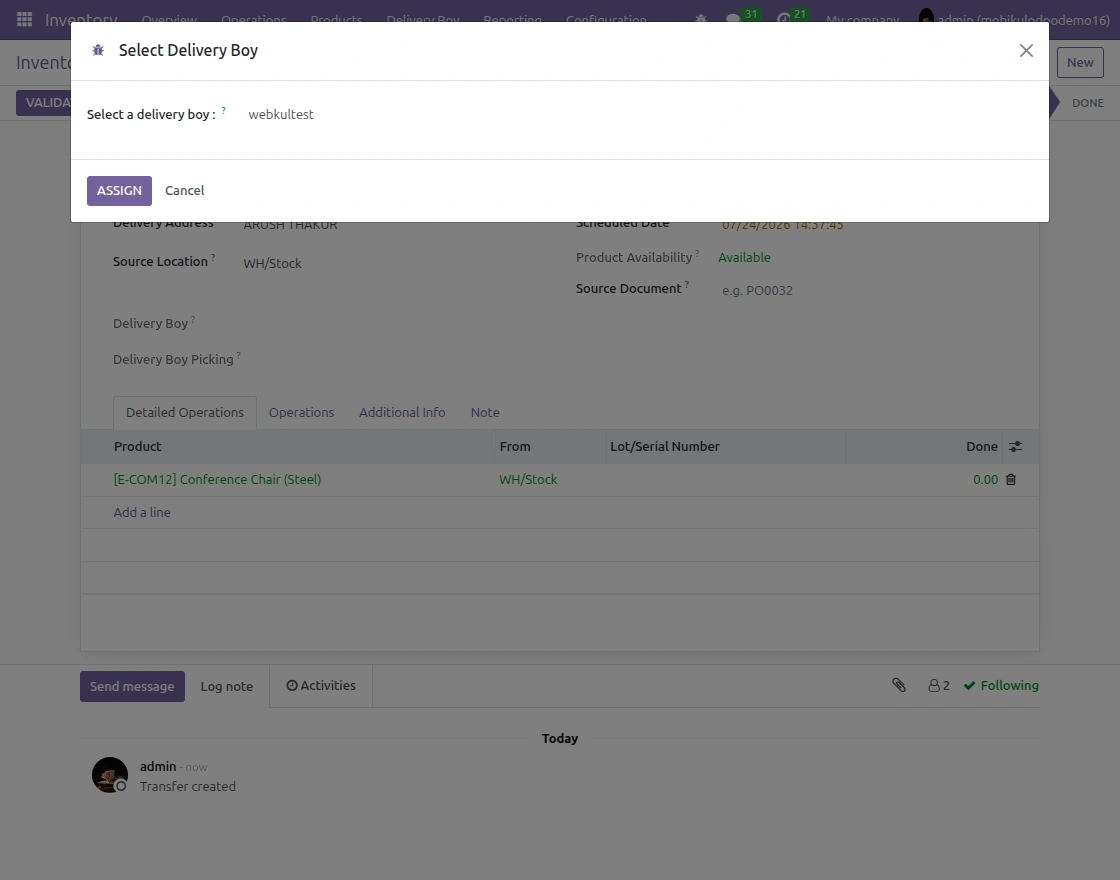
8.) If OTP verification is enabled, the delivery staff must verify the order before completing it. The customer provides the OTP for delivery confirmation.
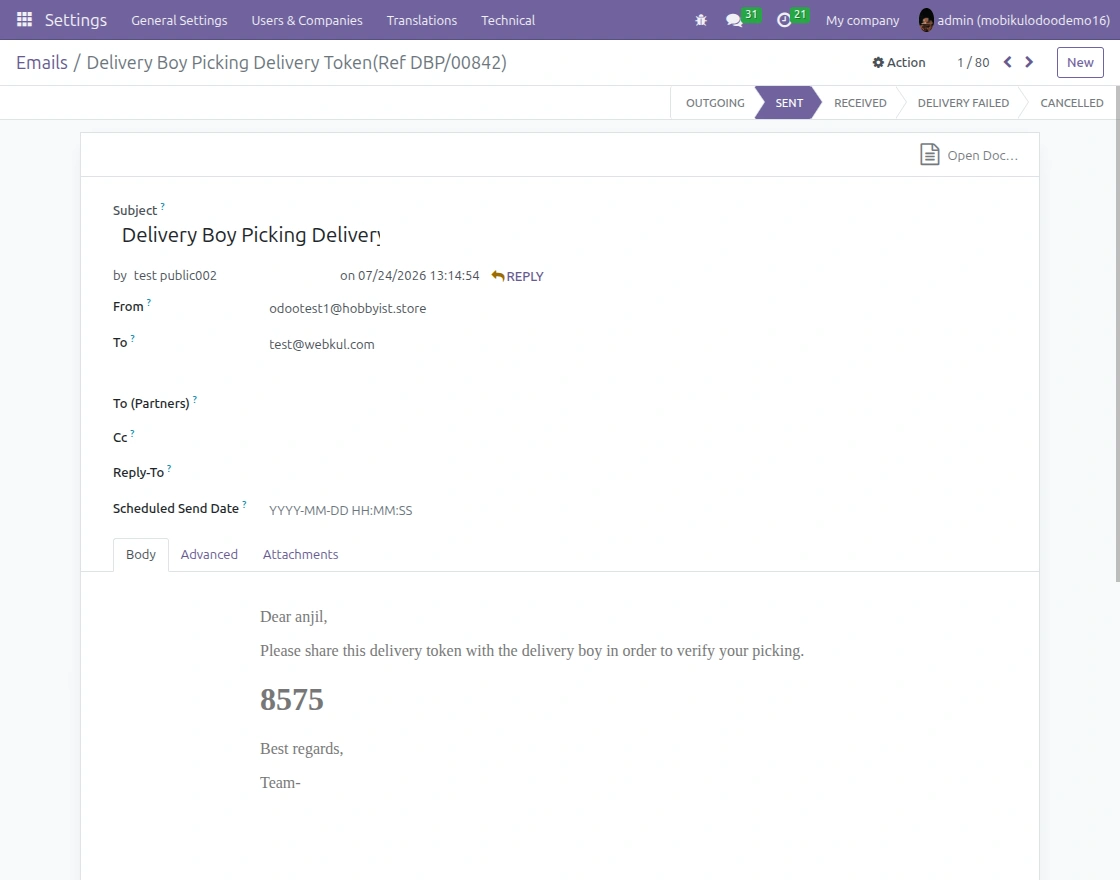
9.) After successful verification, the delivery staff can complete the order. The delivery status is then updated in Odoo.
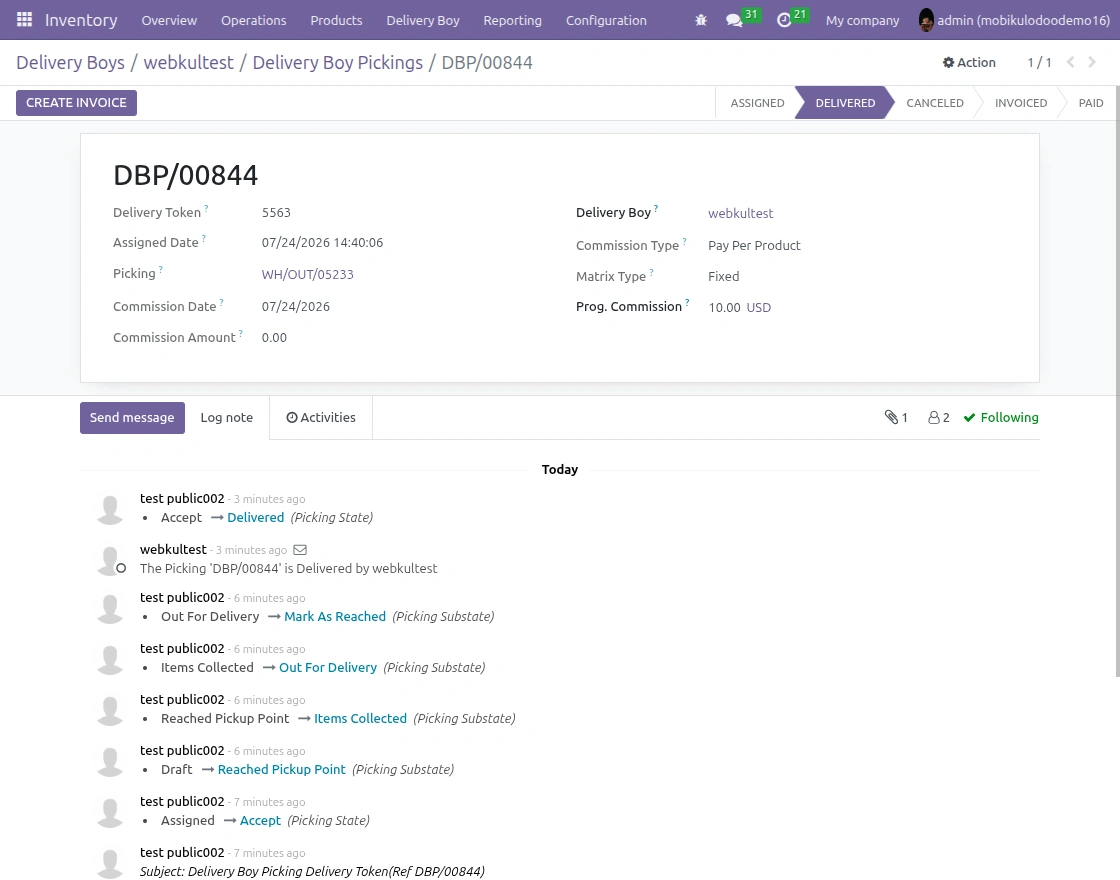
10.) Open the Delivery Boy App and enter the login details of the delivery user. After login, the delivery staff can access assigned orders.
Sign In to Delivery App
Log in using delivery staff credentials to access assigned orders quickly.
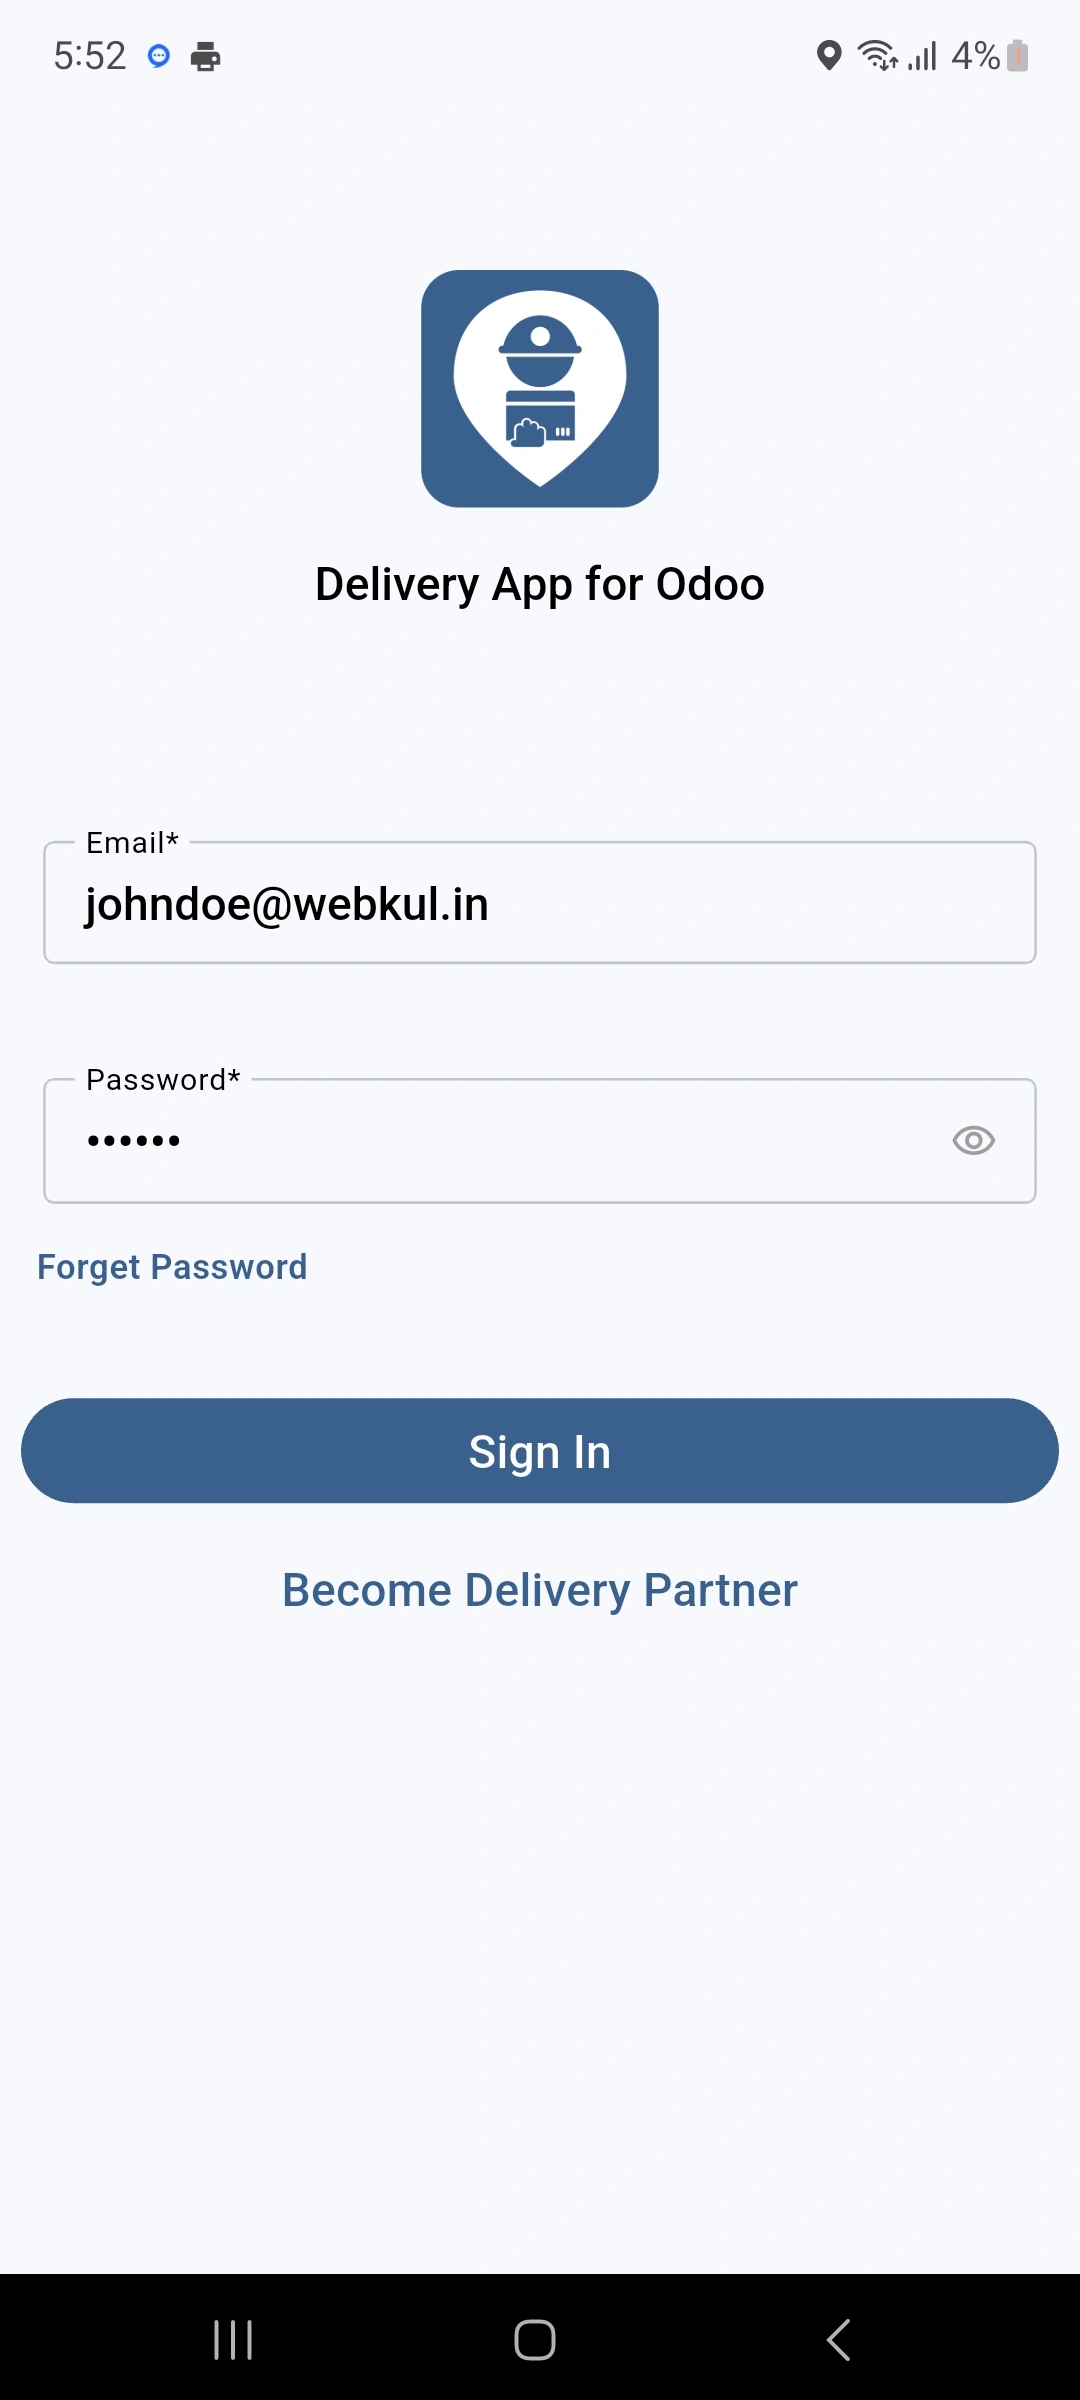
11.) The dashboard shows the delivery tasks assigned to the delivery staff. Staff can use it to check orders and their current status.
Order Ready for Delivery
Check the assigned order and prepare to begin the delivery process.
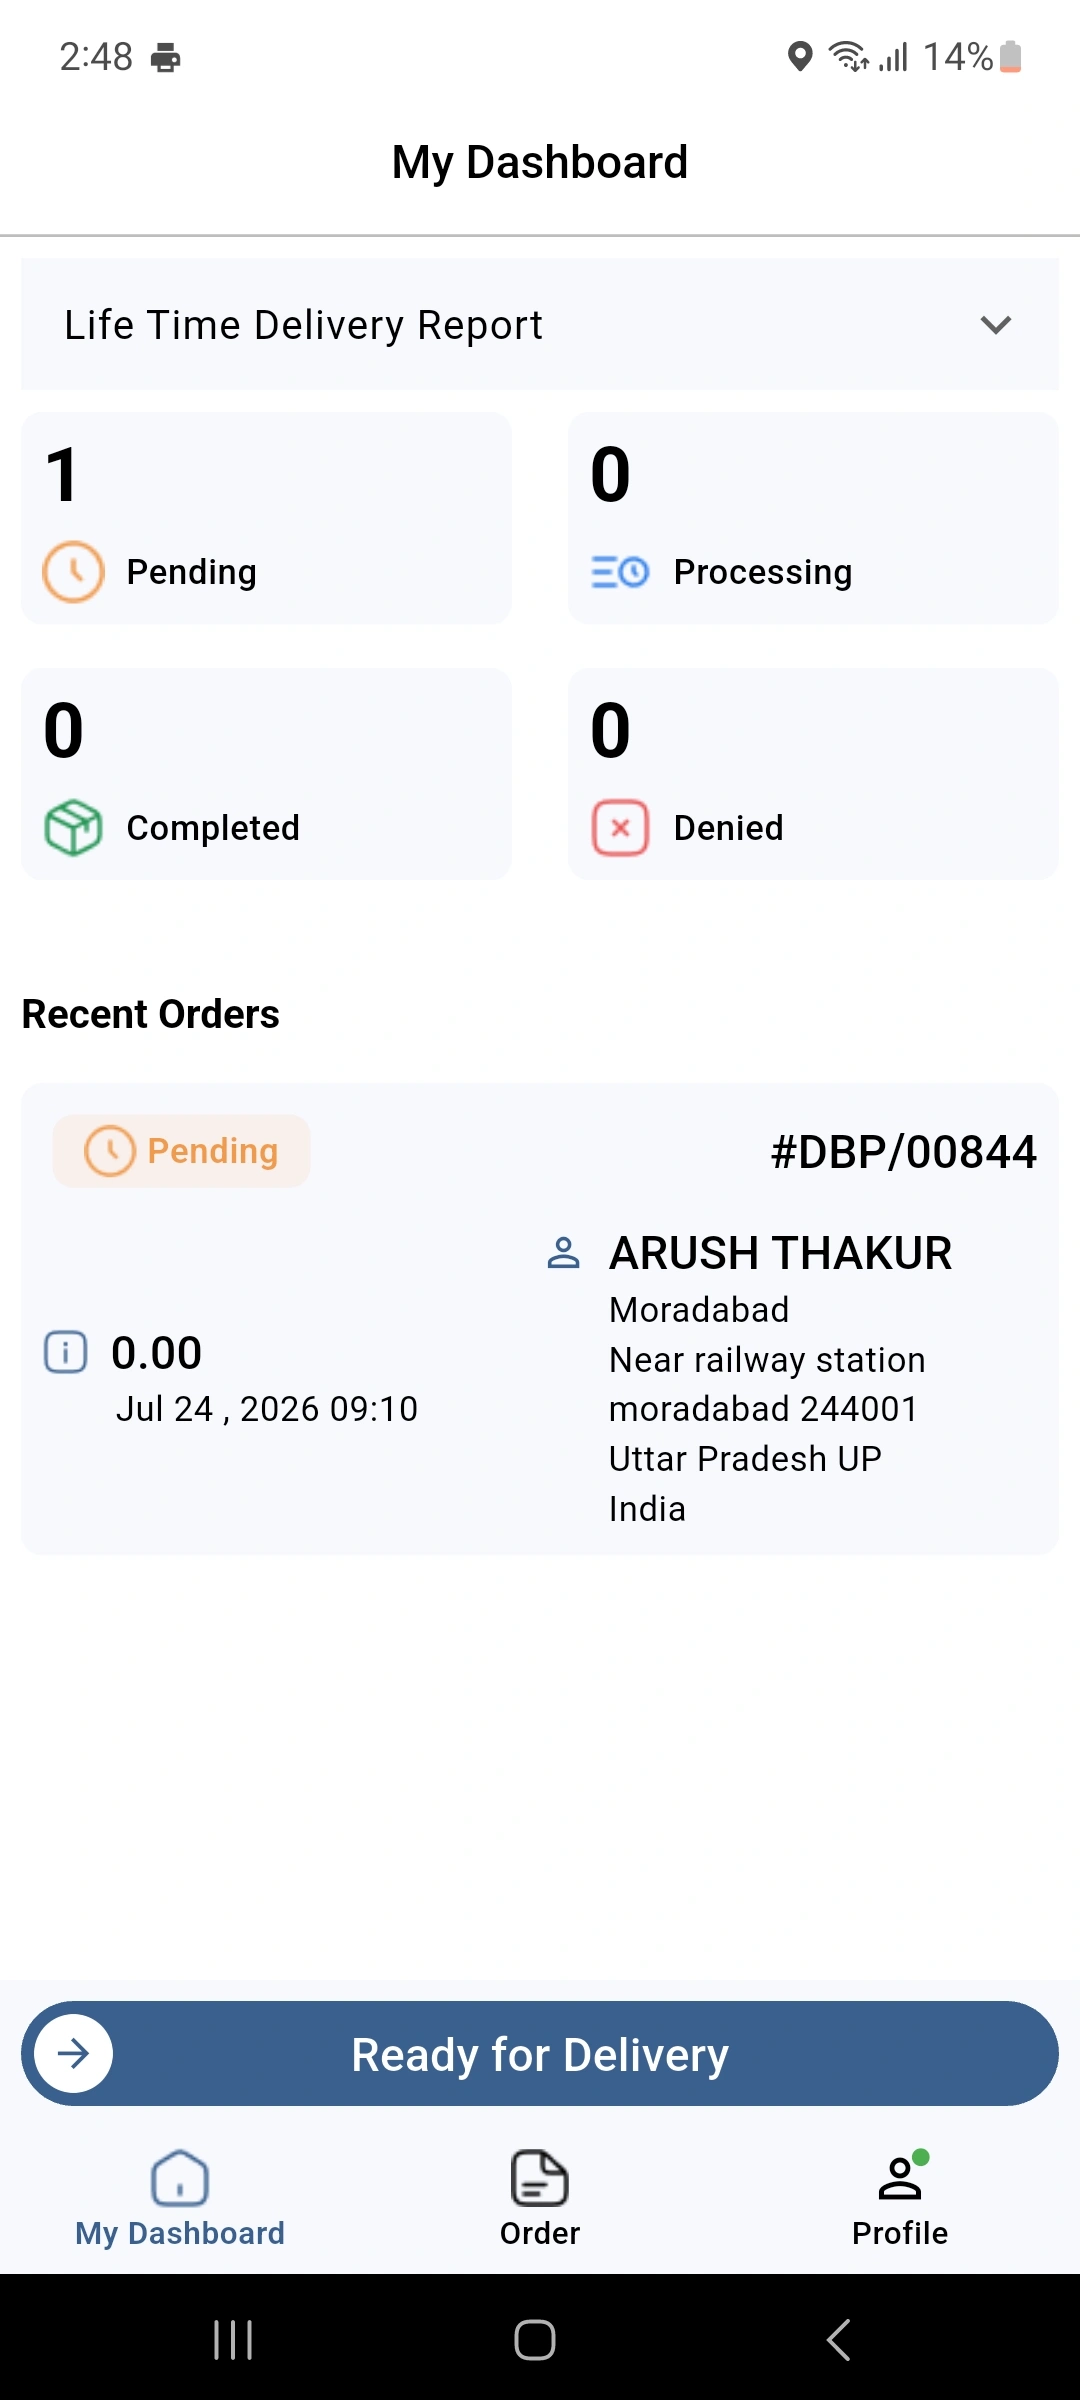
12.) Open the profile section to view the delivery staff account details. This section provides access to the user’s app information.
Profile Section in App
View and manage personal details, profile information, and vehicle details easily.
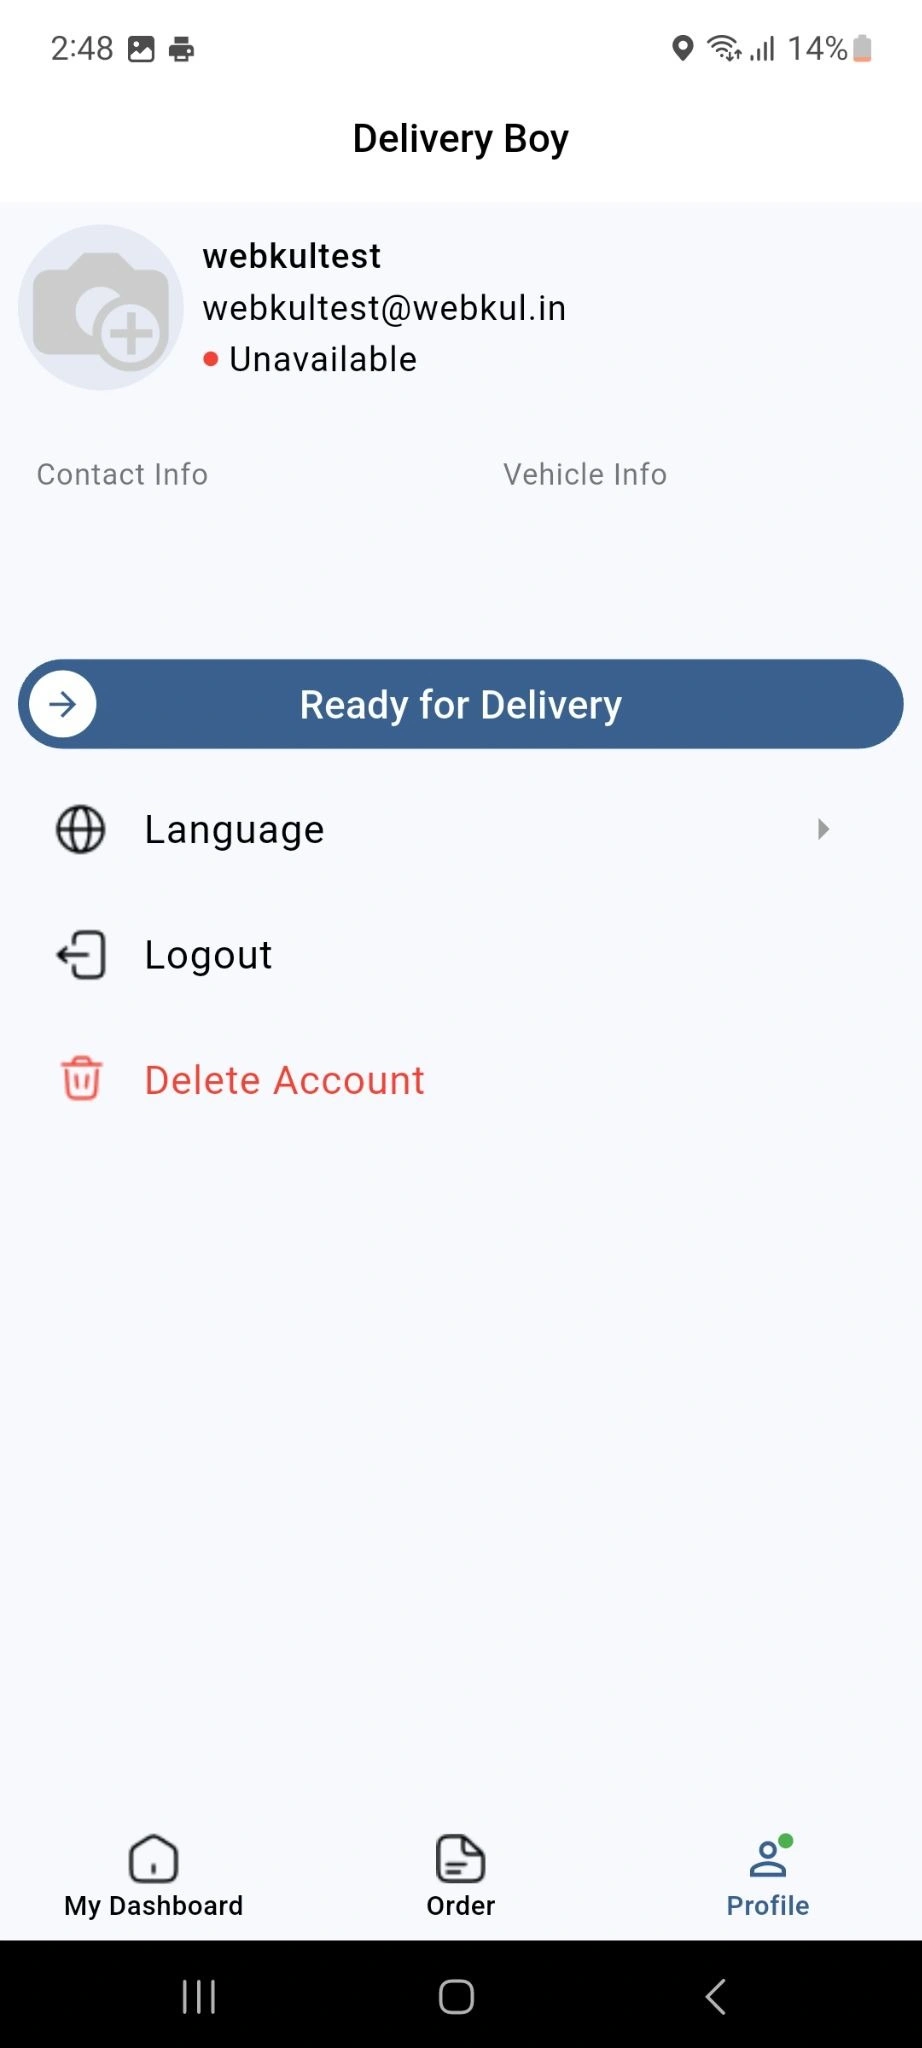
13.) Review the assigned order and slide to accept it. Once accepted, the delivery staff can start the delivery process.
Slide to accept order
Accept the assigned order to begin the next stage of delivery.
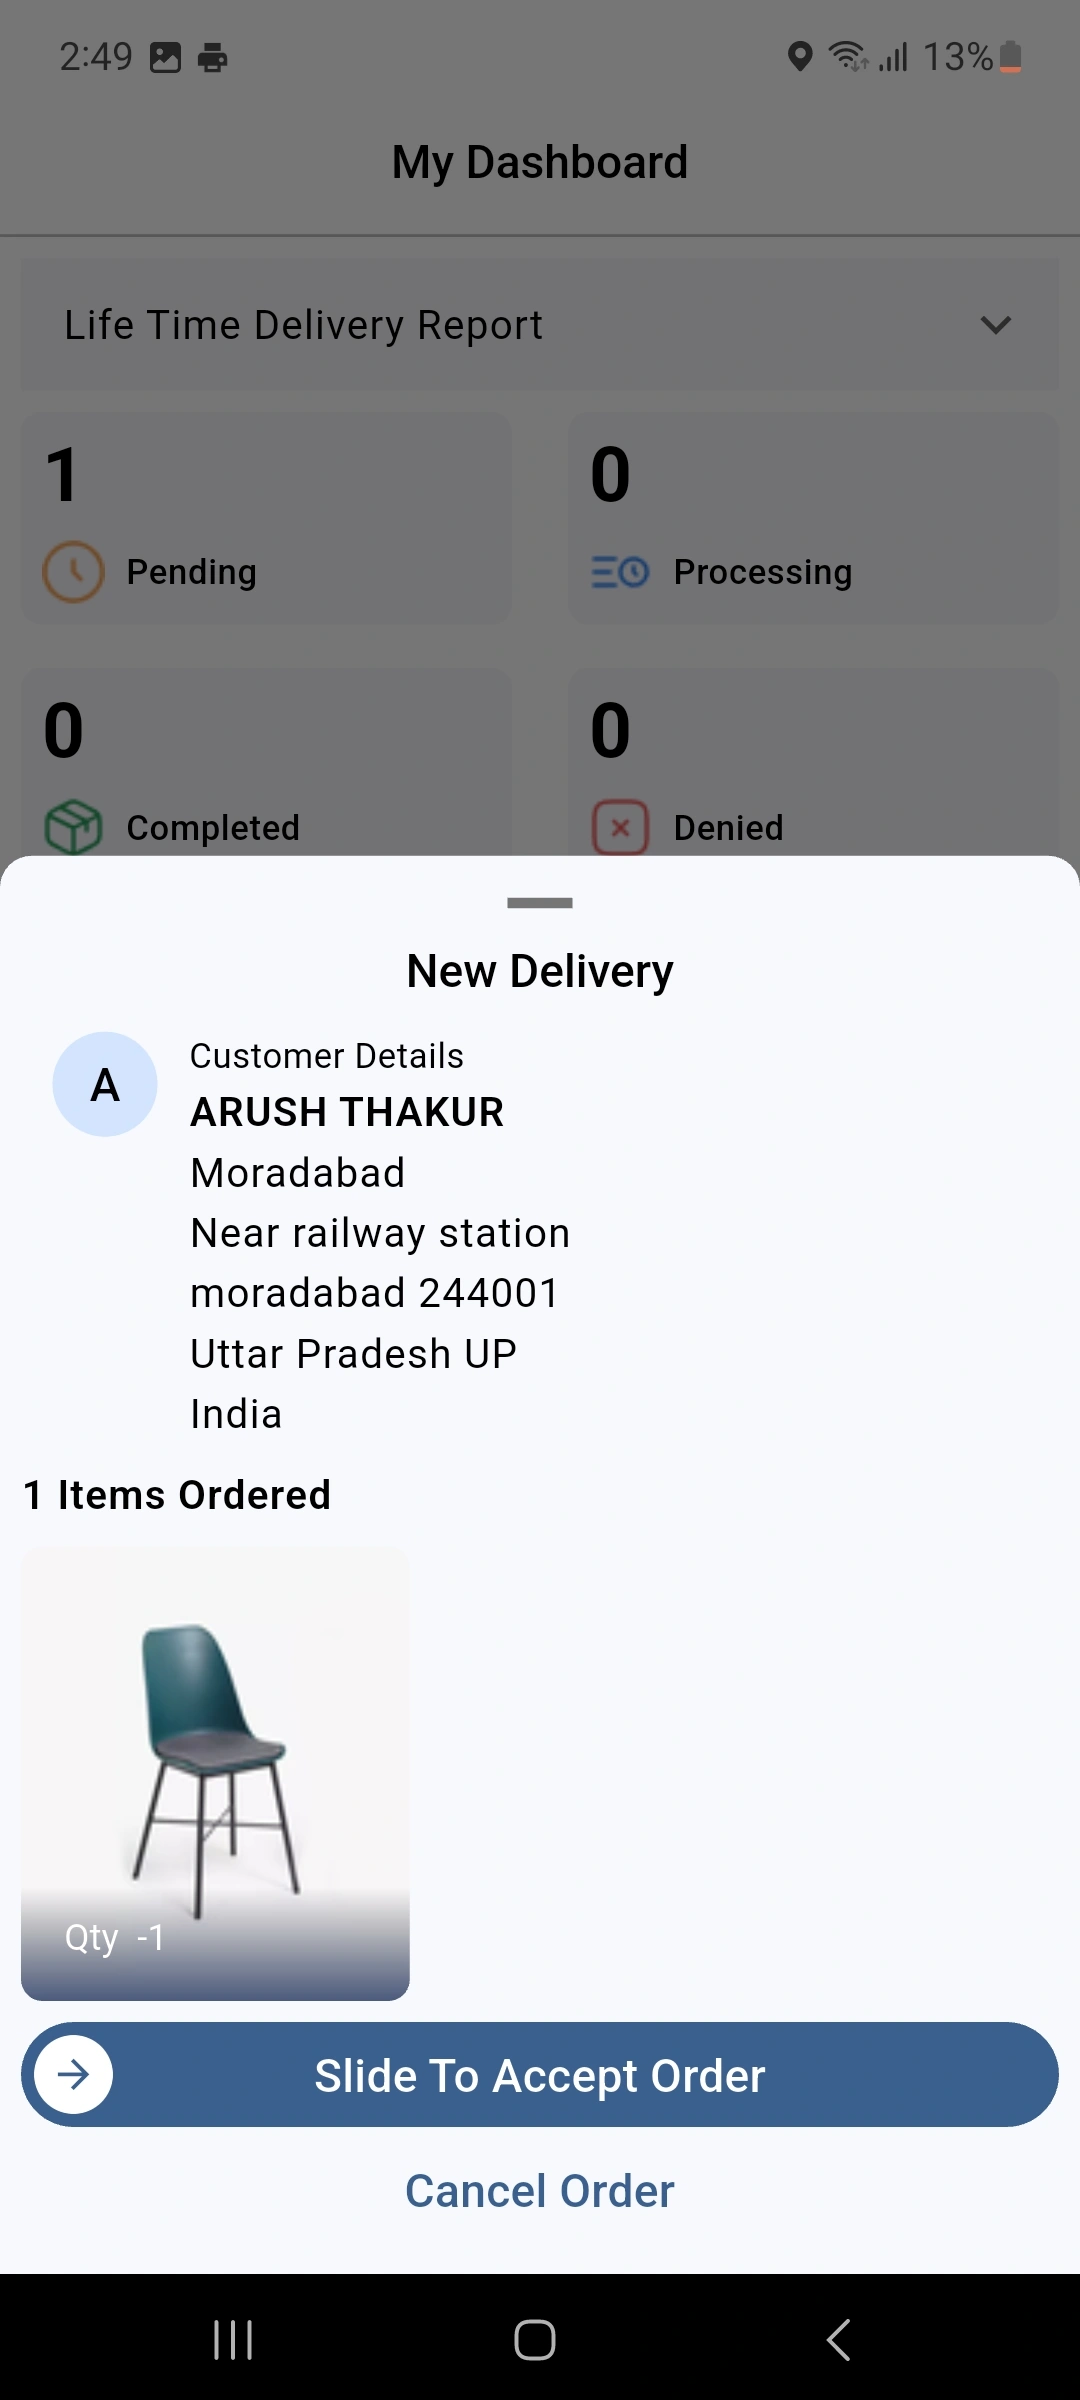
14.) Reach the pickup location and collect the order from the vendor. Confirm that the required items have been collected before moving ahead.
Collect Order Payment
Collect the payment from customers and record the received amount correctly.
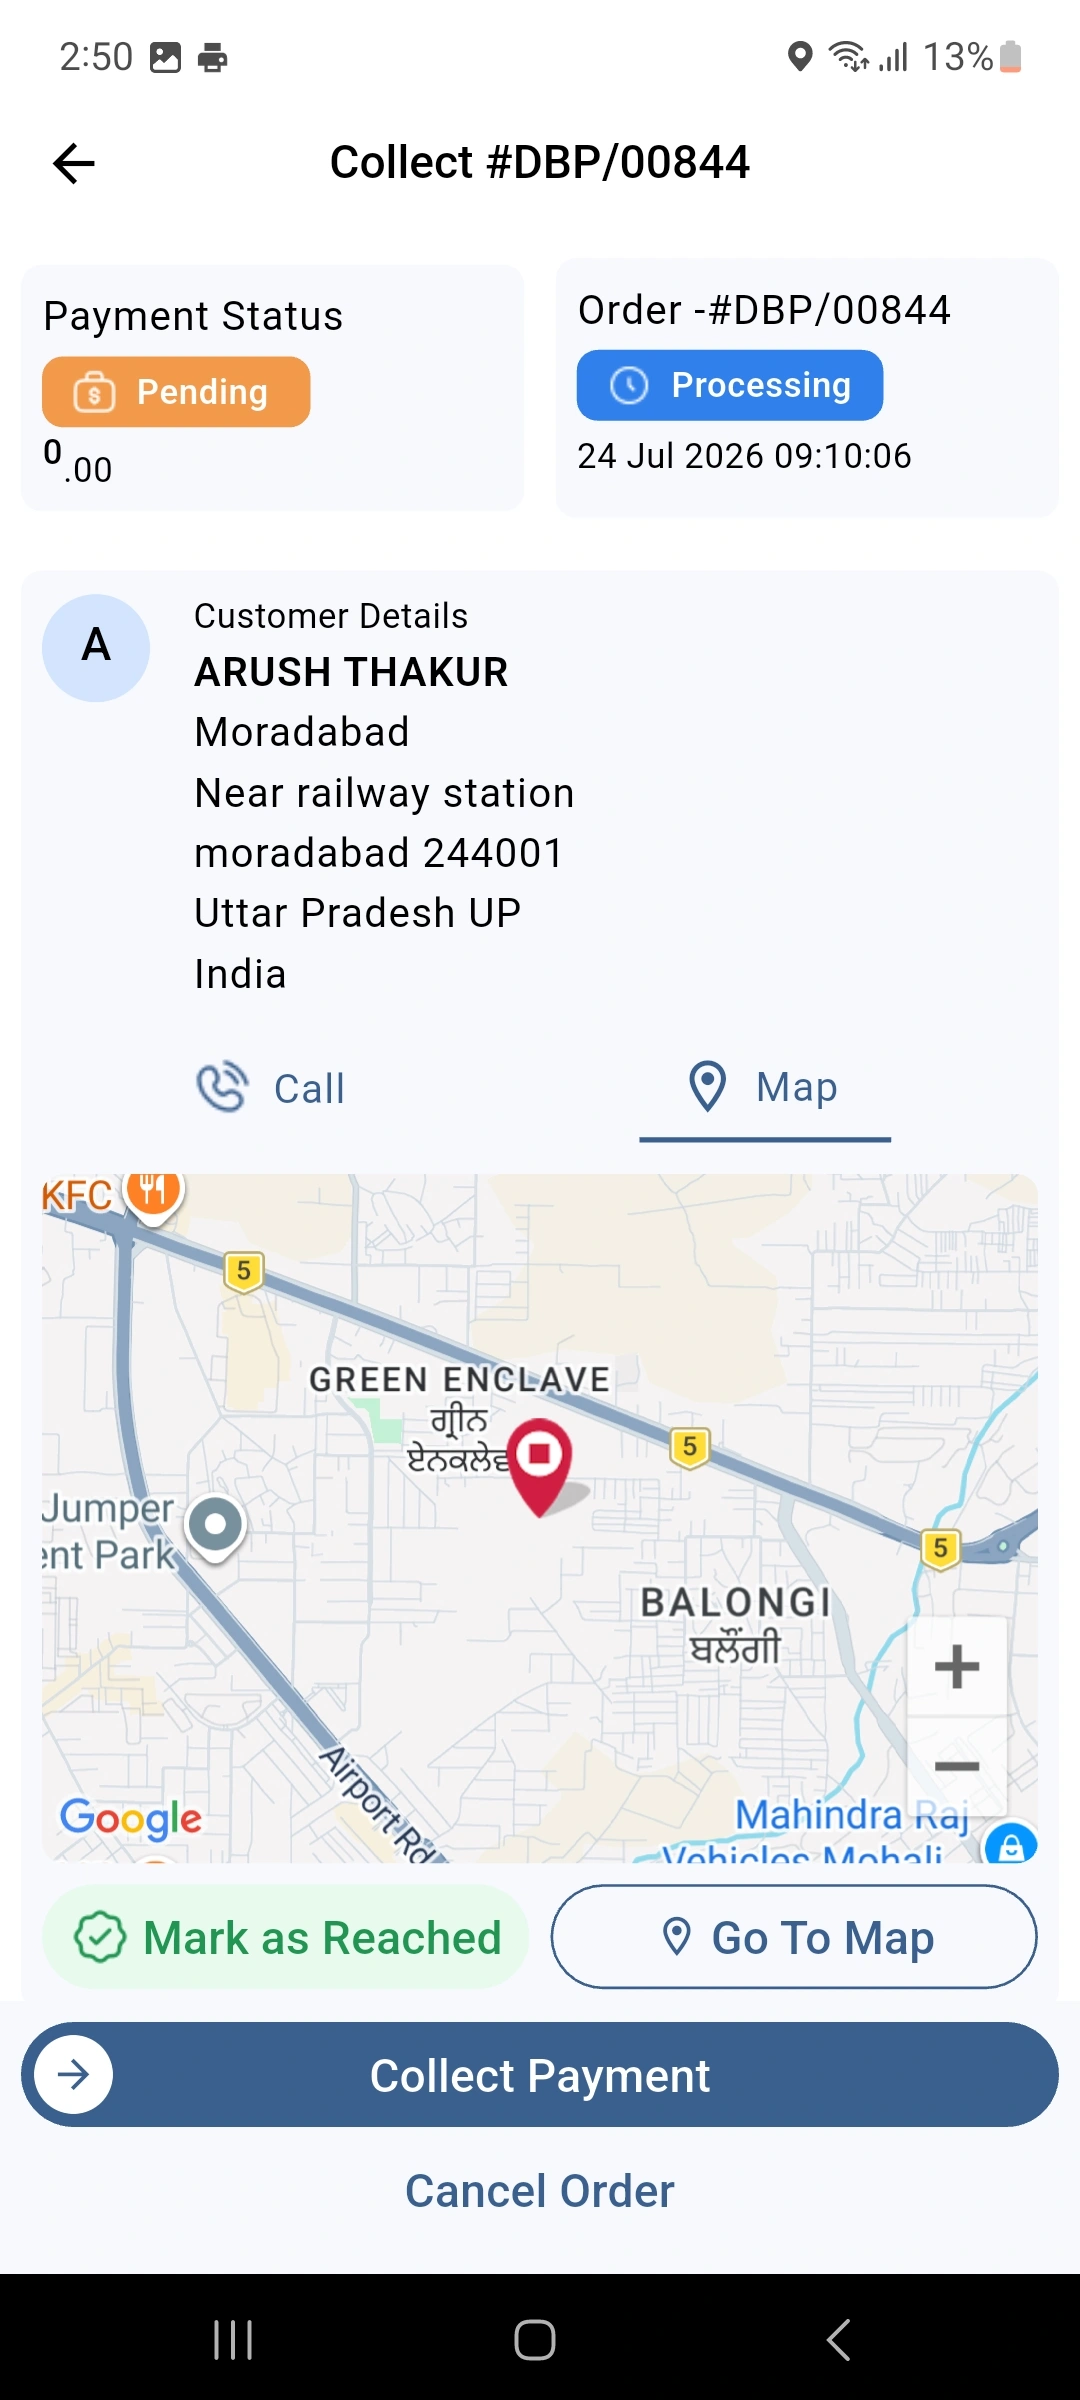
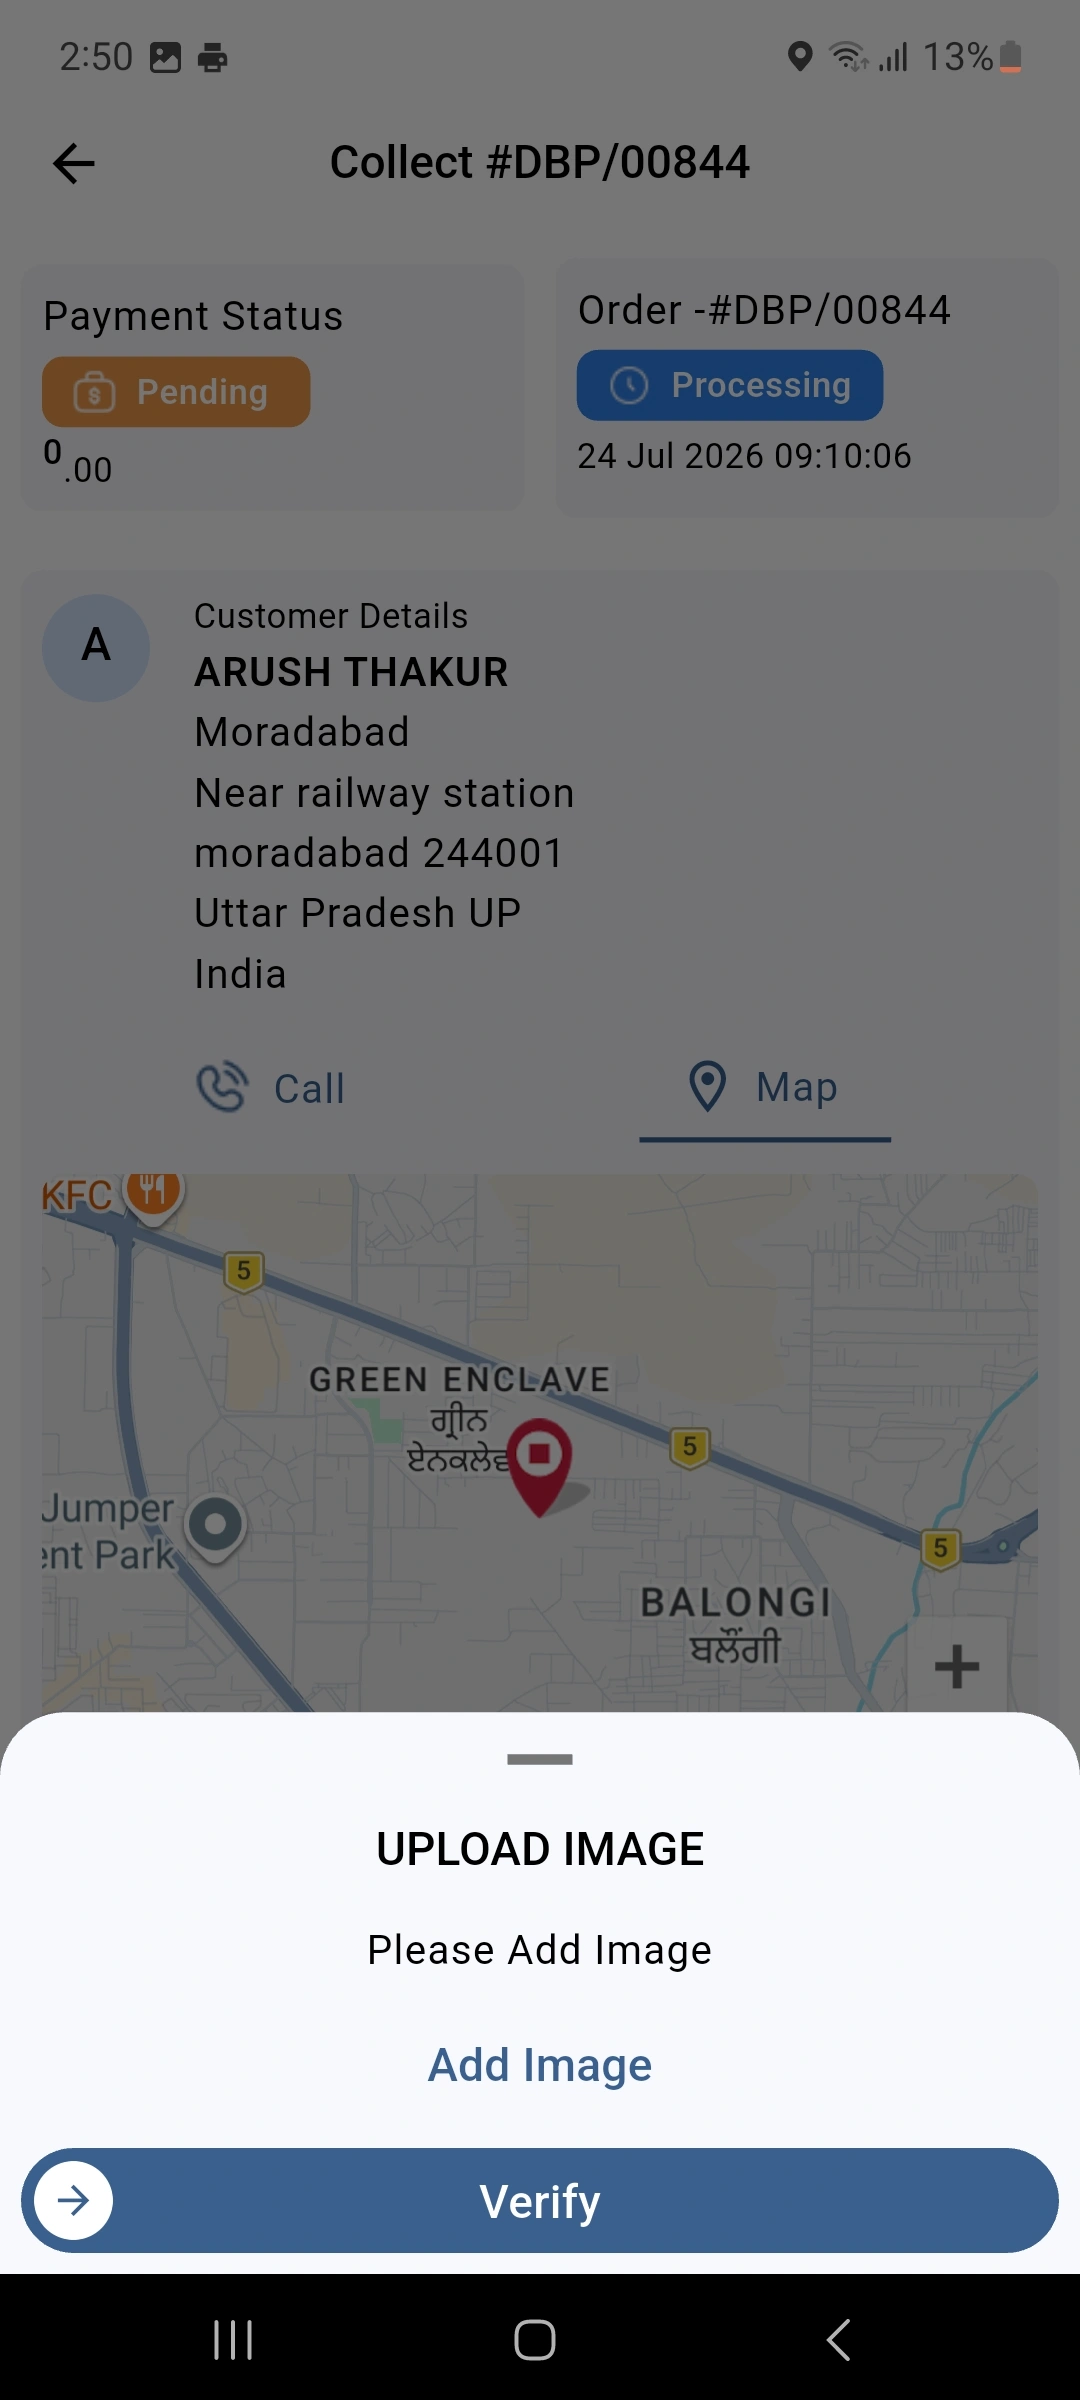
15.) The delivery staff can upload an image when delivery proof is required. This image helps confirm that the delivery was completed.
Upload image for verification
Capture and upload an image as proof of successful order delivery.
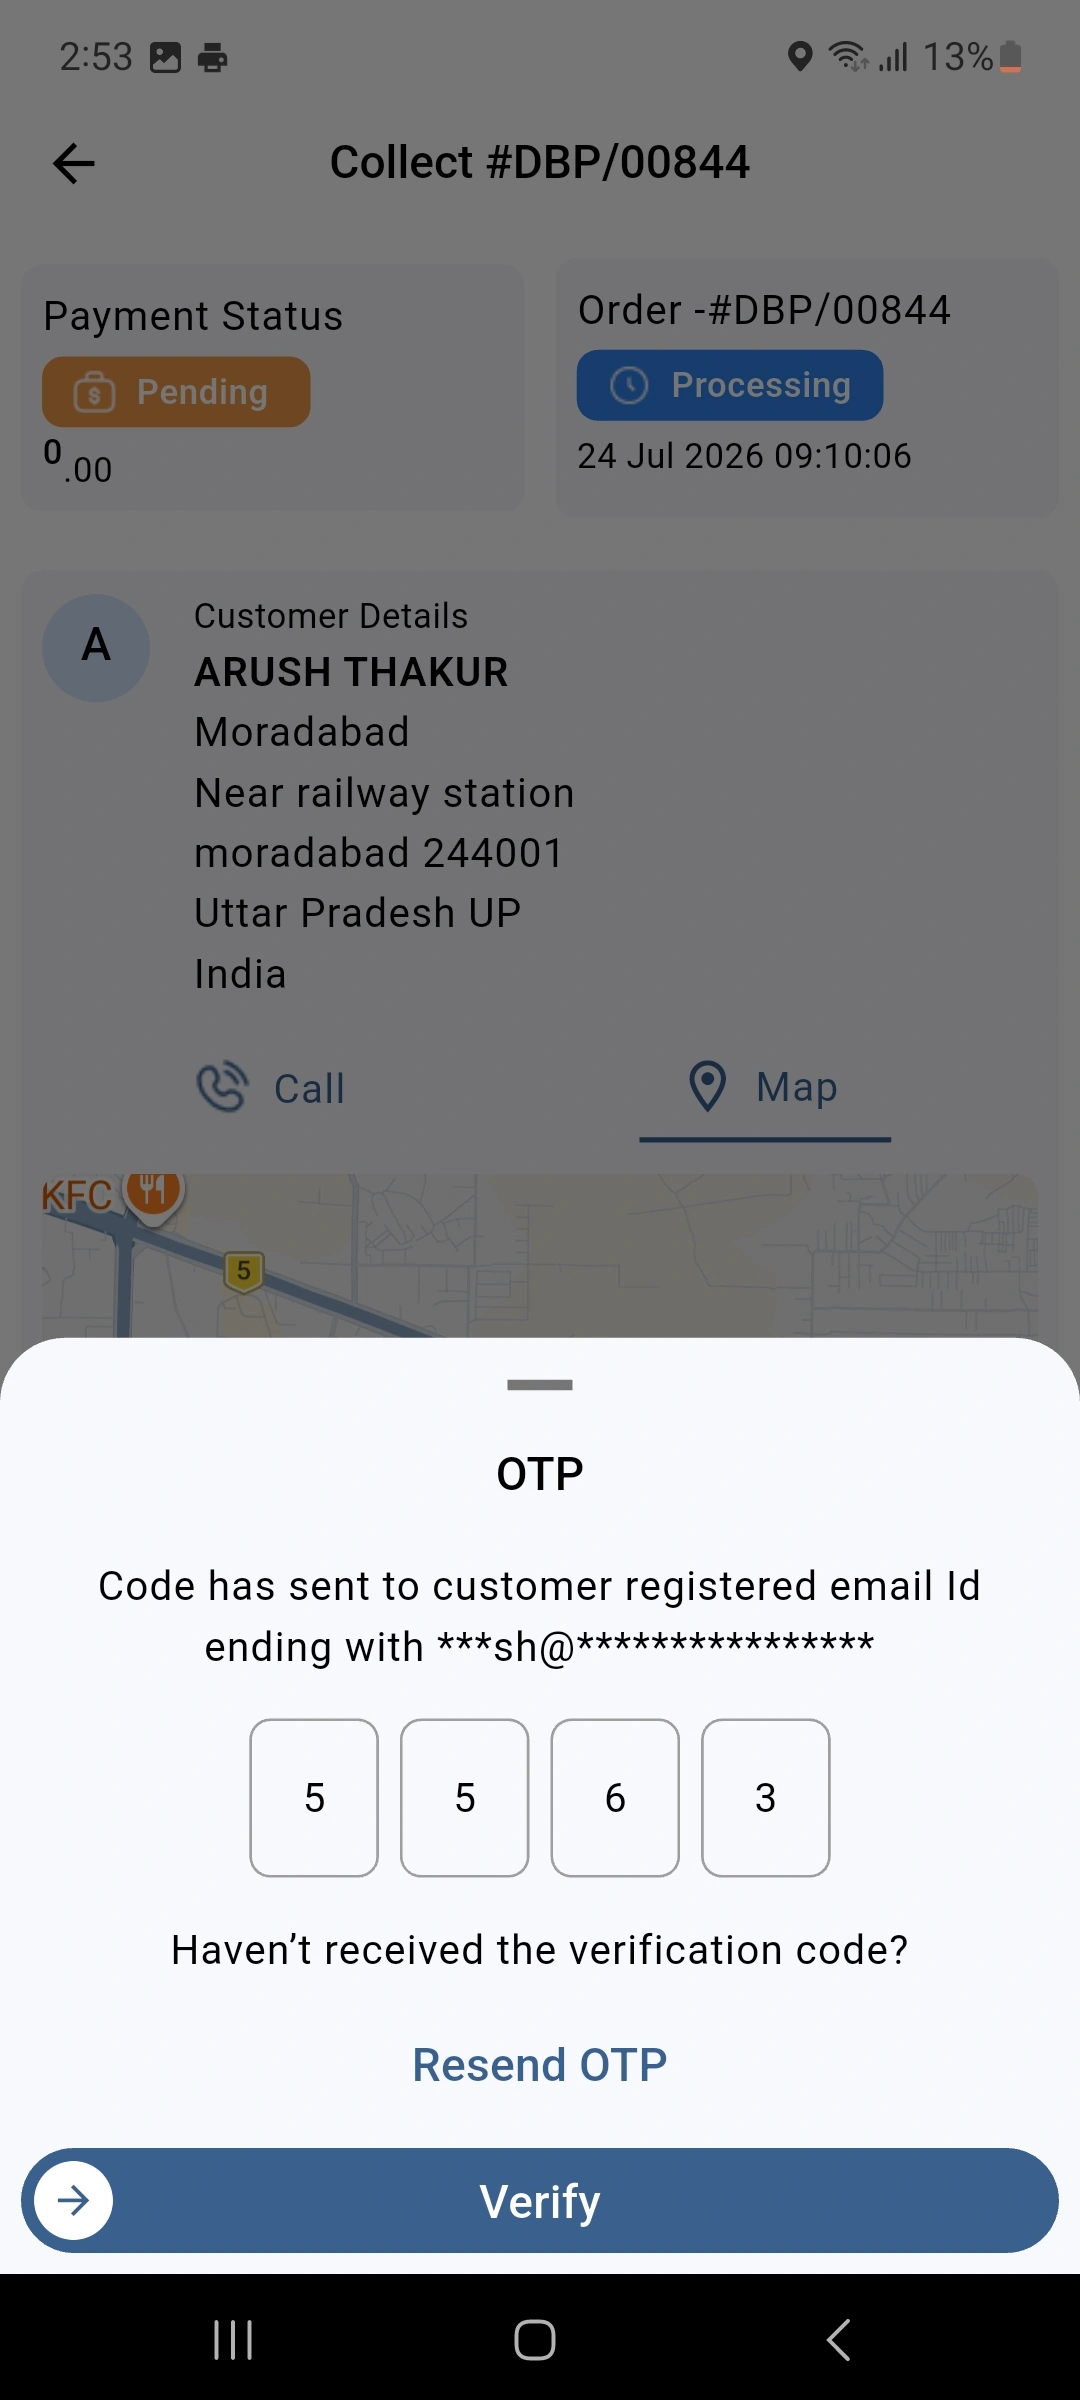
16.) When OTP verification is enabled, ask the customer for the delivery OTP. Enter the OTP in the app to confirm the order.
Customer shares OTP for authorization
Enter the customer OTP to verify and confirm the completed delivery.
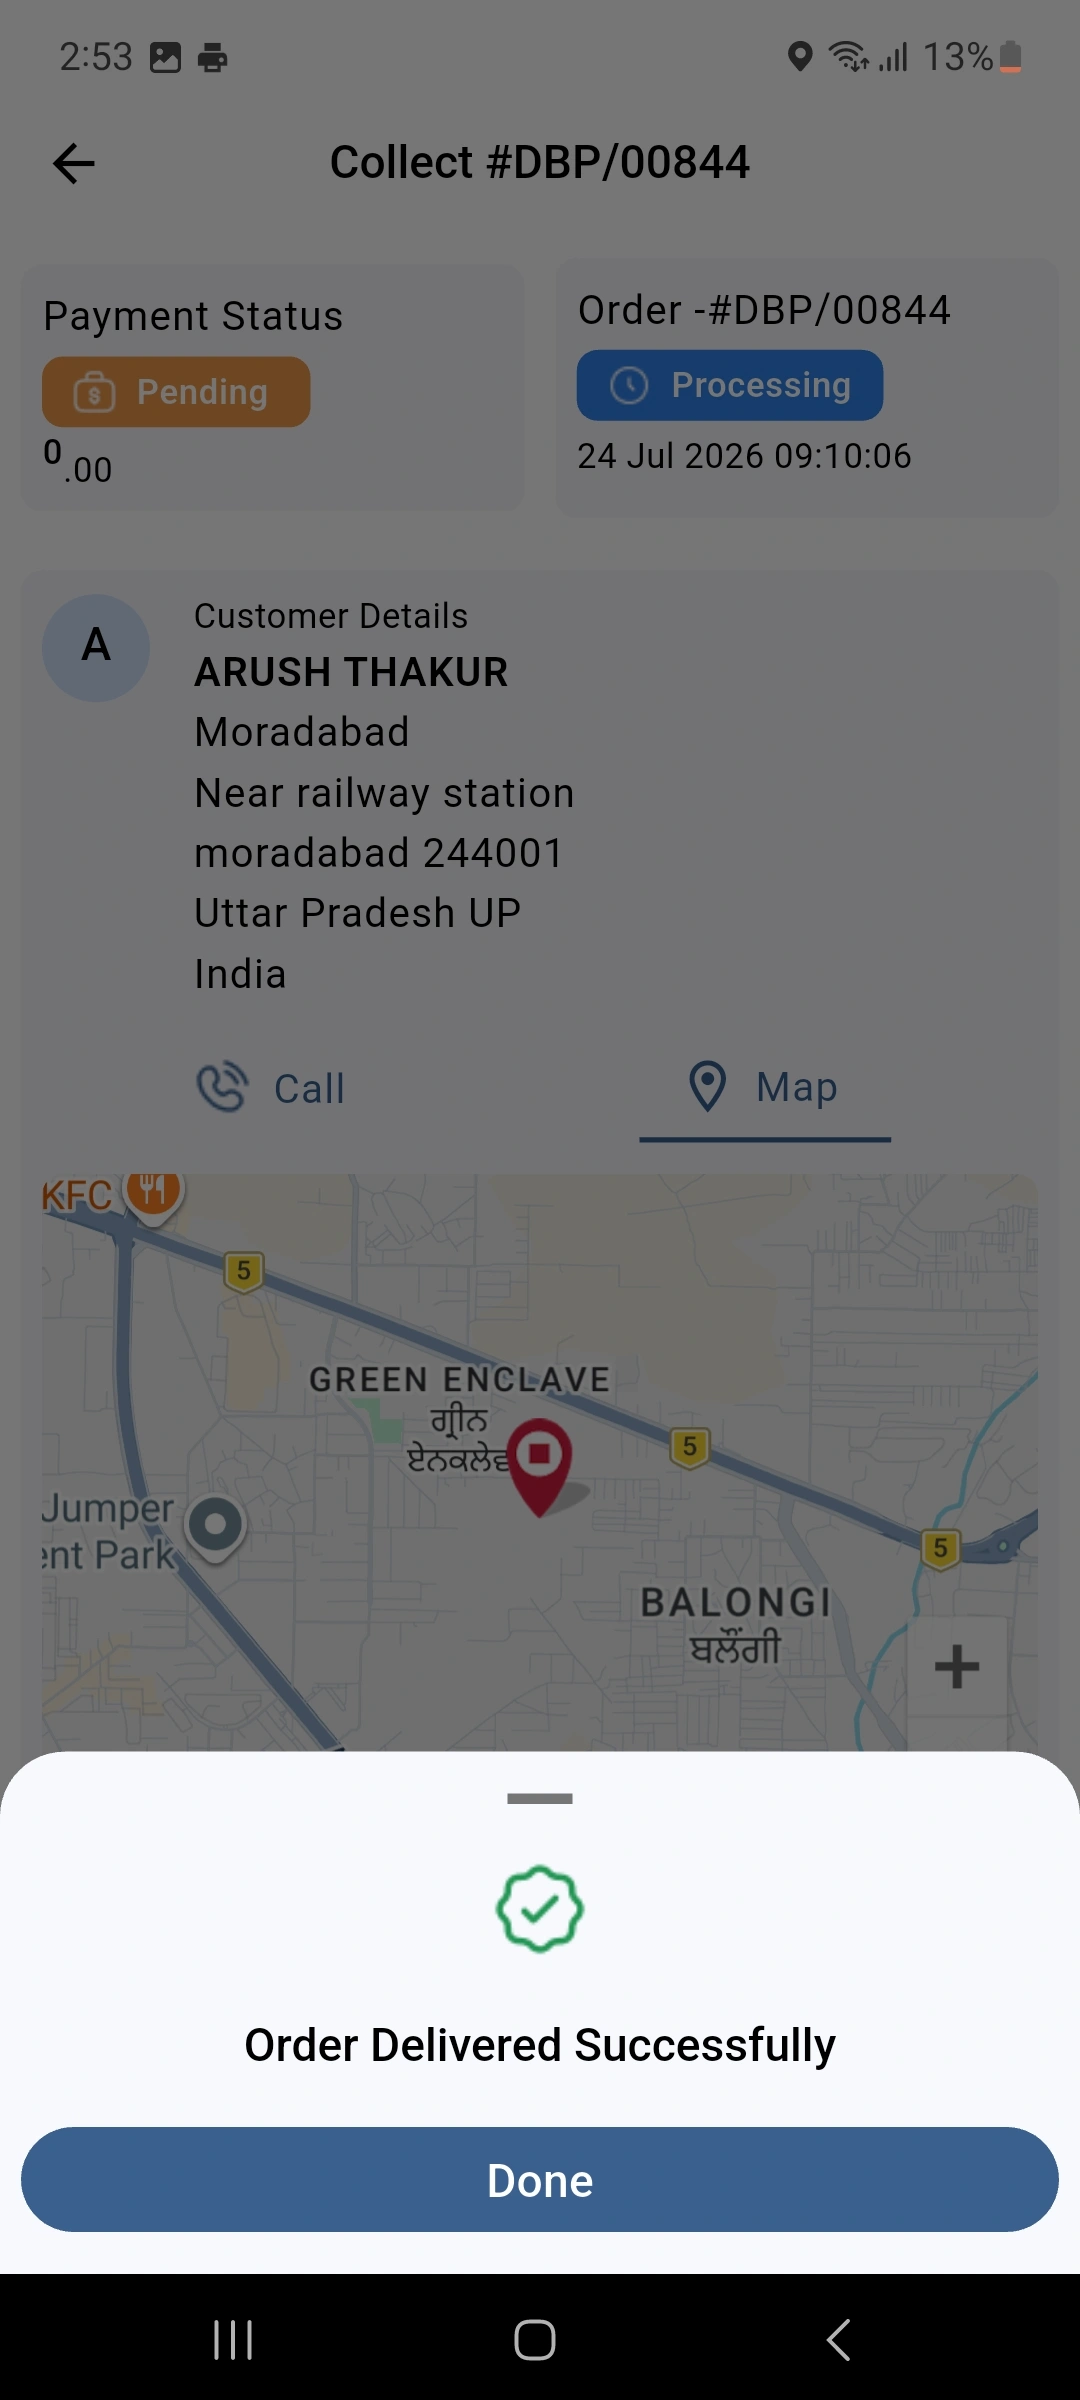
17.) After the required checks are complete, confirm the delivery from the app. The order will then show as successfully delivered.
Order Delivered Successfully
Mark the order as delivered after completing all required delivery steps.
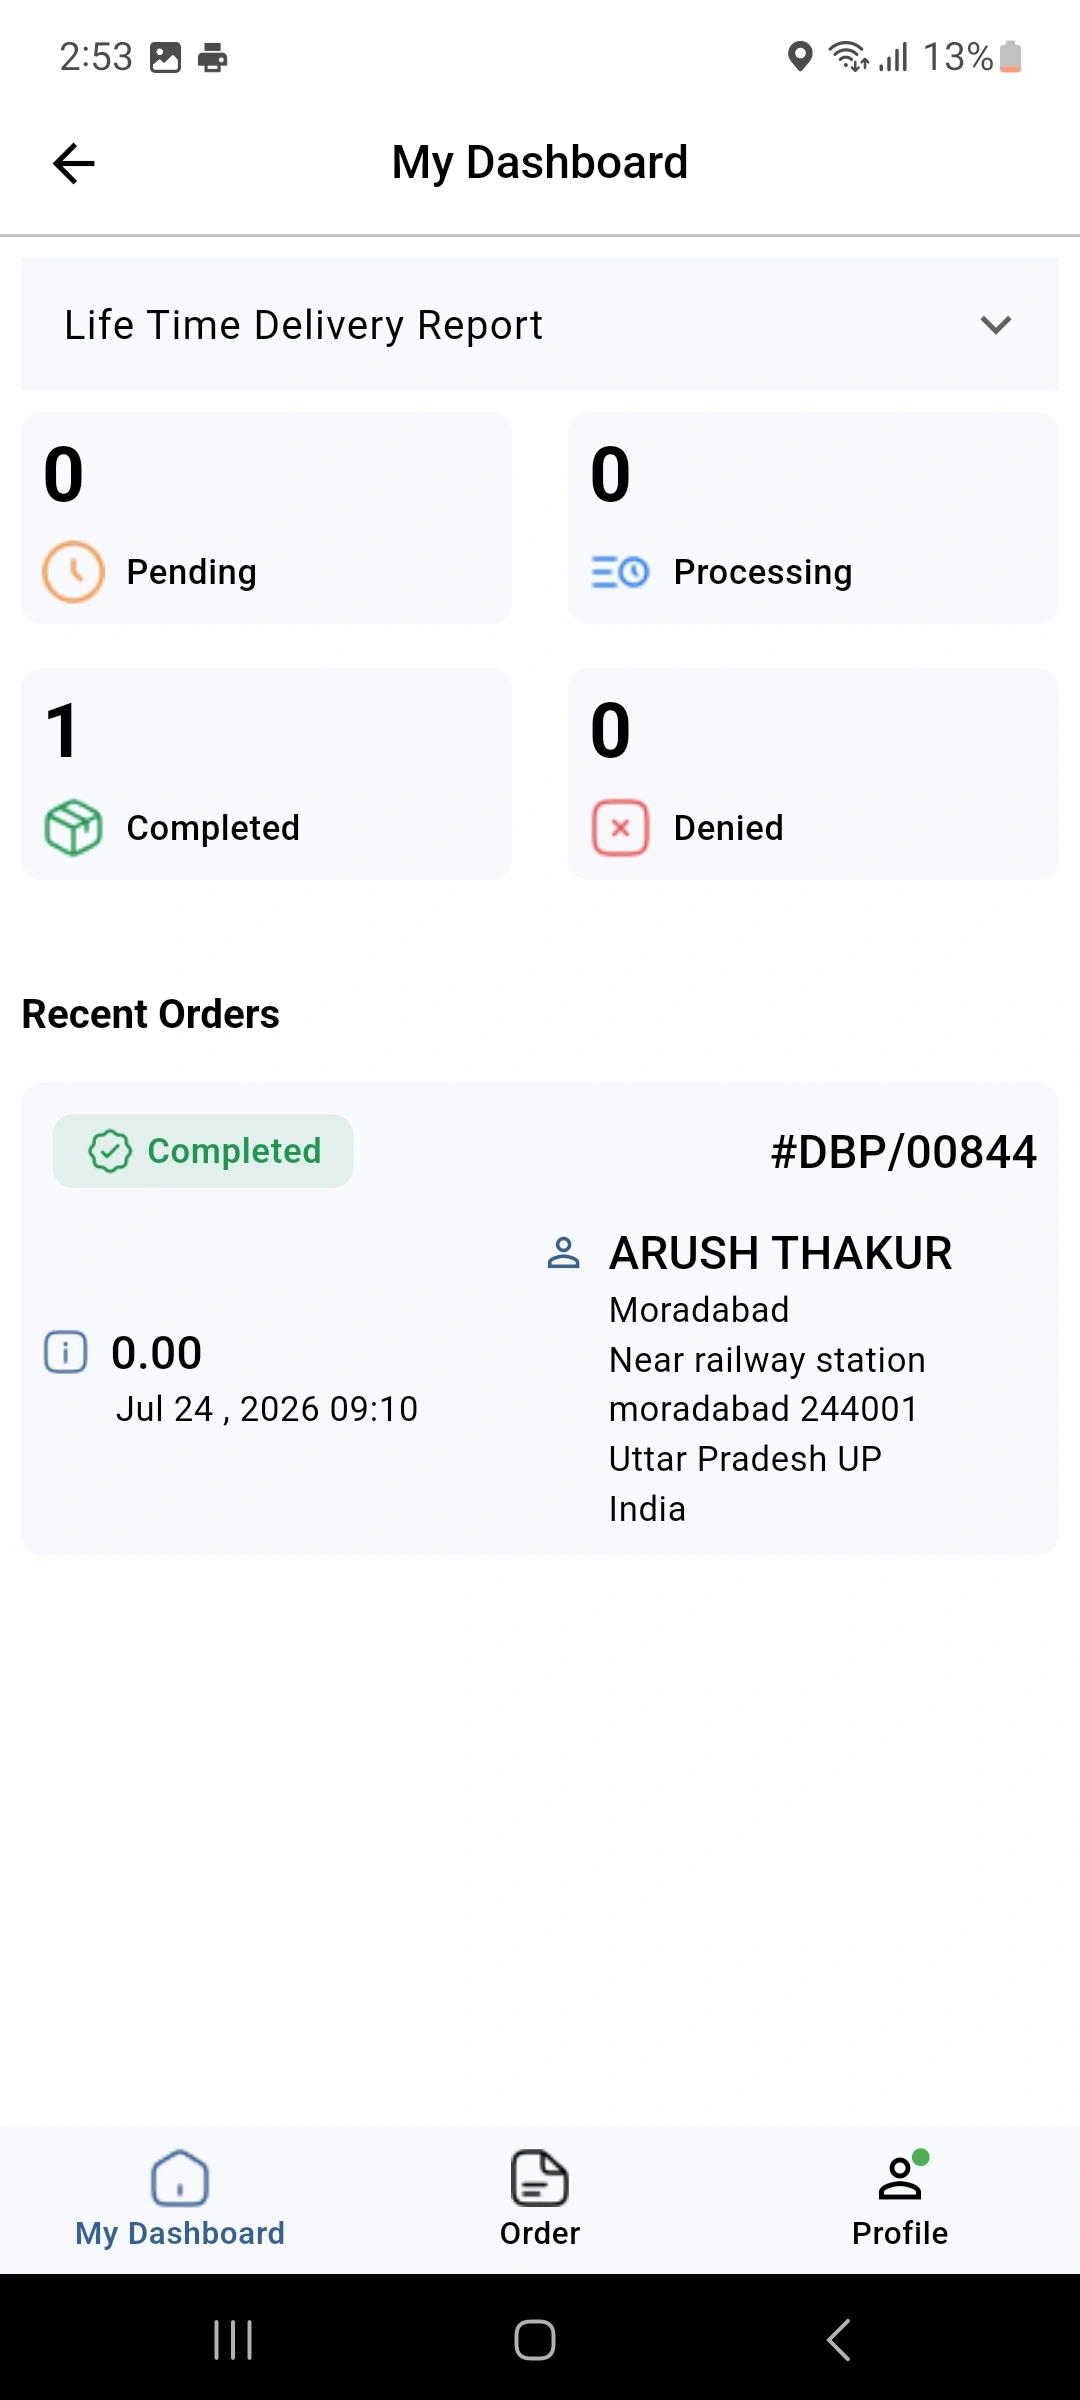
18.) The My Dashboard section gives delivery staff a quick view of their delivery work. Staff can check key delivery details from one place.
My Dashboard Section
View assigned orders, delivery tasks, and daily work from one screen.
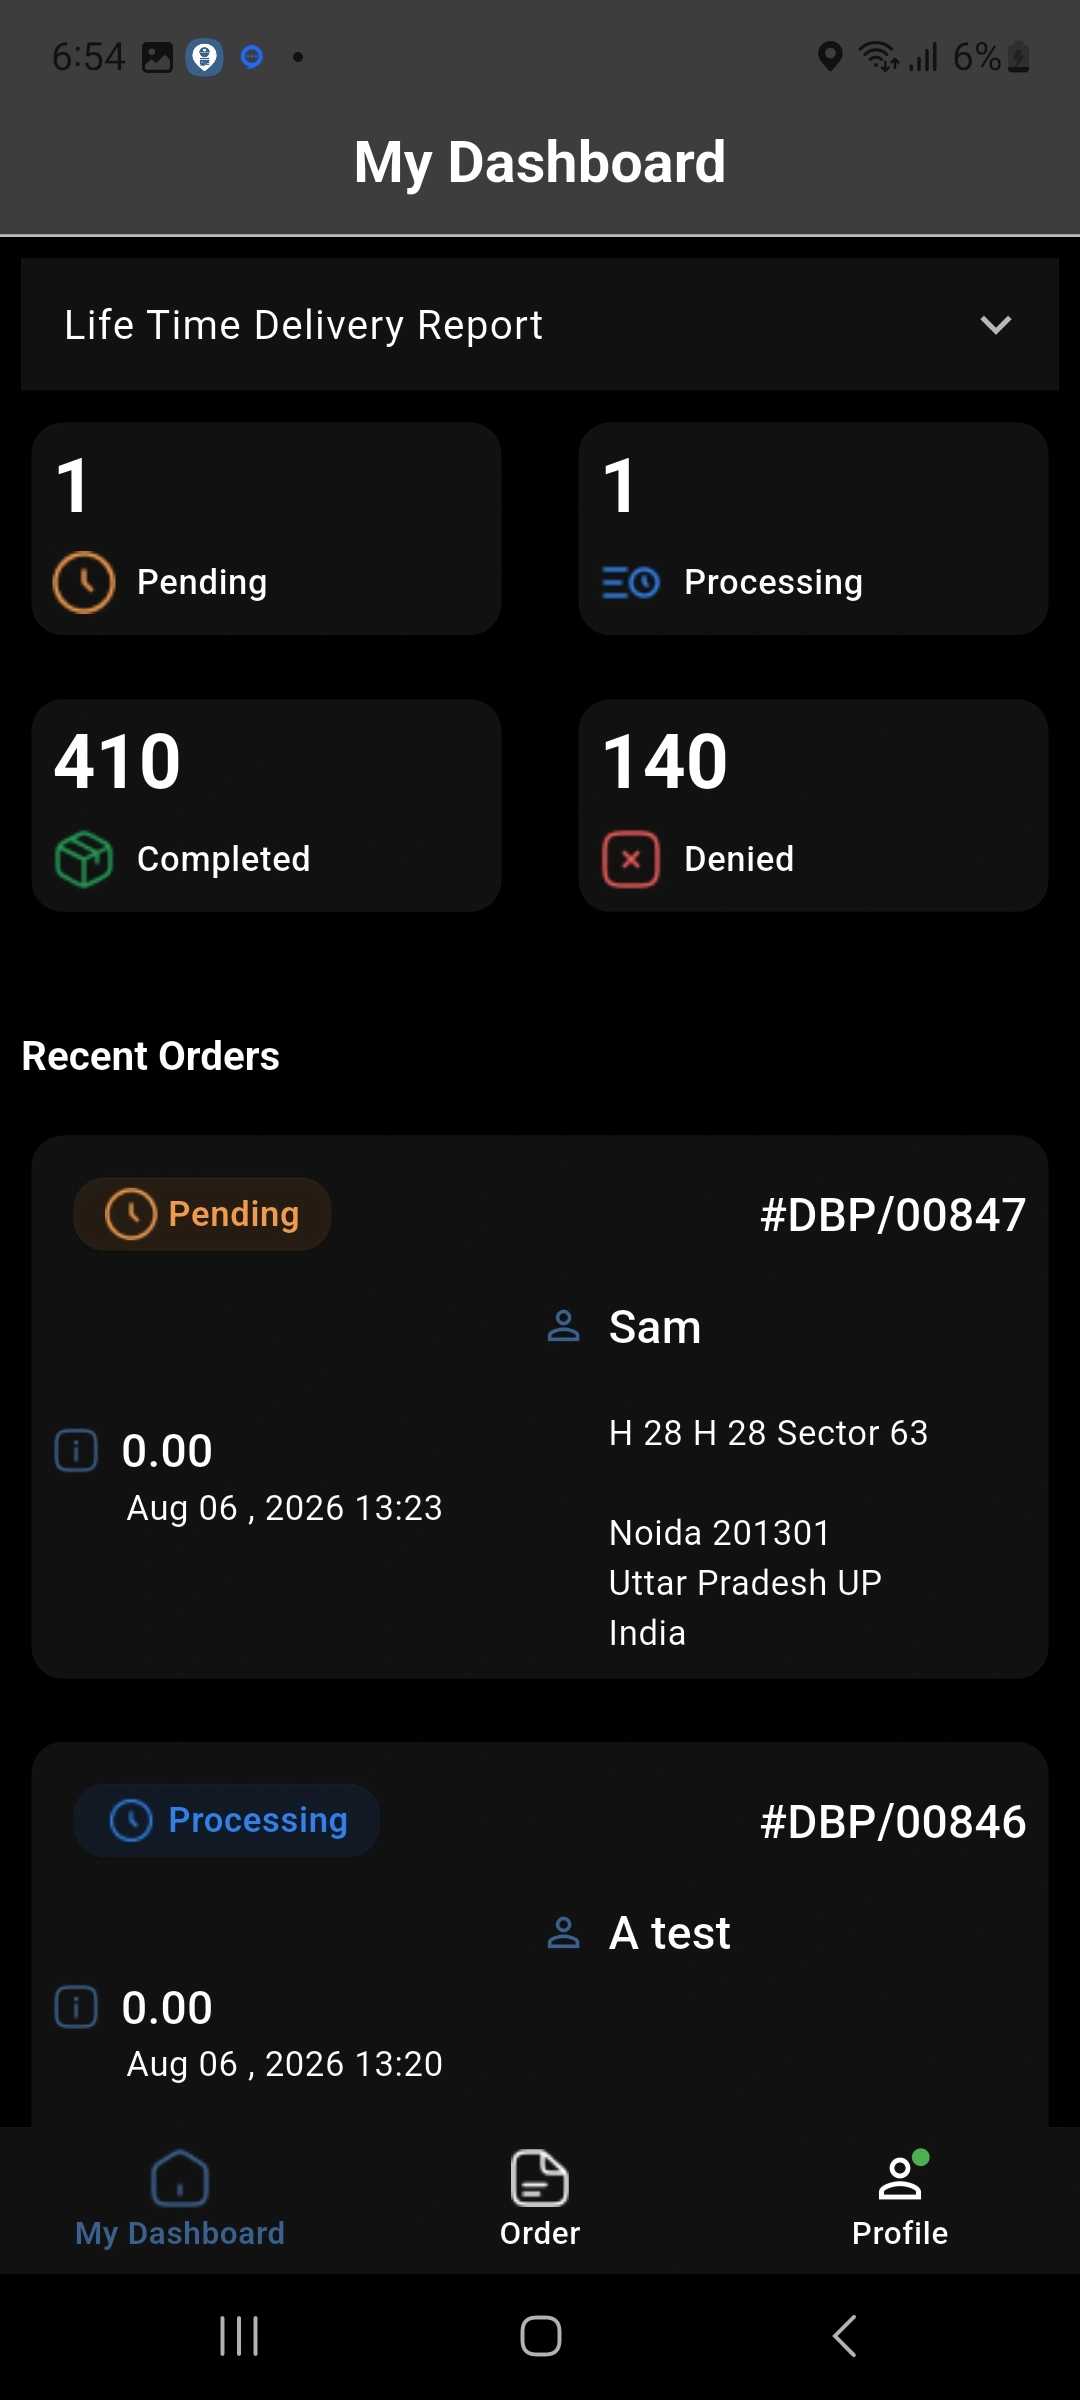
19.) The app also provides a dark theme for a different viewing experience. Delivery staff can switch the app theme when required.
Dark Theme Mode
Switch to dark mode for a comfortable and simple viewing experience.
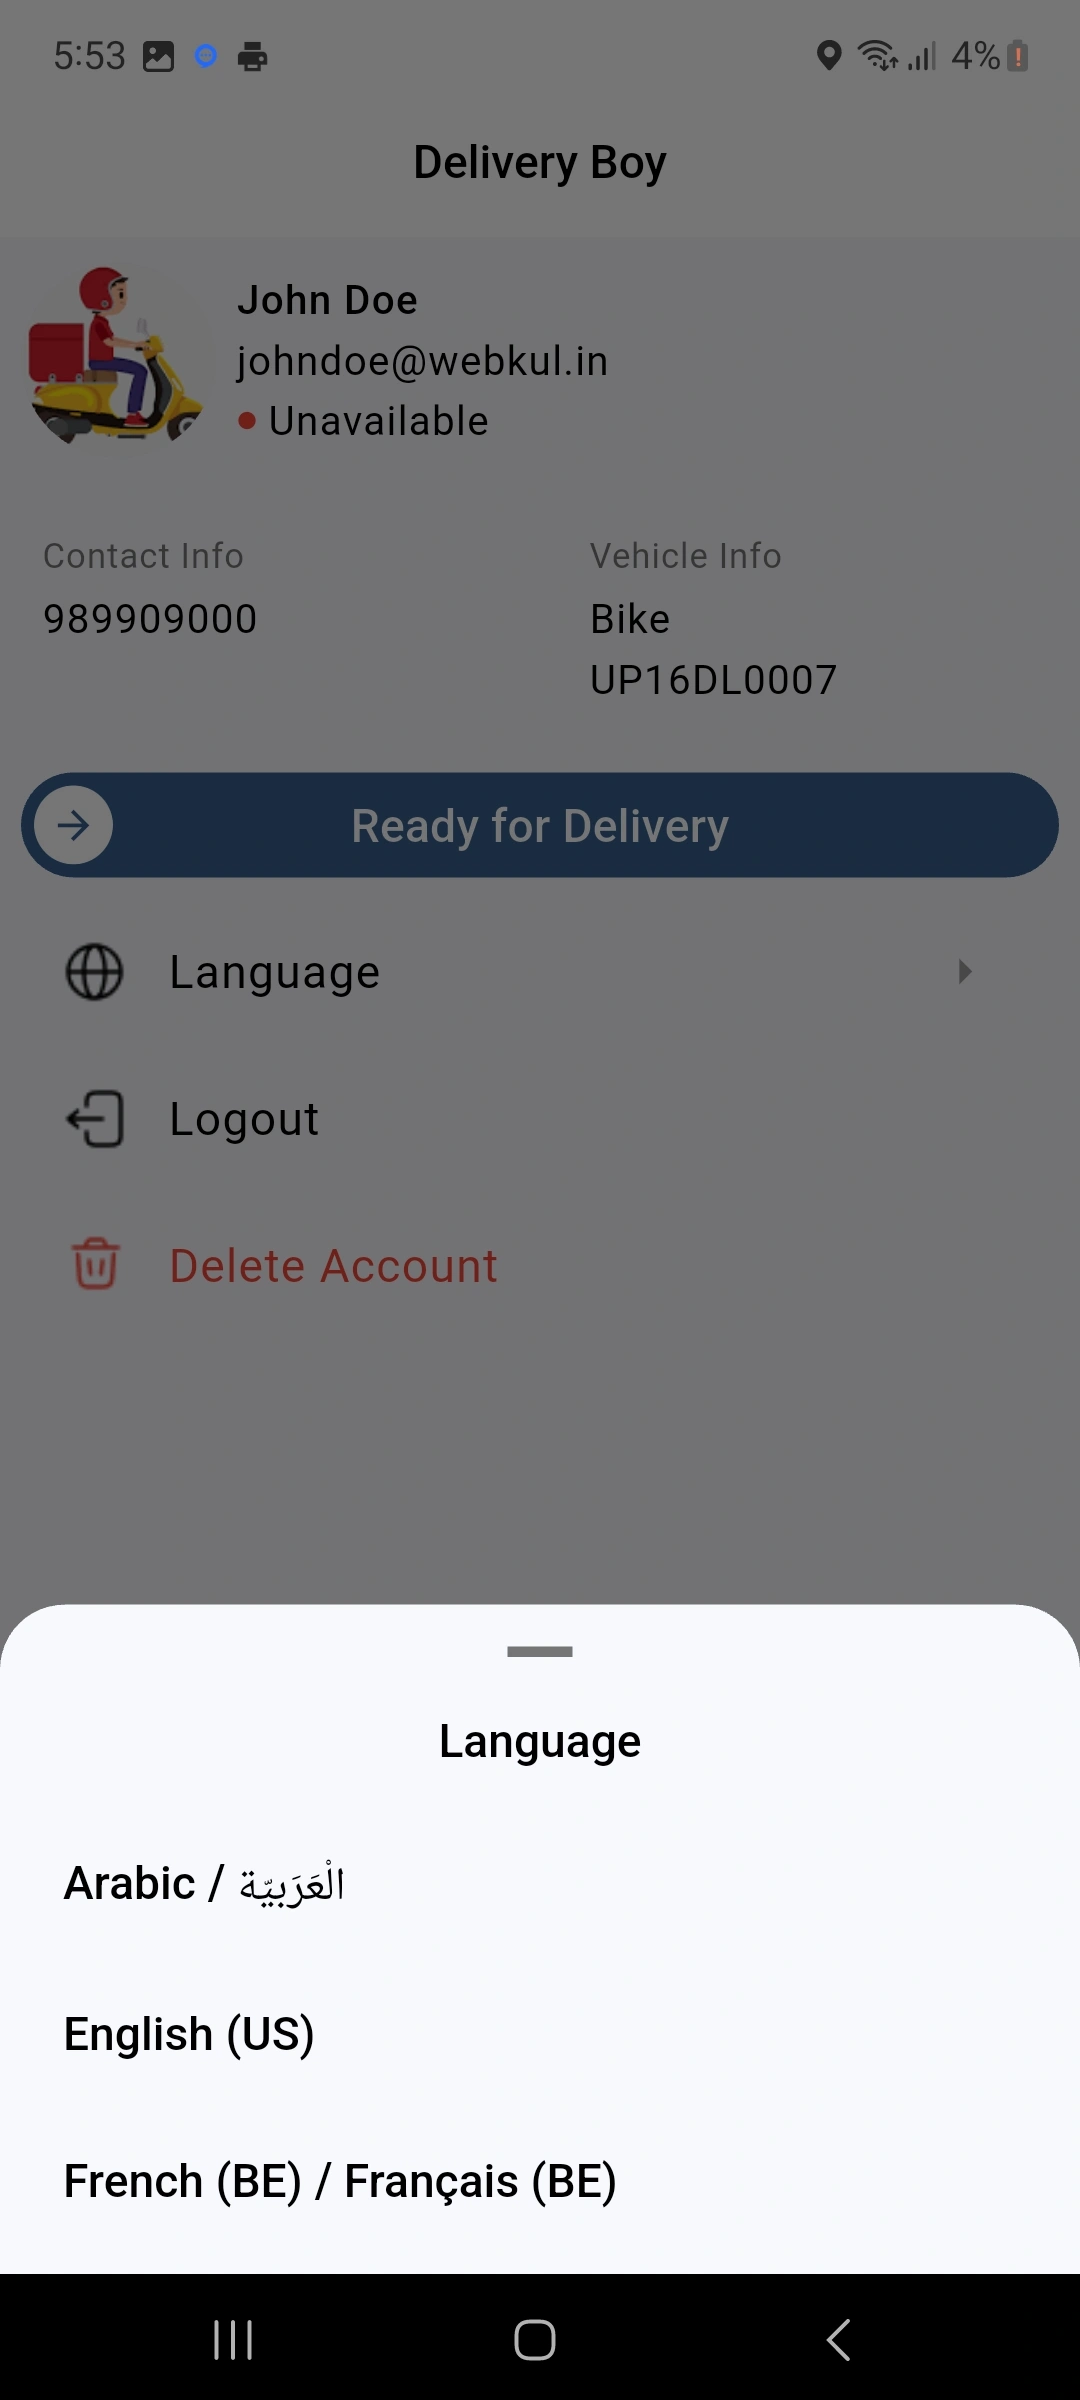
20.) Open the language settings and select the required language. The app will display the supported options in the selected language.
Select Language for App
Choose your preferred language to use the app with greater ease.
21.) Open the report section to check delivery data for different time periods. Select the required report period to review delivery results.
Different Report Selection
View delivery reports for different dates and selected time periods.
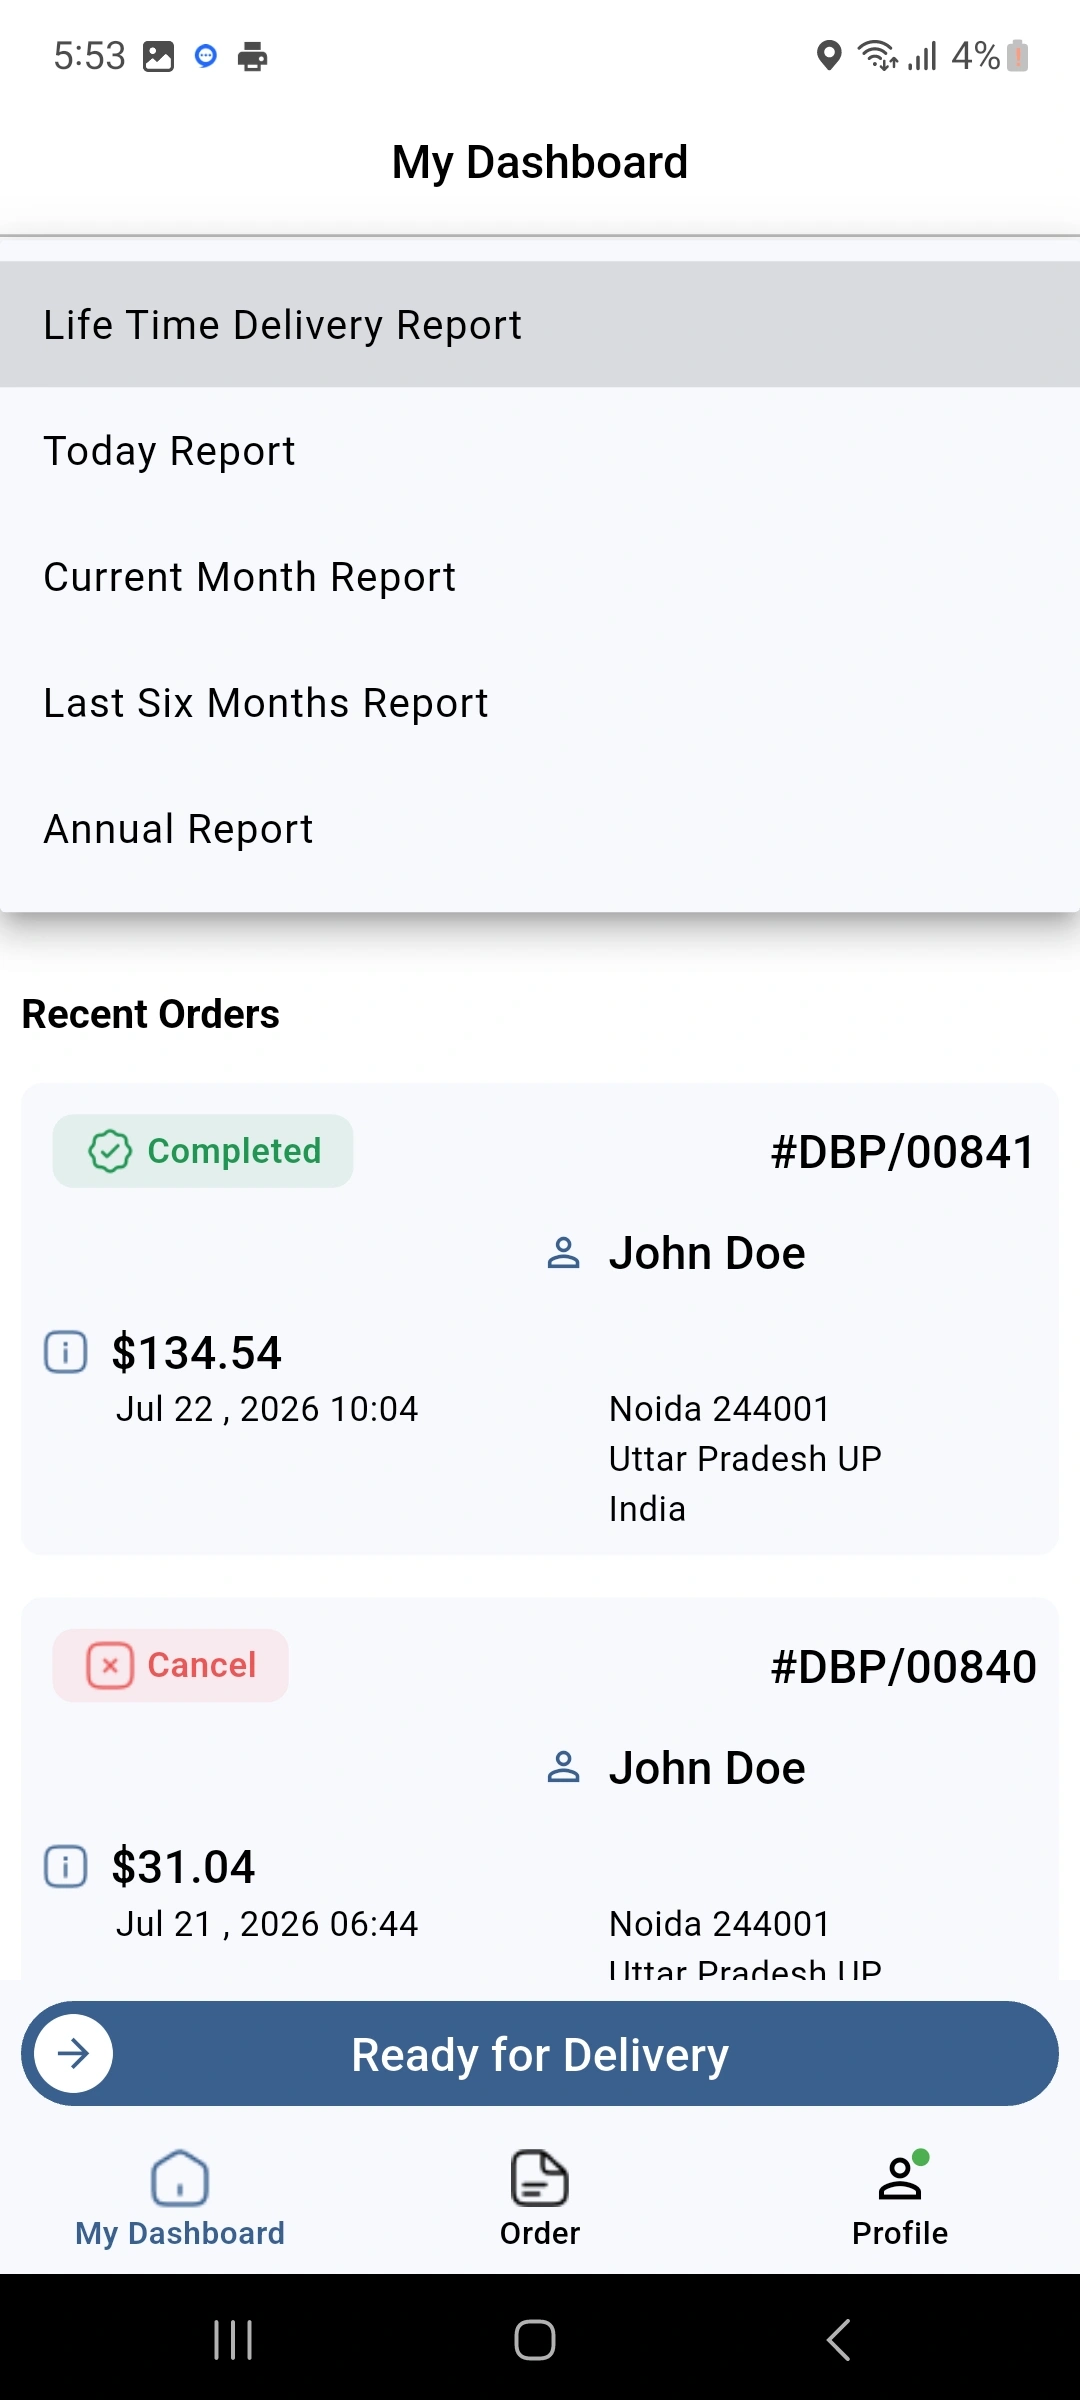
22.) Open My Orders to view the orders linked to the delivery staff. This helps staff review their current and past delivery work.
My Orders Section
Check current and previous orders linked to the delivery staff account.
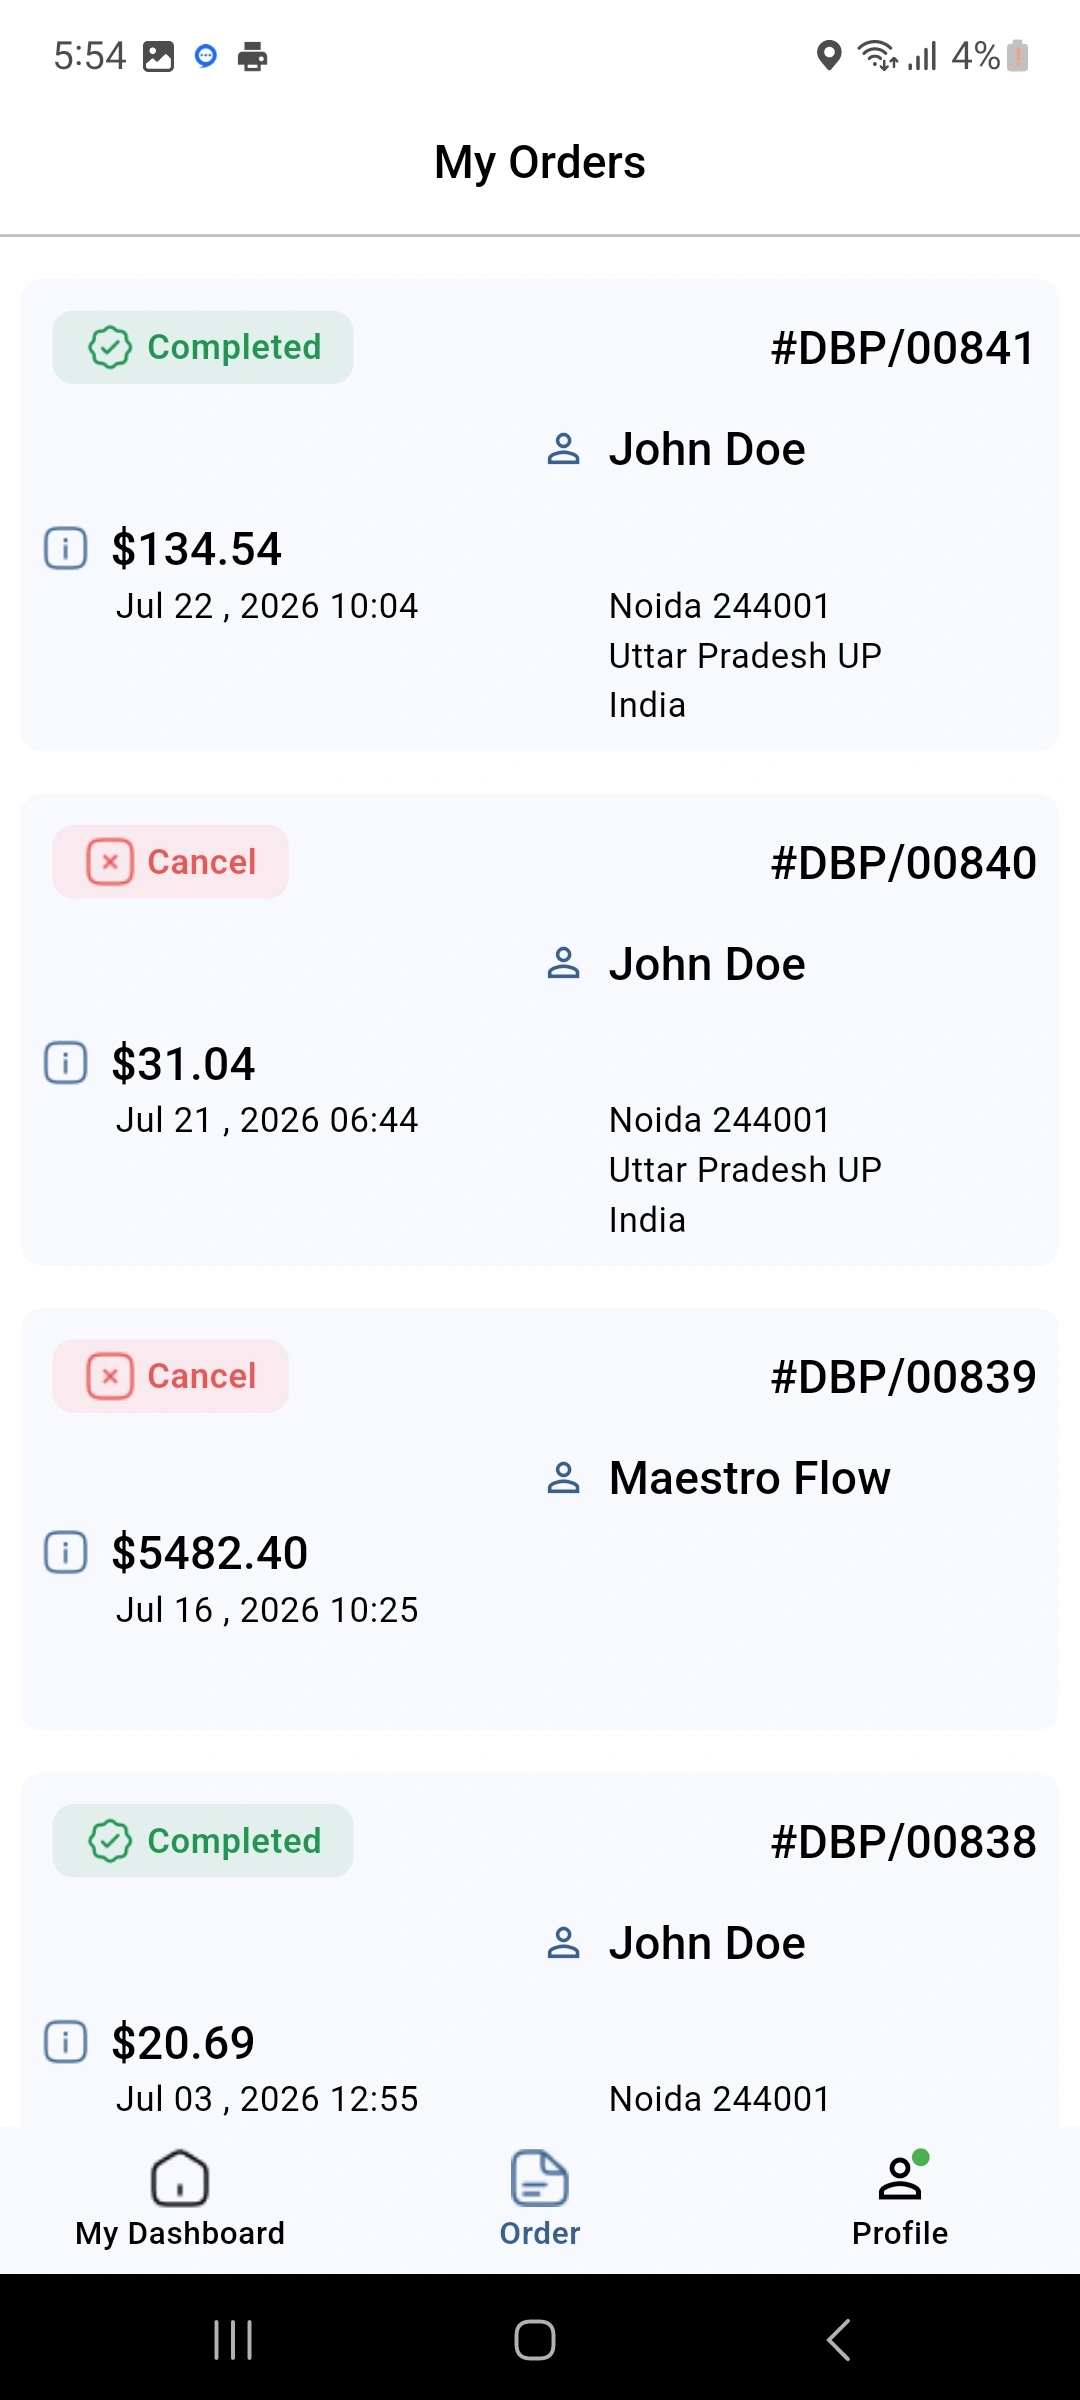
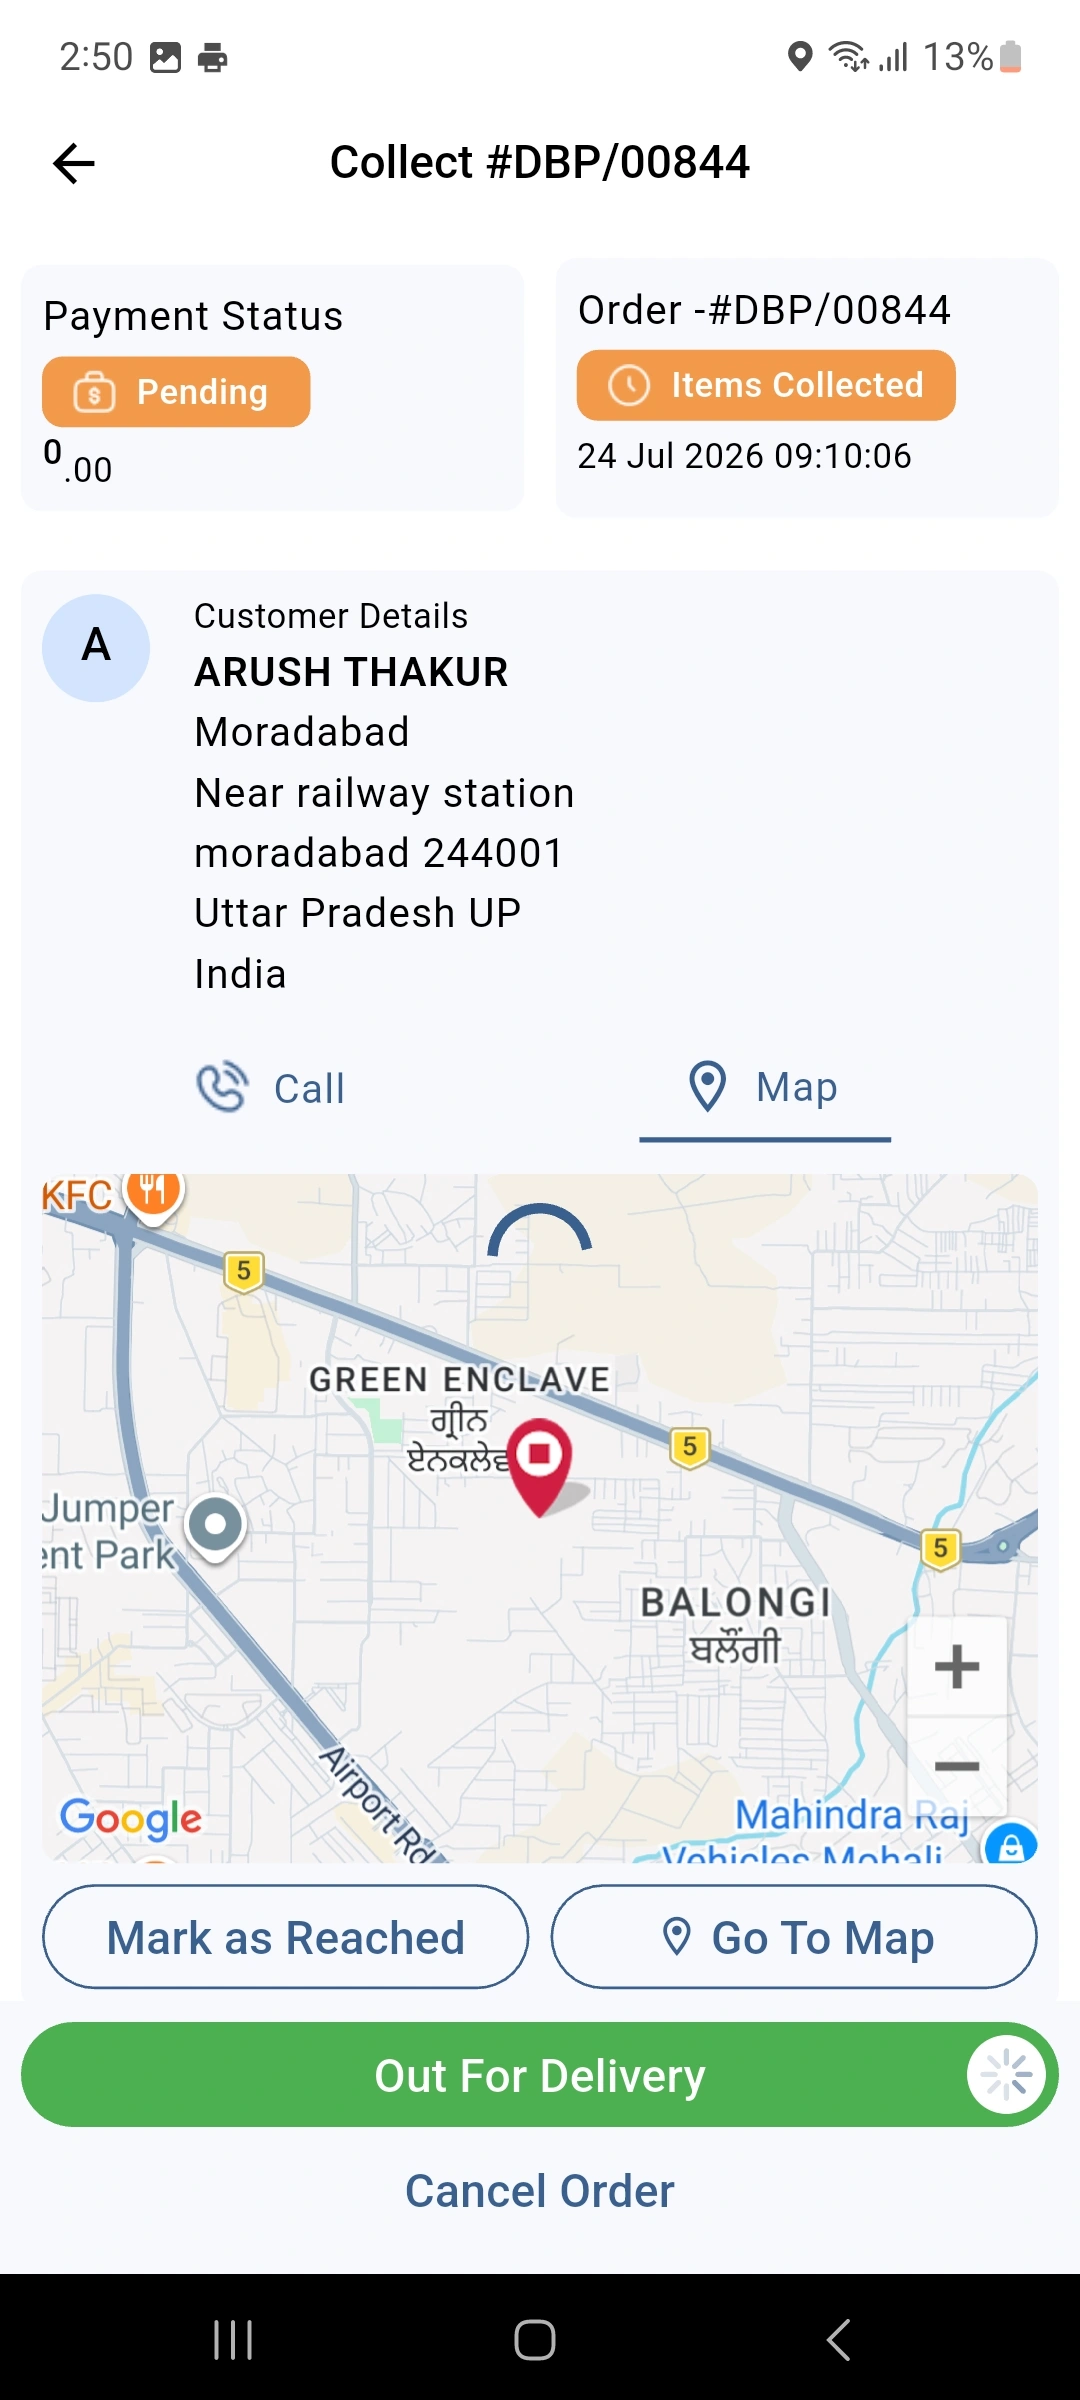
23.) Track the delivery boy’s location during an active delivery. This helps you follow the delivery progress and check the status of the delivery.
Track your Delivery boy
Track delivery staff and follow their location during active deliveries.
Other Features of Delivery Boy App
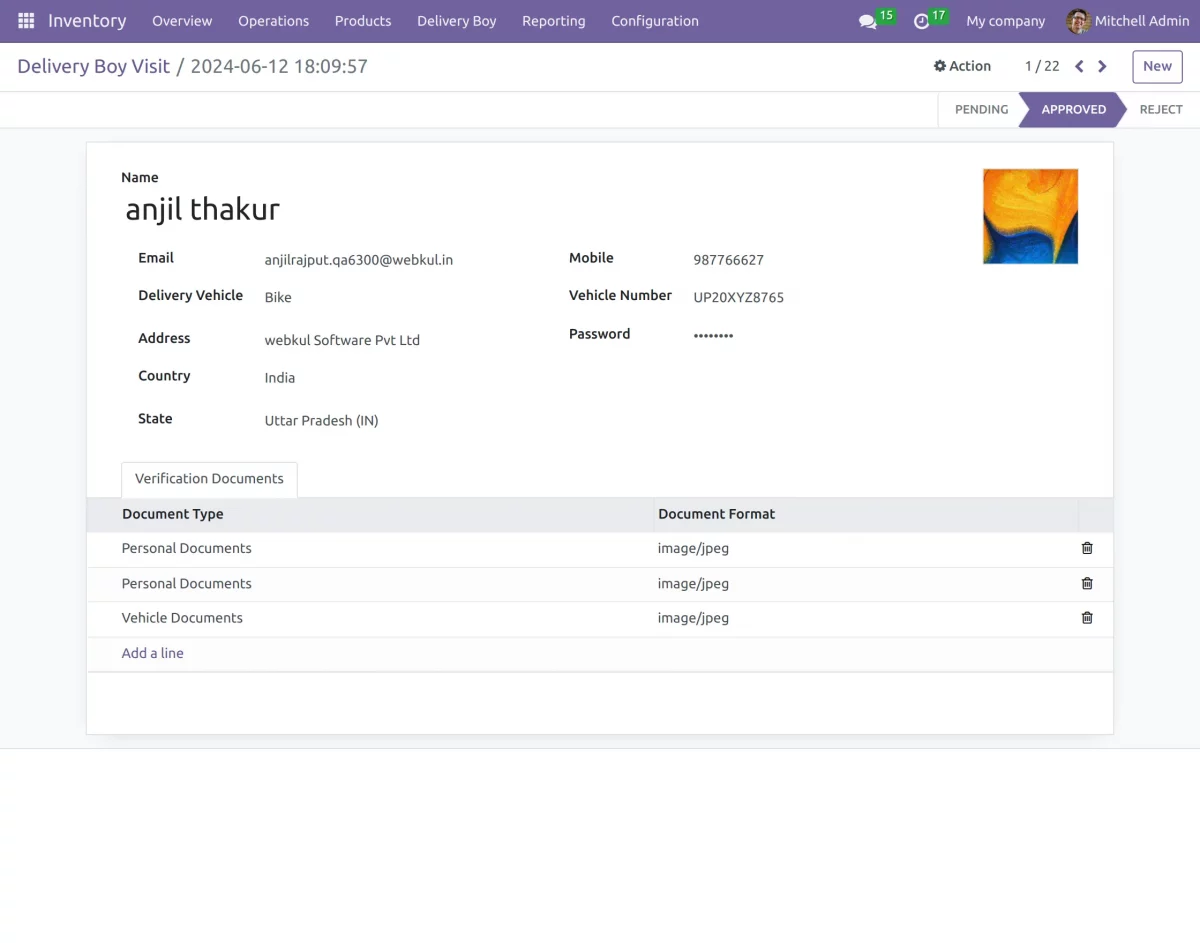
24.) In theDelivery Boy Visit tab, you can view the list of users who have submitted requests to become delivery boys.
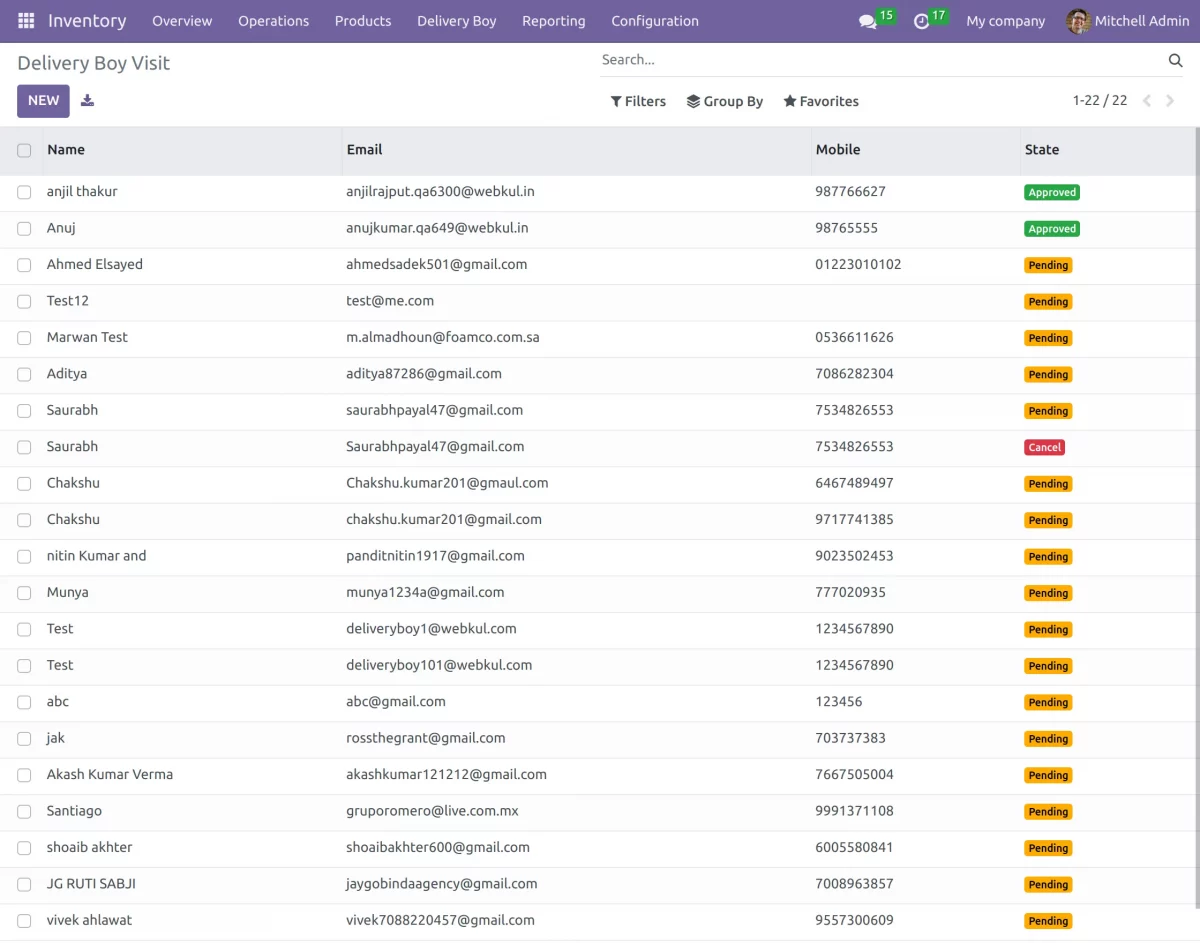
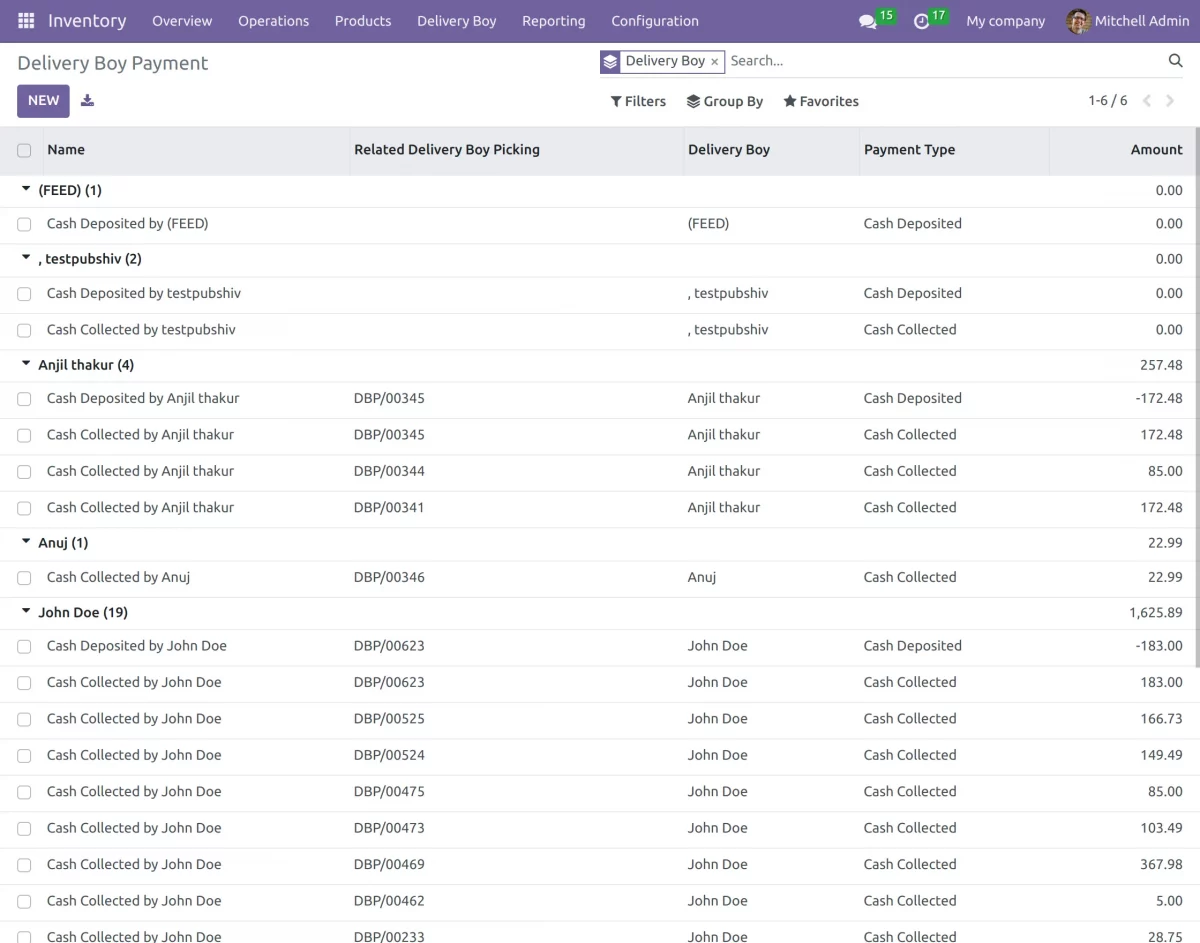
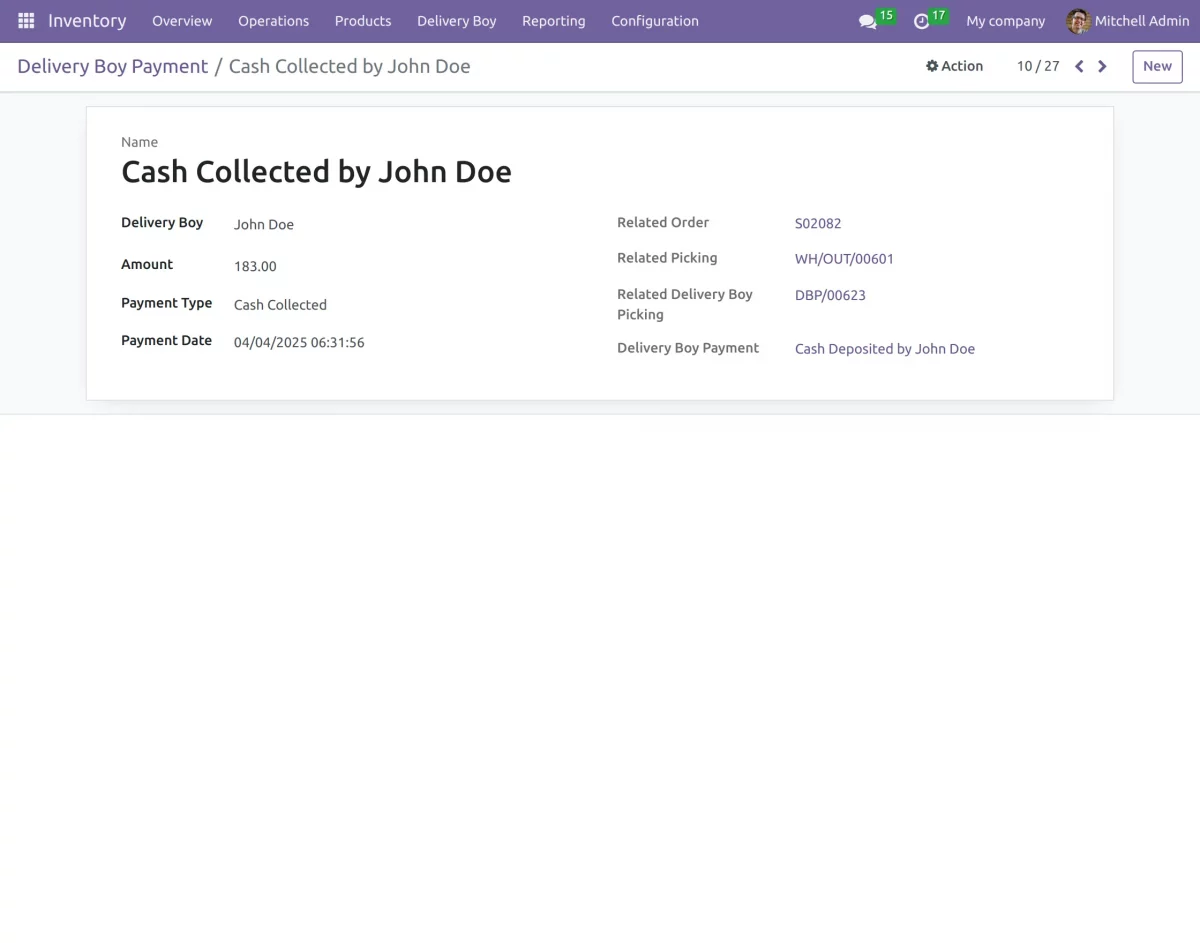
25.) Delivery boy cash collection will show the cash collection state of the delivery boys.
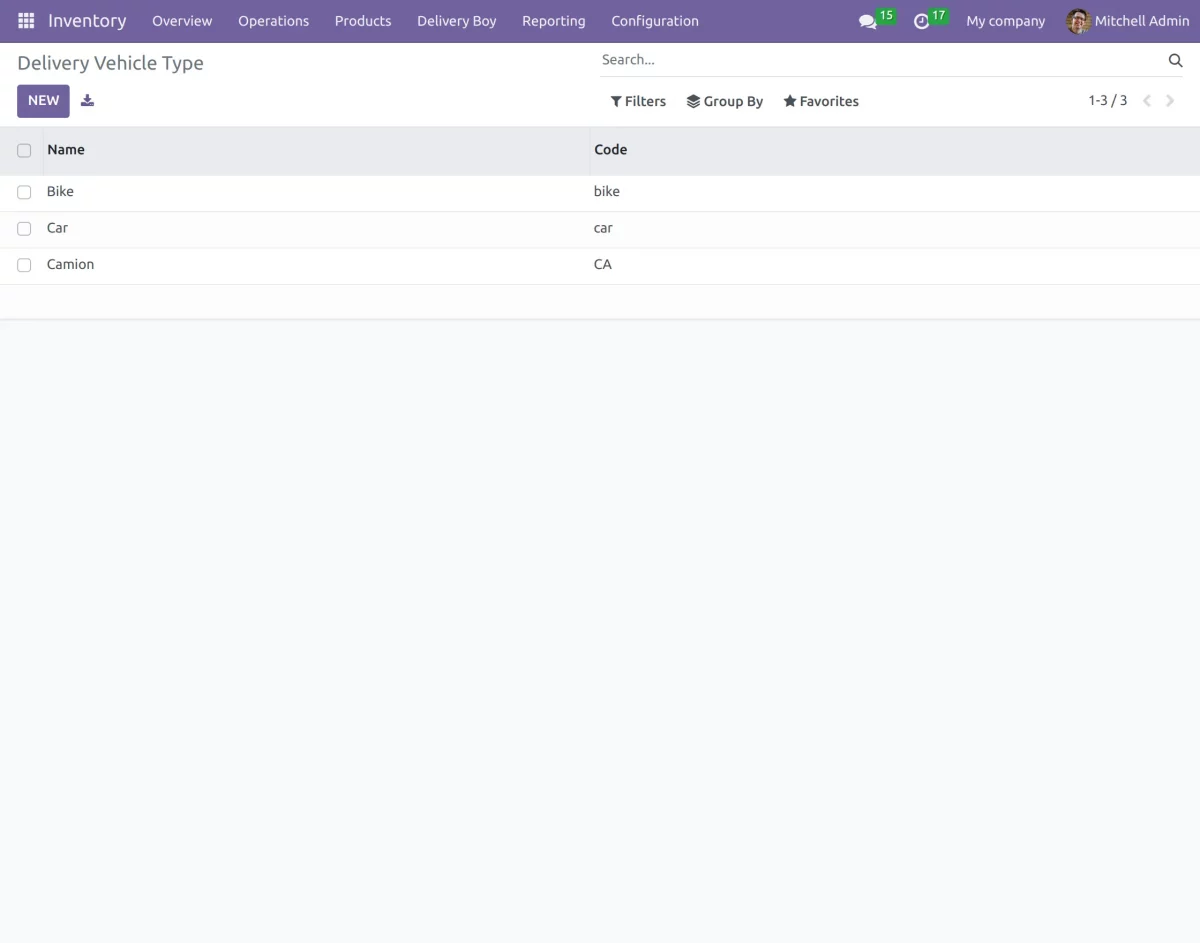
26.) Type of Vehicle of the delivery boy app can be seen at “ Delivery Vehicle Type”.
NEED HELP?
Hope you find the guide helpful! Please feel free to share your feedback in the comments below.
If you still have any issues/queries regarding the same, please raise a ticket at the UV Desk.
I hope this helps. In case of any further queries, contact us at our support mail.
Thanks for paying attention!!
Current Product Version - 1.0.0
Supported Framework Version - ODOO V19, V18, V17, V16,

2 comments
You can also create ticket on [email protected] for further assistance.