Warranty Management System for Magento 2 allows the admin to enable product warranty to increase customer loyalty towards the store products.
Furthermore, the admin can add warranty information like – title, description, time of the product warranty, warranty applicable on, and warranty facility.
When using this module the warranty can be applied to the product of any selected category or to any particular product.
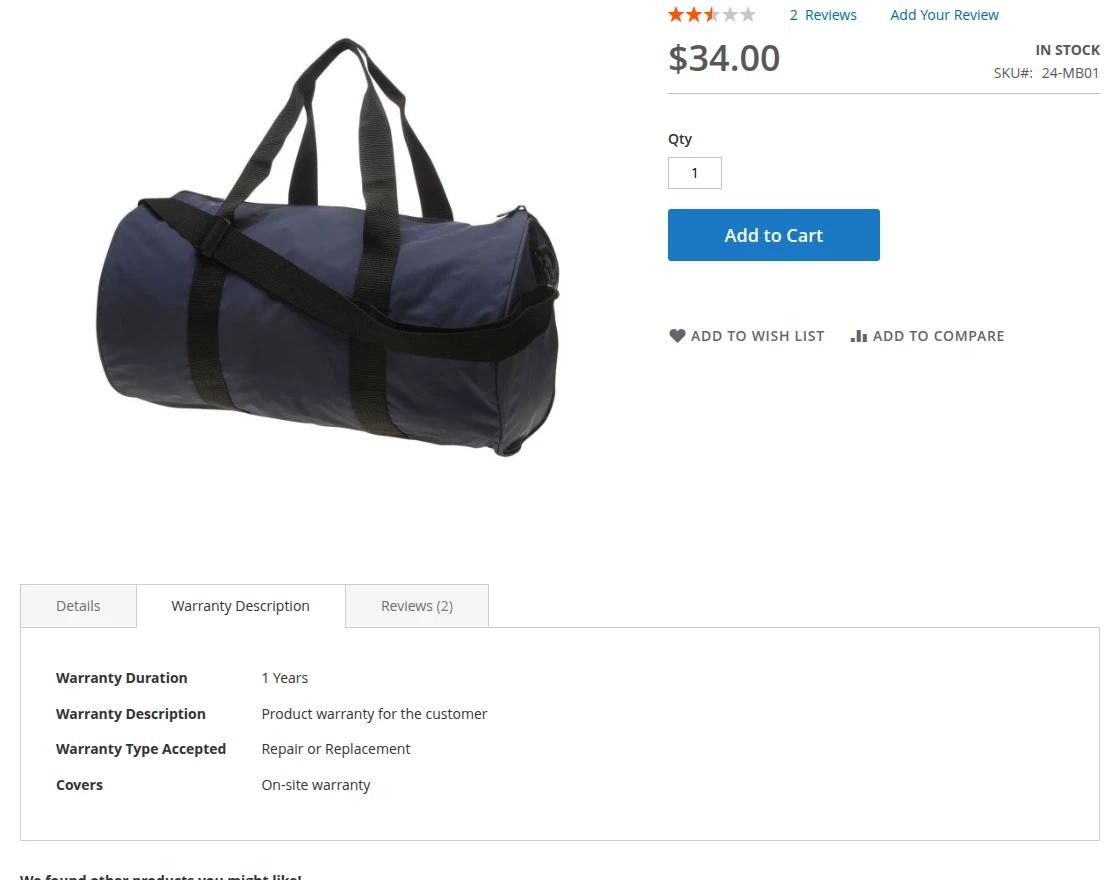
The customers can view the warrant details on the product page along with the description of the warranty.
Note – “Warranty can apply according to the product and category wise.”
Watch the video tutorial below to understand the Magento 2 Warranty Management System workflow and configuration process:
Features
- The admin can create warranties for products and store categories.
- The Admin can set the duration of the warranty based on the time i.e in Years, Months, and Days.
- Warranty Facility options are available as – Repair or Replacement, Refund, and Refund and Replacement.
- The customers can view the warranty and its details on the product page.
- Furthermore, the admin can also view the Warranty Orders.
- The extension is compatible with the Hyva theme.
- GraphQL has been incorporated to facilitate extension.
Installation
Customers will get a zip folder and they have to extract the contents of this zip folder on their system. When extracting, the folder has an src folder, inside the src folder you have the app folder.
Further, the admin needs to transfer this app folder into the Magento 2 root directory on the server.

Henceforth, after the successful installation of Magento 2 Order Attributes Modul, you have to run these commands in the Magento2 root directory:
php bin/magento setup:upgrade
php bin/magento setup:di:compile
php bin/magento setup:static-content:deploy
php bin/magento indexer:reindex
php bin/magento cache:flush
Configuration of Multi-Lingual
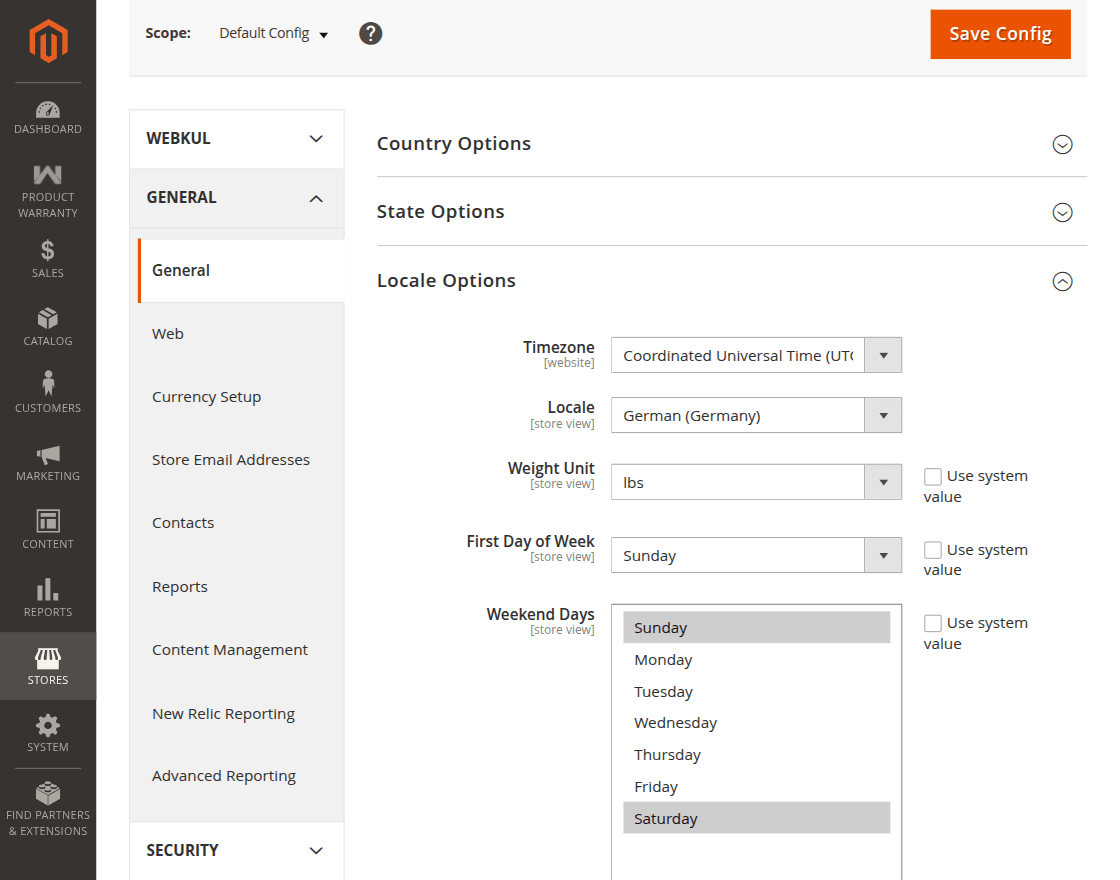
For multilingual support, the admin needs to navigate to Store > Configuration > General > Locale Options in the Magento admin panel.
From there, the admin can select the desired locale, such as German, to translate the store content into that specific language.
Language Translation
If you need to do the module translation, please navigate the following path in your system app/code/Webkul/ProductWarranty/i18n.
Thus, open the file named en_US.CSV for editing as shown in the below screenshot.

Furthermore, once you have opened the file for editing, replace the words after the comma(,) on the right with your translated words.
After editing the CSV file, save it and then upload it to the same folder. Now your module translation is complete.

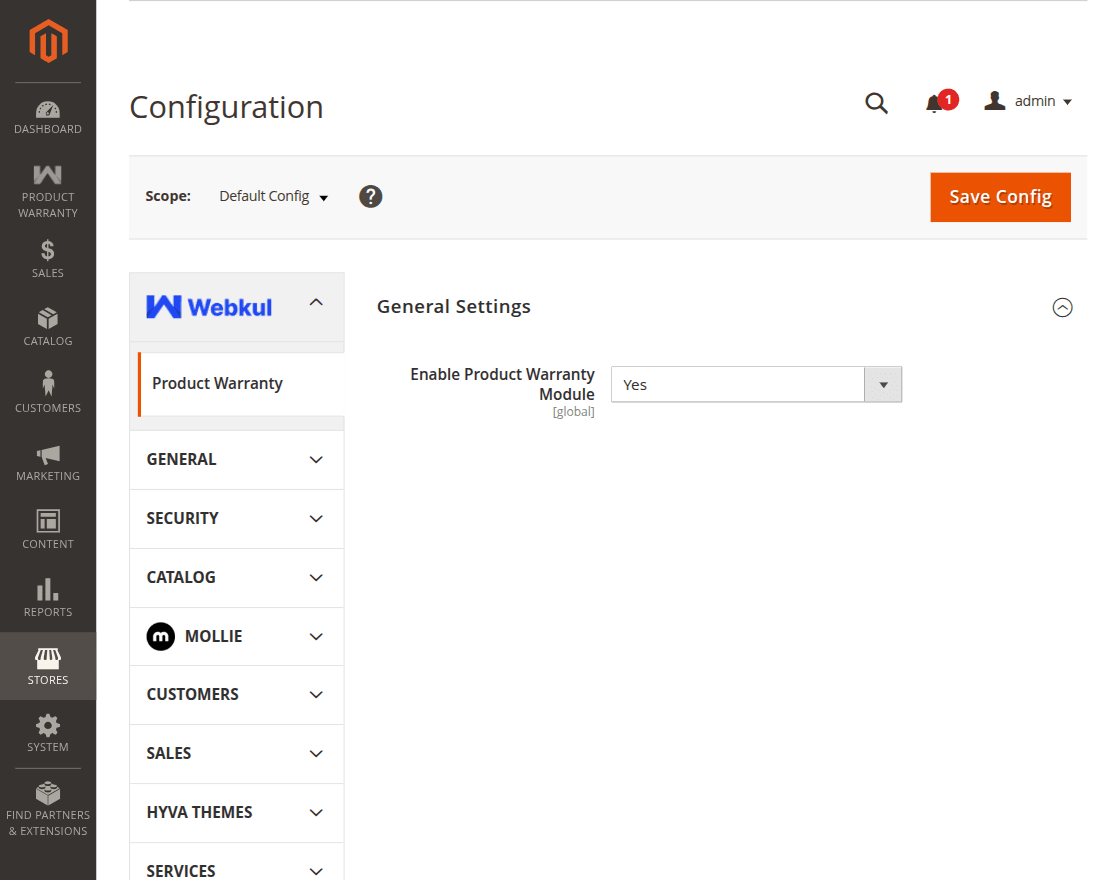
Module Configuration
Furthermore, the admin can manage the module from the admin panel easily. The admin can navigate to Store> Configuration> Product Warranty > General Setting
And enable or disable the module as per their requirements.
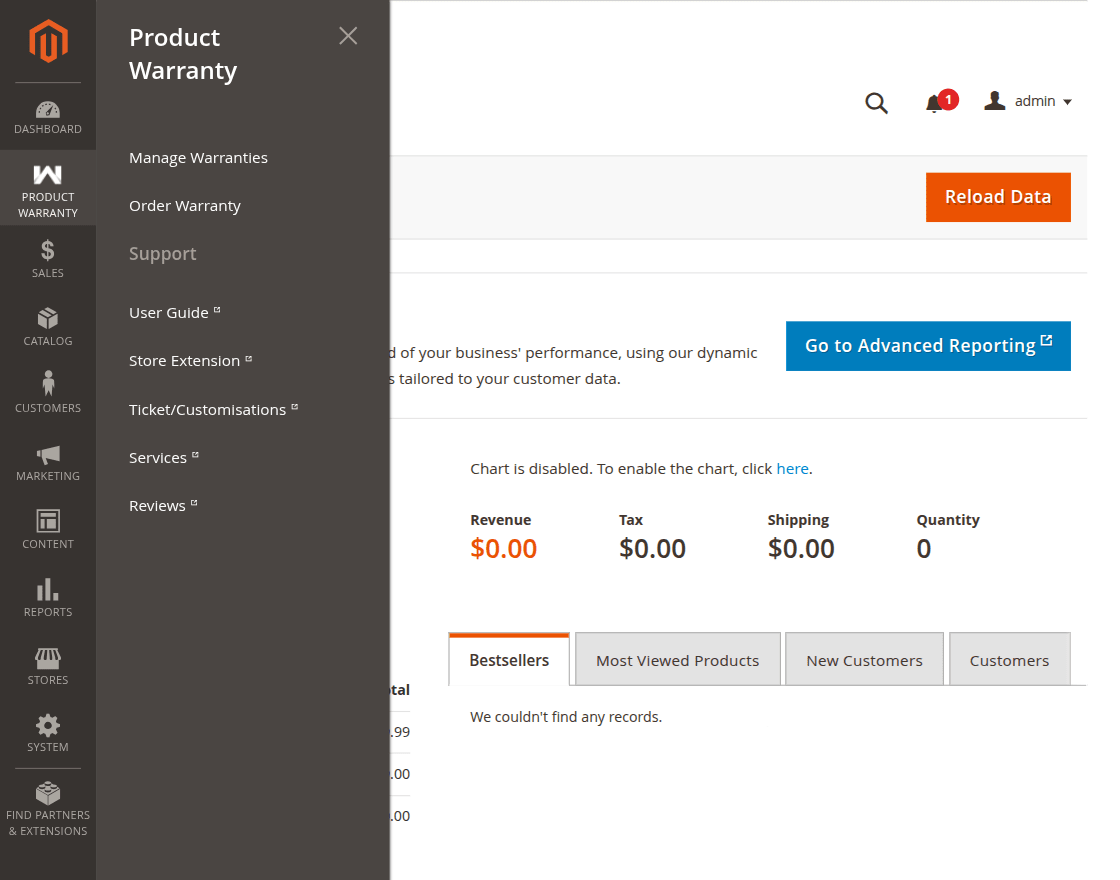
Warranty Management
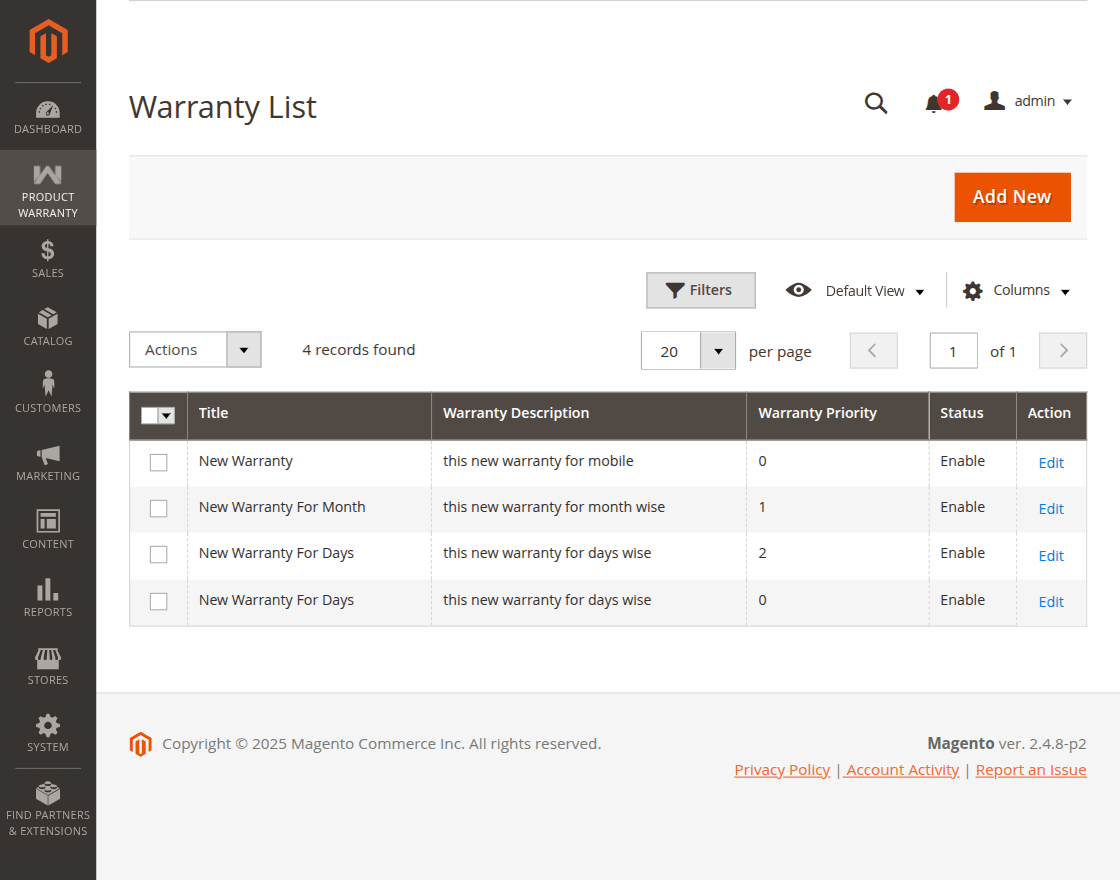
Furthermore, the admin can manage the Warranties by navigating to the Product Warranty> Manage Warranties
moreover, the admin can add a new warranty, view the created warranty, and enable, disable, and delete the warranty. To create a new warranty, the admin can click on the “Add New” button.
Furthermore, by clicking on the “Add New” button the admin will be able to create a new warranty.
The admin will enter the details and select the available options to create a new warranty based on “Products” and “Category.”
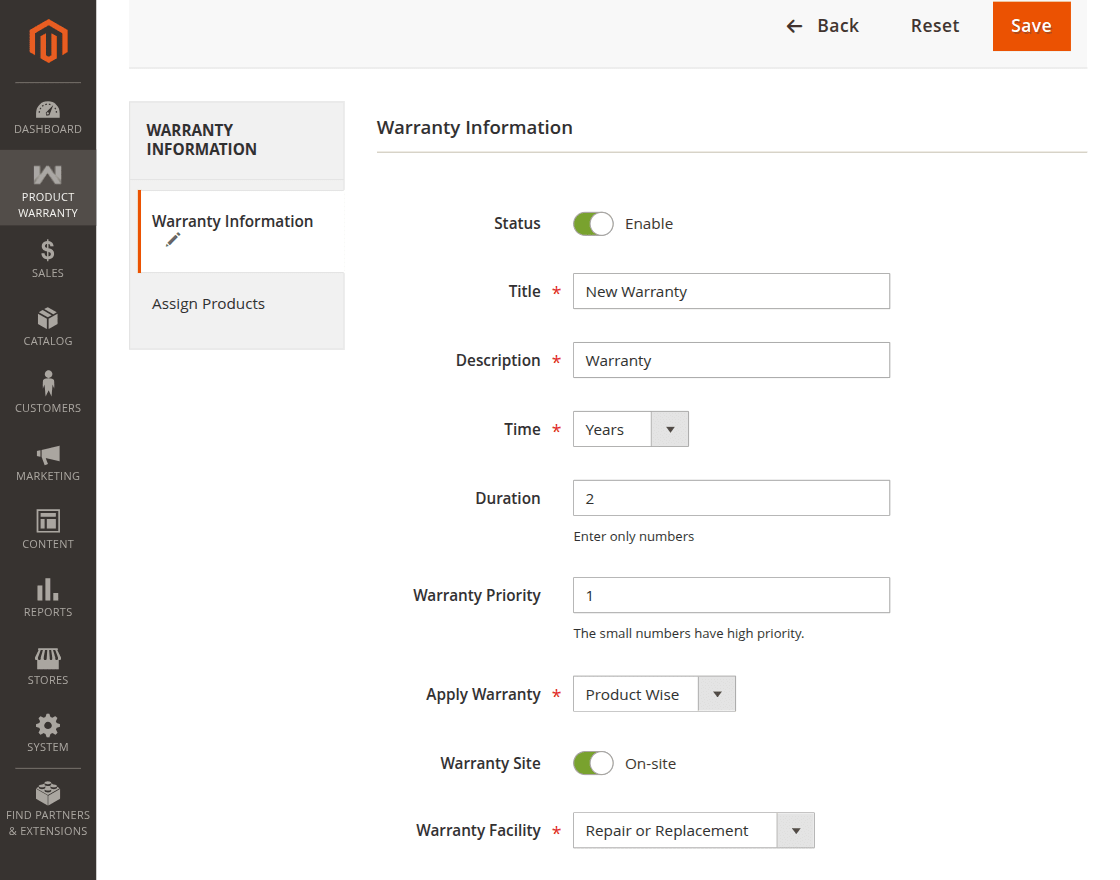
Moreover, from the Warranty Information tab, the admin can –
Status – The admin can “Enable” or “Disable” the module using the toggle button.
Title – The admin can decide the “Title” of the warranty
Description – The admin can enter the “Warranty Description” that will be displayed to the customers.
Time – The admin can select the “Warranty Time” based on “Years,” “Months,” and “Days.”
Duration – The admin will enter the “Duration” of the warranty period based on the selected time i.e years, months, and days.
Warranty Priority – In the front end, the warranty display priority can be defined by the admin based on a numerical scale. A lower number indicates a higher priority for the product or category.
Apply Warranty – The admin will select the option for which the admin wants to apply the warranty. The available options are – “Product based warranty” & “Category Based Warranty.”
When Warranty is Selected for the Products –
So, if the warranty is applied on the “Products” the admin can select the products from the tab “Assign Products” below the “Warranty Information” tab.
To assign the products navigate to Assign Products and select the products from the list.
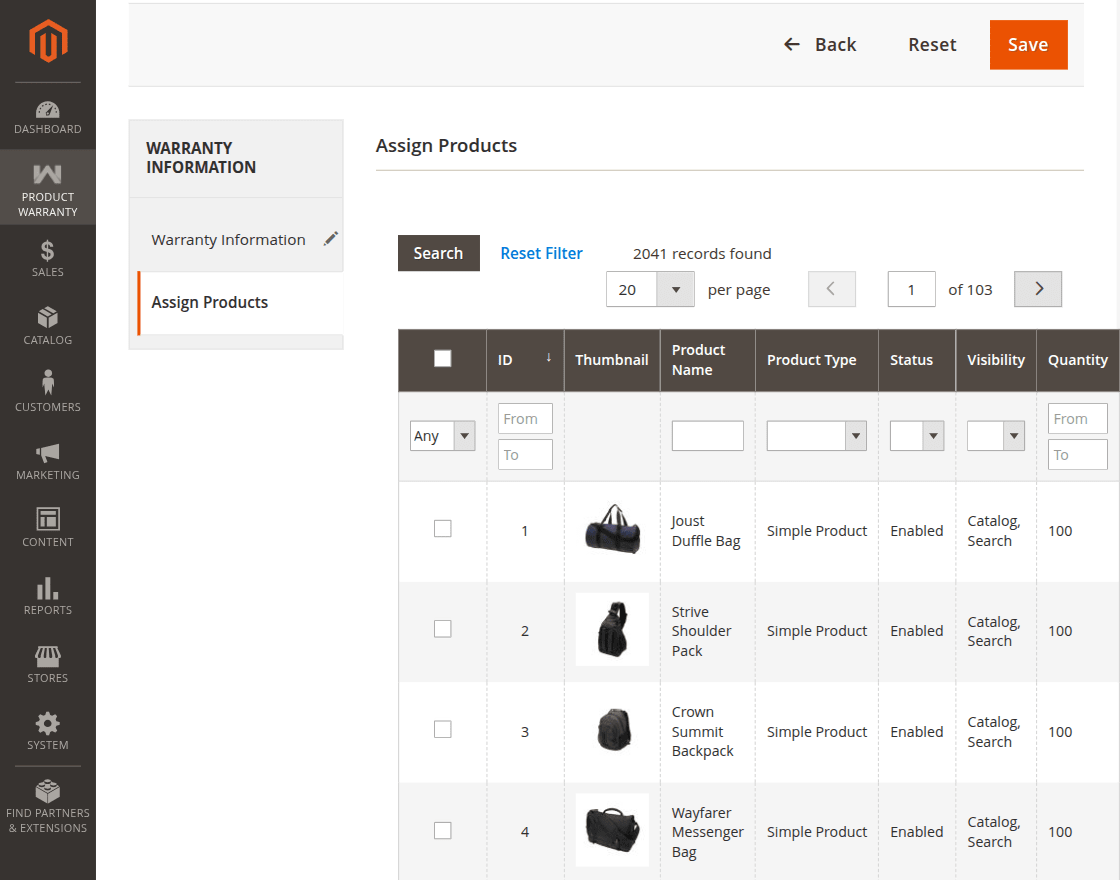
after assigning the products to the warranty, the admin can click on the “Save” button. Henceforth, the warranty will be apply to the select products and it will get dispaly on the product page.
When Warranty is Selected for the Category –
Furthermore, when a warranty is selected based on the “Category” the warranty will be displayed on all the products that are under the select category.
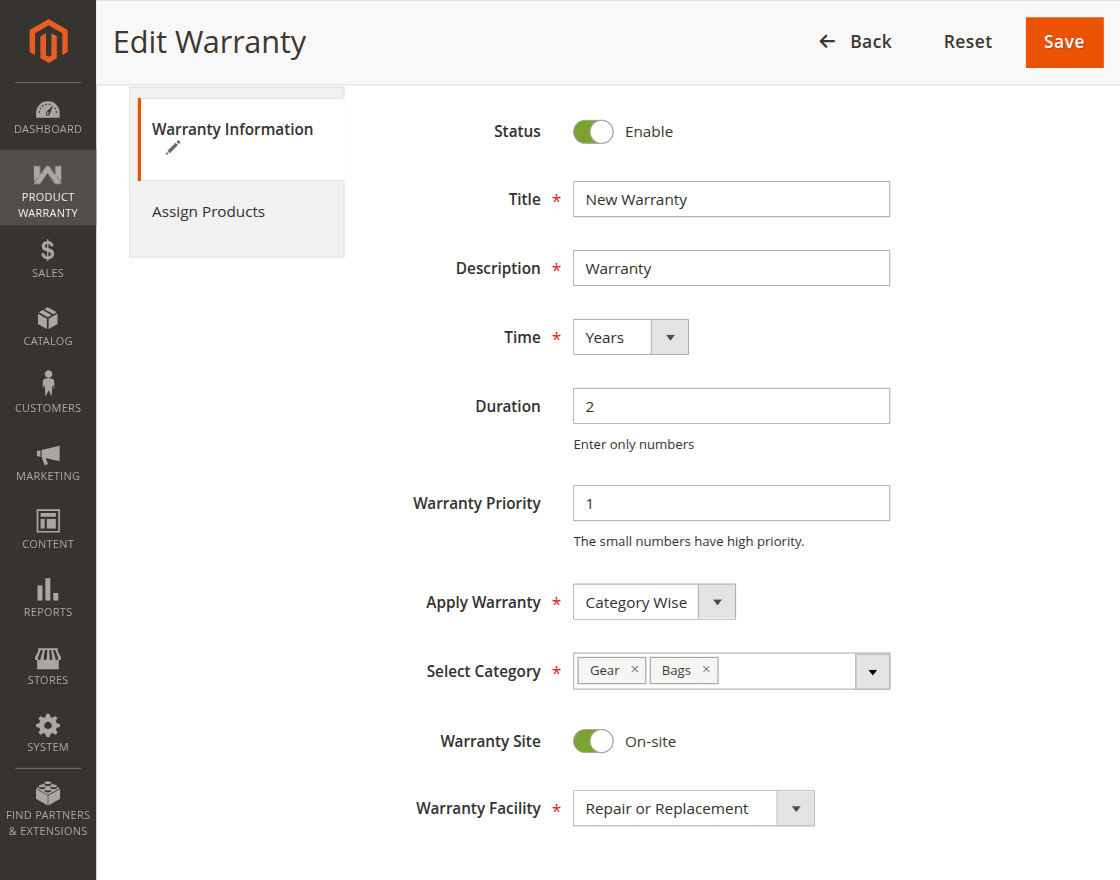
Select Category – The admin can select the “Category” from the list to apply the warranty based on the category products.
Warranty Site – The admin can use the toggle button to “Enable” or “Disable” the on-site warranty option.
Warranty Facility – The admin can select the warranty type as “Repair or Replacement”, “Refund”, and “Refund and Replacement.” The selected option will display to the customer at the front end.
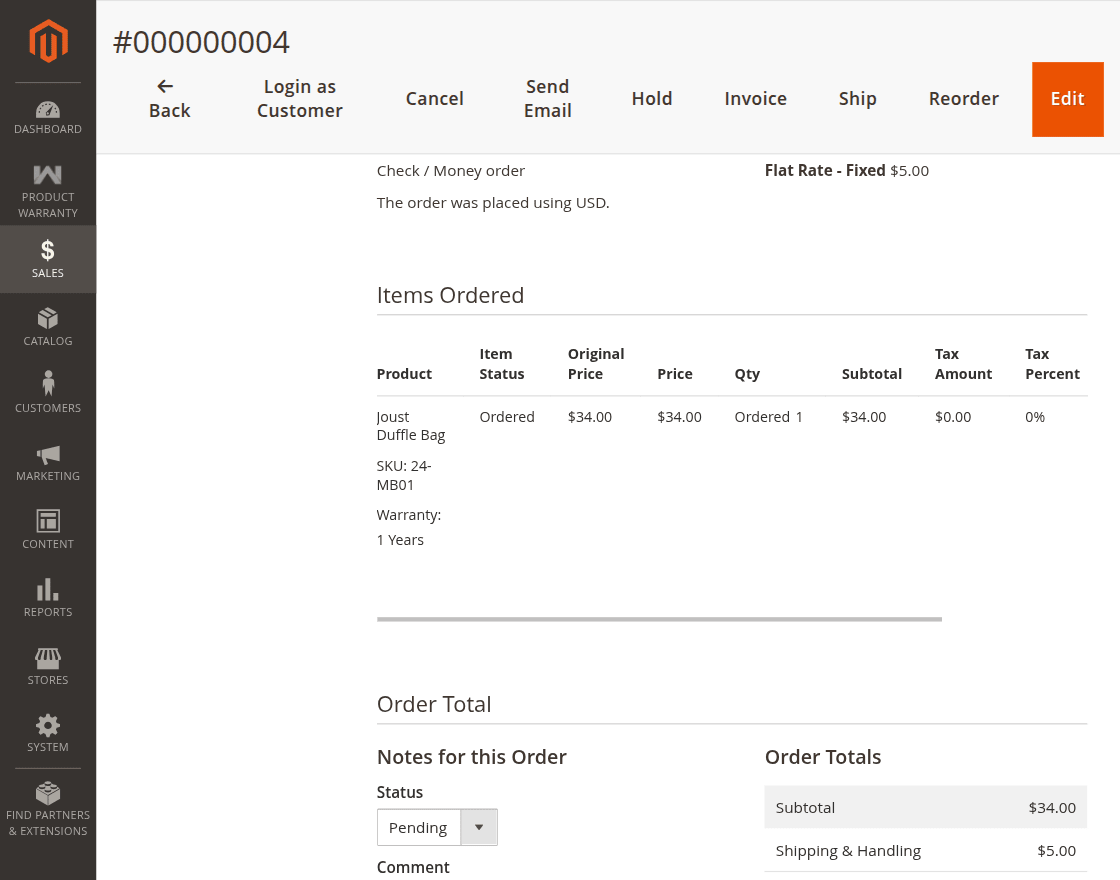
Order Warranty
Moreover, the warranty management system allows the admin to view the orders that have the warranty.
The admin can navigate to Product Warranty> Order warranty, to view the orders from the customers that have the product warranty.
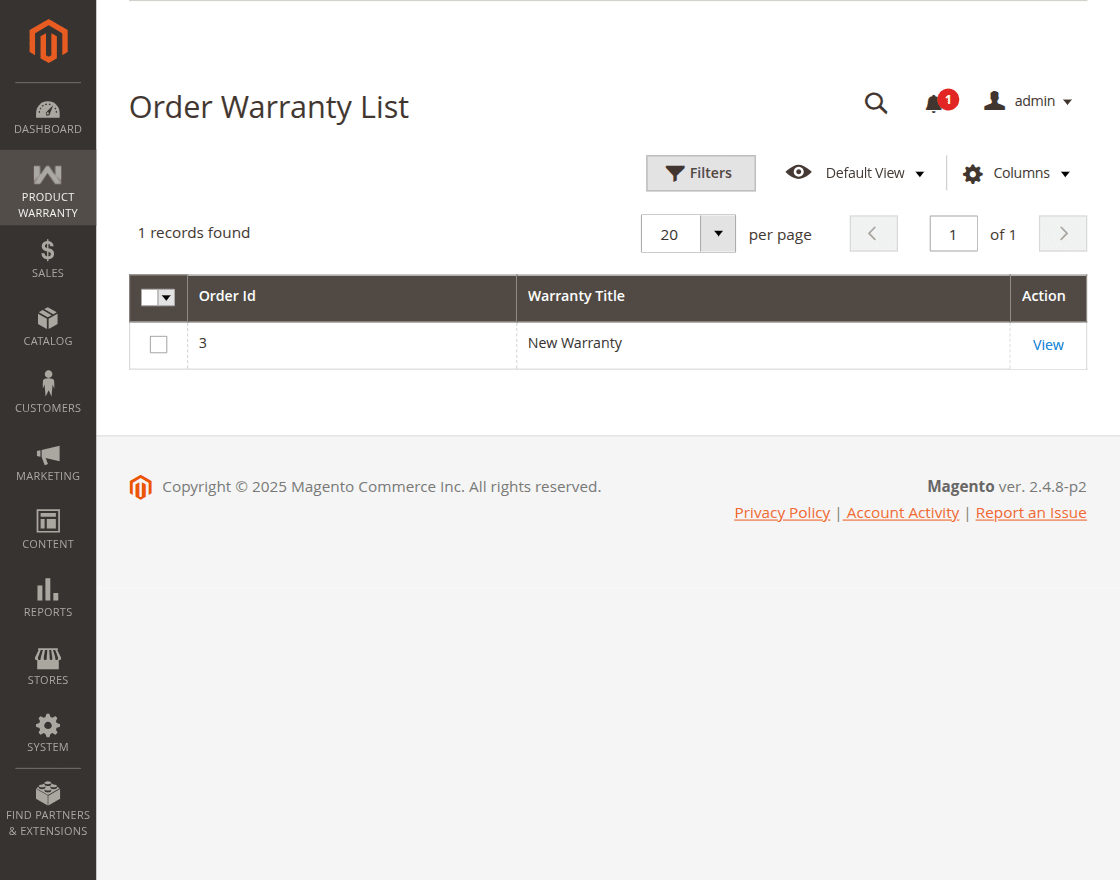
Now click on the “View” button to view the detail of the warranty along with the order information.
Customer View
Moreover, the applied warranty will display to the customer at the front-end in the product page.
That’s all for the Warranty Management System for Magento 2. Still, have any issues please email us at [email protected]. Else you can generate a ticket at https://webkul.uvdesk.com/en/
Current Product Version - 5.1.2
Supported Framework Version - Magento 2.0.x, 2.1.x, 2.2.x,2.3.x, 2.4.x
Be the first to comment.