Introduction
POS Loyalty Rule for Magento 2 (Adobe Commerce) refers to the module which helps the store owner to set the loyalty rules which are further used during the Point of sale respectively. Hence, the store owner can easily create POS loyalty rules as per the choice.
On the other hand, the cashier can redeem loyalty points of the customer who fulfilling the rules criteria, also the cashier can see the history of transaction points of the order.
Note:
- POS Loyalty Rule for Magento 2 module is an add-on of Magento 2 POS. So, you should have installed Magento 2 POS module first.
- For POS Marketplace solution, kindly refer to Magento 2 Multi Vendor POS module.
Check a brief overview of the plugin –
Features
- Admin can create Redemption Rules.
- The admin can create loyalty Rules.
- The admin can disable/enable the module from the configuration Section from Magento admin.
- When a cashier places an order with a new/existing customer, loyalty points will be assigned to the customer(according to the rule) if the module is enabled and the customer will receive an email for credit of loyalty points.
- When the cashier places an order with an existing customer and if the customer has loyalty points, then the cashier can redeem the loyalty points for the order(if a customer wants to redeem the points) and the customer will receive an email for debit/redemption of loyalty points.
- The cashier can check the remaining loyalty points of a customer in the customer list.
- The cashier can see the loyalty points transaction history of orders.
Installation
Customers will get a zip folder and they have to extract the contents of this zip folder on their system. The extracted folder has an src folder, inside the src folder you have the app folder. You need to transfer this app folder into the Magento2 root directory on the server as shown below.

After the successful installation, you have to run these commands in the Magento2 root directory.
First command –
php bin/magento setup:upgrade
Second Command –
php bin/magento setup:di:compile
Third Command –
php bin/magento setup:static-content:deploy
After running the commands, you have to flush the cache from the Magento 2 (Adobe Commerce) admin panel by navigating through->System->Cache management as shown below.

Multi-Lingual Configuration
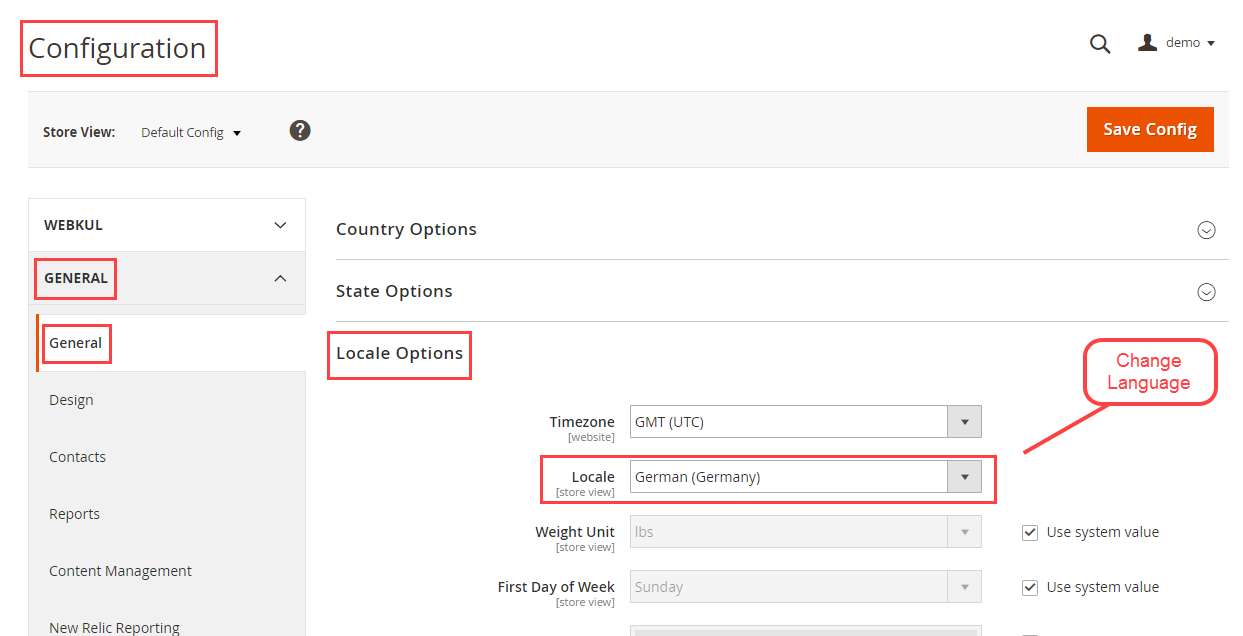
For Multilingual support, please navigate to Store>Configuration>General >Locale Options. And select your desired language from the Locale option.
Language Translation
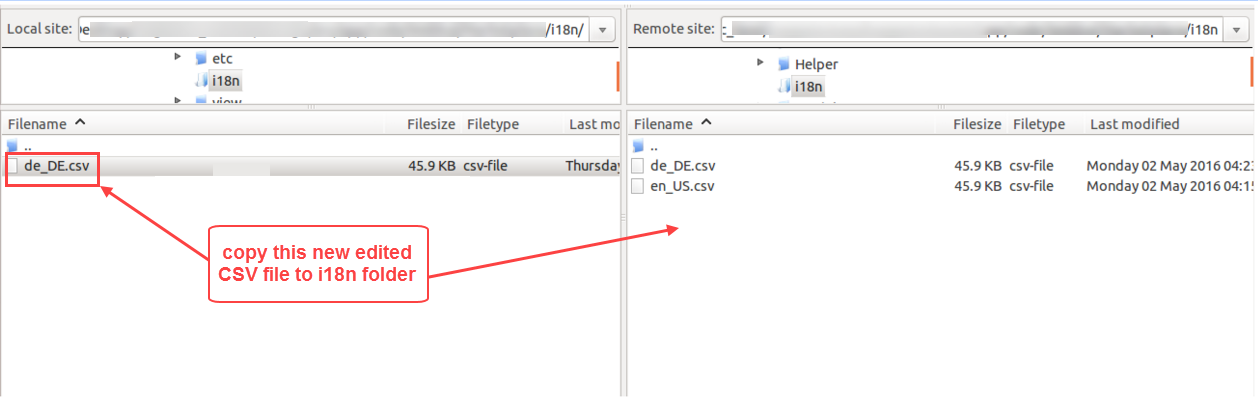
For module translation, navigate to the following path in your system app/code/Webkul/POS Loyalty Rule/i18n/en_US.csv.
Open the file named en_US.CSV for editing as shown in the below screenshot.

Then replace the words after the comma(,) on the right in the file with your translated words.

After editing and translating the CSV file, you need to save the translated file name according to your region language and country code such as – de_DE.CSV. Followed by uploading the translated file to the same folder from where you have obtained it. After that, the module translation is complete.
Module Configuration
After installing the module, the admin has to navigate to POS->POS Loyalty Rule Configuration

After clicking on POS Loyalty Rule Configuration, the admin will be redirected to the configuration page.

Enable Loyalty Rule– The admin can enable/disable the functioning of the module.
Redemption Rule
To create and manage the redemption rule, the admin requires to navigate to the Manage Redemption Rule under the POS Loyalty Rules section.

Now, the admin will be redirected to the Redemption Rules Manager.

Here, the admin can manage and edit all created redemption rules, also the admin can create by clicking
Add New Redemption Rule.

- Redemption Rule Name: The admin can set rule name as per the choice.
- Points Range From: Here, the admin needs to set the range,where to start.
- Points Range To: Here, the admin needs to set the maximum range.
- 1 Reward Point’s Value: The admin can set the value of one reward point.
- Status: The admin can enable/disable the functioning of rule.
After completing all the required fields, the admin needs to click on Save Redemption Rule.
POS Loyalty Rules
To set and manage POS Loyalty Rule, the admin needs to navigate POS-> Manage POS Loyalty Rules.

Now, the admin will be redirected to the POS Loyalty Rules Manage page.

Here, the admin can view all the created rules and can create further by clicking on Add New Rule.

Loyalty Rule Information
- Rule Name: The admin can give a name to the rule.
- Point Calculation Based On: The admin can set point calculation, Purchase amount/POS Product Categories as per the choice.
- Start Date: Here, the admin can set the rule start date.
- End Date: Here, the admin can set an end date for the rule.
- Min. Points To Redeem: The admin can set minimum points required to avail offer.
- Redeem Type: The admin can set redeem type as Partially Redeem/Fully Redeem.
- Status: Here, the admin can enable/disable the rule.
Redemption Calculation

Under the Redemption Calculation section, the admin can do calculations of the created Rule, and also filter accordingly.
Purchase Amount Information

- Minimum Purchase Amount: The admin can set minimum purchase amount.
- Each Purchase Amount: The admin can set purchase amount, product wise.
- Loyalty Point Type: Here, the admin can set loyalty point type as Fixed/Percent.
- Loyalty Points: The admin can set loyalty points that Customer will be awarded by ‘Loyalty Points’ value for a purchase of every ‘Each Purchase Amount’ field value.
Pos Category

Under the POS category section, the admin can select store categories which they want to take under the rule.
Cashier POS
The Cashier now can follow up at their level, after the loyalty rules created.

The cashier can view customer loyalty points under the customer section. Here, after selecting all the products that the customer wants to buy, the cashier navigates to Pay for checkout.

Under the checkout section, the cashier can apply loyalty points accordingly and place an order.
Thereafter, an invoice slip is generated which is printable.

The cashier can also check loyalty points history by navigating to Loyalty History.

Under the Loyalty History, the cashier can see all the transaction points and other product details.

That’s all for POS Loyalty Rule for Magento 2 (Adobe Commerce) module. Still, have any issues please feel free to add a ticket at https://webkul.uvdesk.com/
Explore the Adobe Commerce Cloud development services by Webkul. You may also browse our quality Magento 2 extensions.
Current Product Version - 5.0.0
Supported Framework Version - Magento 2.0.x, 2.1.x, 2.2.x,2.3.x, 2.4.x

Be the first to comment.