Using Magento 2 Marketplace Payment Method Restriction extension, the admin can assign the payment methods to products and the sellers.
Moreover Sometimes the admin wants to restrict a few of the payment methods for some products and sellers.
But So, instead of completely disabling the payment methods for the store, restrict the payment methods that the admin doesn’t wish to use for particular products and sellers.
And The marketplace sellers also can assign Payment Method Restriction to their products. During the checkout process, the customer can view the assigned payment methods to place an order.
Magento 2 Marketplace Payment Method Restriction module is an add-on of Multi-Vendor Marketplace Module. To use this module you must have installed Magento 2 Multi Vendor Module first.
Note: The extension will not create any new payment method for you.
You can also check out our Magento 2 payment restrictions, which help the admin designate specific shipping and payment options for products and categories.
Watch the below video tutorial to understand the extension workflow:
Features
- The admin can enable or disable the module as per convenience.
- Assign specific payment methods to a product.
- Restrict the payment methods for the product types – Simple, Configurable, Virtual and downloadable.
- The admin can also assign payment methods to the individual seller.
- The admin can assign payment methods to the seller’s product also.
- The sellers can assign payment methods to their individual products
- Only assigned payment methods available while checkout to the customers.
Installation
Customers will get a zip folder and they have to extract the contents of this zip folder on their system.
The extracted folder has an src folder, inside the src folder you have the app folder. You need to transfer this app folder into the Magento 2 root directory on the server as shown below.

After the successful installation, you have to run these commands in the Magento 2 root directory. First command – php bin/magento setup:upgrade

Second command – php bin/magento setup:di:compile

Third Command – php bin/magento setup:static-content:deploy

After running the commands, you have to flush the cache from the Magento admin panel by navigating through->System->Cache management as shown below.

Multi-Lingual Configuration
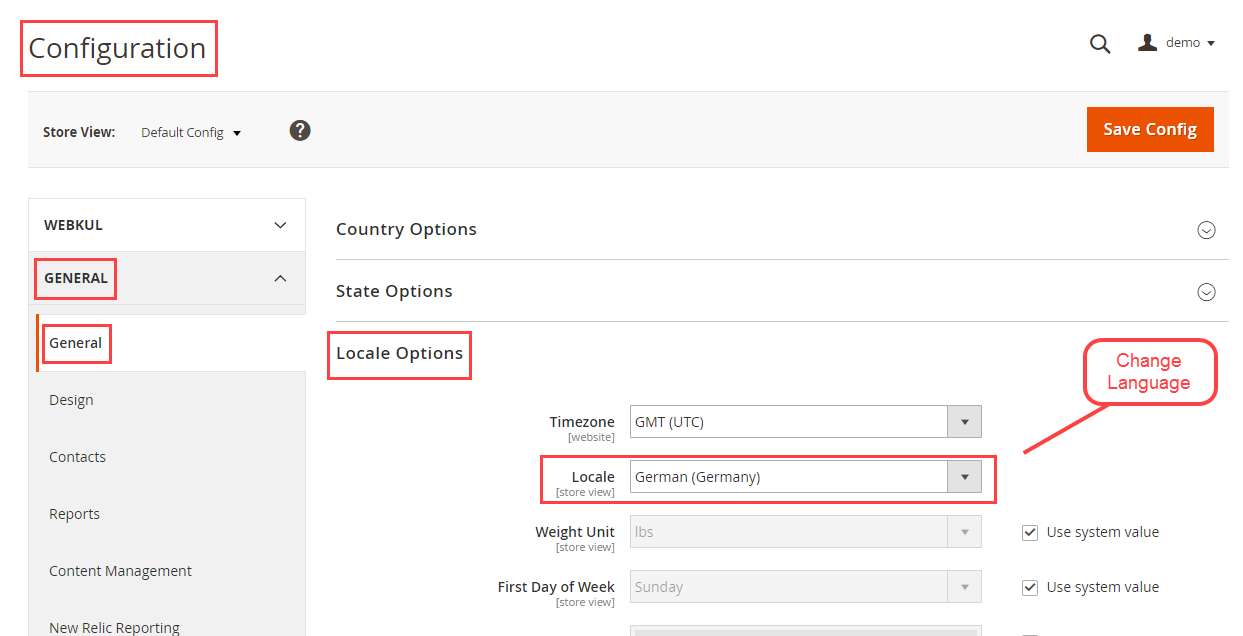
For Multilingual support, please navigate to Store>Configuration>General >Locale Options. And select your desired language from the Locale option.
Language Translation
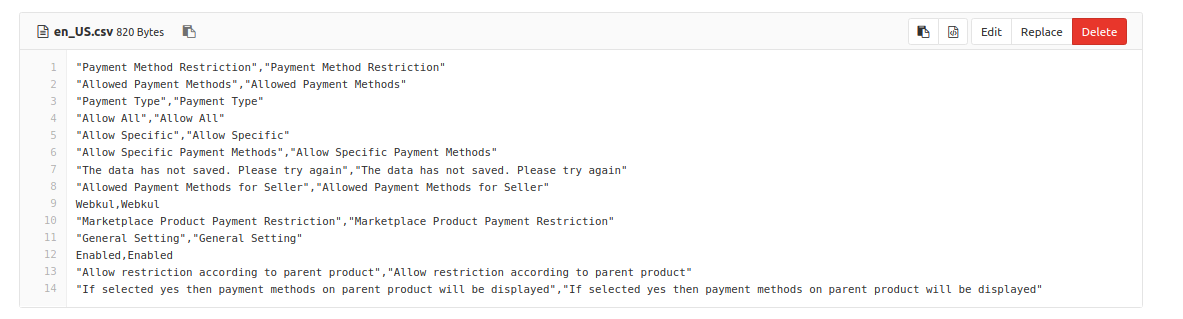
Moreover, For module translation, navigate to the following path in your system app/code/Webkul/MpProductPaymentRestriction/i18n/en_US.csv.
Open the file named en_US.CSV for editing as shown in the below screenshot.

And Then replace the words after the comma(,) on the right in the file with your translated words.
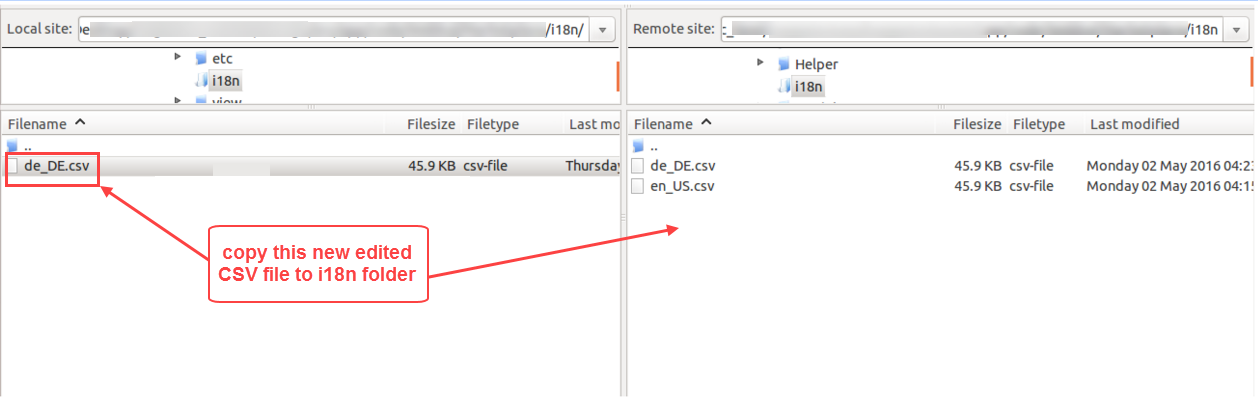
But After editing and translating the CSV file, you need to save the translated file name according to your region language and country code such as – de_DE.CSV.
Followed by uploading the translated file to the same folder from where you have obtained it. Now your module translation is complete.
Module Configuration of Magento 2 Marketplace Payment Method
But After the module installation, the admin can configure the module settings by navigating to the Stores -> Settings -> Configuration -> Webkul -> Marketplace Product Payment Restriction as shown below.

Here, the admin will:
- Enabled – Set the option to Yes if you want to display the allowed payment methods only on the frontend. Else set the option to No if want to display all the payment methods.
- However, allow restriction according to parent product – If set as Yes then the payment methods displayed of child products will be based on the allowed payment methods for the respective parent product. If set as No then payment method should be allowed for each child product separately.
- Allowed Payment Methods For Sellers – Choose the payment methods that want to enable at the frontend. The selected payment methods will be applicable to all the sellers and their products.
And, lastly hit the Save Config button to save the configuration successfully.
Assign Payment Methods To Products – Admin End
The admin can restrict the different payment methods for each product as shown below.

On the product edit page, the admin will have:
- Allowed Payment Type – The admin can select “Allow specific” for enabling selective payment methods or select “Allow all” for enabling all payment methods.
- Allowed Payment Methods – Choose the payment methods that wants to enable for that particular product.
And, lastly hit the Save button to save the product successfully. Note:
- The admin needs to configure the payment methods for each product individually.
- Admin can configure the payment methods for the admin and seller products as well.
- An admin can restrict the payment methods for the product types – Simple, Configurable, Virtual and downloadable.
- An admin can restrict the payment methods for the products which were existing before the installation of this module.
Assign Payment Methods To Sellers – Admin End
The admin can even restrict the different payment methods for each seller. For this, the admin will navigate to Marketplace Management -> Manage Sellers as shown below.

Here, the admin will select the seller to whom the admin wants to assign the payment methods. After selecting the seller, the admin gets navigated to the seller information page as shown below.

Under Payment Method Restriction, the admin can assign the Payment Type as:
- Allow all – It is used for all payment methods selection
- Use Default Configuration – The payment methods selected in the default admin configuration will be used.
- Allow Specific – The admin can select the payment methods from the listed methods.
Note: The seller can assign only those payment methods to their products which are been assigned to the sellers by the admin.
Assign Payment Methods To Products – Seller End
But the seller also can restrict the different payment methods for each product. For this, the seller needs to navigate to the product edit page as shown below.

On the product edit page, the seller will have:
- Allowed Payment Type– The seller can choose any specific payment method or can set payment type as “Allow All” to allow all payment methods
- Allowed Payment Method- Choose the payment methods that are needed to be enabled for that particular product.
And, lastly hit the Save button to save the product successfully. Note:
- The admin/seller needs to configure the payment methods for each product individually.
- The seller can restrict the payment methods for the product types – Simple, Configurable, Virtual and downloadable.
- Moreover, the seller can restrict the payment methods for the products which were existing before the installation of this module.
Front-End of Magento 2 Marketplace Payment Method
Now at the front-end, the customer can’t view the restricted payment methods while placing the order.
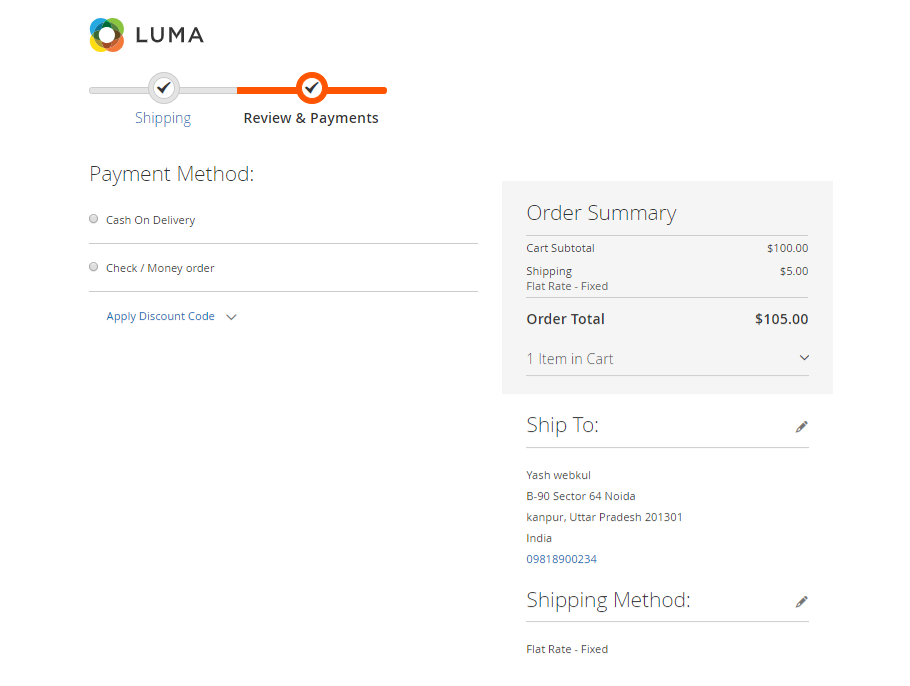
And accordingly, the customer will select the payment method when proceeding further for placing the order.
Case 1: What if the shopping cart has multiple products with different payment methods enabled?
It will check the common payment methods among the multiple products in the cart and accordingly will display them at the checkout.
However, that’s all for the Magento 2 Marketplace Payment Method Restriction plugin. Still, have any issue, feel free to add a ticket and in case of any queries or doubts mail us at [email protected]
Current Product Version - 5.0.2-p1
Supported Framework Version - Magento 2.0.x, 2.1.x, 2.2.x,2.3.x, 2.4.x

Be the first to comment.