After creating the world’s best marketplace plugin for Magento 2, we are now going to release Magento 2 Marketplace Responsive Template. This theme will support all screens either you are viewing your marketplace store site on iPhone, iPad, Android-based mobile devices, or small or big screen devices it will work very fine on all screens.
Note: The theme supports both, Magento 2 default platform and Webkul Magento 2 Multi Vendor Module as well. This means the theme can also work independently without installing the Webkul Marketplace extension.
Watch the below video tutorial to understand the extension workflow :
Features Of Marketplace Responsive Template
- It will adjust your complete template view in screen format.
- To adapt the responsiveness of Magento 2, we are not editing core templates or files, it’s a complete package.
- working with all third-party, modules having responsiveness.
- Easy to Make a review and contact the seller.
- The product image gallery is already included in the template means for product thumbnails you don’t need to increase the area. The gallery will display the rest of the product images in the carousel format.
- Admin can mark any product as “Featured” and “Seller’s Pick”.
- Admin can choose the custom product labels for Products.
- Mega menu supported.
- Retina-based product zooming.
- Complete flat design.
- Social media sharing option included.
- Lightbox product thumbnail zoom.
- Working with all Magento 2 marketplace add-ons and modules.
- Admin can enable and disable the RTL(Right to left) features.
Also, you can check out our Adobe Commerce Theme/Template Development Services.
Installation Of Magento 2 Marketplace Responsive Template
Customers will get a zip folder and they have to extract the contents of this zip folder on their system. The extracted folder has an src folder, inside the src folder you have the app folder. You need to transfer this app folder into the Magento 2 root directory on the server as shown below.

After the successful installation, you have to run these commands in the Magento 2 root directory.
First command- php bin/magento setup: upgrade

Second Command – php bin/magento setup:di: compile
Third Command – php bin/magento setup:static-content:deploy
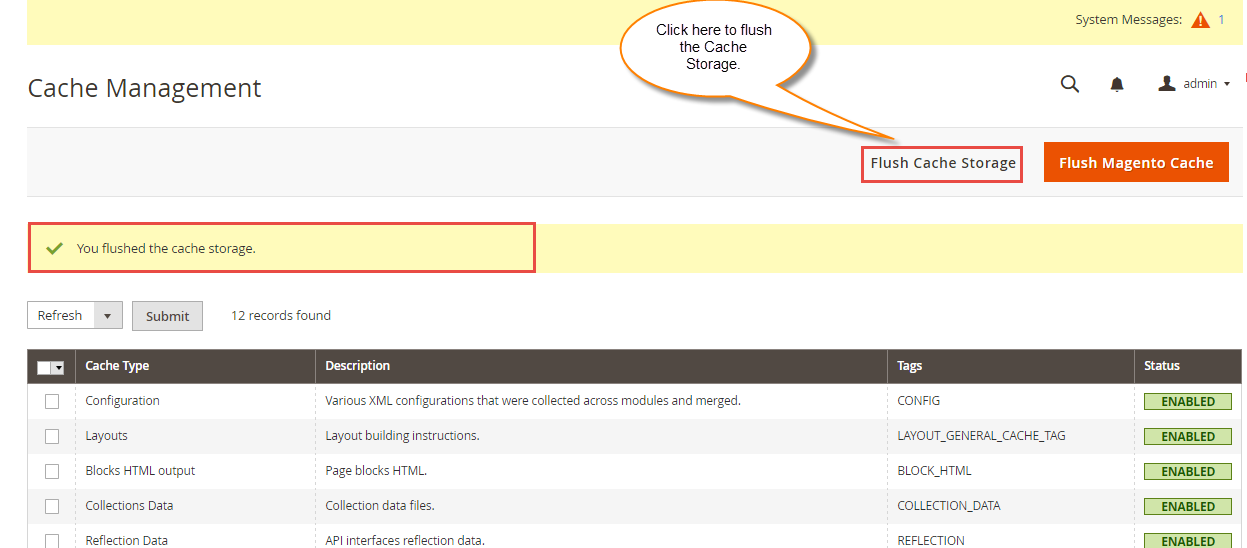
After running the commands, you have to flush the cache from the Magento admin panel by navigating through->System->Cache management as shown below.
Configuration For Multi-lingual Support
For multilingual support, the admin will navigate through Store->Configuration->General ->Locale Options and select the locale as German (the language into which the admin wants to translate his store content).

Magento 2 Marketplace Responsive Template Translation
If a user wants to translate their module from English to German then they need to follow the path app/code/Webkul/Agorae/i18n in their unzipped Magento 2 Agorae folder and will get a CSV file with name “en_US.csv”. Now they will rename that CSV as “de_DE.csv” and translate all right side content after the comma in the German language. After editing the CSV, save it and then upload it to the path app/code/Webkul/Agorae/i18n where they have installed Magento 2 on the server. The module will get translated into the German Language. It supports both RTL and LTR languages.
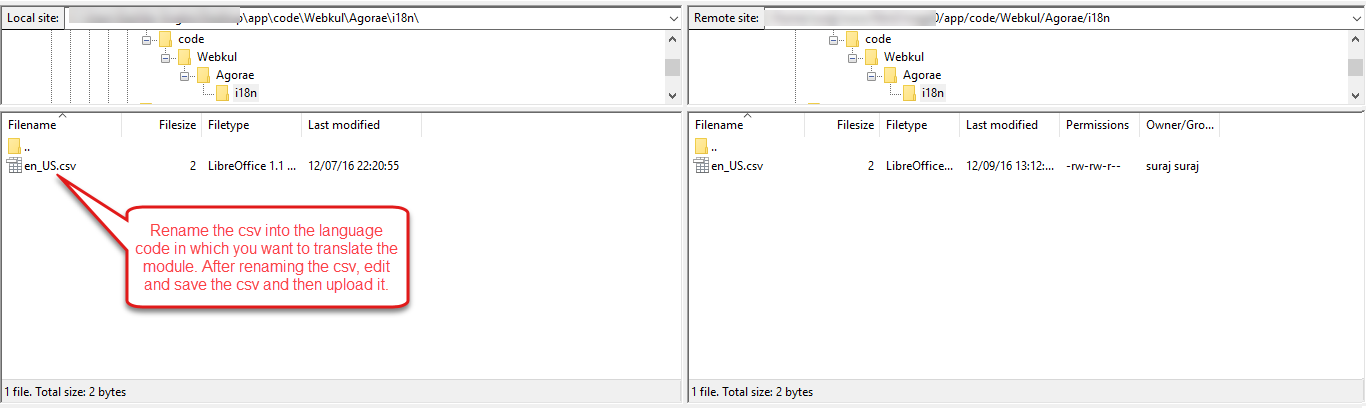

The user can edit the CSV like the image below.
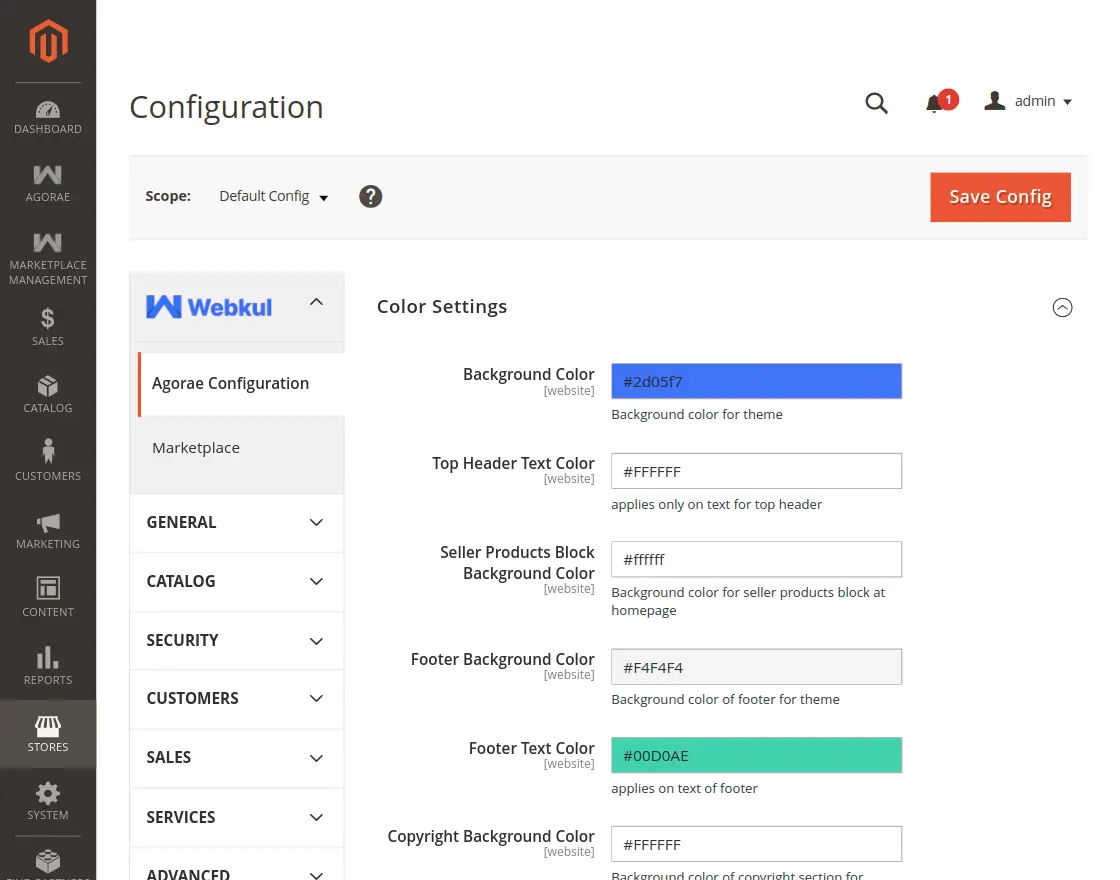
Configuration Of Magento 2 Marketplace Responsive Template
Admin will configure the Marketplace Responsive Template under Stores > Configuration > Agorae. Here the admin will configure the settings for the theme as shown below in the snapshot.


After this the admin will navigate through -> Content ->Design ->Configuration to set the layout for the theme.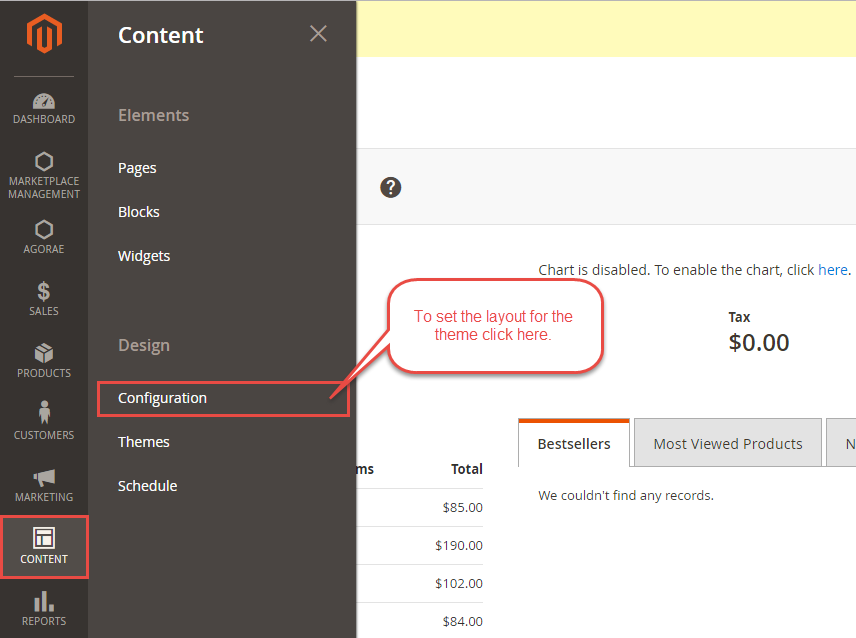
Here the admin will click on the edit button, after which he can apply a different theme and select the layout for the theme.
After clicking the edit, another page will open up where the admin can select any installed theme to apply as shown below in the snapshot.
Product Settings
Admin can mark any product as “Featured” and “Seller’s Pick” and choose custom product labels for the products.

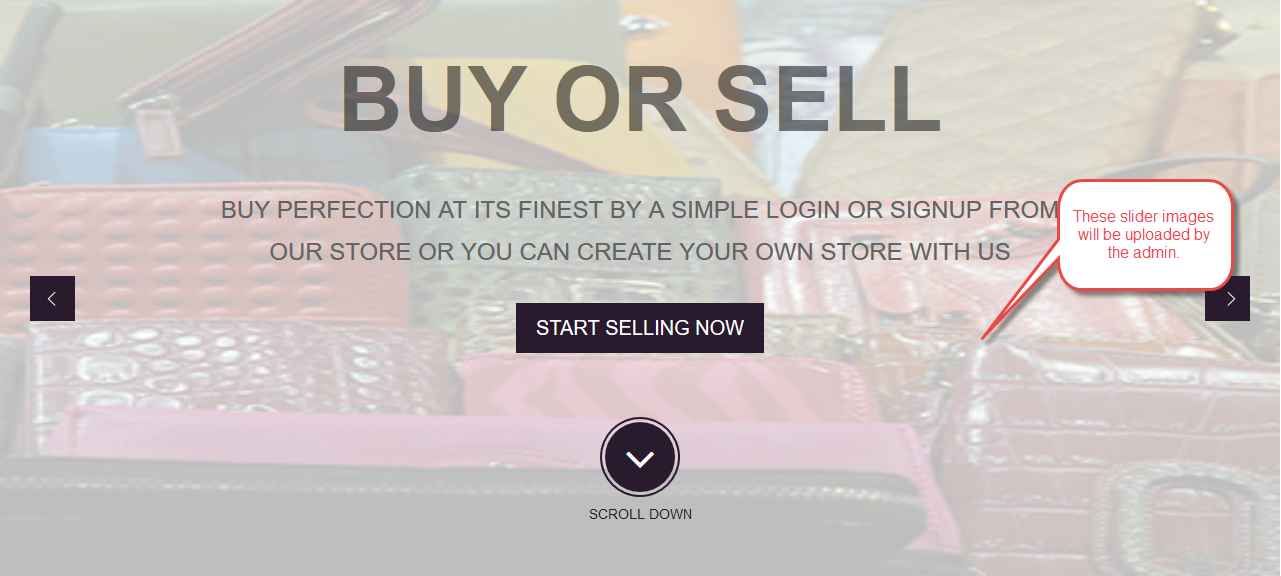
At the homepage, the user can view an attractive slider and this can be configured by the admin from the backend.
NextJS provides ultra-fast speed due to server-side rendering and excellent image optimization using Magento 2 Multi Vendor NextJS Theme.
Admin will navigate through Agorae->Manage Slider Images to set the images for the slider as shown below in the screenshot.

Now the admin will click on the “Add Image For Slider” to add the images for the slider as per the below screenshot.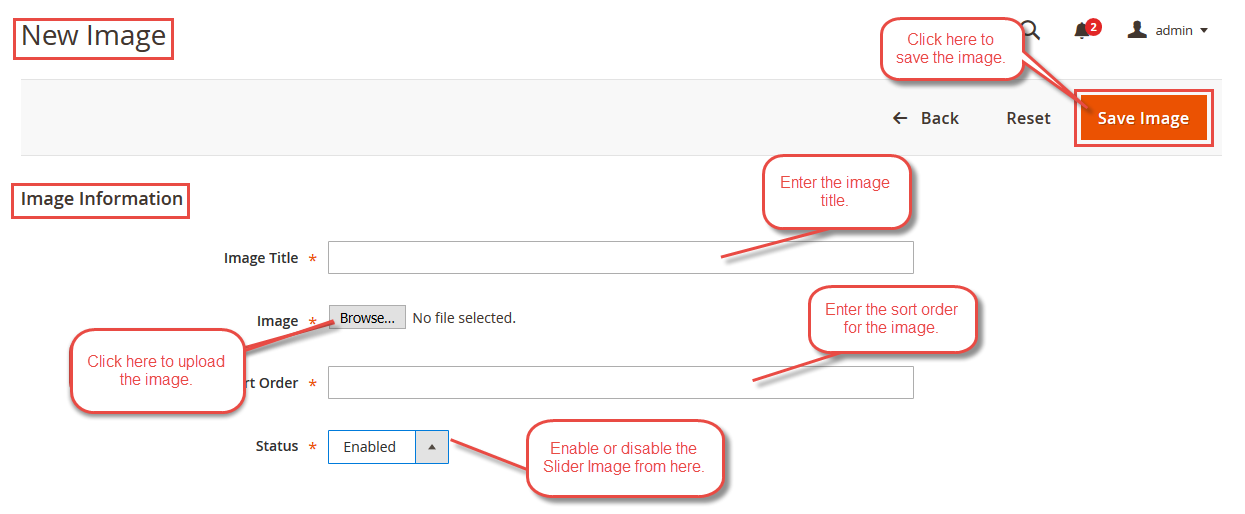
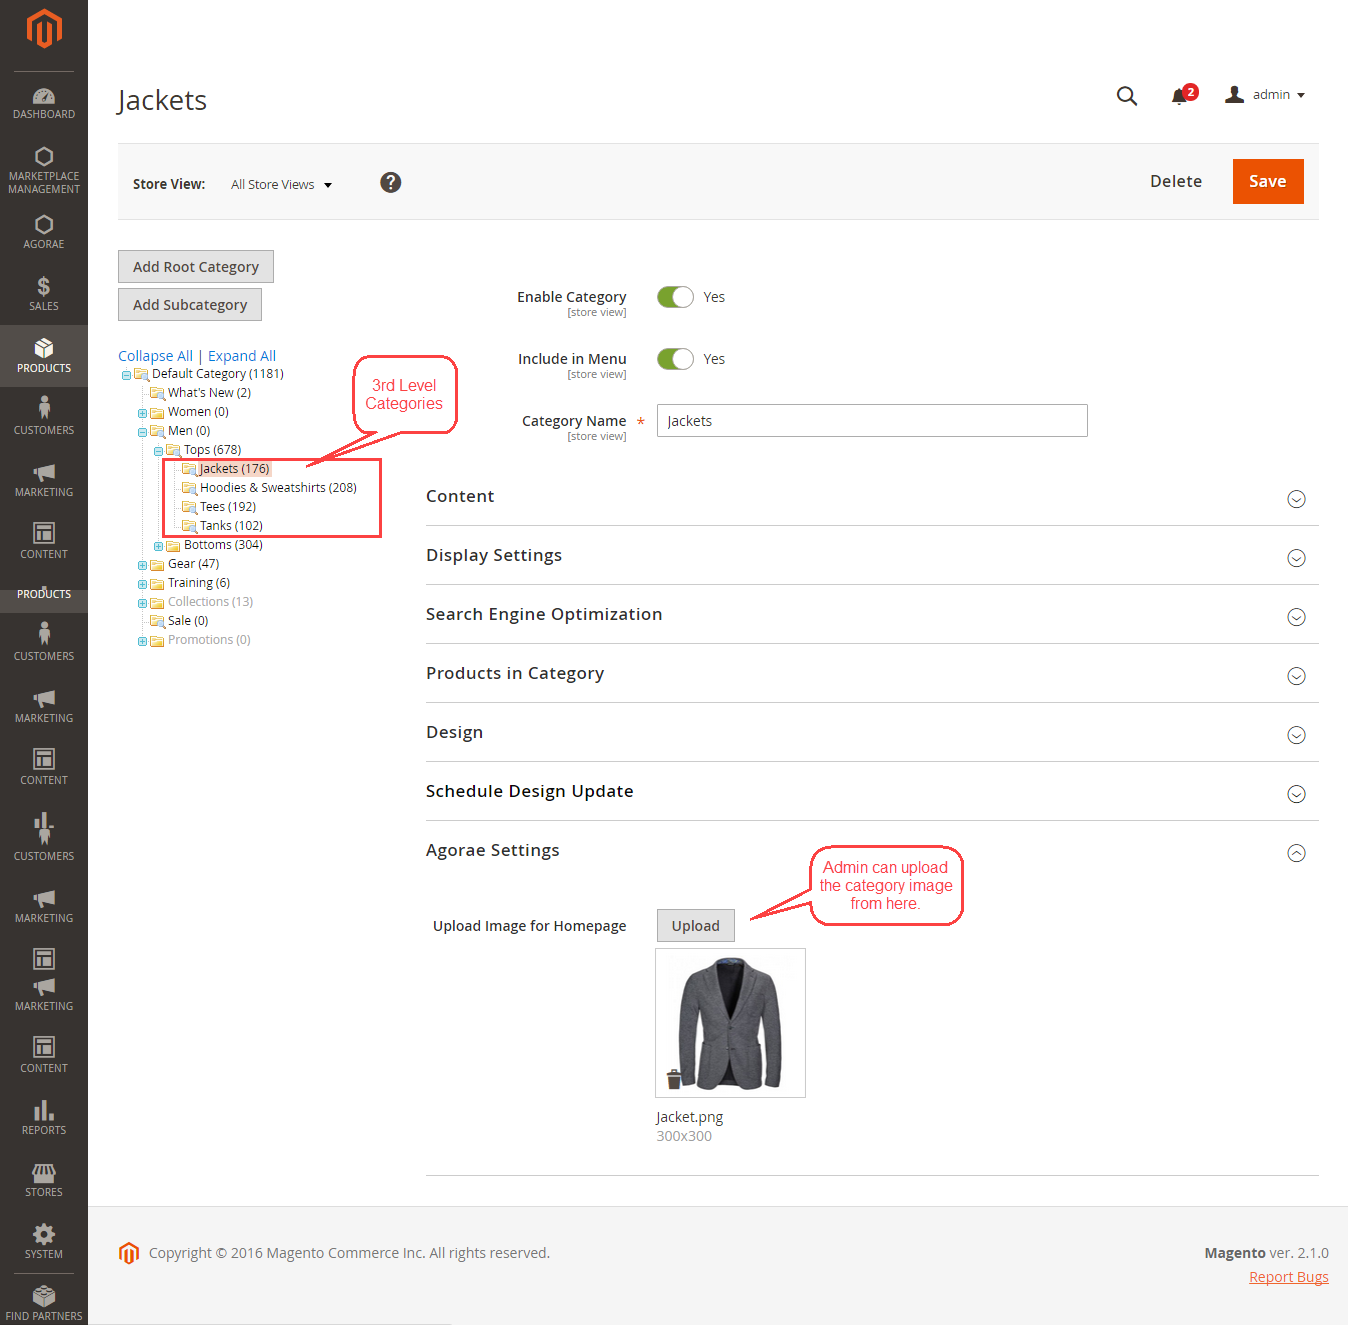
Now let us explain how the admin can set images for various level of categories from the admin panel.
In the backend, admin can see top two first level category like the below image.
The third level category will display on the homepage like the image below.
Top third level categories will display on the homepage. Admin will also choose thumbnail images for those categories which will appear on the homepage.
After the third level of categories, top four products of Marketplace will be displayed as shown below in the snapshot.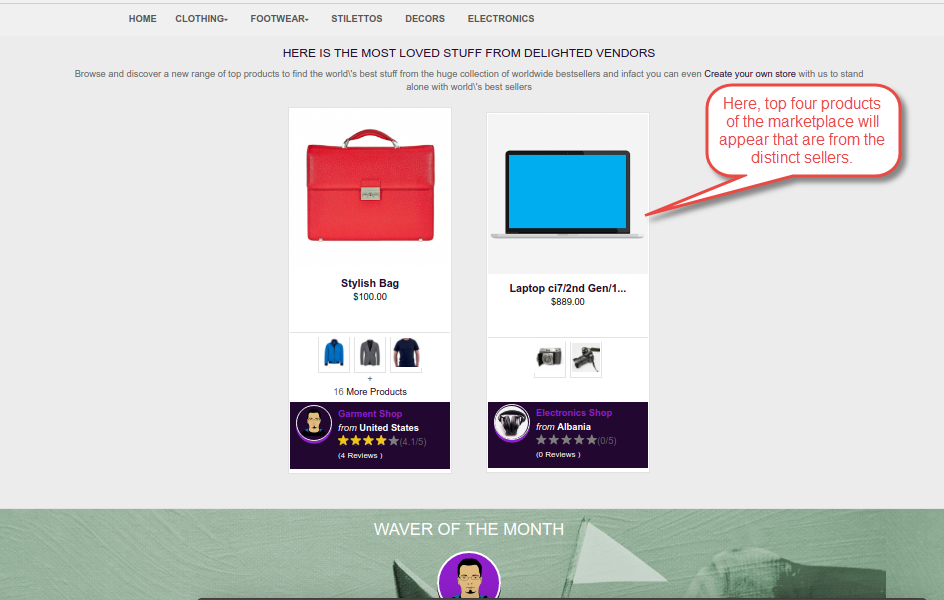
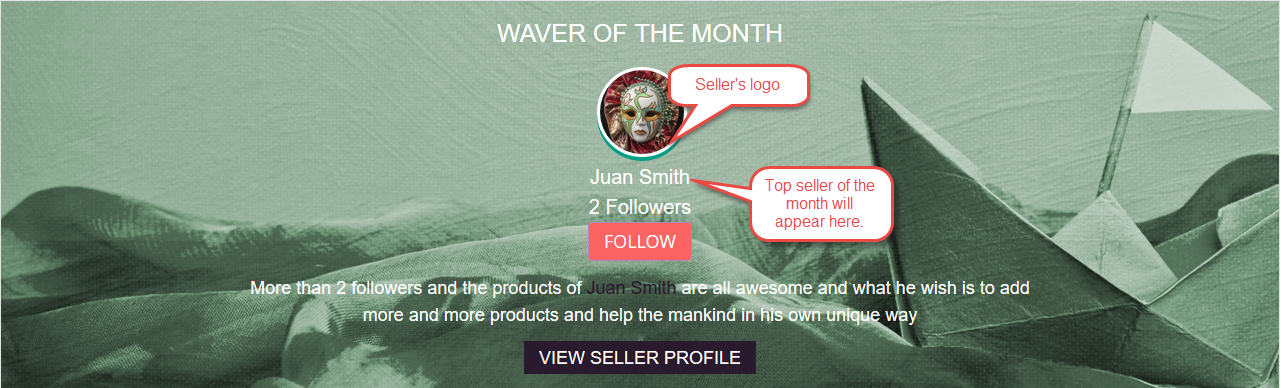
At the end, top seller’s logo and name will be displayed. The logo which seller sets at their profile, that logo will appear on the homepage and their name.
Agorae Home Page

On the product page, you can see the most popular products with Seller details. You can start your shopping from here. In above screenshot, you can see the seller who has sold out their maximum product. Here you can see the different categories at the home page with seller information and most loved stuff from delighted sellers.
Here you can see the seller details on the product page.

Category Page Grid View
Here you can see a Grid view of category page with Seller Information, Wishlist, and the Comparable Products.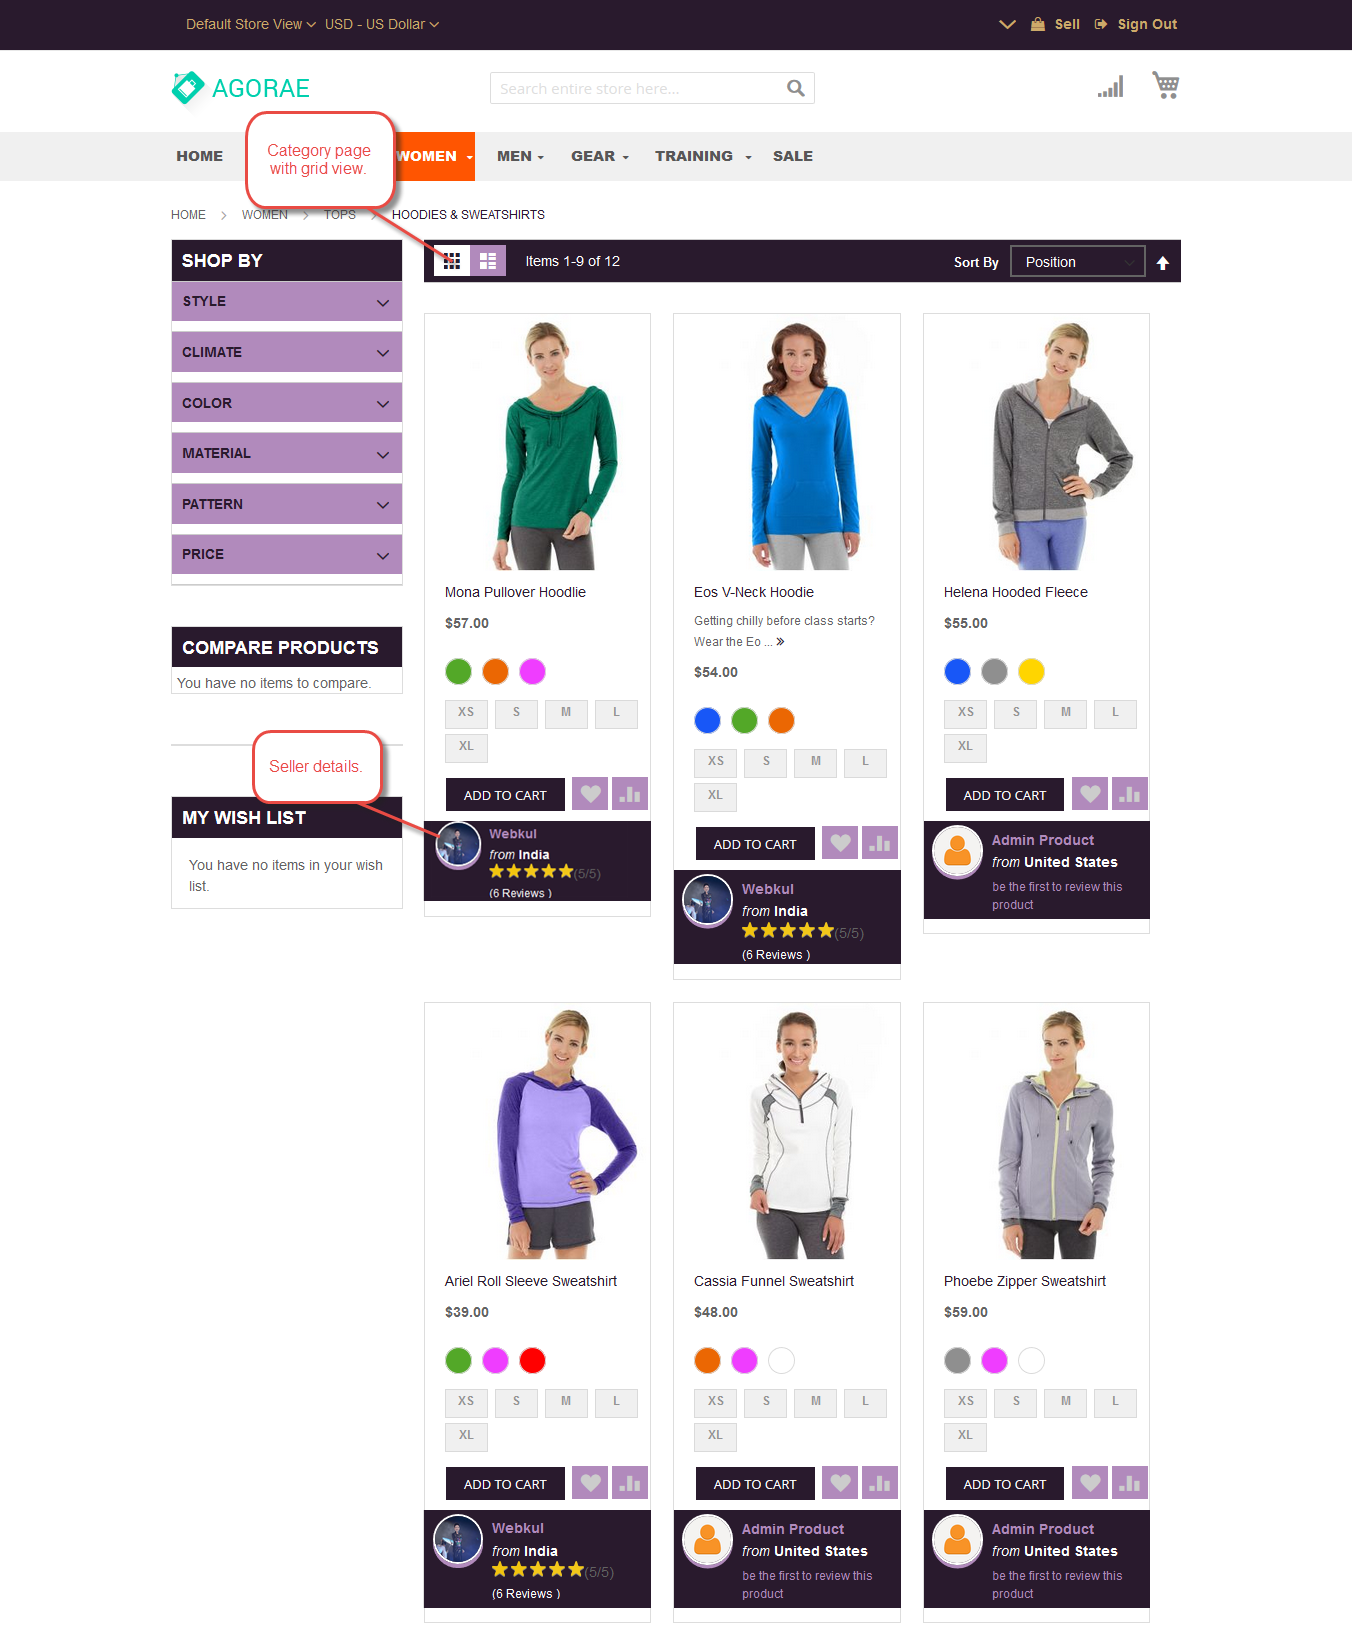
List view of category page with Seller Information looks like this screenshot.
You can see attractive product cart basket at the home page like this screenshot. Here the customer can see their products in the cart basket and from here they can redirect to cart page and proceed to checkout.

Mega Menu
Here you can see the Mega Menu appearing under the Main category – “Women”. The Main category has it’s image and the sub-categories also have their identifiable images.
Using this field you can easily login to your account by entering your valid details.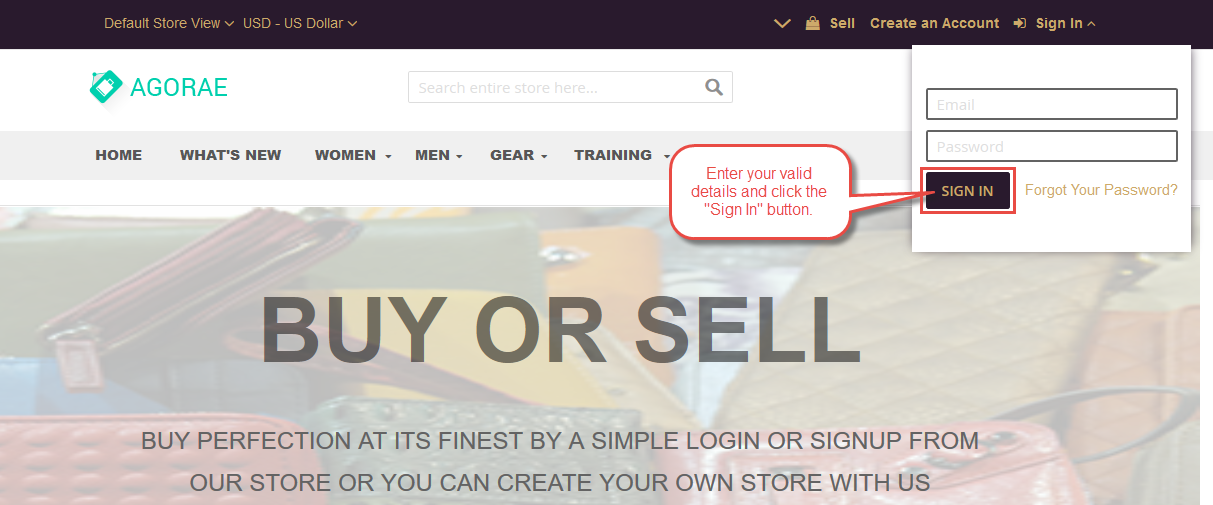
Using this field you can create your account without any difficulties.
Seller’s Collection Page
At the Seller’s Collection page, the user can see products, Seller’s Pick, Reviews, Make a Review and Contact Seller tabs. On the banner, the user can see the seller’s logo, name, and location.

The seller can upload the Company logo and Company banner from their Seller Profile, you can follow the path My Account -> Seller Profile and upload the logo and banner as per the below screenshot.![]()
Here the customer can view products for which seller had enabled the Seller’s Pick while adding products.
At the front-end, Seller’s Pick is displayed like this image.
How to Add Product Labels
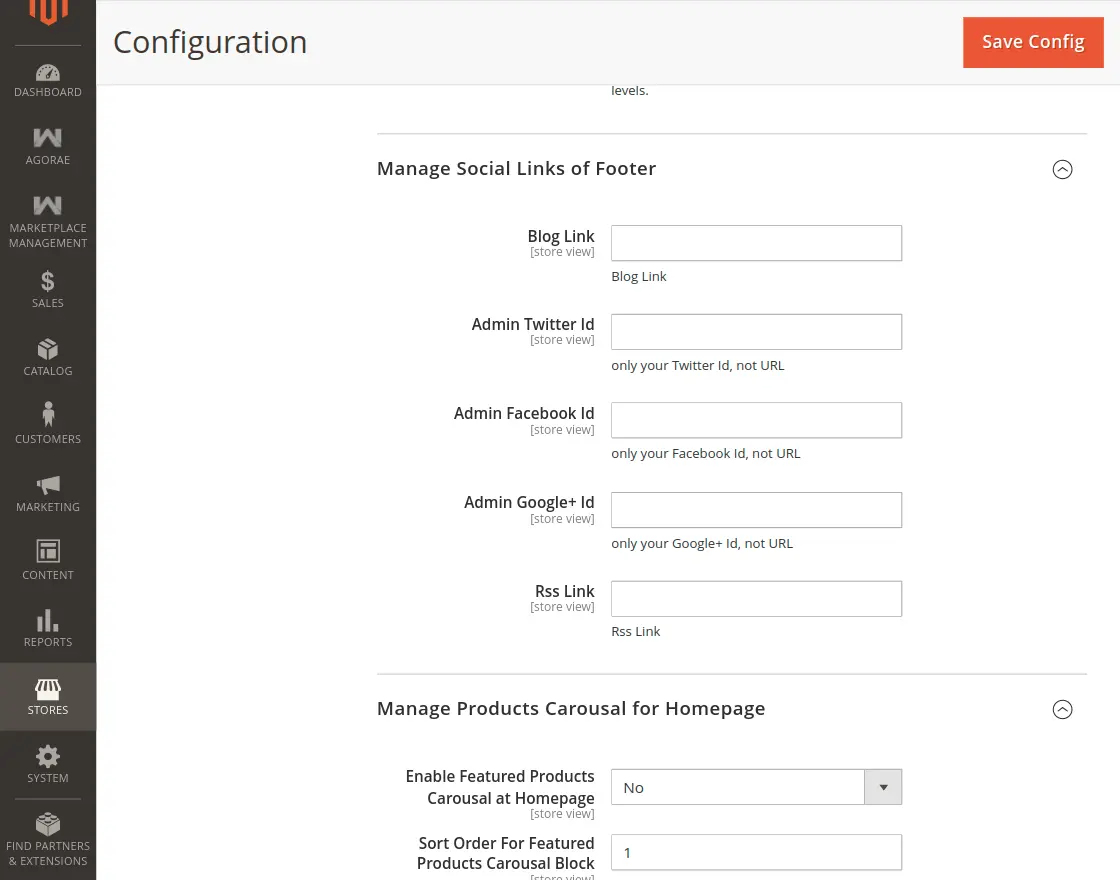
From the backend, the admin will select and upload various labels for products under Stores > Configuration > Agorae >Manage Product Images as shown below in the snapshot, and also enable the Right-to-left features under Store > Configuration > Agorae > Enable RTL to support languages that are written from left to right. 
On the front end, the seller can choose labels for their products while adding products.
When the admin enables RTL features a product will look like this as shown in the below screenshots.


Support Default Magento 2 Agorae Theme
Now the Agorae theme also supports with default Magento 2.
Home Page

Category Page

Product Page

Customer Registration Page

Support
For any technical assistance please raise a ticket or reach us by email at [email protected].
Thanks for Your Time! Have a Good Day!
Current Product Version - 5.0.2-p1
Supported Framework Version - Magento 2.0.x, 2.1.x, 2.2.x,2.3.x, 2.4.x

php bin/magento setup:upgrade
[MagentoFrameworkExceptionSessionException]
Area code not set: Area code must be set before starting a session.
[MagentoFrameworkExceptionLocalizedException]
Area code is not set