Introduction
Laravel Multi Vendor Marketplace Extension converts your Bagisto Store into a complete online marketplace store.
Laravel Marketplace Module allows sellers to manage their Products, Order shipments, Payouts, Shop Profile, and every standard marketplace feature.
The Laravel Multi-vendor Marketplace module also supports all the Bagisto templates and themes and it will be compatible with responsive web designs.
Installation of Laravel Multi-Vendor Marketplace
Customers will get a zip folder after purchasing the extension.
After that, Unzip the respective extension zip and then merge “package” folder into the project root directory.
Goto composer.json file inside the Bagisto root directory and add the following line under ‘psr-4’.
"Webkul\\Marketplace\\": "packages/Webkul/Marketplace/src"
In the bootstrap/providers.php
Webkul\Marketplace\Providers\MarketplaceServiceProvider::class,
Run the following commands to complete the setup:
composer dump-autoload
php artisan marketplace:install
php artisan optimize:clear
After following these steps, the Bagisto Marketplace Extension should be successfully installed and ready for use in your Bagisto v2.3.7 project.
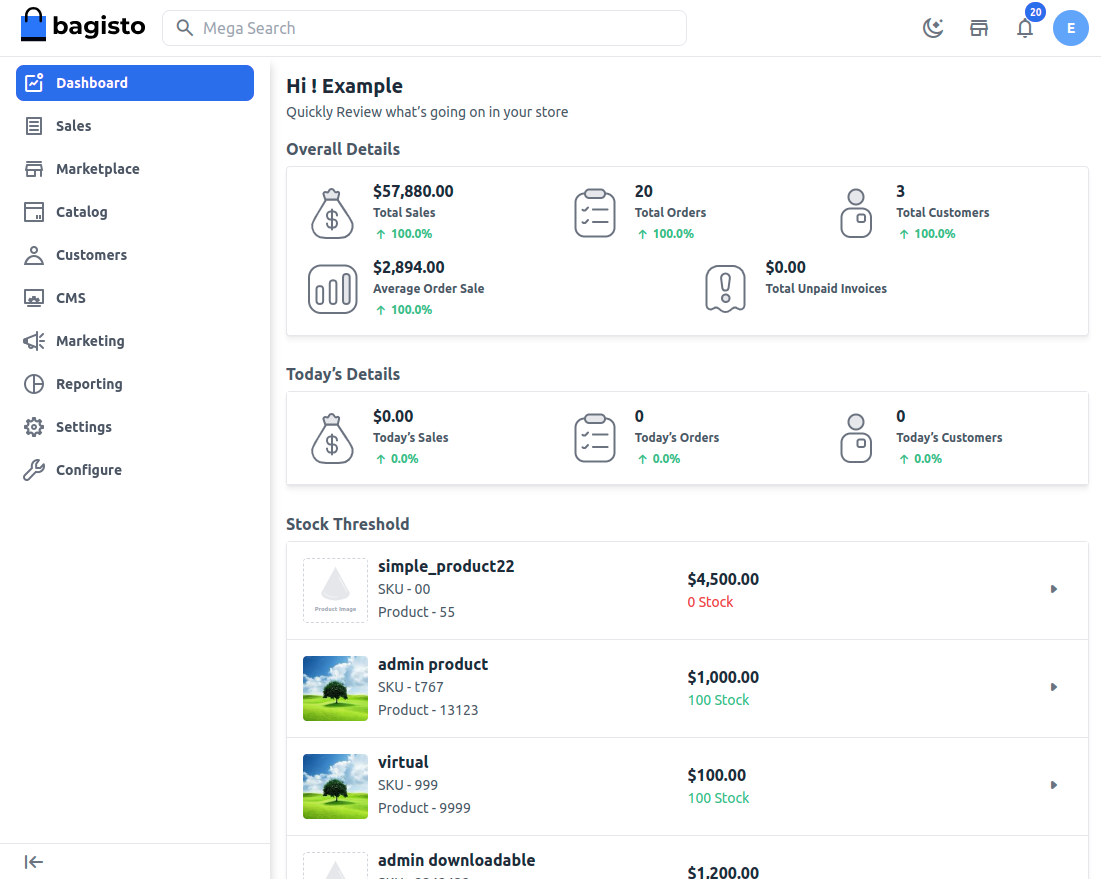
You will also see the Marketplace icon on the left-hand side in the menu bar.
Features
- Individual Seller/Vendor Profiles: Each vendor enjoys a personalized micro site within the marketplace, enhancing their brand identity.
- Customization Options: Sellers can showcase their brand with banners and shop logos on their profiles, adding a professional touch.
- Product Management: Sellers can easily view and manage their product listings, streamlining their operations in Laravel Multi Vendor Marketplace
- RMA (Return Merchandise Authorization): The customer/Guest is in the process of returning a product to receive a refund, a replacement, or to cancel the order request within the stipulated time period.
- Attribute-Based Seller Form Fields: Seller form fields are now attribute-based and fully customizable from the admin panel.
- Data Bulk Upload: Sellers can use CSV or XLS files to upload/delete and update their products in bulk. This supports all product types i.e., Simple, Configurable, Bundled & Grouped products except Virtual and downloadable products.
- Dedicated Product Collections: Each seller’s products are organized neatly in their individual product collection pages, enhancing the shopping experience.
- Feedback and Rating System: An interactive star rating system allows customers to provide feedback and rate sellers directly from their shop pages.
- Seller Support: A direct contact channel is provided for customers to reach out to sellers with queries or concerns.
- Seller Subscription Management – Admins can create customizable subscription plans for sellers, defining access levels and permissions based on business requirements.
- Product Assignment: Admins have the capability to assign products to sellers, facilitating product diversification.
- Seller Autonomy: Sellers can also self-assign products and manage their inventory.
- Interactive Seller Dashboard: A comprehensive dashboard provides sellers with real-time insights into their performance.
- Inventory Management: Sellers can check stock availability directly from their product listings.
- Moderation and Approval: Both vendors and admin benefit from moderation and approval features, maintaining marketplace integrity.
- Module Control: Admins can easily enable or disable the marketplace module as needed.
- Attractive Landing Page: A visually appealing landing page showcases the top four sellers, driving engagement.
Additional Features
- Customizable Shop URLs: Sellers have the flexibility to edit shop URLs for their profile pages, About Shop sections, and policies.
- Bulk Payout Management – Admins can process and pay multiple payment requests from multiple sellers in a single, streamlined workflow.
- Seller Profile Management: Admins can efficiently manage seller profiles, ensuring consistency and quality.
- Multilingual Support: All languages, including right-to-left languages like Hebrew and Arabic, are fully supported.
- Product Management: Sellers can edit and delete their products directly from their panels.
- Earnings Tracking: A dedicated earnings section provides sellers with detailed earning information by date, month, and year.
- Transaction Reporting: Sellers have access to transaction reports, enhancing financial transparency.
- Refund Tracking: Sellers can easily check the status of refunded orders.
- Currency Flexibility: The extension supports all currencies, ensuring global compatibility.
- Rule Support: Cart and catalog rules are seamlessly integrated into the marketplace.
- Rich Media Integration: Product videos can be added to listings, enhancing product presentation in Laravel Multi Vendor Marketplace.
- Inventory Management: Out-of-stock products are clearly indicated for better inventory control.
- Product Diversity: Sellers can create various product types, including bundles and grouped products, offering customers a diverse range of options.
- Product Type Control: Admins have the ability to define which product types sellers are allowed to create or assign, ensuring consistency across the platform.
- Profile Score: A profile score is visible on the seller dashboard, indicating how much of their profile information is completed.
- Custom Seller Attributes: Admins can create custom attributes for sellers and decide where each field should be visible or hidden.
- Additional Seller Information: Custom attributes allow admins to collect additional information during seller sign-up.
- Attribute Visibility Control: Admins can choose to show or hide seller attribute information on the public profile page and toggle visibility on the seller’s profile page.
- Attribute Groups: Admins can create attribute groups and assign attributes to them. The seller edit page is now dynamically prepared based on grouping.
- Locale- and Channel-Based Attributes: Admins can create locale- and channel-based attributes, enabling sellers to provide values specific to different regions and channels.
More Features
- Profile Information: Seller profiles include detailed information such as allowed product types, categories, payment methods, and shipping methods, providing clear guidelines.
- Product Reviews: Sellers can view customer reviews of their products through a dedicated menu, making it easier to monitor feedback.
- Seller Reviews: Sellers can access reviews about their store or services through a dedicated menu.
- User\Roles and Permissions: Sellers can create custom roles with specific permissions (e.g., access control lists) and assign them to sub-sellers, allowing granular management of actions.
- Sub-Sellers Management: Sellers can create sub-sellers, assign roles, and delegate store management tasks effectively.
- Communication Tools: Sellers and admins can communicate directly with each other, share attachments, and manage announcements or issue resolution through the admin panel. Additionally, customers can also communicate directly with sellers for queries, support, and order-related discussions.
- Comprehensive Reporting: Sellers now have access to detailed reports about their store.
- Including sales performance, commissions, top customers, top-selling products, and more, similar to admin-level reporting.
- Flag System: Admins have a dedicated page to view product flags and seller flags.
- Red Flag System: Admins can set limits for specific seller activities. If a seller exceeds these limits, a red flag is displayed on their collection page, alerting the admin team.
- Unapproved Product Preview: Sellers and Admins can preview unapproved products directly from the product edit page on both the Seller and Admin panels.
Note: Make sure the Marketplace Status is enabled before using the RMA.
Multi-Vendor Marketplace Configuration
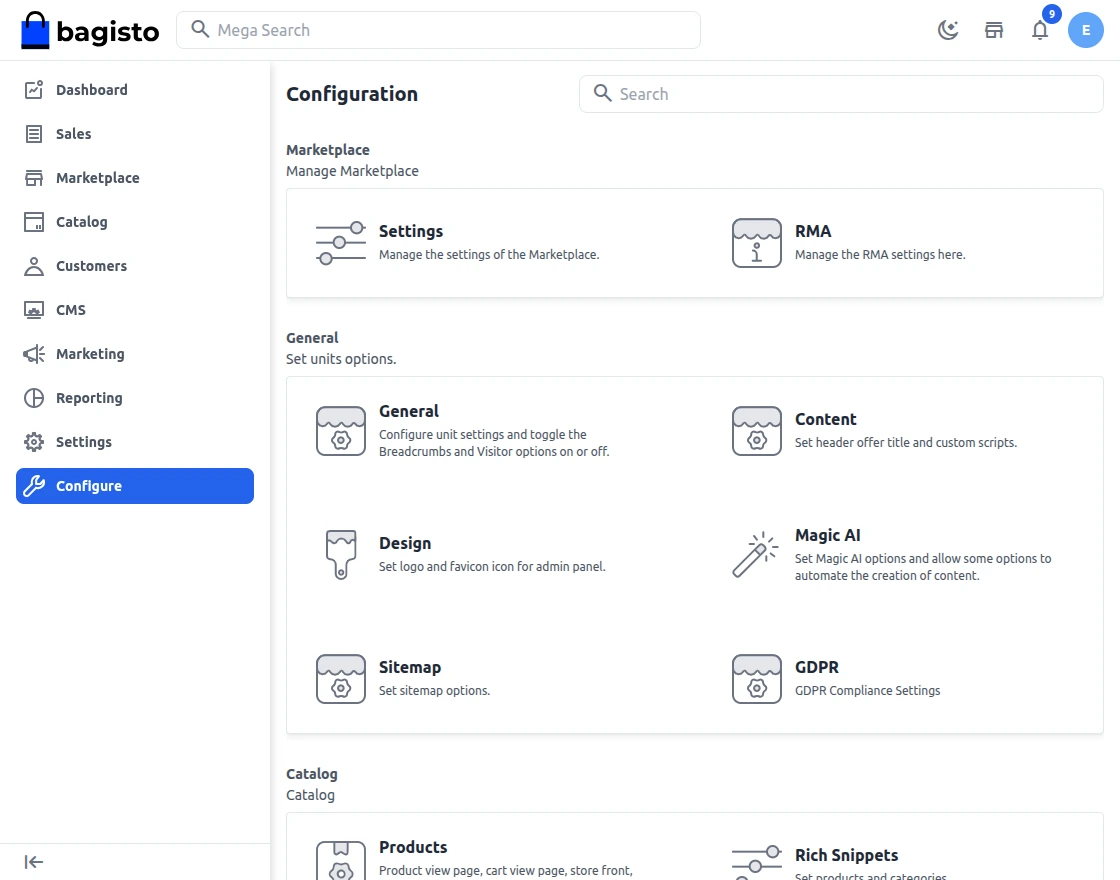
Once you are on the Admin dashboard, click the Configure option on the left-hand side in the menu bar following which you will be redirected to the Marketplace Configuration page.
Here you will be able to see the module version:
General Settings
Above you will get settings to choose channel and locale. Based on that you can also change the configuration of the marketplace.
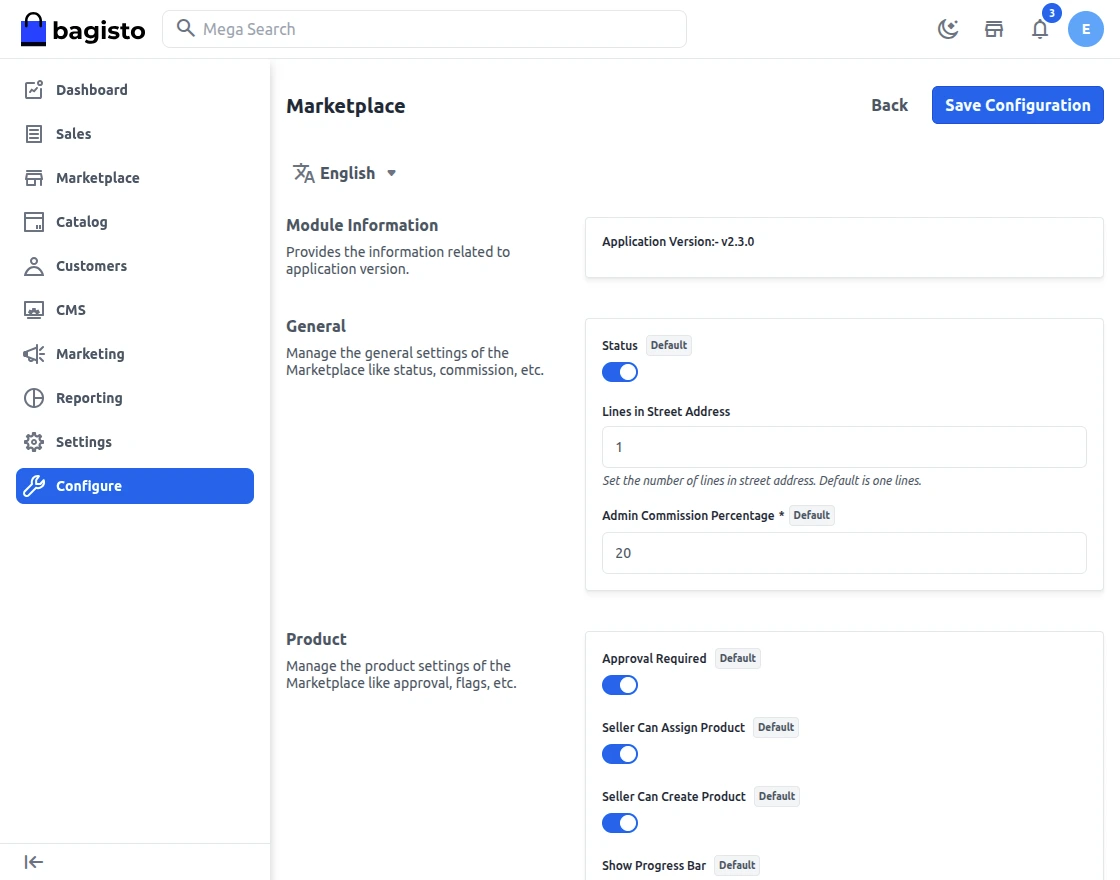
Let’s go through the Configuration Settings one by oneLet’s go through the Configuration Settings one by one.
Status
To enable or disable the complete module functionality.
Line in Street Address
Now admin can define the lines of the address and then it will gets visible on seller’s profile.
Admin Commission Percentage
Here the admin defines to set the global commission % for sellers that will apply to all.
If the admin has set a global commission of 10% for every seller in the marketplace.
When a product is purchased admin will be earning 10% of the product cost as commission.
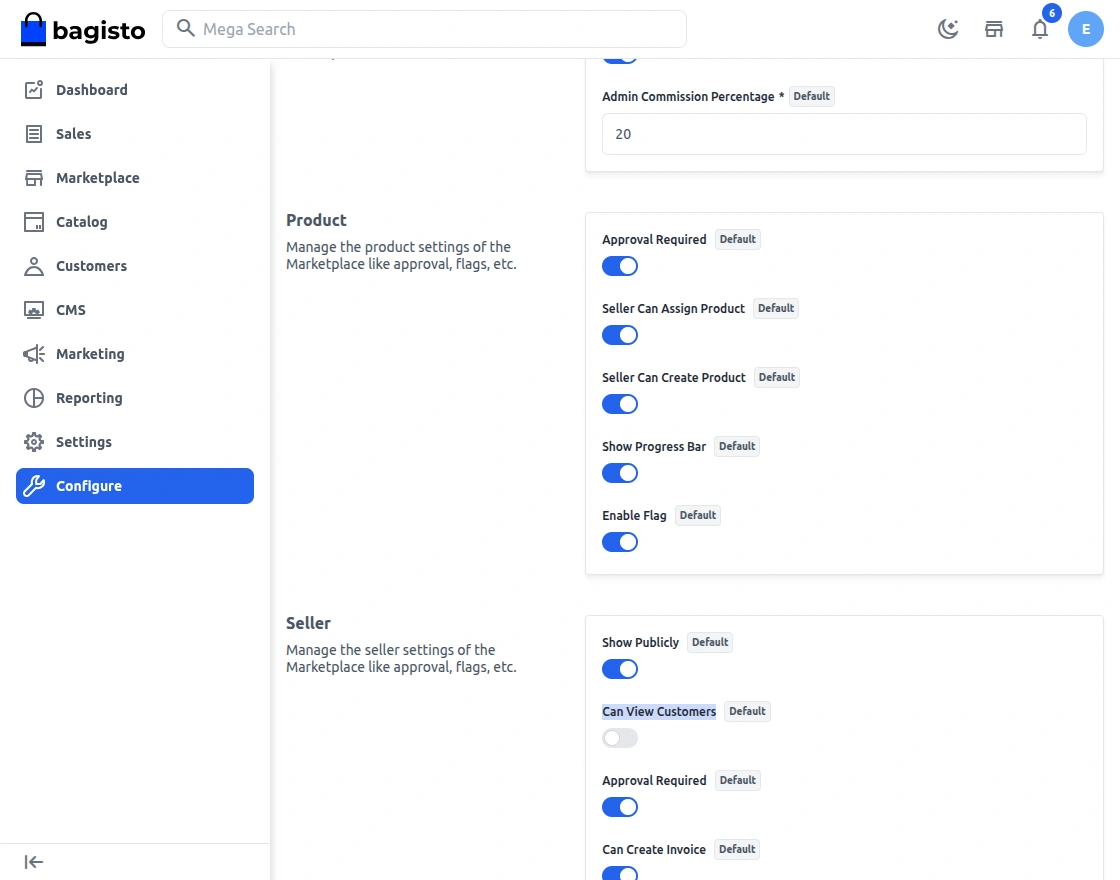
Seller can assign product
eSeller can assign the products from the seller end.
Seller can create product
Seller can create its own product from the seller end.
Show Progress Bar
The Progress bar will get visible on seller’s product edit page on seller’s end.
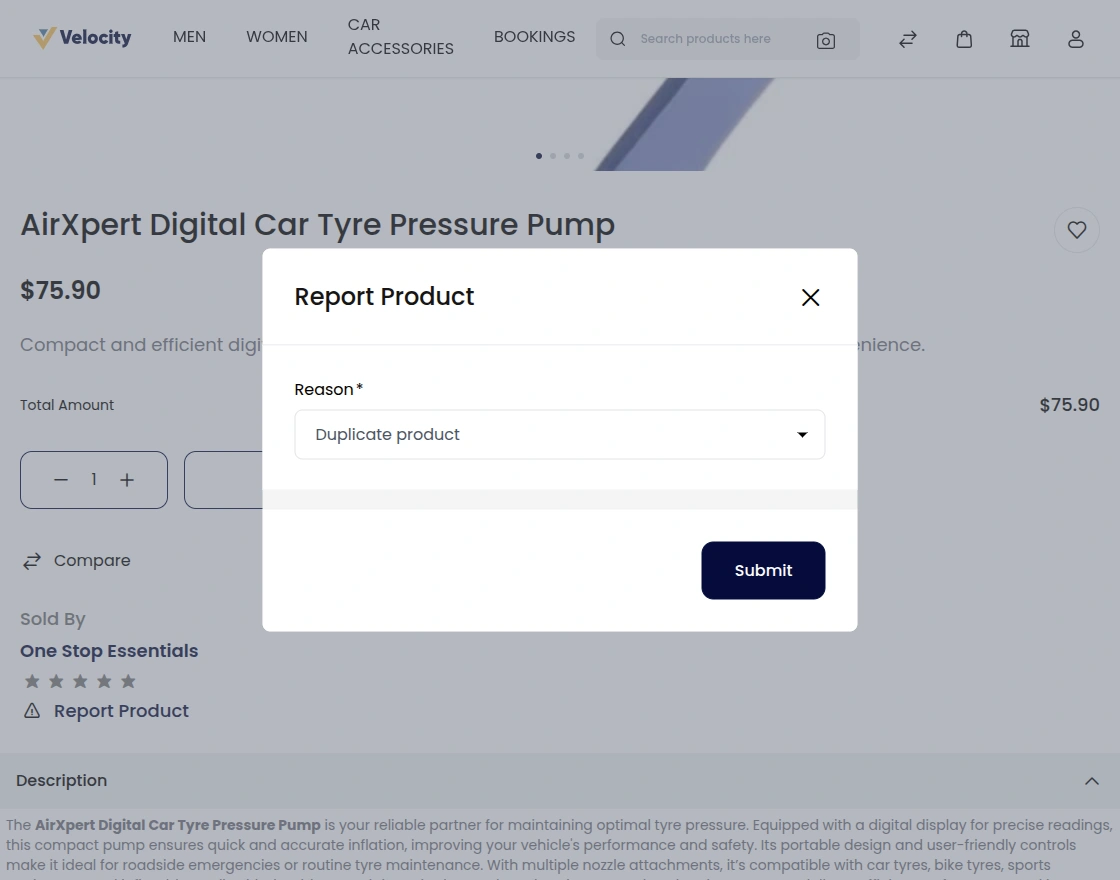
Enable Flag
Enable the option if you want to enable the product flag.
Condition:
1) Customer must be logged in
2) When the customer reports the flag on product then the customer needs to place an order
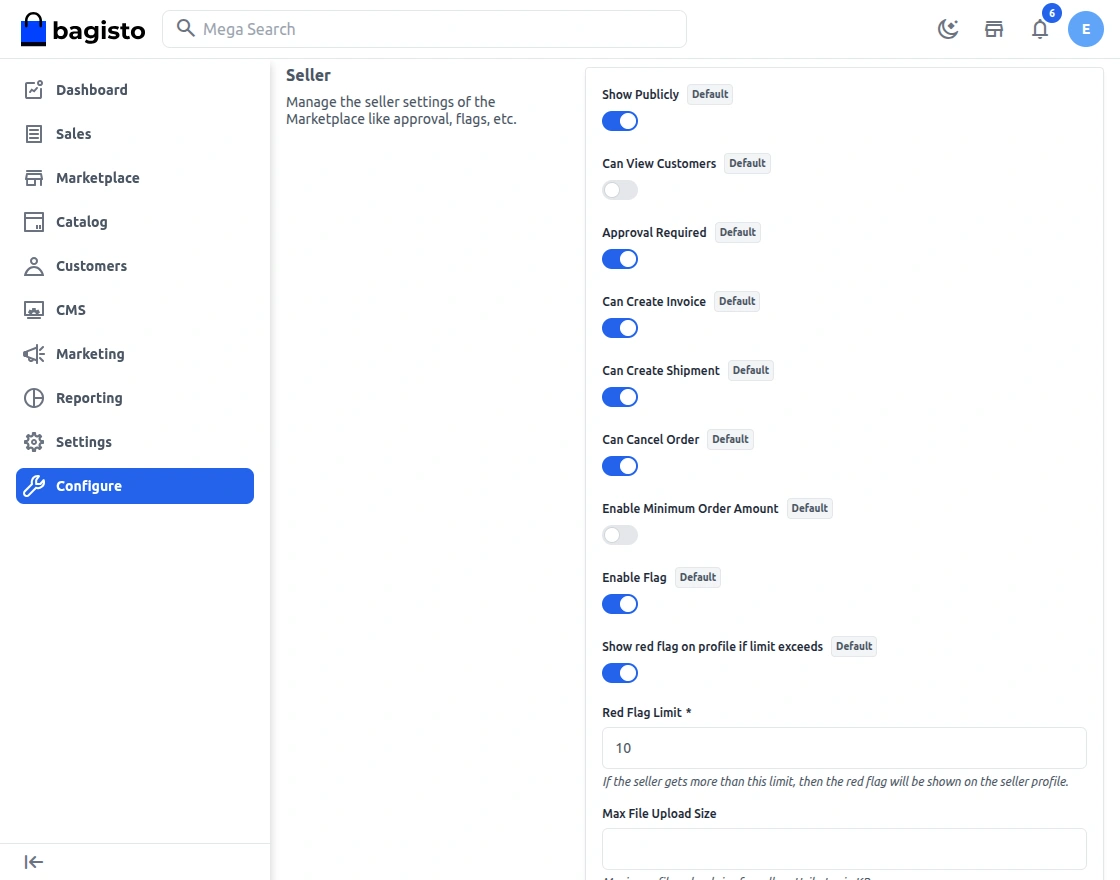
Seller

Show Publicly
The admin can enable this configuration to hide the seller’s shop page from being publicly visible on the ShopFront.
Can View Customers
The admin can enable this configuration to hide customer details from the seller panel.
Seller Can Cancel Order
Choose Yes in the setting if you want to give the seller permission to cancel order.
Enable Minimum Order Amount
Now, Enable the option if you want to enable minimum order amount for sellers.
Enable Flag
Enable the option if you want to enable the seller flag.
Condition:
1) Customer must be logged in
2) When the customer reports the flag on seller then the customer needs to place an order
Show Red Flag on Profile if limit exceeds
After setting up the limit and if limit gets increased it will show the red flag on seller profile page.
Here the admin defines to set the global commission % for sellers that will apply to all.
If the admin has set a global commission of 10% for every seller in the marketplace.
When a product is purchased admin will be earning 10% of the product cost as commission.
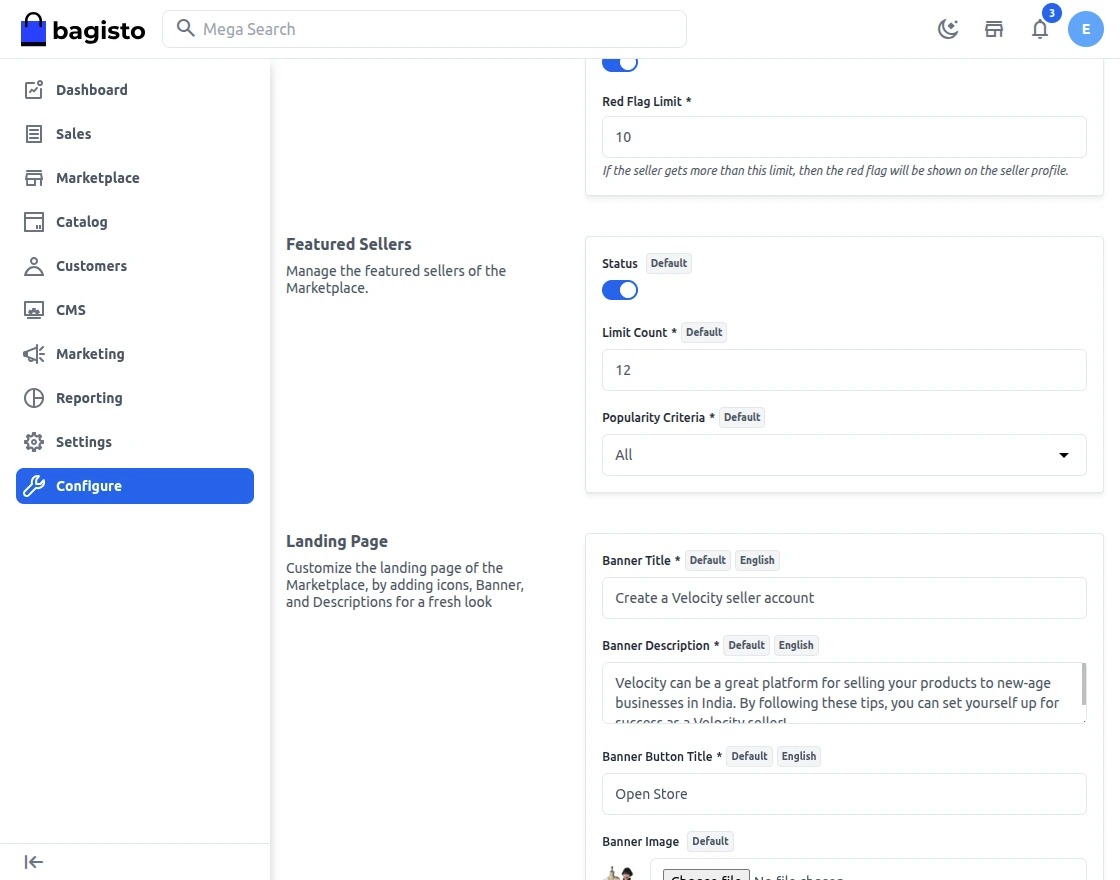
Featured Seller
Enable the configuration if you want to show the featured seller on the marketplace landing page.
Limit Count
After adding a certain limit you can set count of how much featured seller will be visible on the storefront.
Popularity Criteria
1) All –This allows the customers to see all other sellers
2) Maximum Orders – Customers can see the seller which have maximum number of orders.
3) Maximum Rating – Customers can see the seller which have maximum ratings.
4) Maximum Products – Customers can see the seller which have maximum products
5) Maximum Sale – Customers can see the seller which have maximum sale
Featured Sellers
The featured seller will gets visible on the marketplace landing page as shown in the image below.
Landing Page
Here are the settings for your Landing Page, where you can provide descriptive information and attract sellers to sell on your marketplace.
The landing page appears when you click Sell on your Frontend.

Let’s move on with each functionality.

Banner Title
Here you can give the main title to your landing page that will act as the main attraction for your seller.
Banner Description
Here you can provide the banner content that will appear on the banner image as provided.
Banner Button Title
Enter the title for the banner button.
Banner Image
Select the banner image for the front end.
Community Count
Add the community count here.
Business Hour
Enter the operating business hour here.
Payment Duration
Enter the payment duration here.
Serviceable codeSet the pin code for the serviceable area for easy shipments.
Feature Title
Set the feature image title here.
Feature Description
Enter the description for the feature section.


In the above-mentioned snapshot, you can see the Attracting Features list and you can check the complete product count in the store.
To set the journey page for the customers so they can go through with the states to become sellers.

After settings, customers can see the journey banner on the front end.

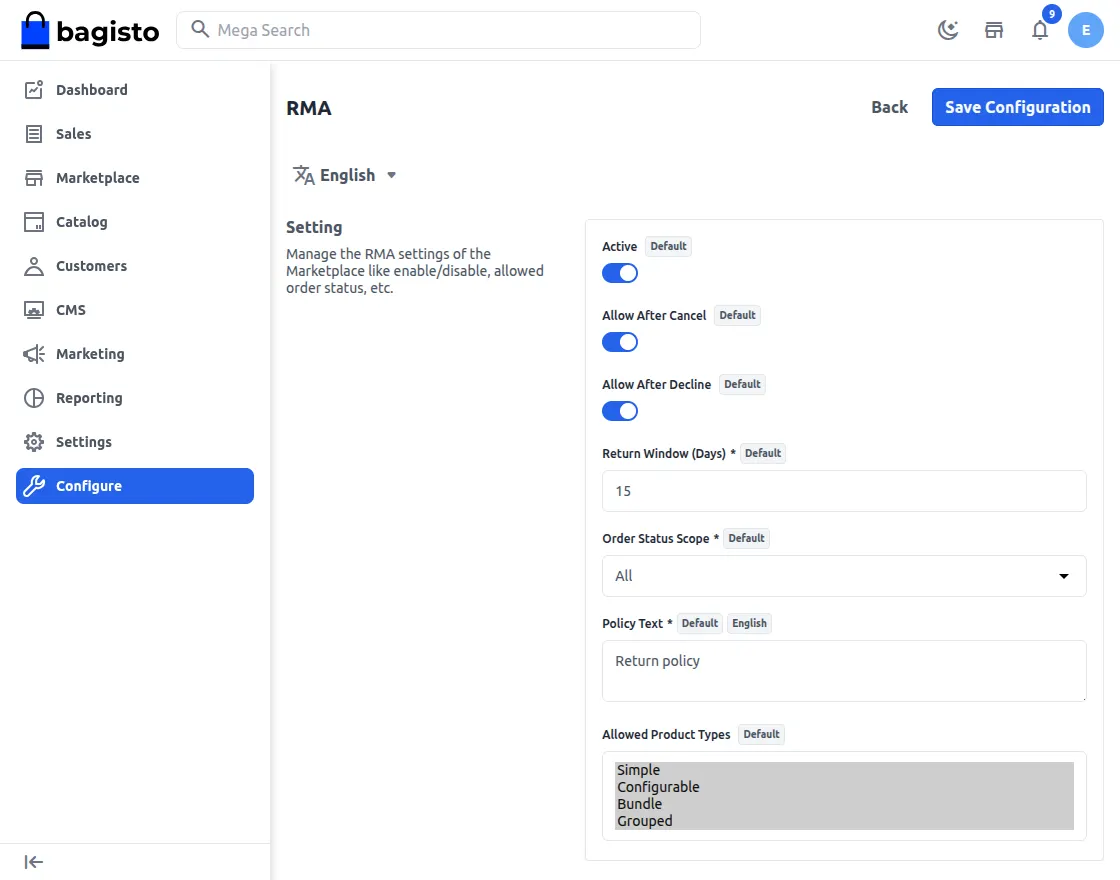
RMA Configuration
Once you are on the Admin dashboard, click the Configure option on the left-hand side in the menu bar, following which you will be displayed the RMA Configuration.
Settings
Above you will get settings to choose channel and locale. Based on that you can also change the configuration of the RMA.
Let’s go through the Configuration Settings one by one.
Status
To enable or disable the complete module functionality.
Allow After Cancel
If status is enabled, the Customer is allowed to reopen the canceled requests.
Allow After Decline
If this status is enabled, the admin is allowed to reopen declined requests.
Return Window (Days)
The number of days in which the customer can request RMA after placing an order.
Order Status Scope
The admin can allow RMA requests to be created for all order statuses or only for completed orders
Policy Text
Admin can add and update the return policy from this option.
Allow Product Types
From here, the admin can select the product type, whether it is a simple, configurable, Bundle product, or Group Product.
Multi-Vendor Marketplace Admin View
On the admin dashboard, click the marketplace icon which is there on the left-hand side to check on the features available in the backend for admin.
Sellers
Here you will find the list of sellers that have registered in your marketplace.
Based on the setting that you have done for Seller Approval in configuration, the status of the seller will also be shown here.
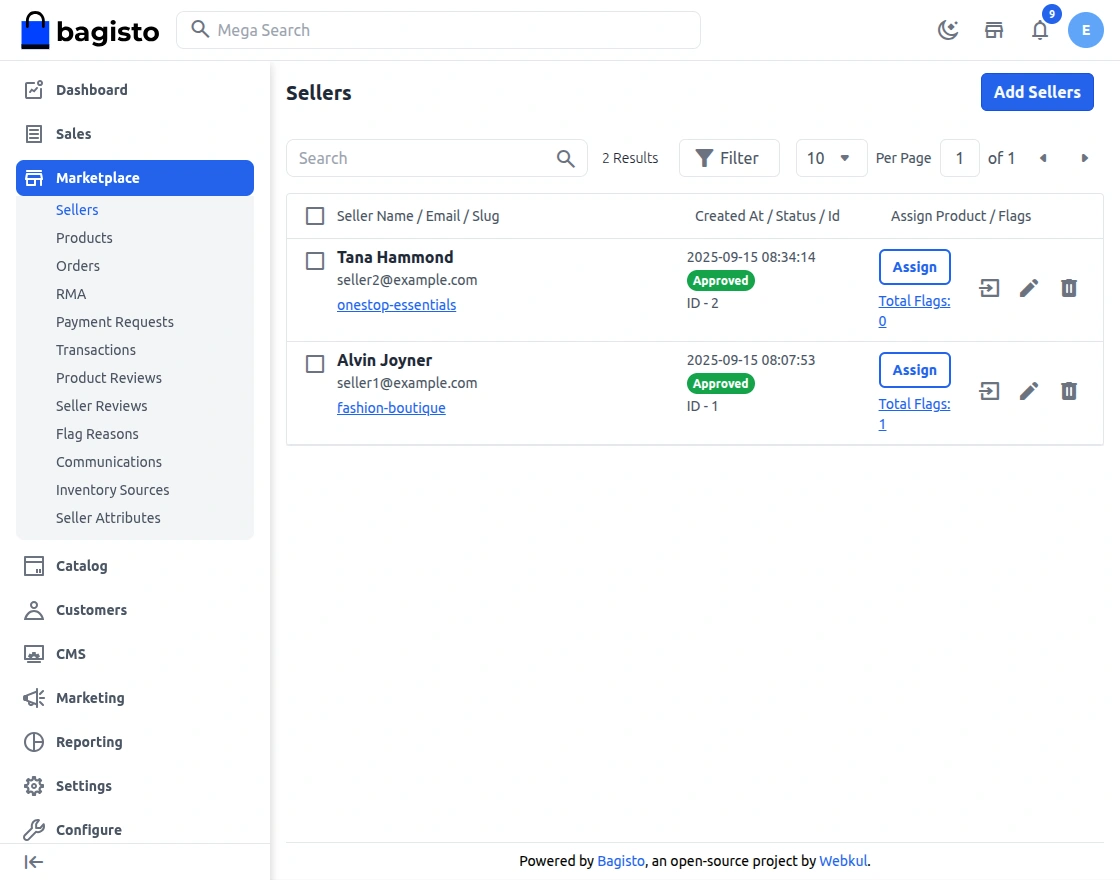
There are two ways to approve or disapprove the seller’s request.
The first option is – Mass update, select the checkbox in front of ID, go to the drop-down option select update then approve or disapprove accordingly.
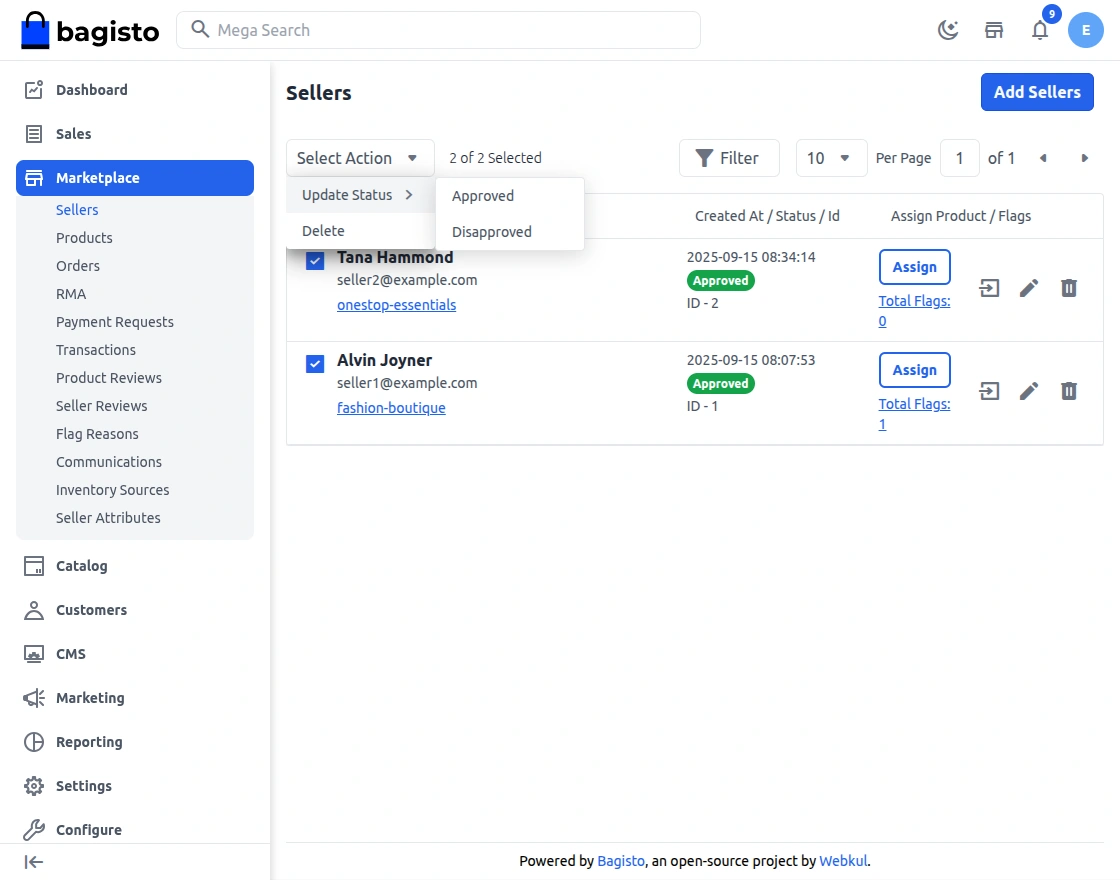
The second option is Individual update, for that just click on the icon of Approve/Disapprove and choose accordingly regarding the update:
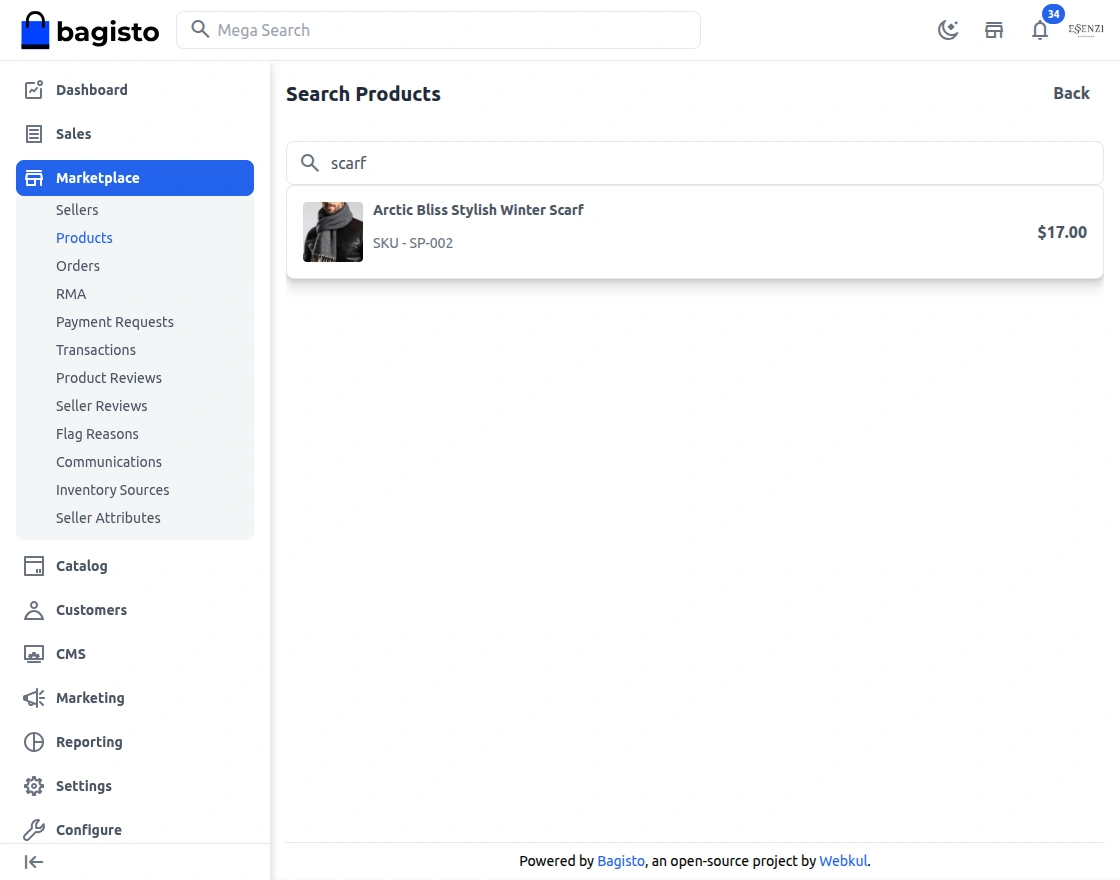
By clicking on the Assign option admin can add the product to the Seller account by searching for the particular product.
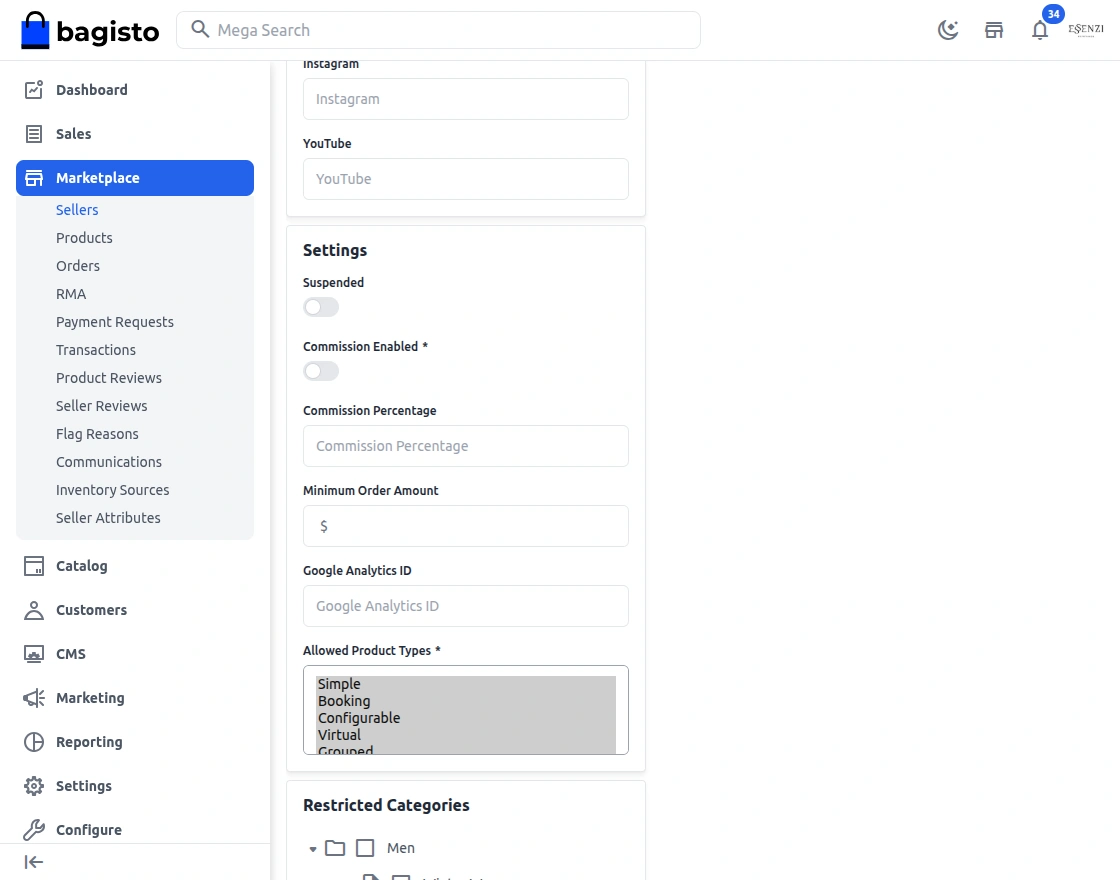
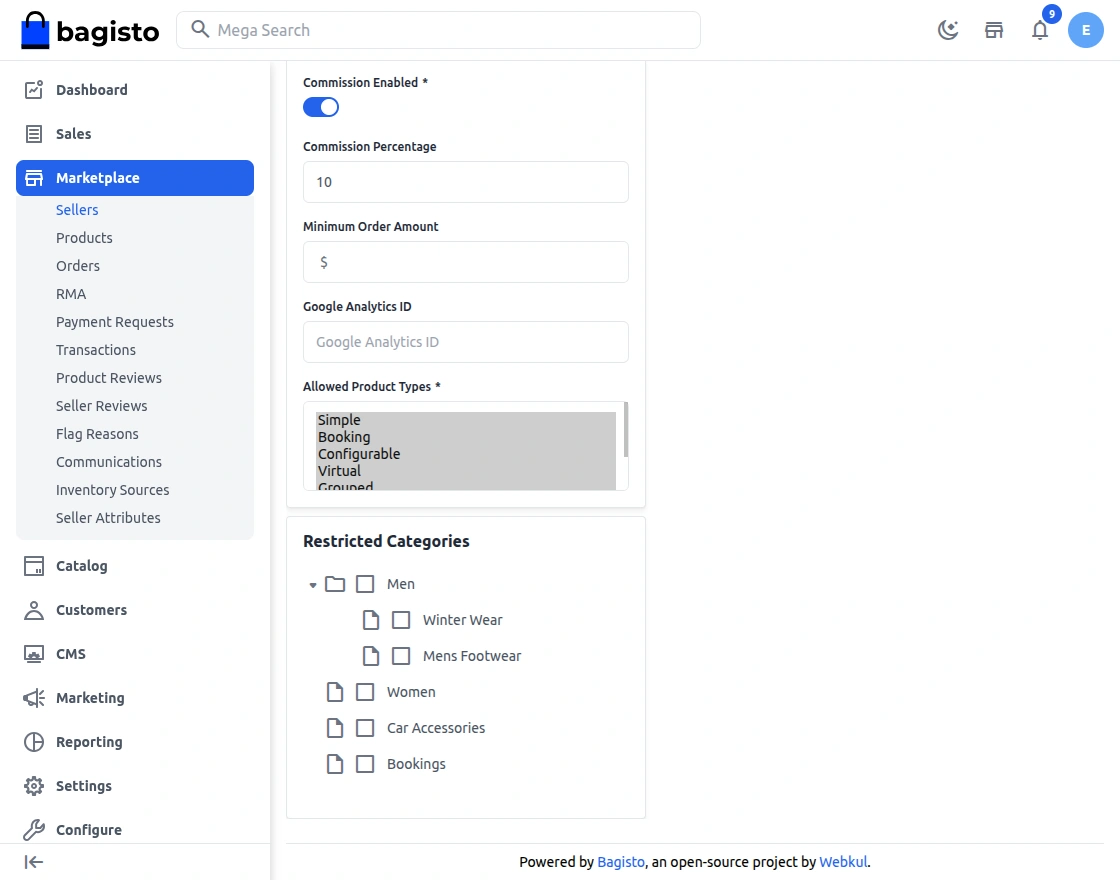
Allowed Product Type
By default in the seller profile, when creating a new product seller can see 7 products i.e. Simple, configurable, Virtual, Grouped, Downloadable, Booking and Bundle products.
From the admin end in this section, if the admin allows any other product, the seller can sell the same.

The admin can set separate commission percentages for any particular seller.
Suspended Settings
The Seller Suspended Settings allow administrators to control the behaviour of a seller’s account when it is suspended due to policy violations, non-compliance, or manual action.
Seller Commission
Click on the edit sellers there you will find the commission per unit option enter the amount in percentage and it will be set for that seller.
Minimum Order Amount Settings

If the admin enabled this feature then the admin and seller both can set the minimum limit of order price to check out from the cart by the customers.
Google Analytics
EnableHere you can enable or disable this feature by selecting Yes or No.
Google Analytics Id
Here you need to enter the Google Analytics Id.
Enable Seller Google Analytics
By enabling this Yes or No, you will be able to see the Google Analytics on the Seller profile.
Products
Here you can see the list of products as created by the sellers. Based on the setting that you have done for Product Approval in configuration.
the status of the seller will also be shown here.
Seller will be able to sell those products only which are approved by the admin.
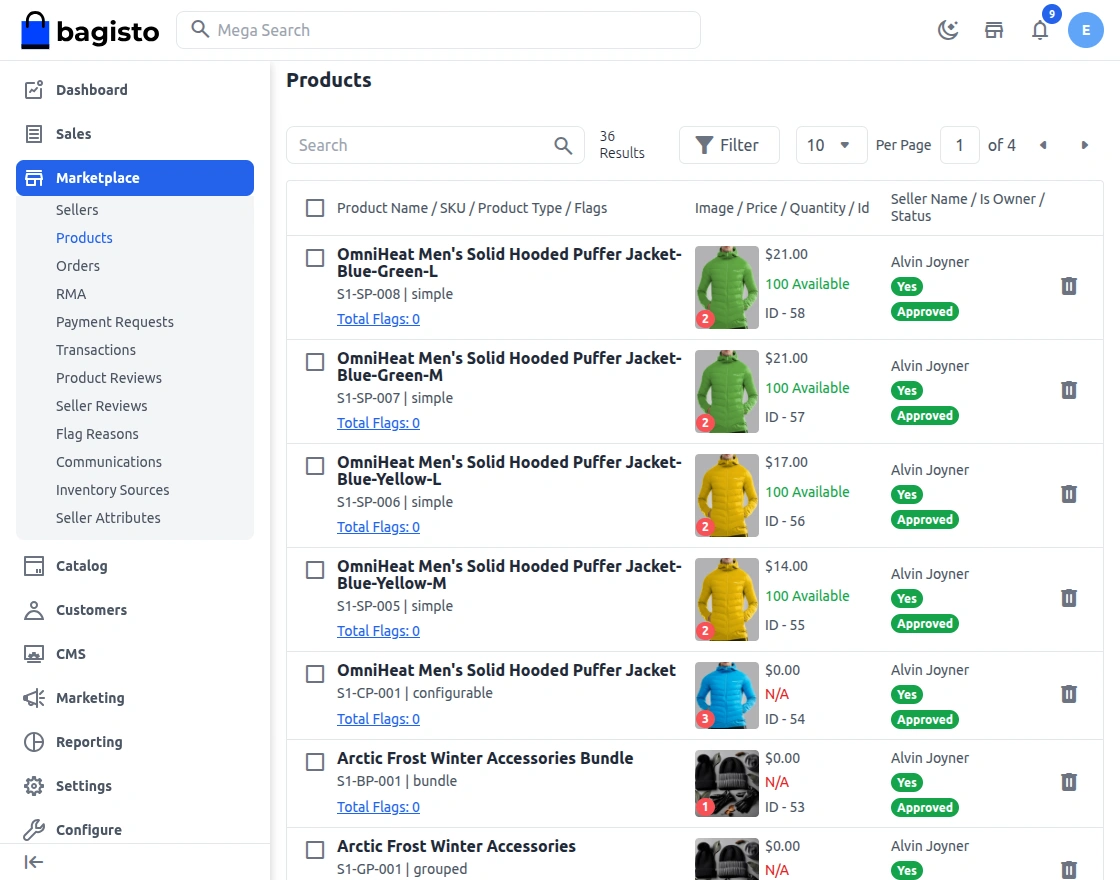
You can check the product for which you want to make any changes in the status and select the option to update or delete from the drop-down.
After selecting Update, you can further choose to Approve or Disapprove the Product.
Restricted Category
The admin can restrict sellers from adding products to categories in which they are not allowed to sell.
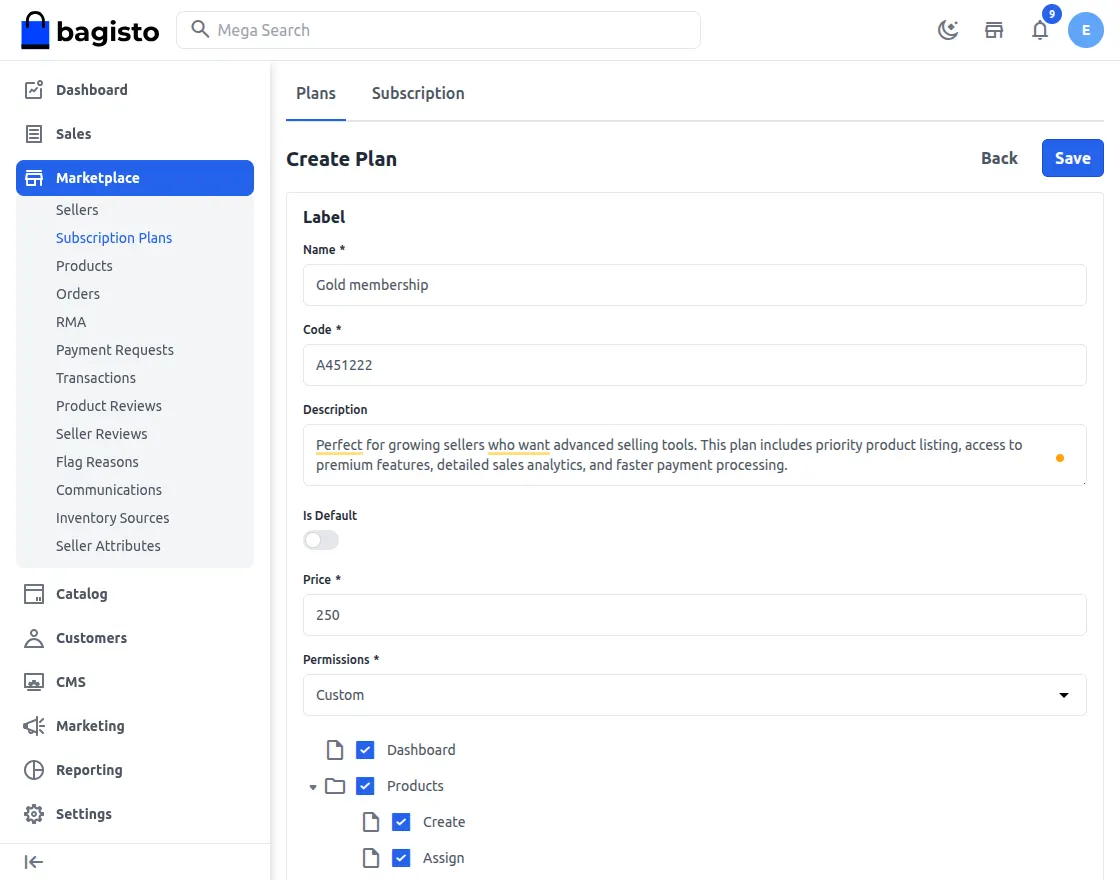
Seller Subscription Management
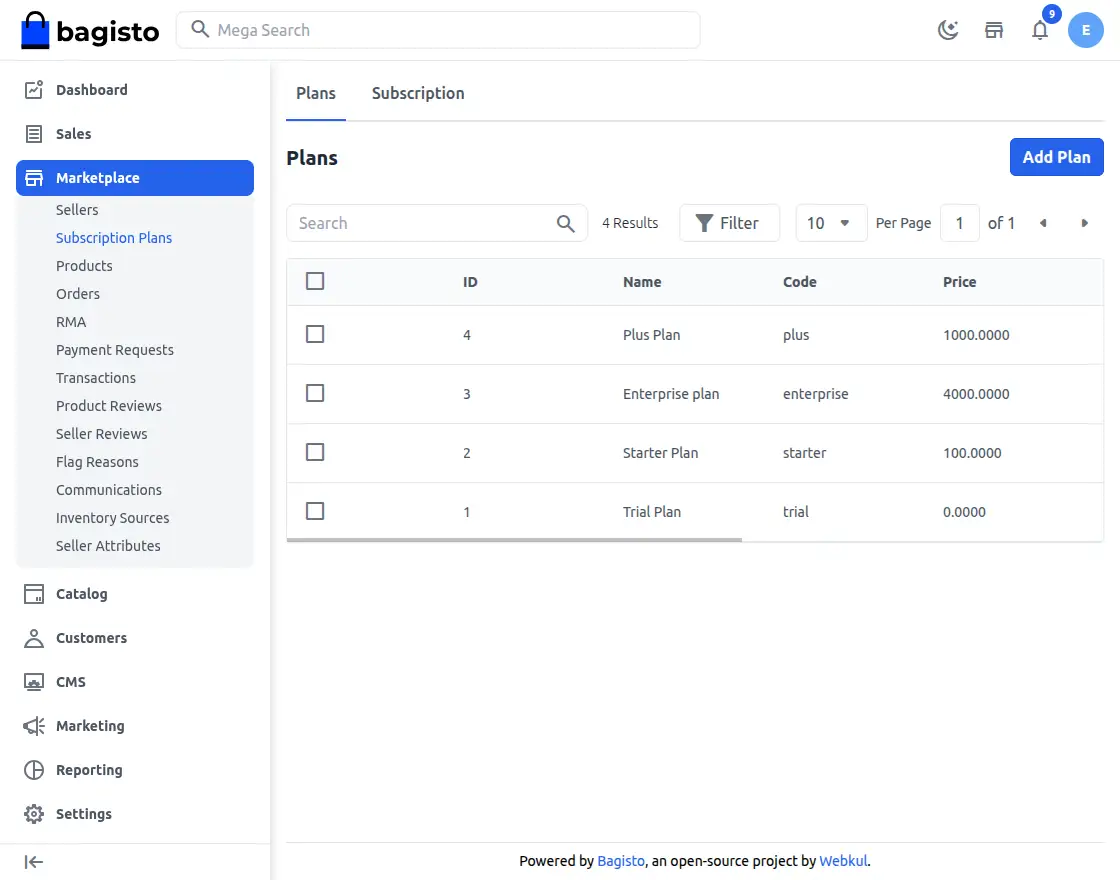
Admins can create and modify subscription plans by assigning specific roles and permissions, ensuring sellers get access only to the features included in their selected plan.
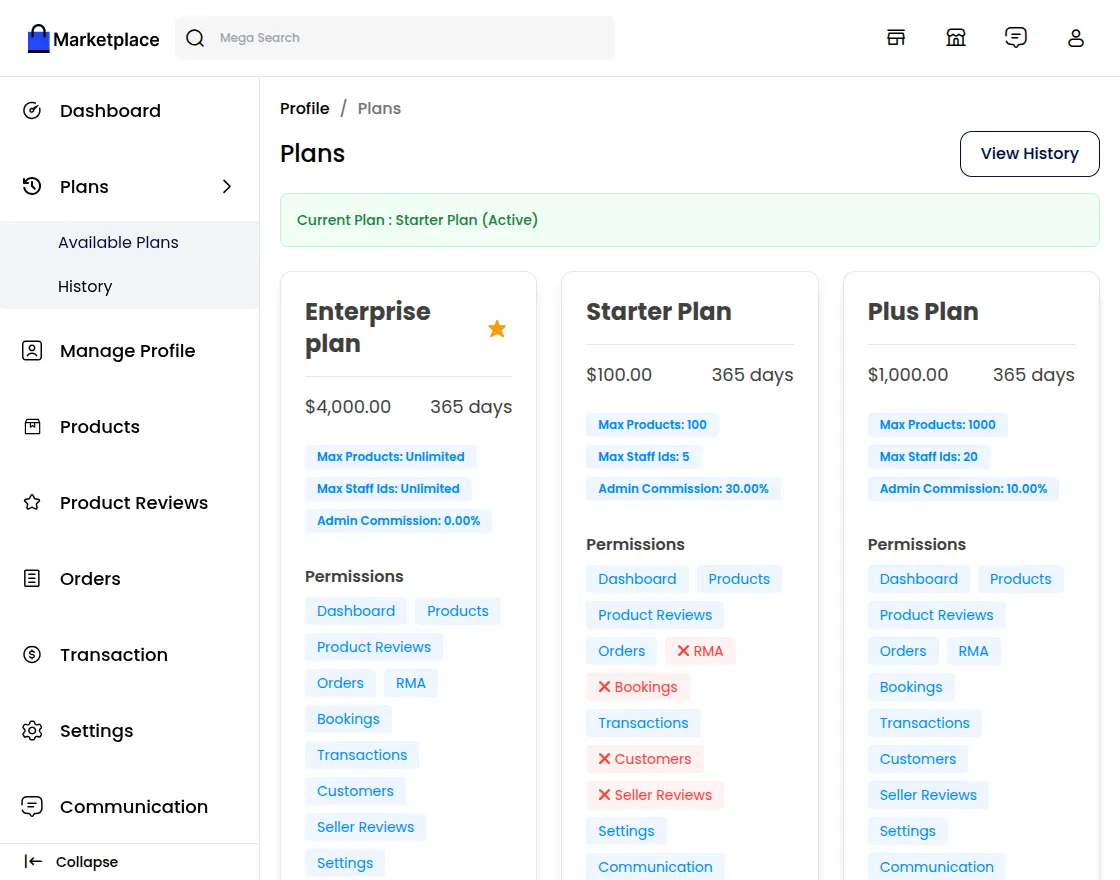
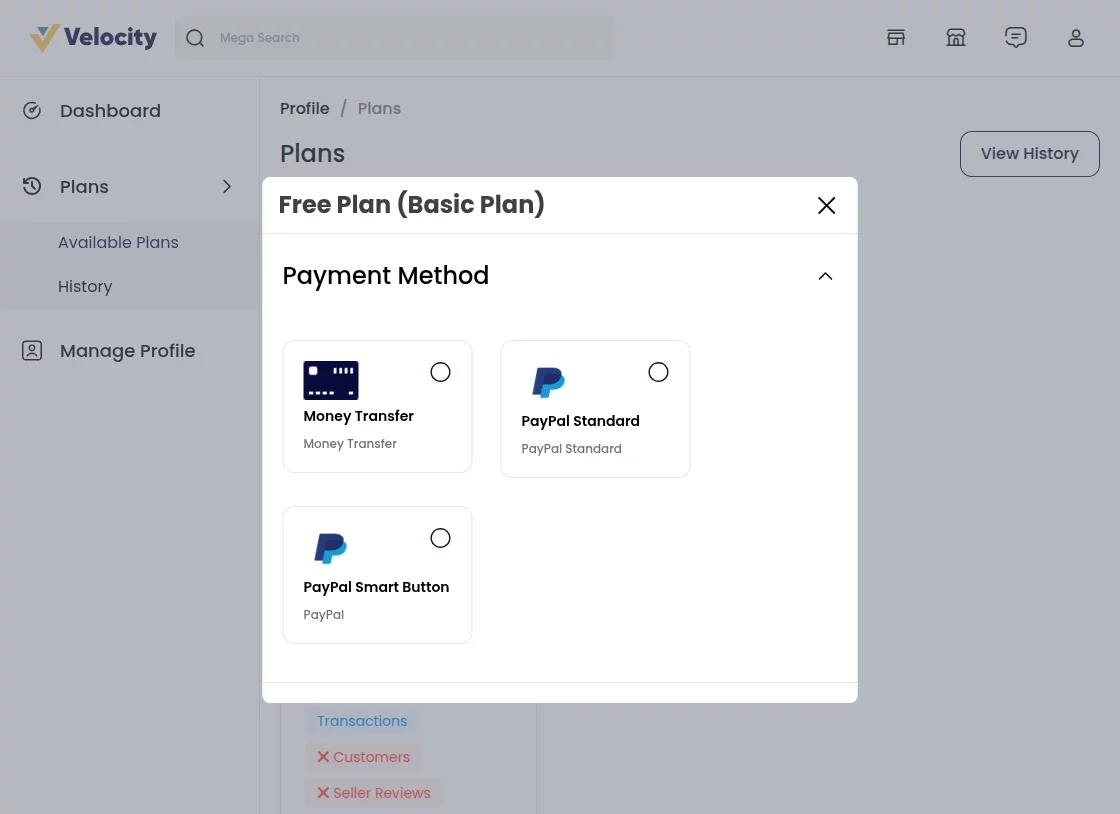
3. Sellers can purchase a subscription plan to unlock full permissions and access all features required to manage and grow their store effectively.
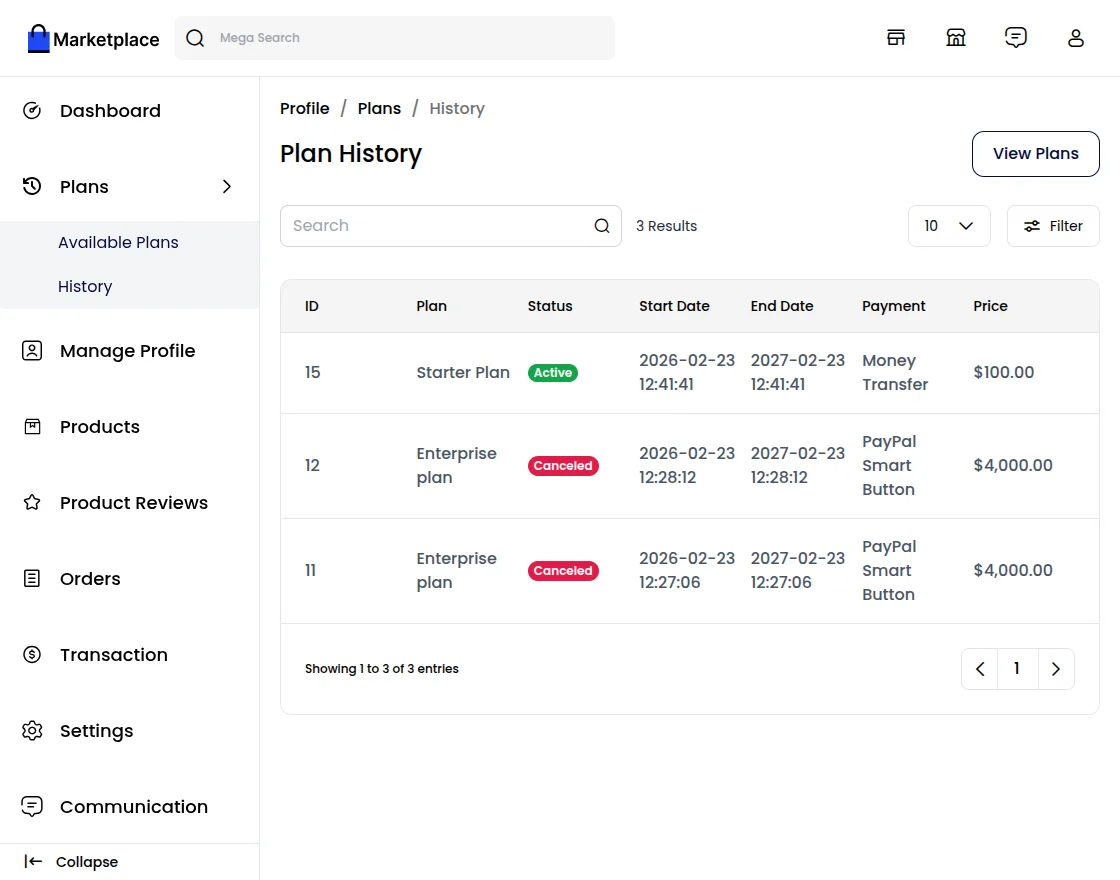
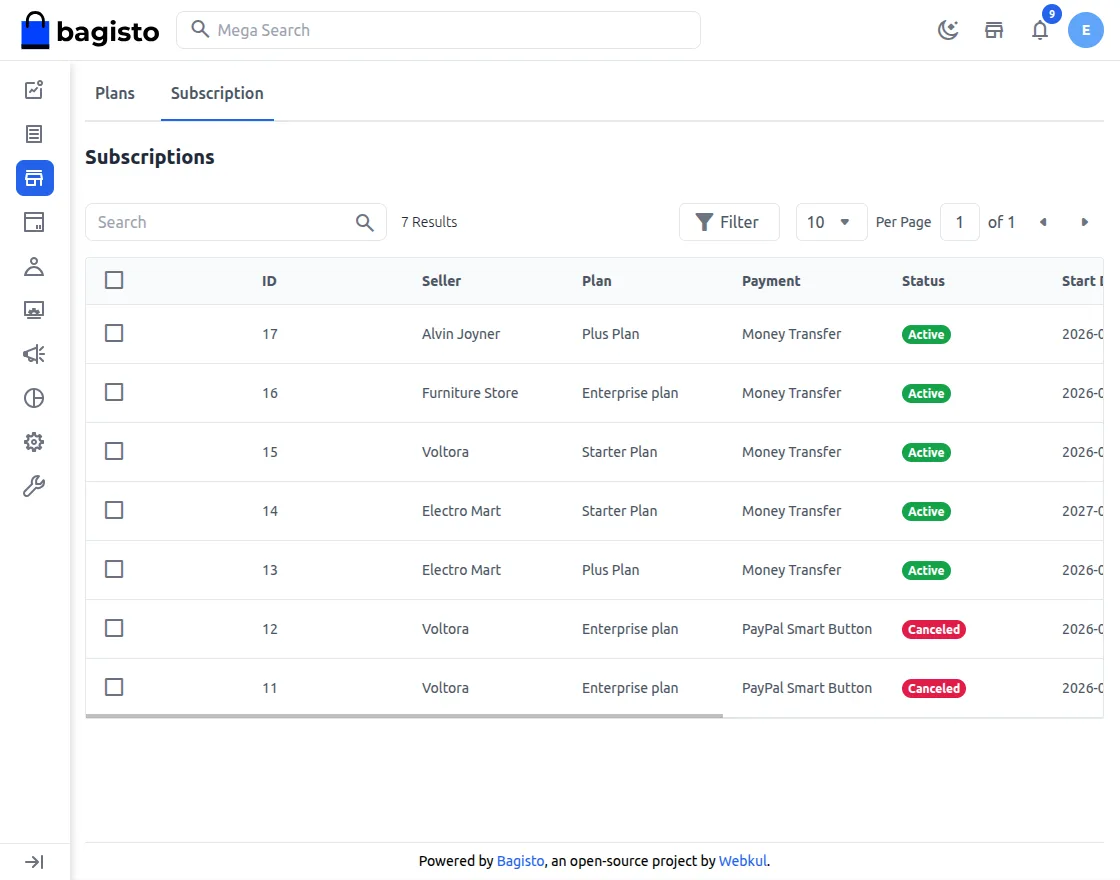
6 .Admins can view a complete list of all subscription plans purchased by sellers, including plan details, payment status, and validity period.
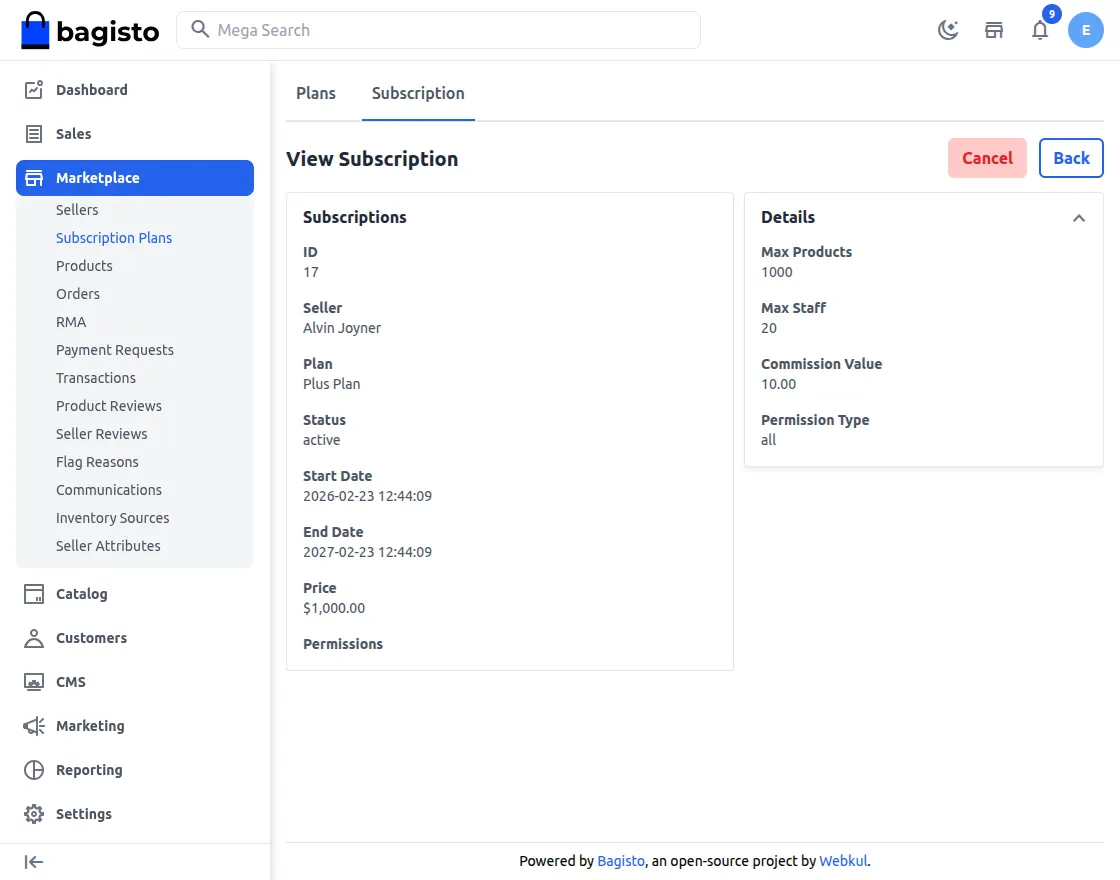
7 .Admins have the ability to update or cancel a seller’s subscription plan whenever required, ensuring flexible and controlled subscription management.
Orders
Here you can see the list of orders made by the customers on your website for the products as offered by the sellers with their status as Completed or Pending.
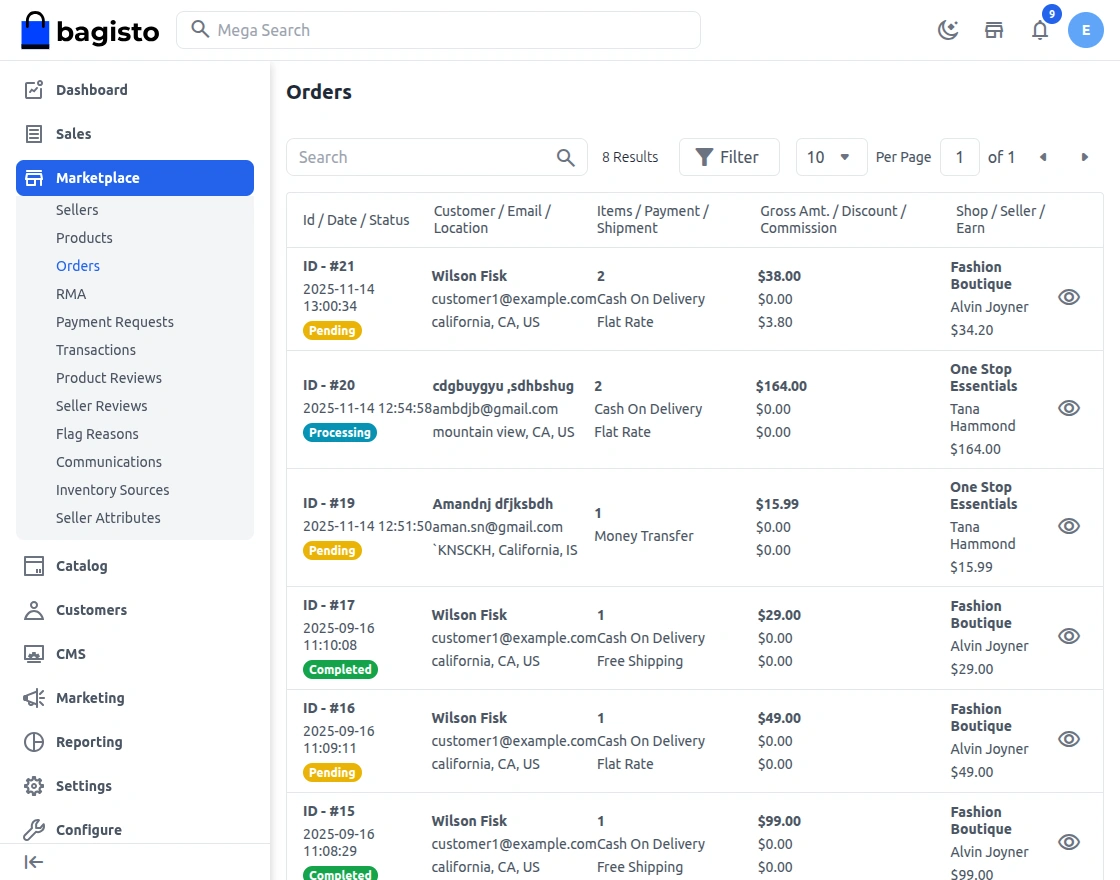
The admin can view the order details by clicking on the eye icon.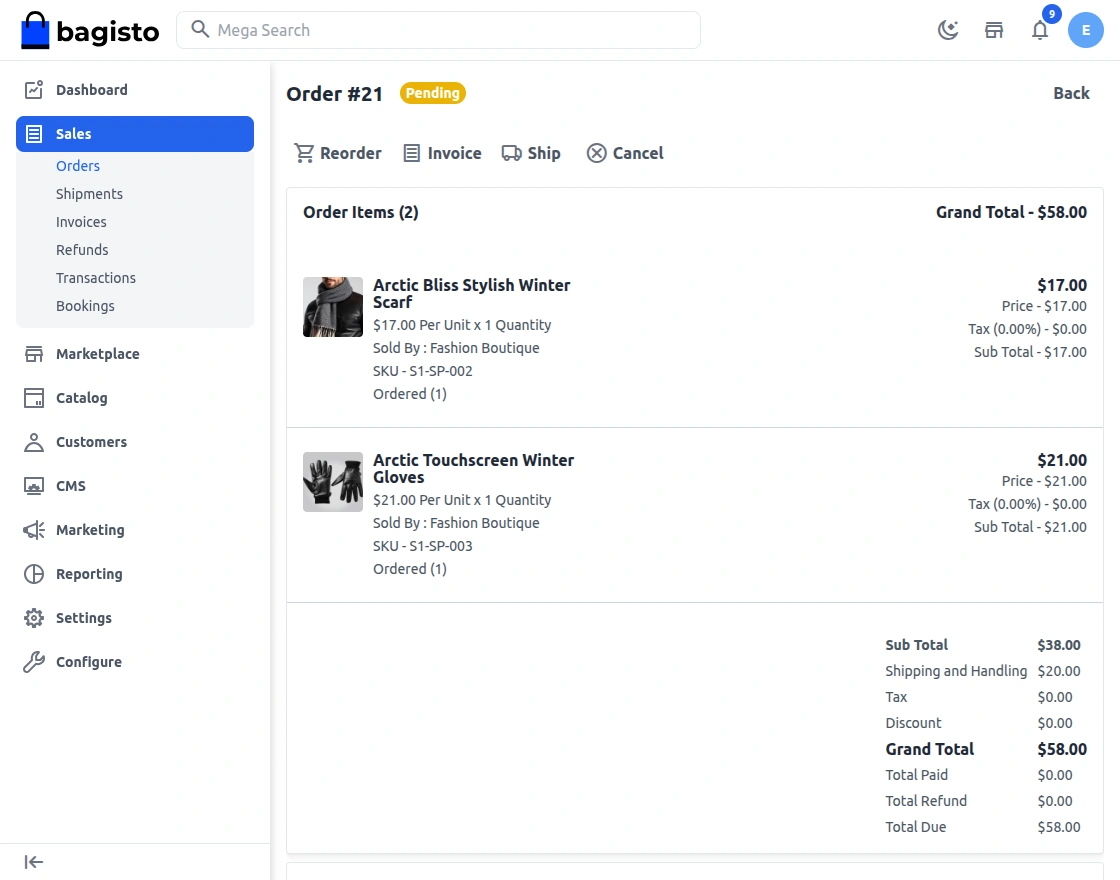
Here, you will get the payment details regarding the product. Next, to generate the invoice, click the invoice button.
If the order is pending then click on the invoice button and add the quantity of the product for which the invoice needs to be generated.
After entering the quantity to invoice, click on the Create Invoice button at the top to generate the invoice.

Next, click the Ship or Refund button.
Admin can refund seller products after the invoice is generated for that particular product.
Shipment
On the Shipment page, you will find the details regarding the shipment. Number of the quantity ordered and order information.
Invoices
From this option, the admin can see the list of invoices created up til now for the products by the seller.
Refunds
A list of refunds that are initiated by the seller or by the admin is mentioned here:
RMA
Now, the Admin can navigate to RMA in the Marketplace section. After clicking on RMA there are five tabs.

Requests
The admin can view all RMA requests created by customers or guests.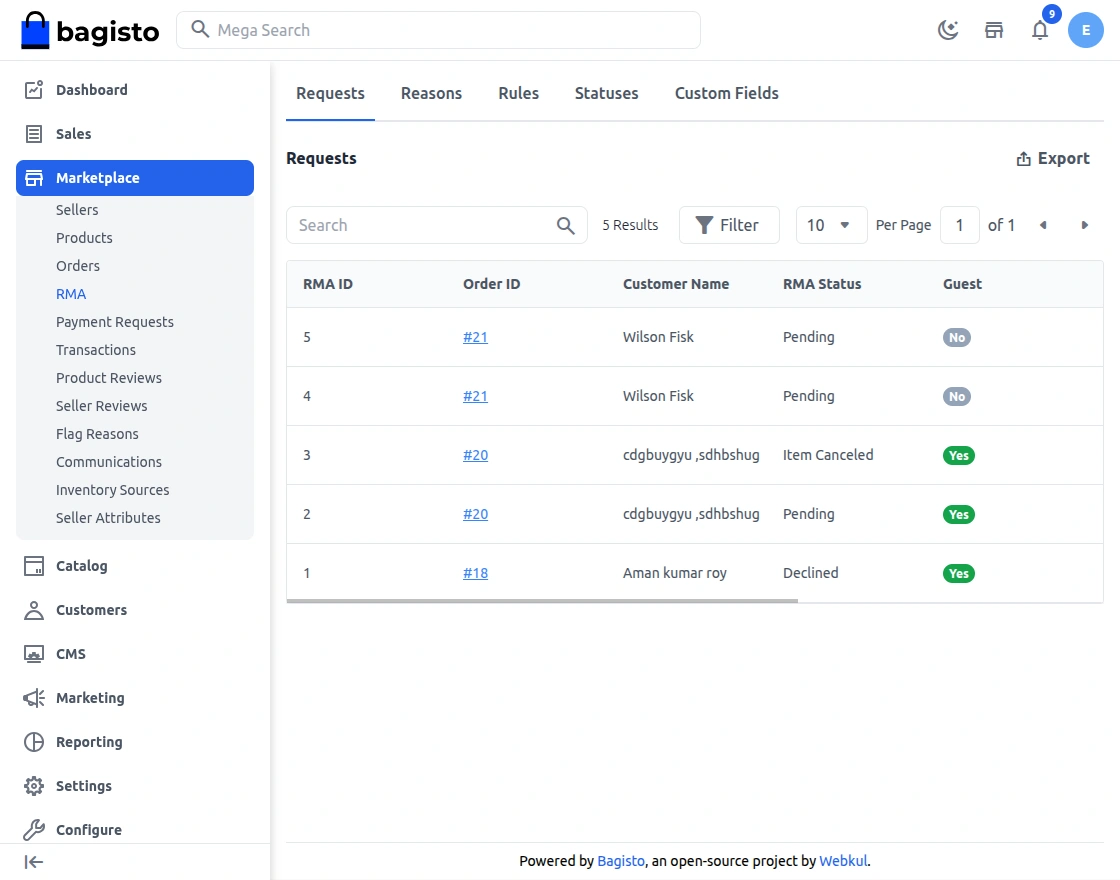
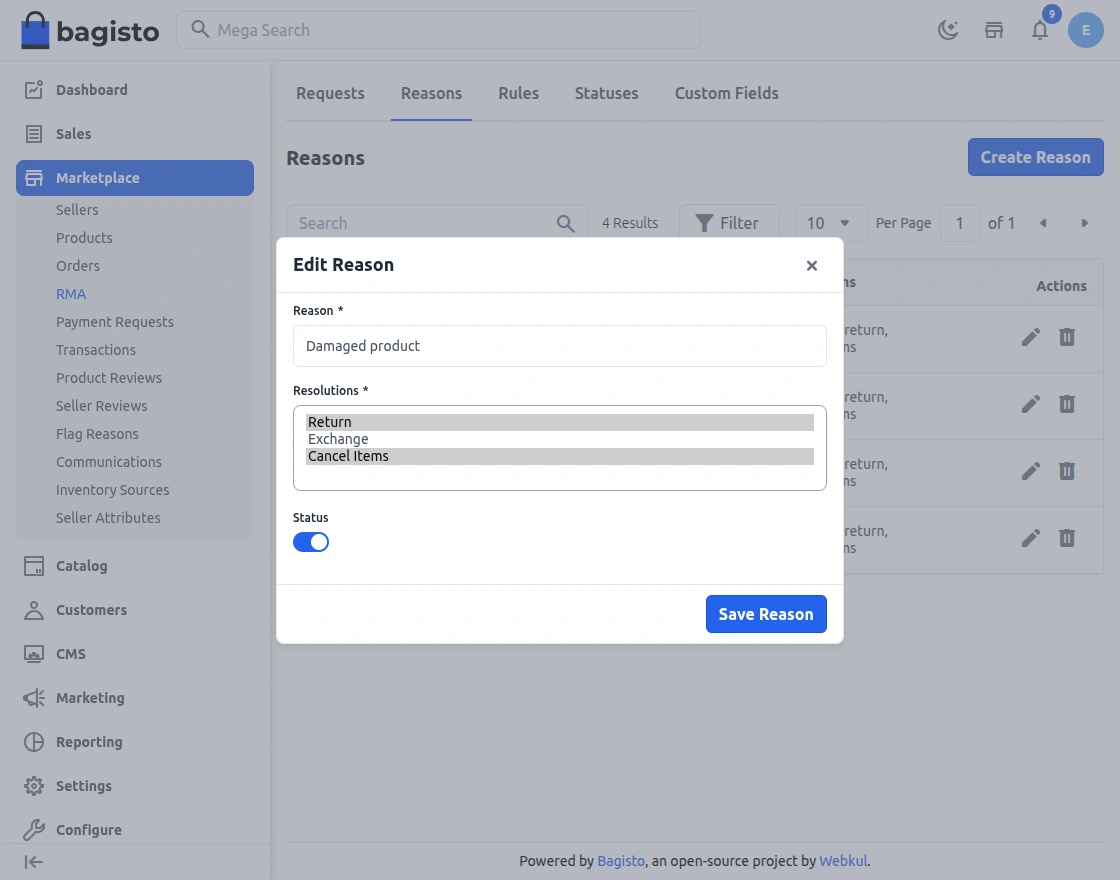
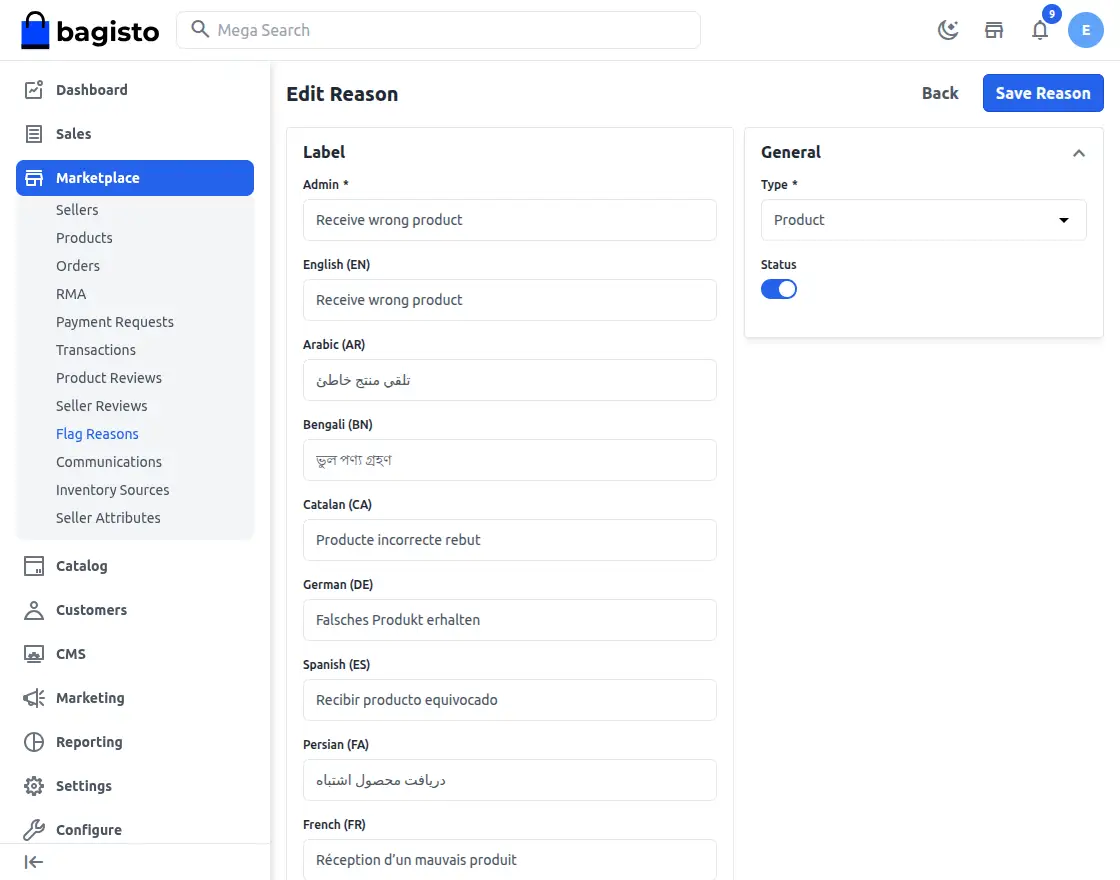
Reasons
In this field, the admin can see the RMA reasons for the customers, those reasons can be used by the customers while generating RMA request.

How to create RMA reasons?
On Admin Panel, click on RMA>>Reasons>>Create New Reason then enter the Reason, Status, its Resolution Type and click on the Save Reason
Rules
How to create rules?
Now, the admin can create RMA rules by navigating to the RMA Rules section.
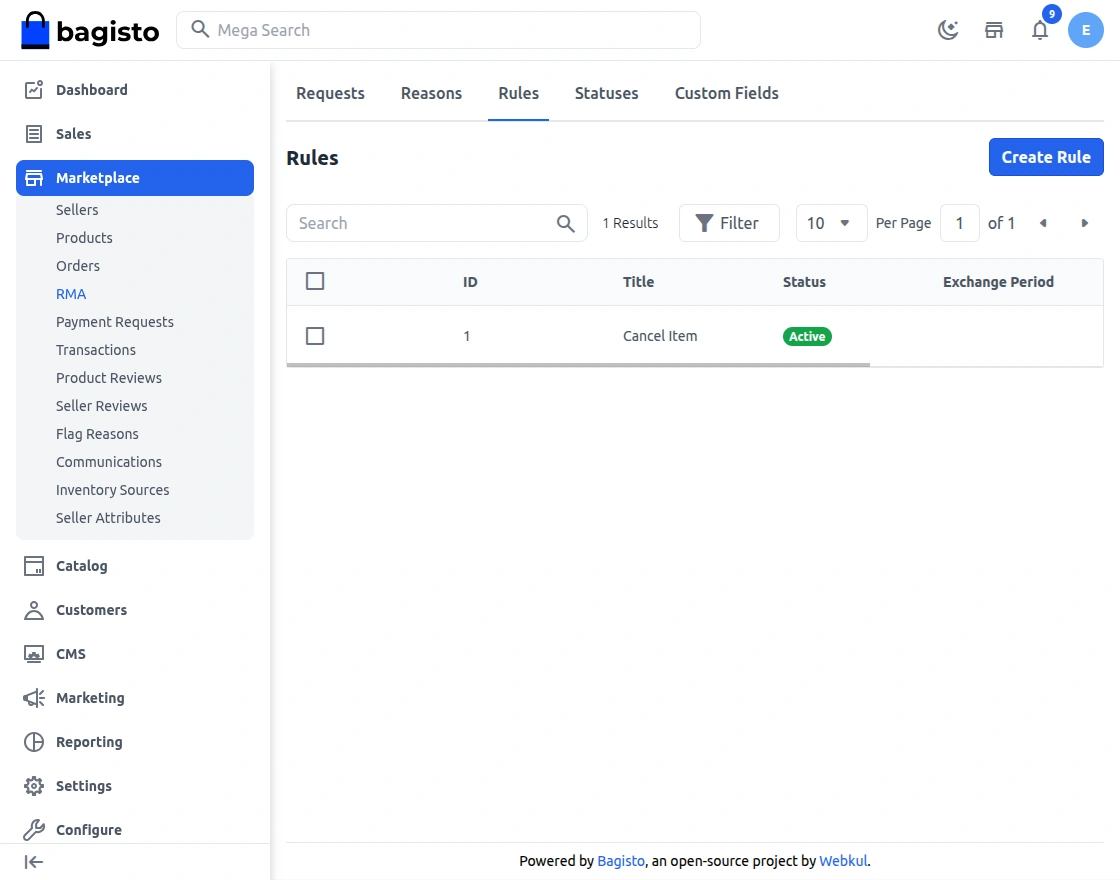
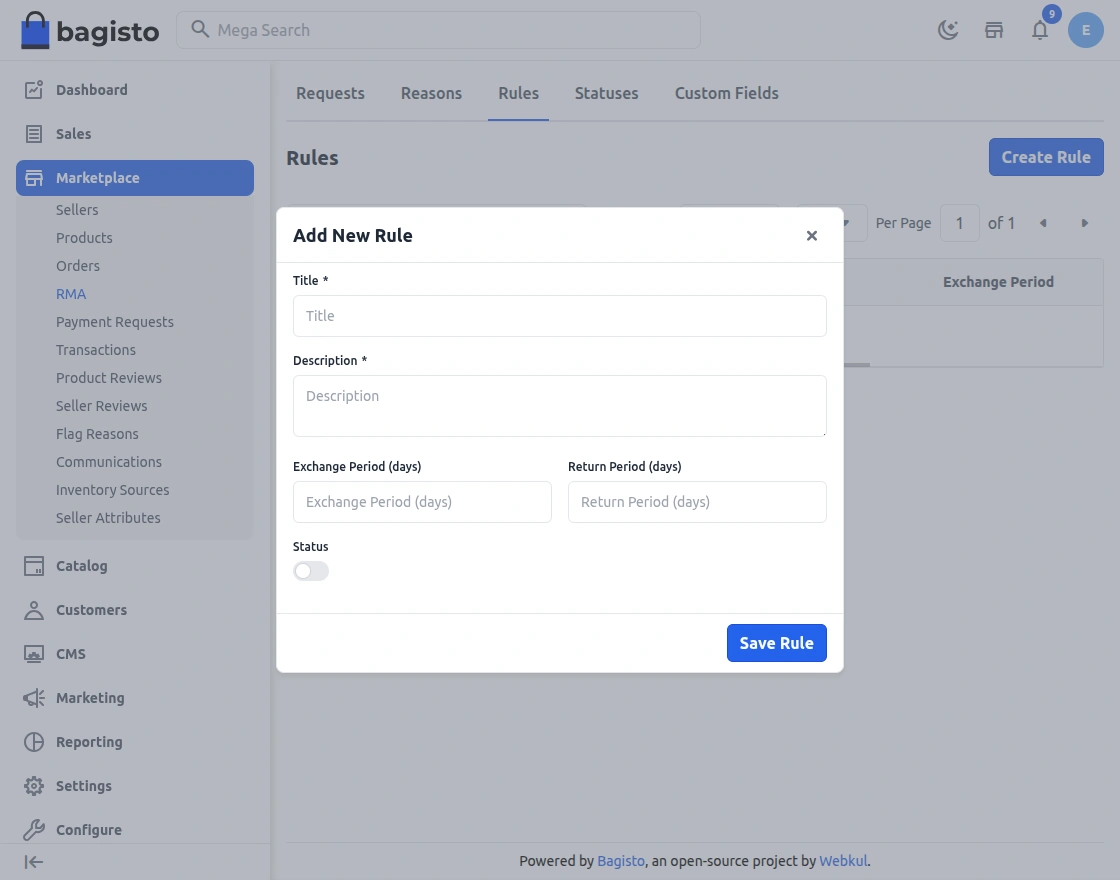
After navigating to the RMA section, the admin will click on Create RMA Rules, and from there the admin can set the rule details which include –
- Rule Title – Enter the RMA rule title.
- Status – Toggle button to enable or disable the rule.
- Rule Description – Enter the description to define the RMA rule.
- Resolutions Period – Provide the number of days for the resolution of the RMA.
- Exchange Period(Days)
- Return Period(Days)
Statuses
From the navigation bar, the admin will navigate to the Statuses Tab. Further, the admin can see the created RMA status and edit them as well.
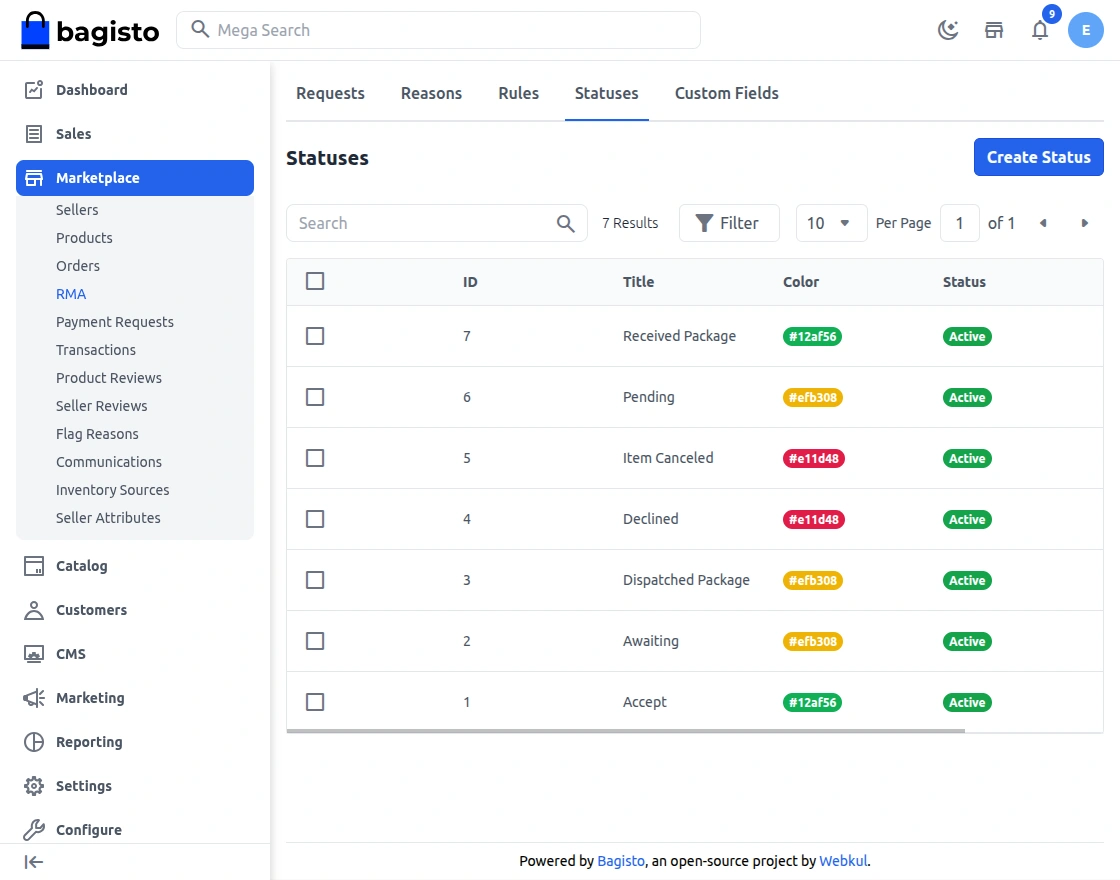
Now, the admin can also create a new RMA Status by clicking on Create New RMA and the basic details like title, status, and color.
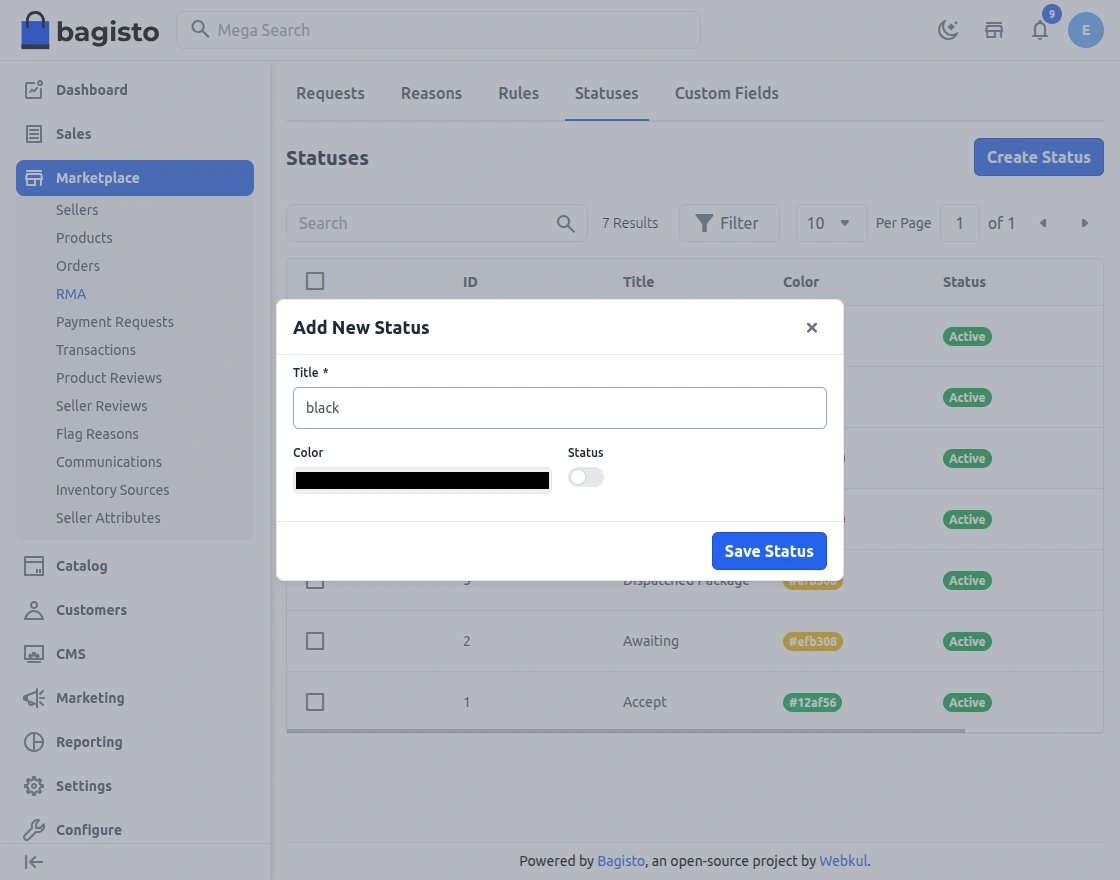
After adding the above details, the admin will click on Save RMA Status.
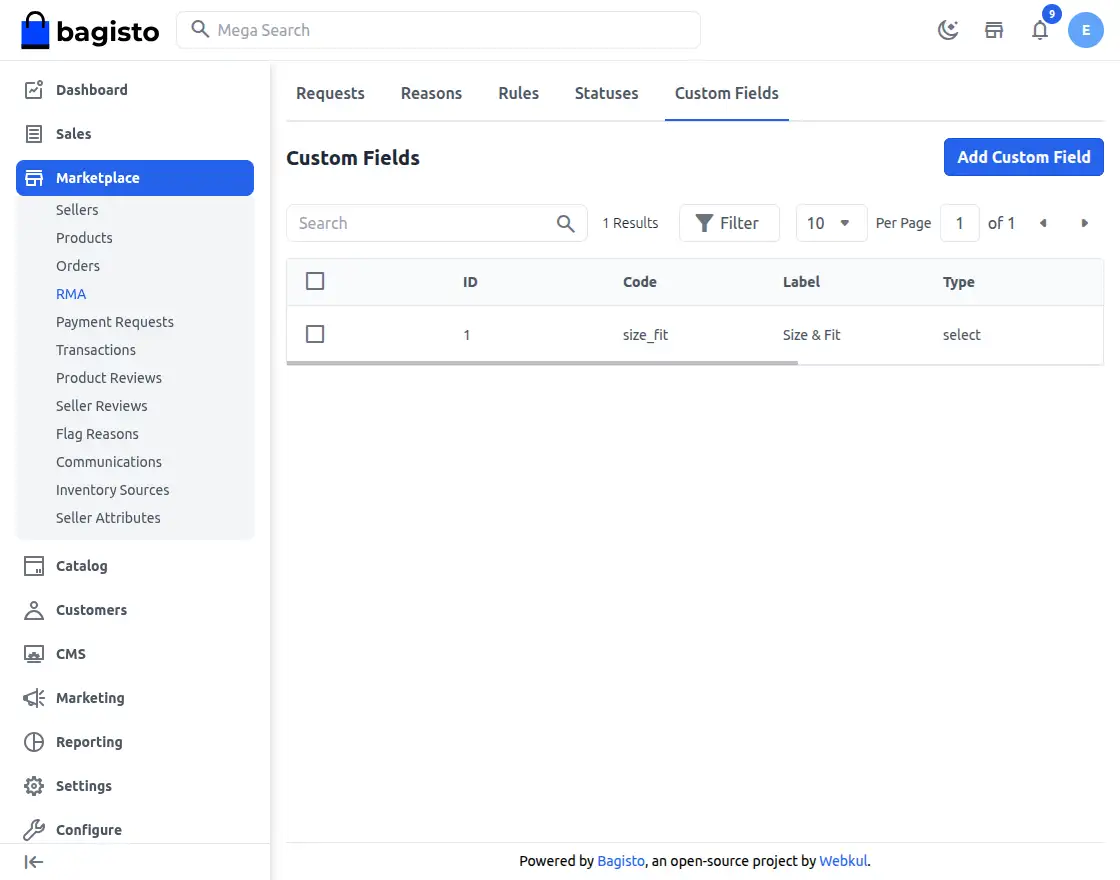
Custom fields
How to create RMA custom fields?
From the navigation bar, the admin will navigate to Custom Fields tabs.
Here, the admin can see the already created RMA custom fields and edit them as well.
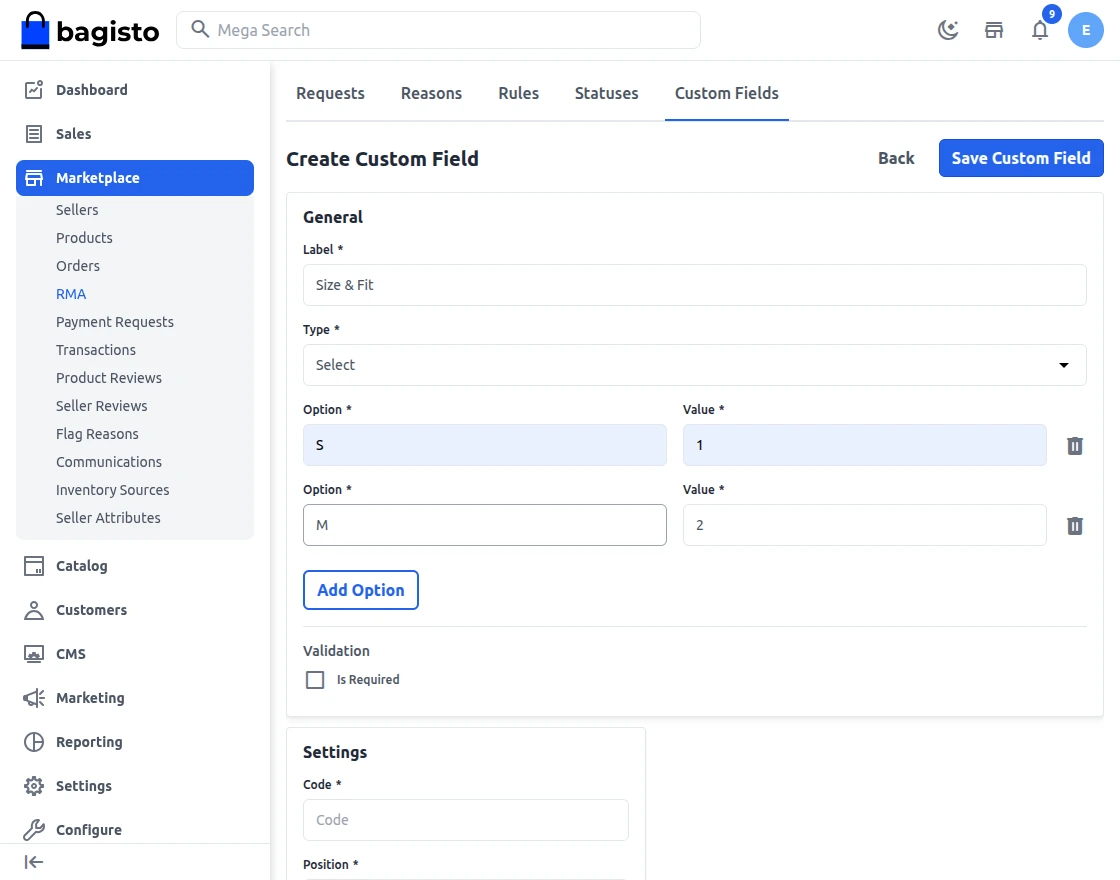
Now, from the right top corner the admin will click on Add New Field and further navigate to the create new rma custom-field page.
From, where the admin can set the status, label, code, position, type, and validations to the new RMA field.
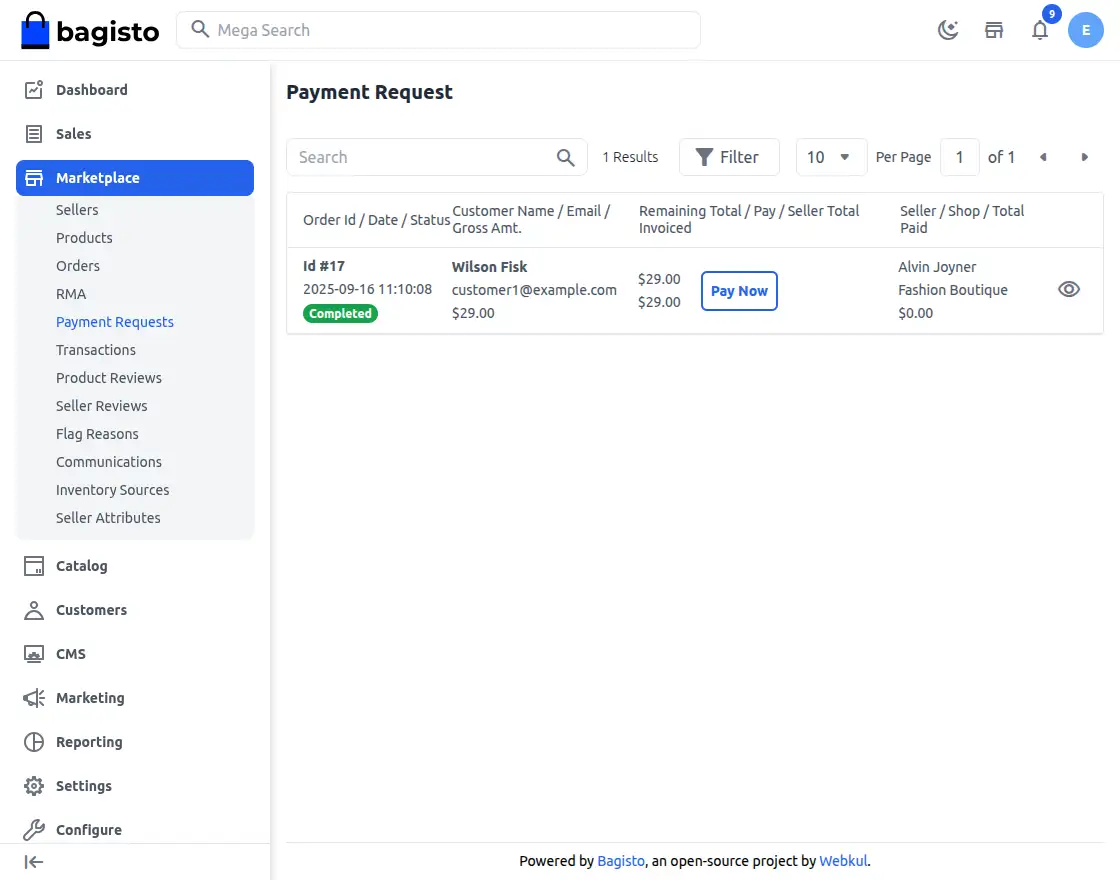
Payment Request
Payment requests initiated by the seller are listed here, The admin can check all the payment requests here:
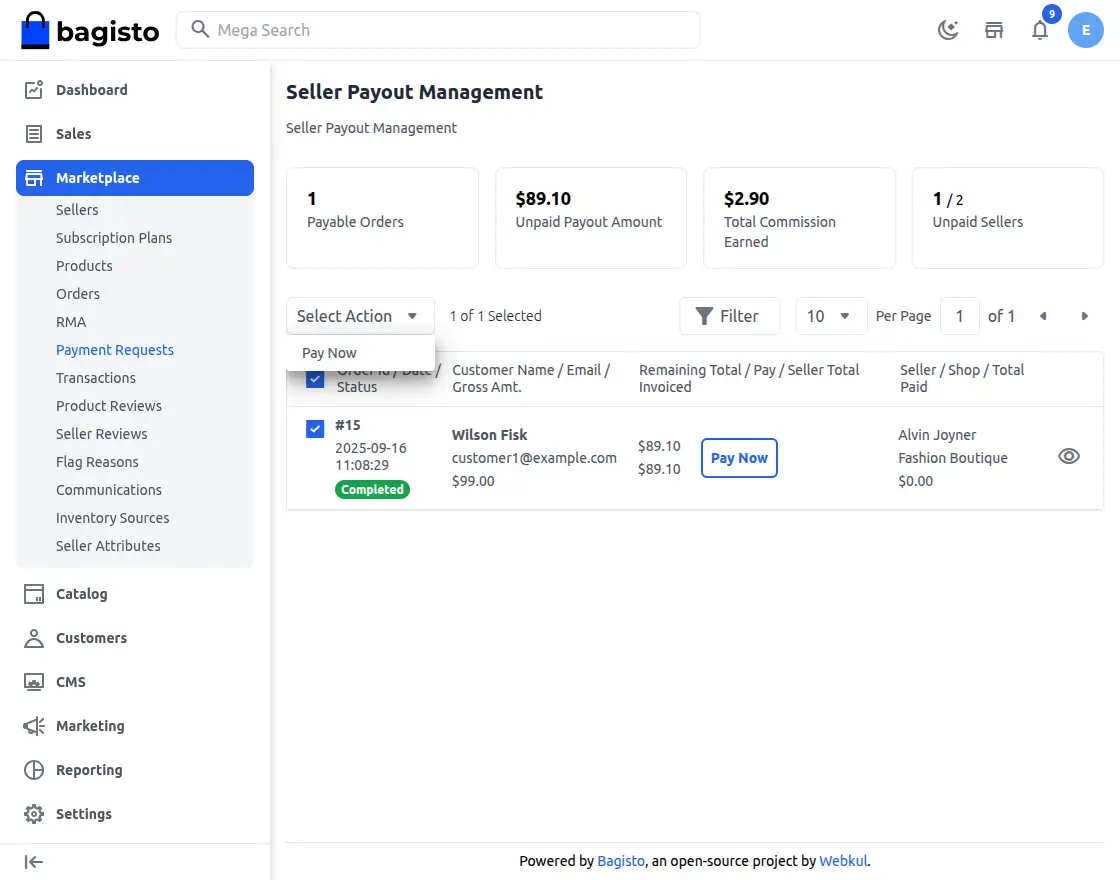
Bulk Payout Management
Transactions
Here you will find the list of payout transactions as done by the Admin to the Sellers also with the amount paid.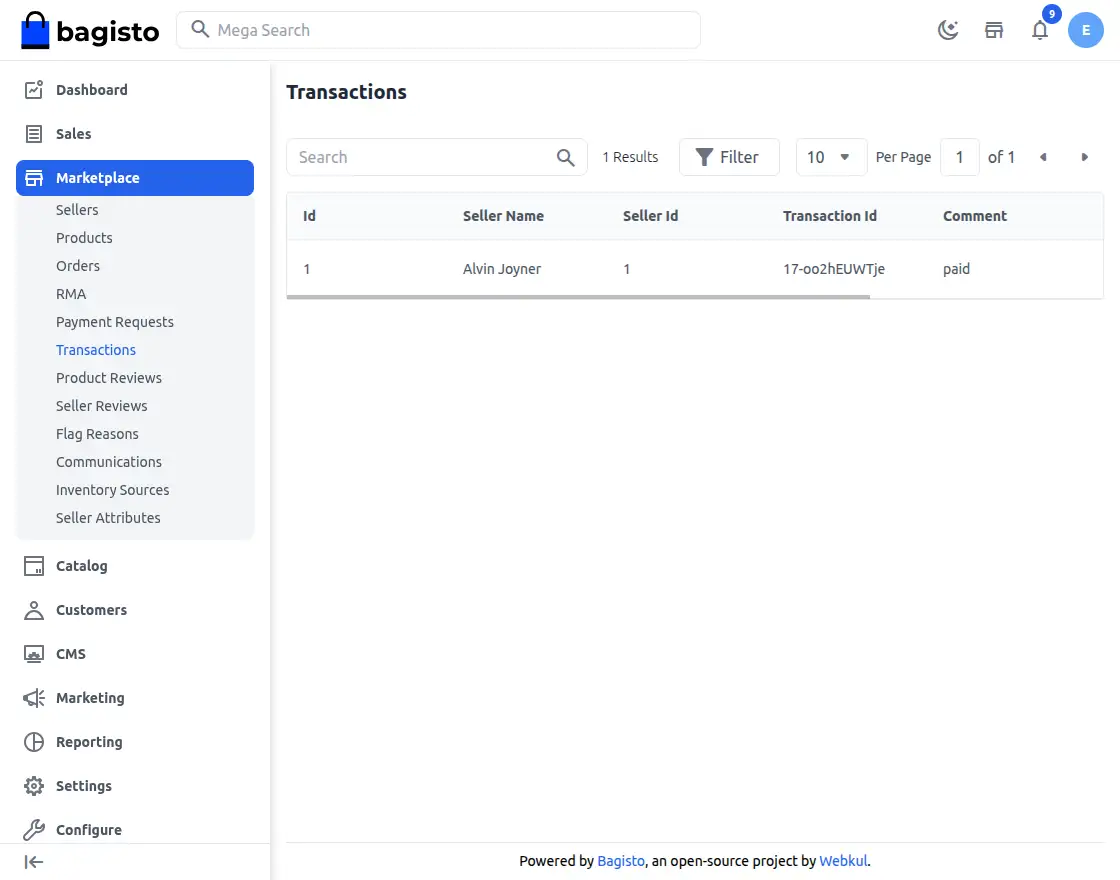
Product Reviews
From here the admin can find the reviews as shared by the customer for the products. By default, the status of the reviews remains unapproved.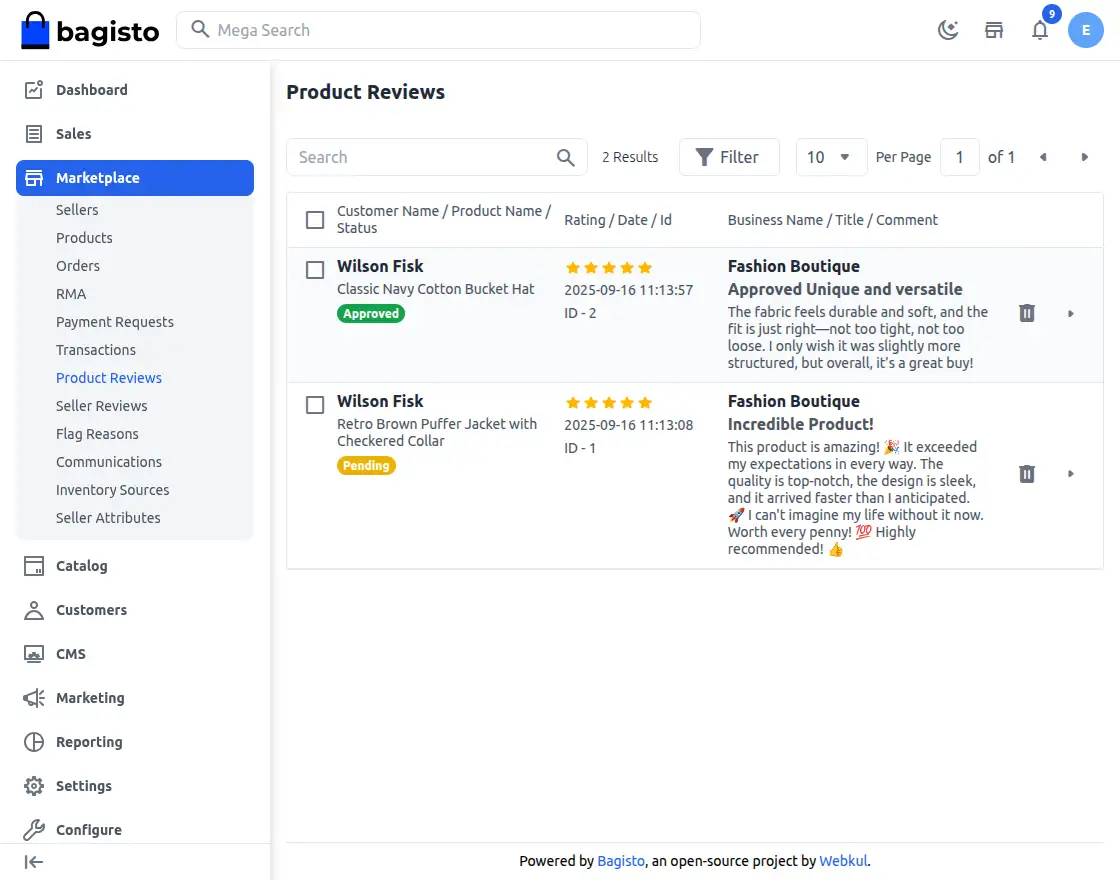
Seller Reviews
Here you will find the reviews as shared by the customer for the particular seller. By default, the status of the reviews remains unapproved.
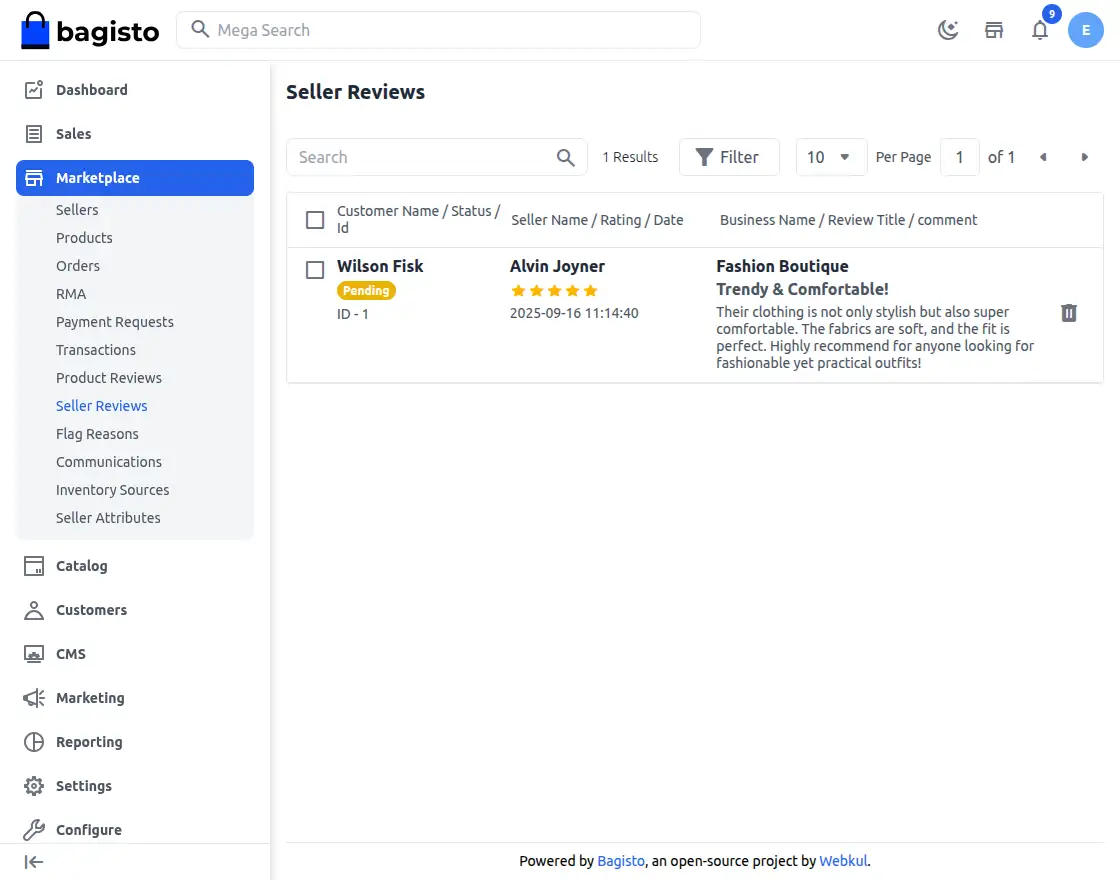
You need to select the review which you want to update and then from the above drop-down, choose Update and then Approve or Disapprove the review.
Flag Reasons
Check the list of created flag reasons for seller profiles.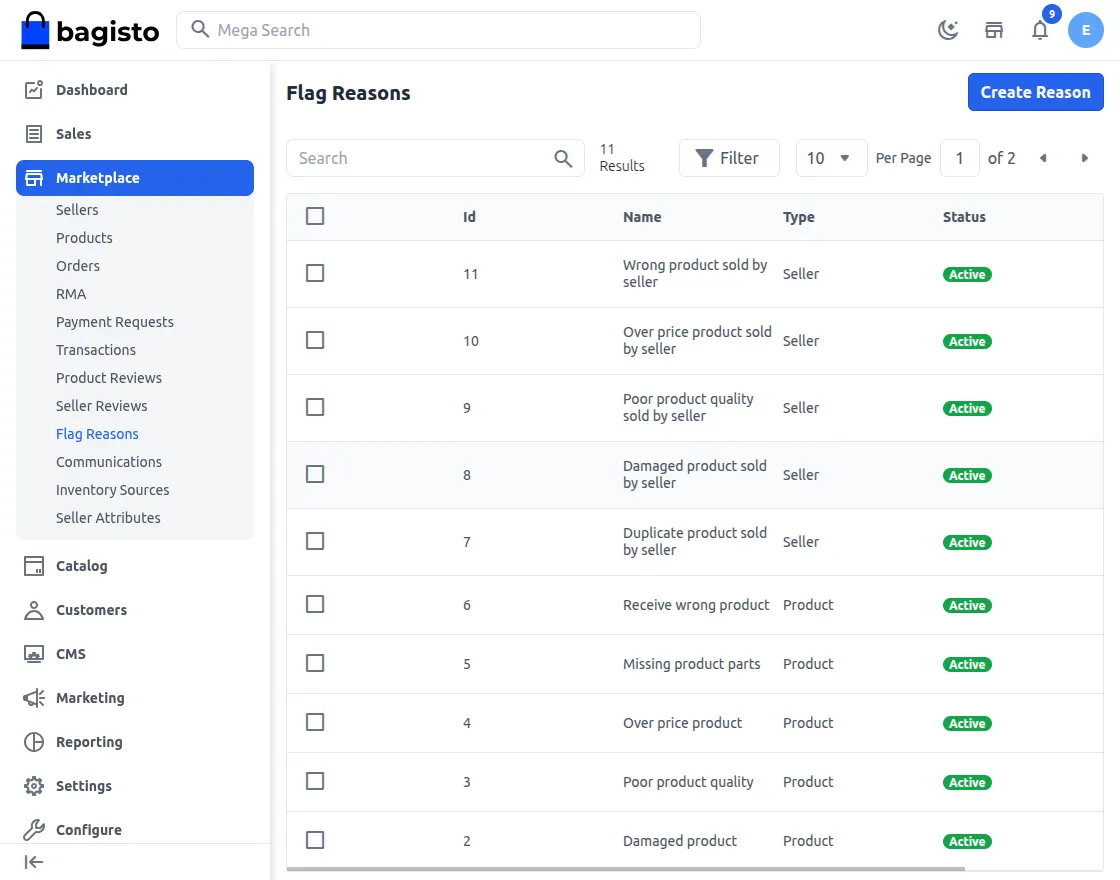
Seller Flag Reason
Select a Seller from the dropdown for which you need to raise the flag.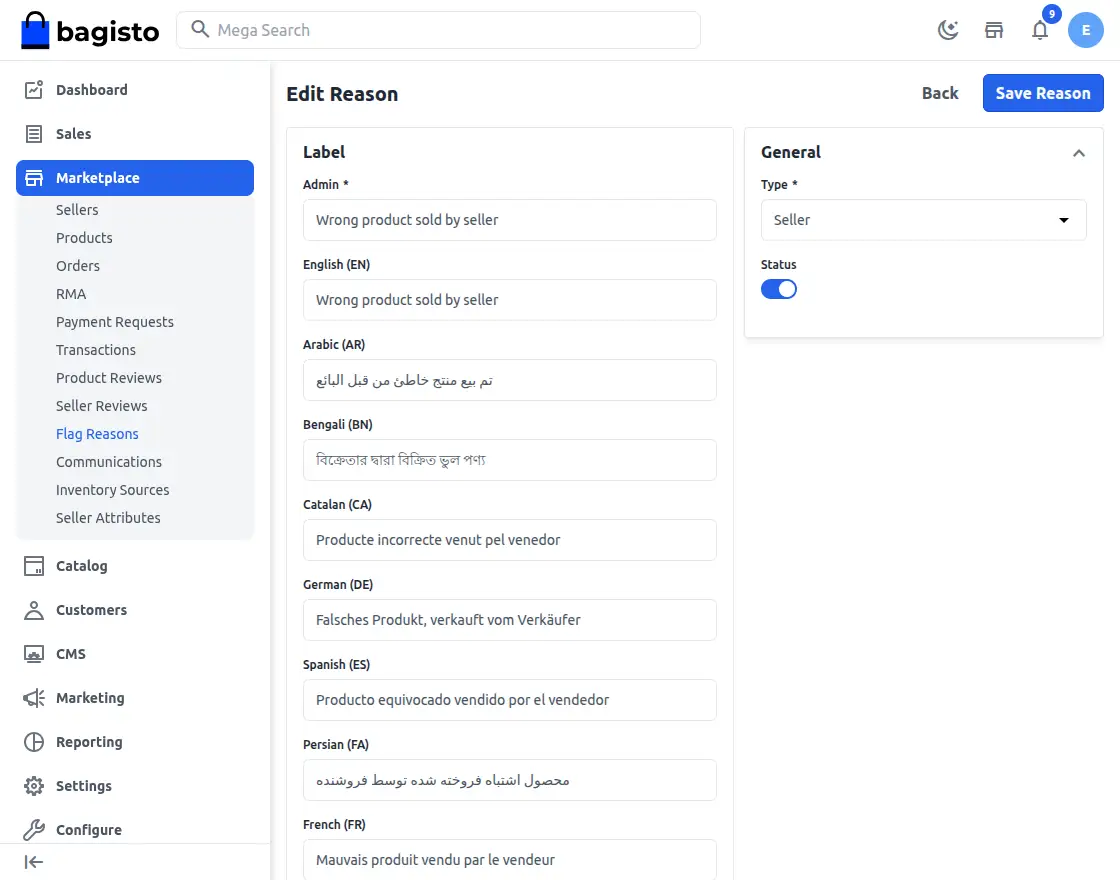
Enable
Here you can enable or disable the flag reasons features for Marketplace by selecting it Yes or No.
Reasons
Enter the reason for raising the seller flag.

Once you click on Reason you will be able to see the reasons and select accordingly.
Enable
Here you can enable or disable the flag reasons features for Marketplace by selecting Yes or No.
Product Flag Reason
Enter the reason for raising the product flag.
Once you click on Reason you will be able to see the reasons and select accordingly.
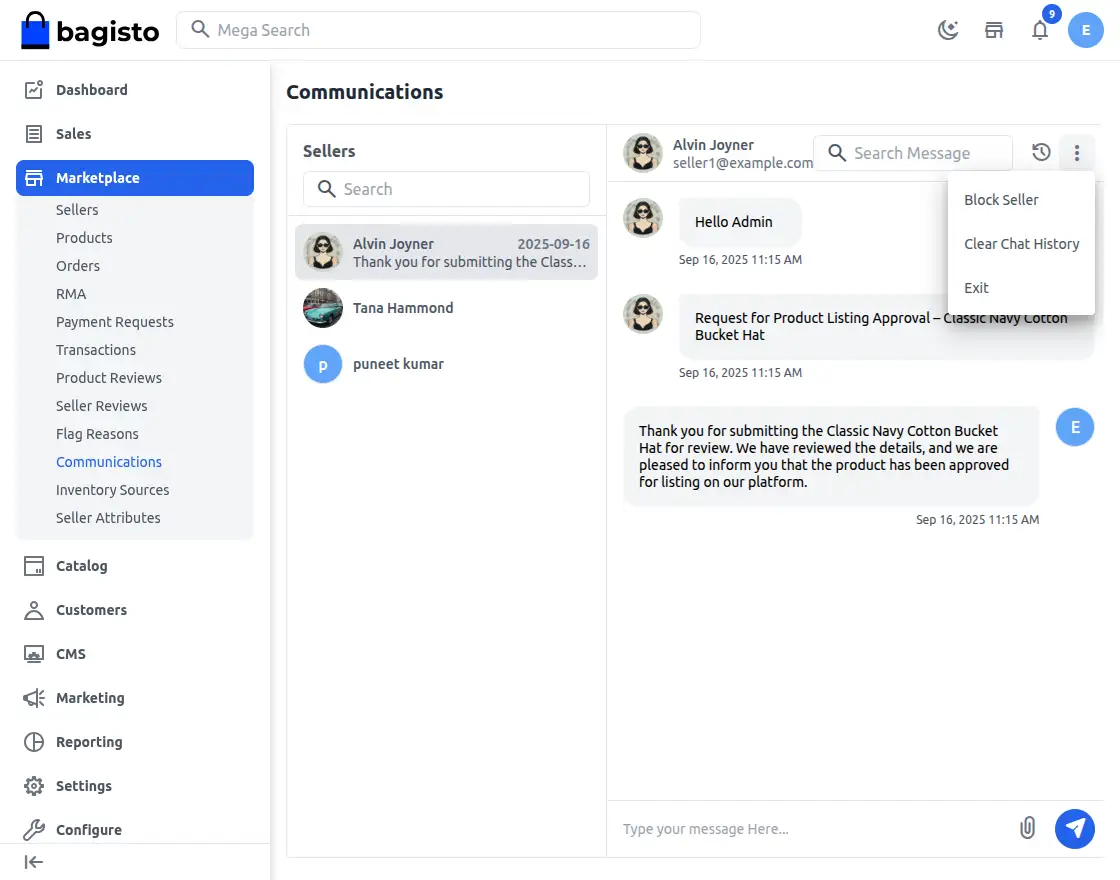
Communications
Now Admin can directly had a communication with their sellers in Laravel Multi Vendor Marketplace as shown in the image below.
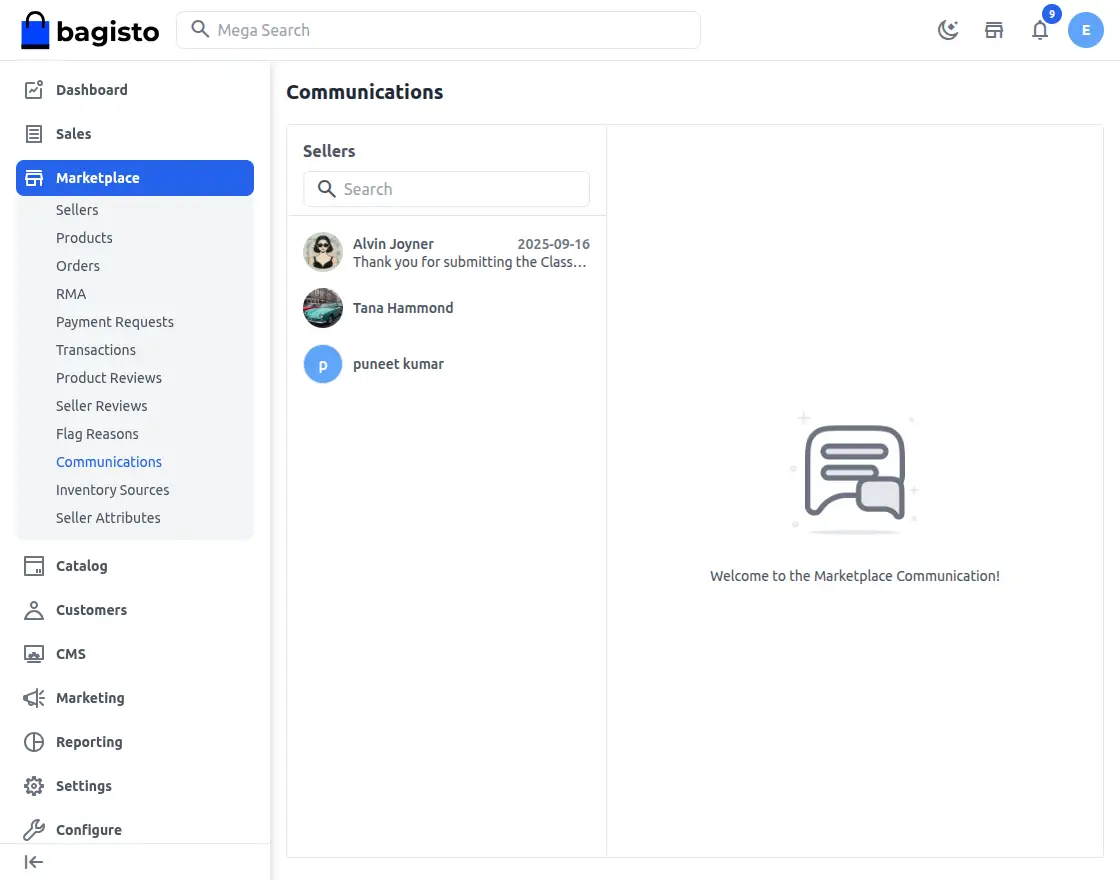
1) Admin can able to send files and sort out the chat history as shown in the image below.

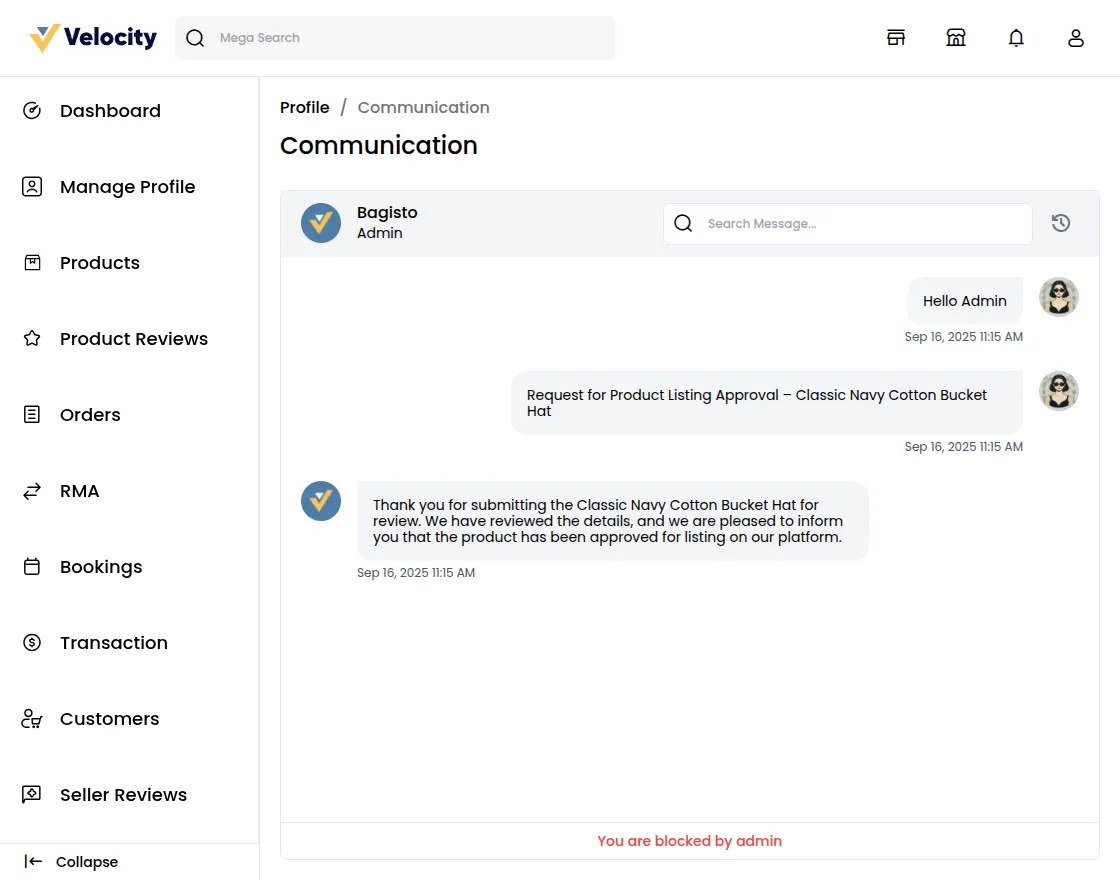
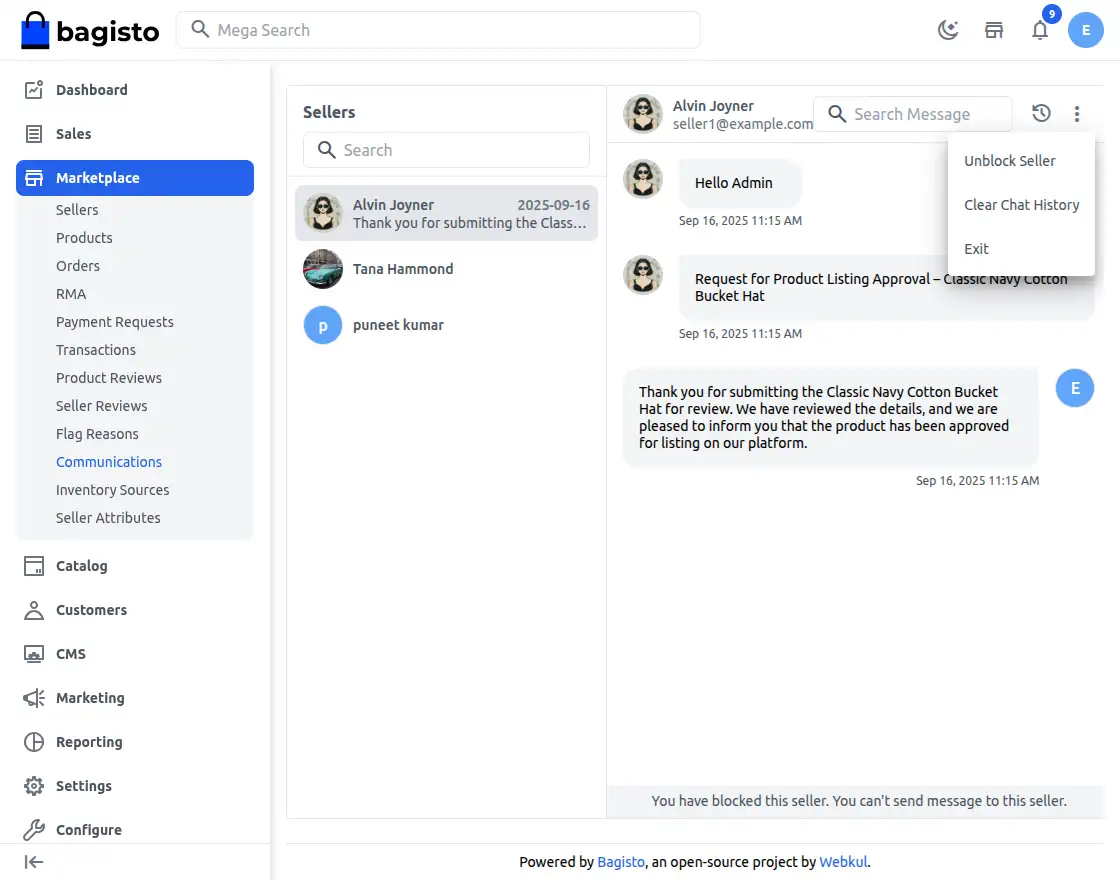
2) The Admin can Block the Seller check out the below image for reference.
After Block now Seller can also able to see this in the Seller Communication section.
3) Admin can also Clear Chat History and Exit the Chat as well.
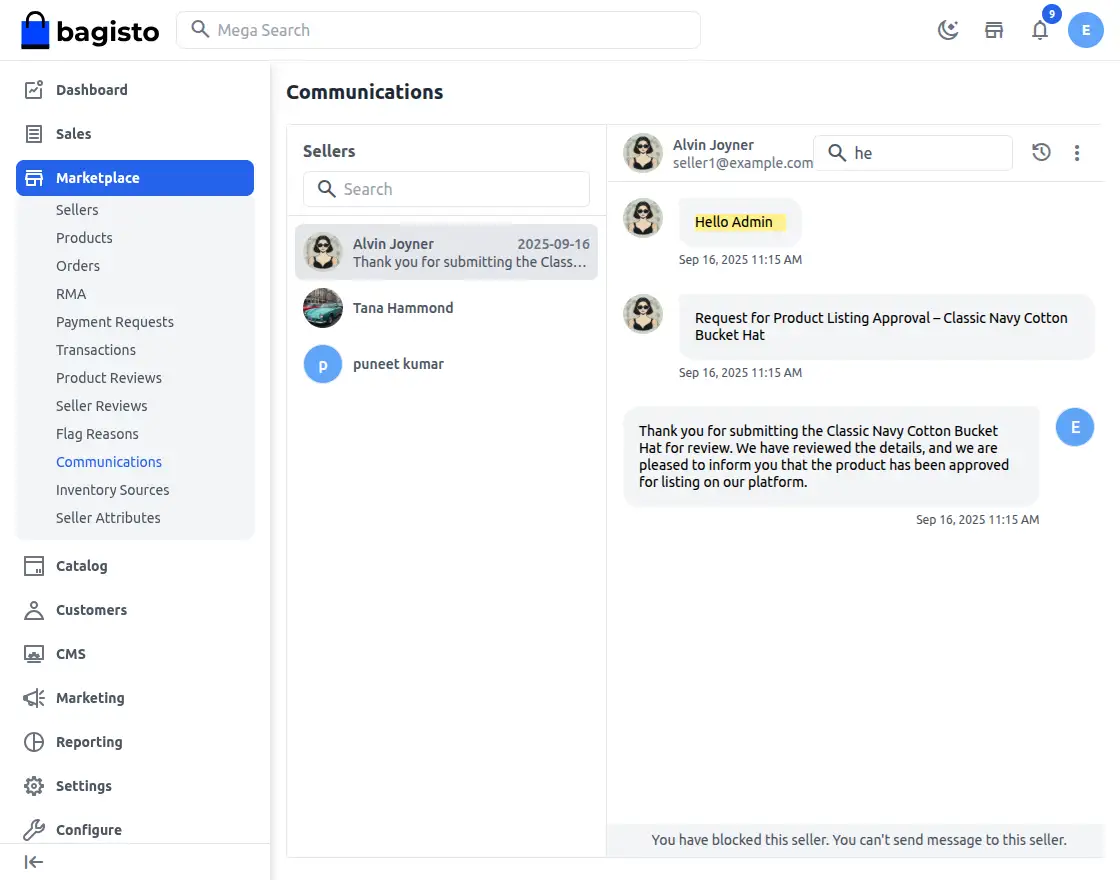
4) The Admin can also use the Search Bar to Search Messages the text will get highlighted accordingly check the below image for reference.
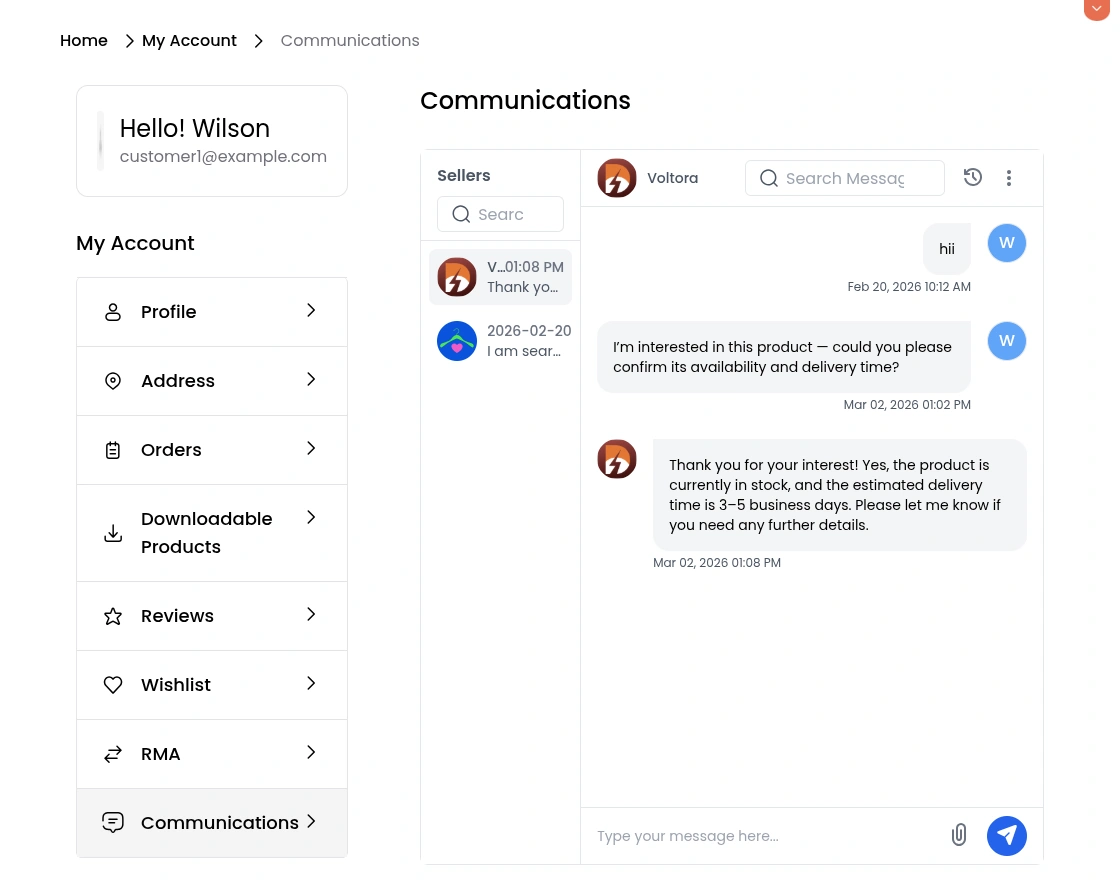
5. Customers and sellers can communicate directly with each other for product inquiries, order updates, support discussions, and quick issue resolution, ensuring a smooth and transparent shopping experience.
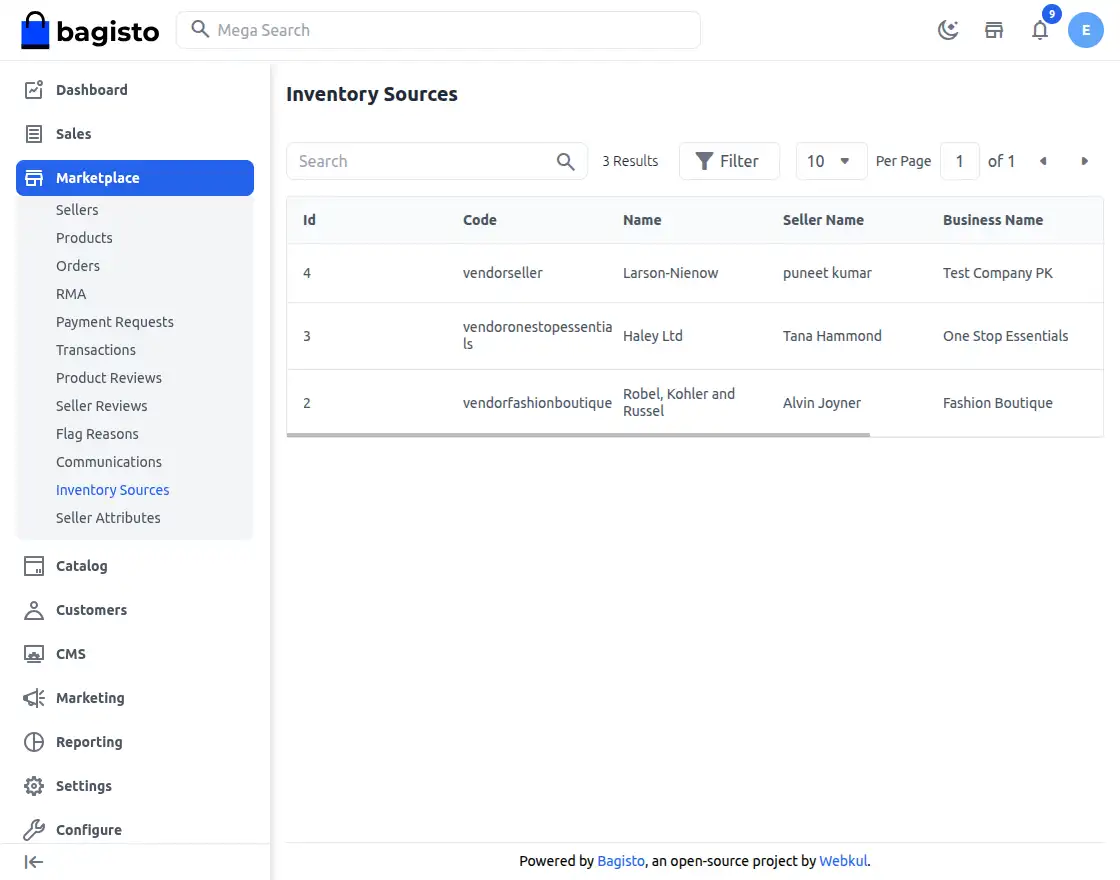
Inventory Sources:
Admin can easily view the complete list of inventory sources created by sellers.
Seller Attributes:
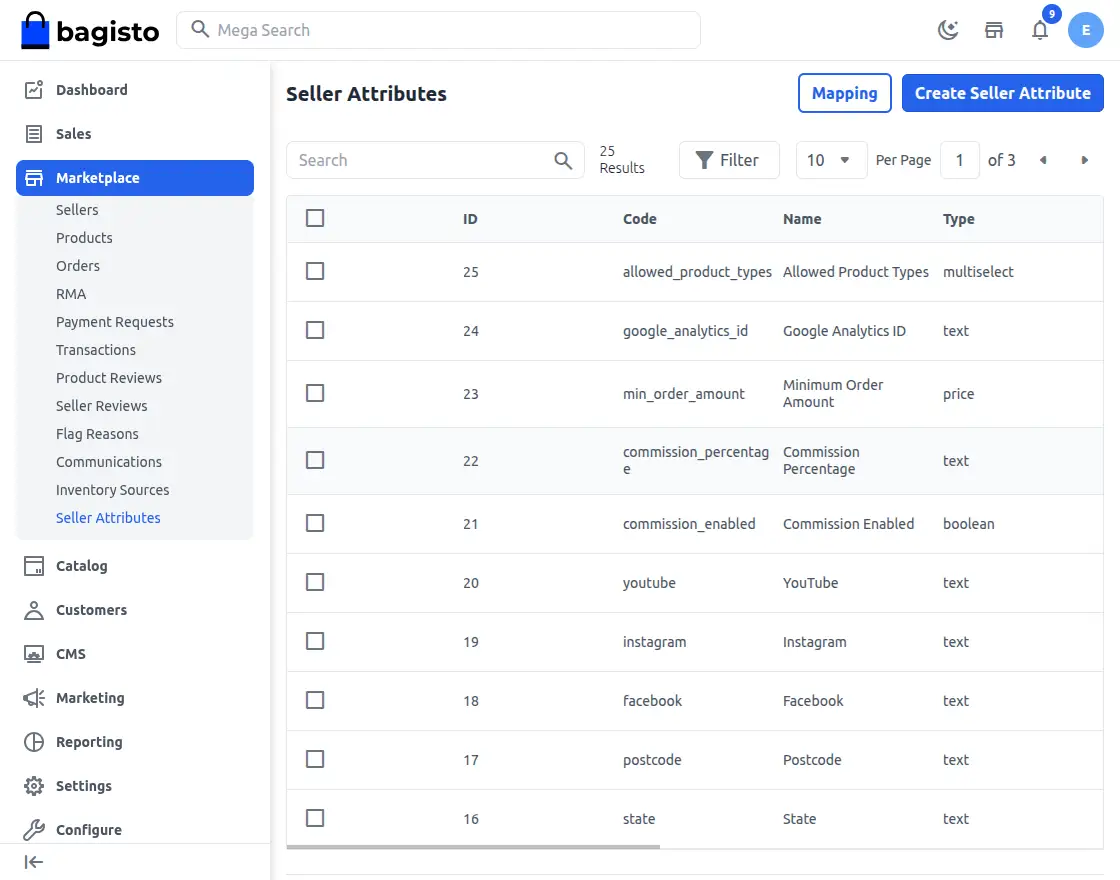 Admins can quickly view all seller attributes and even create new ones for sellers to use.
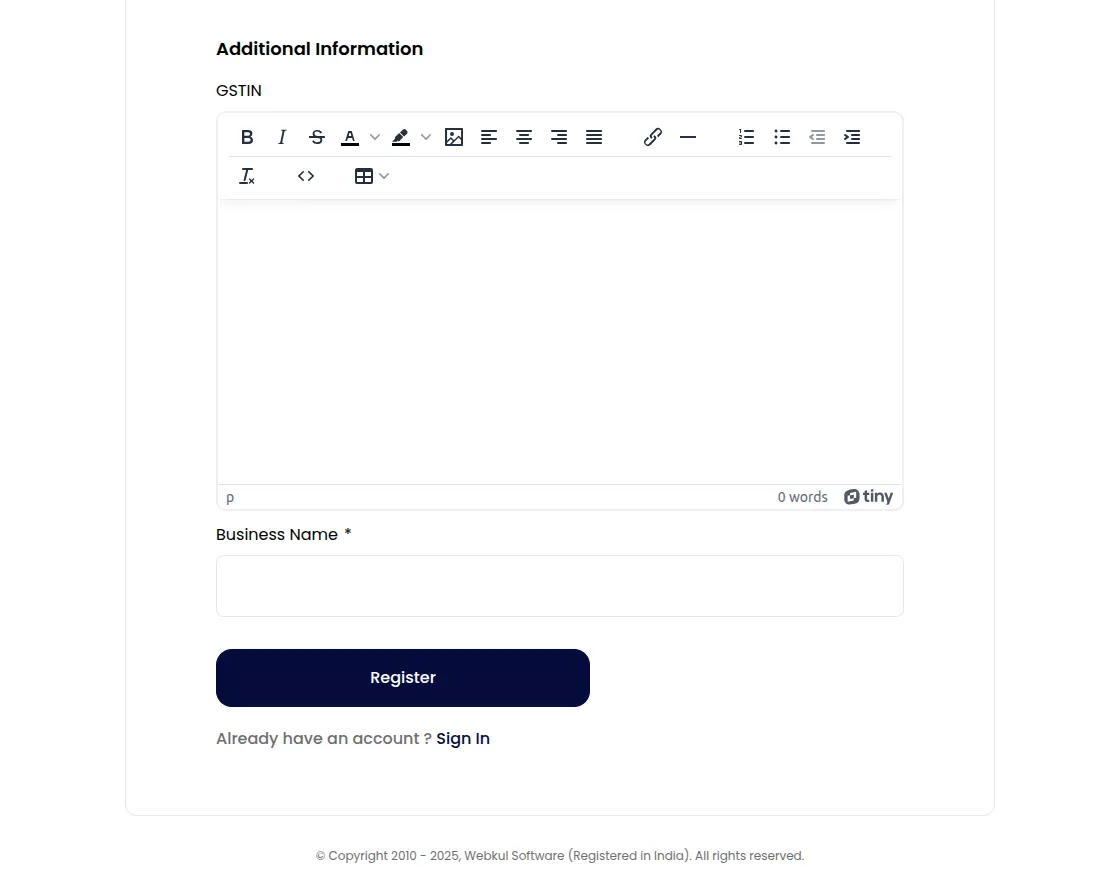
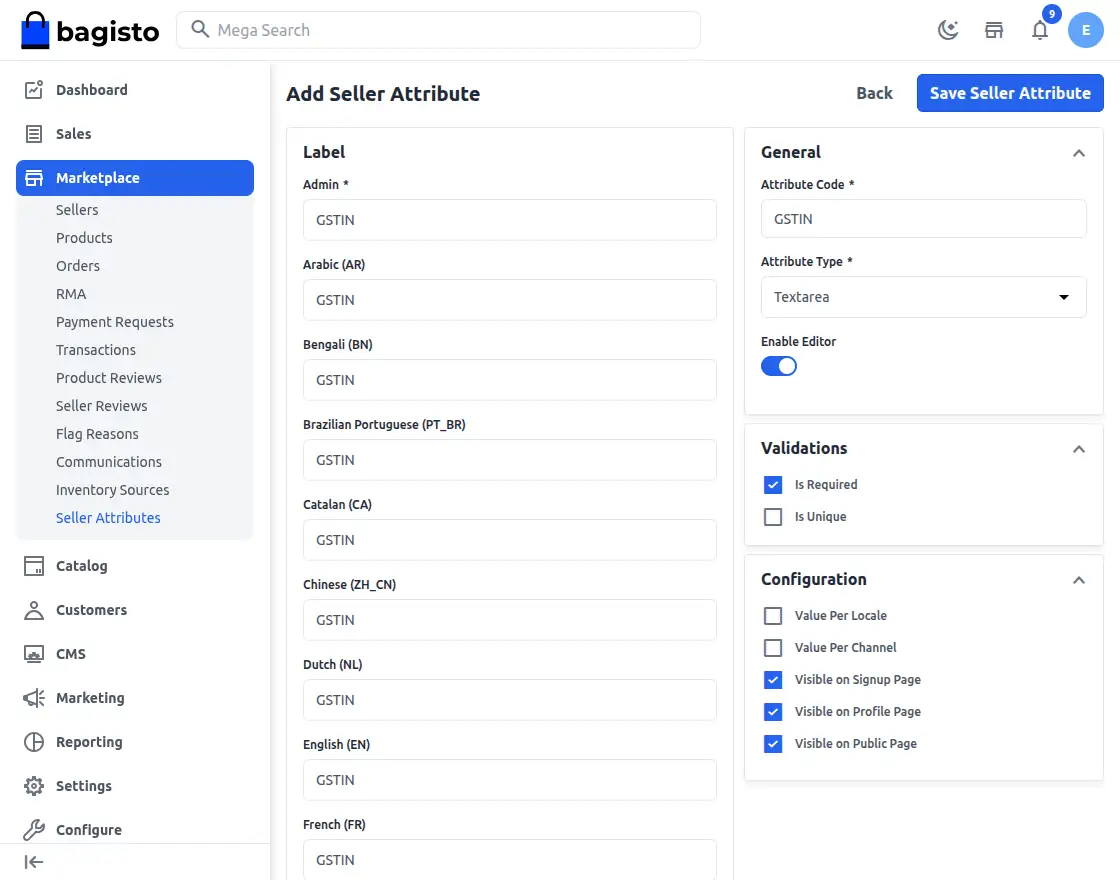 Visible on Signup Page: This attribute appears on the signup page when a seller registers on the website.
Visible on Profile Page: This attribute appears on the profile page when a seller updates their profile.
Visible on Public Page: This Attribute appears on the seller’s public profile page on the shop front.
Mapping the Seller Attributes:
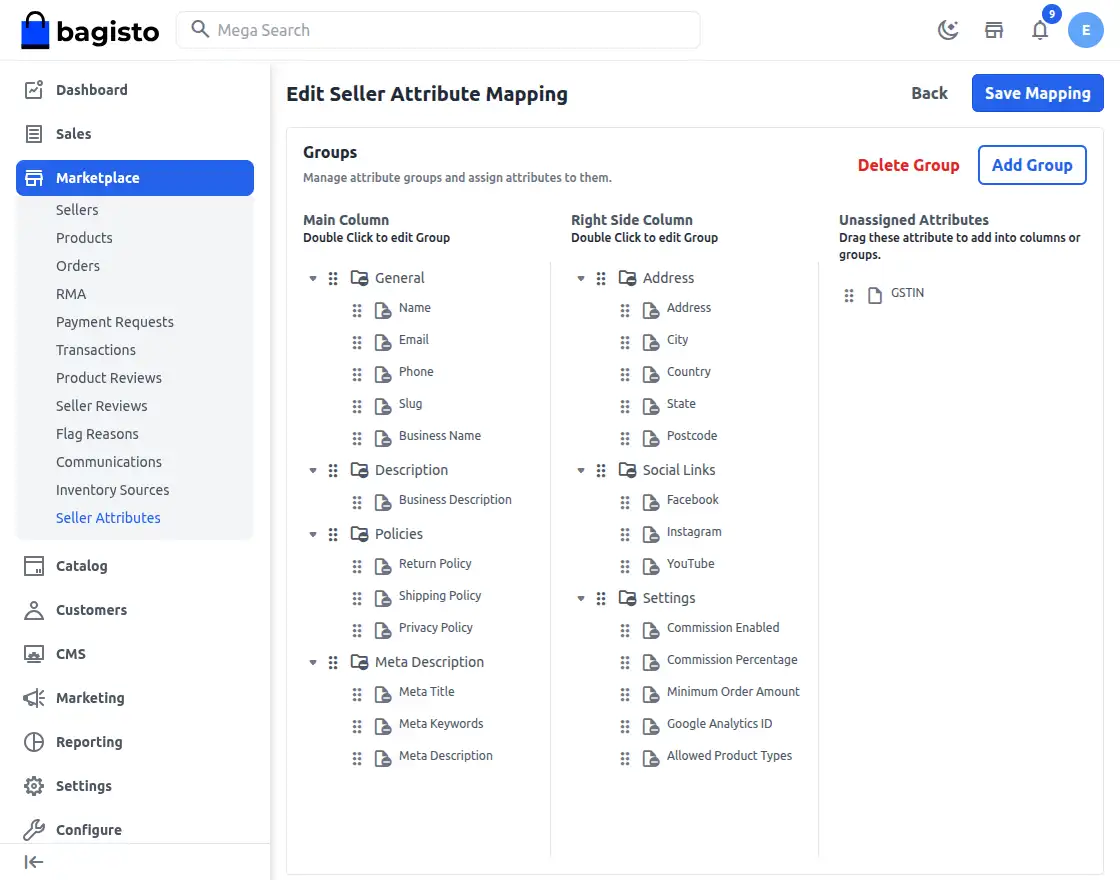
Step 1: Create the Attributes.
Step 2: Next, map the attributes by dragging and dropping the ‘Mapping’ button and placing them in the correct group.
Seller Dashboard
Now the seller can use their separate dashboard to perform various seller actions. They will open the marketplace and click on the open shop button.

It will navigate you to the seller registration page to Sign up as a seller.
Now the customer can directly create their seller account by entering their details, they also need to provide their Shop URL.
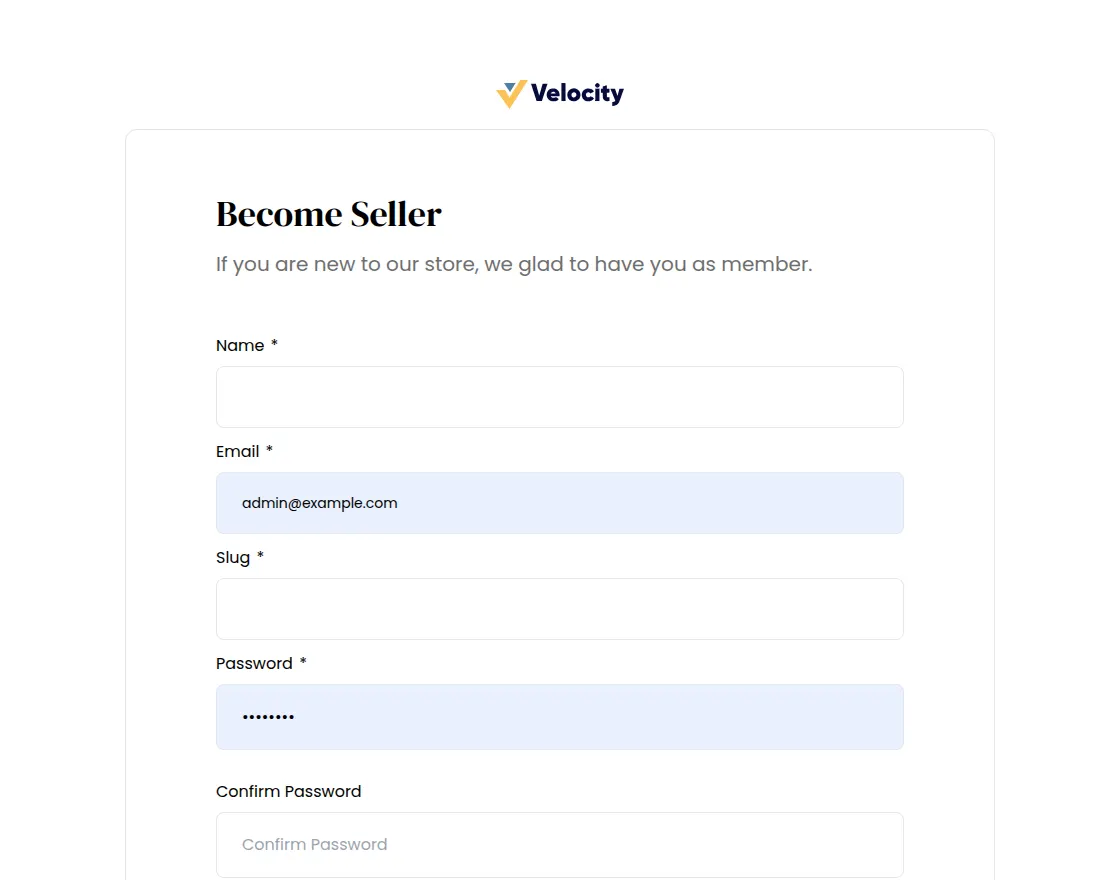
Once you register your seller account will be created and you can log in to the seller dashboard by clicking on the sign-in button.

Let’s move with the features of the Seller dashboard under the Seller separate dashboard.
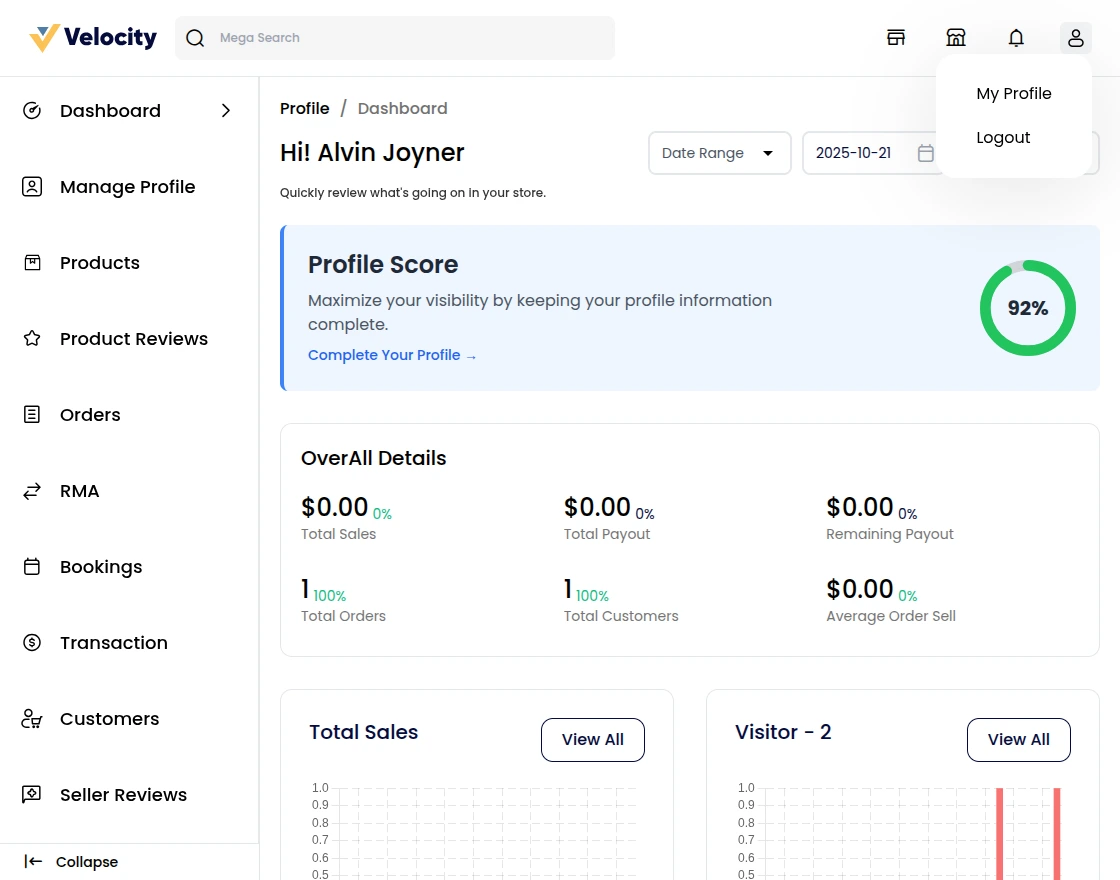
Dashboard
Here you can see complete details of your sales report with an intuitive bar graph. Also, with top-selling products and customers.

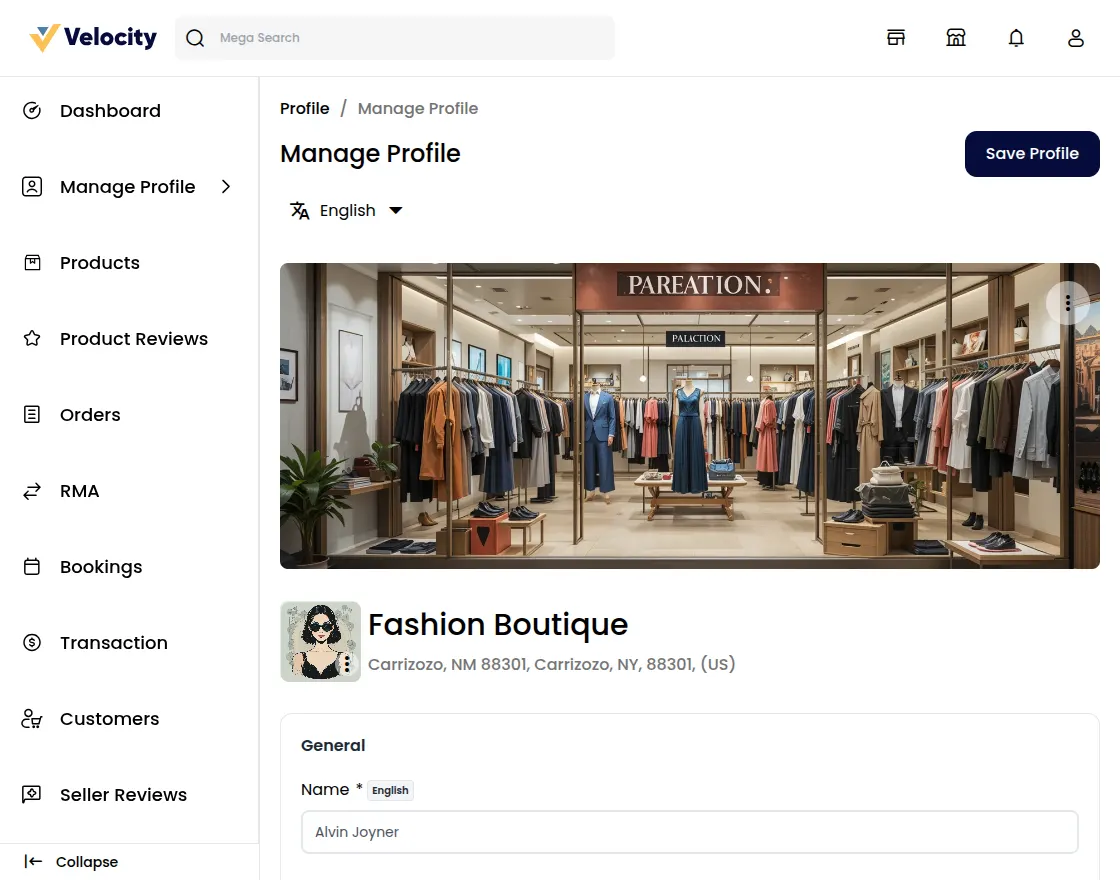
Manage Profile
Here you can manage your shop profile.

Under this section, you need to provide a logo and banner for the shop to be displayed at the front end
Shop Title
Here you need to provide the title or name of your Shop. It’s a mandatory field.
Shop Url
Here you need to provide the URL for your shop by which your shop will be accessible to your customers.
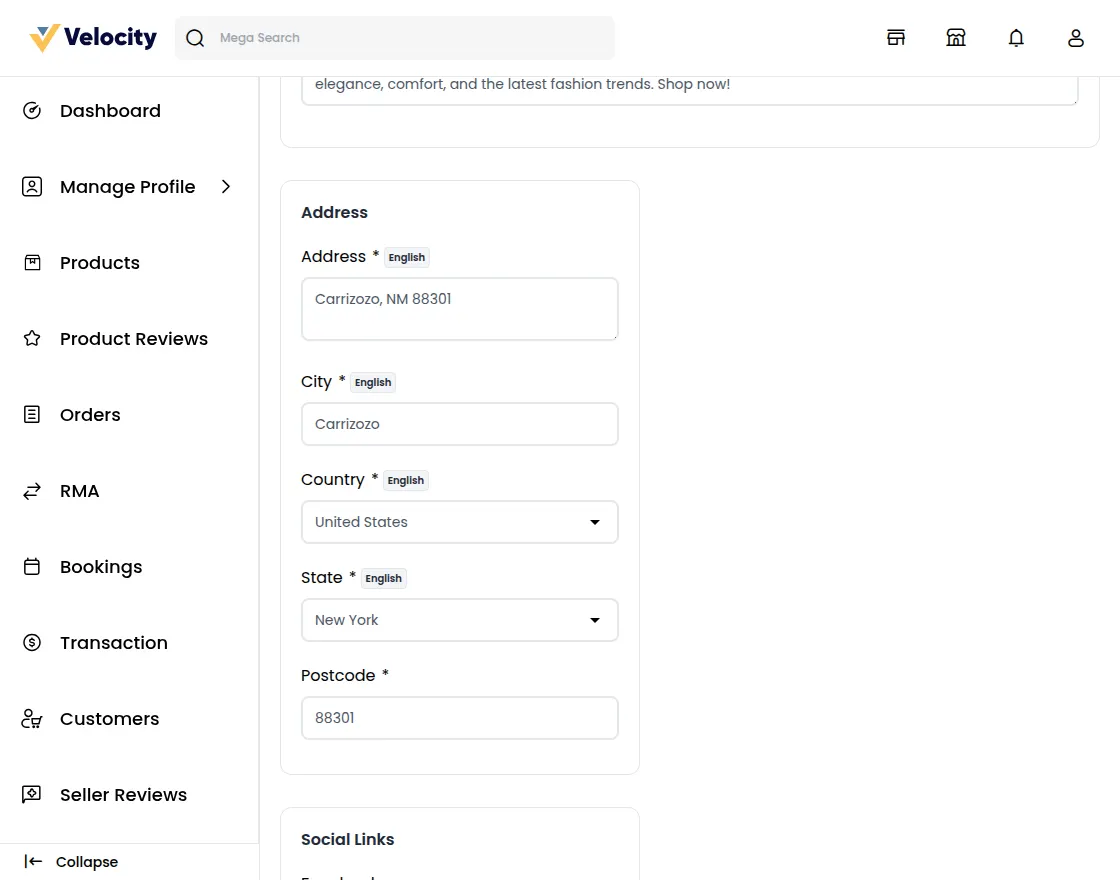
Store address
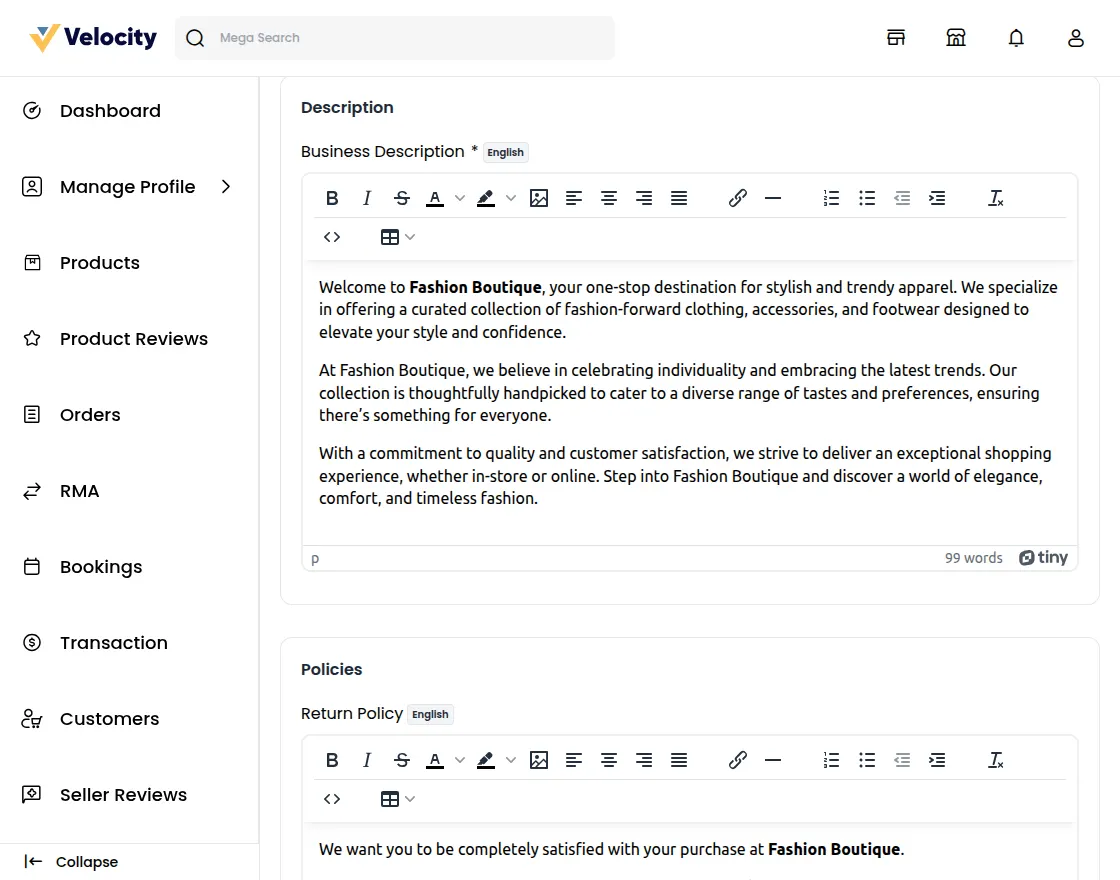
Business Description
Under this section, you can describe your shop inform customers about the products you sell, and other stuff to make it more informative.
Social Links
In this section, you can provide links to your shop’s social channels like Facebook, Twitter, Pinterest, and LinkedIn.

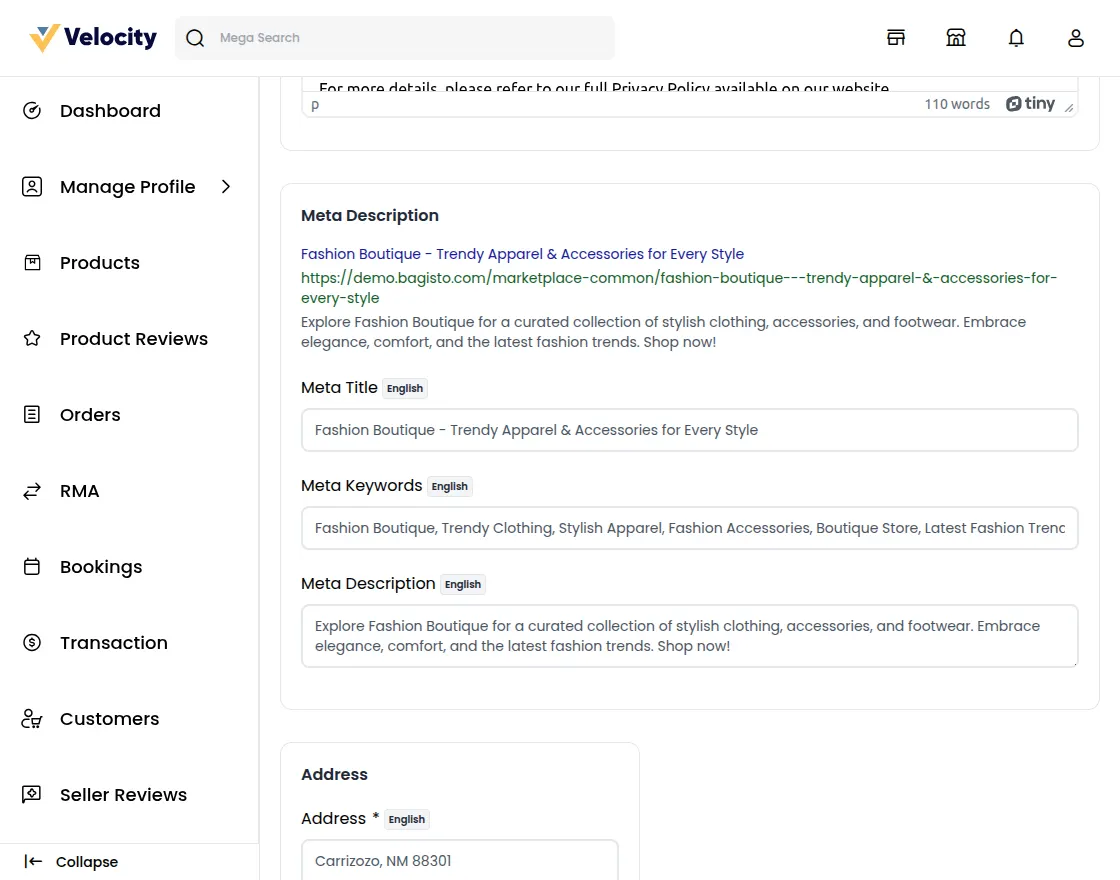
Meta Description
To improve your shop search ranking on search engines, you can enrich that by providing meta titles and descriptions.
Policies
To keep the purchase transparent between you and your customers, you can provide a Shipping, Return, and also Privacy policy.
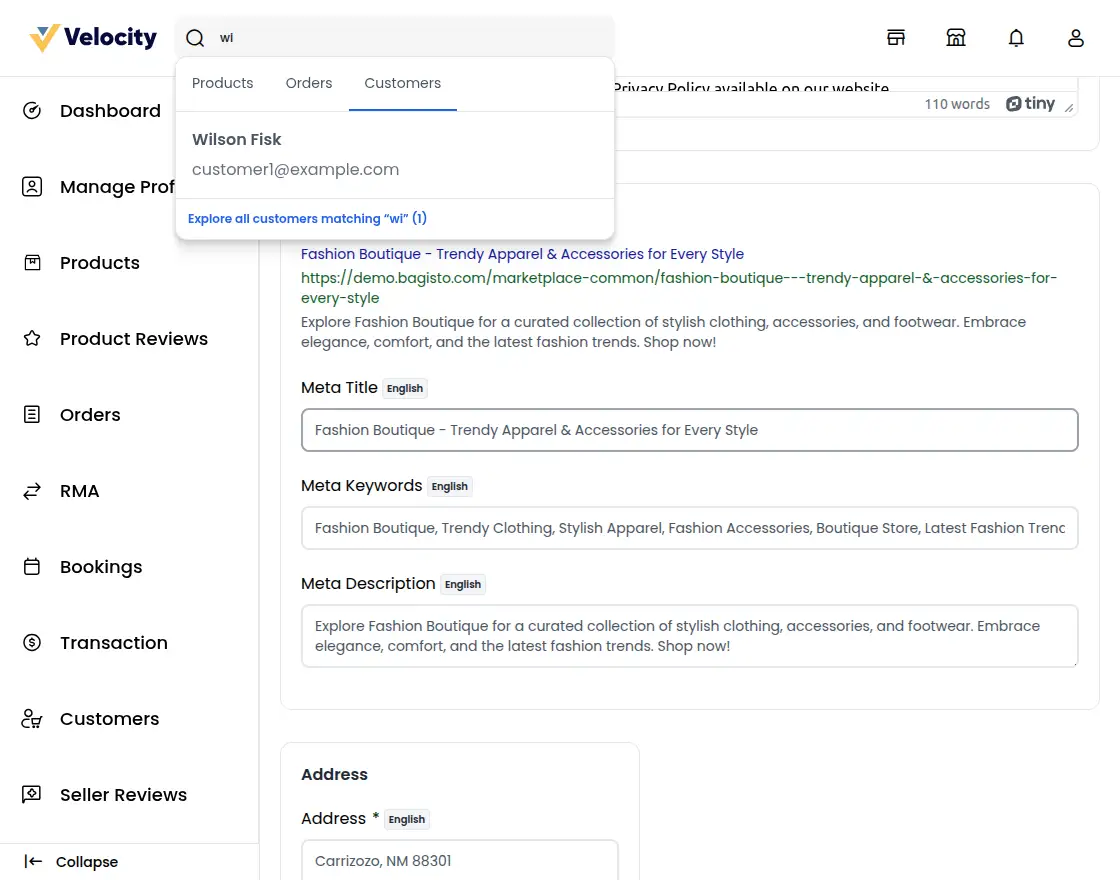
Mega Search
The seller can also search products, orders, and customers by entering keywords and all the associated data will display in the drop-down option.
Products
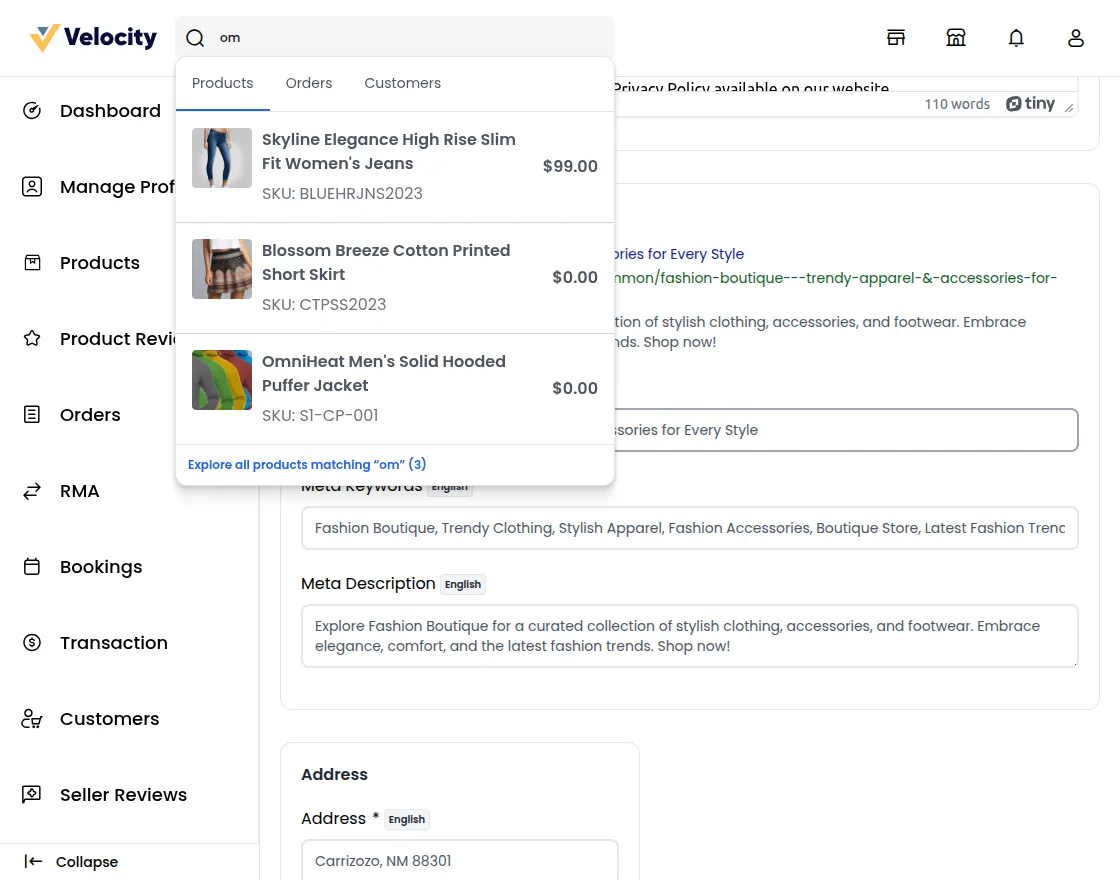
When clicking on products it will show the Explore all Products option so the seller can explore all the products to the related keyword.
Orders
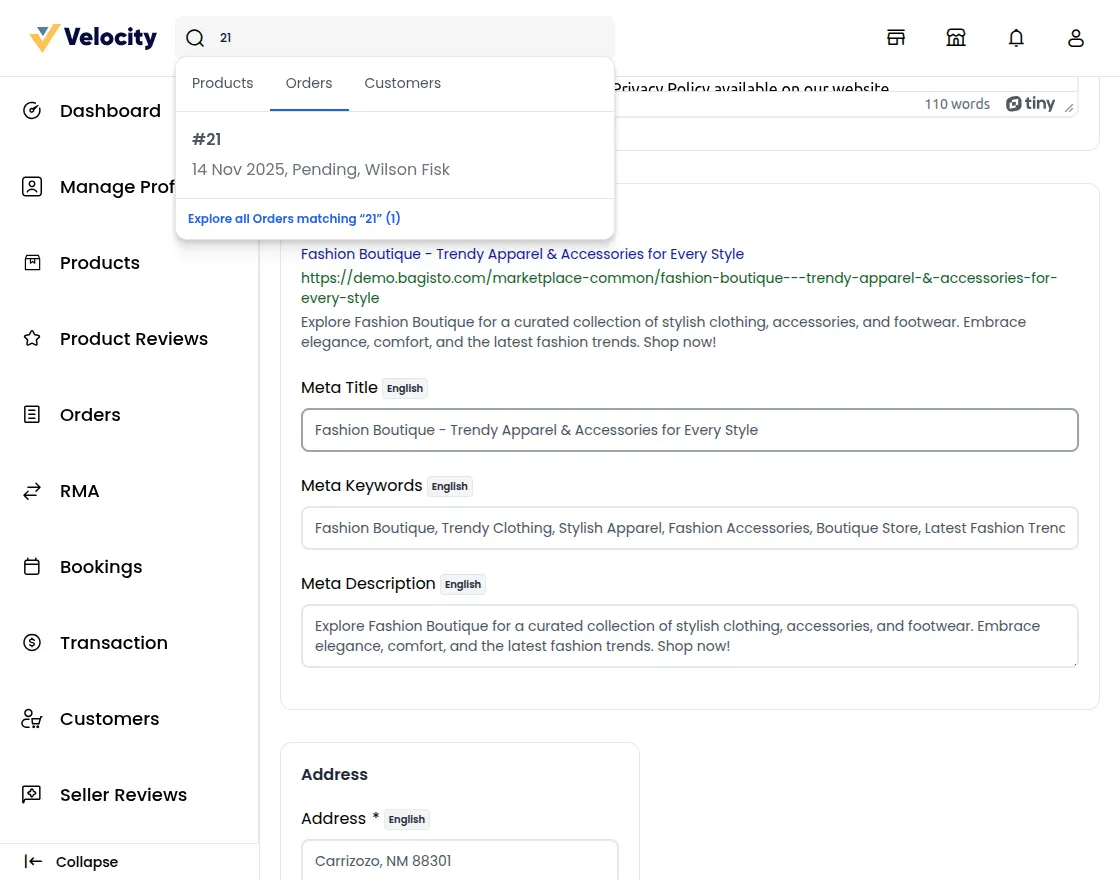
Customers
View Seller Home Page
In the top right corner click on the collection page button to view the seller’s page.
You will then be redirected to the dedicated seller’s page.
To check the seller’s product collection, click View Collection Page. You will then be redirected to the Sellers’ Product Collection page.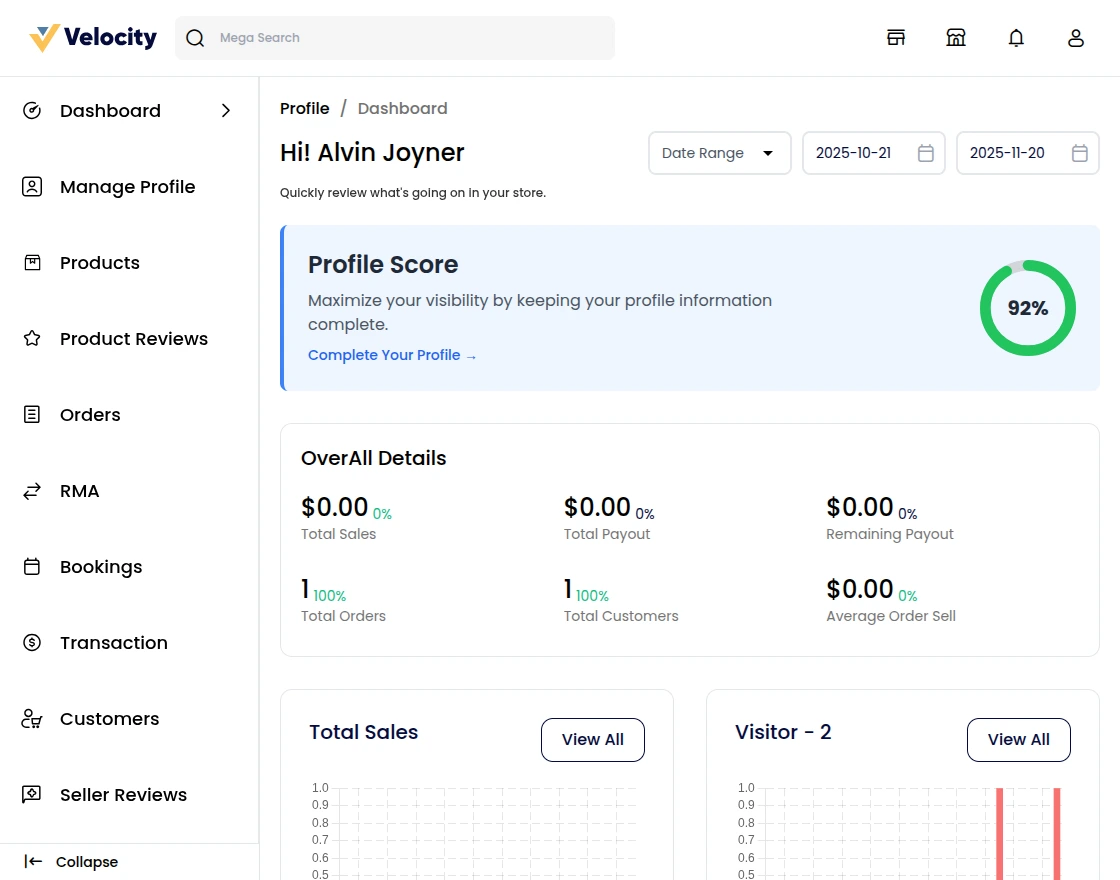
Stock Threshold- Seller products and their stock-related information.
Products on Top- Shows the list of products that are on top sales.
Top Customers – Shows the list of customers who purchased the product the most.
Top Category – It shows the top category list which is top on sales

Seller Logout and Collapse
The seller can click on the logout button and logout from the seller panel.
Products
Here you will find the list of products as created by the seller.
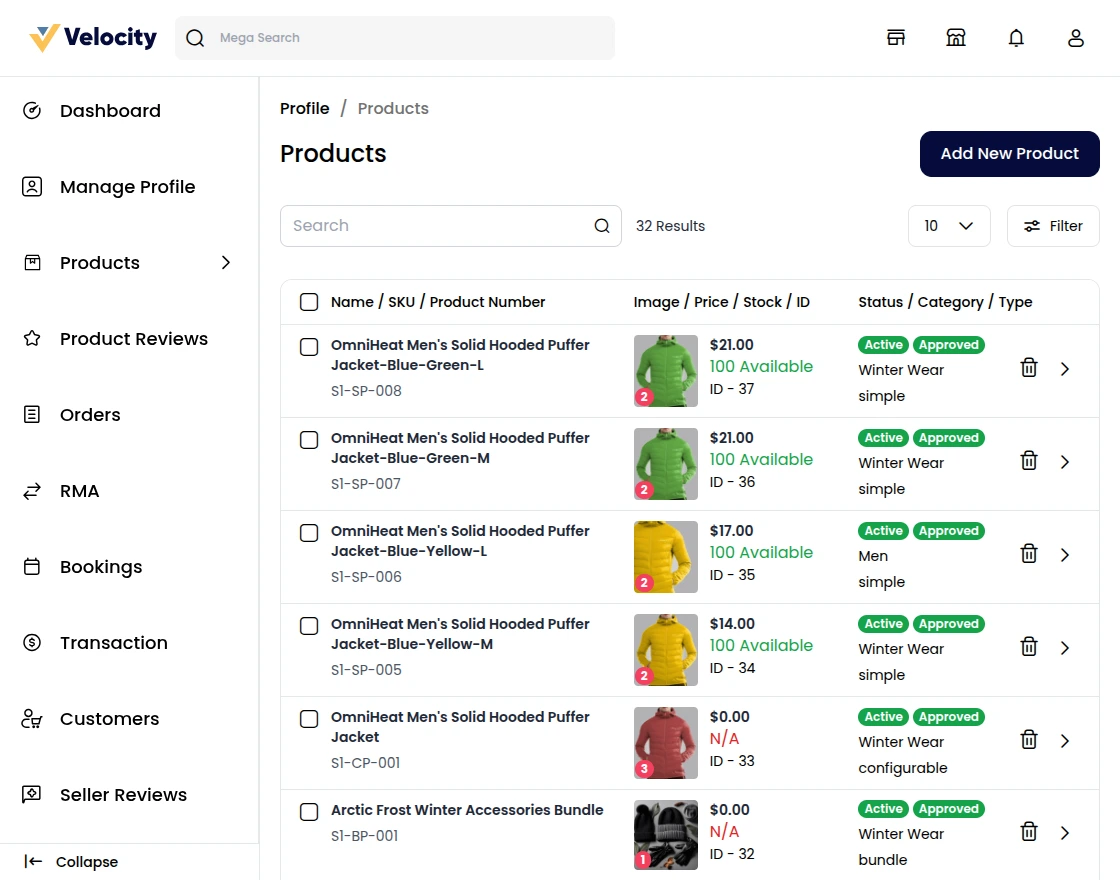
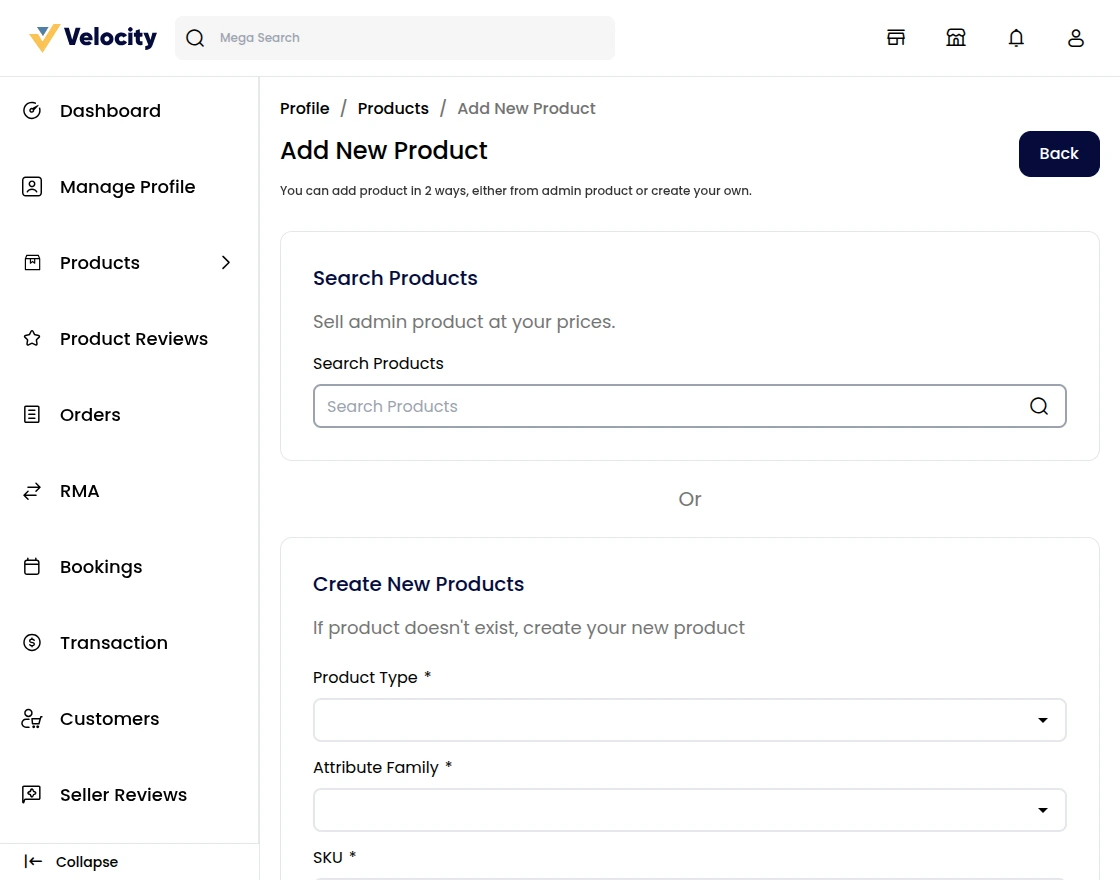
Create a New Product:
If the product is new, you can also click the Add New Product option and create a new product.
- You can create a simple product that doesn’t have any variations in it.
- For the products which have variations in their size, and color then you can create configurable products.
- If you want to sell some membership or any service then you can create the virtual products.
- The products that need to be downloaded in the form of files go with the downloadable products.
- You can create Booking Products, Grouped Products & Bundled Products also. So you can assign seller products only.

Assign an Existing Product:
If there is an already existing product on the website and you want to sell the same product of yours but with different prices, just type the first three letters of the product.
If the product is already there on the website, you will get that in the search results.
Click on Sell Yours to create your version of the existing product. You need to provide the following description of the existing product: Product Condition:
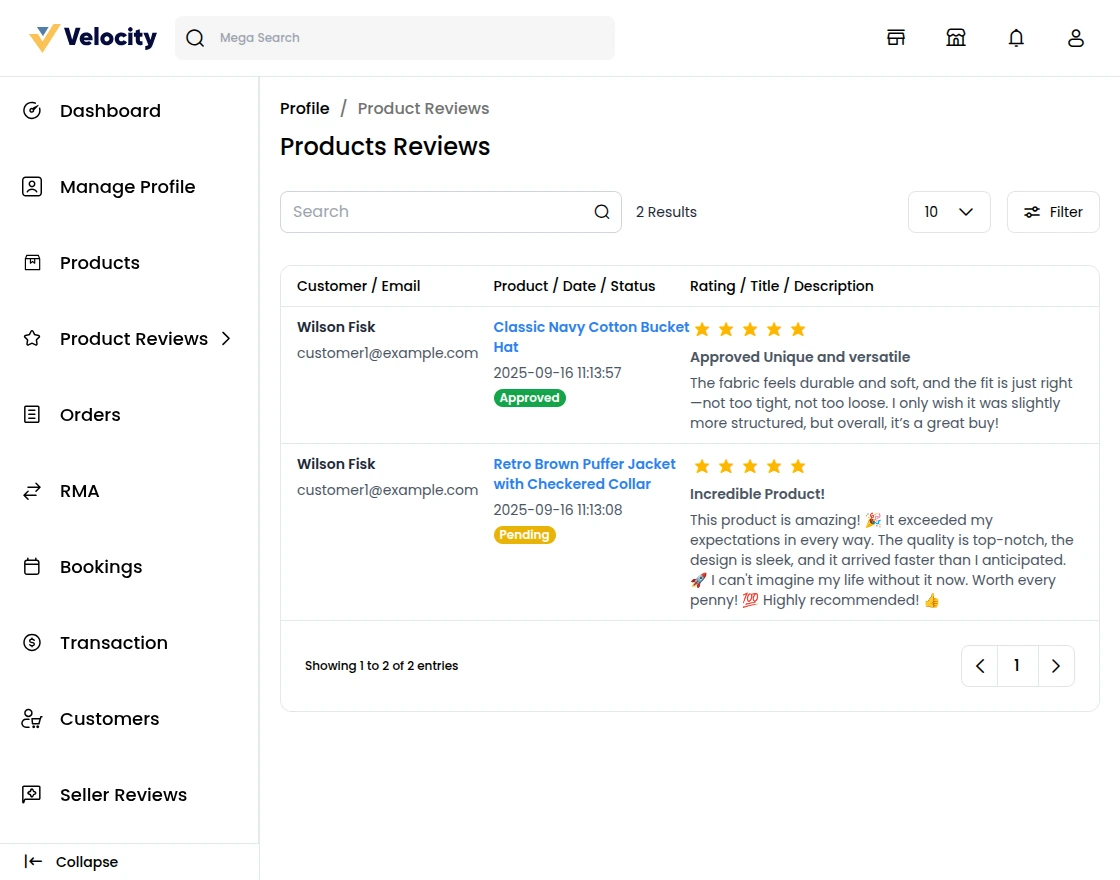
Products Review
Here, the seller can check the reviews given by the customer for particular products.
Seller can also approve/Disapprove the product Review.
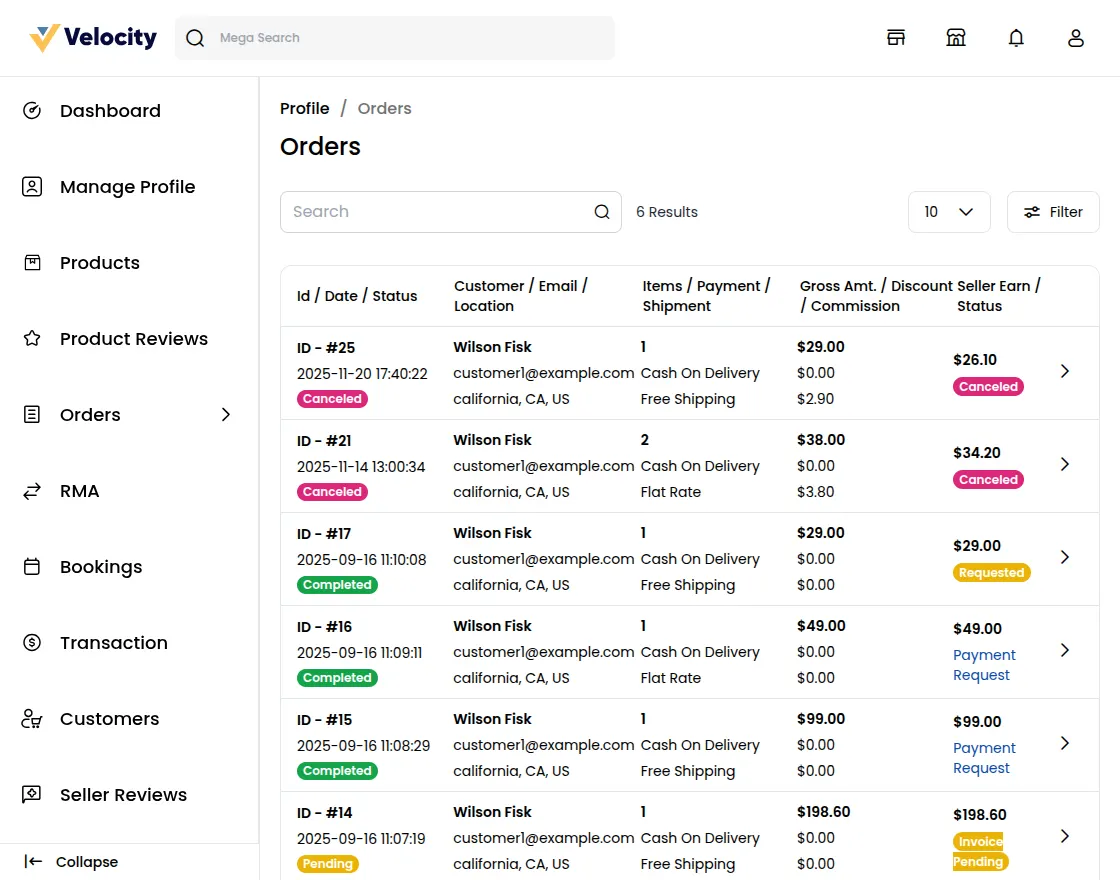
Orders
Here you will find the list of orders as made by the customers for your products.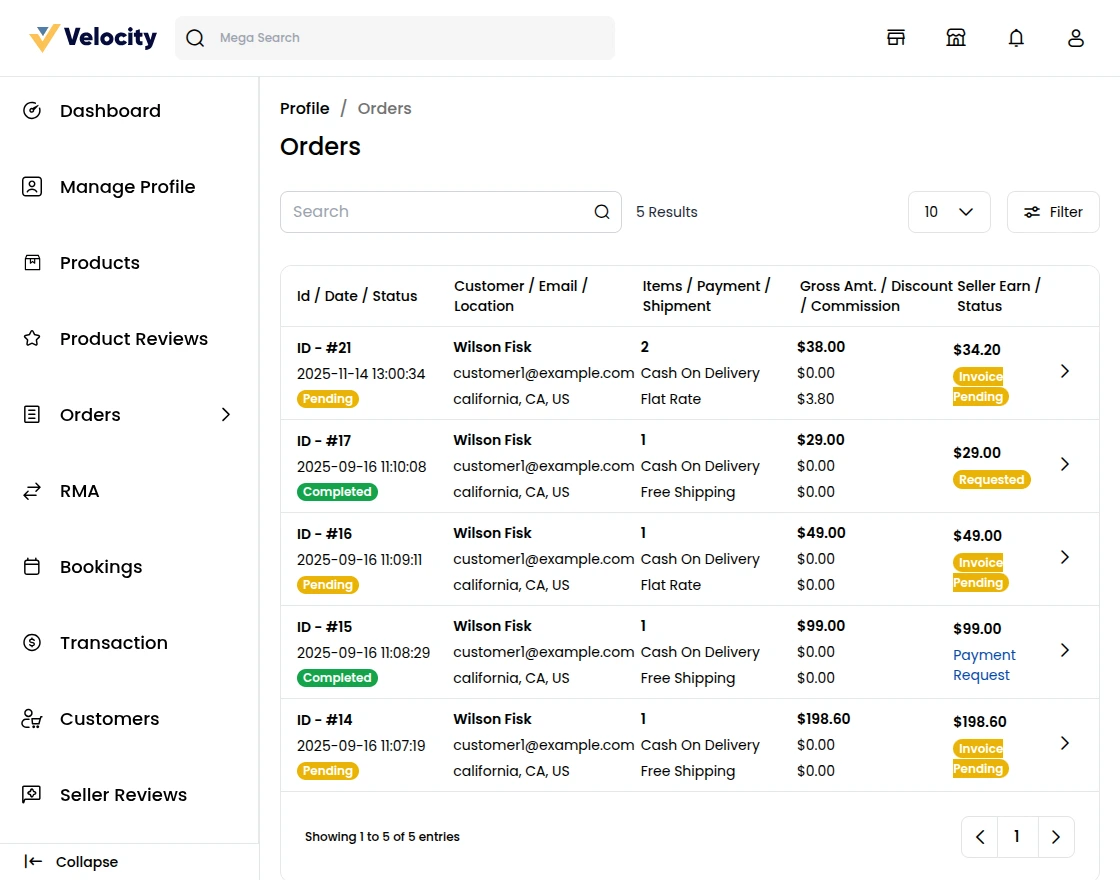
Clicking the arrow icon, you will find more information on the order along with the invoice and also shipment details.
The seller can also do the following things once receives the order from the customer.
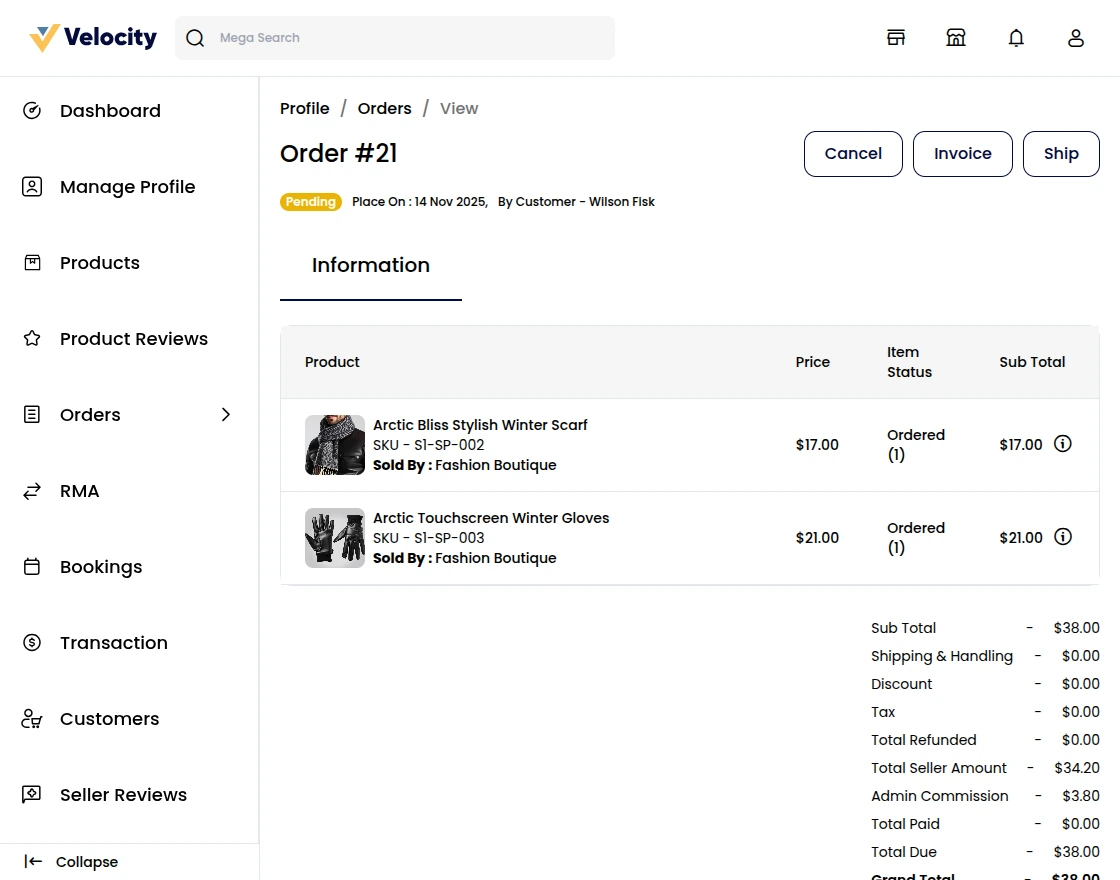
Invoice
The seller can create an invoice, ship, and cancel the product as mentioned in the snapshot.
By clicking on the invoice, it will show a popup with invoice details.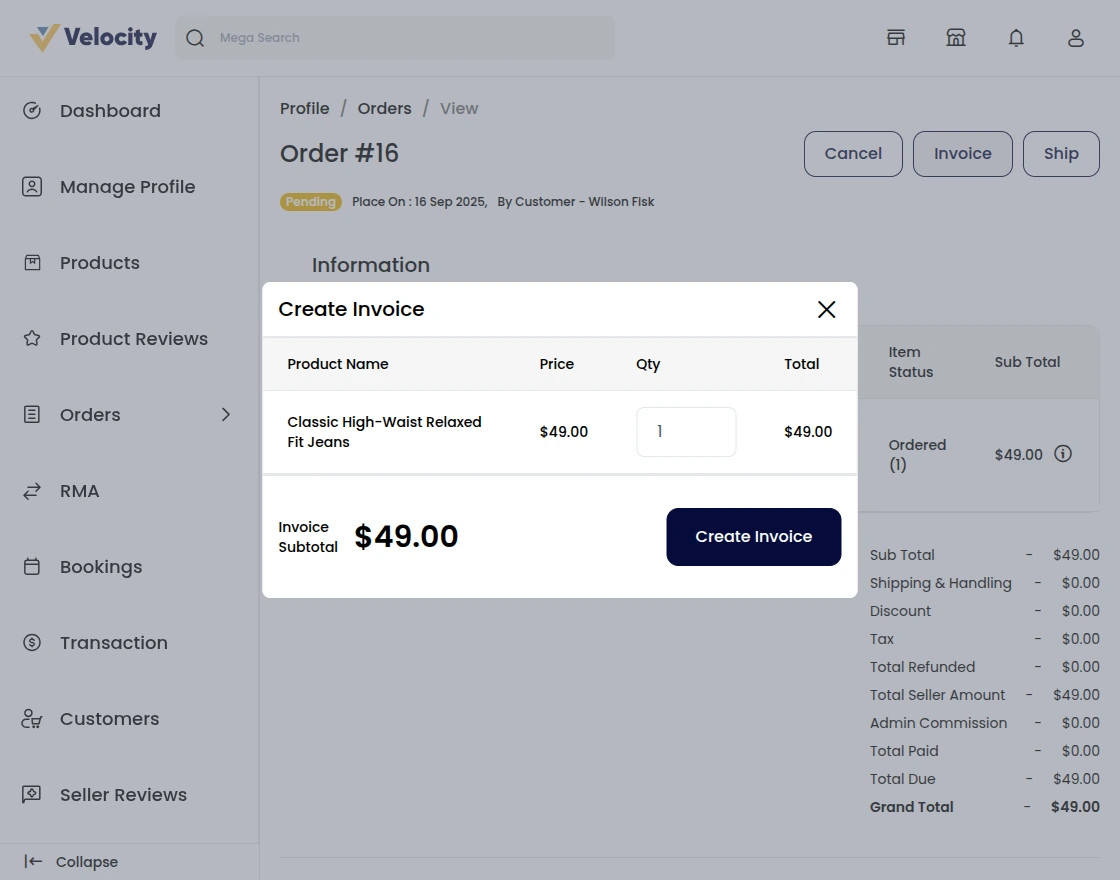 The seller can create the invoice.

Once the invoice is created, the seller can also do the shipment by clicking on the ship button.
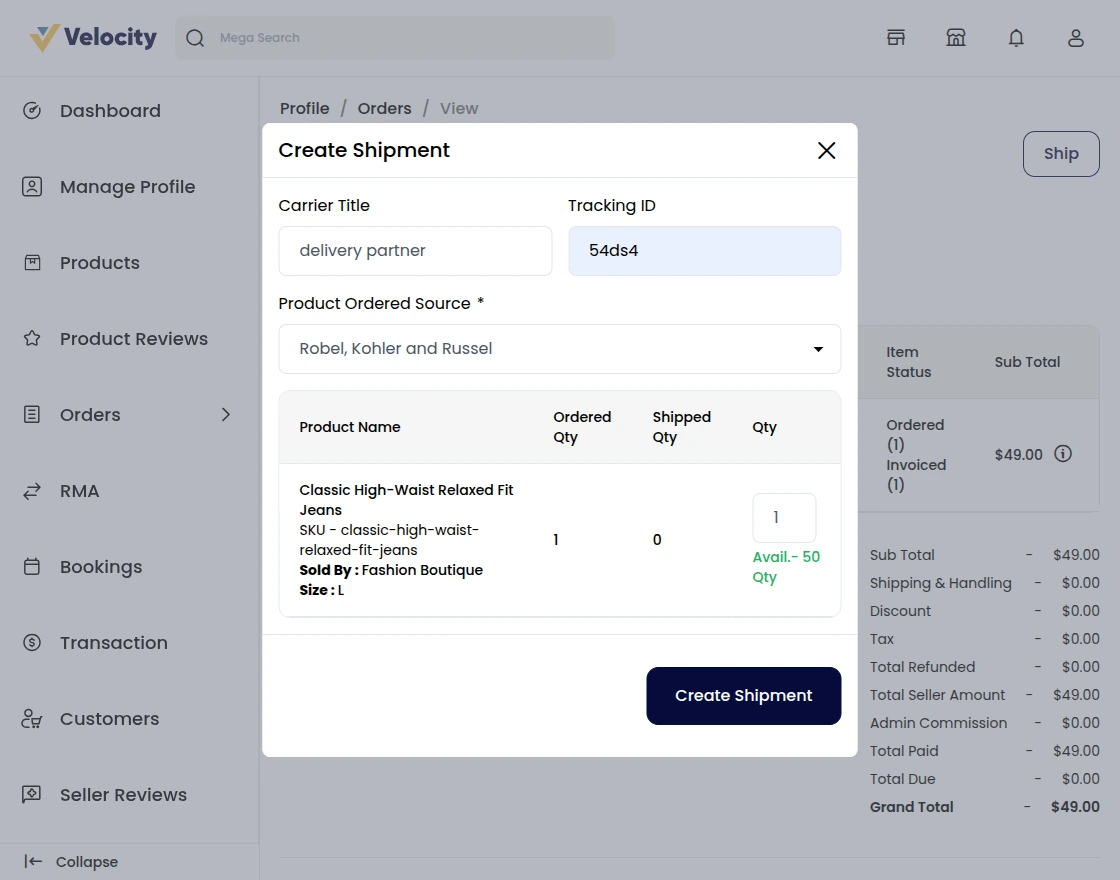 After clicking on create shipment the shipment will generate.
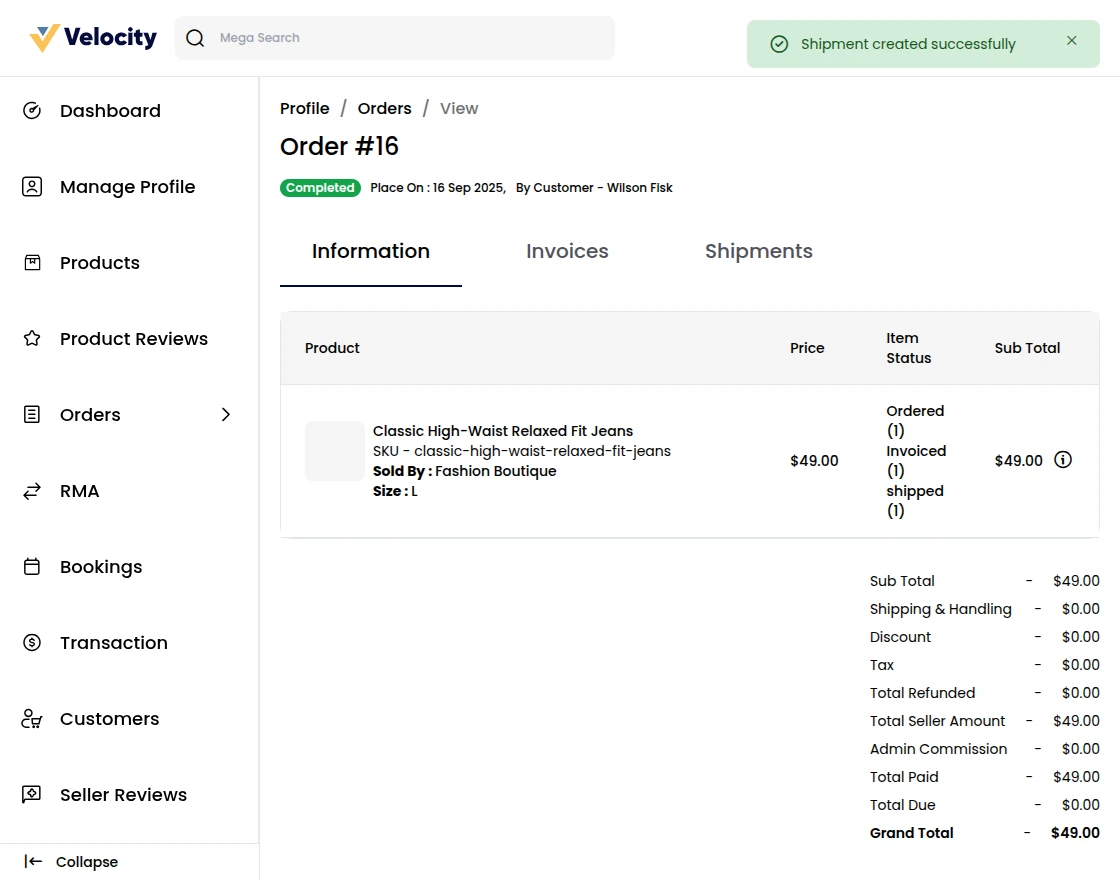 The seller can also cancel the order by clicking on the cancel option:
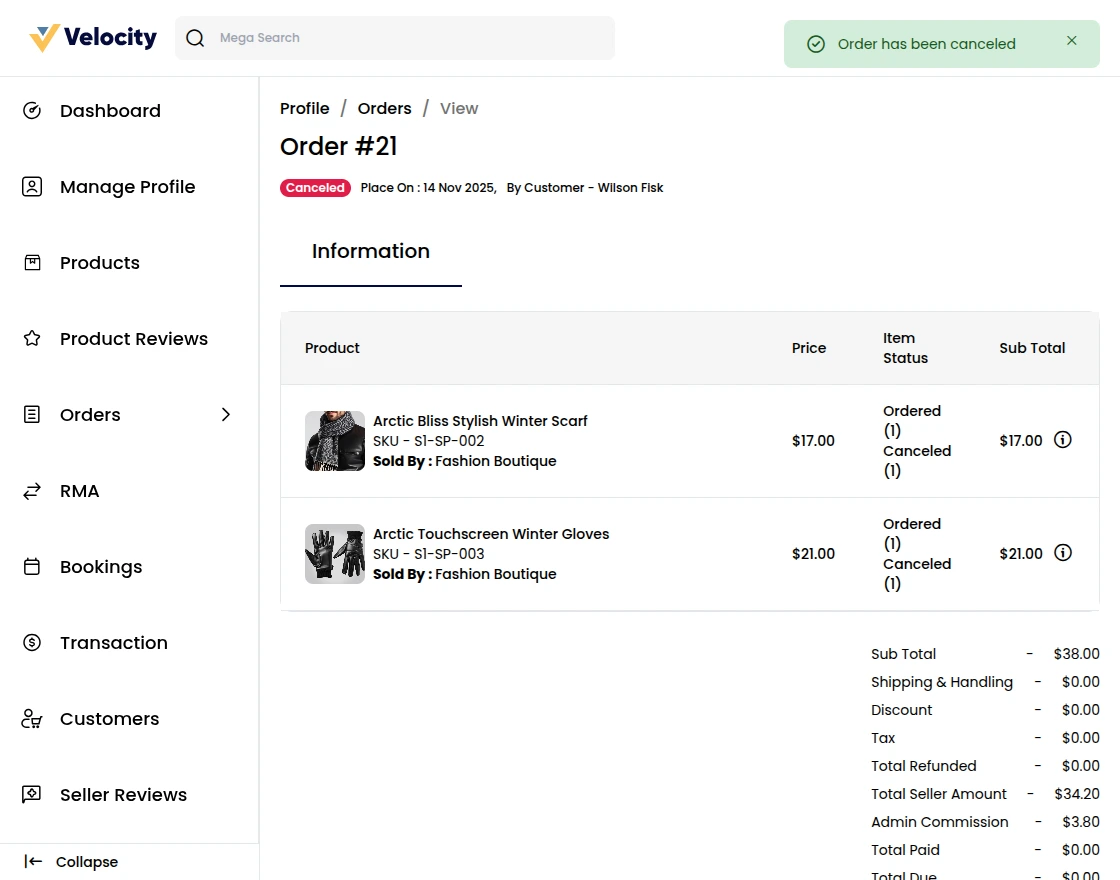
The seller can also check the refund details of any order. But the refund will be initiated by the admin only.
RMA Section
Sellers can see the RMA request that has been generated by the Customers/Guests under the RMA section.
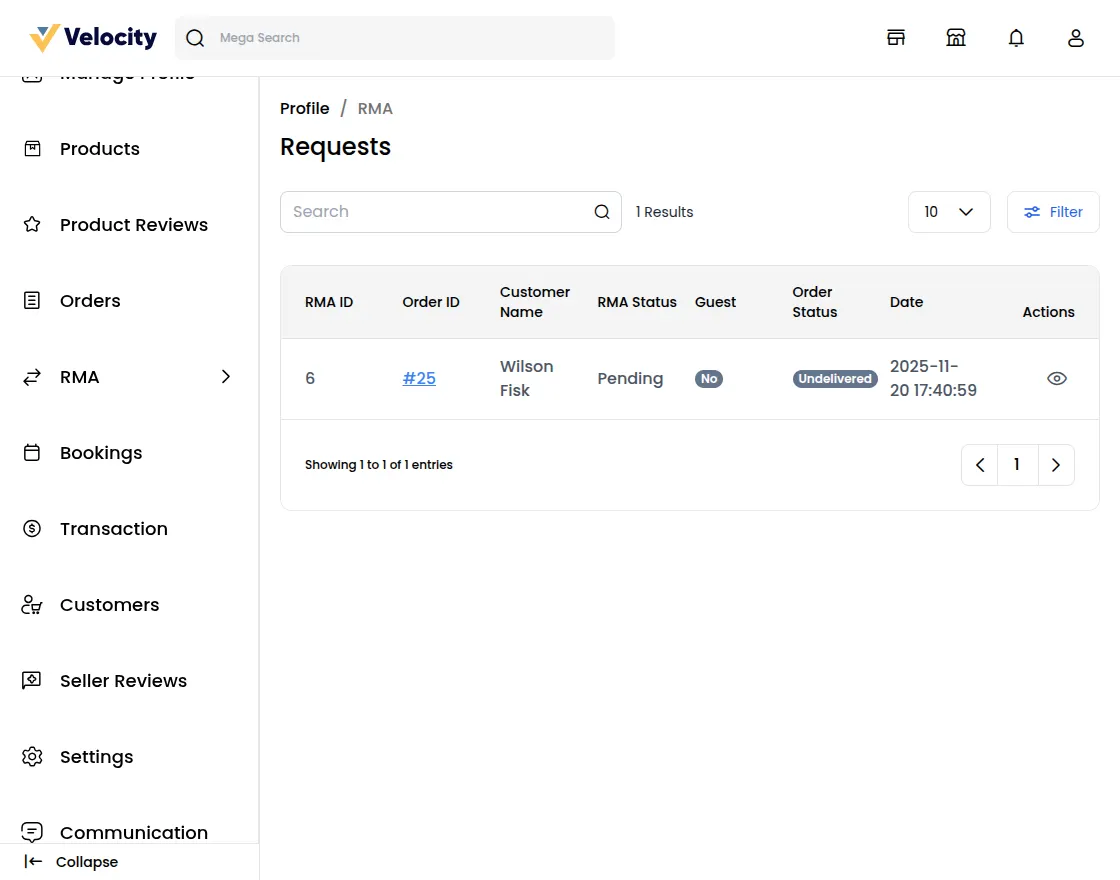
In this section, the seller can see the RMA request with the RMA id the seller needs to click on the eye icon to see all the details of the RMA.
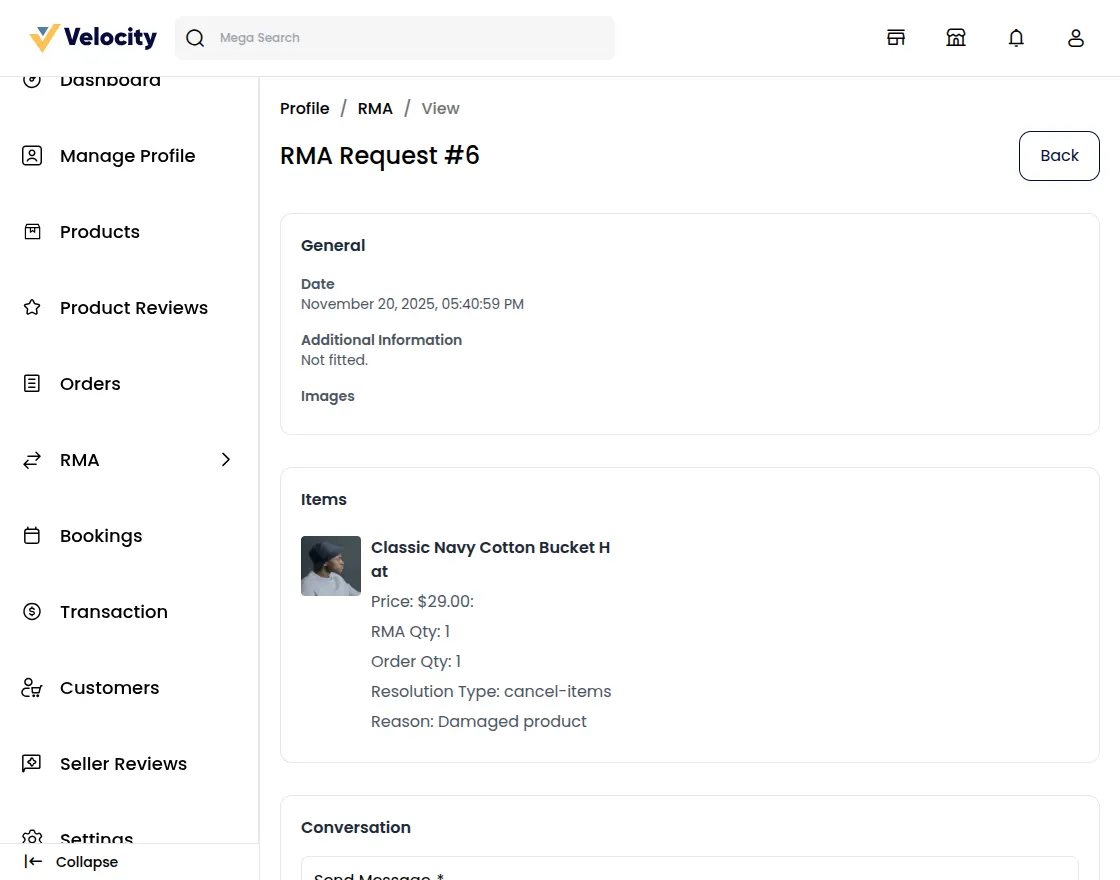
Change RMA status:- In this field sellers can select the RMA status as Pending, Declined or Item cancelled.
Under the Status Details seller can also see the status regarding the RMA such as RMA Status and Order Status.
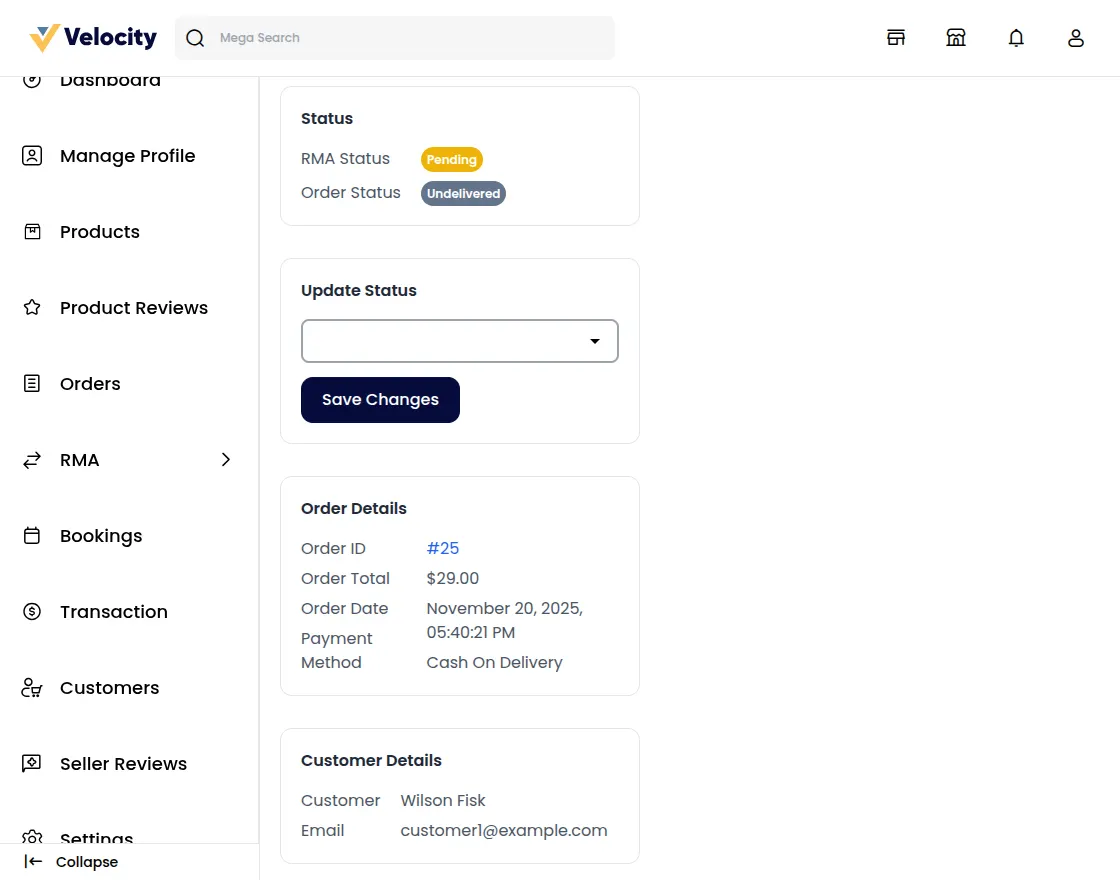
RMA Status
Product Return RMA: When the customer/guest creates a new RMA request, its status will be pending.
After viewing the RMA requests, the seller can select the RMA status according to the resolution type selected by the customers/guests.
Refund
When the customer/guest selects the resolution type as Refund for completed order, the seller can select the following RMA status:
RMA Request Accepted – If the admin has accepted the RMA request of the customer/guest, the seller can change the status to RMA Approved.
Package Received – From here the refund will be initiated and if the seller has received the product from the customer/guest, the seller can change the status to Received Package.
Declined – If the seller rejects the request submitted by the customer/guest, the seller can select this status.
Solved – When the customer/guest receives the refund, the seller can use this status.
Cancel Items
When the customer/guest selects the resolution type as Cancel for the pending orders, the seller can select the following RMA status:
RMA Request Accepted – If the seller has accepted the RMA request of the customer/guest, the seller can change the status to RMA Approved.

Declined – If the seller rejects the request submitted by the customer/guest, the seller can select this status.
Item Canceled – From here the seller can cancel item by accepting the RMA request of the customer/guest for canceling the ordered items, it can use this status.
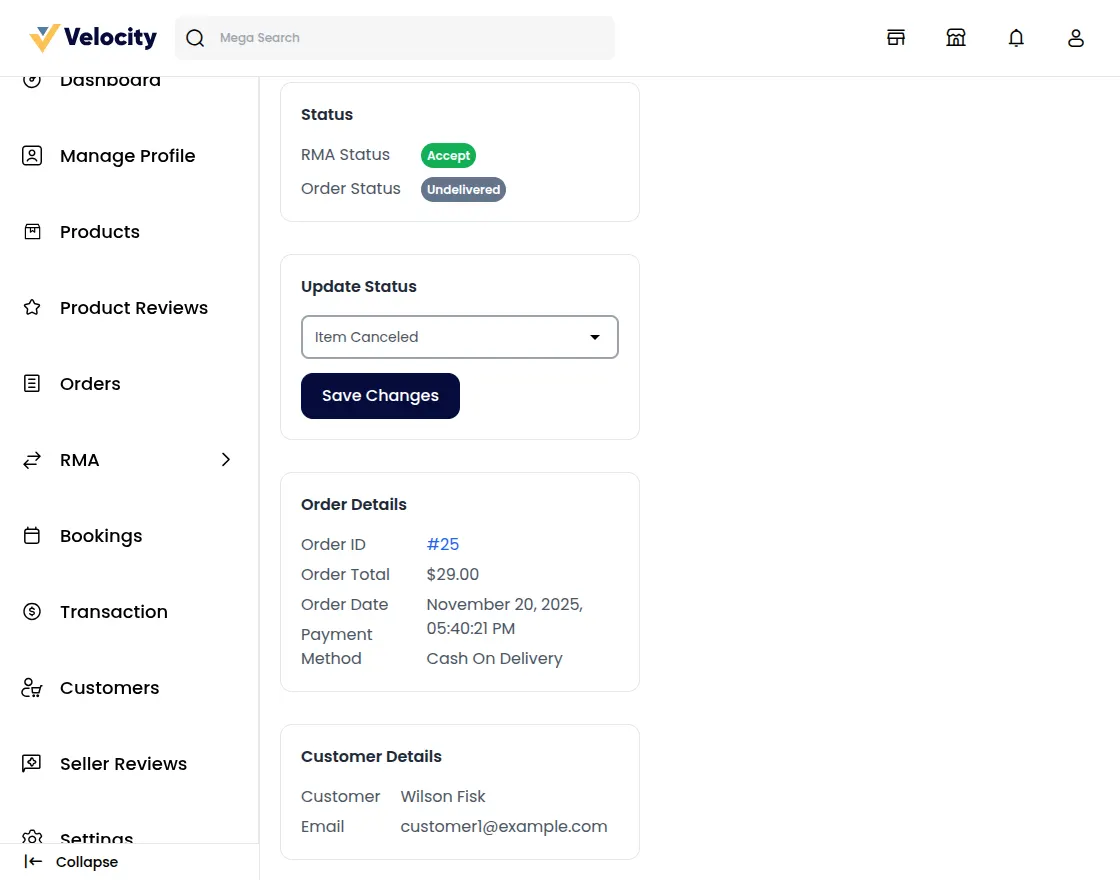
After selecting the “Item Canceled” option and clicking the “Save Changes” button, the order gets canceled automatically.
Exchange
When the customer/guest selects the resolution type as Exchange for the pending orders, the seller can select the following RMA status:
RMA Request Accepted – If the seller accepts the RMA request of the customer/guest, the seller can change the status to RMA Approved.
Package Dispatched – If the seller ships the new exchange product to the customer/guest, the seller can use this status.
Declined – If the seller rejects the request submitted by the customer/guest, the seller can select this status.
Solved – When the customer/guest receives the exchanged product, the seller can use this status.
Note: The Same process is followed by the admin in the Admin -> Marketplace -> RMA section.
Transactions
Here you will also find the payment request as done by the Admin to the seller.
The dashboard here provides details of the total payout done and the amount left unpaid.
Total Sale- Here the Total sales made by the seller appear.
Total Payout- The Amount is received by the seller from Admin.
Remaining Payout- Amount that is pending from the Admin and needs to be collected.
You will also get a list of payout transactions.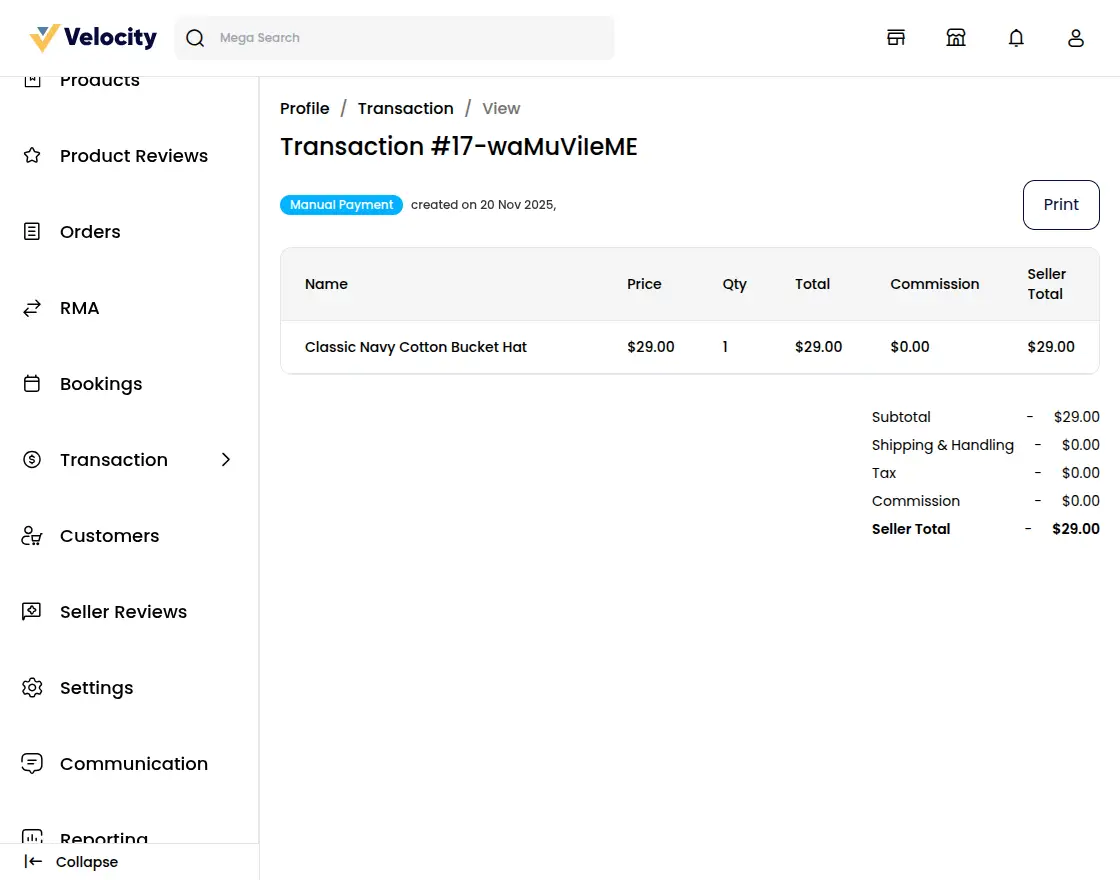
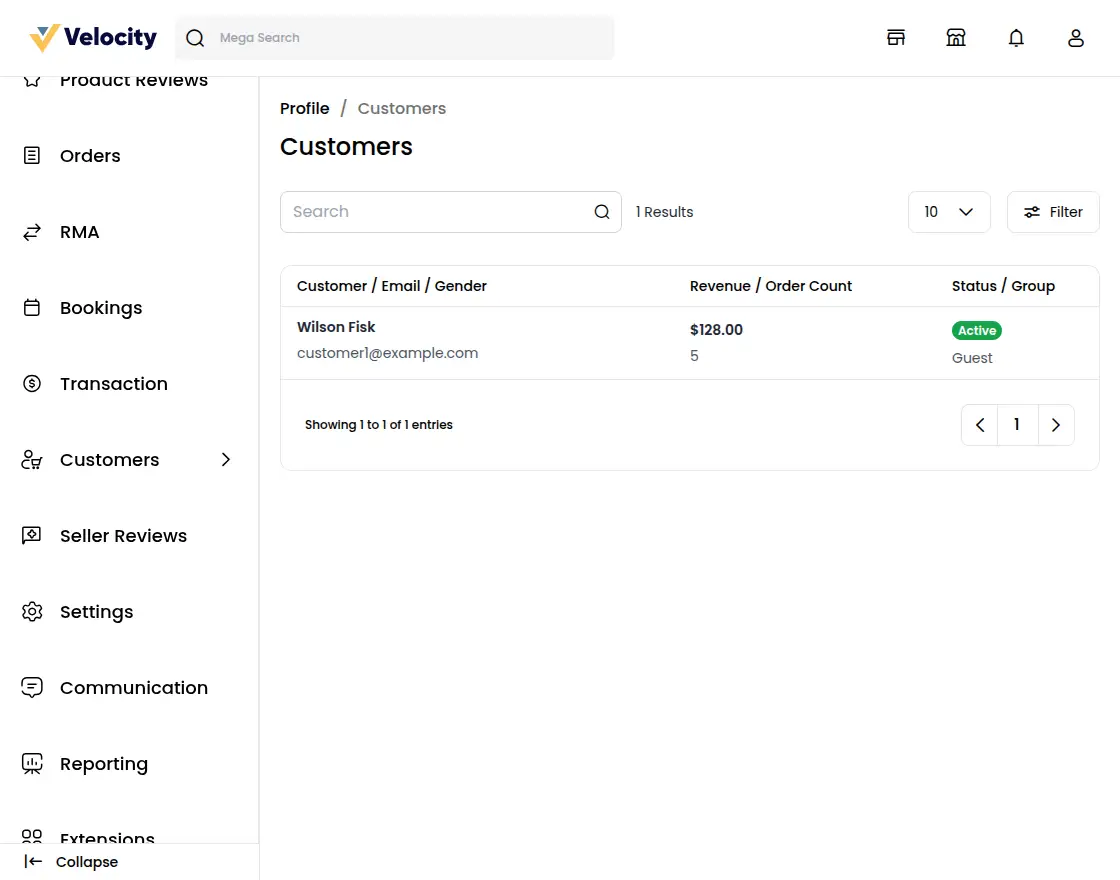
Customers
Here the sellers can also see their customer details who have purchased the products from the sellers.
Also, the seller can see the Order count, on clicking the order count the seller can see the details of the Ordered product.
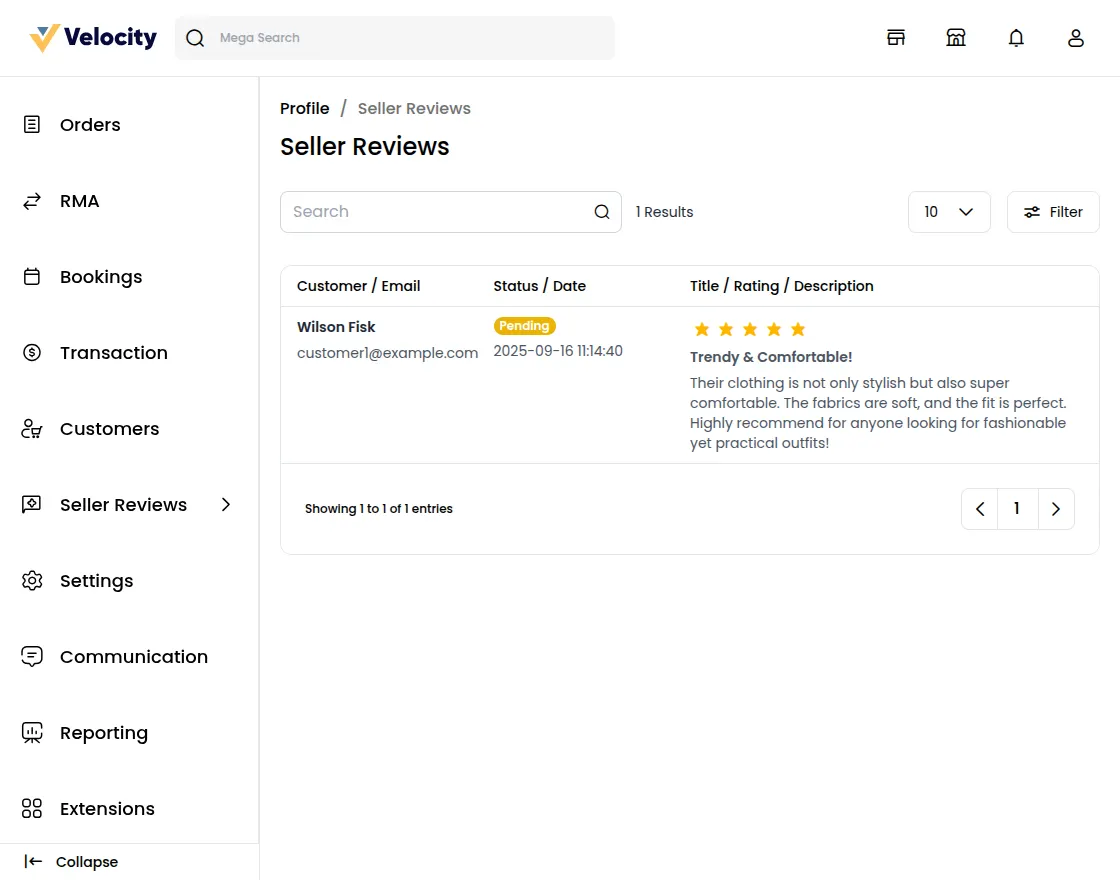
Seller Reviews
Here you will also get the list of reviews as given by the customer to the particular seller.
Admin have an access to Approve/Disapprove the reviews of the sellers.
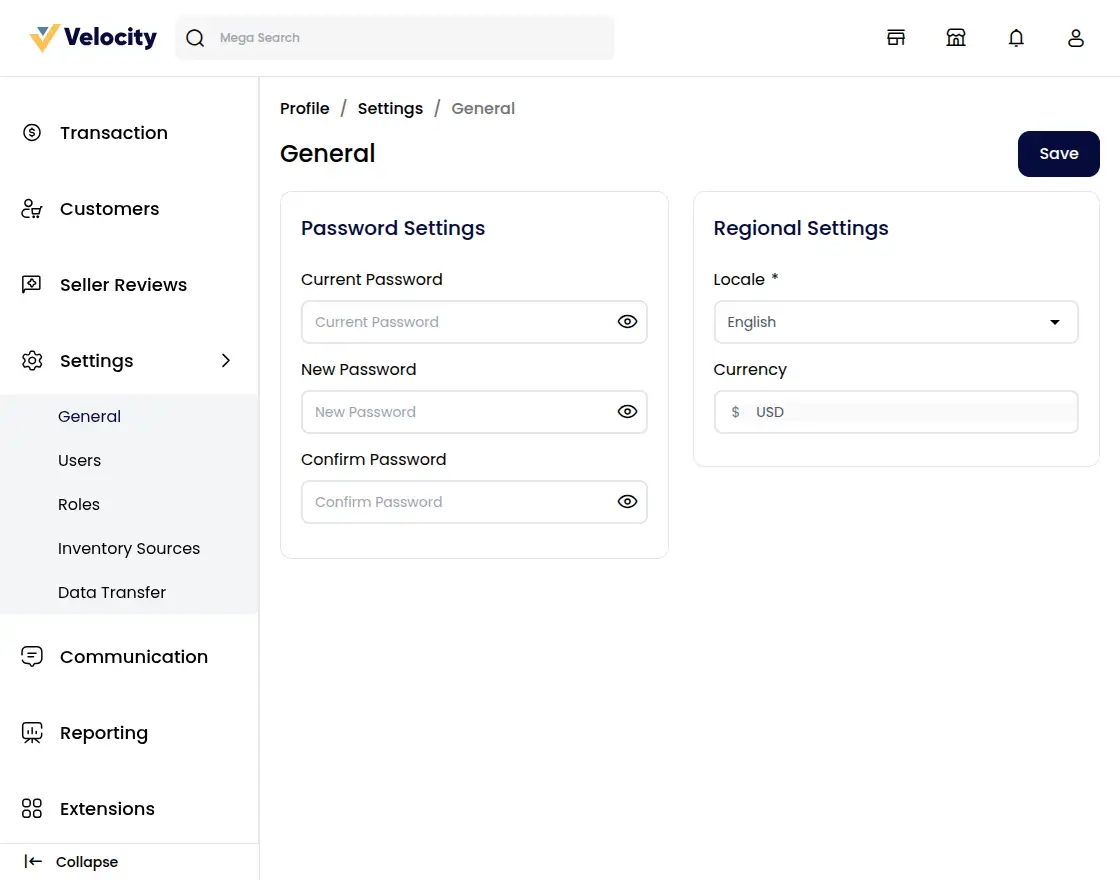
Settings
Seller can manage only the Locales but currency is the same as the admin panel
Users
Sellers can also create Sub-sellers. Under the Users Option on the left side seller can view all the sub-sellers.
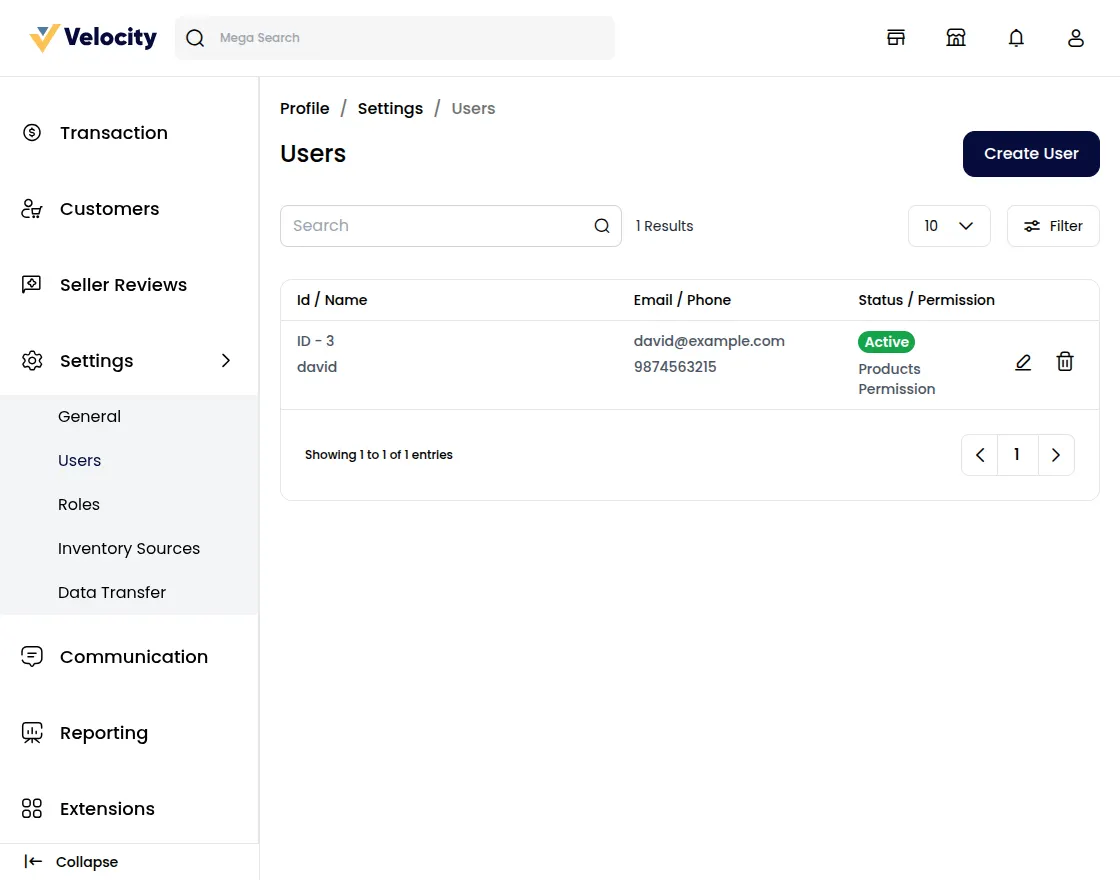
To create a new Sub-seller click on the Create User Button.
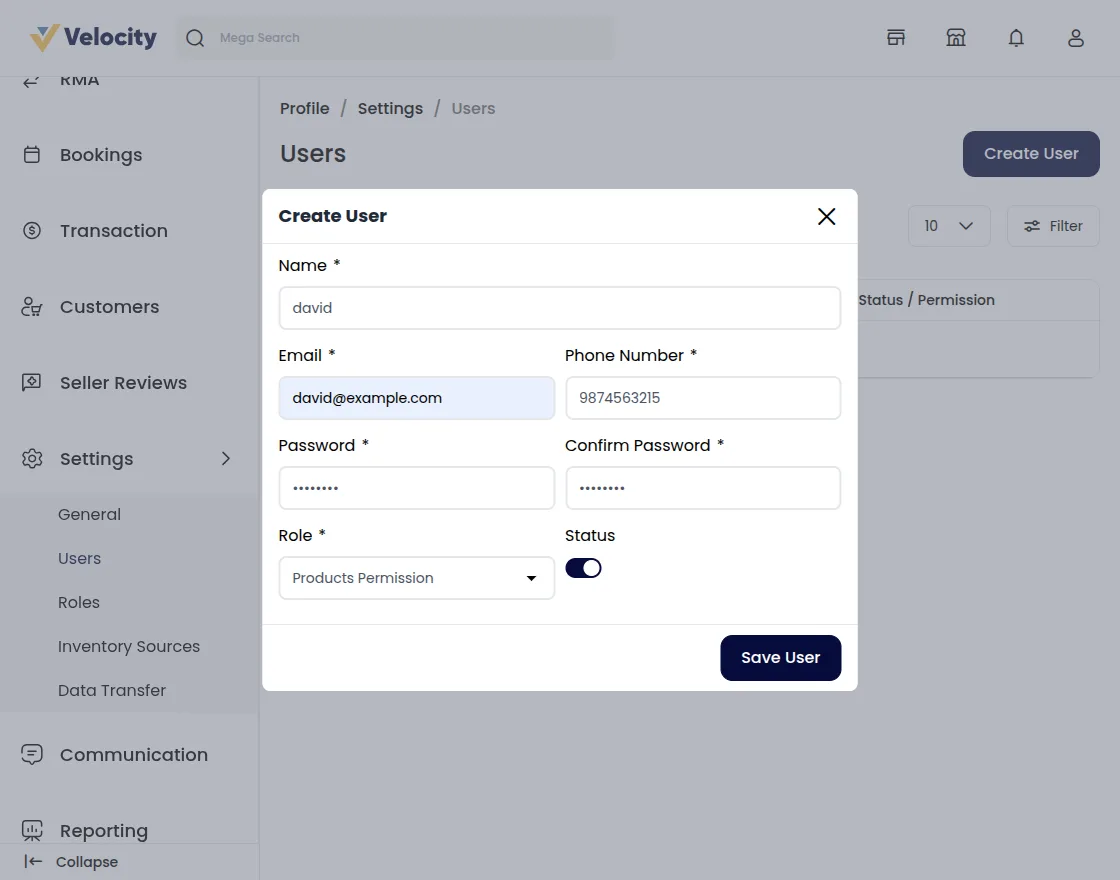
Now, Enter all the details of the new user or sub-seller.
Name: Enter the Name of the user.
Email: Enter the Email of the user.
Phone Number: Enter the user’s Phone number. Phone numbers must be unique for all users.
Role: Select the role of the user.
Status: To Enable the status to be user.
Password: Enter the password
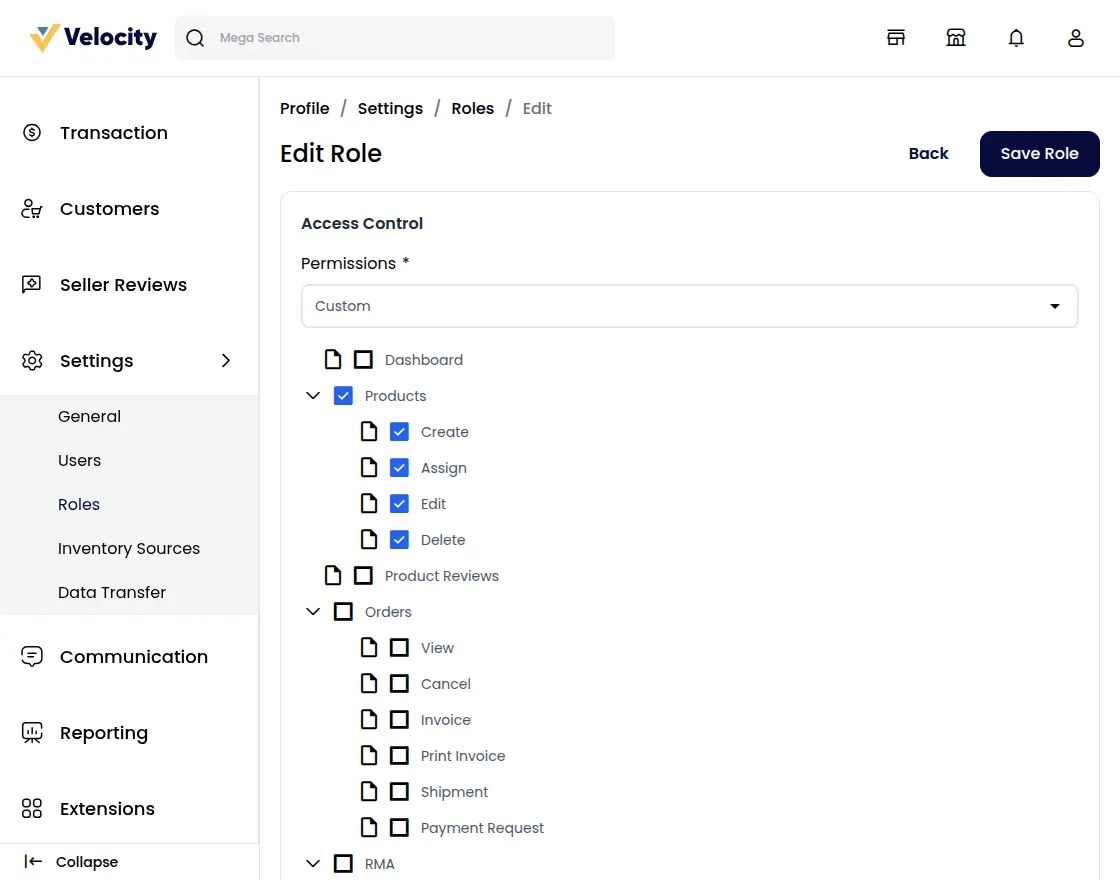
Role
Sellers can create a custom role for creating the sub-seller. and view all the roles in the Role section.
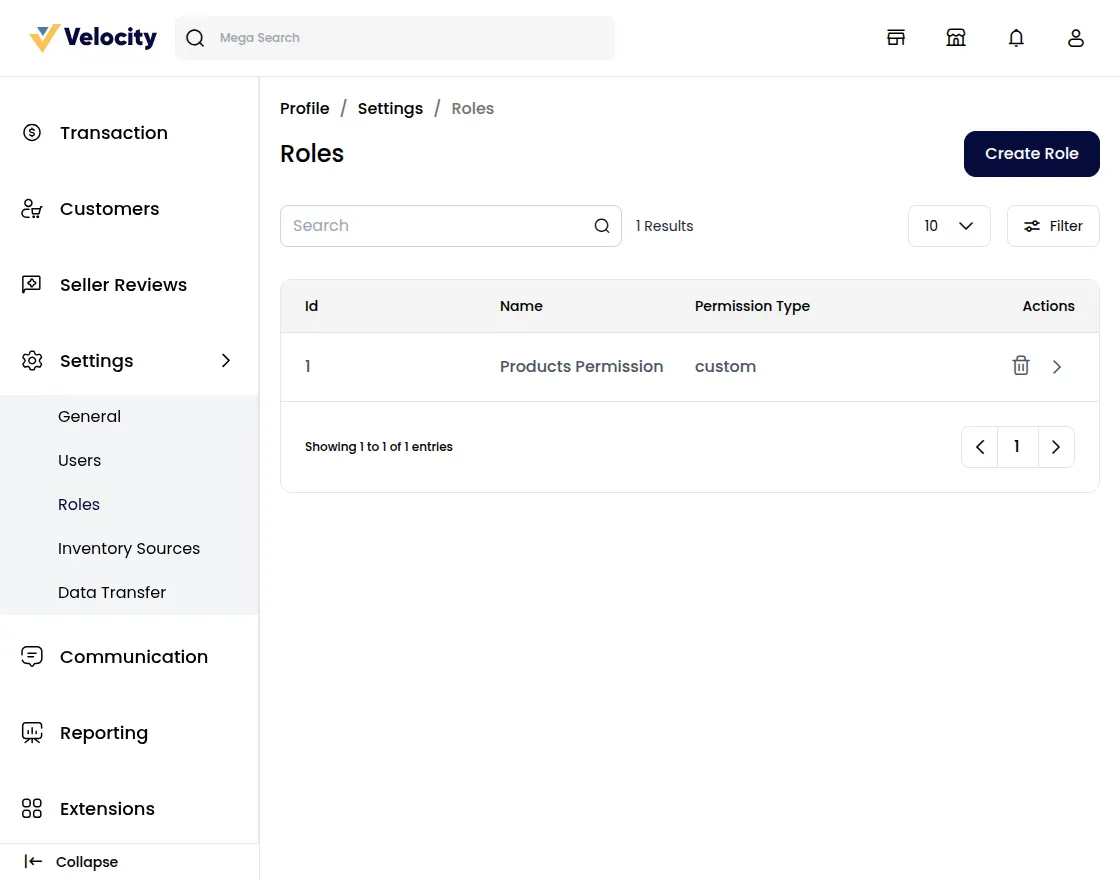
To create a new role click on the Create Role Button. and select the fields that you want to give access to the users or sub-sellers.

Inventory: The Seller can create their inventory sources for the products.

Data Transfer
Sellers can use CSV or XLS files to upload their products in bulk.
This functionality is helpful for sellers with many products, saving time by allowing them to upload all their products at once instead of entering them one by one.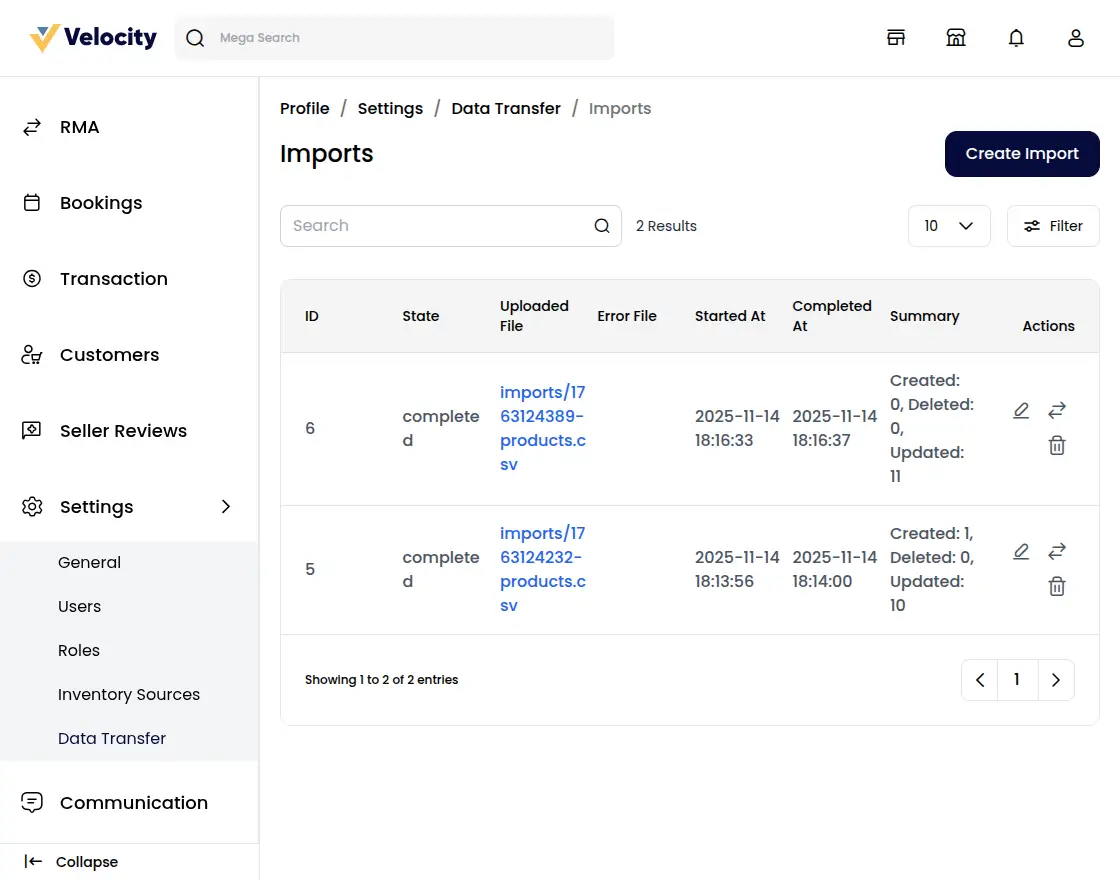
How to import products in Bulk?
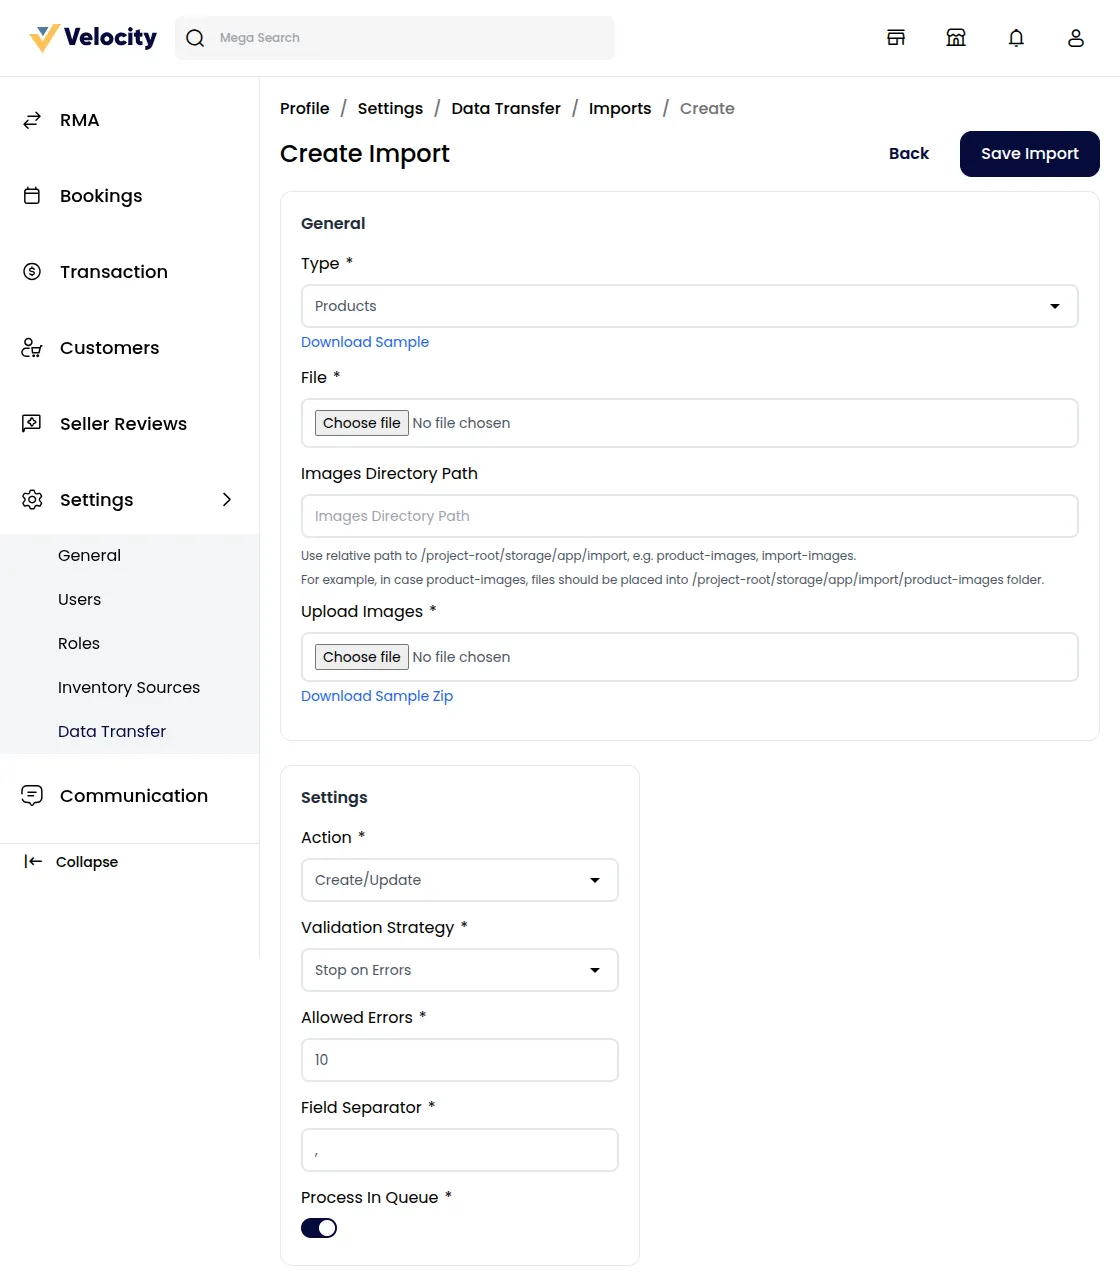
Step 2: Under general configurations select the below fields:
1) Type – Seller Can only Import the Products in Bulk.
2) File – Choose the file in your desired format (CSV, XLS, XLSX) and kindly make sure you have all the required fields in the file.
Note – While importing the product data Simple, Configurable, Bundled & Grouped product types.
3) Download Sample – You can also download the sample Product file.
Kindly make sure the file you are uploading is similar to this sample file.
Note: You need to fill in all the required attributes in the sample file provided for product creation.
4) Image Directory Path – Use relative path to /project-root/storage/import/app to store images.
5) Upload Images(zip) – Upload all the product images through a zip file.
6) Action – Kindly select from the settings configuration that you want to Create/Update or Delete the records.
7) Validation Strategy – This unique feature allows you to Skip the Errors or to Stop on Errors while Importing the data.
8) Allowed Errors – This feature allows you how much quantity of errors will get neglected while importing the data.
9) Field Separator – This feature allows you to set the fields.
10) Process in Queue – This feature allows you to run your import process in a queue.
So now click on the Save Import Button.
Once you click on the ‘Save Import’ button, the import process will begin.
Step 3: Now the import process will get started and after it is completed the product import process will be done.
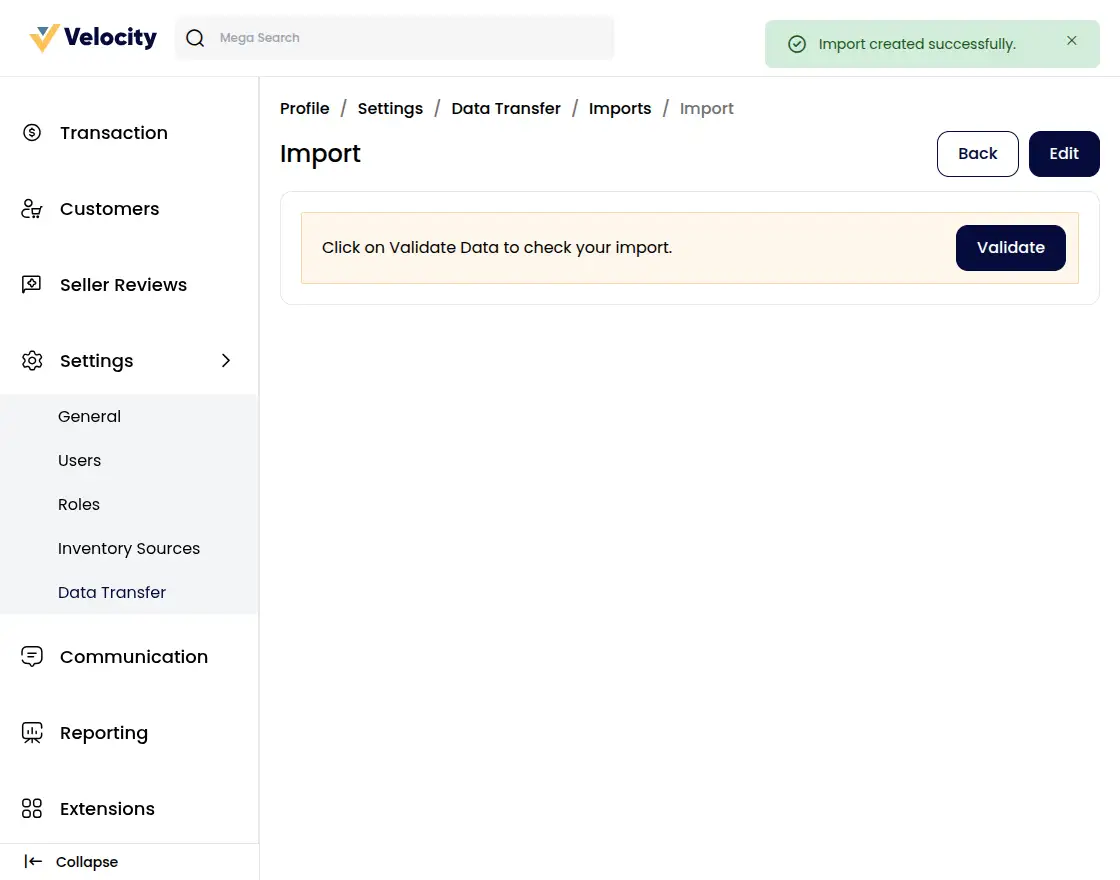
Step 4: Click on the “Validate” button.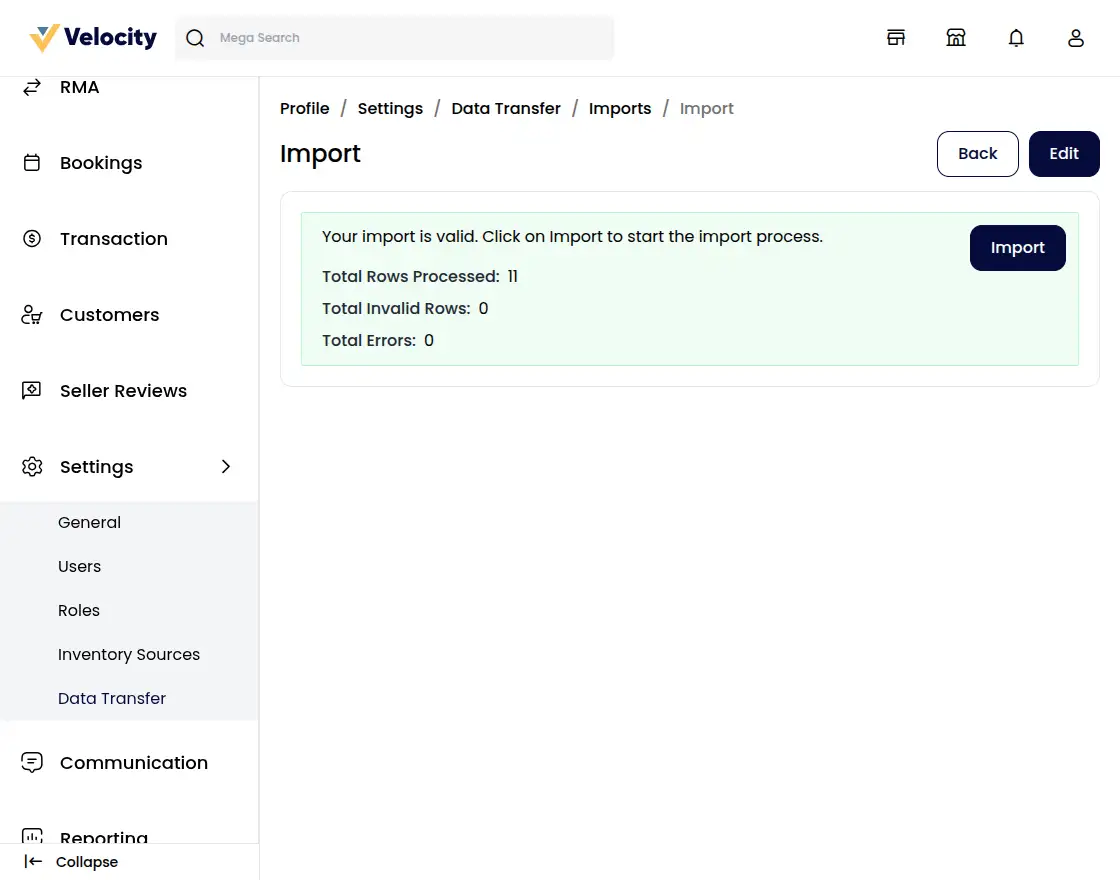
Step 5: Click on the “Validate” button.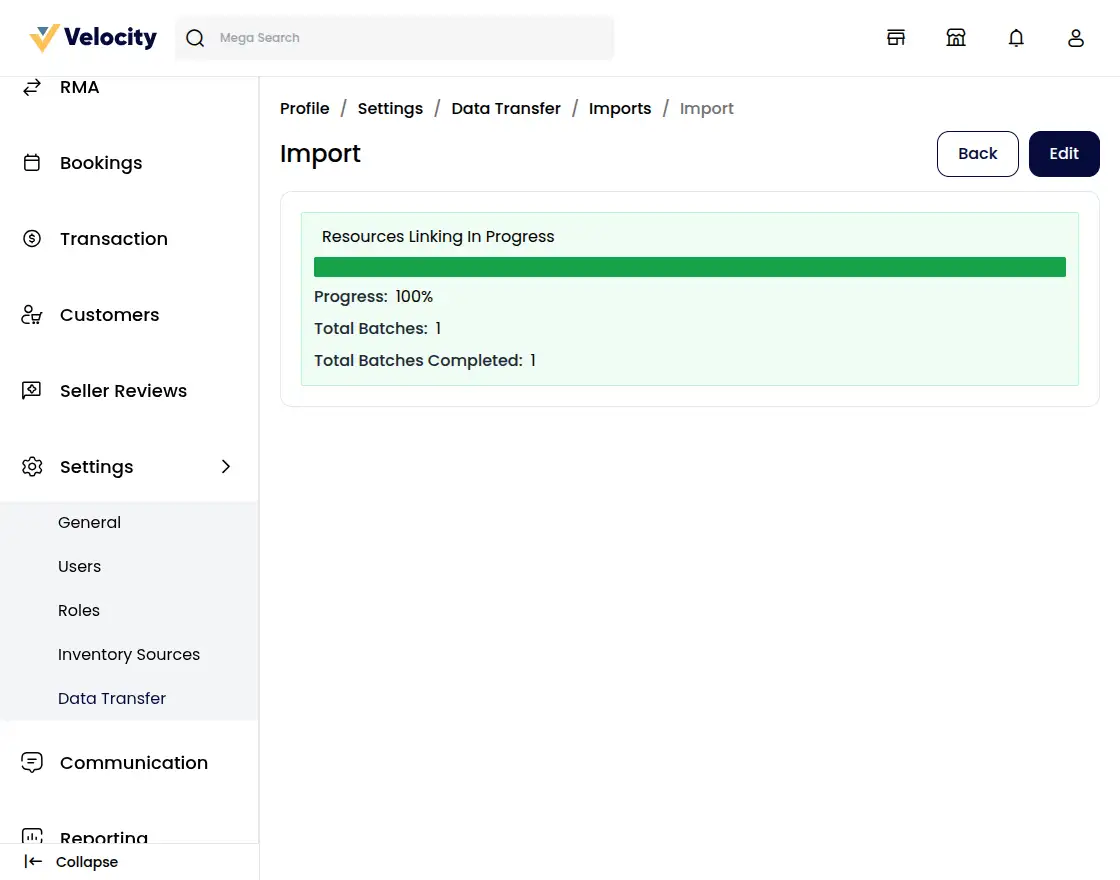
Once the seller’s product is successfully imported, some details will be displayed.
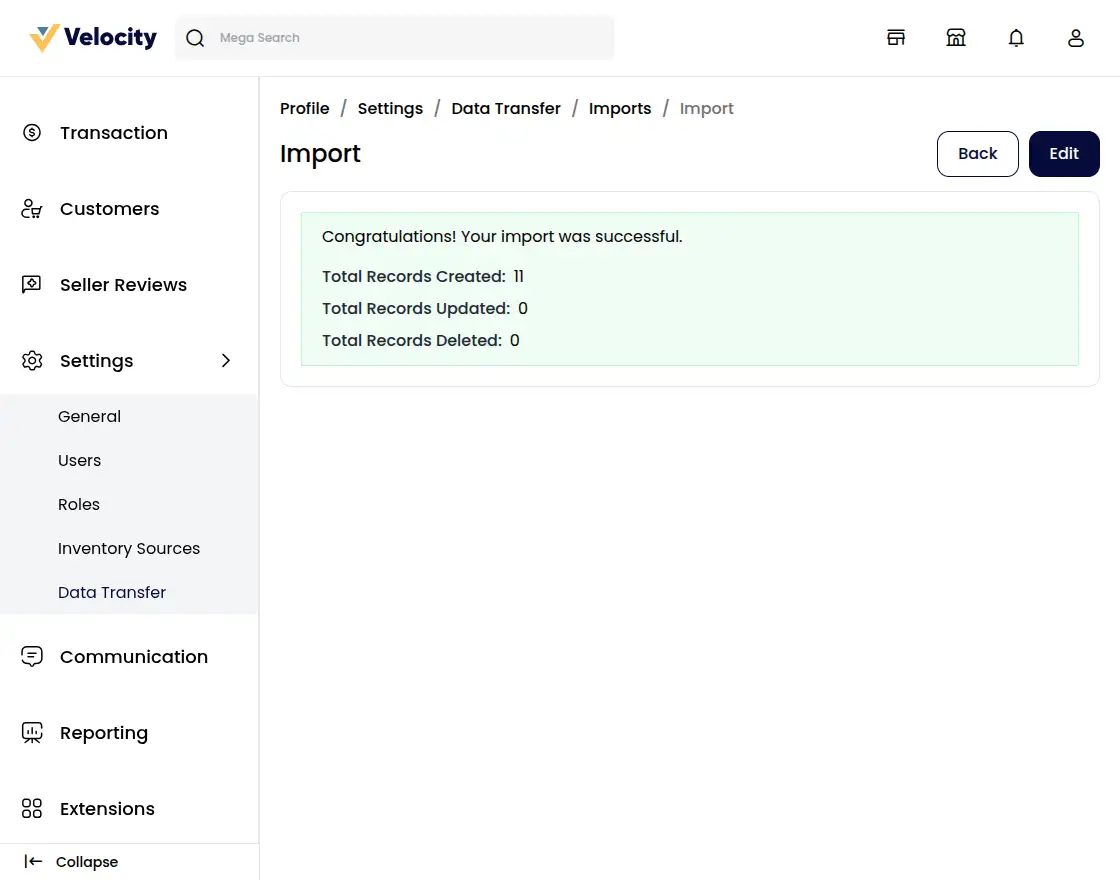
Congratulations! Your import was successful.
Total Records Created:11 [Newly Created Product]
Total Records Updated:0 [No update in the product]
Total Records Deleted:0 [No product deleted]
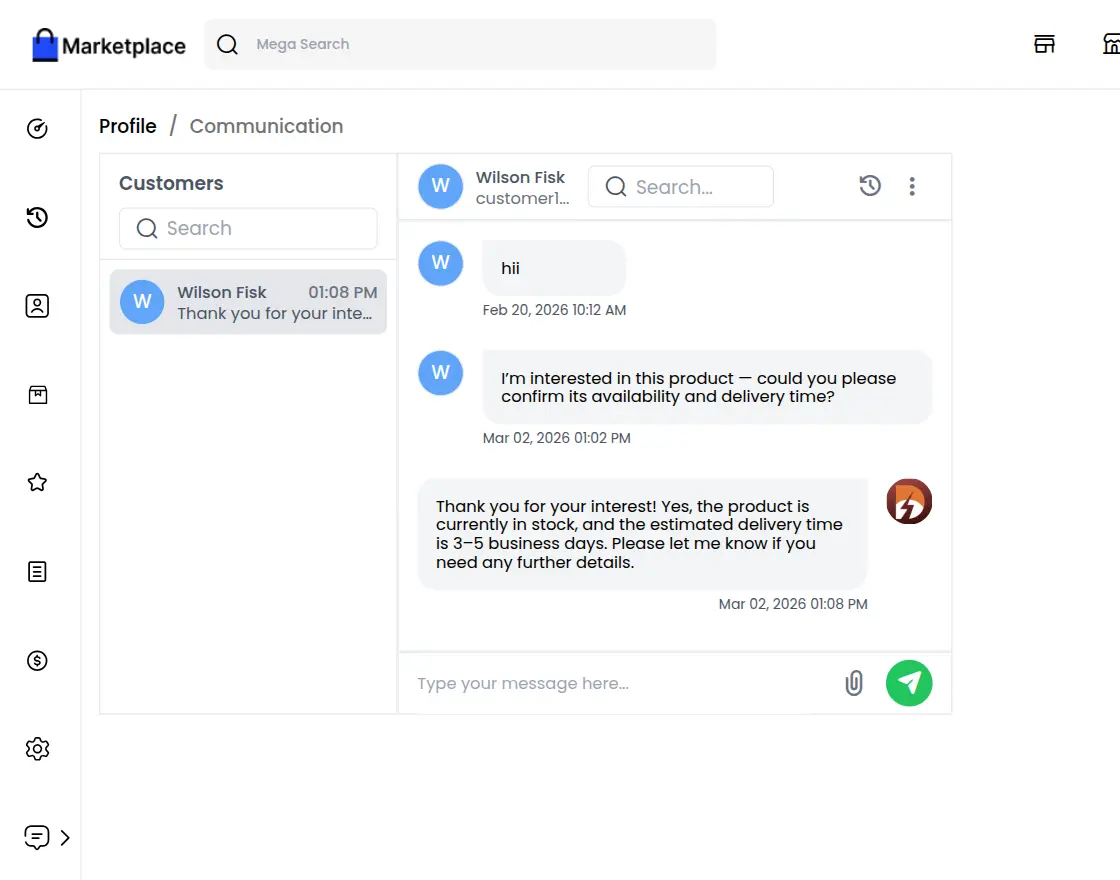
Communications
Now sellers can directly communicate with the admin of Laravel Multi Vendor Marketplace as shown in the image below
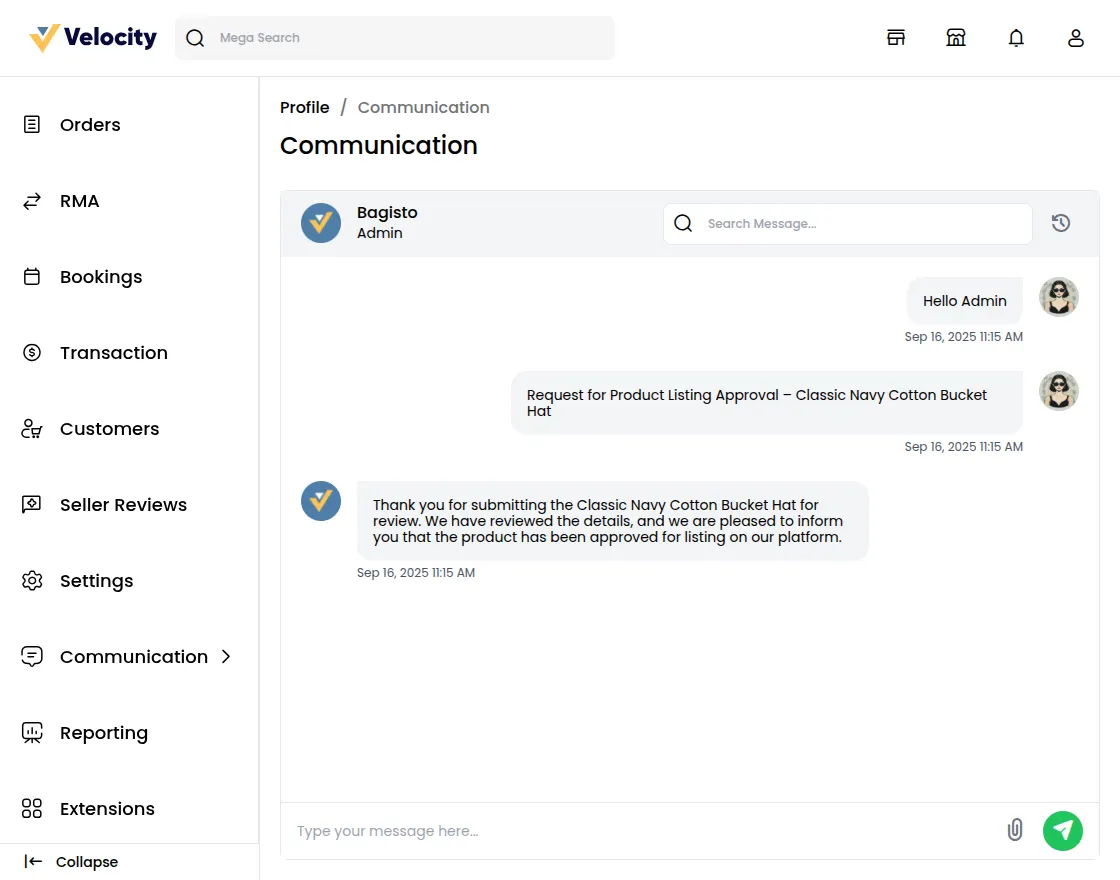
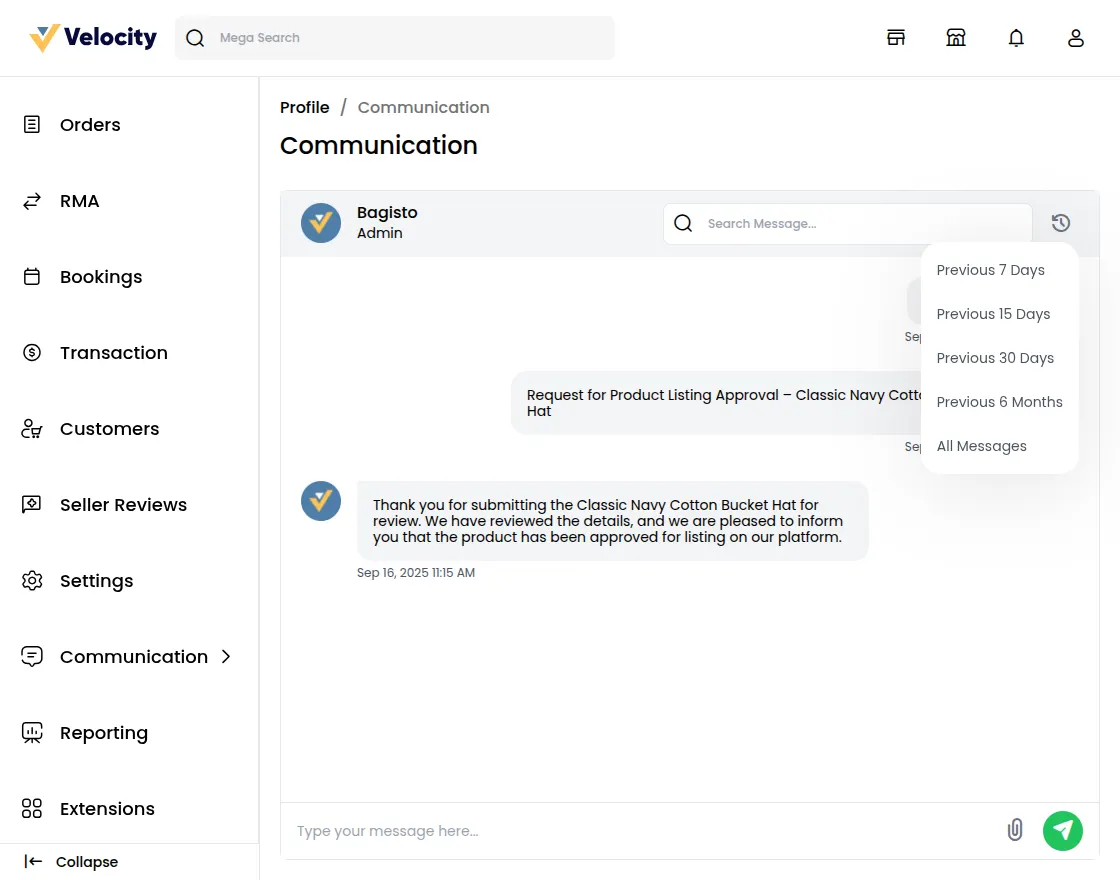
1) Sellers can able to send files and sort out the chat history as well as shown in the image below.
 2) The Seller can also use the Search Bar to Search Messages the text will get highlighted accordingly check the below image for reference.
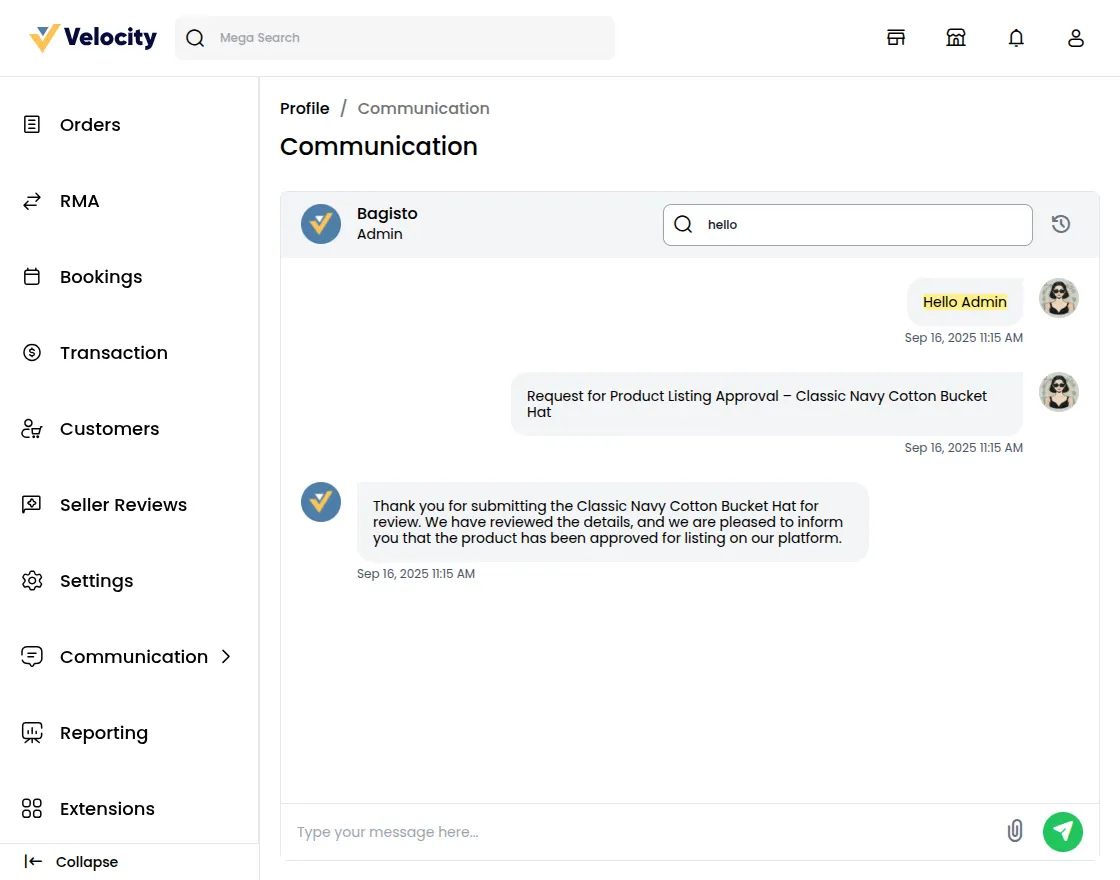
Sales Reporting
In the sales report seller can easily able to track
- Total Commission Paid
- Total Sales
- Purchase Funnels, Abandoned Carts
- Total Orders
- Average Order Value
- Tax Collected
- Refunds
Top Payment Methods.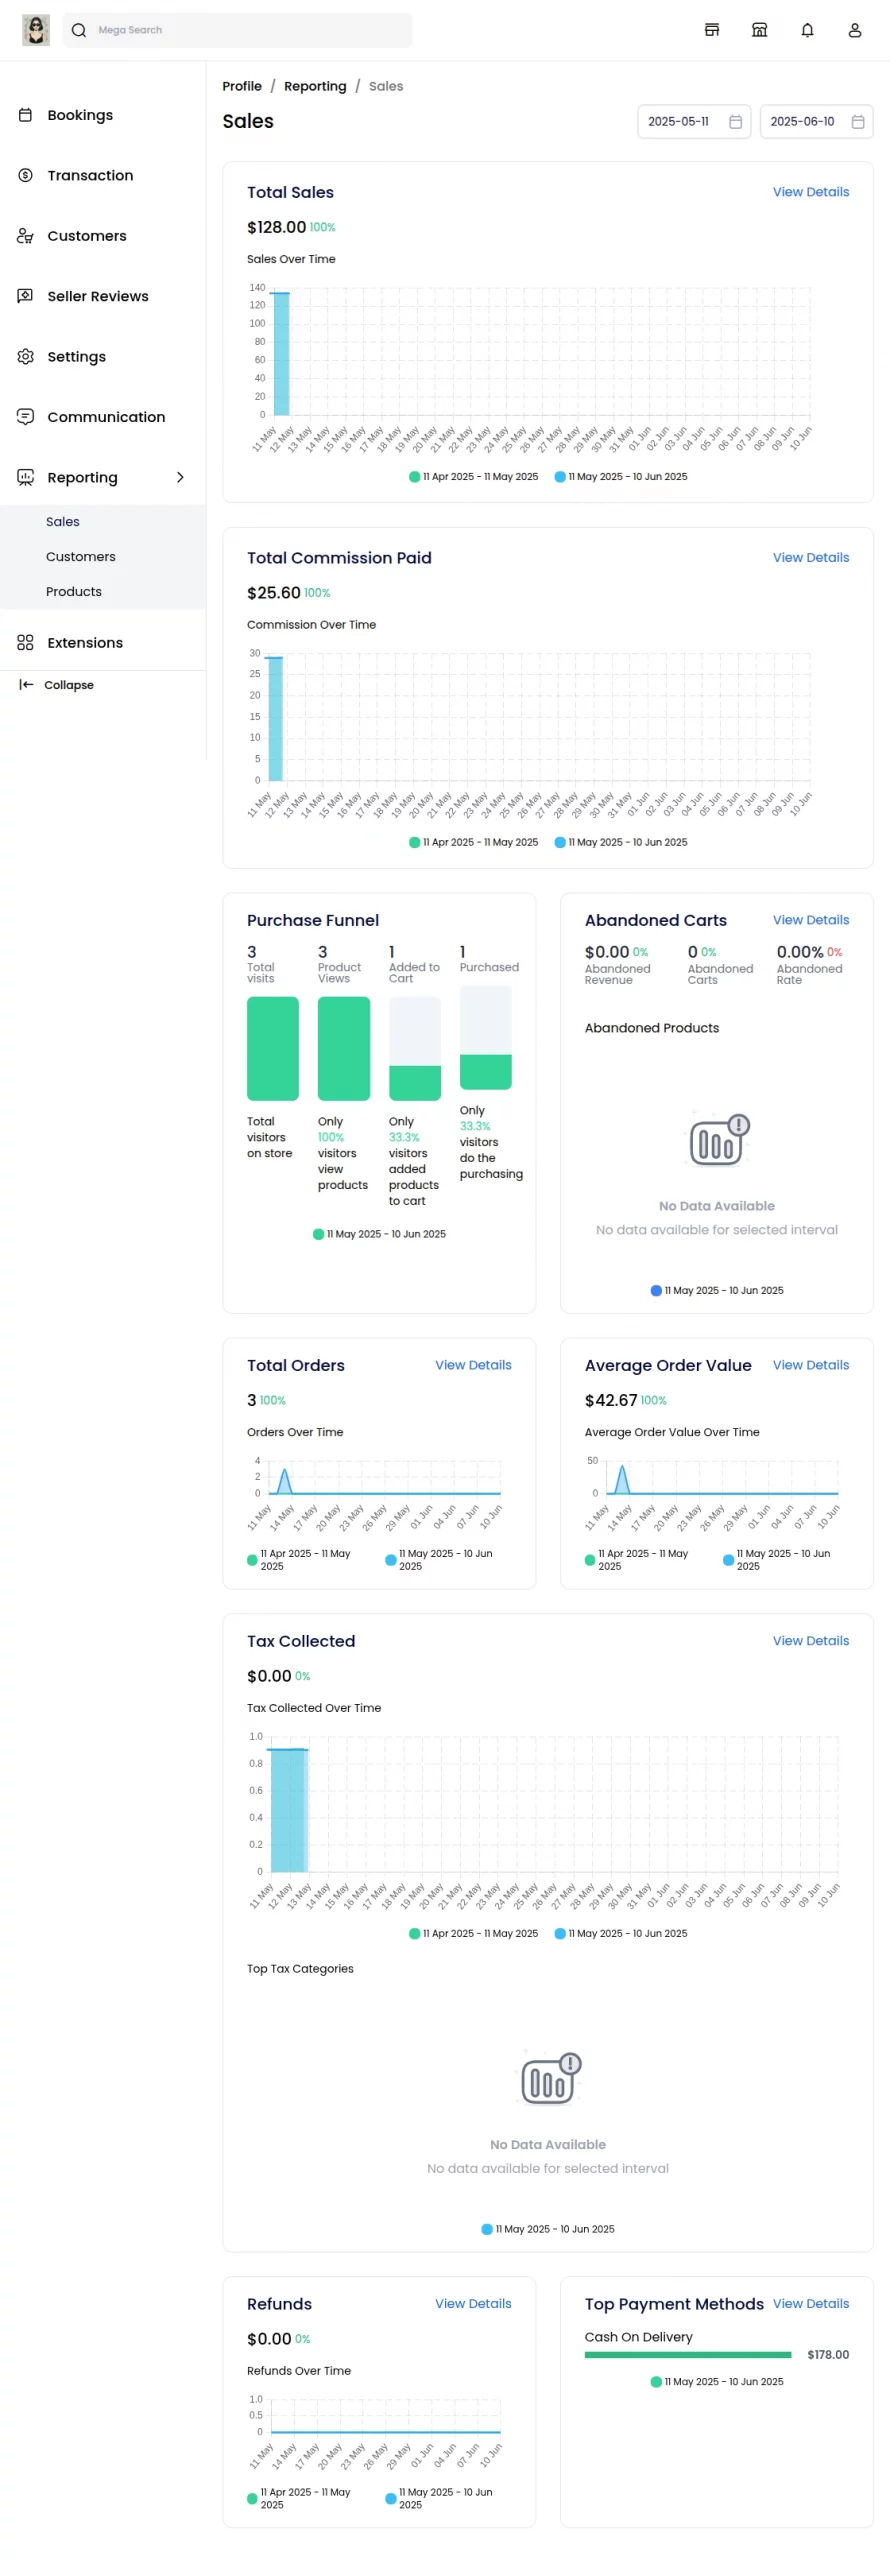
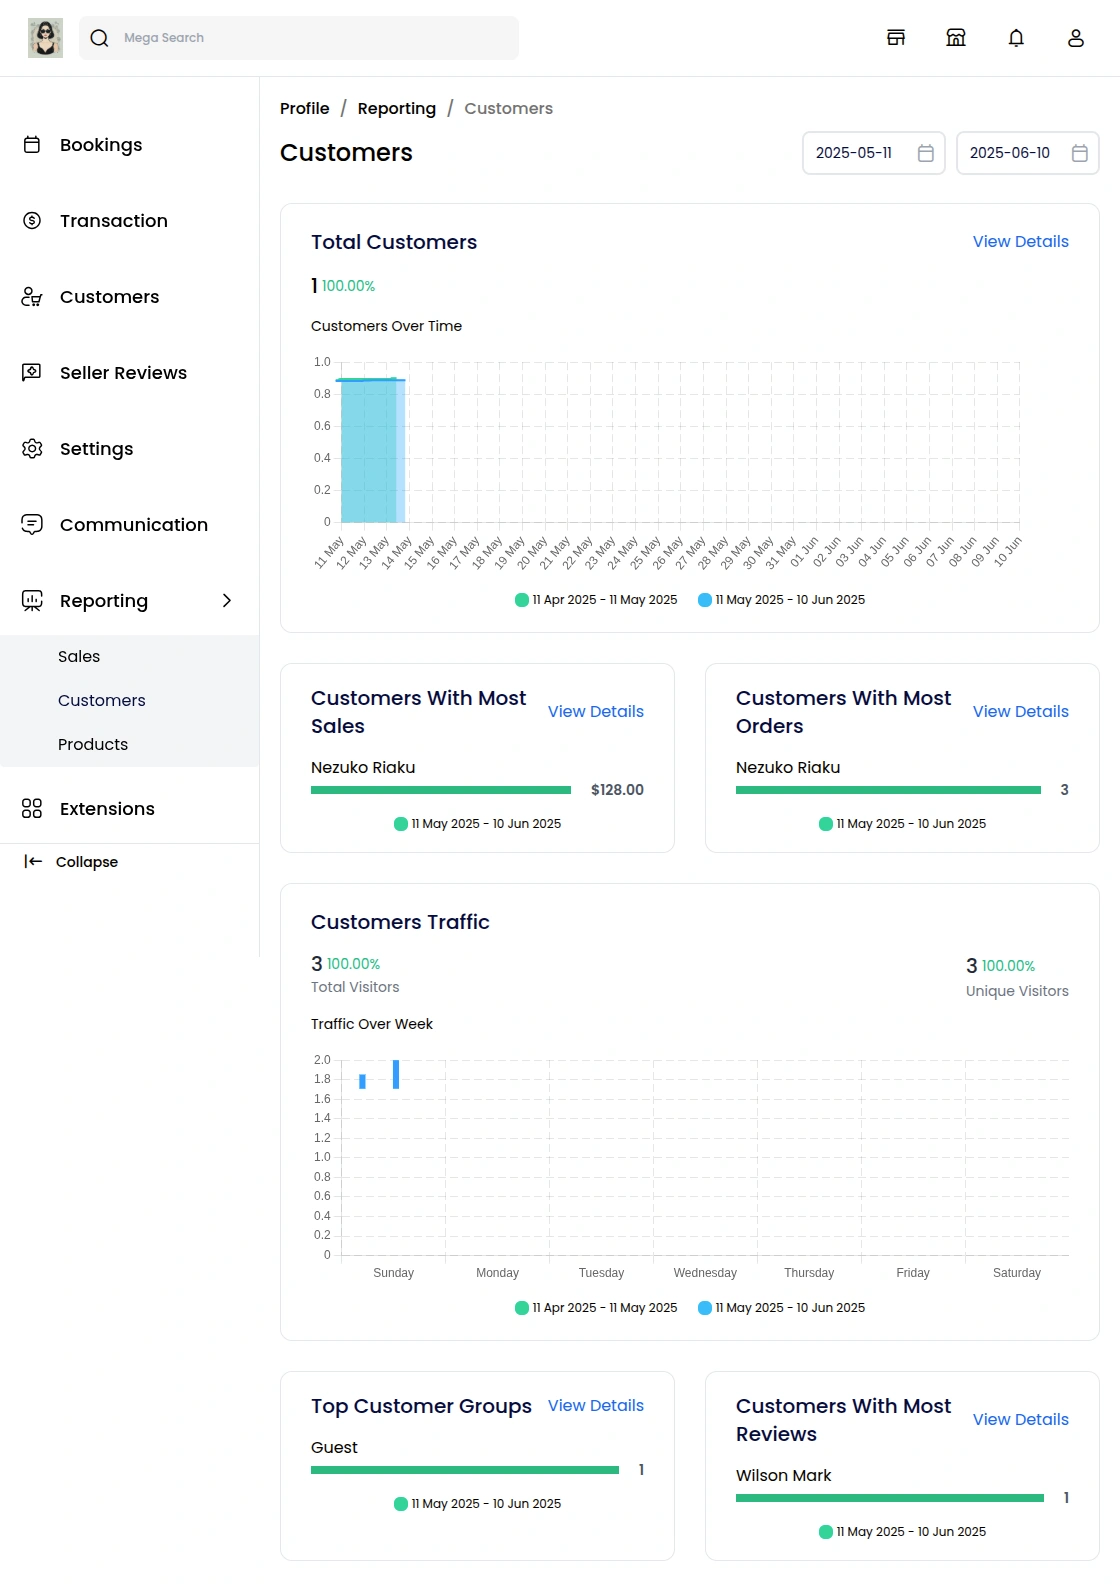
Customers
In the customers report seller can easily able to track
- Total Customers
- Customers With Most Sales
- Customers With Most Orders
- Customers Traffic
- Top Customer Groups
- Customers With the Most Reviews
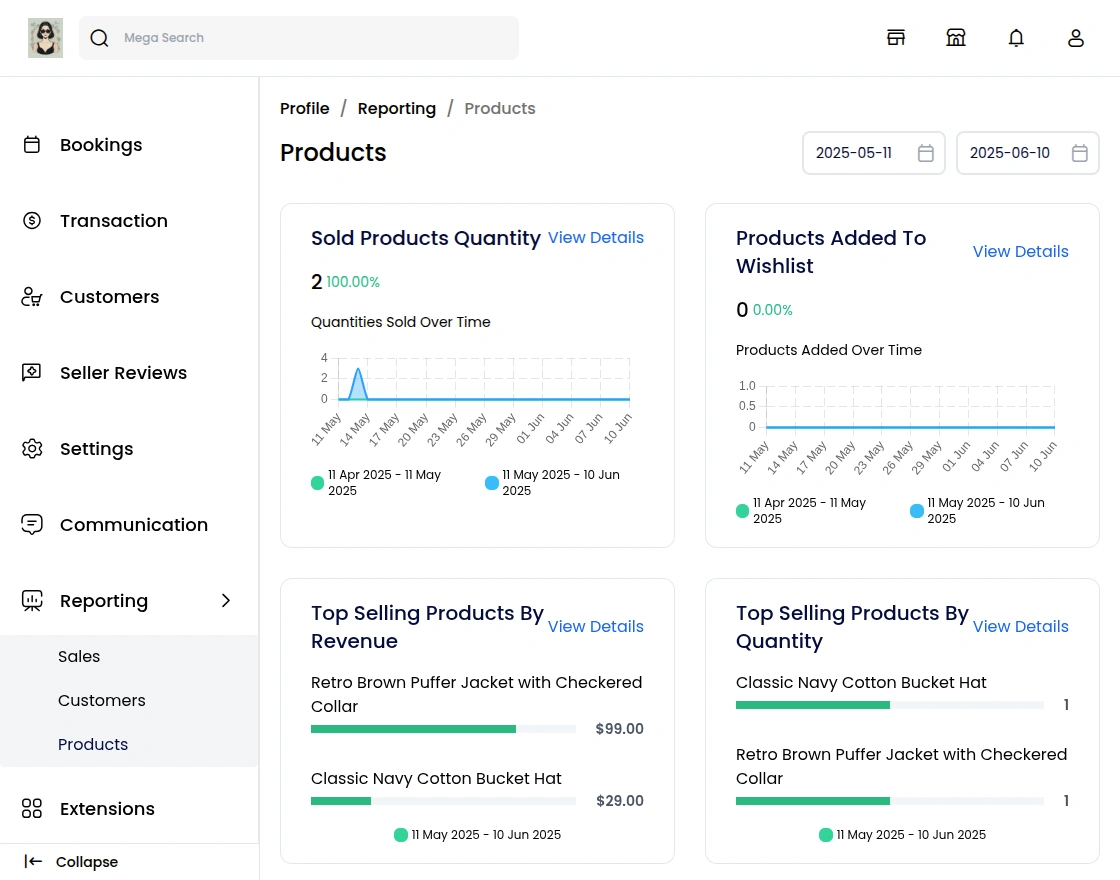
Products
- Sold Products Quantity,
- Products Added To Wishlist
- Top Selling Products By Revenue
- Top Selling Products By Quantity
- Products With Most Reviews
- Products With Most Visits
How can a customer create an RMA request from the shopfront?
First, the customer needs to log in to their account and place an order by checking out any product.
After the order is placed, if the customer wants to cancel or return an order/exchange item, they can follow these steps:
-
Go to the Customer Profile.
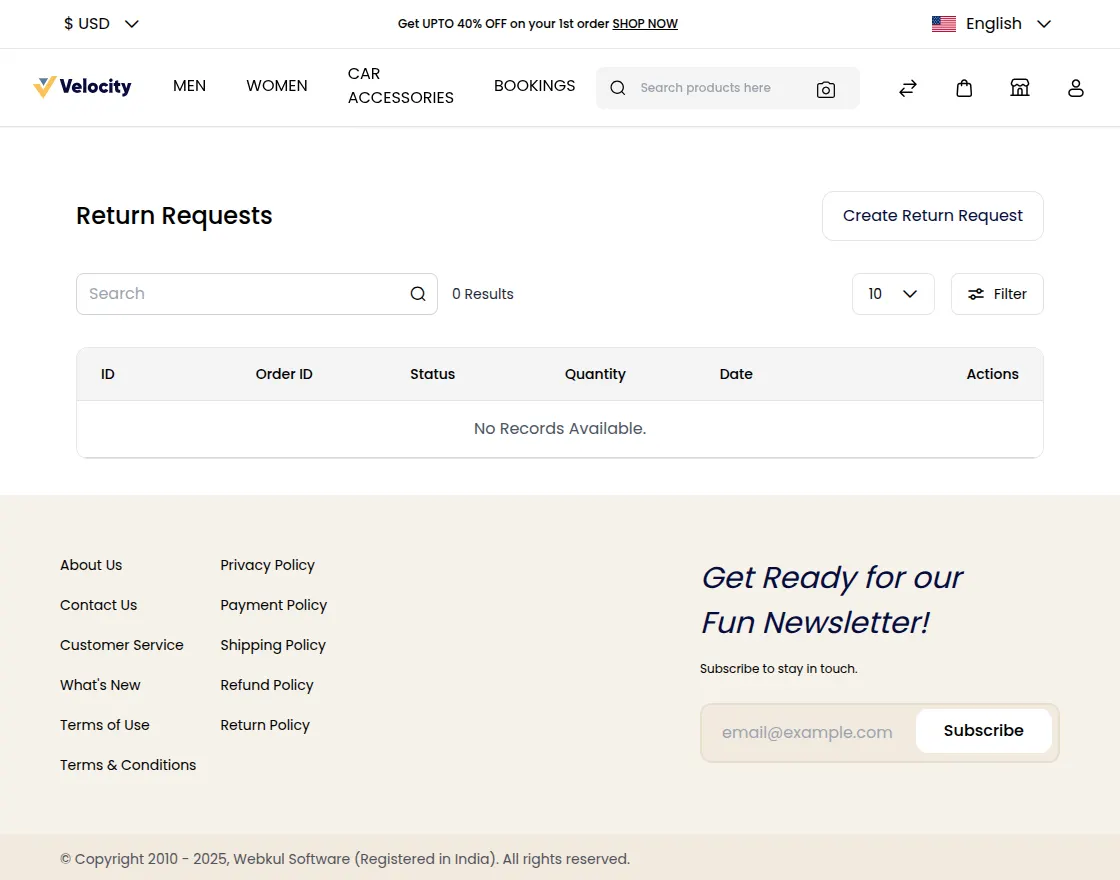
-
Navigate to the RMA section.
Step 3:
Click on the “Create Return Request” button.
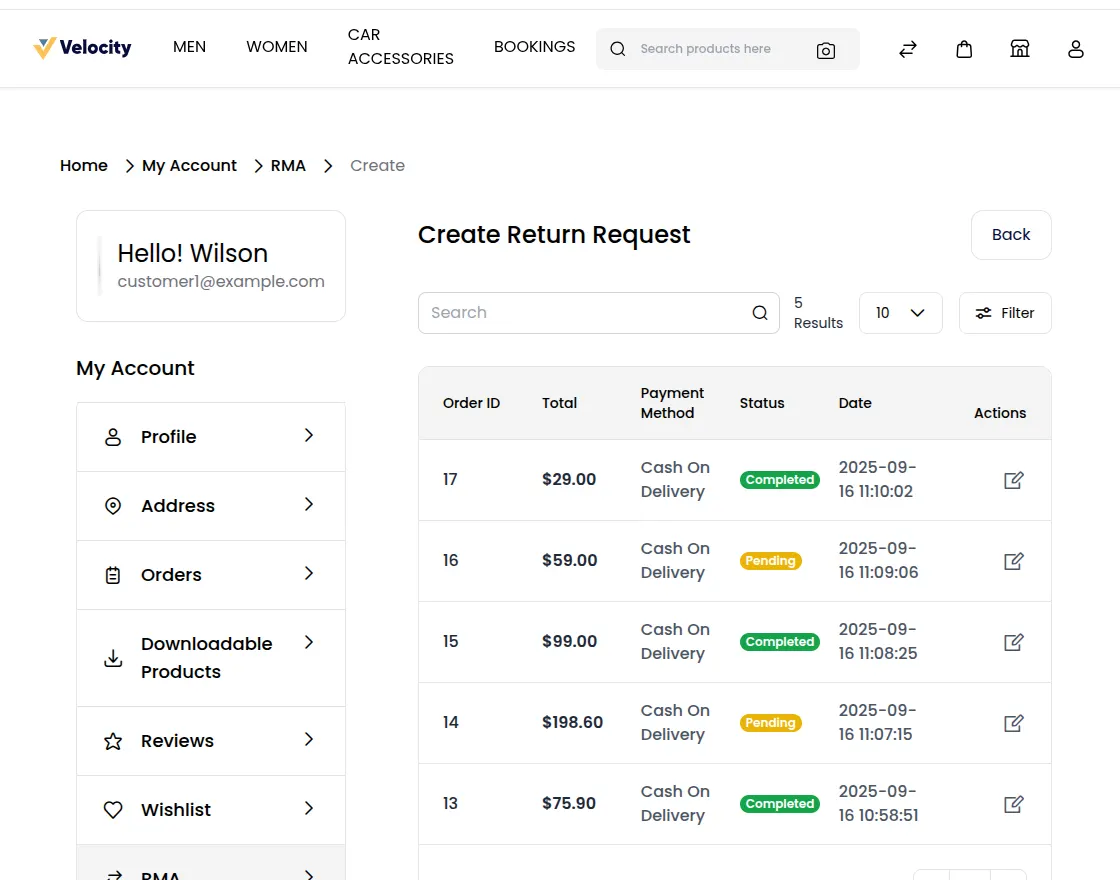
Step 4:
Select the order ID and proceed with the return/cancellation request.
Click on the Action icon.
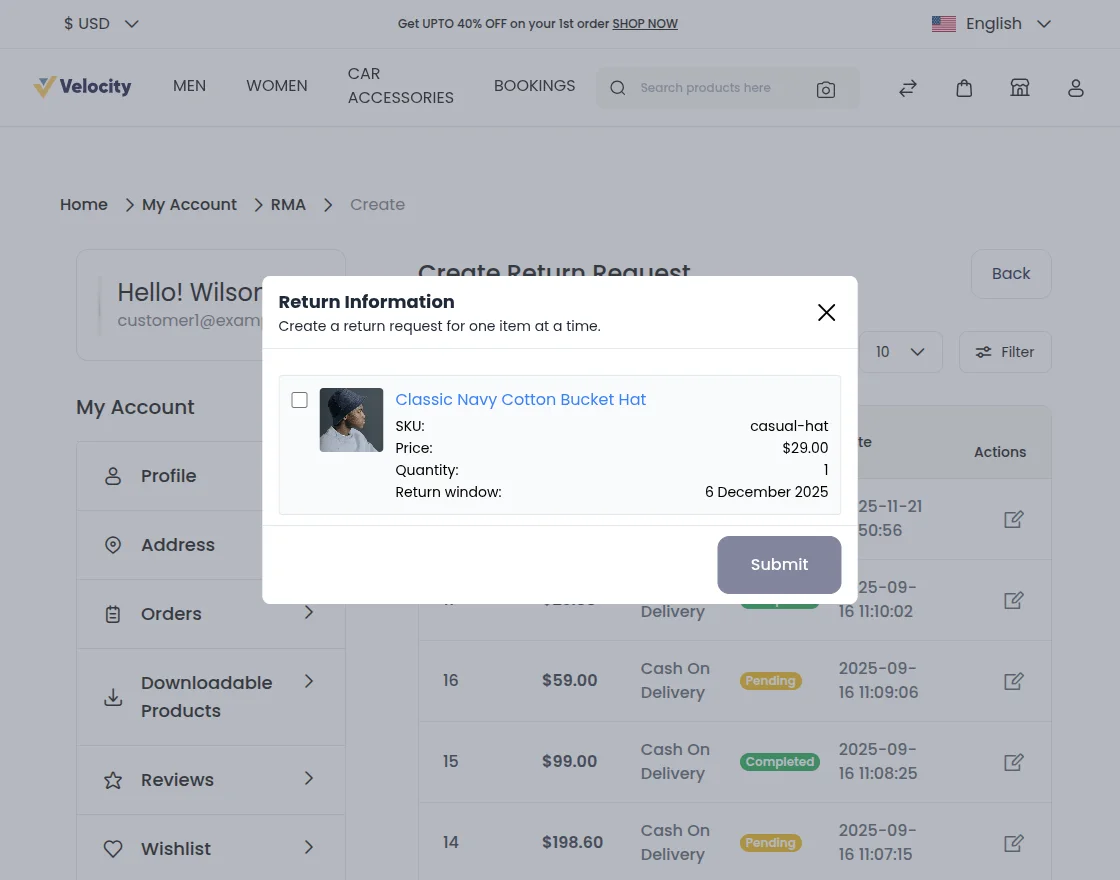
Step 5:
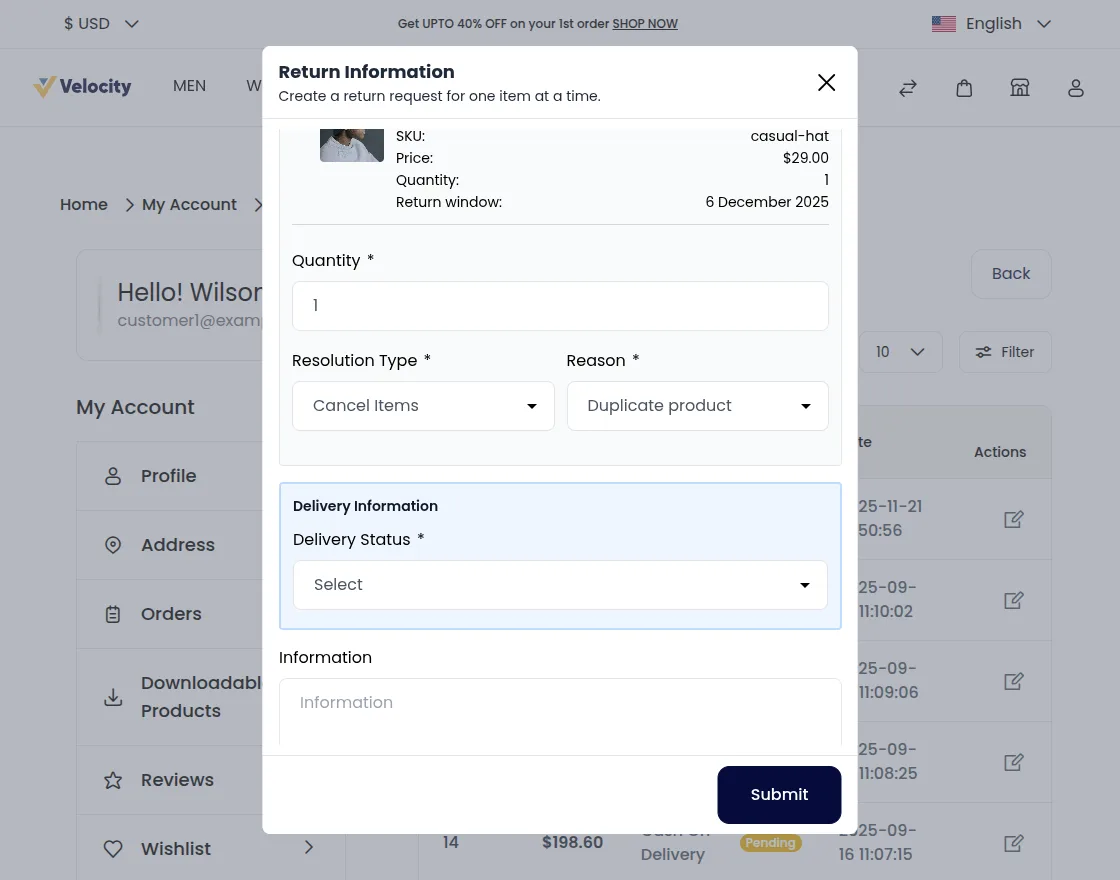
Check the box and fill in some details.
Like: Product quantity, resolution type, Delivery information, and attachment.
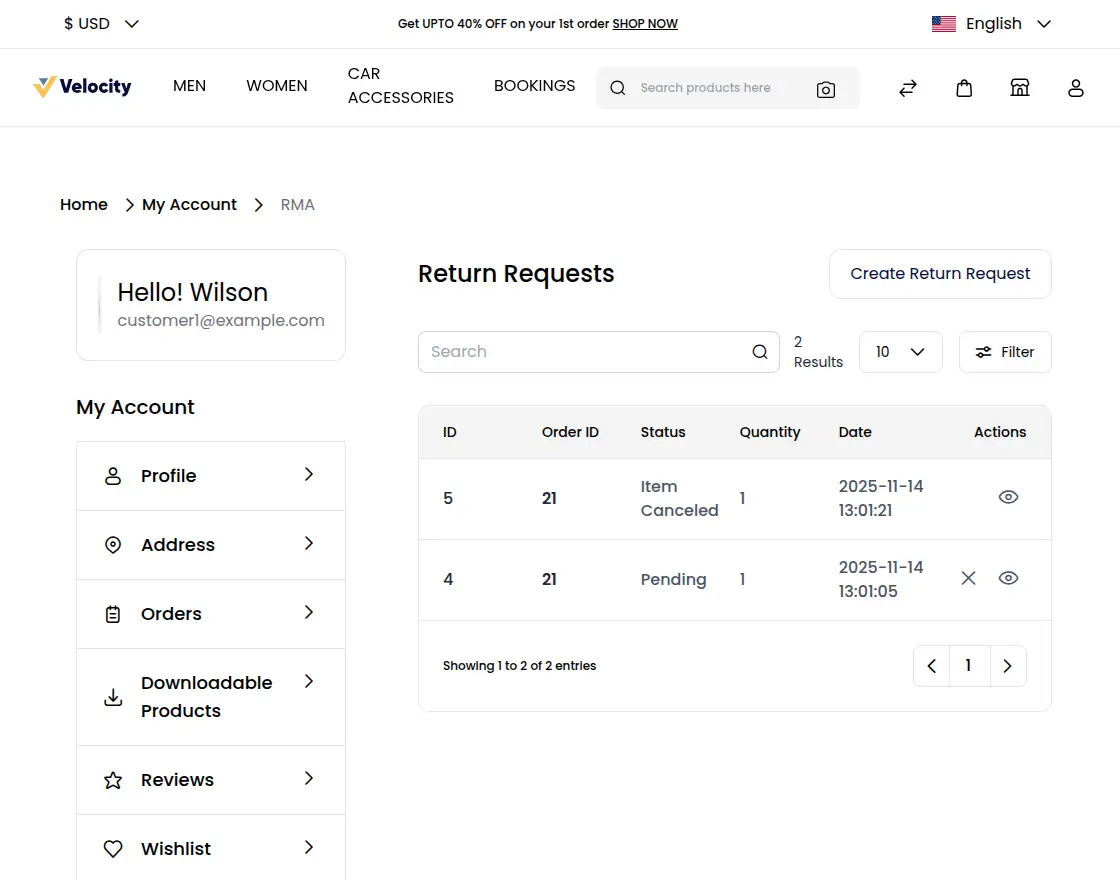
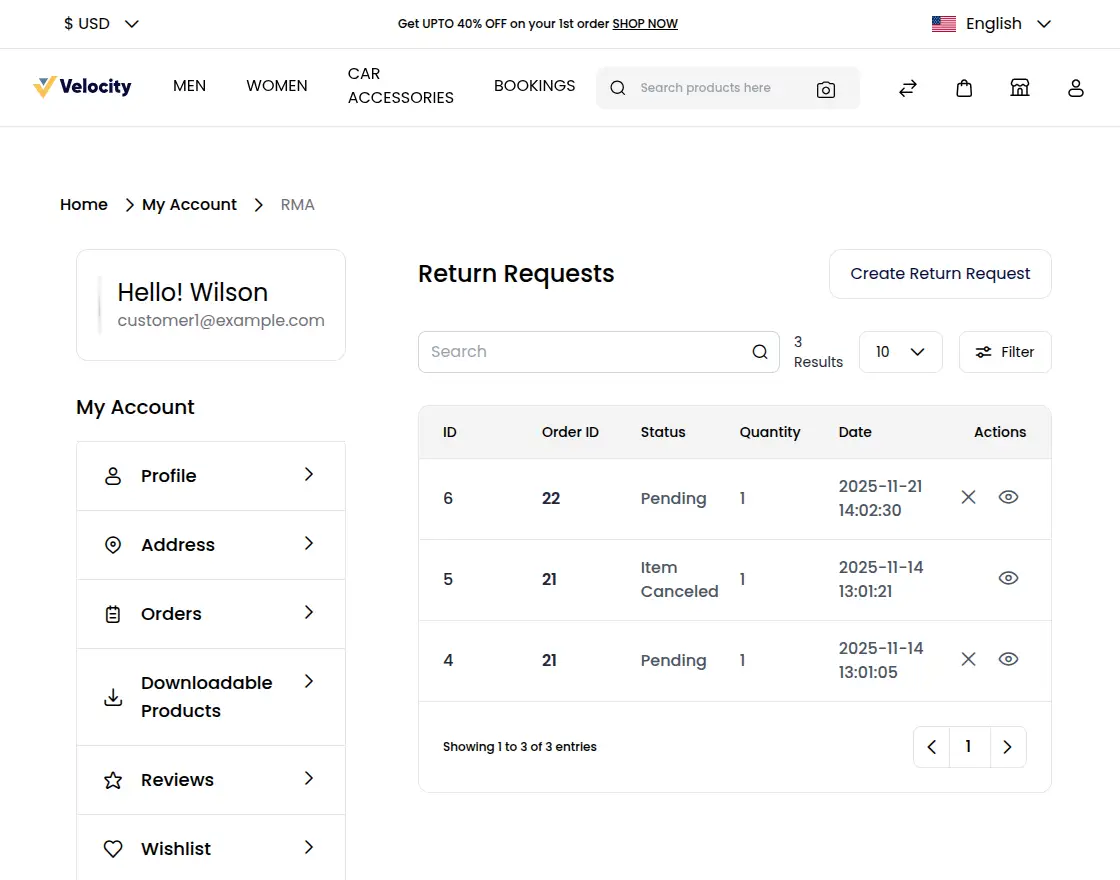
Once the RMA request is created by the customer, it will be displayed on the RMA section.
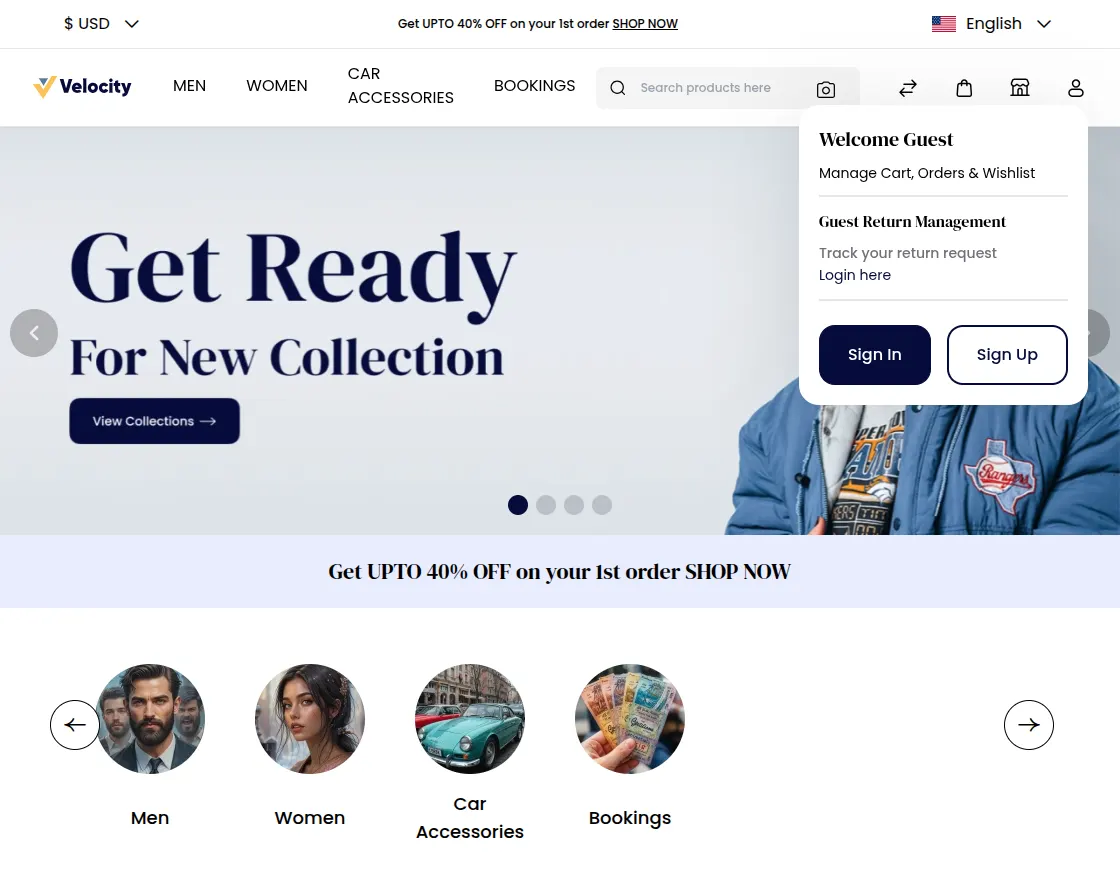
How can a Guest create an RMA request from the shopfront?
First, the guest places an order by checking out any product.
After the order is placed, the guest can log in using the Order ID and the email address used during checkout. If the guest wants to cancel or return/exchange an order item, they can follow these steps:
Step1 :
Step2 :
Guests can log in using their email address and Order ID.
Click on the guest “login here” button.
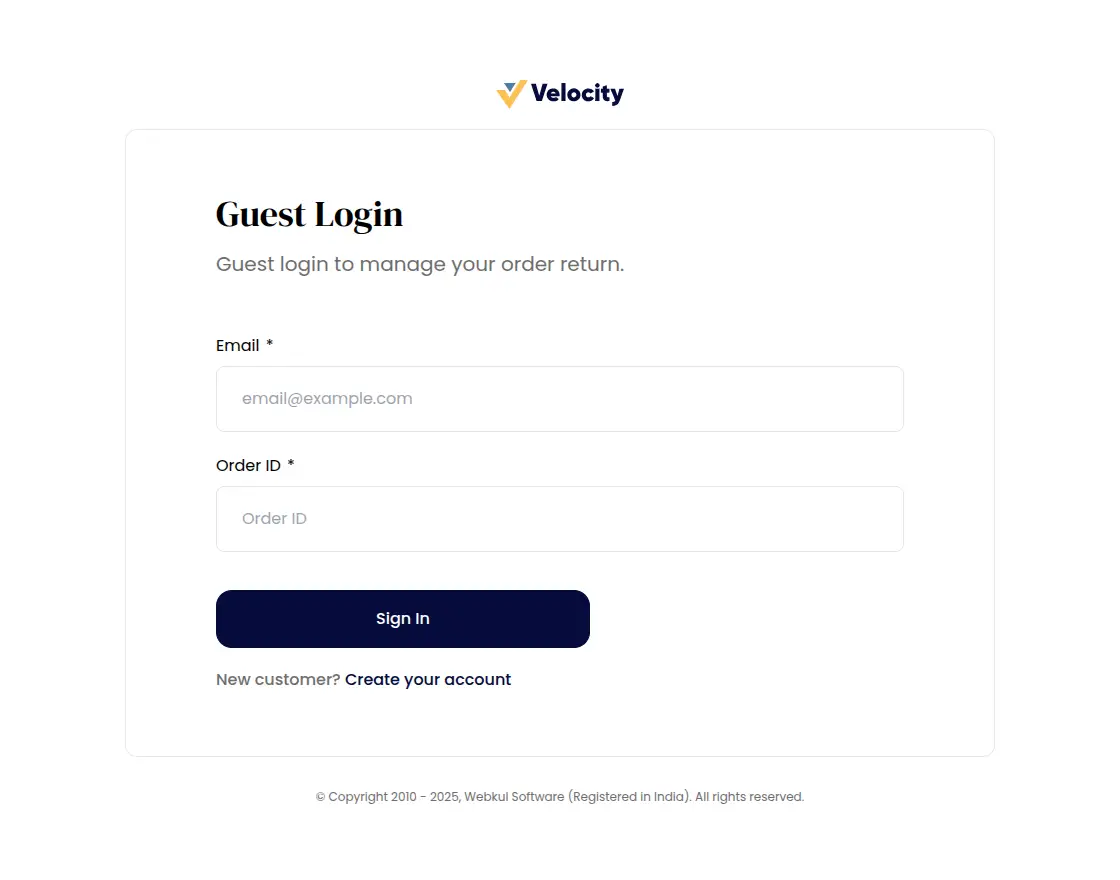
Fill in the email and Order ID and click on the “Sign In” button and redirect the guest request page.
The remaining process is the same as on the customer end.
That’s all for Laravel Multi-Vendor Marketplace. If you still have any issues feel free to add a ticket and also let us know your views to make the module better https://bagisto.uvdesk.com/en/
Current Product Version - V2.3.9
Supported Framework Version - Bagisto 2.3.9

4 comments
If you have purchased the multi-vendor marketplace module, please raise a ticket for your query at https://bagisto.uvdesk.com/en/ along with your Order ID.