Laravel eCommerce Customer Document extension allows the admin to upload the document for the customer.
However, by uploading these documents, the admin can easily provide their customers with information related to the products, such as the product SKU and description.
Moreover, the admin can also provide the information to the customer about the new offers/discounts by uploading the marketing document.
Features of Laravel eCommerce Customer Document
- The admin can easily upload the documents for the customers
- The admin can also upload the document for a specific customer
- The customer can download the documents
- The admin can upload documents related to the product & marketing
- The admin can delete & download the documents
Installation of Laravel eCommerce Customer Document
Once you have successfully downloaded the zip file of the Laravel eCommerce Customer Document.
Unzip the respective extension zip and then merge “packages” and “public” into the project root directory.
Goto bootstrap/providers.php file and add the following line under ‘providers‘
Webkul\CustomerDocument\Providers\CustomerDocumentServiceProvider::class,
Goto composer.json file and add following line under ‘psr-4‘
"Webkul\\CustomerDocument\\": "packages/Webkul/CustomerDocument/src"
#Run Commands
Run these commands below to complete the setup
composer dump-autoload
php artisan customer-document:install
Admin Management
After Installation, The admin can configure this module by navigating through Configure>>Documents.
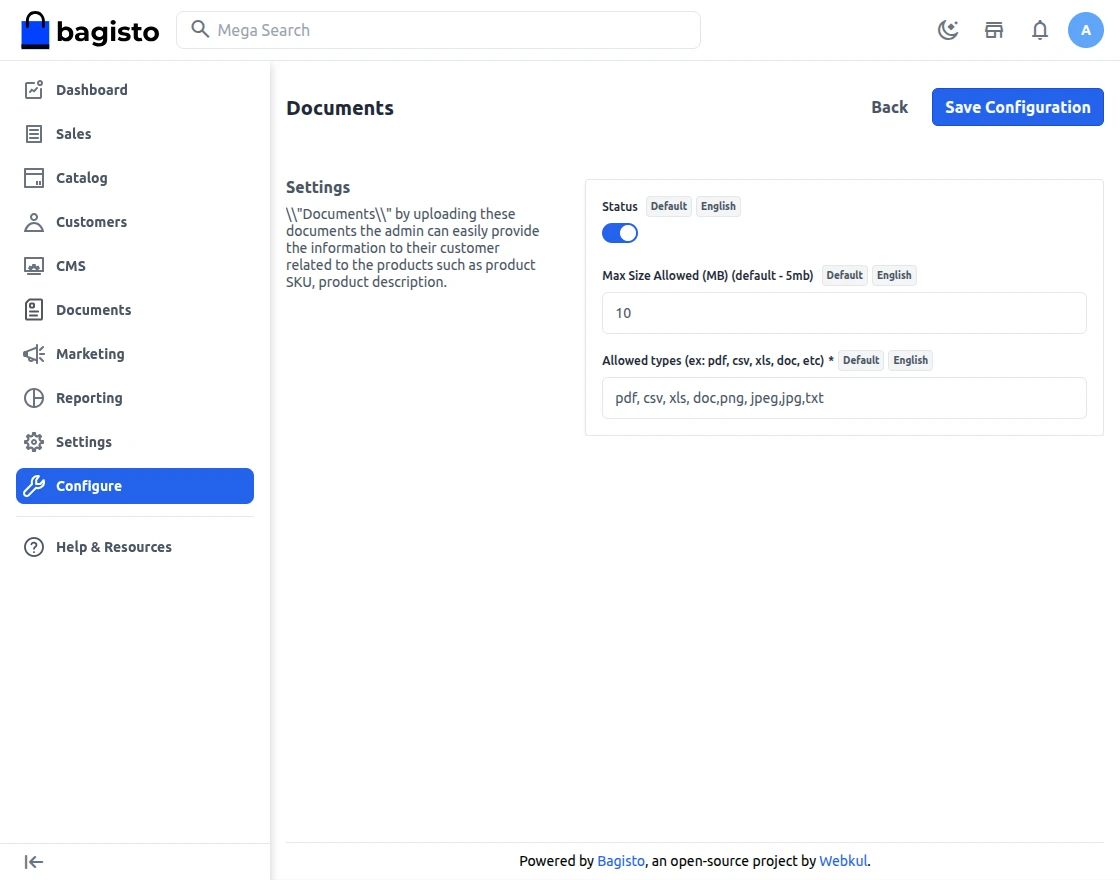
Now, you need to follow the given settings.
Status: To enable or disable the module.
Max Size: Admin can set the maximum file size of the document.
Allowed Types: Also, admin can set the file types.
Once you have successfully executed the module. You will see the Customer Document Icon on the left side in the menu bar, as shown in the below image.
Let the admin click on the Document Icon after that below page will open.
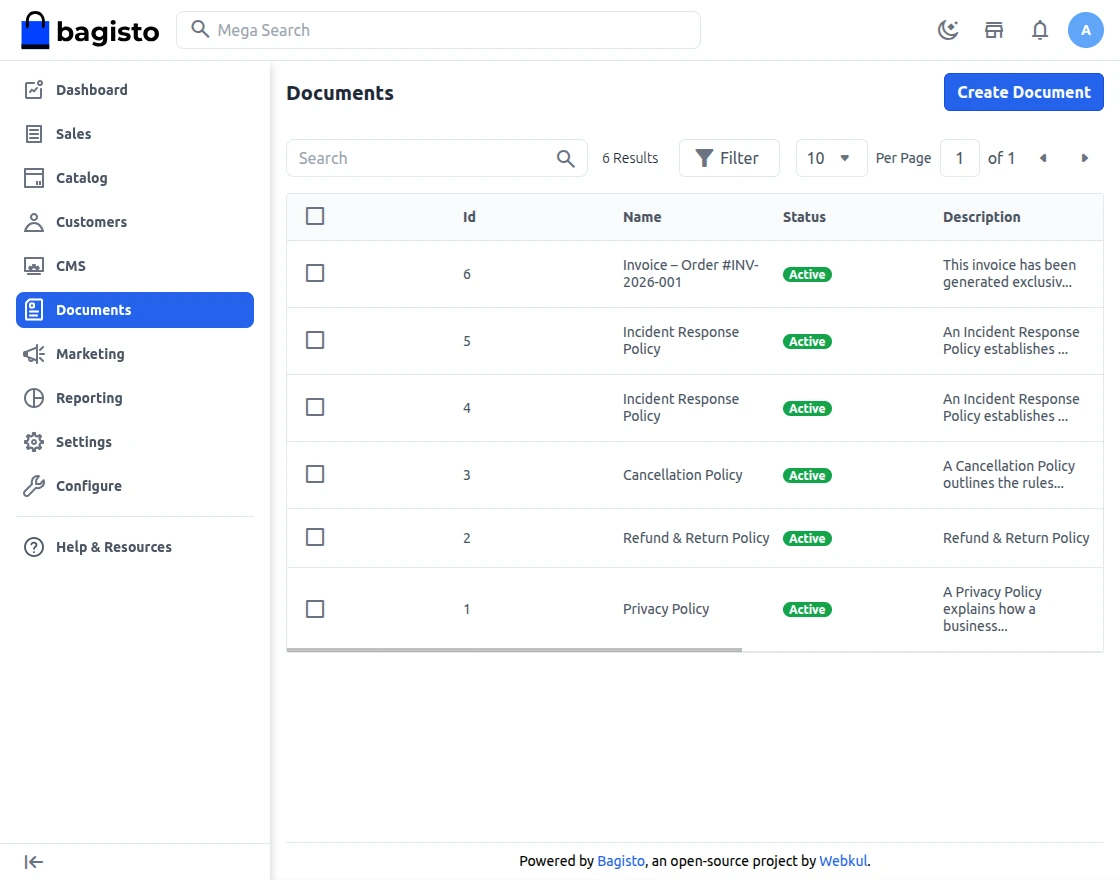
Here admin will find the list of all the documents.
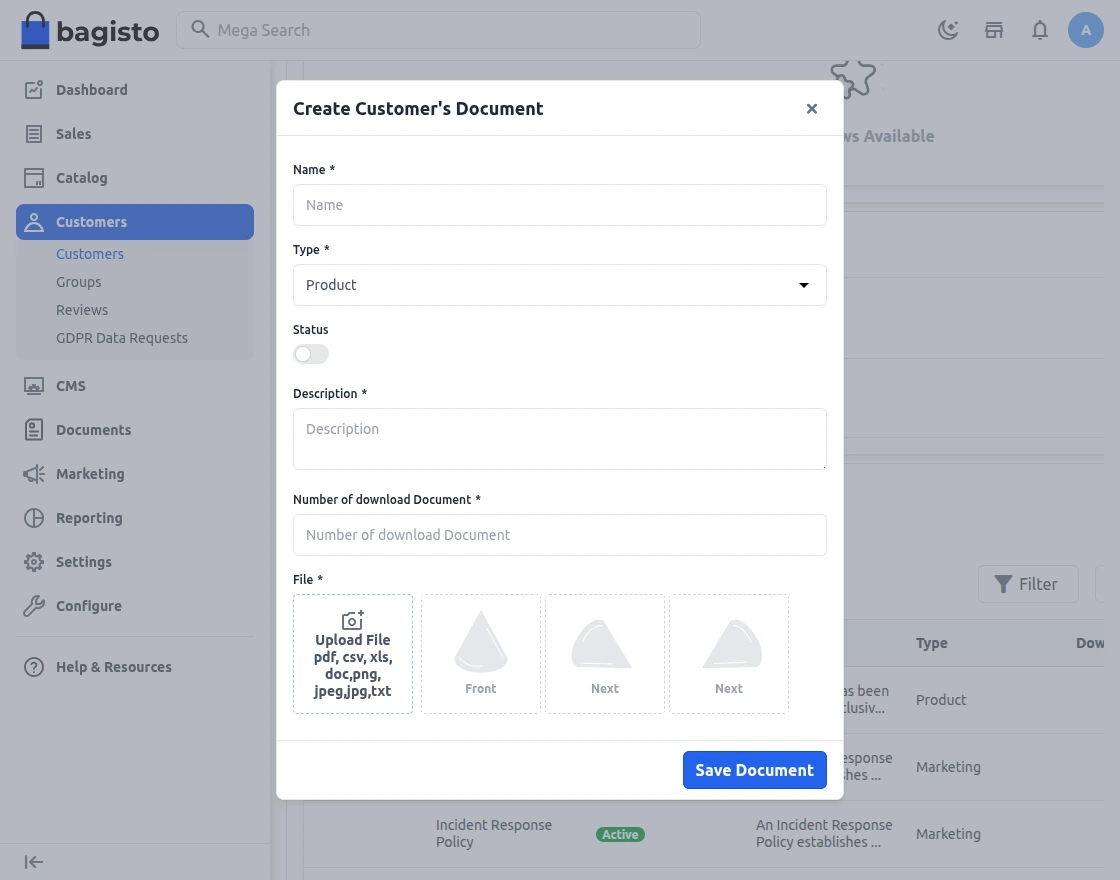
After that, the admin will click on the add document button to add the new document.

Now the admin has to enter the required details while uploading the document such as :
- Name: Enter the document name
- Type: Select the type (If the document is related to the Product, the admin will choose the Product Type else admin can choose the Marketing).
- Status: Select the document status as Active or Inactive.
- Description: Enter the description.
- Number of download Document: admin can set the maximum download limit.
- File: Choose the file.
Lastly and most importantly admin will click on the Save Document button.
Add document for specific Customer
In addition, with the help of this module, the admin can easily add any required document for a specific or individual customer.
The admin can navigate through Customers>>Customer.
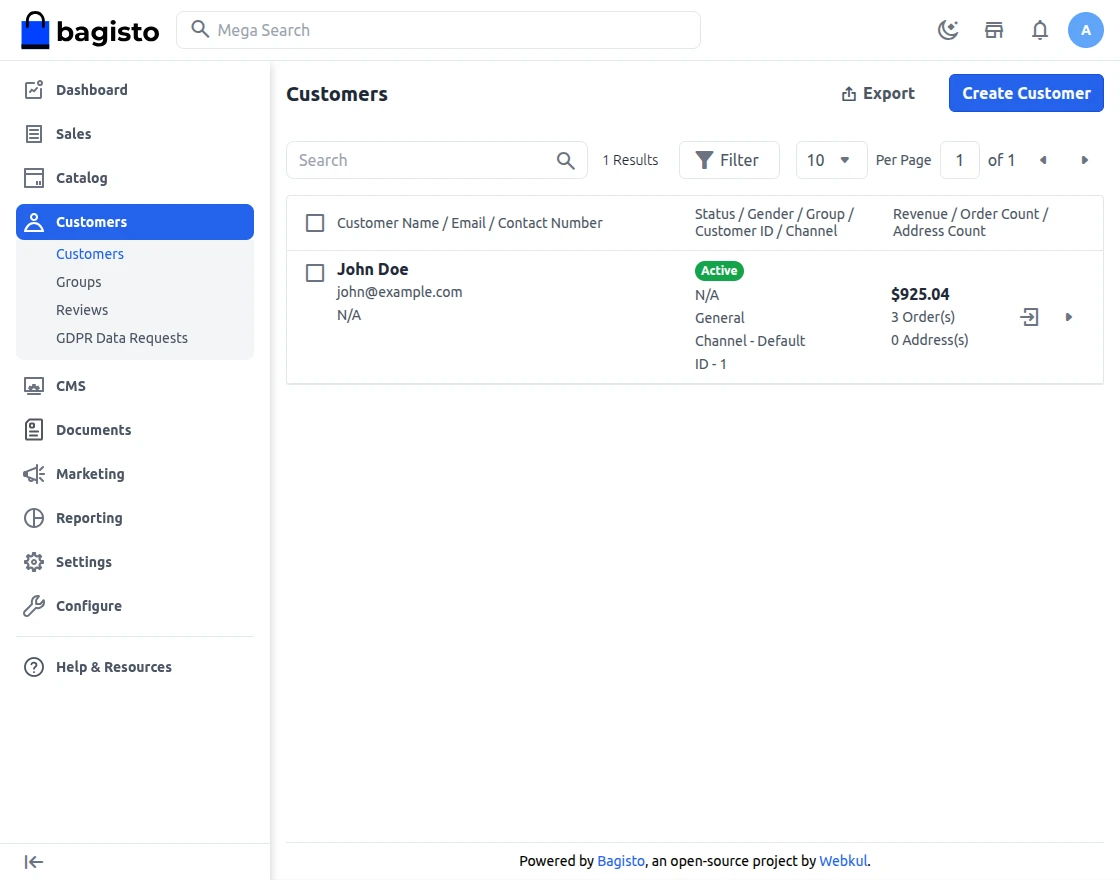
Let’s click on the edit button, after that the below page will be open.
By hitting the Create Document button admin can easily add the document to a specific/individual customer.
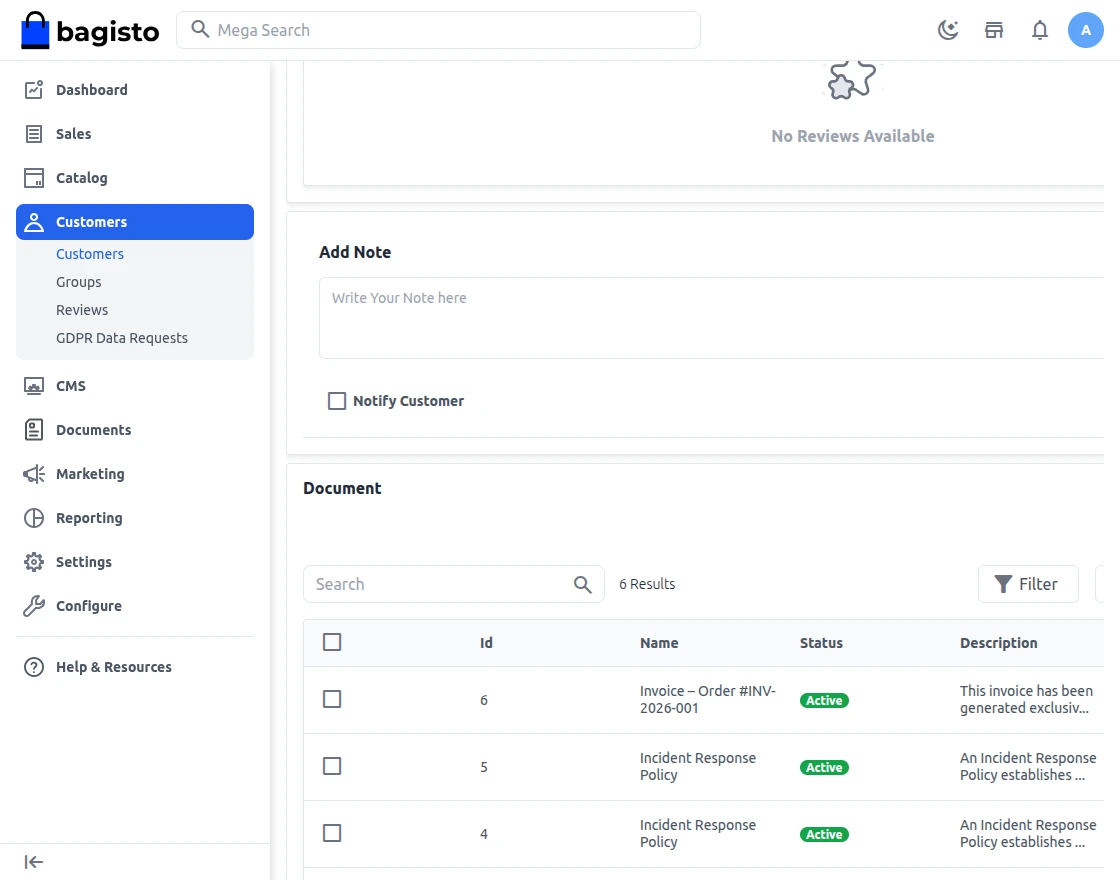
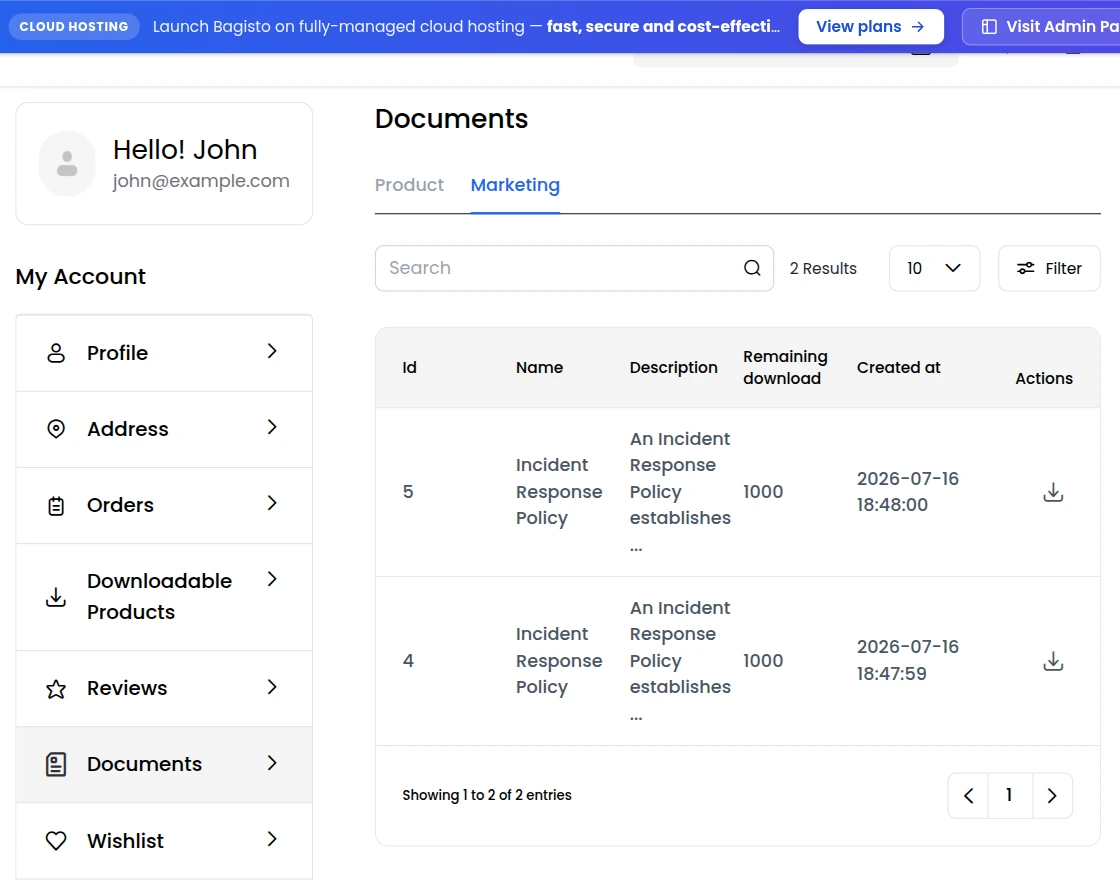
Customer View
The customer can easily view all the documents provided by the admin under their customer profile.
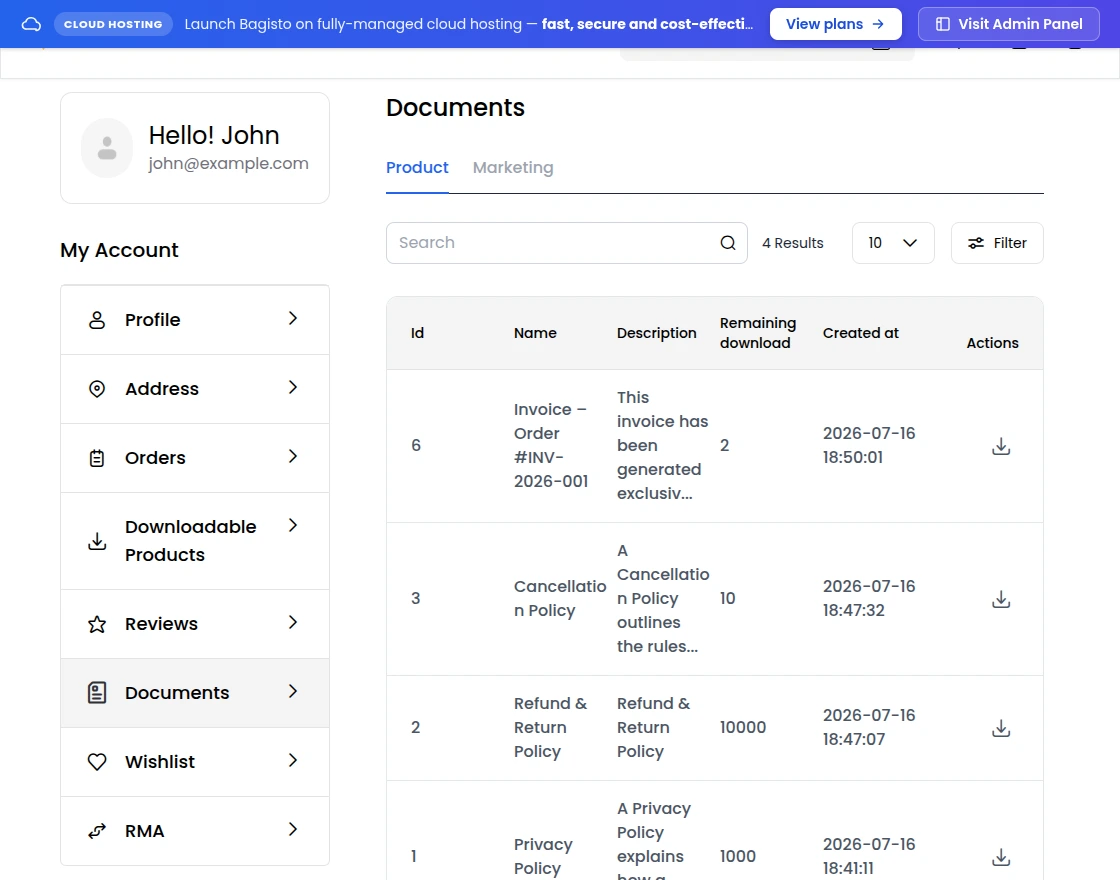
And, Customers can also check all the marketing documents by clicking on the Marketing button.
That’s all for Laravel eCommerce Customer Document, still, have any issue feel free to add a ticket.
Also let us know your views to make the module better https://bagisto.uvdesk.com/en/
Current Product Version - v2.4.x
Supported Framework Version - Bagisto, v2.4

Be the first to comment.