Introduction – Order Tag
The Order Tag module for Magento 2 provides a better order management procedure for the store owner. Having a tag on every order shows the type of the order and so the owner can proceed further with the arrived orders.
The admin can create different types of tags from their end and assign them to the orders. The tags are also auto-assigned to the orders as per the rules set by the admin.
They can easily create various tags as per various tag appearances like text, image, or both for orders. The tags are like Refund, Urgent, Bulk Order, Fast Delivery, etc.
Check a brief overview of the plugin –
Feature List
- The admin can create multiple tags for the orders.
- Image, text, or a combination of both types of tags.
- Multiple tags are assigned to a single order.
- Single tag to multiple orders.
- Auto-assignment of tags to the order.
- Conditions are set for the auto-assignment by the admin.
- The admin can delete or edit the existing tags.
- The admin can enter the sort order for the tags.
- Orders can be filtered based on tags.
Installation
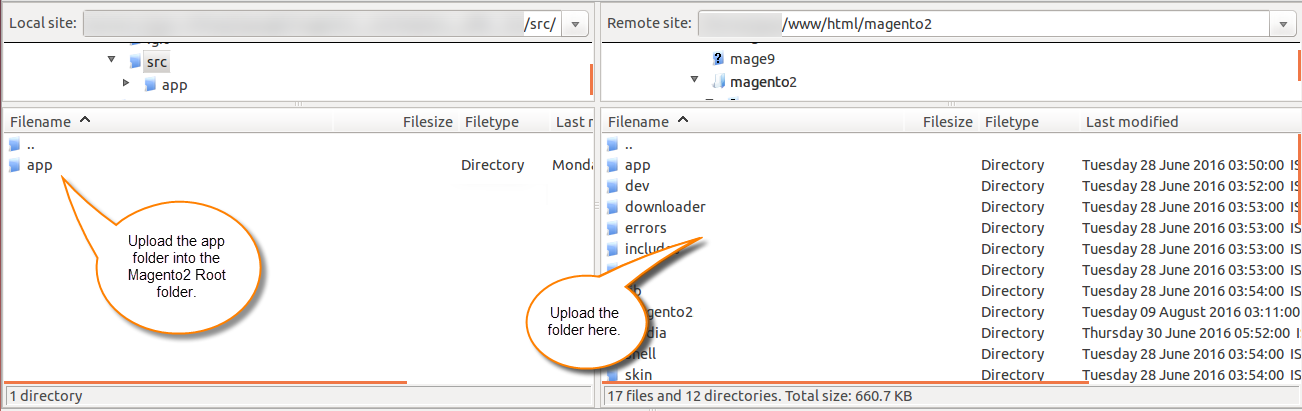
Customers will get a zip folder. Then they have to extract the contents of this zip folder on their system. The extracted folder has an src folder, inside the src folder you have the app folder.
You need to transfer this app folder into the Magento2 root directory on the server as shown below:
After the successful installation, you have to run these commands in the Magento2 root directory.
First Command –
php bin/magento setup:upgrade
Second Command –
php bin/magento setup:di:compile
Third Command –
php bin/magento setup:static-content:deploy
After running the commands, you have to flush the cache from the Magento admin panel by navigating through System > Cache management as shown below:

Language Translation
For translating the module language, navigate through src/app/code/Webkul/OrderTag/i18n and edit the en_US.csv file.
Thereafter, rename the CSV as “en_SA.csv” and translate all right side content after the comma in the Arabic language. After editing the CSV, save it.
Then upload it to the path src/app/code/Webkul/OrderTag/i18n where the Magento2 is installed on the server.
The module gets translated into the Arabic Language. It supports both RTL and LTR languages.

Module Configuration
After the successful installation of the module, the admin needs to navigate through Store > Configuration > Order Tags as shown below:

From here, the admin can enable or disable the module.
Order Tag Management
The admin can create and manage all the existing tags by navigating through, Order Tag Management > Manage Tags

From here, the admin can delete the tags by the selecting Delete button under the Action button and also, they can edit the existing tags.

It also facilitates the admin to filter the tags using ID, Name, and Status as shown in the above image.
Filter Orders Using Tags

The admin can do quick filter using tags by clicking on the Filters button.

New Order Tag Creation
The admin can create a new tag by navigating through Order Tag Management > Manage Tags > Create New Tag as shown below:

Tag Information:
Name – Enter the name of the tag.
Status – Set the status of the tag as enable or disable.
Sort Order – Enter the sort order of the tag.
Customize Tag:
Tag Appearance – Here, the admin has to select the appearance of the tag. There are three types of tag appearance:
- Text
- Image
- Both Image and Text
If the admin has selected Tag Appearance type as Text, then they need to fill the below information:
Tag’s Label Text – Enter the text which will appear on the tag label.
Label Color – Select the color of the label.
Tag’s Label Text Color – Select the text color on the label.
If the admin has selected Tag Appearance type as Image, then they need to select the Label Image.
For the reference, check the below snapshot:

If the admin has selected Tag Appearance type as Both Image and Text, then they need to fill all the information which is required in the Tag Appearance type- Image and Text.
For the reference, check the below snapshot:

Tag Auto Assignment:
If the admin wants to auto-assign the tags to the store orders, then the admin can set the auto-assignment conditions. For the reference, check the below snapshot:
For that,

Enable Auto Assignment – Select Yes to auto-assign the tag according to the conditions.
If all the set conditions are TRUE for any order, then the tag will be auto-assigned to that particular order.
Manage Order
The admin can see all the orders and the tag associated with it in the orders section by navigating through, Sales > Orders as shown below:

Manual tag assignment:
For the manual assignment of the tag, the admin needs to select the orders first. Then they need to select Assign Tag under the Action button as shown below:

Also, multiple tags can be assigned manually or automatically to a single order. For the reference, check the below snapshot:

Thus, that’s all for the Order Tag module for Magento 2. If you face any issue, feel free to add a ticket at our HelpDesk system.
Current Product Version - 5.0.3
Supported Framework Version - Magento 2.0.x, 2.1.x, 2.2.x,2.3.x, 2.4.x

Mybtysun