Learning Management System (LMS) for Magento 2: The upsurge in digitization has bought a drastic change even in traditional educational practices.
The times when everything was executed without the internet, especially education have dissipated and gone online.
As a result, LMS or Learning Management System has come into existence which brings the trainers and learners together to be a part of the knowledge sharing process.
Learning Management System (LMS) for Magento 2 allows a new product type, namely Course Product.
It facilitates the admin to create multiple trending online courses and creates a common platform where both the aspirants and trainers can gain and impart knowledge, respectively.
For these courses, the admin can create multiple content sections and add new content, such as videos or pdf files under Content and Assignment, respectively.
The main focus is to provide the customers with a common arena where they can look for trending online courses and befit from the same.
Note:
- It is mandatory to install the FFmpeg or the Fast Forward MPEG, which is responsible for instant video format conversions, in the Magento 2 Root Directory.
- Click here to download the FFmpeg.
- Further, after installing the module, a composer command is run which fetches the above process.
Check the working & setup in this video –
Features
- The admin can create new courses under the Course Product type.
- It leverages the admin to choose either Content or Assignment for initializing content sections.
- The admin can upload videos under the Content option for the course product type.
- Under the Assignment option, the admin can add pdf, or zip files for the course product type.
- The customers can ask course-related questions.
- Answers can be added by the admin for the questions which the customers ask.
- The customers can preview the course content video before making a purchase.
- The customer can see the course completion percentage in a progress bar.
Installation
Customers will get a zip folder. Then they have to extract the contents of this zip folder on their system.
The extracted folder has an src folder, inside the src folder you have the app folder.
You need to transfer this app folder into the Magento2 root directory on the server as shown below.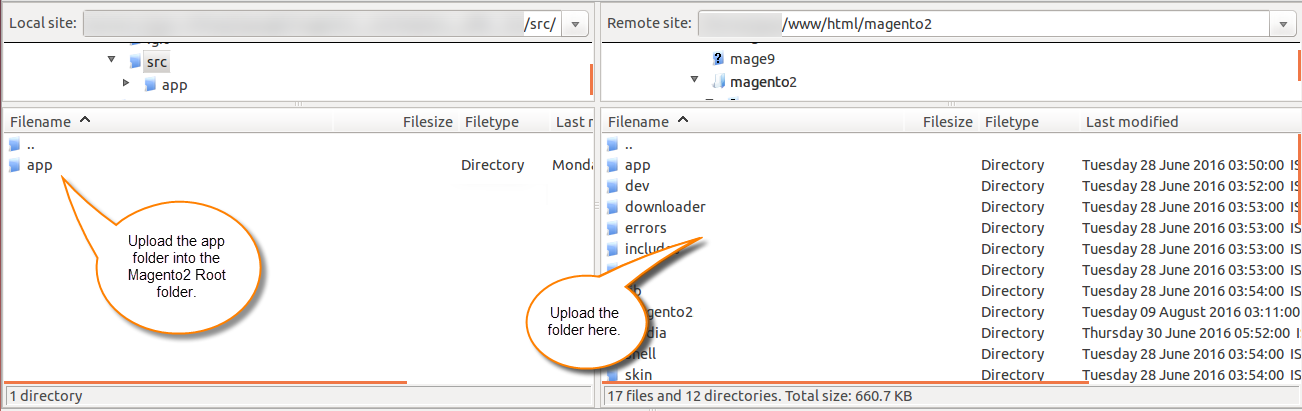
After the successful installation, you have to run these commands in the Magento2 root directory.
First Command –
composer require php-ffmpeg/php-ffmpeg
Second command –
php bin/magento setup:upgrade
Third Command –
php bin/magento setup:di:compile
Fourth Command –
php bin/magento setup:static-content:deploy
After running the commands, you have to flush the cache from the Magento admin panel by navigating through->System->Cache management as shown below.
Language Translation
For translating the module language, navigate through src/app/code/Webkul/LearningManagementSystem/i18n and edit the en_US.csv file.
Thereafter, rename the CSV as “ar_SA.csv” and translate all right side content after the comma in the Arabic language. After editing the CSV, save it.
Then upload it to the path src/app/code/Webkul/LearningManagementSystem/i18n where the Magento2 is installed on the server.
The module gets translated into the Arabic Language. It supports both RTL and LTR languages.
LMS Admin Configurations
Once the installation process is complete, the admin can configure the settings by navigating through Stores > Configuration.
It redirects the admin to the Configuration page where the admin needs to set the Display Settings and Social Share for Course permissions.

Display Settings
The admin can set the Display Settings permission as under:
Show:
- No. of Enrolled Students: The admin can mark ‘Yes’ for this field.
- Course Section: The admin can choose to display the Course Section.
- Short Description About the Course: The admin may allow displaying a short description of the respective course.
- Total Course Duration: The admin may choose to display the course duration.
- Progress Bar after User has Purchased the Course: The admin may allow displaying the progress bar once the user purchases the course.
- Share Option after Purchasing the Course: The share option may be enabled by the admin after the course is purchased.
Social Share for Course
Configurations for the Social Share are set by the admin as under:
Twitter: The admin may enable course sharing on Twitter.
Facebook: The admin may enable course sharing on Facebook.
Email: The admin may allow course sharing through emails as well.
Creating A Course Product for LMS
On setting the configurations of the module, the admin must proceed to create a new course product by navigating through Catalog > Products > Add Product > Course Product as shown in the image below. 
The admin creates the new course product under Course Product type in a usual way, i.e. by adding the details such as Product Name, SKU, Attribute Set, Price, etc. 
As the admin saves the details of a new course product, one more option apart from the Course Details option (visible in the above image) will appear i.e Course Content.

On tapping the Course Content option, the admin will find the Add Course Section tab as shown in the image below.

Afterward, the admin needs to enter the following details:
Section Title: The admin needs to enter the Section Title.
Content Title: The admin configures the content tile for the course content.
Description: A short description that gives an idea about the respective course content.
Type: The admin can choose the desired Type to initialize the Course Content. The admin may choose either Content or Assignment.
- Under Content, the admin may upload videos for the chosen course section.
- On choosing Assignment, the admin may add doc files bearing extensions such as .pdf, .txt, or .zip for the chosen course section.
Preview: The admin can allow a preview of the course content (video or doc files).
Select File to Import: Upload the video or document files, as chosen.
The admin can select ‘Content’ or ‘Assignment‘ against the Type field while setting the New Course Content configurations.
On choosing the ‘Assignment’ option against the Type field, the admin can upload PDF, zip, or text files for the course content.

To add more course sections the admin needs to click on the Add Course Section button as per the below screenshot.

To add more course content the admin needs to click on the Add Course button as per the below screenshot.

Frontend Workflow
The customer needs to log in, using their account credentials to make a purchase.
On the home page, the customers will find a new category by the name “Courses” on clicking which the customers can view available online courses as shown in the image below.
 The customer can choose the desired course and click on it to view the product/ course details.
It redirects the customer to the product page of the respective course. It displays all the details such
The product page includes the details of the course including the Course Content along with which the video/ or pdf, text files.
The customer can even choose to preview the video before buying the course.
Also, a review section is present, where the customer can add their reviews for the respective online course.

The reviews that the customer provides will be displayed under the Product Reviews option in the Product Creation Page in the admin panel as shown below.

Further, the customer can add the desired product/ course to the cart and proceed to checkout as shown below. 
On the checkout page, the customer needs to agree to the terms and conditions and then place the order.

LMS QnA Section
 The customer can click on any of the purchased courses and navigate to the QnA section as shown in the image below to raise a doubt regarding the course.

On clicking the QnA tab, the customer will find the Ask New Question tab, clicking which the customer can ask any question relevant to the online course and publish the same.
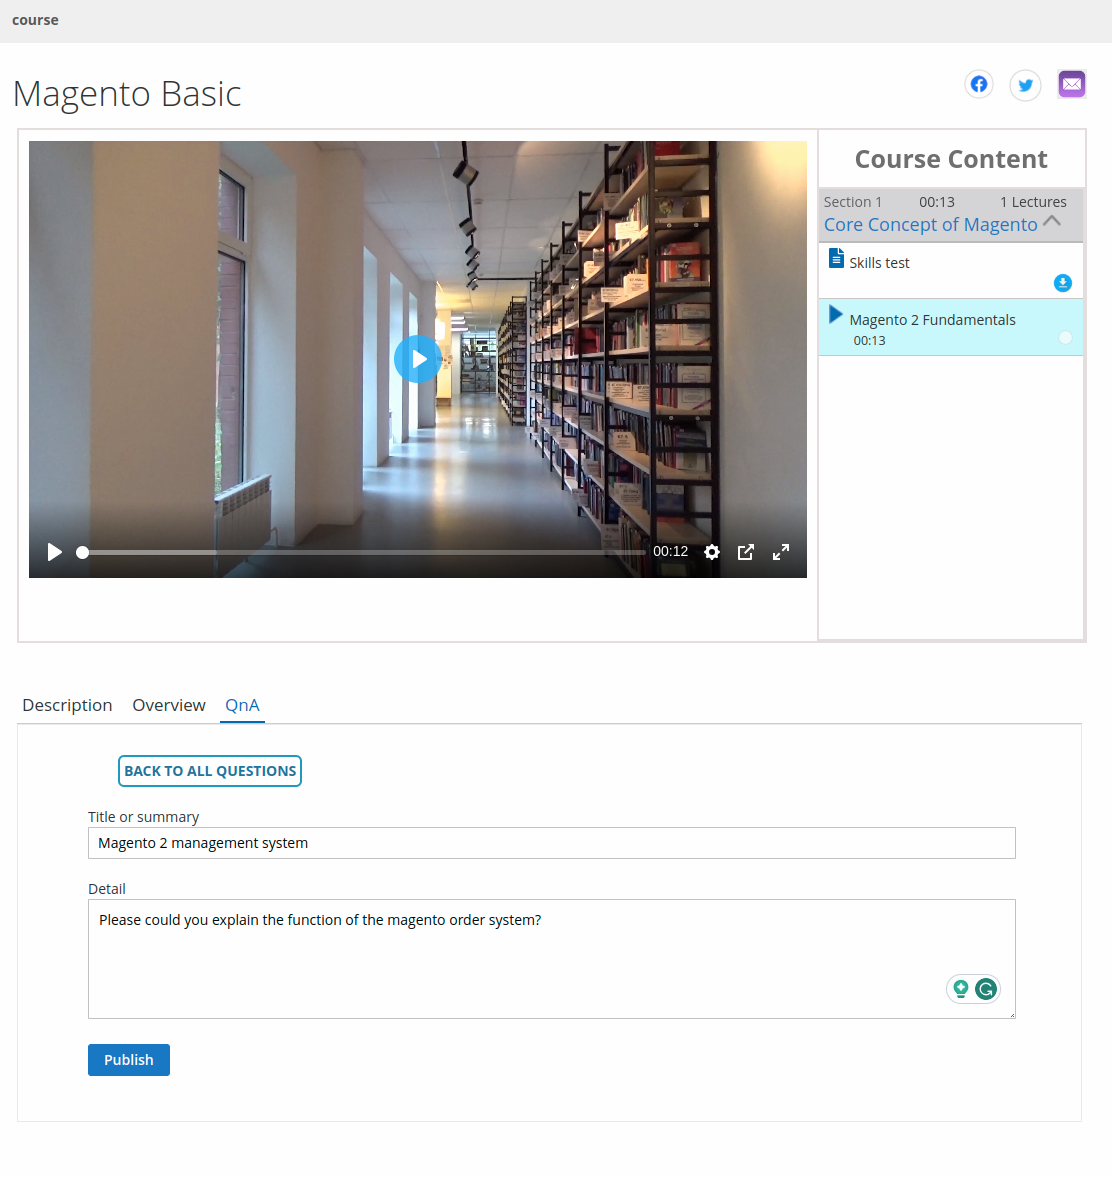
The admin can in return add a revert for the customer’s query there itself.
The flow of the QnA section will display as shown in the image below.

LMS Social Sharing
Meanwhile, the customer can forward or recommend the online course to other candidates as well through social sharing options.
One can find these options on the top-right corner of the Course Content page as shown in the image below.
These social sharing icons are visible once the customer purchases the online course.
On clicking the Twitter icon, the customer can share the online course(s) on Twitter as shown in the image below.

The mail icon allows the customer to share the online course(s) to other aspirants over mail as shown in the image below.

That’s all for the Learning Management System (LMS) for Magento 2. If you face any issue, feel free to add a ticket at webkul.uvdesk.com
Current Product Version - 5.0.2
Supported Framework Version - 2.0.x, 2.1.x, 2.2.x, 2.3.x, 2.4.6

Be the first to comment.